7
zAUDIO OUTPUTREMOTE
THIS PRODUCT COMPLIES
WITH 21CFR 1040.10
CAUTION
CLASS 1
LASER
PRODUCT
WARNING: THIS APPARATUS MUST BE EARTHED
FUSE TYPE: T400 mA
INPUT: 230V~ 50/60 Hz
POWER CONSUMPTION: 50VA APPROX. IN OUT L
R
ASEE UNDERSIDE FOR SAFETY DETAILS ▼B
+
++
Switching on for the first time
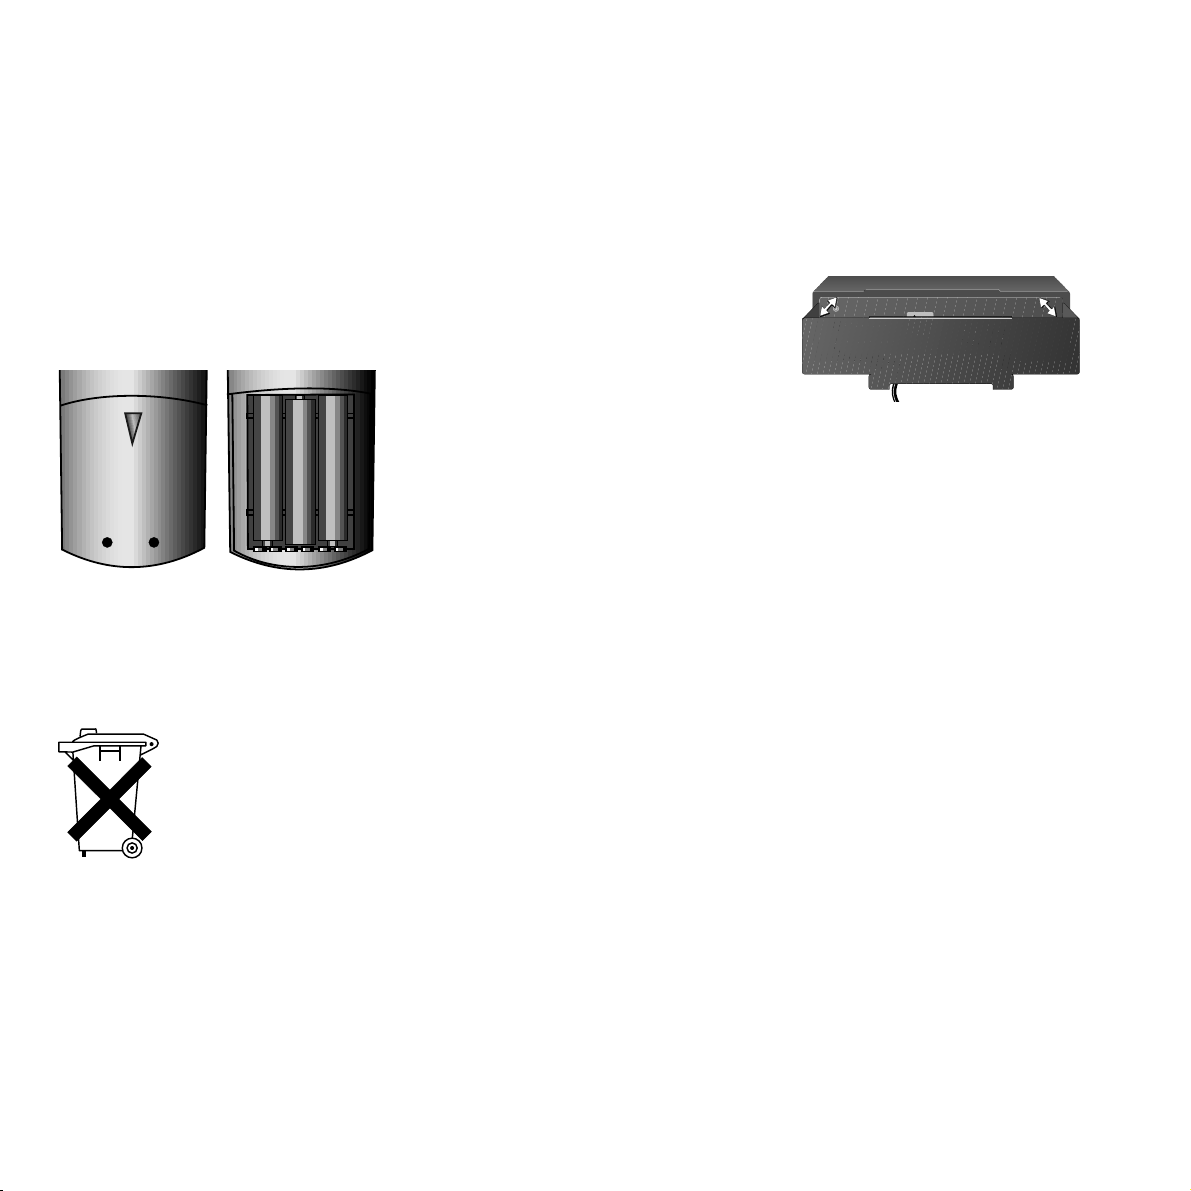
Remote control batteries
To insert or change the batteries,press on the
arrow on the remote control rear cover. Slide
and remove it, to open the battery compart-
ment.
Only insert alkaline manganese CR 03 (AAA)
batteries (as delivered).Make sure they are
positioned correctly (+ and –).
Then close the compartment.
Notes on battery disposal:
The original batteries do not
contain any pollutants such as
cadmium,lead and mercury.
Used batteries do not belong in
the domestic waste.They must
be taken to the appropriate
collection points according to
the national laws.Ask your
dealer.
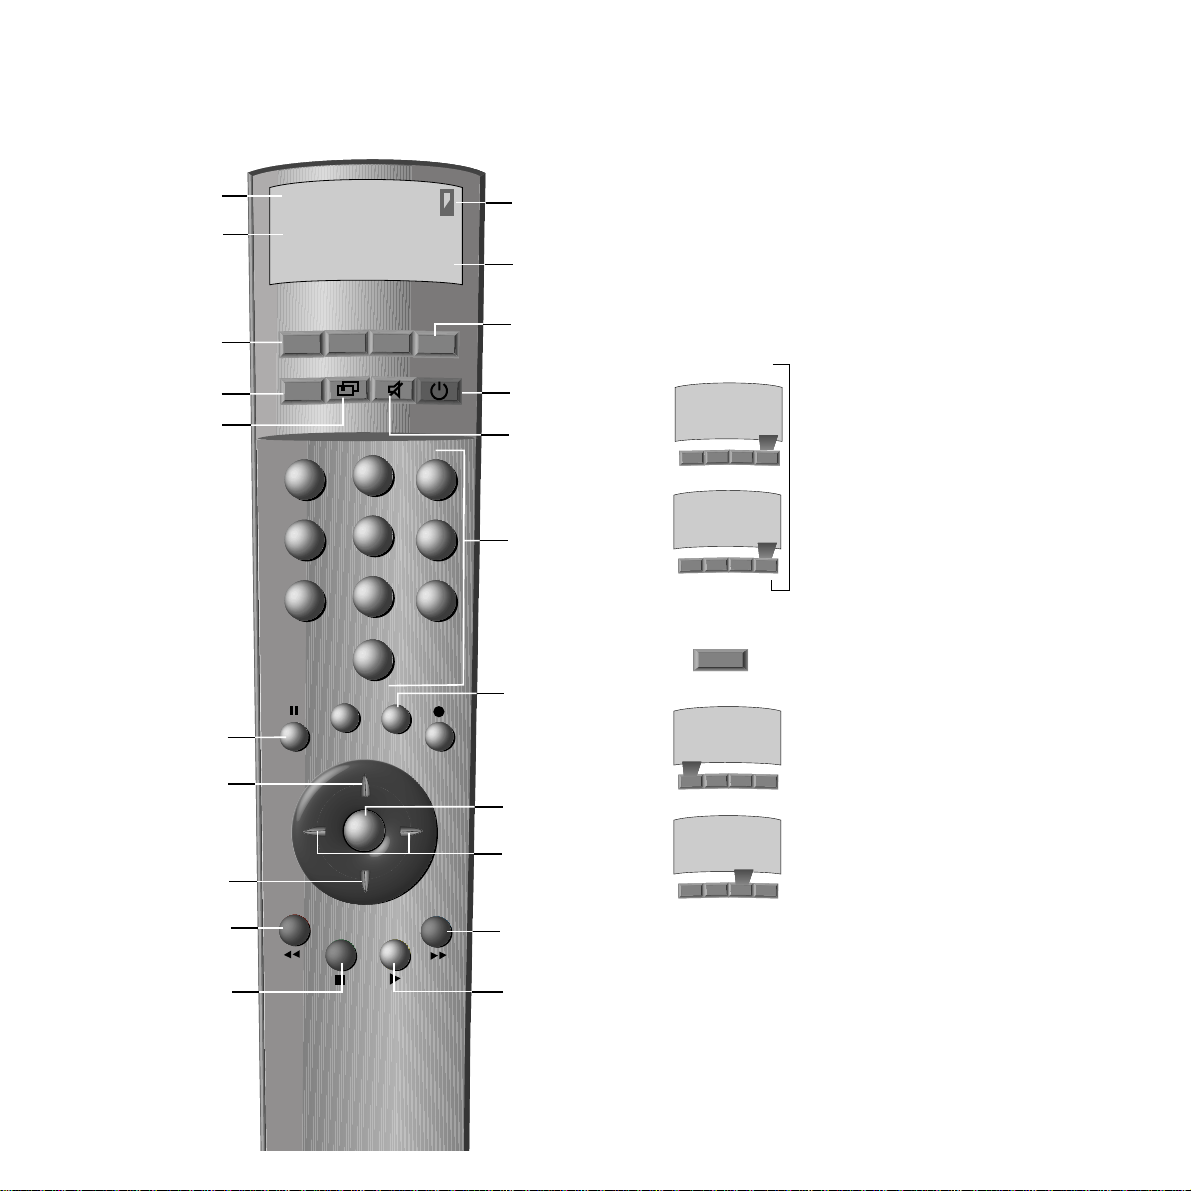
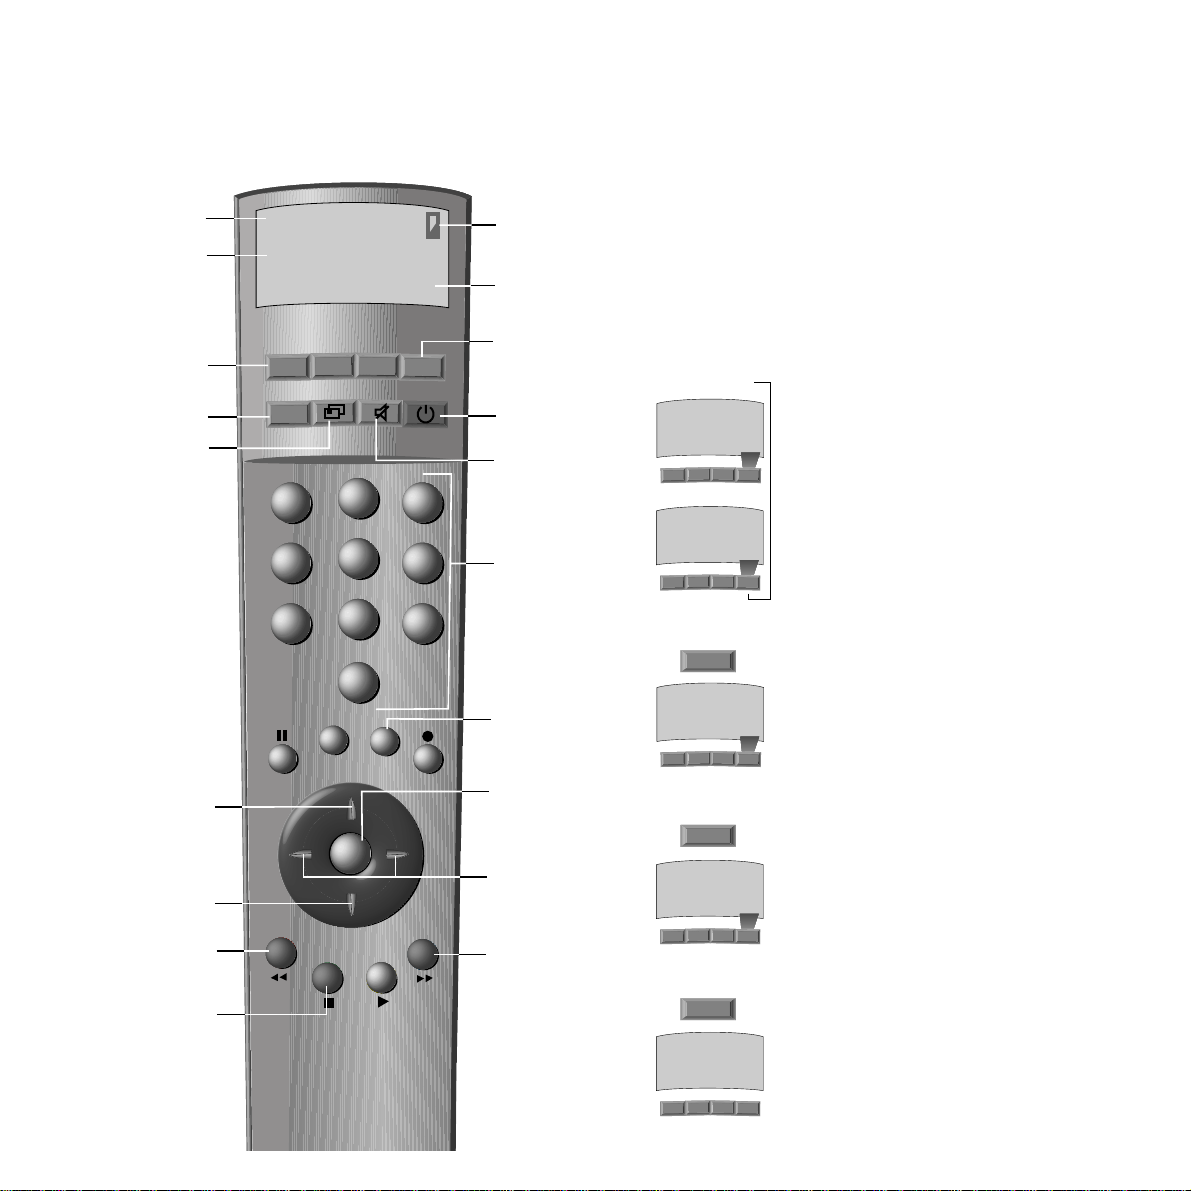
Using the remote control
The top three buttons on the remote control -
F1,F2 and F3 - are variable.Their functions are
shown in the display immediately above,e.g.
after pressing the HIFI button, F1 switches to
the tuner «TU». Having switched to «TUNER»,
F1 has a new function which is «AUT/AUTO
STORE», i.e. auto-programming.
To have the advantage of having access to
rarely used functions with just a few buttons,
F4 switches to several operating levels for the
variable F1-F3 buttons, e.g. in «TUNER» mode
F1 is «AUT» on first level and
«SIG/SIGNAL» on second level.
To change from tuner to CD mode,you will first
have to call up «CD» in the display using the
HIFI button. «CD» appears above F2. Pressing
F2 then switches to «CD PLAYER».
To save battery power, the remote control
switches to a minimum display e.g.«HIFI» (in
the top line of the display), one minute after
the last use. Pressing any button will switch on
thedisplay.
After that the buttons and functions are ready
for use.
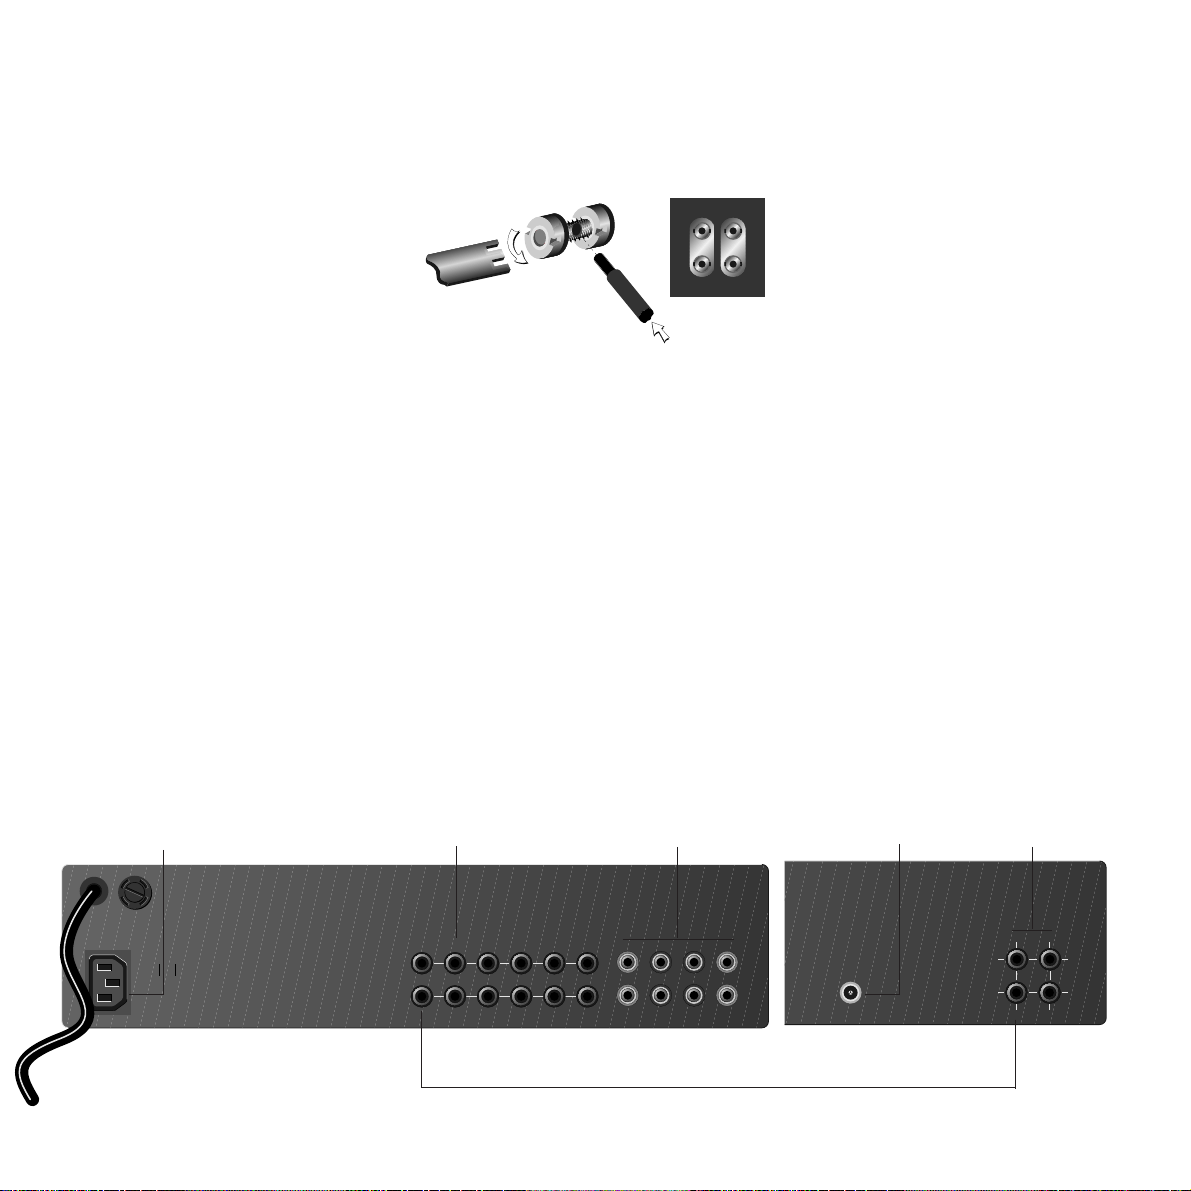
Connections
Before connecting or disconnecting any equip-
ment or speakers always turn the power off.
Pull the panels straight off the back of the
units. (The panel with the bottom cut-out be-
longs to the amplifier or tuner / amplifier.)The
panels cover the wiring after installation.
If you stack your hi-fi components on top of
one another, it is best to put the amplifier at
the bottom.This makes connecting the power,
speaker and aerial cables easier.
If you arrange the components next to one
another the best place for the amplifier is in the
middle, with the tuner on the left and the CD
player on the right (viewed from front).With
the panel in place the cables can be passed
through openings in the base.
If you have also purchased a Loewe CD rack,
the cables can be passed invisibly through the
cable duct in the back wall to the floor.