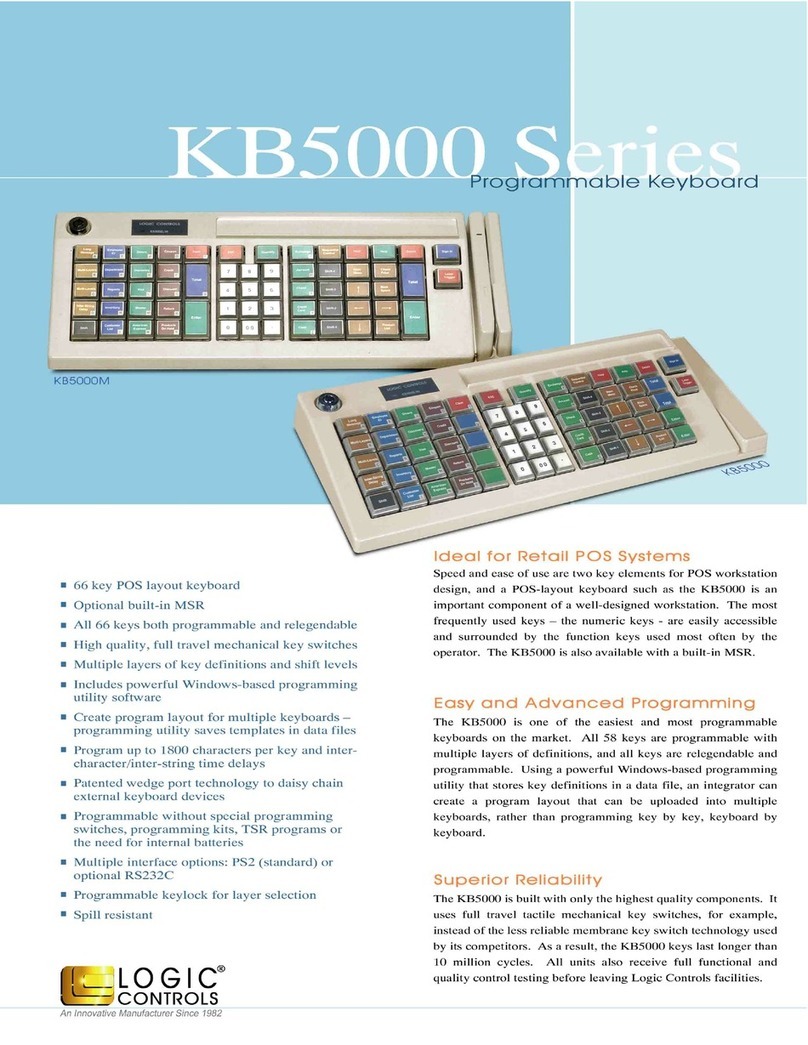
Logic Controls LK7000 Owner's manual

Built-in Laser Barcode Scanner
PROGRAMMING MANUAL
LOGIC CONTROLS, INC.
355 Denton Avenue
New Hyde Park, NY 11040
TEL: (516) 248-0400
FAX: (516) 248-0443
Email: [email protected]
http://www.logiccontrols.com
Klaser Series Programmable Keyboard

1
Operational Parameters
The Klaser integrated barcode scanner is shipped with the default settings shown below. These
default values are stored in non-volatile memory and are preserved even when the scanner is
powered down.
You can change the default values by scanning the appropriate bar codes included in this manual.
These new values replace the standard default values in memory. The default parameter values
can be recalled by scanning the SET ALL DEFAULTS bar code.
Parameter Default Value
Beeper Tone Medium Frequency
Laser On Time 3.0 sec
Triggering Mode Level
Time-out Between Same Symbol 1.0 sec
Beep After Good Decode Enable
UPC-A Enable
UPC-E Enable
UPC-E1 Disable
EAN-8 Enable
EAN-13 Enable
Bookland EAN Disable
Decode UPC/EAN Supplementals Ignore
Transmit UPC-A Check Digit Enable
Transmit UPC-E Check Digit Enable
Transmit UPC-E1 Check Digit Enable
UPC-A Preamble System Character
UPC-E Preamble System Character
UPC-E1 Preamble System Character
USS-128 Enable
UCC/EAN-128 Enable
ISBT 128 Enable
Code 39 Enable
Set Length(s) for Code 39 2-55
Code 39 Check Digit Verification Disable
Transmit Code 39 Check Digit Disable
Code 93 Disable
Set Length(s) for Code 93 4-55
Interleaved 2 of 5 Enable
Set Length(s) for I 2 of 5 14
I 2 of 5 Check Digit Verification Disable
Transmit I 2 of 5 Check Digit Disable
Discrete 2 of 5 Disable
Set Length(s) for D 2 of 5 12
Codabar Disable
NOTIS Editing for Codabar Disable
Set Lengths for Codabar 5-55
Prefix NULL
Suffix 1 LF
Suffix 2 CR
Scan Data Transmission Format Data as is
2
Set Default Parameter
Scanning this barcode returns all parameters to the factory default values.
Beeper Tone
To select a decode beep frequency (tone), scan the appropriate bar code.
Laser On Time
This parameter sets the maximum time decode processing continues during a scan attempt. It is
programmable in 0.1 second increments from 0.5 to 9.9 seconds. To set a Laser On Time, scan the barcode
below. Next scan two numeric barcodes at end of this manual that correspond to the desired on time. Times
less than 1.0 second must have a leading zero. For example, to set an on time of 0.5 seconds, scan the bar
code below, then scan the “0” and “5” bar codes. If you make an error, or wish to change your selection,
scan the CANCEL barcode.

3
Triggering Modes
Level - Pressing and holding trigger key activates the laser. The laser remains on, and
decode processing continues until trigger key is released, a valid decode, or the
Laser On Time-out is reached.
Pulse - Pressing trigger key activates the laser. The laser remains on and decode
processing continues until a valid decode, or the Laser On Time-out is reached.
Continuous - The laser is always on and decoding.
Blinking - The laser is blinking on & off and decoding. Scanning range is reduced in this
mode.
Time-out Between Same Symbol
When in Continuous triggering mode, this parameter sets the minimum time that must elapse before the
scanner decodes a second bar code which is identical to one which has just been decoded. It is
programmable in 0.1 second increments from 0.0 to 9.9 seconds. To set a time-out value, scan the bar code
below. Next scan two numeric barcodes at the end of this manual. Times less than 1.0 second must have a
leading zero. For example, to set a time-out of 0.5 seconds, scan the bar code below, then scan the “0” and
“5” barcodes. If you make an error, or wish to change your selection, scan the CANCEL barcode.
Beep After Good Decode

4
UPC/EAN
Enable/Disable UPC-A
Enable/Disable UPC-E
Enable/Disable UPC-E1
Enable/Disable EAN-8

5
Enable/Disable EAN-13
Enable/Disable Bookland EAN
Decode UPC/EAN Supplementals
Supplementals are additionally appended characters (2 or 5) according to specific code format conventions
(e.g., UPC A+2, UPC E+2, EAN 8+2). Three options are available.
DECODE - UPC/EAN barcodes with supplemental characters are decoded. Barcodes without
supplemental characters are ignored completely.
IGNORE - UPC/EAN barcodes are decoded and the supplemental characters ignored.
AUTO - Auto-discriminate option will have the UPC/EAN barcodes always decoded and any
supplemental characters will also be decoded.

6
Enable/Disable UPC-A Check Digit Transmission
Enable/Disable UPC-E Check Digit Transmission
Enable/Disable UPC-E1 Check Digit Transmission

7
UPC Preamble
Three options are given for lead-in characters for UPC symbols transmitted to the host device: No Preamble
transmitted, transmit System Character Only, and transmit System Character and Country Code (“0” for
USA). The lead-in characters are considered part of the symbol.
UPC-A Preamble
UPC-E Preamble
UPC-E1 Preamble

8
Code 128
Enable/Disable USS-128
Enable/Disable UCC/EAN-128
Enable/Disable ISBT 128

9
Code 39
Enable/Disable Code 39
Set Lengths for Code 39
Lengths for Code 39 may be set for one discrete length or lengths within a specific range. The length of a
code refers to the number of characters (i.e., human readable characters), including check digit(s) the code
contains. (Numeric barcodes are at the end of this manual. If you make an error, or wish to change
your selection, scan the CANCEL barcode. Single digit numbers must always be preceded by a
leading zero.)
One Discrete Length
- This option allows you to decode only those codes containing a selected length. For example, if
you scan Code 39 One Discrete Length and then scan 0, 9, only Code 39 symbols containing
9 characters are decoded.
Length Within Range
- This option allows you to decode a code type within a specified range. For example, to decode
Code 39 symbols containing between 4 and 12 characters, first scan Code 39 Length Within
Range. Then scan 0, 4, 1and 2.

10
Enable/Disable Code 39 Check Digit Verification
Enable/Disable Code 39 Check Digit Transmission

11
Code 93
Enable/Disable Code 93
Set Lengths for Code 93
Lengths for Code 39 may be set for one discrete length or lengths within a specific range. The length of a
code refers to the number of characters (i.e., human readable characters), including check digit(s) the code
contains. (Numeric barcodes are at the end of this manual. If you make an error, or wish to change
your selection, scan the CANCEL barcode. Single digit numbers must always be preceded by a
leading zero.)
One Discrete Length
- This option allows you to decode only those codes containing a selected length. For example, if
you scan Code 39 One Discrete Length and then scan 0, 9, only Code 93 symbols containing
9 characters are decoded.
Length Within Range
- This option allows you to decode a code type within a specified range. For example, to decode
Code 93 symbols containing between 4 and 12 characters, first scan Code 93 Length Within
Range. Then scan 0, 4, 1and 2.

12
Interleaved 2 of 5
Enable/Disable Interleaved 2 of 5
Set Lengths for Interleaved 2 of 5
Lengths for I 2 of 5 may be set for one discrete length or lengths within a specific range. The length of a code
refers to the number of characters (i.e., human readable characters), including check digit(s) the code
contains. (Numeric barcodes are at the end of this manual. If you make an error, or wish to change
your selection, scan the CANCEL barcode. Single digit numbers must always be preceded by a
leading zero.)
One Discrete Length
- This option allows you to decode only those codes containing a selected length. For example, if
you scan I 2 of 5 One Discrete Length and then scan 1, 4, then the only I 2 of 5 symbols
decoded are those containing 14 characters.
Length Within Range
- This option allows you to decode a code type within a specified range. For example, to decode I
2 of 5 symbols containing between 4 and 12 characters, first scan I 2 of 5 Length Within
Range. Then scan 0, 4, 1and 2.

13
I 2 of 5 Check Digit Verification
When enabled, this parameter checks the integrity of an I 2 of 5 symbol to ensure it complies with
a specified algorithm, either USS (Uniform Symbology Specification), or OPCC (Optical Product
Code Council).
Enable/Disable I 2 of 5 Check Digit Transmission

14
Discrete 2 of 5
Enable/Disable Discrete 2 of 5
Set Lengths for Discrete 2 of 5
Lengths for D 2 of 5 may be set for one discrete length or lengths within a specific range. The
length of a code refers to the number of characters (i.e., human readable characters) the code
contains, and includes check digits. (Numeric barcodes are at the end of this manual. If you make
an error, or wish to change your selection, scan the CANCEL barcode. Single digit numbers must
always be preceded by a leading zero.)
One Discrete Length
- This option allows you to decode only those codes containing a selected length. For example, if
you scan D 2 of 5 One Discrete Length and then scan 1, 4, then the only D 2 of 5 symbols
decoded are those containing 14 characters.
Length Within Range
- This option allows you to decode a code type within a specified range. For example, to decode
D 2 of 5 symbols containing between 7 and 12 characters, first scan D 2 of 5 Length Within
Range. Then scan 0, 7, 1and 2.

15
Codabar
Enable/Disable Codabar
Set Lengths for Codabar
Lengths for Codabar may be set for one discrete length or lengths within a specific range. The
length of a code refers to the number of characters (i.e., human readable characters) the code
contains, and includes check digits. (Numeric barcodes are at the end of this manual. If you make
an error, or wish to change your selection, scan the CANCEL barcode. Single digit numbers must
always be preceded by a leading zero.)
One Discrete Length
- This option allows you to decode only those codes containing a selected length. For example, if
you scan Codabar One Discrete Length and then scan 1, 4, then the only Codabar symbols
decoded are those containing 14 characters.
Length Within Range
- This option allows you to decode a code type within a specified range. For example, to decode
Codabar symbols containing between 7 and 12 characters, first scan Codabar Length Within
Range. Then scan 0, 7, 1and 2.

16
Enable/Disable OTIS Editing
When enabled, this parameter strips the start and stop characters from decoded Codabar symbol.

17
Prefix/Suffix Values
A prefix and/or one or two suffixes may be appended to scan data for use in data editing. These
values are set by scanning a four digit number (i.e. four barcodes) that corresponds to key codes
for various terminals. See the Character Table (P.20) and Numeric Barcodes (P.19). If you make
an error, or wish to change your selection, scan the CANCEL barcode.
Note: In order to use Prefix/Suffix values, the Scan Data Transmission Format must be set
accordingly. Default is Data only.

18
Scan Data Transmission Format
To change the Scan Data Transmission Format, scan one of the eight bar codes below
corresponding to the desired format.

19
Numeric Bar Codes
Other manuals for LK7000
1
Table of contents
Other Logic Controls Keyboard manuals

Logic Controls
Logic Controls KB5000 Series Owner's manual

Logic Controls
Logic Controls LK1800 Series User manual

Logic Controls
Logic Controls LK1600 Series User manual

Logic Controls
Logic Controls LK7000 User manual

Logic Controls
Logic Controls KB5000 Series User manual

Logic Controls
Logic Controls KB5000 Series Quick guide

Logic Controls
Logic Controls KB5000 Series User manual

Logic Controls
Logic Controls KB5000 Series User manual

Logic Controls
Logic Controls LK1600 Series User manual

Logic Controls
Logic Controls LK8000 Series User manual