LOLO RACKS SWING OUT 2023 User manual

2023 SWING OUT
ASSEMBLY GUIDE
Thank you for choosing an American made product!
REV JAN 2023 Rev-

Warning and disclaimer:
Failure to follow warnings and instructions may result in INJURY OR DEATH
💀
,
VEHICLE CRASH, PROPERTY DAMAGE.
Failure to follow warnings and instructions WILL Void the warranty.
Hauling heavy loads at highway speed is a serious task.
Please take it seriously.
1. DO NOT use this swing out attachment with ANY other hitch adaptors, hitch extenders, hitch
doublers. THIS IS DANGEROUS and could result in property damage, serious injury or death.
This will surely jeopardize ground clearance, add wobble and damage parts and pads.
2. Do NOT install any non-LOLO brand bike racks into or onto the swing out.

3. Use with a class C or larger RV, motor-home is prohibited. Use on any trailer is strictly
prohibited.
4. Be aware of low clearance sections or roads to avoid contact with ground. Use caution when
crossing ditches and gullies swing out may hit.
5. Be careful of your hands and kids around pinch points in the swing.
6. Check that ALL bolts and nuts are tightly secured monthly.
7. Intended only for class 3, 4 or 5 hitches (2” receiver). (2.5” is okay with reducer sleeve)
Warranty is void if used in a smaller hitch with an adaptor. This is dangerous and is surely
overloading the small hitch. If your hitch itself is wobbly or flexing by hand discontinue use
immediately and have the hitch inspected or serviced.

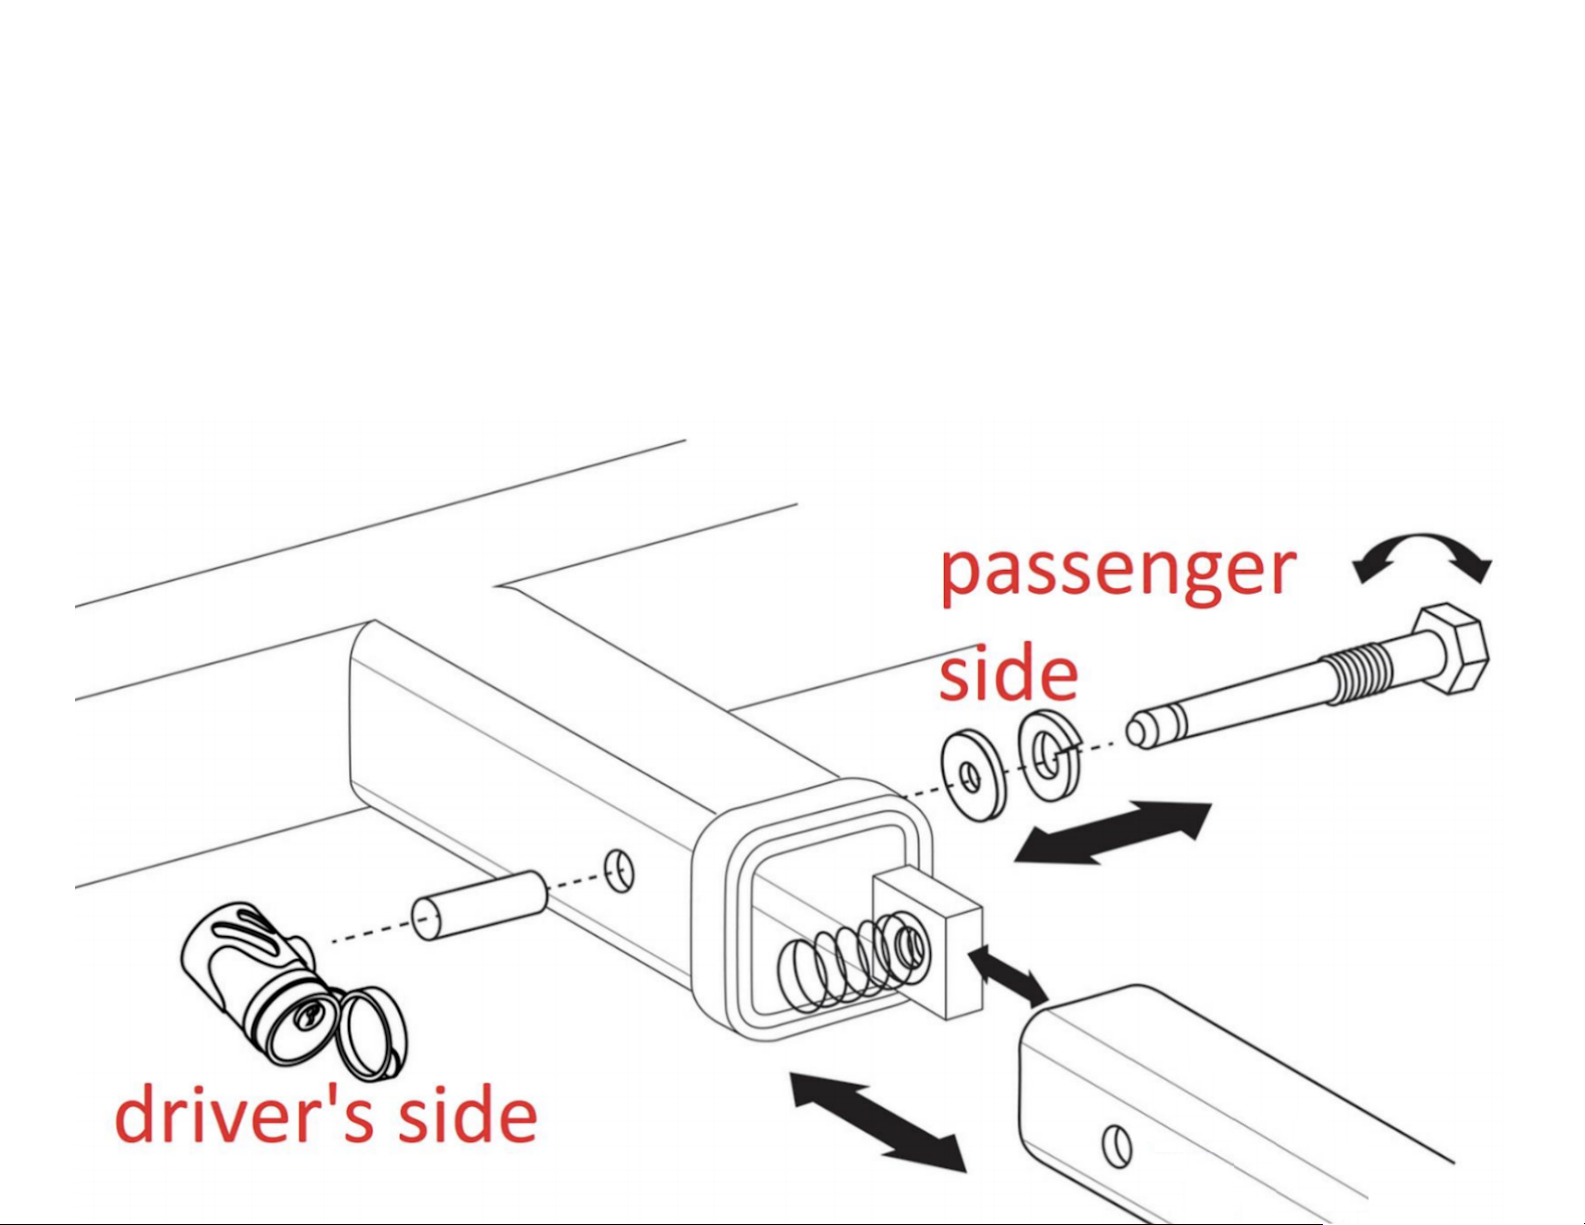
8. Do not operate the swing without either a lock or hairpin clip on the end of the hitch bolt for
safety.
9. Do not exceed 250lbs total, keep in mind the 4 bike Lolo rack is about 55 and the 6 bike Lolo
is about 68 pounds by themselves.
10. Remove E-Bike batteries prior to loading.
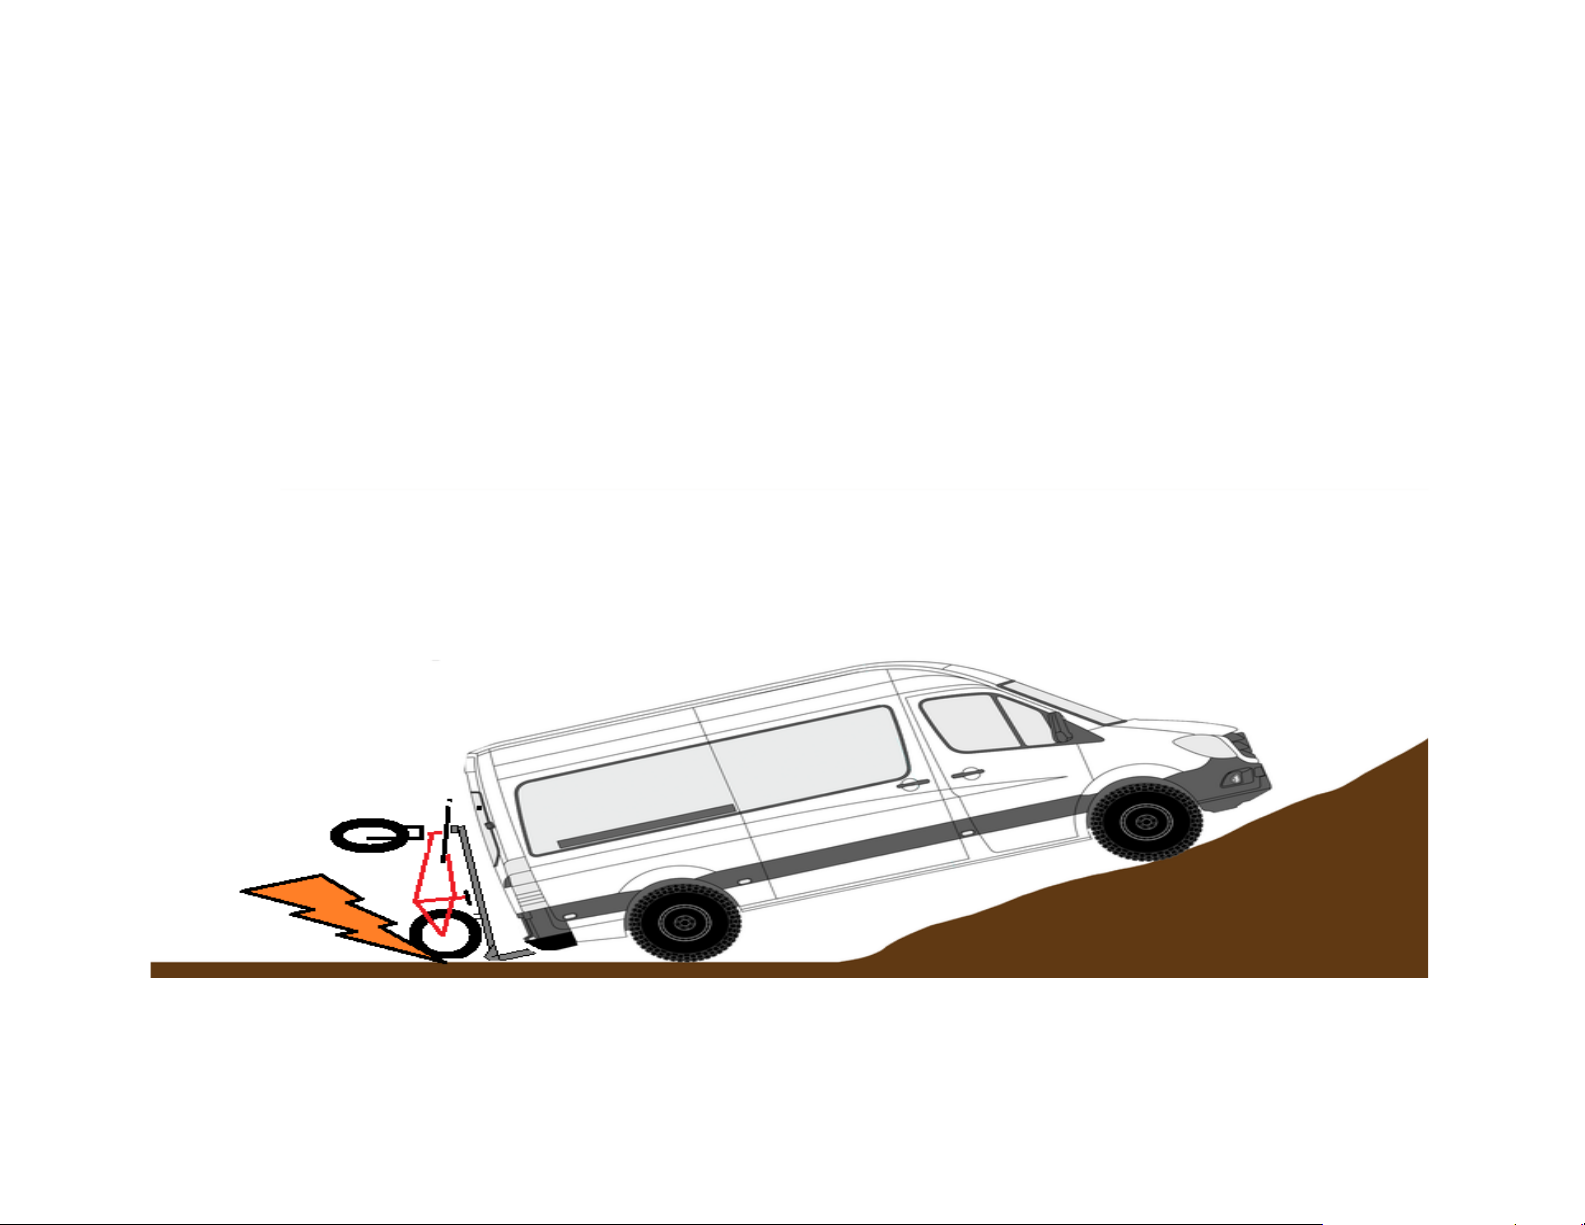
11. This swing rack is not intended for rugged off-road use. Exercise better judgment and be more
cautious when traveling with the swing installed.
12. Modification, removal or substitution of the swing or any components in any way will void the
warranty.
13. For those that live where they salt or treat the roads: we recommend washing the rack with soapy
water after driving on salty roads and then spraying WD-40 inside some of the holes in all the tubes.
14. Mud Flaps will help keep your swing from being sprayed with rocks and salt. This will prolong it’s
beauty and functioning life.
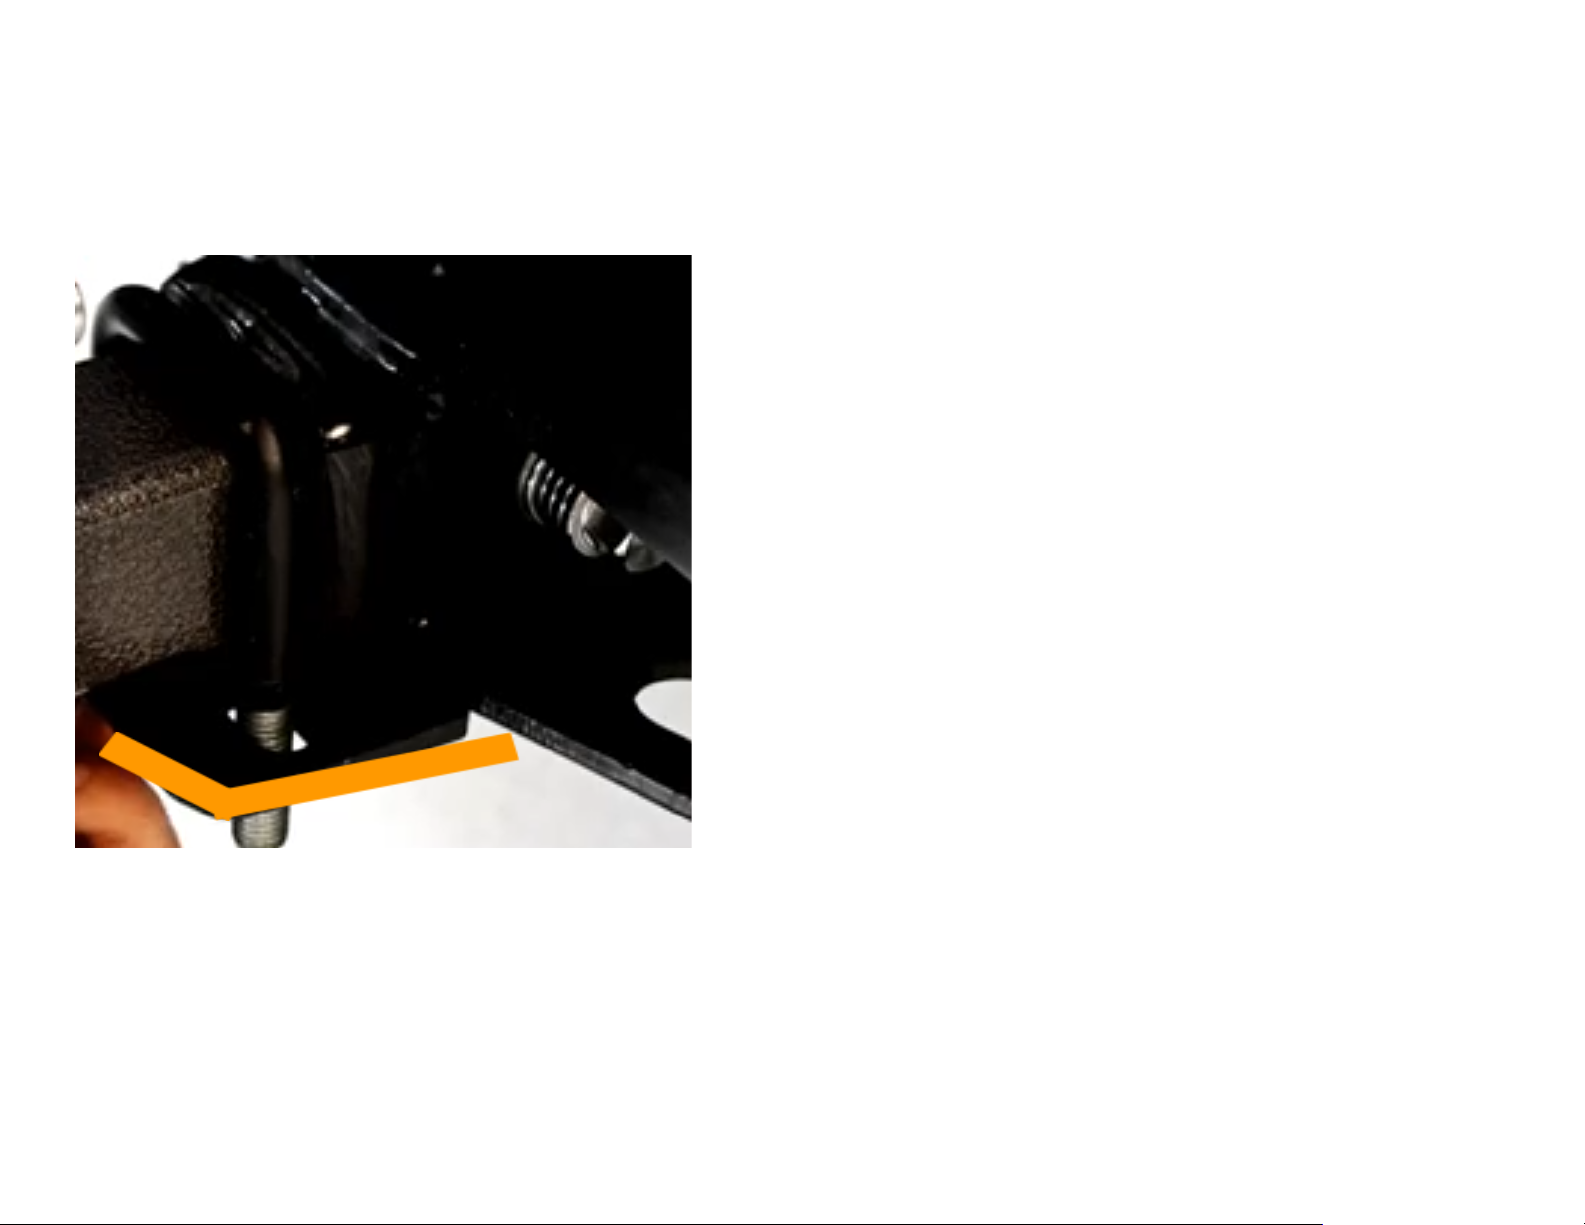
15. DO NOT remove the 90 deg stopper bolt. Doing so will damage the rack and void your warranty.

Pay attention to changing terrain!
Be careful when navigating up and down steep inclines and
driveways and deep ditches.
Damage can occur to vehicle, bike rack or bikes.

Okay, LETS DO THIS!
The Lolo and Swing are designed to be bolted directly together for a more compact and
robust system. You must build the rack to the swing as shown below.
If you are building the rack and swing for the first time skip ahead to installing the square nut.
Tools required:
●5/8” socket fits the locking hitch bolt.
●3/4” wrenches or sockets. (19mm works in an emergency)

First step for those with an existing Lolo Rack
Remove The top cross bar. This is just to make the rack lighter and easier to maneuver later.

Next, Remove the red pin and lay the rack down on the ground. Remove the side plates.
Clean all parts with WD-40 or similar.

Remove the hitch bolt from the hitch and car.
Remove the square nut from inside of the normal Lolo receiver tube.
Clean all parts as you go.

Install Hitch Tightener per it’s packaging. Note the bend in the plate and it’s orientation.
Place U-bolt over the Lolo tube and push up against the vehicle hitch.

Reinstall the square nut by compressing the spring with your fingers and inserting it into the
SWING OUT such that the square is on the passenger side of the tube. Reference
https://youtu.be/osE9Ooncfoc at 0:30. This is the same installation method for the swing.
Line up the threads and spring with the first hole from the end. (shallower insertion)
Install the swing to the vehicle. Lining up with the first hole to line up with the hole in your
vehicle’s hitch.

Install the hitch bolt per 1:39 of the video. https://youtu.be/osE9Ooncfoc
(it’s the same operation)
Protip: get a buddy or put your knee under the swing to level it to install the bolt sleeve.
Next, Install the lock.
Level the swing and tighten hitch bolt to 30 ft/lbs (pretty tight with a normal 6-7 in long
wrench)

Most solid bolting setup: Use your existing (3) 4.25” long ½ in bolts along with the additional
one that came with your swing out. Make sure there are washers on both sides of the pivot
plates on both sides. (16) washers will be used for this set up. Use a ¾” wrench and socket to
tighten all the nuts and bolts to 30-40ft/lbs (pretty tight).

OPTIONAL ARRANGEMENT IF ADJUSTING THE ANGLE OF THE MAST IS DESIRED.
THIS WOULD GIVE MORE GROUND CLEARANCE WITH THE MAST LEANING TOWARD THE
VEHICLE OR GIVE MORE DOOR OPENING CLEARANCE WHEN MORE STRAIGHT UP.
NOTE RED PIN NOW GOES THROUGH THE MAST. MAKE SURE YOU HAVE WASHERS EVERYWHERE
AROUND THE PLATES.

Rebuild the rack: If you are building the rack portion for the first time refer to the video and
rack assembly guide.
If you are rebuilding the rack back from adding the swing. You can reinstall the top crossbar
assembly.

To maintain the rock solid performance of the swing you may need to occasionally adjust
the CAM clamp.
The swing will come pre-adjusted but as parts settle in or wear you will need to adjust them.
Note the “feel” of the cam handle action. If this feel weakens the rack may wiggle more
and cause premature wear.
You should adjust the nut to get this “feel” and tightness back. (kinda like how a quick
release on a bike works)
With a ¾”or 19 mm wrench tighten the nut about 1/12th of a turn and try the handle for that
feel. (nut highlighted in blue below)
Adjust to suit. The handle should operate with roughly 10 pounds of pressure. Do not make it
super hard to close the cam, damage may result.
A dab of grease on the sliding surfaces of the cam plates and brass washer will keep it
working nice.


Operation:
To open: Fully disengage the cam clamp via lifting and rotating the grip. Pull the round
handle nearest the hitch and hold open while swinging open. To have the swing lock open
at 90 degrees: Remove the silver pin from the ear of the swing and replace in location
highlighted in BLUE below. Warranty is void if the stopper bolt is removed.

To close: Remove silver pin and rotate swing. Replace pin in its home. Pull inside handle and
push till the pin starts over the tube. Let go of the handle and push until the pin drops in.
Close the handle on the cam.
Maintenance:
If driving in salty conditions wash salt off after use and spray all over and inside with WD-40 or
similar. Wash off sand as soon as possible.
Check all rack and swing bolts for tightness monthly.
Regularly check cam bolt feel as noted earlier. A dab of grease on the sliding surfaces of the
cam plates and brass washer will keep it working nice.
Let us know if you need anything [email protected].
We appreciate your business and are happy you supported an AMERICAN MADE product.
Have FUN with your friends and family!!!

Table of contents
Popular Automobile Accessories manuals by other brands

Canyon
Canyon CNE-CCA05 quick guide

GU Electronic
GU Electronic LandRover 2016-TD manual

WeatherTech
WeatherTech Child Car Seat Protector installation instructions

Parrot
Parrot CK 3000 Evolution Specifications

Black Horse Off Road
Black Horse Off Road EX-K376 installation instructions

RVS systems
RVS systems RVS-507635 instruction manual

Thule
Thule CHEVROLET Aveo Fitting instructions

EUFAB
EUFAB 11575 operating instructions

Lippert
Lippert 10570 Manual of use and maintenance

Spyder Auto
Spyder Auto PRO-YD-CS99 Series installation guide

DFK
DFK HardCabs CAM-AM DEFENDER MAX installation instructions

Continental Refrigerator
Continental Refrigerator FOBIK user manual