LoLo LCF15TPF-L User manual

This manual provides information for:
OPERATOR MANUAL
IMPORTANT INFORMATION, KEEP FOR OPERATOR
PART NUMBER 159667 Rev. A (02/11)
THIS MANUAL MUST BE RETAINED FOR FUTURE REFERENCE.
READ, UNDERSTAND AND FOLLOW THE INSTRUCTIONS AND
WARNINGS CONTAINED IN THIS MANUAL.
FOR YOUR SAFETY
Do not store or use gasoline or other ammable vapors or liquids in the vicinity
of this or any other appliance.
Information contained in this document is known to be current and accurate at the time of printing/
creation. LoLo Commercial Foodservice Equipment recommends referencing our product line
websites, www.getLoLo.com, for the most updated product information and specifications.
POST IN A PROMINENT LOCATION
Instructions to be followed in the event user smells gas.
This information shall be obtained by consulting your local gas supplier. As
a minimum, turn o the gas and call your gas company and your authorized
service agent. Evacuate all personnel from the area.
IMPROPER INSTALLATION, ADJUSTMENT, ALTERATION,
SERVICE OR MAINTENANCE CAN CAUSE PROPERTY DAMAGE,
INJURY OR DEATH. READ THE INSTALLATION, OPERATING
AND MAINTENANCE INSTRUCTIONS THOROUGHLY BEFORE
INSTALLING OR SERVICING THIS EQUIPMENT.
MODELS
LCF15TPF-L, LCF30TPF-L,
LCF15TPF-N, LCF30TPF-N
Gas Fryer
NOTIFY CARRIER OF DAMAGE AT ONCE
It is the responsibility of the consignee to inspect the container upon receipt and
to determine the possibility of any damage, including concealed damage. LoLo
Commercial Foodservice Equipment suggests that if you are suspicious of dam-
age to make a notation on the delivery receipt. It will be the responsibility of the
consignee to le a claim with the carrier. We recommend that you do so at once.
Manufacturer’s Service/Questions 877-246-5656

2 OM-LCF
IMPORTANT - READ FIRST - IMPORTANT
IMPORTANT FOR FUTURE REFERENCE
Please record this information and retain this manual for the life of the equipment.
For Warranty Service and/or parts, this information is required.
_________________ ________________ _________________
Model Number Serial Number Date Purchased
SAFETY PRECAUTIONS
Before installing and operating this equipment be sure everyone involved in its operation are fully
trained and are aware of all precautions. Accidents and problems can result by a failure to follow
fundamental rules and precautions.
The following words and symbols, found in this manual, alert you to hazards to the operator, service
personnel or the equipment. The words are defined as follows:
DANGER: This symbol warns of imminent hazard which will result in serious injury or death.
WARNING: This symbol refers to a potential hazard or unsafe practice, which could result in serious
injury or death.
CAUTION: This symbol refers to a potential hazard or unsafe practice, which could result in minor
or moderate injury or product or property damage.
NOTICE: This symbol refers to information that needs special attention or must be fully
understood even though not dangerous.
TO AVOID PROPERTY DAMAGE, PERSONAL INJURY OR DEATH. SHUT OFF GAS
BEFORE SERVICING THE UNIT.
TO AVOID PROPERTY DAMAGE, PERSONAL INJURY OR DEATH. PRIOR TO
LIGHTING, CHECK ALL JOINTS IN THE GAS SUPPLY LINE FOR LEAKS. USE
SOAP AND WATER SOLUTION (BUBBLES). DO NOT USE AN OPEN FLAME.
A. CHECK ALL JOINTS PRIOR TO THE GAS VALVE BEFORE LIGHTING UNIT.
B. CHECK ALL JOINTS BEYOND THE GAS VALVE AFTER THE UNIT IS LIT.
TO AVOID PROPERTY DAMAGE, PERSONAL INJURY OR DEATH, ALL GAS
JOINTS DISTURBED DURING SERVICING MUST BE CHECKED FOR LEAKS.
CHECK WITH A SOAP AND WATER SOLUTION (BUBBLES). DO NOT USE AN
OPEN FLAME.
This product is intended for commercial use only. Not for household use.
Local codes regarding installation vary greatly from one area to another. The National
Fire Protection Association, Inc., states in its NFPA96 latest edition that local codes are “Authority
Having Jurisdiction” when it comes to requirements for installation of equipment. Therefore,
installation should comply with all local codes.

OM-LCF 3
Table of Contents
Inspect for Shipping Damage ............................................................... 4
General Installation Instructions ............................................................ 5
Specifications and Dimensions ............................................................. 6
Gas Pressure ......................................................................................... 6
Lighting Instructions .............................................................................. 7
Operating Instructions ........................................................................... 8
Cleaning ................................................................................................ 9
Maintenance ........................................................................................ 11
Service / Repair ................................................................................... 12
Troubleshooting Guide ........................................................................ 13
Exploded View of Parts ....................................................................... 14
Parts List ............................................................................................. 15

4 OM-LCF
All containers should be examined for damage before and during unloading. The
freight carrier has assumed responsibility for its safe transit and delivery. If the
equipment is received damaged, either apparent or concealed, a claim must be made
with the delivering carrier.
A) Apparent damage or loss must be noted on the freight bill at the time of
delivery. It must then be signed by the carrier representative (Driver). If this is
not done, the carrier may reject the claim. The carrier can supply the necessary
forms.
B) Concealed damage or loss, if not apparent until after the equipment is
uncrated, can also be claimed. However, a request for inspection must be made
to the carrier within 15 days. The carrier should arrange an inspection. Be
certain to retain all contents and packaging material.
Installation should be performed by a qualified installer who has thoroughly read,
understands and will follow these instructions.
If you have any questions concerning the installation, operation, maintenance or
service of this product, contact LOLO at 877-246-5656.
Inspect for Shipping Damage
Congratulations on your purchase of LOLO commercial cooking equip-
ment. LOLO takes pride in the design and quality of our products. When
used as intended and with proper care and maintenance, you will expe-
rience years of reliable operation from this equipment. To ensure best
results, it is important that you read and follow the instructions in this
manual carefully.
LOCATION OF DATA PLATE: The data plate is located on the side panel.

OM-LCF 5
General Installation Instructions
Ensure gas supply and gas-type as shown on unit data plate agree.
Installation of this equipment must conform to the current editions of the National Fuel Gas Code, ANSI Z223.1/NFPA 54, the National
Gas Installation Code, CSA-B149.1, or the Propane Installation Code, CSA-B149.2 as applicable and in accordance with local codes.
Screw legs into the permanently fastened nuts on the four corners of the unit and tighten by hand. Level the unit by
turning the adjustment screw at the bottom of each leg. Do not slide the unit with legs mounted; lift, if necessary, to move
the unit.
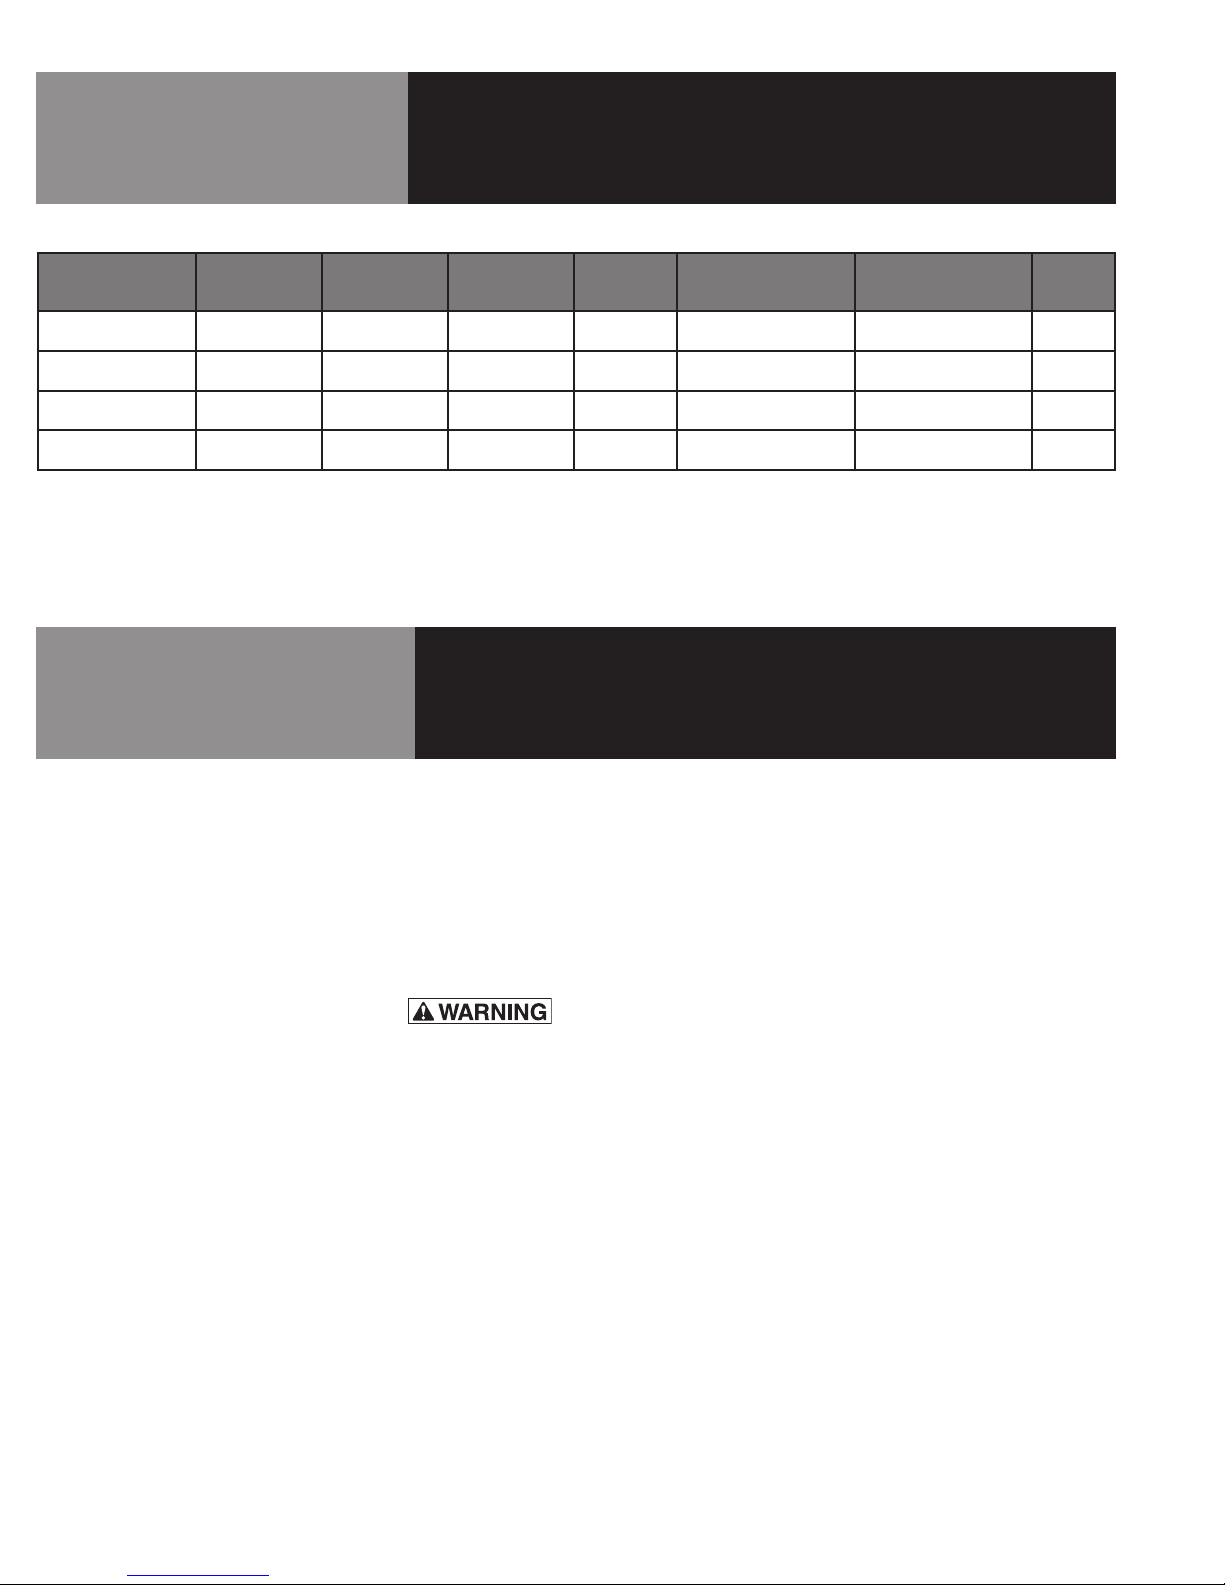
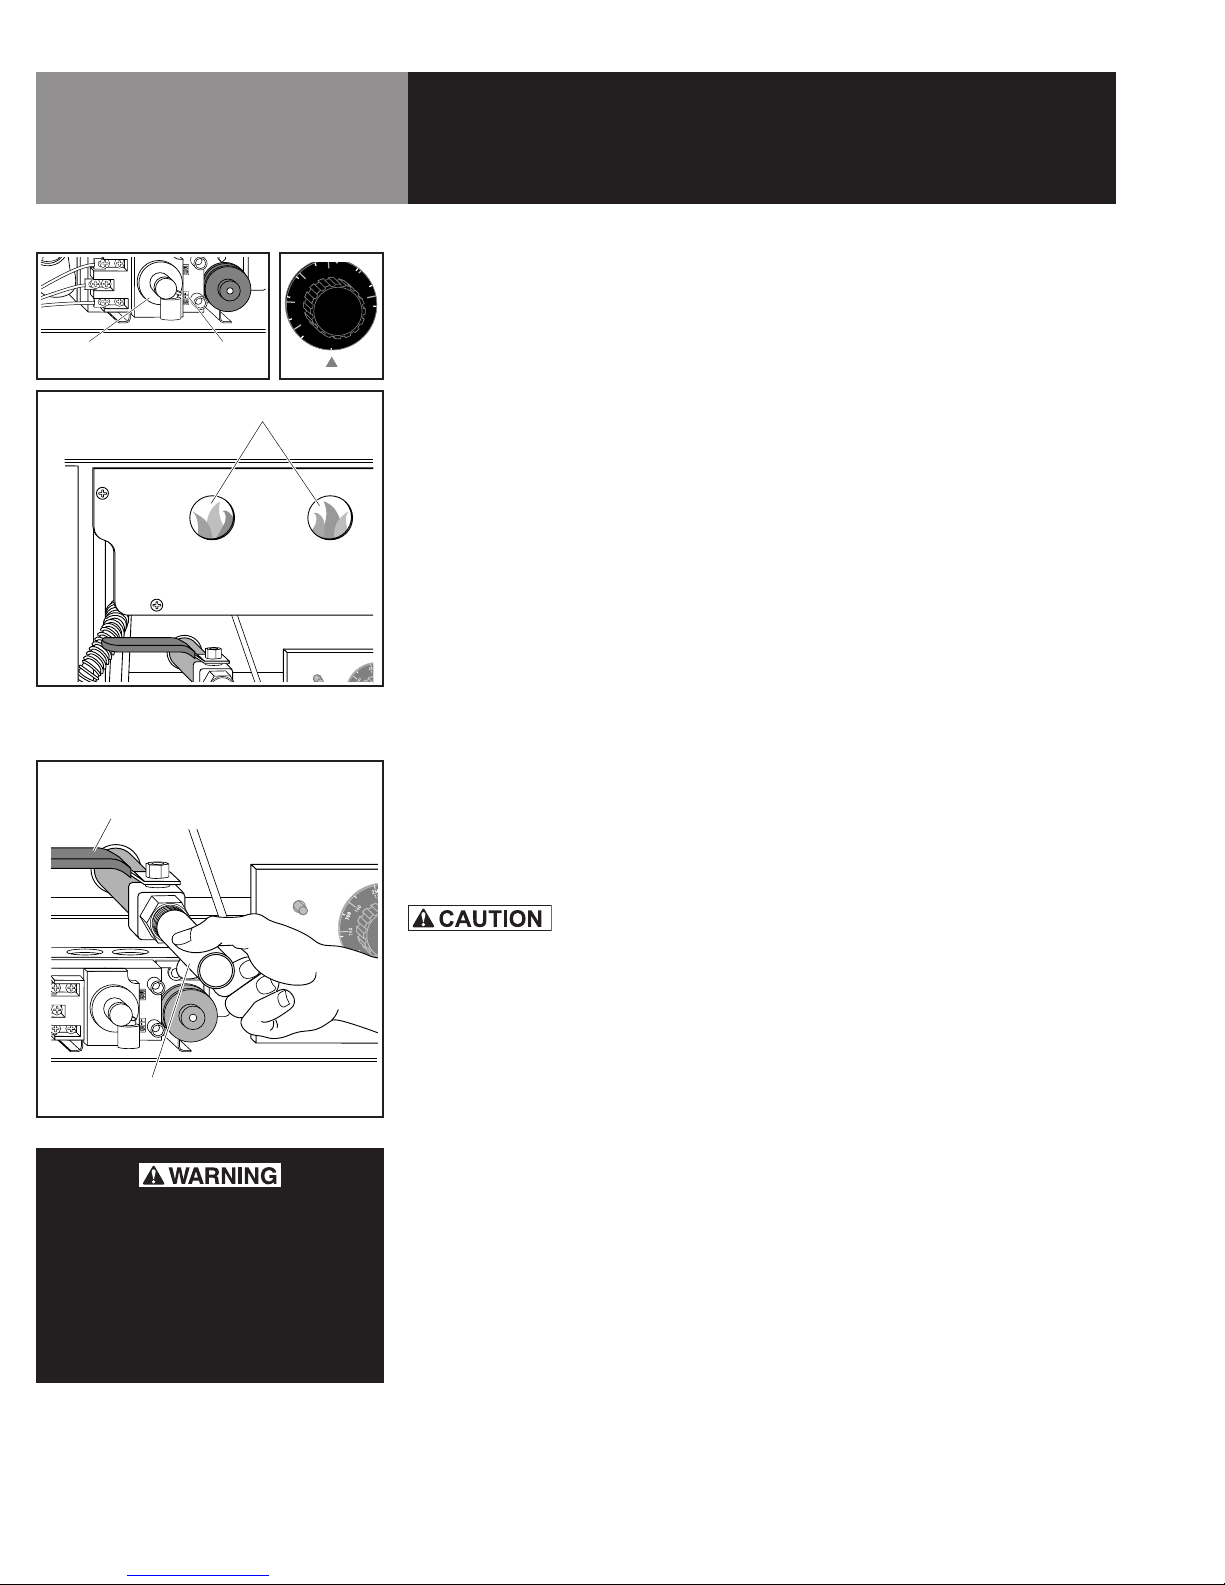
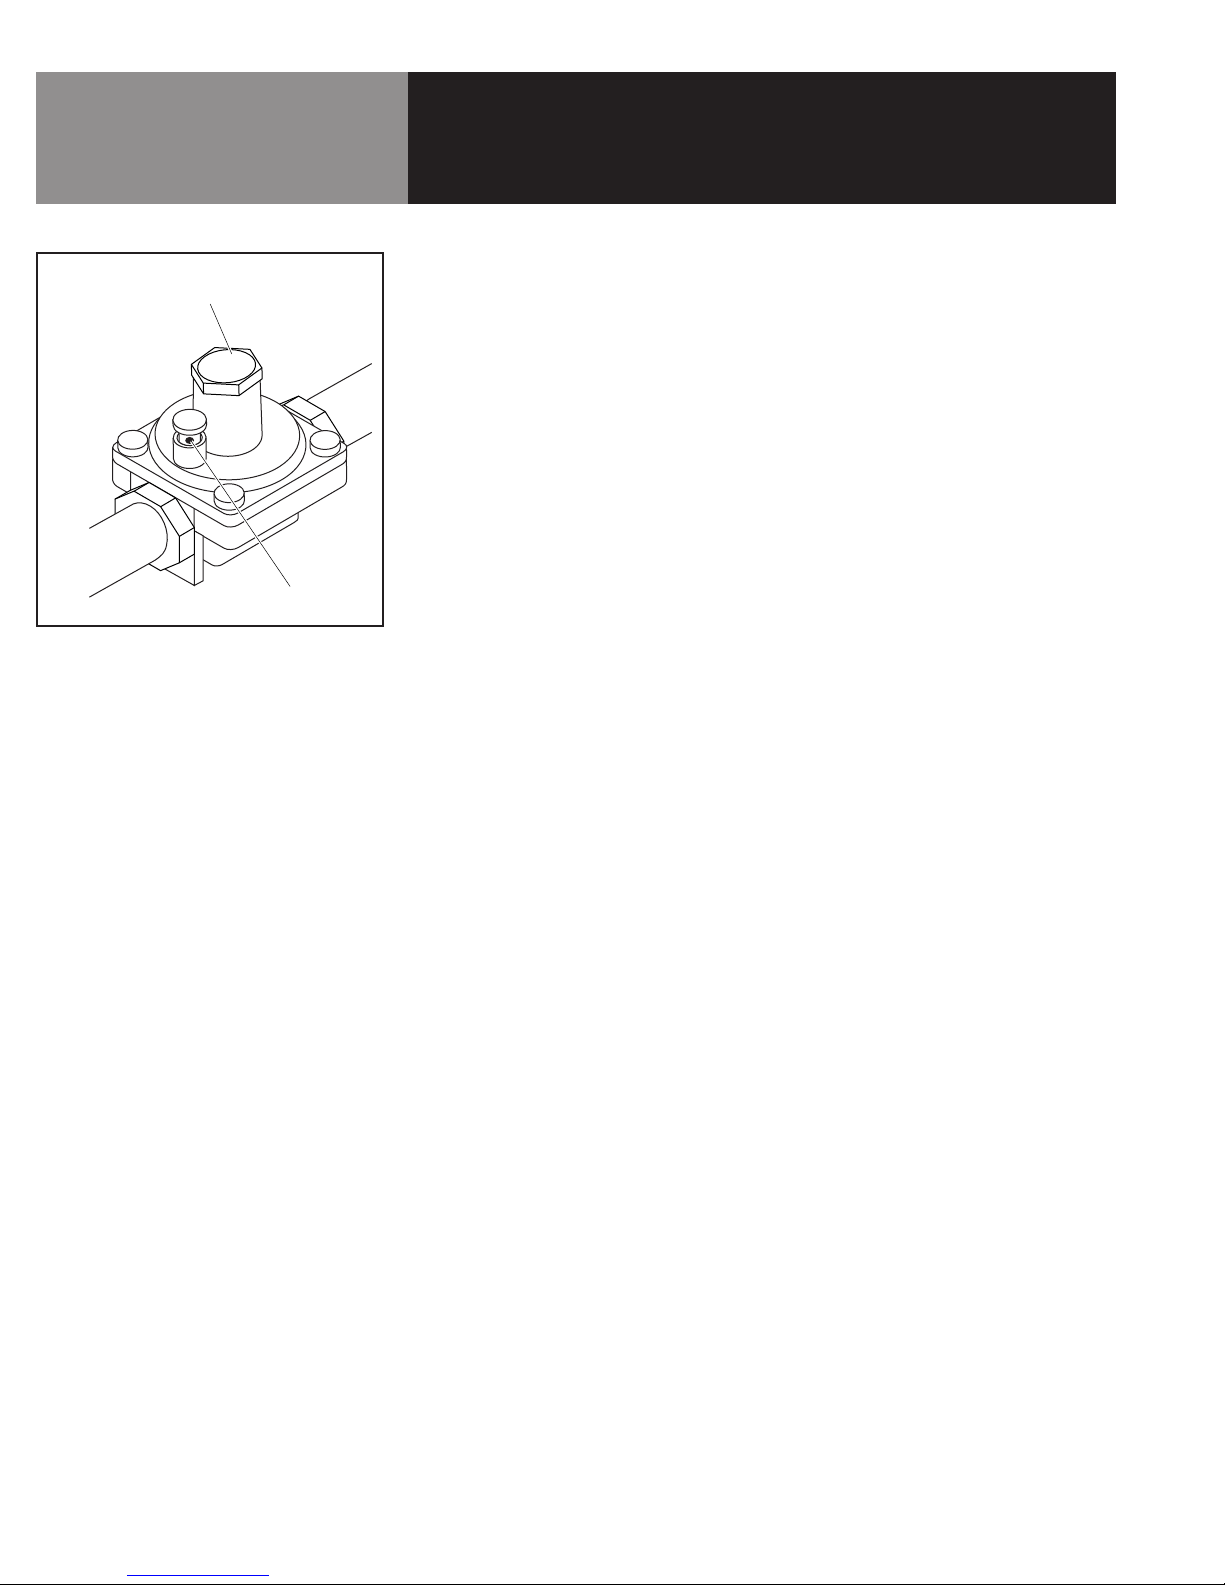
Use the correct pipe thread compound on any threaded pipe connections. It must be resistant to the action of liquified petroleum gases.
To avoid property damage or personal injury, DO NOT use an open flame to check for leaks. Check all
gas piping for leaks with a soap and water solution before operating unit.
THESE UNITS ARE SUITABLE FOR INSTALLATION ON NON-COMBUSTIBLE SURFACES AND NEAR NON-COMBUSTIBLE WALLS ONLY.
Noncombustible clearances:
6" sides (152 mm)
6" rear (152 mm)
4" floor (102 mm)
Do not obstruct the flow of combustion and ventilation air under the unit by the legs or behind the unit by the flue.
Adequate clearance for air openings into the combustion chamber is required. Do not store anything under the unit.
• Do not permit air to blow directly at the unit. Wherever possible, avoid open windows next to the unit’s sides or
back. Avoid wall-type fans which create air cross-currents within a room.
• Sufficient make-up air should be allowed to enter the room to compensate for the ventilation system. Otherwise, a
negative atmospheric pressure will occur and can cause intermittent operation.
• A properly designed and installed hood and ventilation system is required for correct installation.
To avoid risk of product or property damage or personal injury, installer must verify the installation
complies with the applicable local codes and regulations. The unit must be installed by a licensed
plumber or gas fitter when installed within the Commonwealth of Massachusetts.
: TO AVOID RISK OF PRODUCT OR PROPERTY DAMAGE, PERSONAL INJURY OR DEATH, INSTALLATION OF
THE FRYER MUST BE PERFORMED BY PERSONNEL QUALIFIED TO WORK WITH GAS.
: TO AVOID RISK OF PRODUCT OR PROPERTY DAMAGE, PERSONAL INJURY OR DEATH, THIS UNIT IS
FOR COMMERCIAL USE ONLY. NEVER USE RESIDENTIAL GRADE GAS CONNECTIONS. RESIDENTAL
CONNECTIONS DO NOT MEET GAS CODES AND COULD BE HAZARDOUS.

6 OM-LCF
Gas Pressure
Specifications and Dimensions
MODEL WIDTH
IN. (MM)
DEPTH
IN. (MM)
HEIGHT
IN. (MM)
# OF
BURNERS
BTU/BURNER
NAT/LP TOTAL BTU/Hr / Kw
W.C.-IN.
NAT/LP
LCF15TPF-N 11 (280) 29 (740) 25 (640) 2 13,250 26,500 / 7.77 KW 4/NA
LCF30TPF-N 17 (440) 29 (740) 25 (640) 4 13,250 53,000 / 15.54 KW 4/NA
LCF15TPF-L 11 (280) 29 (740) 25 (640) 2 13,250 26,500 / 7.77 KW NA/10
LCF30TPF-L 17 (440) 29 (740) 25 (640) 4 13,250 53,000 / 15.54 KW NA/10
NOTE: Gas inlet connection is 3/4" NPT.
The appliance and its individual shutoff valve (to be supplied by user) must be
disconnected from the gas supply piping system during any pressure testing of that
system at test pressures in excess of ½ psi (3.45 kPa).
The appliance must be isolated from the gas supply piping system by closing its
individual manual shut-off valve during any pressure testing of the gas supply piping
system at test pressures equal to or greater than ½ psi (3.45 kPa).
: TO AVOID PROPERTY DAMAGE, PERSONAL INJURY OR DEATH,
A FACTORY AUTHORIZED SERVICE AGENT SHOULD HANDLE ALL
MAINTENANCE AND REPAIR. BEFORE DOING ANY MAINTENANCE
OR REPAIR, CONTACT LOLO.

OM-LCF 7
Lighting Instructions
Initial Cleaning
It is important to clean equipment thoroughly before using it for the first time.
Clean the protective oil from all the surfaces and interior of the tank with a solution of
mild detergent or other grease-dissolving material.
Fryers are furnished with a Gas Control Safety Valve. Please follow the instructions below.
Before Lighting Pilot and Burners
Fill the tank about 3/4" below the full line with suitable frying compound before
lighting the pilot. This will allow for the expansion of the frying compound during the
heating process.
If the frying compound expands above the full line, the frying compound may overflow
out of the tank during the cooking process. It is important to add the frying compound
in fry tank before lighting the pilot or burners. Never allow either the main burners or
the pilot to remain on when the fry tank is empty. This will damage the fry tank.
Lighting Instruction
1. Turn thermostat knob to the “OFF” position (clockwise as far as possible).
2. Turn gas control valve dial to “pilot” position and press dial and turn to the
“OFF” position.
3. Wait 5 minutes before lighting the pilot.
4. Turn gas control valve dial to the “Pilot” position.
5. Press and hold gas control valve dial while lighting the pilot. Allow pilot to burn
approximately 1 minute or until pilot remains lit when dial is released.
6. Turn gas valve dial to “ON” position.
7. Set thermostat knob to the desired temperature. Main burners will ignite
automatically.
8. To turn the main burner off, rotate the thermostat knob to the “OFF” position
and turn gas control valve dial to “Pilot” position. The main burner will
extinguish and the pilot burner will remain lit.
9. To turn both the main burners and the pilot burners “OFF”, press gas control
valve dial and turn it to the “OFF” position.
10. Wait 5 minutes before relighting burners.
Gas Control
Valve
OFF Position
200°C
250
300
350
400
OFF
100°C
120
140
160
180
200
Thermostat
Reset Button
Limit Control
Piezo Igniter

8 OM-LCF
Operating Instructions
TO AVOID RISK OF PROPERTY DAMAGE,
PERSONAL INJURY OR DEATH, HANDLE
HOT OIL/SHORTENING WITH CARE!DO
NOT DRAIN HOT OIL/SHORTENING INTO A
NON-HEAT RESISTANT CONTAINER. HOT
OIL CAN MELT
CERTAIN MATERIALS.
Overnight shutdown
Turn gas control valve dial to the “OFF” position and turn thermostat knob to the
“OFF” position.
1. Make sure the gas control valve dial is in the “OFF” position.
2. Make sure the thermostat dial is in the “OFF” position.
3. Turn the gas control valve dial to “Pilot” position and hold. Press the pilot
ignition button to purge any air from the gas pipe system for the first use. Press
and hold the gas valve dial in the “Pilot” position for 5-7 minutes until it lights.
If the pilot will not ignite, light the pilot with an ignition source, such as a
match. Continue to press the gas valve for an additional minute after the pilot
burner lights.
4. Turn the gas control valve dial to the “ON” position then set the thermostat dial
to the desired temperature. You can view the burner flame through this panel.
Draining Instructions
The drain extension pipe is attached to the inside of the cabinet door.
Screw the drain extension pipe into the main drain valve. Once secured, use the blue
handle and turn the valve “ON” to release the oil.
To avoid risk of property damage or personal injury, turn the
thermostat to the “OFF” position and the gas valve to the
“Pilot” position before draining the fry tank.
NOTE:
• All burners are lit from the standing pilot burner. Turn the thermostat to the
desired set point temperature to light the main burner and put the unit in service.
• A properly designed and installed hood will act as the heart of the ventilating
system for the room or area in which the unit is installed and will leave the unit
independent of changing draft conditions.
All valves must be checked and lubricated periodically. This must be done by an
authorized service representative as part of a regular maintenance program.
Gas Control
Valve
OFF Position
200°C
250
300
350
400
OFF
100°C
120
140
160
180
200
Thermostat
Reset Button
Limit Control
Piezo Igniter
Drain Valve
Blue Handle
Drain Extension Pipe
View burner flames

OM-LCF 9
Cleaning
Initial Cleaning
It is important to clean equipment thoroughly before using it for the first time. Remove
any plastic covers from all stainless steel surfaces. Clean the protective oil from all
the surfaces and interior of the tank with a solution of mild detergent or other grease-
dissolving material.
Daily Cleaning
1. Always turn unit off and allow it to cool completely before cleaning. Clean
thoroughly before the initial use.
2. Never clean unit by immersing it in water.
3. The frequency of cleaning should depend on the actual use of the fryer. Set up
a cleaning schedule that corresponds to how often the fryer is used. However,
you should clean the unit at least once a week.
4. Strain the frying compound into a clean, dry, heat-safe container. Make sure there
is no compound left in tank. (If the tank is to be left empty for more than 2 minutes,
shut the pilot burner off. If this is not done, the fry tank may be damaged.)
5. Add water to the “MAX” line.
6. Add a good quality, non-foaming fryer cleaner and follow the manufacturer’s
instructions on the label.
7. Turn the thermostat to 250°F. Allow the burners to bring the solution to a boil.
8. Boil long enough to loosen or dissolve all varnish or carbon deposits on the
inside surfaces of the fry tank. Normally this takes approximately 30 minutes.
9. Turn the main burner and the pilot off.
10. If necessary, clean the inside of the fry tank, paying special attention to the
thermostat probes. Use a long-handled fiber or plastic brush and mild detergent
solution.
11. Rinse with clean water to remove all cleaning solution and drain the fry tank.
12. Rinse the inside of the tank with 2 cups of vinegar.
13. Rinse with clean water until the vinegar odor is gone. The fry tank must be
thoroughly rinsed, since even a trace of cleaning solution left inside the tank
will contaminate the frying compound.
14. Dry thoroughly.
15. Cover the tank if compound will not be added until later.
16. Clean all exterior surfaces of unit regularly with a damp cloth. Thin films of oil
subjected to frying temperatures quickly form into gummy consistency. In order
to avoid these formations, clean the surfaces regularly.
17. To remove discolorations or oil film, a non-abrasive cleaner may be used.

10 OM-LCF
Regulator Cleaning
Clean the regulator at least once a month. Make sure the vent opening is open and
not blocked in any way. Failure to do so will cause variations in pressure. This can
affect how the unit functions and may shorten the life of the product.
Once a month, clean the area surrounding vent opening (see illustration on left) with a
clean, wet rag to remove accumulated dust, dirt, lint etc.
Cleaning
Regulator
Vent opening

OM-LCF 11
Maintenance
Overnight Shutdown
Turn the Thermostat knob to the “OFF” position; or, turn the main gas valve control
to the “Pilot’ position if you don’t want to change the temperature setting. (The pilot
flame alone will keep the frying compound temperature about 130-145°F when not
cooking. This will shorten the preheat time when the unit is turned back on.)
Extended Shutdown (4 days or longer)
1. Turn the temperature control knob to the “OFF” position.
2. Turn the Off/Pilot/On valve control knob to the “OFF” position.
3. Turn the manual control valve under the unit to the “OFF” position.
4. Turn the gas supply valve (not supplied by LOLO) to the “OFF” position.
5. Make sure the entire flue duct opening on the top rear of unit is not blocked.
Filling Fry Tank
To avoid risk of property damage or personal injury, never
light pilot or turn burners on when fry tank is empty.
1. If using liquid frying compound, fill the fry tank approximately 3/4" below
the full line. The frying compound will expand as it is heated. Heat the frying
compound to 375° F for 20 minutes, then check the level. Add or decrease the
amount of frying compound until it reaches the full line.
2. When using solid frying compound, fill the fry tank only half full. Set the
temperature to 200 °F and allow the compound to liquify. Add more compound
until the fry tank is full.
3. Always use a good quality frying compound.
4. Filter the frying compound frequently, at least once a day. Filter more often if
frying heavily breaded products.
5. Skim out food particles frequently with a strainer/skimmer.
6. Add at least 15% (of fry tank capacity) of fresh frying compound daily (more
if possible) without overfilling the tank. If necessary, drain the fry tank just
enough to allow the addition of fresh frying compound. This will add life to the
frying compound and improve the taste of the products being cooked.
7. Do not overload the fry baskets. This will result in longer recovery time, longer
cook time, and an unsatisfactory product.
8. Prepare the food properly.
9. Keep salt out of the frying compound. Do not salt foods with the basket over
the fry tank.

12 OM-LCF
Maintenance
10. Check thermostat operation regularly by measuring the frying compound
temperature with a reliable frying thermometer. Allow the burner to cycle off
and then check the temperature of the compound. Temperature of compound
should be comparable to thermostat setting.
11. Keep the fry tank and thermostat probes clean.
Thermostat Calibration
The fryer control is factory calibrated. If cooking results indicate unit is not
maintaining correct temperatures, contact your authorized service representative.
NOTE: This appliance must only be serviced by an Authorized Service Representative.
NOTE: This unit is covered by the Original Manufacturer’s Warranty. Any adjustments
or repairs must be performed by an Authorized Service Representative.
If you have any questions or problems contact your nearest LOLO Service Representative.
PHONE: ______-______-__________
Service / Repair

OM-LCF 13
Troubleshooting Guide
PROBLEM
POSSIBLE CAUSE
Frying Temperature Too
High/Overheating (Check
Thermostat)
Frying Temperature Too
Low/Overheating (Check
Thermostat)
Overloading Fryer
Improper Draining of Food
After Frying
High Moisture Content in
Food Being Fried
Inadequate Frying
Compound Turnover
Improper Preparation of
Food
Contamination of Fryer
Compound (Due to salt or
other foreign material)
Excessive & Premature Foaming ★ ★ ★ ★
Greasy Food / Excessive
Frying Compound Absorption ★★★★★★
Objectionable Odor or Flavor of
Frying Compound ★ ★ ★
Objectionable Flavor of Fried Food ★ ★ ★ ★
Excessive Smoking of Frying
Compound ★ ★ ★ ★
Excessive Darkening of Frying
Compound ★ ★ ★ ★
Frying Compound Won’t Hold Heat ★ ★ ★ ★
Food Crust Color Not Brown ★ ★ ★ ★
Rapid Breakdown of Frying
Compound ★ ★ ★ ★

14 OM-LCF
Exploded View of Parts
MODEL: LCF15TPF-N/LCF15TPF-L
31 32 33 34 1 2
3
4
5
6
7
8
9
10
1718 16 15
11
12
13
14
28
27
29
30
26
25
24
23
22
21
20
19

OM-LCF 15
Parts List
Item no. Description Part number
1 ADJUSTABLE STAINLESS STEEL FEET 159501
2 MOUNTING PLATE FOR DOOR HINGE 159531
3 SUPPORT PLATE FOR FRONT FEET, LCF15TPF-L/LCF15TPF-N 159529
3 SUPPORT PLATE FOR FRONT FEET, LCF30TPF-L/LCF30TPF-N 159529
4 THERMOSTAT ENCLOSURE, LCF15TPF-L/LCF15TPF-N 159525
4 THERMOSTAT ENCLOSURE, LCF30TPF-L/LCF30TPF-N 159537
5 LCHM LIMIT CONTROL 159626
6 THERMOSTAT, MILLIVOLT 159624
7 SUPPORT PLATE FOR REAR FEET, LCF15TPF-L/LCF15TPF-N 159530
7 SUPPORT PLATE FOR REAR FEET, LCF30TPF-L/LCF30TPF-N 159536
8 REGULATOR 6"-NAT or 10"-LP, 3/4"-NPT 159591
9 PANEL, RIGHT 159528
10 RIGHT PLATE OF FLUE 159533
11 REAR PANEL, LCF15TPF-L/LCF15TPF-N 159534
11 REAR PANEL, LCF30TPF-L/LCF30TPF-N 159540
12 BASKET POTHOOK, LCF15TPF-L/LCF15TPF-N 159561
12 BASKET POTHOOK, LCF30TPF-L/LCF30TPF-N 159559
13 FRONT PLATE OF FLUE, LCF15TPF-L/LCF15TPF-N 159570
13 FRONT PLATE OF FLUE, LCF30TPF-L/LCF30TPF-N 159572
14 REAR PLATE OF FLUE, LCF15TPF-L/LCF15TPF-N 159534
14 REAR PLATE OF FLUE, LCF30TPF-L/LCF30TPF-N 159539
15 FRY TANK ASSY., LCF15TPF-L/LCF15TPF-N 159654
15 FRY TANK ASSY., LCF30TPF-L/LCF30TPF-N 159656
16 FILTER PANEL, LCF15TPF-L/LCF15TPF-N 159526
16 FILTER PANEL, LCF30TPF-L/LCF30TPF-N 159538
17 BASKET BAFFLE, LCF15TPF-L/LCF15TPF-N 159562
17 BASKET BAFFLE, LCF30TPF-L/LCF30TPF-N 159560
18 BASKET 159502
19 LEFT PLATE OF FLUE 159532
20 PANEL, LEFT 159527
21 VALVE, TANK DRAIN 159581
22 TANK DRAIN PIPE 159505
23 ISOLATING PLATE, UPPER, OF BURNER LCF15TPF-L/LCF15TPF-N 159566
23 ISOLATING PLATE, UPPER, OF BURNER LCF30TPF-L/LCF30TPF-N 159565
24 ODS FLAME PROTECTION, LCF15TPF-N/LCF30TPF-N 159589
24 ODS FLAME PROTECTION, LCF15TPF-L/LCF30TPF-L 159590
25 BURNER ASSY. 159644
26 ORIFICE #51, LCF15TPF-N/LCF30TPF-N 159586
26 ORIFICE #58, LCF15TPF-L/LCF30TPF-L 159588

16 OM-LCF PART NUMBER 159667 Rev. A (02/11)
5925 I-55 South, Byram, MS 39272
www.lolo.com
© 2011 LoLo Commercial Foodservice Equipment. All Rights Re-
served.
Parts List
Item no. Description Part number
27 GAS PIPE ASSY., LCF15TPF-L/LCF15TPF-N 159623
27 GAS PIPE ASSY., LCF30TPF-L/LCF30TPF-N 159622
28 ISOLATING PLATE, FRONT, LCF15TPF-L/LCF15TPF-N 159569
28 ISOLATING PLATE, FRONT, LCF30TPF-L/LCF30TPF-N 159571
29 DOOR ASSY., LCF15TPF-L/LCF15TPF-N 159655
29 DOOR ASSY., LCF30TPF-L/LCF30TPF-N 159657
30 DOOR HANDLE 159503
31 ISOLATING PLATE, LOWER, OF BURNER LCF15TPF-L/LCF15TPF-N 159567
31 ISOLATING PLATE, LOWER, OF BURNER LCF30TPF-L/LCF30TPF-N 159564
32 CORRUGATED PIPE 159674
33 PIEZO IGNITION 159625
34 SAFETY CONTROL VALVE ASSY., LCF15TPF-N/LCF30TPF-N 159658
34 SAFETY CONTROL VALVE ASSY., LCF15TPF-L/LCF30TPF-L 159660
16 OM-LCF

5925 I-55 South, Byram, MS 39272
www.lolo.com
NUMÉRO DE RÉFÉRENCE 159667 Rév. A (02/11)
5925 I-55 South, Byram, MS 39272 USA
www.lolo.com
© 2011 LoLo Commercial Foodservice Equipment. Tous droits réservés.
Nomenclature des pièces
Pièce n° Description Numéro de
référence
26 ORIFICE CALIBRÉ N° 51, LCF15TPF-N/LCF30TPF-N 159586
26 ORIFICE CALIBRÉ N° 58, LCF15TPF-L/LCF30TPF-L 159588
27 TUYAUTERIE DE GAZ, LCF15TPF-L/LCF15TPF-N 159623
27 TUYAUTERIE DE GAZ, LCF30TPF-L/LCF30TPF-N 159622
28 PLAQUE ISOLANTE AVANT, LCF15TPF-L/LCF15TPF-N 159569
28 PLAQUE ISOLANTE AVANT, LCF30TPF-L/LCF30TPF-N 159571
29 PORTE, LCF15TPF-L/LCF15TPF-N 159655
29 PORTE, LCF30TPF-L/LCF30TPF-N 159657
30 POIGNÉE DE PORTE 159503
31 PLAQUE ISOLANTE INFÉRIEURE DE BRÛLEUR, LCF15TPF-L/
LCF15TPF-N 159567
31 PLAQUE ISOLANTE INFÉRIEURE DE BRÛLEUR, LCF30TPF-L/
LCF30TPF-N 159564
32 TUYAU ONDULÉ 159674
33 ALLUMEUR PIÉZOÉLECTRIQUE 159625
34 SOUPAPE DE SÛRETÉ, LCF15TPF-N/LCF30TPF-N 159658
34 SOUPAPE DE SÛRETÉ, LCF15TPF-L/LCF30TPF-L 159660
16 OM-LCF

14 OM-LCF
Nomenclature des pièces
Pièce n° Description Numéro de
référence
1 PIEDS RÉGLABLES EN ACIER INOXYDABLE 159501
2 PLAQUE DE MONTAGE DE CHARNIÈRE DE PORTE 159531
3 PLAQUE D’APPUI DE PIEDS AVANT, LCF15TPF-L/LCF15TPF-N 159529
3 PLAQUE D’APPUI DE PIEDS AVANT, LCF30TPF-L/LCF30TPF-N 159529
4 BOÎTIER DE THERMOSTAT, LCF15TPF-L/LCF15TPF-N 159525
4 BOÎTIER DE THERMOSTAT, LCF30TPF-L/LCF30TPF-N 159537
5 LIMITEUR LCHM 159626
6 THERMOSTAT, MILLIVOLT 159624
7 PLAQUE D’APPUI DE PIEDS ARRIÈRE, LCF15TPF-L/LCF15TPF-N 159530
7 PLAQUE D’APPUI DE PIEDS ARRIÈRE, LCF30TPF-L/LCF30TPF-N 159536
8 RÉGULATEUR 6 po-GAZ NAT. ou 10 po-PROPANE, 3/4 po-NPT 159591
9 PANNEAU, DROIT 159528
10 PLAQUE DROITE DE CONDUIT 159533
11 PANNEAU ARRIÈRE, LCF15TPF-L/LCF15TPF-N 159534
11 PANNEAU ARRIÈRE, LCF30TPF-L/LCF30TPF-N 159540
12 CROCHET DE PANIER, LCF15TPF-L/LCF15TPF-N 159561
12 CROCHET DE PANIER, LCF30TPF-L/LCF30TPF-N 159559
13 PLAQUE AVANT DE CONDUIT, LCF15TPF-L/LCF15TPF-N 159570
13 PLAQUE AVANT DE CONDUIT, LCF30TPF-L/LCF30TPF-N 159572
14 PLAQUE ARRIÈRE DE CONDUIT, LCF15TPF-L/LCF15TPF-N 159534
14 PLAQUE ARRIÈRE DE CONDUIT, LCF30TPF-L/LCF30TPF-N 159539
15 CUVE À FRITURE, LCF15TPF-L/LCF15TPF-N 159654
15 CUVE À FRITURE, LCF30TPF-L/LCF30TPF-N 159656
16 PANNEAU DE FILTRE, LCF15TPF-L/LCF15TPF-N 159526
16 PANNEAU DE FILTRE, LCF30TPF-L/LCF30TPF-N 159538
17 DÉFLECTEUR DE PANIER, LCF15TPF-L/LCF15TPF-N 159562
17 DÉFLECTEUR DE PANIER, LCF30TPF-L/LCF30TPF-N 159560
18 PANIER 159502
19 PLAQUE GAUCHE DE CONDUIT 159532
20 PANNEAU, GAUCHE 159527
21 ROBINET, VIDANGE DE CUVE 159581
22 TUYAU DE VIDANGE DE CUVE 159505
23 PLAQUE ISOLANTE SUPÉRIEURE DE BRÛLEUR, LCF15TPF-L/
LCF15TPF-N 159566
23 PLAQUE ISOLANTE SUPÉRIEURE DE BRÛLEUR, LCF30TPF-L/
LCF30TPF-N 159565
24 PROTECTION DE FLAMME ODS, LCF15TPF-N/LCF30TPF-N 159589
24 PROTECTION DE FLAMME ODS, LCF15TPF-L/LCF30TPF-L 159590
25 BRÛLEUR 159644
OM-LCF 15

Vue éclatée des pièces
MODÈLE : LCF15TPF-N/LCF15TPF-L
31 32 33 34 1 2
3
4
5
6
7
8
9
10
1718 16 15
11
12
13
14
28
27
29
30
26
25
24
23
22
21
20
19
14 OM-LCF OM-LCF 15

12 OM-LCF
Guide de dépannage
PROBLÈME
CAUSE POSSIBLE
Température de friture trop
élevée/surchauffe (vérier le
thermostat)
Température de friture trop
‘basse/surchauffe (vérier le
thermostat)
Friteuse surchargée
Mauvais égouttage des
aliments après friture
Teneur élevée en eau des
aliments frits
Renouvellement insufsant
de la friture
Préparation incorrecte des
aliments.
Contamination de la friture
(par le sel ou d’autres corps
étrangers)
Moussage excessif ou prématuré ★ ★ ★ ★
Aliments graisseux/absorption
excessive de friture ★★★★★★
Odeur ou goût désagréable de la
friture ★ ★ ★
Goût désagréable des aliments frits ★ ★ ★ ★
Dégagement excessif de fumée de la
friture ★ ★ ★ ★
Assombrissement excessif de la
friture ★ ★ ★ ★
La friture ne reste pas chaude ★ ★ ★ ★
La croûte des aliments n’est pas
brune ★ ★ ★ ★
Décomposition rapide de la friture ★ ★ ★ ★
OM-LCF 13
This manual suits for next models
3
Table of contents