3G/4G Wireless Remote Quick Start Guide
2
1. Product Overview
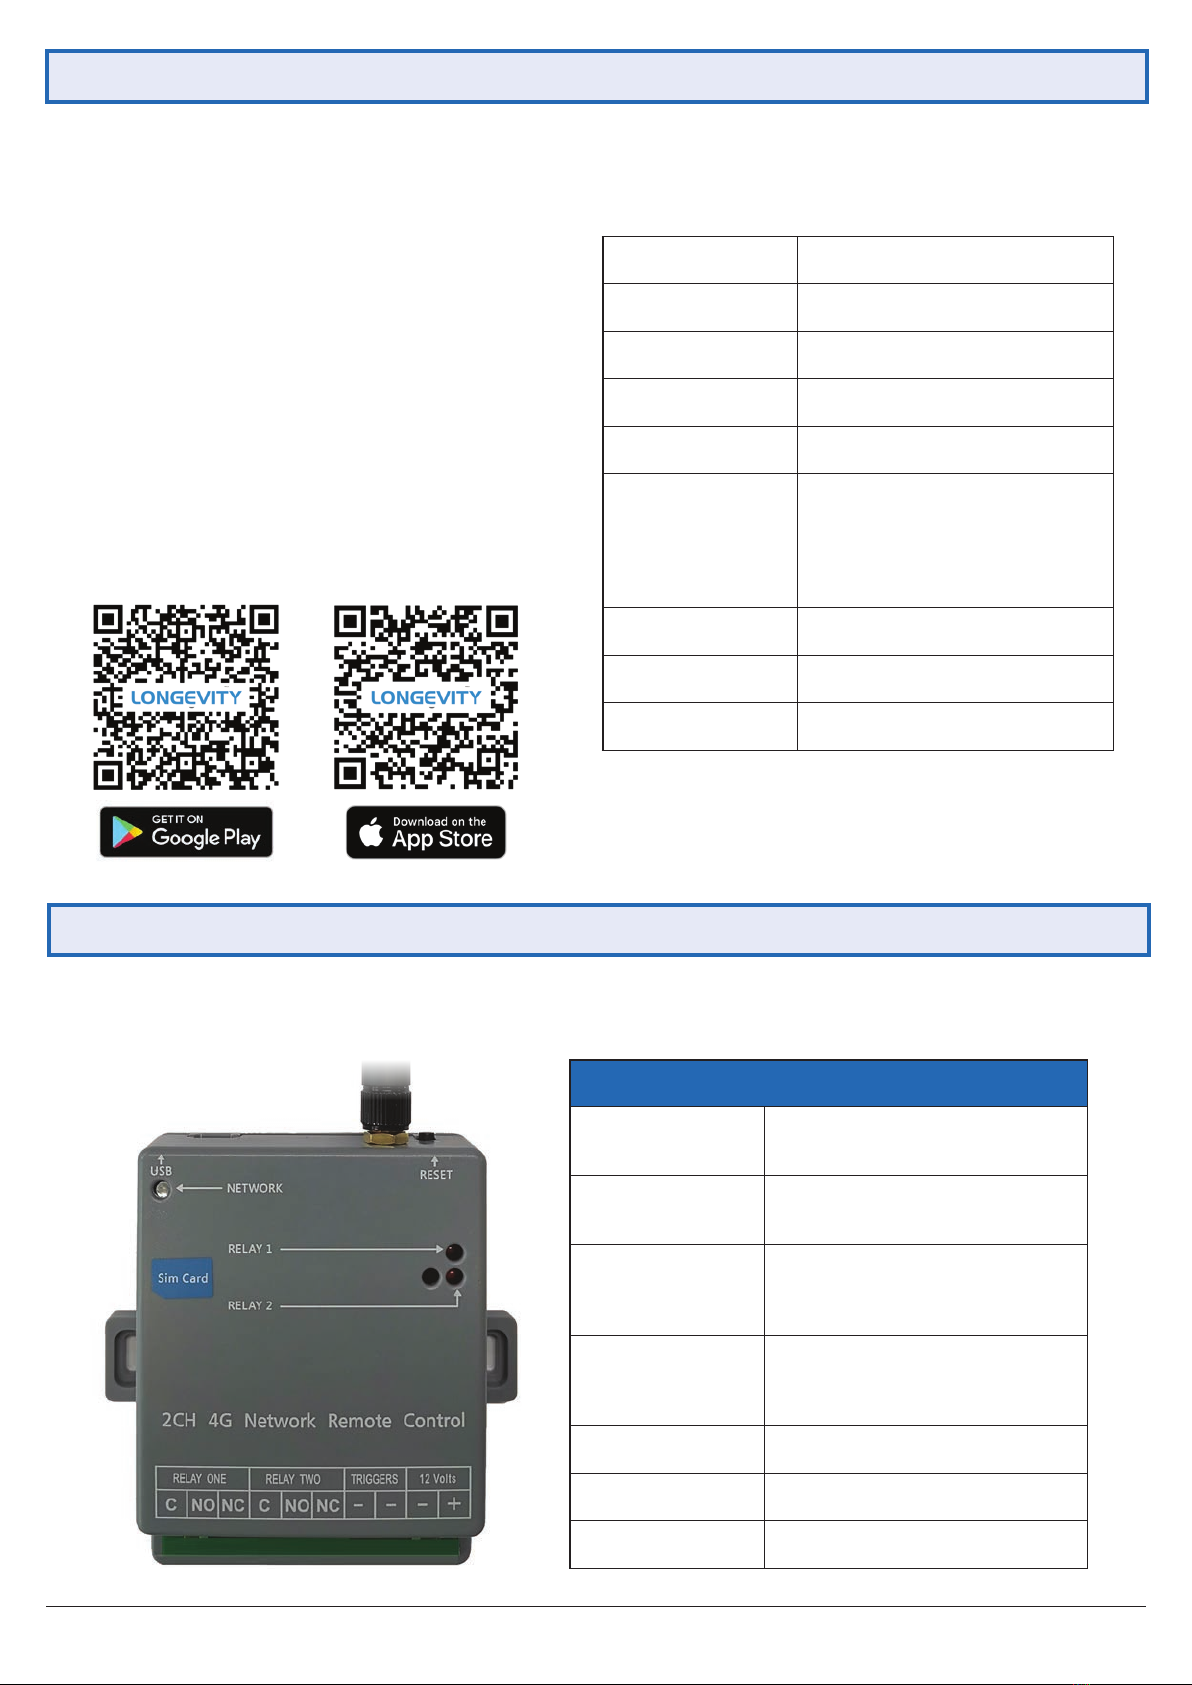
2. Connecting the WGRX4G
• 3G/4G GSM network
• Remote set up and control by App
• Unlimited number of users
• Device output naming
• 5 working mode: On/O, Timer, Interlock, Sequential
lock and Schedule mode
• Log records
• Device sharing
• User limitation: administrator can set user operation
time in specic working hours
• User management: Add, delete users
• Restore factory defaults
The Longevity WGRX4G is a smart controller based on GSM network. It can be used in a wide variety of remote control devices
and access control systems.
Connect the unit with 12V DC power.The network LED will ash quickly to indicate network searching. If the network is registered
successfully, the LED will blink slowly. Otherwise, the device will stay on for 10 seconds and continue searching.
Features
App Download
Specications
Terminals
12 Volts (+) Connect to the positive terminal of a
12VDC power supply (not included)
12 Volts (-) Connect to the negative terminal of a
12VDC power supply (not included)
TRIGGERS - (Left)
Connect this terminal to 0V (GND). This
will force Relay 1 to switch o when it
fails to connect to the mobile network.
TRIGGERS - (Right)
Connect this terminal to 0V (GND). This
will force Relay 2 to switch o when it
fails to connect to the mobile network.
RELAY ONE/TWO (C) Common contact of the relay.
RELAY ONE/TWO (NO) Normally Opened contact of the relay.
RELAY ONE/TWO (NC) Normally Closed contact of the relay.
Output Channels 2
Working Current 90~180mA
Standby Current 40~50mA
Power Supply 11~14VDC
Relay Contact Rating 20A 14 VDC or 20A 125 VAC
Network Band
4G: LTE-TDD B40
LTE-FDD B1/B2/B3/B4/B5/B7/B8/B28
3G: UMTS/HSPA+ B1/B2/B5/B8
2G: GSM/GPRS/
EDGE850/900/1800/1900MHz
Antenna 50 Ω SMA Antenna
Operating Temperature -10 to +50°C
Size 93mm x 70mm x 30mm


