Lorex DM111 Safety guide

Digital Monitoring System
Starter’s Guide
DM111
FCC COMPLIANCE STATEMENT
Note:This equipment has been tested and found to comply with the limits for a Class B
digital device, pursuit to Part 15 of the FCC Rules.These limits are designed to provide
reasonable protection against harmful interference in a residential installation.This
equipment generates, uses and can radiate radio frequency energy and, if not installed
and used in accordance with the instructions, may cause harmful interference to radio
communication. However there is no Guarantee that interference will not occur in a
particular installation. If this equipment does cause harmful interference to radio or television
reception, which can be determined by turning the equipment off and on, the user is
encouraged to try to correct the interference by one or more of the following measures:
•Reorient or relocate the receiving antenna increases the separation between the
equipment and receiver.
•Connect the equipment into an outlet on a circuit different from that to switch the
receiver is connected.
•Consult the dealer or an experienced radio or television technician for help.
This device complies with Part 15 of the FCC rules. Operation is subject to the following two
conditions:
1. This device may not cause harmful interference, and
2. This device must accept any interference received, including interference that may
cause undesired operation
This digital apparatus does not exceed the Class B limits for radio noise emissions from
digital apparatus set out in the Radio Interference Regulations of the Canadian Department
of Communications.
Because our products are subject to continuous improvement, SVC reserves the right to modify product design and specifications without
notice and without incurring any obligation. E &O.E.
38 DM111 Digital Monitoring System Starter’s Guide

DM111 Digital Monitoring System Starter’s Guide
TABLE OF CONTENTS
1 INTRODUCTION. . . . . . . . . . . . . . . . . . . . . . . . . . . . . . . . . . . . . . . . . . . . . . . . . . . . . 1
1.1 SYSTEM OVERVIEW . . . . . . . . . . . . . . . . . . . . . . . . . . . . . . . . . . . . . . . . . . . . . 1
1.2 MINIMUM SYSTEM REQUIREMENTS . . . . . . . . . . . . . . . . . . . . . . . . . . . . . . . . 1
1.3 SYSTEM CONTENTS. . . . . . . . . . . . . . . . . . . . . . . . . . . . . . . . . . . . . . . . . . . . . 1
1.4 VIDEO IMAGE . . . . . . . . . . . . . . . . . . . . . . . . . . . . . . . . . . . . . . . . . . . . . . . . . . 1
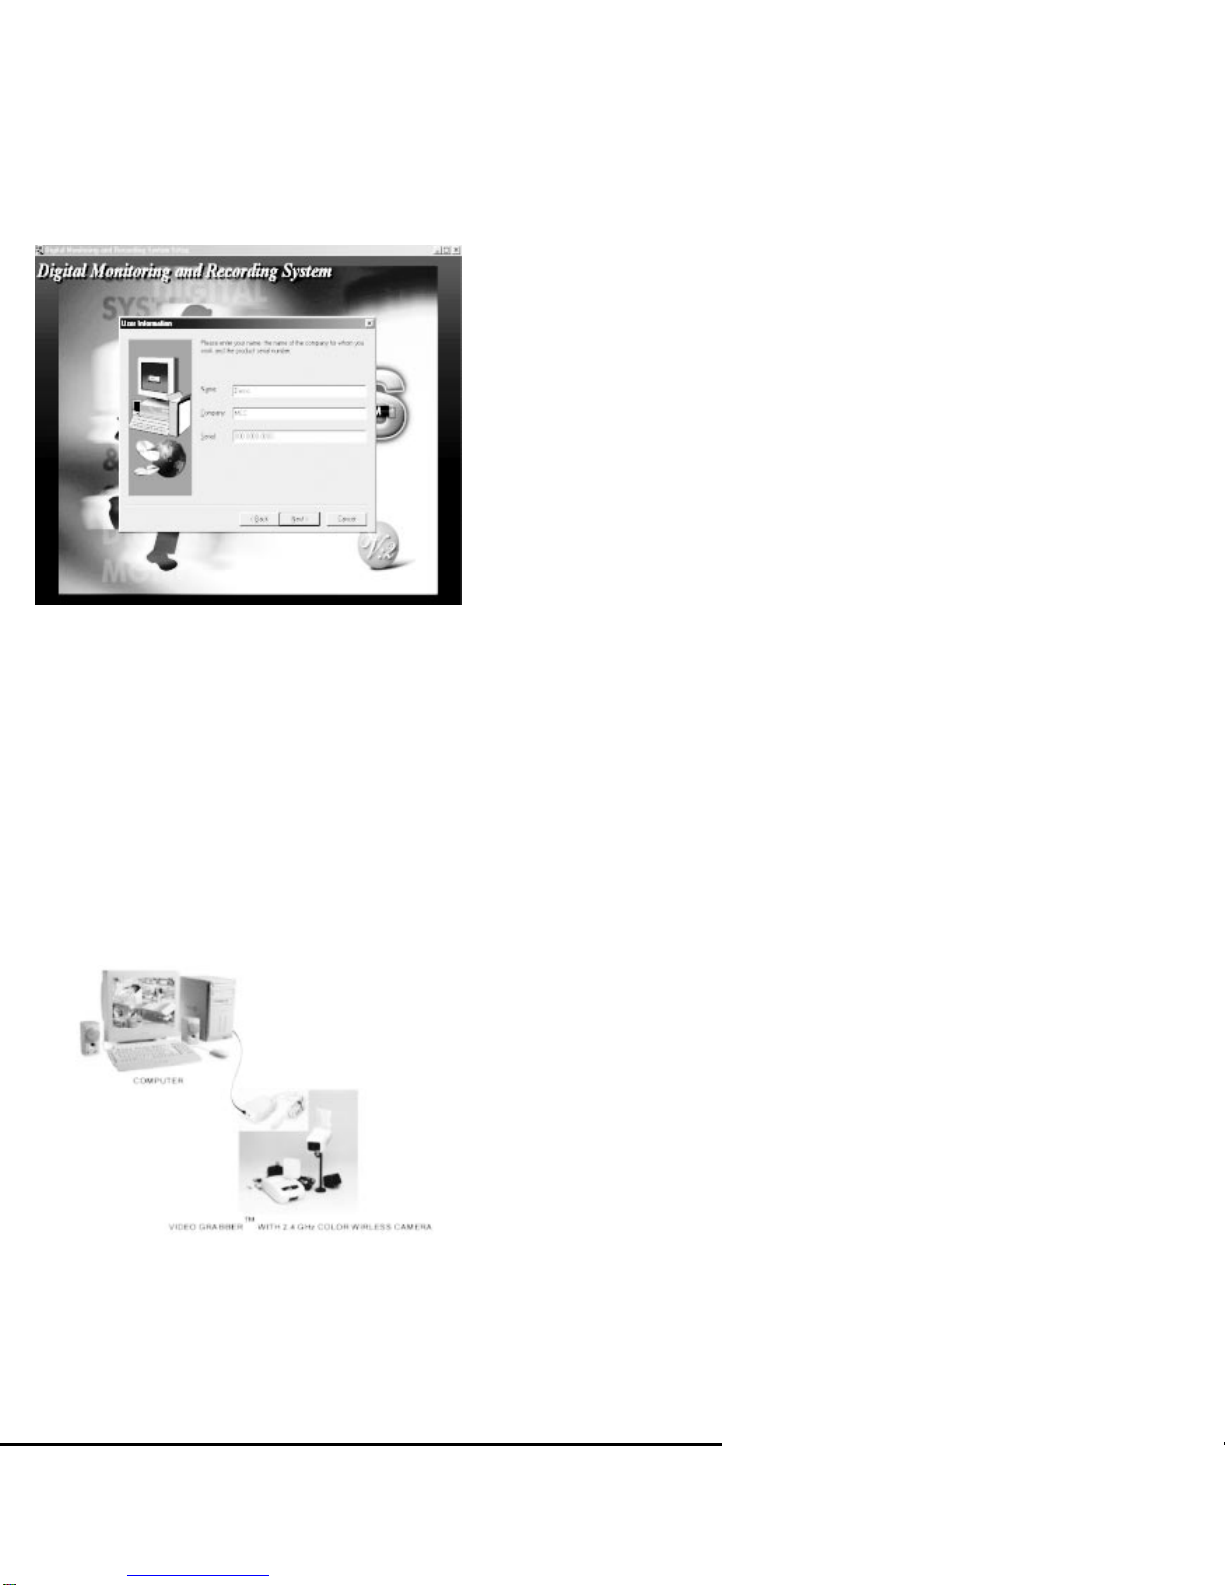
2 INSTALLATION. . . . . . . . . . . . . . . . . . . . . . . . . . . . . . . . . . . . . . . . . . . . . . . . . . . . . . 2
3 APPLICATION SOFTWARE . . . . . . . . . . . . . . . . . . . . . . . . . . . . . . . . . . . . . . . . . . . . 5
3.1 DMRS MAIN . . . . . . . . . . . . . . . . . . . . . . . . . . . . . . . . . . . . . . . . . . . . . . . . . . . . 7
3.1.1 Main Screen . . . . . . . . . . . . . . . . . . . . . . . . . . . . . . . . . . . . . . . . . . . . . . . . 7
3.1.2 DMRS Main - ICONS. . . . . . . . . . . . . . . . . . . . . . . . . . . . . . . . . . . . . . . . . .8
3.1.3 Program Configuration . . . . . . . . . . . . . . . . . . . . . . . . . . . . . . . . . . . . . . . . 8
3.1.4 Advanced Camera Settings. . . . . . . . . . . . . . . . . . . . . . . . . . . . . . . . . . . . 13
3.1.5 Viewing Options . . . . . . . . . . . . . . . . . . . . . . . . . . . . . . . . . . . . . . . . . . . . 27
3.1.6 JPEG Image. . . . . . . . . . . . . . . . . . . . . . . . . . . . . . . . . . . . . . . . . . . . . . . 27
3.2 DMRS VIEWER. . . . . . . . . . . . . . . . . . . . . . . . . . . . . . . . . . . . . . . . . . . . . . . . . 29
3.2.1 DMRS Viewer. . . . . . . . . . . . . . . . . . . . . . . . . . . . . . . . . . . . . . . . . . . . . . 29
3.2.2 Remote Control Functions. . . . . . . . . . . . . . . . . . . . . . . . . . . . . . . . . . . . . 30
3.2.3 Searching a Recorded file. . . . . . . . . . . . . . . . . . . . . . . . . . . . . . . . . . . . . 31
3.2.4 Viewing Options . . . . . . . . . . . . . . . . . . . . . . . . . . . . . . . . . . . . . . . . . . . . 31
3.3 DMRS CLIENT . . . . . . . . . . . . . . . . . . . . . . . . . . . . . . . . . . . . . . . . . . . . . . . . . 33
3.3.1 Run DMRS Client . . . . . . . . . . . . . . . . . . . . . . . . . . . . . . . . . . . . . . . . . . . 33
3.3.2 Main menu of DMRS Client application . . . . . . . . . . . . . . . . . . . . . . . . . . . 34
3.3.3 Setup Connection Device Using Modem . . . . . . . . . . . . . . . . . . . . . . . . . . 34
3.3.4 Setting Up The Camera Configuration Of Local PC . . . . . . . . . . . . . . . . . . 37
NEED ASSISTANCE
Should you need more information that was not found in this manual you can reach
our automated support services 24 hours a day, every day.The services contain
the most up to date information about our products.You can access installation
instructions, trouble shooting information and general product information.
Our website is: www.strategicvista.com
TECHNICAL SUPPORT
There are 2 options available for technical support:
•Online Option: Please visit our website at www.strategicvista.com for free
technical assistance anytime.
•Telephone Support: Should you need to talk to a DMRS technician, you may
access our telephone support line.This service is provided free for the first 90
days. Call toll free 1-877-304-3226.
3.3.4 Setting Up The Camera Configuration Of Local PC
DMRS allows user to setup or change the camera configuration of Local PC when user is
in remote site.
Please check chapter 3.3.3 to Setup Connection Device for local and remote PC.
DM111 Digital Monitoring System Starter’s Guide 37

36 DM111 Digital Monitoring System Starter’s Guide DM111 Digital Monitoring System Starter’s Guide 1
1. Introduction
1.1 System Overview
Now you can easily turn your PC into a video security monitoring system with the Video
Grabber™ Digital Monitoring System.The Video Grabber™ and DMRS Application software
allows you to connect a security camera directly to your PC to monitor your home, store or
business. By loading the software on a second PC, you can now access the camera image
remotely for total security protection.
If movement is detected when using the motion sensor option, an alarm will sound to alert
you of potential trouble.With Video Grabber™ Digital Monitoring System, you can program
your system to automatically call the telephone, cell phone or pager number, which you
have designated or digitally record the picture to the PC’s hard drive.View, setup and con-
figure the video security cameras from a remote computer location with TCP/IP or modem
dial up option to monitor and protect your business or home from across the hall or around
the world.
1.2 Minimum System Requirements
Pentium II 350 MHZ processor or faster
64 MB RAM memory
Windows 98/ ME
16 Bit or Higher VGA Card
36,000 bps or faster voice modem
800 x 600 High color Display
8 bit or higher PCI sound Card
CD Rom Drive required for software installation
1.3 System Contents
System Includes:
Video Grabber
USB Cable
Owners Manual
DMRS Application
Quick Setup Guide
1.4 Video Image
Size of video
- 320*240 pixels per video window
Colors
- High Color (16 bit)
Video compression type
- JPEG + Proprietary algorithm
Network Option
1. LOCAL SITE SETUP:
(Note: This has to be done at the local PC with DMRS Main program)
a. Click the Hammer icon to enter “Program Configuration” dialog box
under DMRS Main application.
b. Check "Open Remote Control Function".
c. Select Network as your connection device from the drop-down list.
d. Click the button to save your settings and exit Program Configuration
dialog box.
CONNECTION:
Click the connection icon to view the picture from the remote location.
The user should make sure that the settings on the Local PC matches the setting
given below.
2. REMOTE SITE SETUP:
a) Click the Hammer icon to enter DMRS Client dialog box.
b) Check on TCP/IP option
c) Enter the Local PC IP Address given by the ISP (Internet Service Provider).
d) Enter your password if the did setup password at the local PC (refer to section 3.1.3.D).
Note:The password entered here must be exactly the same with that you entered on
the local PC password, or your access will be denied.
e) Click the button to save your settings and exit DMRS Client dialog box.

2 DM111 Digital Monitoring System Starter’s Guide DM111 Digital Monitoring System Starter’s Guide 35
Frame rate of displaying video image
- 5 fps (frames per second)
Frame rate of saving video image
- 4 fps
Frame rate of transmitting video image
- 1 fps for 33600 bps Modem
- 4 fps for Network
2. Installation
1. UNPACK SYSTEM CONTENTS
Remove the contents contained in your system
Video Grabber with DMRS 1.1 Starter’s Guide
USB Cable* Application Software
2. INSTALL DMRS SOFTWARE
IMPORTANT NOTE: Do not connect Video Grabber™ to your PC until installing
the DMRS 1.1 Application Software.
a. Insert DMRS 1.1 Application software into the PC’s CD Rom Drive. Select the
language, then, click on the ‘OK’ button to access the installation screen.
Modem Dial Up Option
1. LOCAL SITE SETUP:
(Note:This has to be done on the local PC with DMRS Main program)
a) Click the Hammer icon to enter the "Program Configuration" dialog box.
b) Check "Open Remote Control Function".
c) Choose "Current Modem Type" from the drop down list.
d) Click the button to save your setting and exit "Program
Configuration" dialog box.
Note: We highly recommend user to use external modem instead of internal modem.
2. REMOTE (CLIENT) SITE SETUP:
a) Click the Hammer icon to enter DMRS Client dialog box.
b) Check on Modem button.
c) Choose your modem model from the drop down list.
d) Enter the local PC’s telephone number.
e) Enter your password.
(Note:This safety feature is prompted only if this safety feature
was set – refer to section 3.1.3 D.) Note: The password entered here must be exactly
the same with that you entered on the local PC password, or your access will be
denied.
f) Click the button to save these settings and exit DMRS Client dialog
box.
CONNECTION:
Click the connection icon to view the picture from the remote location.
The user should make sure that the settings on the Local PC matches the setting
given below.

3.3.2 Main menu of DMRS Client application
# Functional Description
Click to start the connection. Once connected, you can view live
video from the remote PC.
Click to cut off connection between Local & Remote PC.
Click this icon to close your DMRS Client application down.You
can also click icon to shut down this application.
Click to open the DMRS Client configuration dialog box.
34 DM111 Digital Monitoring System Starter’s Guide DM111 Digital Monitoring System Starter’s Guide 3
b. Continue following the directions on the screen until reaching the User Information
Screen. Enter your name, company (if applicable), and the serial number of the CD –
located on the inside flap of the CD case.
Note: * Video Grabber device is built-in into the Lorex SG7892UWQ Monitor.
c. Continue clicking the ‘NEXT’ button for standard (recommended) installation. After
installing the DMRS software, restart your computer.
3. CONNECT HARDWARE DEVICE
a. Connect a Video Device (e.g. Camcorder, Video Security Camera Etc.) to Video
Grabber™
b. Insert one end of the USB Cable into Video Grabber™, the other end into the USB
port of your computer.The computer will automatically detect a new hardware
device.
3.3.3 Setup Connection Device Using Modem

4 DM111 Digital Monitoring System Starter’s Guide DM111 Digital Monitoring System Starter’s Guide 33
4. INSTALL VIDEO DRIVER – STEP 1
Two Video Drivers are required in order to operate Video Grabber™.These drivers are
located on the DMRS 1.1 Application Software which is included with your system. To
load these drivers to your hard drive, proceed with the following steps.
a. Click ‘Next’ to enter the Scanner and Camera installation Wizard Screen.
b. Select the Winbond Electronic Inc. option, followed by pressing the Next button
5. INSTALL VIDEO DRIVER – STEP 2
Select (LPT1) option, followed by pressing the Next button. As each new screen
appears, continue clicking on the Next button followed by clicking the Finish button.
3.3 DMRS Client
This module allows the user to remotely view the camera location using standard dial up or
Network connection.The user has the option to change the DMRS functions from the
remote site location. Before continuing, please make sure the local and remote PC are
connected to the Modem or Network.
3.3.1 Run DMRS Client
To run DMRS Client: Go the Start > Programs > Digital Monitoring and Recording
System > and Click the DMRS Client.

32 DM111 Digital Monitoring System Starter’s Guide DM111 Digital Monitoring System Starter’s Guide 5
6. INSTALL VIDEO DRIVER – STEP 3
Restart your computer in order to complete the set up procedure.
3. Application Software
There are three main options in the Video Grabber™ Digital Monitoring System. A brief
explanation regarding each function is outlined in this Starter’s Guide.To learn more
about these applications, refer to the Help Menu.
DMRS Main – This is the principle module in the DMRS Software. Use DMRS main to
view the camera locally. Note: DMRS Main must be activated in order for DMRS Client
to be used.
DMRS Viewer – This module allows the user to view a recorded picture saved to the
computer’s hard drive during alarm recording or continuous recording. DMRS Viewer
allows the user to digitally freeze and zoom in on a recorded frame.
DMRS Client – This module allows the user to remotely view the camera location-using
standard dial up modem connection or using TCP/IP.The user has the option to change
the DMRS functions from the remote location.
DMRS CLIENT

6 DM111 Digital Monitoring System Starter’s Guide DM111 Digital Monitoring System Starter’s Guide 31
3.2.3 Searching a Recorded file
DMRS allows you to quickly find the video frame at a certain time.
1. Click the "Search" icon.
2. Enter the desired time and search range.
(Note: The search range can be given in
Seconds, Minutes or Hours. If you give 30 minutes as Search range, the DMRS will
start searching and shows all video frames recorded during the desired time ± 30
minutes.)
3. Click the Search icon to start the search process.
Note: No image will appear on the screen if nothing was detected during the specified
time frame.
3.2.4 Viewing Options
Two viewing options are available:
< F1 > Change to Full Screen window size
< F2 > Back to normal size
DMRS MAIN

30 DM111 Digital Monitoring System Starter’s Guide DM111 Digital Monitoring System Starter’s Guide 7
3.1 DMRS MAIN
3.1.1 Main Screen
DMRS is the principle module used in the digital monitoring system. It is used to view cam-
eras locally (e.g. directly connected to the user’s PC.). DMRS main must be activated in
order for the user to operate DMRS Viewer and DMRS Client.
3.2.2 Remote Control Functions
Icon Functional Description
Time, Month,Year Read out box.
Used to open a recorded video file.
Start the playback of recorded video file
Stop
Pause the playback
Advance to the next video frame
Go back to the previous video frame
Print the on-screen video frame with time stamp.
Click to close DMRS Viewer application.
Click this icon to open Search Setting dialog box.
Repeat Image sequence.
Negative Image
Sharpness
Adjust Gray Color

8 DM111 Digital Monitoring System Starter’s Guide DM111 Digital Monitoring System Starter’s Guide 29
3.2 DMRS Viewer
DMRS Viewer – This module allows the user to view a recorded picture saved to the
computer’s hard drive during alarm recording. DMRS Viewer allows the user to digitally
freeze and zoom in on a recorded frame.
3.2.1 DMRS Viewer
To run DMRS Viewer: Go to Start > Programs > Digital Monitoring and Recording
System > and click on the DMRS Viewer .
A. Viewing Digital Image
Follow the following steps to view a video, which has been recorded to your PC’s hard drive:
1. Press the “Open” button. Locate the file and press the
button.The picture will appear on your screen.
3.1.2 DMRS Main - ICONS
Icon Functional Description
Used to view software version.
Used to close DMRS Main application.You can also
click the icon to exit.
Used to load in an existing camera configuration file.
Used to Save a camera configuration.
Used to open the Program Configuration dialog box to
setup a camera, password and to activate the remote
control functions.
Used to open Camera Setting dialog box.
3.1.3 Program Configuration
When using Digital Monitoring System for the first time, the user must configure the software
settings. Follow the steps indicated below:
Click the Hammer icon to open the Program Configuration window.

28 DM111 Digital Monitoring System Starter’s Guide DM111 Digital Monitoring System Starter’s Guide 9
A. Initial Camera Set Up
1. Click the icon. Select Winbond W9967 PC Camera. Next, click the
button as shown below.
2. Ensure the NTSC and composite settings are checked by clicking on the
button on the Program Configuration Window.
(Note:These settings
represent the standard North American setting for cameras.)
Click the
button.
DMRS VIEWER
8.1

3. Save these settings by clicking the Icon.
Note: By saving these
settings, the user can re-establish these setting when exiting the Digital Monitoring
System
.The camera image will appear on the DMRS screen.
4. Save the configuration for future use. Name the file, followed by pressing the Save
button on the main screen.
B. Retrieving Camera Setting
Important Note: When exiting the DMRS Main Screen, the user will need to re-
establish the program configuration previously saved. If the user did not save the
settings previously, the program settings will have to be recreated.
1. To retrieve the camera settings, click the load configuration icon and select the
configuration which, you have saved on your PC. Click the button.
10 DM111 Digital Monitoring System Starter’s Guide D7111 Digital Monitoring System Starter’s Guide 27
MonitoringYour Office orYour Home By Date and Time Only
With Digital Monitoring System, you can monitor your business or home by specific Date and
Time only. For Example:
1. Click the Set up icon from the DMRS Main Screen to view the
"Detection" tab. Mask the area, which needs detection from the screen on the right
side of the window, and click the button and press the "Apply" button to
apply the changes made.
2. Go to "Alarm 1" Tab and under "Recording" field check the "Record Video" option
ON. Click the button to save settings (to the user’s PC) and click "Apply"
to save changes. Finally, click the button to exit.
3. Click the tab to check the function button.
4. Under the field "By Date and Time" select the desired Date and Time. Check the "Open
Detection" feature ON. (See the below picture). Click on the ADD button and click
to save settings and exit.
3.1.5 Viewing Options
Two viewing options are available:
< F1 > Full-screen viewing window
< F2 > Frameless window display
3.1.6 JPEG Image
DMRS captures images in JPEG format when motion is detected.
These JPEG images can be later viewed through DMRS Viewer.
31.4
9.1

26 DM111 Digital Monitoring System Starter’s Guide DM111 Digital Monitoring System Starter’s Guide 11
C. Open Remote Control Function
In order to access your computer remotely, the "Open Remote Control Function" should
be activated.
1. Check the “Open Remote Control Function” box from the DMRS main menu by
clicking the Hammer button.
2. From the "DEVICE SELECTED" drop down list, select the connection device (Modem
or Network).
Note: The connection device selected must be the same as the remote PC. For
example, if the user uses standard dial up option, select "CURRENT MODEM TYPE".
If the user uses LAN connection, select "NETWORK"
2. Go to "Alarm 1" Tab and under "Recording" field check the "Record Video" option
on. Click the button to save settings (to the user’s PC) and click "Apply"
to save changes. Finally, click the button to exit.
3. Click the tab to check the function button.
4. Check the Saturday button , leaving the other days blank.
5. Check the button and click hour 0,1, 2, 3, 4, 5
on the Saturday bar to
disable the motion detection feature from 12:00am to 5:00am.
6. Click the button to save these settings. Click to exit the
set up menu.
28.2

12 DM111 Digital Monitoring System Starter’s Guide DM111 Digital Monitoring System Starter’s Guide 25
D. Password Protection Option
The password protection option is available for the user, which protects your system from
unauthorized use.
Enter the Password. Next, confirm the password on the next line.
The password protection option will now be activated every time you enter DMRS Main.
3. Save these settings by clicking the Icon.
Note: By saving these
settings, the user can always re-establish the saved settings even after exiting the
Digital Monitoring System.
4. The user always has the option of saving the program settings to their PC by the
pressing the Save button.
MonitoringYour Office 24 Hours a Day (Records only when motion is detected)
1. Click the Set up icon from the DMRS Main Screen to view the
"Detection" tab. Mask the area, which needs detection from the screen on the right
side of the window, and click the button. Next, press "Apply" to apply
the changes made.
2. Go to "Alarm 1" Tab. Under the "Recording" field check the "Record Video" option
ON. Click the button to save the settings to a file (to the user’s PC) and
click "Apply" to save changes. Finally, click the button to exit.
MonitoringYour Office orYour Home for a SpecificTime Frame Only
With Digital Monitoring System, you can monitor your business or home during a specific
time frame only.The following example is how one can monitor the specified premises on
Saturday from 6:00am to 11:00pm.
1. Click the Set up icon from the DMRS Main Screen to view the
"Detection" tab. Mask the area, which needs detection from the screen on the right
side of the window, and click the button and press "Apply" to apply the
changes made.

24 DM111 Digital Monitoring System Starter’s Guide DM111 Digital Monitoring System Starter’s Guide 13
3.1.4 Advanced Camera Settings
This section will instruct you how to activate various advanced detection and surveillance
features.
Note: Prior to accessing Advanced Camera Settings, the user should complete the Initial
Camera Set-up procedure as shown in "Initial Camera Set Up" on page 9.
a. Click the icon from DMRS main screen.
E. To Remove Password Option
1. From the main screen, click the Hammer icon to open the program
configuration box.
2. Highlight the letters in the Password box and press the delete button from your key-
board.
3. Highlight the letters in the Confirm box and press the delete button from your keyboard.
F. Program Auto Run
You have the option to automatically start Digital Monitoring System whenever the user turns
on their PC. By default, this feature is disabled.
To activate this feature, proceed as follows:
1. Check on the button from DMRS Main screen.
2. Use browser to look for camera configuration file that you want the system to run
every time DMRS is started. Once the file is found, click on button.
3. Save these settings by clicking the Icon.
Note: By saving these
settings, the user can re-establish these setting when exiting the Digital Monitoring
System
.
4. The user always has the option of saving the program settings to their PC by pressing
the button.
MonitoringYour Office 24 Hours a Day (Continuous recording)
1. Click the Set up icon from DMRS Main Screen to go to "Alarm 1" Tab.
Under "Recording" field check the "Record Video" and also check "Full Time Record"
on. Click the button to save the settings to a file and click “Apply” button
to save changes and click to exit the window.

DM111 Digital Monitoring System Starter’s Guide 23
A. Motion Detection Setting
The motion sensor option is used to protect a specific camera area within the picture frame.
When motion is detected in the specific area, the image will be saved to your computer’s
hard drive for later use.
Example: Have Digital Monitoring System Monitor the entrance.
1. Click the Set Up icon from the DMRS Main screen to enter the
"CAMERA SETTING WINDOW".
J. Setting Alarm Interval
This option provides the user the option to set the time span between alarm events. For
example, if you set the Alarm Interval to 5 minutes, an emergency alarm signal will only be
sent out to the Pager, or Telephone, every 5 minutes regardless how many motion events
are detected during this time.
K. Timer Schedule Settings
This function allows the user to enable and disable DMRS Motion Detection Function on
weekly session or full time basis.
1. Click the Set Up icon to go to "Camera Setting" window and press the
button.
Note: User should always remember to check the is on
for "By Date and Time" in order for the event to be recorded to the assigned time by
the user.When motion detection is not needed, the user can choose the
field.
14 DM111 Digital Monitoring System Starter’s Guide

2. Ensure a check mark is next to the detective icon.
3. In the Camera Setting Screen, select the area that you want to protect by holding the
left button on your PC’s mouse and dragging it.The area to which you want to protect is
now masked. When movement is detected in this masked area, an alarm will sound to
alert you of potential trouble.
Note: To clear the masked area, hold the right button of the mouse and drag it to the
desired area.
22 DM111 Digital Monitoring System Starter’s Guide DM111 Digital Monitoring System Starter’s Guide 15
Masked area
H. Telephone Option
Digital Monitoring System provides you the opportunity to have the system call a telephone
number in the event of an alarm.To operate this feature, you need to ensure the PC is
equipped with a voice modem and telephone line. Consult your PC’s user manual on how to
set up the voice modem and telephone option.
1. Click the icon followed by pressing the "Alarm 2" button. Click the
"Telephone Setting".
2. Select the TAPI Device (Modem) from the dropdown list, which will be used for making
a phone call.
3. Enter the telephone number(s) including area code.
4. Click the Open icon located to the right of the "Location of Sound File" box.
Select the sound file to be added. Press the button to add this
sound.
5. Click the button to save these settings and to exit the Alarm 2
dialog box.
I. Setting Alarm Priority
Digital Monitoring System provides the user the option to have the system contact the
pager, or telephone first.The system has been defaulted to pager option.

4. Enter the continuous active time (0-59 seconds
selectable). Continuous active time is the amount of time someone needs to be in the
masked area before the detection mode activates the alarm feature.
5. Adjust the sensitivity level by sliding the sensitivity lever .The
default setting is 10%.
(Note: When a higher sensitivity level is selected, very minor
movement will trigger the system detection function. In this case, Digital Monitoring
System may sometimes be triggered even when there is no intrusion.We strongly
suggest you set the system at the default level.)
6. In the description box name the masked area (e.g. "Detection") .
7. Save these settings by clicking the button. Click to exit
camera setting screen.
8. To save these settings for future use follow steps 3 (on page 15) and 4 above.
B. Digital Recording
This feature allows the user to digitally record to the PC’s hard drive.The system can be set
to overwrite older video frames automatically if your PC’s hard drive is full.To record video
frames whenever motion is detected, proceed as indicated below:
1. Click the button.
16 DM111 Digital Monitoring System Starter’s Guide DM111 Digital Monitoring System Starter’s Guide 21
2. Select the TAPI Device (Modem), which you wish to use for making a pager call from
the dropdown list. All the TAPI devices that are equipped with your computer will
automatically show on the dropdown list of TAPI Device (Modem).
3. Enter your pager number, pager prefix number and message.
4. Click the icon to add the pager number to right side dialup.When
motion is detected all pager numbers will be called with the number at the top being
contacted first.
5. Click the button to save these settings and exit "Alarm 2" dialog box.

20 DM111 Digital Monitoring System Starter’s Guide DM111 Digital Monitoring System Starter’s Guide 17
2. Click the “Alarm 1” tab. Check the Record video button.
3. Check the “Full time record” button.
4. Adjust compression quality. A higher compression will result in a better quality picture,
but will also require more hard drive space. Digital monitoring system is defaulted to
60%.
5. Click the button and save the video file to a folder in your computer’s
hard drive. Click Add, followed by Apply.
6. Enter the number of days for keeping the stored video frame.
Note: Each camera will
take about 1GB of storage space per day.
7. Click to save these settings and exit the “Alarm 1” dialog box.
F. Standard Alarm Message
To activate a standard alarm sound from the drop down menu when motion is detected, pro-
ceed with the following steps.
1. Click the Set up icon followed by pressing the "Alarm 1" button.
Check the Function button.
2. Using the browser, look for your desired sound file.You can select from the drop down
list available with Digital Monitoring System, or select the personalized alarm message,
which you previously recorded.
3. Test the sound file, by clicking on the Test Button icon.
4. Click the button to save these settings and to exit the "Alarm 1" dialog
box.
G. Pager Option
Digital Monitoring System provides the user the opportunity to have the system call a pager
in the event of an alarm.To operate this feature, you need to ensure that the PC is equipped
with a telephone line and the modem connection works properly. Consult your PC’s user
manual on how to set up the telephone and modem connection.
1. Click the Set up icon followed by pressing the "Alarm 2" button. Check
the "Pager Setting Option".

Important:
In order for you to hear the various alarm sound features included with Digital
Monitoring System, you need to ensure the system is equipped with a sound card,
speaker and a microphone.
If you would like to check whether the related devices functions well, go to Start >
Programs > Accessories > Entertainment > Media Player. Use Media Player to
open a sound file to play. If this doesn't work, then Digital Monitoring System will
not be able to play any sound file.
18 DM111 Digital Monitoring System Starter’s Guide DM111 Digital Monitoring System Starter’s Guide 19
D. Motion Alarm Indicator
You may want an audible alarm to warn you when motion has been detected.The user has
the option of a personalized recorded message or can select a sound from a drop down
menu.
E. Personalized Alarm Message
To create your personalized alarm message, proceed with the steps outlined below.
1. Click the Set up icon followed by pressing the “Alarm 1” button.
2. Check mark the function tab.
3. Click the Record button.The sound record dialog box will be opened.
4. Click the Record button to begin recording your personalized message.
5. Speak into the PC’s microphone. Click the Stop button when completed.
6. Click the Save icon to save this recorded sound file.
7. Once saved, click the Play button to play back the recorded message.
C. Pager and Telephone Alarm Function Settings
Alarm 1 and Alarm 2 are used to activate alarm features when motion is detected. DMRS
can play an alarm sound or contact you via pager or telephone.
Table of contents
Other Lorex Recording Equipment manuals