manuals.online logo
Brands
  1. Home
  2. •
  3. Brands
  4. •
  5. Sony
  6. •
  7. Recording Equipment
  8. •
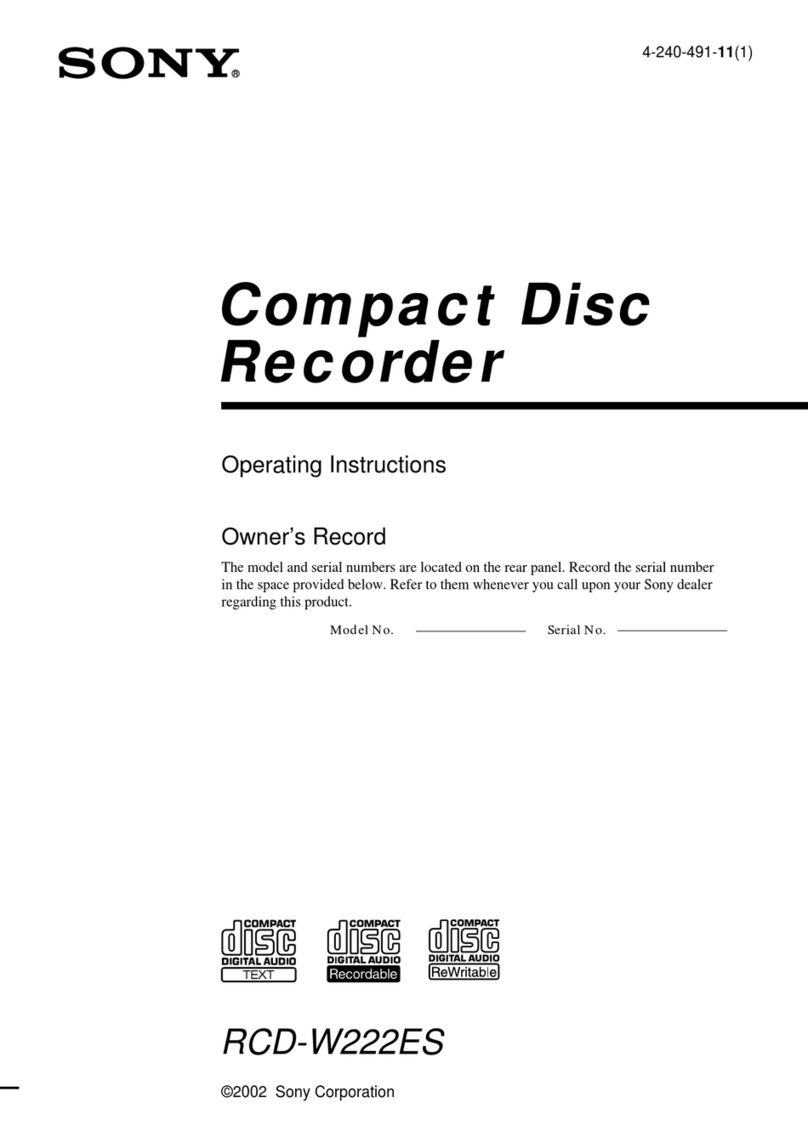
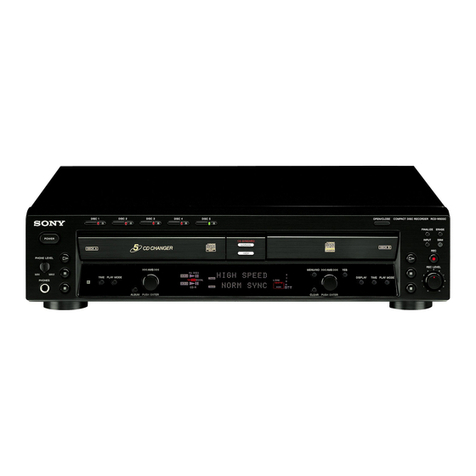
  9. Sony RCD- W222ES User manual

Sony RCD- W222ES User manual

SONY0
4-240-491-11(l)
Compact Disc
Recorder
Operating Instructions
Owner’s Record
The modelandserialnumbersarelocatedon therearpanel.Recordthe serialnumber
in thespaceprovidedbelow. Referto themwheneveryou call uponyour Sonydealer
regardingthis product.
Model No. SerialNo.
RCD- W222ES
02002 Sony Corporation
Thefollowing caution label is locatedinsidethe
apparatus.
To prevent fire or shock hazard, do not
expose the unit to rain or moisture.
A
n
I
.
CAUTION
This symbol is intendedto alerttheuser
to thepresenceof uninsulated
“dangerousvoltage” within the
product’s enclosurethatmaybeof
sufficient magnitudeto constitutearisk
of electric shockto persons.
This symbolis intendedto alerttheuser
to thepresenceof importantoperating
andmaintenance(servicing) instructions
in theliterature accompanyingthe
appliance.
You arecautionedthat anychangesor modifications
notexpresslyapprovedin this manualcould void
your authority to operatethis equipment.
WARNING
This equipmenthasbeentestedandfound to comply
with thelimits for aClassB digital device,pursuant
to Part 15of theFCCRules.Theselimits are
designedto providereasonableprotectionagainst
harmful interferencein aresidentialinstallation.This
equipmentgenerates,uses,andcanradiateradio
frequencyenergyand,if not installedandusedin
accordancewith theinstructions,maycauseharmful
interferenceto radiocommunications.However,there
is noguaranteethatinterferencewill not occurin a
particular installation. If this equipmentdoescause
harmful interferenceto radioor television reception,
which canbedeterminedby turning the equipment
off andon,theuseris encouragedto try to correctthe
interferenceby oneor moreof thefollowing
measures:
-Reorient or relocatethereceiving antenna.
- Increasetheseparationbetweentheequipmentand
receiver.
-Connect theequipmentinto anoutlet on acircuit
different from thatto which thereceiveris
connected.
- Consultthedealeror anexperiencedradio/TV
technicianfor help.
As thelaserbeamusedin this unit is harmful to eyes,
donot attemptto disassemblethecabinet.Refer
servicingto qualified personnelonly.
2
Don’t throw awaythebatterywith
generalhousewaste,disposeof it
correctly aschemicalwaste.
Getting Started
Unpacking 6
Hooking Up the System ........... ............ 6
This Unit Can Use the Following Discs 7
“”_,”.x_,.I,. .
Basic Operations
Playing aCD ......................................... 8
Using the Display ..... .. ......................... 9
Locating a Specific Track .................... 11
Locating aParticular Point in aTrack.... 12
Playing Tracks/Discs Repeatedly
(RepeatPlay) . . 13
Playing in Random Order
(Shuffle Play) ................................ 14
Creating Your Own Program
(Program Play) .............................. 15
Notes on Recording ............................. 16
Useful Tips for Recording ................... 16
Synchro-Recording a CD to CD-R or
CD-RW ......................................... 18
Recording on aCD-R or CD-RW
Manually ....................................... 20
Adjusting the Recording Level.. .......... 21
Marking Track Numbers While
Recording ....
.................................. 22
Recording the Original Sound of the
Program Source
(Direct Recording Function) .........23
Fading In and Out (Fader) ................... 23
Finalizing a CD-R or CD-RW ............. 24
Unfinalizing a CD-RW ........................ 25
Erasing Tracks of a CD-RW ............... 25
Labeling Tracks/Discs ......................... 26
Using the Setup Menu ......................... 28
Messages ............................................. 29
Self-diagnosis Function ....................... 30
System Limitations .............................. 30
Troubleshooting ................................... 31
Specifications ........................ Back cover
3
Thank you for purchasingthis SonyCompact
Disc Recorder.Before operatingtheunit,
pleasereadthis manualthoroughly andretain it
for future reference.
Conventions
l
Instructionsin this manualdescribethecontrolson
theunit. You canalsousethecontrols onthe
remoteif theyhavethesameor similar namesas
thoseontheunit.
l
Thefollowing icon is usedin this manual:
e
13
I Indicatesthatyou cando thetaskusing
theremote.
On safety
l
Shouldanysolid object or liquid fall into the
cabinet,unplugtheunit andhaveit checkedby
qualified personnelbeforeoperatingit anyfurther.
l
Theuseof optical instrumentswith this productwill
increaseeyehazard.
On power sources
l
Beforeoperatingtheunit, checkthattheoperating
voltageof thedeckis identical with your local
powersupply. The operatingvoltageis indicated
onthenameplateat therearof theunit.
- If you arenot going to usetheunit for along time,
besureto disconnecttheunit from thewall outlet.
To disconnecttheAC powercord,graspthe plug
itself: neverpull thecord.
On condensation in the unit
If theunit is broughtdirectly from acold to awarm
location,or is placedin avery damproom, moisture
maycondenseonthelensesinsidethe unit. Should
this occur,theunit maynot operateproperly. In this
case,removetheCD, CD-R, or CD-RW andleavethe
unit turnedon for aboutanhour until the moisture
evaporates.
On handling discs
l
To keepthediscclean,handleit by its edge. Do
not touchthe surface.
l
Do not stick adhesivepapersor tapesontothedisc.
l
Only regularcircular discscanbeusedin this unit.
Irregularly shapeddiscs,suchasstaror heart-
shapeddiscsmaydamagetheunit.
l
If thereis glueor asimilar substanceonthedisc,
removeit completely beforeusingthedisc.
On storage
l
Do not exposethedisc to direct sunlight or heat
sourcessuchashot air ducts,nor leaveit in acar
parkedin direct sunlight astherecanbea
considerablerise in temperatureinsidethecar.
l
Storediscsin their cases.Do not storediscseither
stackedhorizontally or standingvertically without
their cases.
On cleaning
l
Fingerprintsor duston thedisc maycausepoor
soundreproductionor sounddropout.
l
Beforeplaying adisc,cleanit with acleaningcloth.
Wipe thedisc from thecenterout.
l
If thedisc is still dirty afterbeingwiped with a
cleaningcloth, wipe it againwith aslightly
moistenedcloth. Thenwipe off theresidual
moisturewith adry cloth.
* Do not usesolventssuchasbenzene,thinner,
commercially availablecleaners,or antistaticspray
intendedfor vinyl LPs.
4
Note on High&peed
Synchro-Recording
Certain CD conditions may cause sound
dropout or noise in the recording results, or
even create unwanted tracks on the CD-R or
CD-RW. If this happens. clean the CD as
instructed in “On cleaning” above, and
record material to the CD-R or CD-RW
using normal speed Synchro-Recording only.
Note on CD=R or CD=RW
playback
When you playback a CD-R or CD-RW
recorded by a CD-R or CD-RW recorder,
you may not be able to playback depending
on the recording conditions (e.g., dirty disc,
etc.). Also, you should note that you need to
finalize a CD-R or CD-RW before playing
back on another system other than the one
used to make the recording. (Finalizing is a
process to complete the recording.)
After finalizing a CD-R, you can play it in
any conventional CD player. However,
depending on the state of the recording, there
may be sound skips during playback.
After finalizing a CD-RW, you can play it in
a CD-RW compatible player only.
5
Check that the following items are included:
l
Audio connecting cords
Phono jack x 2 (red/white)
c, Phonojack x
2 (red/white) (2)
This sectiondescribeshow to hook up the unit
to anamplifier. Be sureto turn off thepower of
eachcomponentbeforemaking the
connections.
l
Remotecommander(remote)(1)
Connecting the unit to an
l
SizeAA (R6) batteries(2)
amplifier
Inserting batteries into the
remote
You cancontrol theunit usingthe supplied
remote.
Inserttwo sizeAA (R6) batteriesby matching
the@ and0 endsonthebatteriesto the
markingsinsidethecompartment.Whenusing
theremote,point it attheremotesensor
q
on
theunit.
Tip
With normaluse,thebatteriesshouldlastfor about
six months.Whentheremotenolongeroperatesthe
unit, replacebothbatterieswith newones.
Notes
l
Do not leavetheremotenearanextremelyhot or
humid place.
l
Do notdropanyforeign objectinto theremote
casing,particularly whenreplacingthebatteries.
l
Do notexposetheremotesensorto direct light from
thesunor lighting apparatus.Doing somaycausea
malfunction.
l
If you don’t usetheremotefor anextendedperiod
of time, removethebatteriesto avoidpossible
damagefrom batteryleakageandcorrosion.
Connecttheamplifier to theANALOG IN/
OUT jacks usingtheaudioconnectingcords
(supplied),making sureto matchthecolor-
codedcordsto theappropriatejacks on the
components:red (R) to redandwhite (L) to
white. Be sureto makeconnectionsfirmly to
preventhum andnoise.
Audio connecting cords (supplied) (2)
White (L)
Red (R)
White (L)
Red (R)
RCDW222ES
A: Signal flow
6
Connecting the unit to a
digital component
Connect a component such as digital amplifier,
CD player, DAT deck, or MD deck through the
DIGITAL OPTICAL IN/OUT or DIGITAL
COAXIAL IN/OUT jacks with the optical
digital cord (not supplied) or the coaxial digital
cord (not supplied). Plug in the cord.
Optical digital cord (not supplied)
Coaxial digital cord (not supplied)
Connecting the AC power
cord
Connect the AC power cord to a wall outlet.
The unit can use three types of discs as follows: f
Audio CD B
COMPACTDiscswith theselogoscanbeplayedby
UkiE 8
bothDECK A (theCD player section) p
•tntr~~p~~~ntnandDECK B (theCD-R or CD-RW
uilrm
recordingsection)of theunit.
OlOllALAUDIO
[TEXT)
Audio CD-R
oom~~~r Discswith this logo arerecordable
dloocE only one time. Whenyou finalize the
OIO~T,~~.LAIJDIO
B disc (page24) you canplay it in either
DECK A (theCD player section)or
DECK B (theCD-R or CD-RW
recordingsection),or anyconventionalCD player
(you maynotbe ableto play it in someCD players),
including home,car,andportablemodels.(An
unfinalized disccanbeplayedonly in DECK B.)
Whenyou buy aCD-R, pleasenotethatyou mustbuy
anaudioCD-R. A CD-R designedfor computeruse
will notwork in this unit.
Audio CD-RW
COMPACT
Discswith this logo arerecordable,
alm and also re-writable. Whenyou
DIGITAL~~.UDIO
[ReWritable] finalize thedisc (page24),you canplay
it in eitherDECK A (theCD player
section)or DECK B (theCD-R or CD-
RW recordingsection),andCD-RW compatible
players.They will notplay backin mostcurrentCD
playersunlesstheplayer is CD-RW compatible.(An
unfinalized disccanbeplayedonly in DECK B.)
Whenyou buy aCD-RW, pleasenotethatyou must
buy anaudioCD-RW. A CD-RW designedfor
computerusewill not work in this unit.
This logo meansthat anunit is
compatiblewith Audio CD-R and
Audio CD-RW (bothAudio CD-R and
Audio CD-RW canbeused).
7
This unit hastwo decks.
In this manual,theCD player sectionisjust
calledDECK A, andtheCD-R andCD-RW
recordingsectionis called DECK B.
When usingtheremote,setSELECT to CD for
operationson DECK A (theCD player
section),or to CDR for operationson DECK B
(theCD-R or CD-RW recording section).
POWER DISC 1-5 & OPEN/CLOSE
11 PLAY MODE ) N
1
Turn on the amplifier and adjust the
volume to the minimum.
2 Set the function of the connected
amplifier with its input selector.
3 Press POWER.
4 Press OPEN/CLOSE (or one of the DISC
l-5 P buttons for DECK A) and place a
disc on the inner circle of DECK A (or
B). Press OPEN/CLOSE (or 62) again to
close the disc tray. /
With the label side up
5 For DECK A, press PLAY MODE
repeatedly to select the Continuous
play mode.
When you The unit plays
select
ALL DISCS All discs in the unit consecutively
in the order of the,disc number.
1DISC Only one disc you have selected.
8
6
Press ) (or
D
on the remote).
The unit starts playing. Adjust the volume on
the amplifier.
To Do the following:
Stop playback Pressw.
Pauseplaying PressII. Pressthe button again or
press) (or D on the remote)
to resumeplaying.
Selectthe disc Pressone of the DISC l-5
(for DECK A) buttons.*
Go to the next disc PressD. SKIP on the remote.
(for DECK A) m
Go to the next Turn AMS~“*clockwise (or press
track HI on the remote ).
Go to the beginning Turn AMS counterclockwise (or
of the cul+enttrack pressItl on the remote).
or the preceding
track
Remove the disc PressOPEN/CLOSE (or A),
whichever contains the disc you
want to remove after stopping
Play.
* When the disc is in the unit, the indicator lights up
in orange, then it turns greenwhen the disc is selected.
“*AMS: Automatic Music Sensor
Tips
l
You can start playing with the track selected in Step 6.
1 Turn AMS (or press w/HI or the number
buttons on the remote) to select the track you
want to play using the display
2 Press ) (or D on the remoti).
*See “Using the Display” on page 9.
l
You can remove or load discs while playing the
other deck. Press OPEN/CLOSE (or 2) of the deck
that is not currently playing to open that tray, and
remove or load a disc.
l
The DISC 1-5 button indicator lights up when the
disc is in the tray. The indicator turns to green when
the disc is selected.
l
You can connect a headphone to the PHONE jack
on the front panel. Turn the PHONE LEVEL
control to adjust the volume.
l
You can replace any discs in the other disc trays
while playing a disc in DECK A. Press OPEN/
CLOSE (or A) of the deck that is not currently
playing to open that tray, and remove or load a disc.
Notes
l
You can play unfinalized CD-Rs or CD-RWs only
in DECK B. For the detailed explanation about
finalizing, see “Finalizing a CD-R or CD-RW” on
page 24.
- Do not leave the disc tray open when the unit is not
in use to prevent dust and dirt from entering and
prevent damage to the disc tray.
l
When you turn on the unit, you will hear some
mechanical noise from the unit. This is not a
malfunction.
You cancheckinformation aboutthedisc using
thefront paneldisplay.
When usingtheremote,setSELECT to CD for
operationson DECK A, or to CDR for
operationson DECK B.
DISPLAY
TdlE
Front PaAel Display TldE
SELECT SCROLL
DISPLAY UME
Changing the display
DECK B
PressDISPLAY while theunit is stoppedor
playing. Eachtime you pressthebutton, you
canchangethedisplay asfollows:
DECK A/DECK B divided display
+
Whenyou placedanunfinalized CD-R or CD-
RW in DECK B, you canalsocheckthe
remainingrecordabletime by pressingTIME.
The information appearsasfollows:
The total track number and total playing time
Detaileddisplay for DECK A
+
Detailed displayfor DECK B
The remaining recordable time of the disc (only
the unfinalized CD-R or CD-RW) I
DECK A/DECK B divided displav
I
CD,MT as <:1...,,.“j ‘2 .... ,: j::;i... ~
m : i,.’ ;: ::.j.:: .,,,i;::i (
Ica
m - ::::/ ..:::j::
:cDTm:CD-W, ...’ ..;;:::i tl
.,..:...)a, ‘Dyy
Detailed disolav for DECK A
Detailed display for DECK B
m,cn p.11.1:i’:‘ii”; I;:;i.,.!
.,,,.:.. :
Tee
m m ::I-: i:>j:::
cIE?BCD-W ...’ .......j:: -if::> ,‘
. ... 27;
Tips
l
Thedisc titles andtrack titles aredisplayedas
follows:
Wheneitherof thedetaileddisplaysareselected,
thedisc title amearswhenevertheunit is
stopped.
Thetitle of thecurrenttrack appearswhena&k is
playing. &
To label adiscandits tracks,see“Labeling Tracks/ ;
Discs” onpage26.
l
You canscroll discor track
titles that
donot fit 00
entirely into thedisplay. q tD
3
PressSCROLL ontheremoteto seetherestof the
title. PressSCROLL againto pausescrolling, and g
againto continuescrolling. 7
Display while the unit is
stopped
The information appearsasfollows:
DECK A
The total track number and total playing time
Eii m 1,.: : :..:...
.... T../,j :..Ii...
..Ji,,,:/.I..........
TiP
Whenyou put aCD containingaCD text in thedisc
tray, “CD TEXT” lights up in thedisplay.
Tip
Whenyou put aCD containing aCD text in thedisc
tray, “CD TEXT” lights upin thedisplay.
continued 9
Display while playing Display while recording
PressTIME repeatedlywhile theunit is
playing. Eachtime you pressthebutton, the
display for anydeckthat hasadisc inside
changesasfollows:
PressTIME repeatedlywhile recording.Each
time you pressthebutton, thedisplay for
DECK B changesasfollows:
DECK A
The track number and recording time of the
track currently being recorded
The track number and playing time
sii, :::>i-‘li.,; c::
m ._,::..,:j ./:,..:
Tee ‘:El
zEsBco.ew .A . ‘1/:::i
..i. I::!/ ::z./:::/ ;fi
The track number and remaining time of the
track currently being played
sib ,2;...:+,j F.
m ,,“I‘,,,Si’.ic:i
mc .:;z
;::.,.,..“1c ‘C:i (‘1/:.:. *ii
mIzEco-w : / ,,, ... ii .... .... -*yy
The total remaining time of the disc (in Continuous
play mode)
sib ..-......i ! .-.
role:::;i.../i’.i!..i
Tcz ,:Ig
::i .._
zczEfs@ED-Rw -;li-I “1‘1, Ls{I
ii i.... -*ii
DECK B
The track number and playing time
CDm.7 ‘i..;‘F,“‘.?““,,,;
&’ j, F$f’:. :
Tee
5s) i::’ .... ..:i..:
m c&R* - .-./ ILII, I ::.
The track number and remaining time of the
track currently being played
oom.7 .fi .r ,...(i(“:i /
,:-.,:,r.!i”:,‘j’
i&In, ,:..
:....
.-.:
~m.nvl = ‘h’ :A.
ii i
“I “/ -;I
97;
The
total
remaining time of the disc (in Continuous
play mode)
~DTcx7 f) 1 ii; K ‘.i.i
Iox- ,:.a
EmI* ...._,..., :.._:
sEmcCD.RI - ‘I-..:ji-.i,: :::>;:i -2:
mai;
iorem I.,,/:... !./ ....:....,...,
: ... i’.f .:; :// i::::
TOC ma ,:1g
mml* :....
..... ii
~CD-RW mm .: ...I ii ..i .:::: &g
jsL j/
The total remaining time of the CD-R or CD-RW
Ci)TE”T i..,!:... /.I
: : ....g i ..i ,::::z ::::i
... ii: . ..
mc m 1::: m
!i!t!EI,, - .. . ....
;.j i :,:y/:..
... ii ...s .../
/ *ID
- --ia
Display for disc information
of DECK B
The indicators show which typeof recordable
disc is in thedisc tray, andwhetherthe
recordabledisc hasbeenalreadyfinalized.
TOC indicator
:. .: :*-’ i...;
: : : :... . . .
ii ii
i....
CD TEXT CD-RIRW
indicator indicator
The CD-R/RW indicator
When you put anunfinalized CD-R in thedisc
tray, “CD-R” lights up.
Whenyou put aCD-RW disc in thedisctray,
“CD-RW” lights up.
The TOC indicator
Whenyou put anunfinalized CD-R or CD-RW
in thedisc tray, “TOC” lights up.
For detailson finalizing, refer to page24, and
page25 for unfinalizing.
10
The CD TEXT indicator
W$en you put aCD containingaCD text in the
disc tray, “CD TEXT” lights up.
When “CD TEXT” is framedin red in the
display of DECK B, CD TEXT information is
not recorded.In this case,finalize thedisc to
recordtheinformation.
If you removethedisc or turn off thepower
beforefinalizing, CD TEXT information is
erased.
Note
Whenyou
put
aCD or finalized CD-R in thedisc
tray, “CD” lights up.
You canquickly locateanytrack while playing
adisc by usingtheAMS (Automatic Music
Sensor)dial on thedeck, t44 andw
buttonson theremote,or numberbuttonson
theremote.
When usingtheremote,setSELECT to CD for
operationson DECK A, or to CDR for
operationson DECK B.
AMS AMS )
SELECT
Number buttons/
>I0
continued 11
To locate
Thenext or
succeeding
tracks
Do the following:
During playback,turn AMS
clockwise (or pressHI onthe
remoterepeatedly)until you find the
track.
Thebeginning During playback,turn AMS
of thecurrentor counterclockwise(or pressI44 on
precedingtrackstheremoterepeatedly)until you find
thetrack.
A specific track In stopmode,turn AMS (or press
numberor track I44 /HI on theremoterepeatedly)
namedirectly until you find thetrack numberor
track name,andpresst (or
D
on
theremote).
Tip
To pauseplaying atthebeginningof atrack, turn
AMS (or pressI44 /HI ontheremote)after
pausingplayback.
Playing directly using the
number buttons
q
You canplaybackatrack directly by usingthe
numberbuttons.Pressthetrack numberyou
wantto play. When you selectatrack number
over 10,press>lO first, thenthecorresponding
numberbuttons.
Example:
To enternumber 15,press>lO, then 1and5.
You canlocateaparticular point in atrack
during playbackor playbackpause.
Before usingtheremote,setSELECT to CD
for operationson DECK A, or to CDR for
operationson DECK B.
SELECT I-
0 0
000
000
000
000
000
000
000
OOQ
-
mEI
To locate a Do the following
point
While During playback,pressandhold
-.
monitoring the 44 or w ontheremoteuntil you
sound find thepoint.
While During pause,pressandhold 44 or
observingthe m ontheremoteuntil you find the
display point. You will nothearthesound
during operation.
Tip
“-Over-” appearsif thedisc reachestheend.Turn
AMS counterclockwise(or pressI44 or 44 on the
remote).
Note
Tracksthat areonly afew secondslong maybetoo
shortto scanusingthesearchfunction. For such
tracks,it is betterto play thediscat normalspeed.
12
You can play tracks repeatedly in any play
mode.
Before using the remote, set SELECT to CD
for operations on DECK A, or to CDR for
operations on DECK B.
D
- REPEAT
Repeating all tracks on the
disc
Press REPEAT repeatedly until “REPEAT”
lights up in the display, and then press
D.
The unit repeats the discs/tracks asfollows:
When the disc The deck repeats
is played in
ALL DISCS All trackson all discs.
Continuousplay
(page8)
1DISC All trackson thecurrentdisc.
Continuousplay
(Dane8)
Shuffle Play All
tracks on the current
discin
(Dage141 randomorder.
ProgramPlay All thesameprogram.
(page 15)
To stop Repeat Play
Press n .
To cancel Repeat Play
Press REPEAT repeatedly until “REPEAT”
goes off.
Notes
l
Whentheunit hasrepeatedtracksin thesameplay
modefive times,playbackstops.
l
When“ALL DISCS SHUFFLE” (page14)is
selected,you cannotrepeatedlyplay all trackson
thedisc.
Repeating only the current
track
While the track you want to repeat is being
played, press REPEAT repeatedly until
“REPEAT 1” lights up.
To cancel Repeat 1
Press REPEAT repeatedly until “REPEAT 1”
goes off.
13
You canhavethe unit “shuffle” tracksandplay
themin randomorder.
When usingtheremote,setSELECT to CD for
operationson DECK A, or to CDR for
operationson DECK B.
PLAY MODE PLAY MODE
SELECT
PLAY MODE
1
While the unit is stopped, press PLAY
MODE repeatedly to select the Shuffle
Play mode as follows:
When you
select The unit plays
ALL DISCS All trackson all discsin random
SHUFFLE(for
order.
DECK A)
1DISC All tracksonthecurrentdiscin
SHUFFLE (for randomorder.
DECK A)
SHUFFLE (for All trackson thedisc in random
DECK B) order.
To stop Shuffle Play
Pressn .
To cancel Shuffle Play
While the unit is stopped,pressPLAY MODE
until “SHUFFLE” goesoff.
Tip
To play from thebeginningof thecurrenttrack again,
turn AMS counterclockwise(or pressl44 onthe
remote). You cannotgobackto tracksthat have
alreadybeenplayed.
Notes
l
If “ALL DISCS SHUFFLE” is selectedin the
“REPEAT” setting,“REPEAT” is cancelled.
l
You cannotchangethePLAY MODE during
playback.
2 Press ) (or
D
on the remote).
“4” appearsin thedisplay while theunit is
“shuffling” the tracks,andthetrack is
played.
14
You canspecify theplaybackorderof the
trackson adisc to createyour own programs
containingup to 25 tracks.
When usingtheremote,setSELECT to CD for
operationson DECK A, or to CDR for
operationson DECK B.
DISC 1-5 PLAY MODE
PLAY MODE AMS AtiS
SELECT
PLAY MODE
--
00
CLEAR
00
00
D.SKIP
1
While the unit is stopped, press PLAY
MODE repeatedly until “PROGRAM”
lights up in the display.
2 For DECK A, press one of the DISC l-5
buttons (or D. SKIP on the remote) to
select the desired disc number.
3 Turn AMS to select the desired track
number, then press AMS (or press HI/
m to select the desired track number,
then press PLAY MODE on the remote).
4 To program additional tracks, repeat
Step 3 (Steps 2 and 3 for DECK A).
5 Press ) (or
D
on the remote) to start
Program Play.
The unit startsplaying tracksin the
programmedorder.
To program all tracks on the
selected disc
After displaying the first track numberin Step
3 above,turn AMS counterclockwise(or press
I44 on theremote)to select“AL” insteadof a
track number. k
m.
To stop Program Play
Pressn .
P
tD
To cancel Program Play
PressPLAY MODE repeatedlyuntil
“PROGRAM” goesoff.
To erase the last programmed track
PressCLEAR. Eachtime you pressthebutton,
thelastprogrammedtrack is erased.
Tips
l
You can
alsoselectthe
track
numberusingthe
number buttons on
theremotein Step3above.See
page11.
l
TheprogramremainsevenafterProgramPlayends.
Whenyou press) (or
D
ontheremote),you can
play thesameprogramagain.
l
To checkthetotal numberof theprogrammed
tracks,pressTIME while theunit is stopped.
Notes
l
You cannotcreateaprogramcontainingtracksfrom
both DECK A andDECK B.
- “StepFull!” appearsin thedisplay whenyou
programover 25tracks.Erasetheunnecessary
tracksto enterothertracks.
l
Theprogramis erasedwhenyou turn theunit off.
l
If thetotal time of theprogram
exceeds 99 minutes
59seconds,“--,--” appearsin thedisplay.
l
You cannotchangethePLAY MODE during
playback.
15
l
You cannotrecordover existing material.The unit
automatically startsrecordingfrom the endof any
existing material.
l
Make surethat theremainingrecordabletime onthe
CD-R or CD-RW is longerthantheplaying time of
asourceCD, especiallyif you wantto recordall the
trackson theCD.
l
If amessageappearsin thedisplay, referto
“Messages”onpage29.
l
With thefollowing kinds of CDs,you may
experienceareadingfailure or noisewhenrecorded
to aCD-R or CD-RW.
-CD with adhesivelabels
attachedtothem
-Irregularly shapedCDs (for example,heartor star
shaped)
-CDs with printedtext concentratedon oneside
only
- Old CDs
- ScratchedCDs
- Dirty CDs
-Warped CDs
l
If thefollowing occursduring CD playbackor
recording,areadingerrormayoccuror noisemay
beproducedin therecordedresults:
-The disctray or otherpartof thesystemis
bumped.
-The systemis placedon anunevenor soft
surface.
-The systemislocatednearaspeaker,door,or
othersourceof vibration.
l
Recordingautomatically stopsif recordingis
pausedfor morethanabout3 minutes.
Note on a copy protection
Somecommercial CD may contain acopy
protectioncodethat will preventthedisc from
beingrecorded.In this case,“Cannot Copy”
andeither “C12” or “C41” will appear
alternatelyin thedisplay.
Do not move the unit or disconnect
the unit from power source in the
following situation. Recording may
not complete successfully.
l
When“Finalize,” “Unfinalize,” “Erase,” or “OPC”
appearsin thedisplay:
Theunit is currently updatingthetableof contents
(TOC).
l
When“PMA Writing” appearsin thedisplay:
Theunit is currently updatingthetrack information.
When usingtheremote,setSELECT to CDR.
SBM
TIME
SELECT _
TIME
Checking the remaining
recordable time on the CD=R
or CD-RW
PressTIME repeatedly
Eachtime you pressthebutton while theunit
is stopped,thedisplay alternatesbetween
total disc playing time and remaining
recordabletime on theCD-R or CD-RW
(page9).
Eachtime you pressthe button while
recording, the display alternatesbetweenthe
recordingtime of the current track andthe
remaining recordabletime on the CD-R or
CD-RW (page 10).
16
Using the Silent Pause
function
There has been no sound input for
about 30
seconds during recording. The unit changes to
recording
pause
after recording about 30
seconds of silence.
If the unit continues pausing for about 3
minutes after the Silent Pause Function
activated, recording stops automatically.
Note that this function does not activate if the
unit is Synchro-Recording from a CD on DECK
A.
Tip
You canturn off theSilent PauseFunction.For
details,see“Using theSetupMenu” (page28).
Insert the silence into the
end of the song (The function
of adding Post Gap)
You can insert the silence of 2 seconds between
the songs, when recording more than two tracks
at once. The silence is inserted according to the
following situations.
l
When recording is stopped.
l
When the disc of DECK A changes to the
next disc during Synchro-Recording.
To use the function of adding Post
Gap
Set“Post Gap” of the setupmenuto “On” during
stop.For details,see“Using theSetupMenu” onpage
28.
Using the SBM (Super Bit
Mapping) function
When you record through the ANALOG IN
jack, the SBM function enables you to record a
24-bit high quality sound source by converting
it to a 16-bit source without reduction in sound
quality. This is made possible by incorporating
a noise-shaping filter in the 24-bit A/D
converter of this unit, which has a frequency
range designed to cover the range of human
hearing.
During recording pause, press SBM. The
indicator lights up.
When you press the button again, the function
is canceled and the indicator turns off.
Notes
l
You cannotchangethesettingwhile recording.
l
Whenyou recordthroughtheDIGITAL OPTICAL
IN or DIGITAL COAXIAL IN iack, or whenYOU
makeSynchro-Recording,theSBM function k
automaticallycanceled.
17
You caneasily makedigital recordingsfrom a
CD to aCD-R or CD-RW. Beforerecording,
see“Notes on Recording” on page16.To
recordaCD athigh speed,seepage19.
Thereare2 typesof recording.Eachrecording
typecanbeselectedboth in normal speed
Synchro-RecordingandHigh-SpeedSynchro-
Recording(page19).
Normal Synchro-Recording (NORM
SYNC)
l
After recording,you mustfinalize thedisc.
Until thedisc is properly finalized, it cannot
beplayedon anyothermachine.See
“Finalizing aCD-R or CD-RW” on page24.
l
A CD text containedin thedisc is not
automaticallyrecordedon the disc.To label
tracks/discs,see“Labeling Tracks/Discs”
(page
26).
TiP
YoucanperformSynchro-Recordinginthe
programmedorder(page15).
Make-Disc Synchro-Recording (MAKE
DISC)
RecordsaCD in theoriginal orderof its track
numberregardlessof the selectedplay mode,
andfinalizes thedisc. Be sureto usethedisc
thathasnot beenrecorded.(“Blank Disc”
appearsin thedisplay whenyou put thedisc in
DECK B.)
l
A CD text (if containedin thedisc) is
automatically recorded.(Note that “Text
Save”in SetupMenu is setto “On.” ) You
canenterthedisc nameor track name(up to
70 characterseach,and40 tracksper disc).
Tip
Whenyou do not wantto recordtheCD text
automatically,set“TextSave”inSetupMenuto
“Off.” Fordetails,see“UsingtheSetupMenu”(page
28).DependingontheCDs,theCDtextis
automaticallyrecordedevenif “TextSave”inSetup
Menuissetto“Off.”
Notes
* YoucannotpauserecordinginSynchro-Recording.
l
If Repeat
Playhasbeenset,it is automatically
canceled.
l
If you starttherecordingwhenShuffle play is set,
Shuffle play is automaticallycanceled.
l
Silent PauseandSBM functionsdo not work during
Synchro-Recording.
l
Therecordinglevel is setto 0.0dB regardlessof the
SetupMenu setting.
l
Whencopying adiscdigitally recordedunder
control of theSerialCopy ManagementSystem
(SCMS),theunit automatically selecttheanalog
recording.High speedrecordingchangesto normal
speedrecording.For detailedexplanationon
SCMS,refer to the“Notes” onpage20.
l
Whencopying acommercialmusicCD contains
copy protectioncode,the unit automatically select
theanalogrecording.High speedrecordingchanges
to normal speedrecording.
l
You cannotstoprecordingduring finalizing in
Make-Disc Synchro-Recording.
Normal speed Synchro=
Recording
The disc is recordedatthesamespeedasthe
playing CD. You canhearthesoundduring
recording.
Whenusingtheremote,setSELECT to CDR
POWER DISC I-5 P OPEN/CLOSE
CDSYNCHRO NORMAL b w
SELECT
- CD SYNCHRO
NORMAL
-N
18
1 Press POWER.
High&peed Synchro-Recording
2 Press OPEN/CLOSE of DECK B and
, place a recordable CD-R or CD-RW on
the disc tray. Press OPEN/CLOSE of
DECK B again to close the disc tray.
You caneasilymakedigital recordingsfrom a
CD to aCD-R or CD-RW, fasterthannormal
speedSynchro-Recording.
You cannotmonitor therecordedsignalwhile
recording.
When usingtheremote,setSELECT to C6R.
With the label side up
“TOC Reading” appears.The unit startsto
readtheTOC (Table of Contents)dataand
showsthetype of thedisc onthe deckin the
display.
3 Press one of the DISC l-5 62buttons of
DECK A and place a CD on the disc
tray. Press P of DECK A again to close
the disc tray.
Whenyou perform Normal Synchro-
Recording(NORM SYNC), you canchoose
thedisc which you want to record,andthe
play mode.
When you perform Make-Disc Synchro-
Recording(MAKE DISC), thedisc in
DECK A is usedto record.
4 Press CD SYNCHRO NORMAL
repeatedly to select the recording type,
“NORM SYNC” or “MAKE DISC.”
DECK B standsby for recording,and
DECK A standsby for playing.*
Whenyou placeaCD-R or CD-RW in the
deck,the unit optimizes itself for thebest
possiblerecording and“OPC” appearson
thedisplay shortly.
When “Not Blank” appears,makesurethat
theblank disc is placedcorrectly.
*The unit standsby for recording
immediately by pressingYES. While
“OPC” appears,you cannotpressYES.
5 After “New Track” appears in the
display, press ) (or
D
on the remote)
(or II) of DECK B to start recording.
Synchro-Recordingstarts.DECK A and
DECK B will automatically stopafter
recording.
To stop recording
PressW.
CDSYNCHROHIGH b W
SELECT
D
- CD SYNCHRO
HIGH
-s
1
Do Steps 1 to 3 of “Normal speed
Synchro-Recording” on page 18.
2 Press CD SYNCHRO HIGH repeatedly
to select the recording type, “NORM
SYNC” or “MAKE DISC.”
DECK B standsby for recording, and
DECK A standsby for playing. *
* Theunit standsby for recording
immediately by pressingYES.
3 After “New Track” appears in the
display, press ) (or
D
on the remote)
(or II) of DECK B to start recording.
High-SpeedSynchro-Recordingstarts.
DECK A andDECK B will automatically
stopafter recording.
To stop recording
Pressn
.
Playing from the beginning of
the disc after recording
1
Press
n
again while the unit is
stopped.
2 Press F (or
D
on the remote).
The unit startsplaying from thefirst track.
Note
WhenyoumakeSyncbro-Recordinginprogrammed
order,therecordingspeedautomaticallychangesto
Normal.
19
You canstartrecording from theendof the
existing material.Before recording,see“Notes
on Recording” on page16.
Whenusingtheremote,setSELECT to CDR.
l
After recording,you mustfinalize thedisc.
Until thedisc is properly finalized, it cannot
beplayedon anyothermachine.See
“Finalizing aCD-R or CD-RW” on page24.
OPEN/CLOSE INPUT
II REC.
SELECl
INPUT
D
II
REC 0
w
1
Turn on the amplifier and the sound
source, and then select the sound
source on the amplifier.
2 Press OPEN/CLOSE of DECK B and
place a recordable CD-R or CD-RW on
DECK B.
Press OPEN/CLOSE again to close the
disc tray.
With the label side up
3 Press INPUT repeatedly to select the
input connector.
To record through Turn on the indicator
DIGITAL OPTICAL IN OPTICAL
DIGITAL COAXIAL IN COAXIAL
ANALOG IN ANALOG
To recordthediscin DECK A, turn off
“OPTICAL,” “COAXIAL,“or “ANALOG.”
4
Press REC 0.
DECK B standsby for recording
5 Adjust the recording level, if necessary.
For details, see“Adjusting the Recording
Level” on page21.
6
Press ) (or
D
on the remote).
7 Start playing the sound source you
want to record.
To pause recording
PressII. To resumerecording,pressthebutton
againor press) (or
D
on theremote).
Note
Wheneveryoupauserecording,anewtracknumber
isadded.Forexample,if youpausedrecording
while
recordingontrack4,thetracknumberincreasesby
one and
recordingcontinuesonthenewtrack when
recordingis resumed.
To stop recording
PressH.
“PMA Writing” appearswhile updatingthe
information of thedisc beforestoppingthe
recording.
Notes
l
If you pressRBC 0 during recording,you canadd
atrack (page22).The track mustbelongerthan4
seconds.
* Whenrecordingfrom morethanonediscmanually,
thesilencebetweentracksmaybecomelonger.To
preventthis, useSynchro-Recording.
l
This unit usestheSerialCopy ManagementSystem,
which allows only first-generationdigital copiesto
bemadeof premasteredsoftwarevia theunit’s
digital input. Thereforeyou maynot beableto
recordaCD-R or CD-RW digitally throughthe
DIGITAL OPTICAL IN or DIGITAL COAXIAL
IN jack dependingonthecontentbeingrecorded.
l
Becauseof therestrictionof theSerialCopy
ManagementSystem(SCMS),you may notbeable
to makedigital recordings.In this case,useanalog
recordingthroughtheANALOG IN jack whenyou
recordfrom otherunits. Or useSynchro-Recording
whenyou recordfrom DECK A. (Therecording
modeis automaticallychangedto analogrecording.)

This manual suits for next models

1

Other Sony Recording Equipment manuals

Sony XDCAM EX PMW-EX30 User manual

Sony

Sony XDCAM EX PMW-EX30 User manual

Sony HDW-1800 User manual

Sony

Sony HDW-1800 User manual

Sony CI-100 User manual

Sony

Sony CI-100 User manual

Sony STR-DA30ES - Fm Stereo/fm-am Receiver User manual

Sony

Sony STR-DA30ES - Fm Stereo/fm-am Receiver User manual

Sony MSU-700A User manual

Sony

Sony MSU-700A User manual

Sony XA 300 User manual

Sony

Sony XA 300 User manual

Sony ICD-SX713/ICD-SX813 User manual

Sony

Sony ICD-SX713/ICD-SX813 User manual

Sony J10 User manual

Sony

Sony J10 User manual

Sony MDCC-2000 User manual

Sony

Sony MDCC-2000 User manual

Sony SEQ-431 User manual

Sony

Sony SEQ-431 User manual

Sony CDR-W33 User manual

Sony

Sony CDR-W33 User manual

Sony PWSK-4504 User manual

Sony

Sony PWSK-4504 User manual

Sony CDR-W33 User manual

Sony

Sony CDR-W33 User manual

Sony XE-90 MkII User manual

Sony

Sony XE-90 MkII User manual

Sony SEQ-V902 User manual

Sony

Sony SEQ-V902 User manual

Sony SLV-KS1 - Video Cassette Recorder User manual

Sony

Sony SLV-KS1 - Video Cassette Recorder User manual

Sony DMX-R100 User manual

Sony

Sony DMX-R100 User manual

Sony WX-C55 User manual

Sony

Sony WX-C55 User manual

Sony PMW50 User manual

Sony

Sony PMW50 User manual

Sony IFB-40 User manual

Sony

Sony IFB-40 User manual

Sony PCM-7040 User manual

Sony

Sony PCM-7040 User manual

Sony TC-377 Setup guide

Sony

Sony TC-377 Setup guide

Sony BDX-N1000 User manual

Sony

Sony BDX-N1000 User manual

Sony SB-3335 User manual

Sony

Sony SB-3335 User manual

Popular Recording Equipment manuals by other brands

Synthrotek VCO manual

Synthrotek

Synthrotek VCO manual

SeaLevel 5402e user manual

SeaLevel

SeaLevel 5402e user manual

Russound WALTX-2 instruction manual

Russound

Russound WALTX-2 instruction manual

Paia 4712 Assembly and using manual

Paia

Paia 4712 Assembly and using manual

SMC Networks EX180-SMJ3 Series Operation manual

SMC Networks

SMC Networks EX180-SMJ3 Series Operation manual

ALLEN & HEATH GPIO Getting started guide

ALLEN & HEATH

ALLEN & HEATH GPIO Getting started guide

Aiwa HS-JS479 Service manual

Aiwa

Aiwa HS-JS479 Service manual

VTC Pro Audio DLMS4080 Connecting

VTC Pro Audio

VTC Pro Audio DLMS4080 Connecting

RME Audio ADI-2 user guide

RME Audio

RME Audio ADI-2 user guide

Telos Alliance Linear Acoustic SDI XNODE user manual

Telos Alliance

Telos Alliance Linear Acoustic SDI XNODE user manual

Eiki 5090A datasheet

Eiki

Eiki 5090A datasheet

Hagerman Audio Labs Trumpet MC manual

Hagerman Audio Labs

Hagerman Audio Labs Trumpet MC manual

Swisson XRC-200 user manual

Swisson

Swisson XRC-200 user manual

Vogtlin red-y smart Series instruction manual

Vogtlin

Vogtlin red-y smart Series instruction manual

M-Audio Delta Audiophile 2496 manual

M-Audio

M-Audio Delta Audiophile 2496 manual

M-Audio MacMan manual&nbsp;

M-Audio

M-Audio MacMan manual&nbsp;

Concept Pro VHDIPL user manual

Concept Pro

Concept Pro VHDIPL user manual

ELAD EXTIO-232 user manual

ELAD

ELAD EXTIO-232 user manual

manuals.online logo
manuals.online logoBrands
  • About & Mission
  • Contact us
  • Privacy Policy
  • Terms and Conditions

Copyright 2025 Manuals.Online. All Rights Reserved.