LOSRECAL Logistics User manual
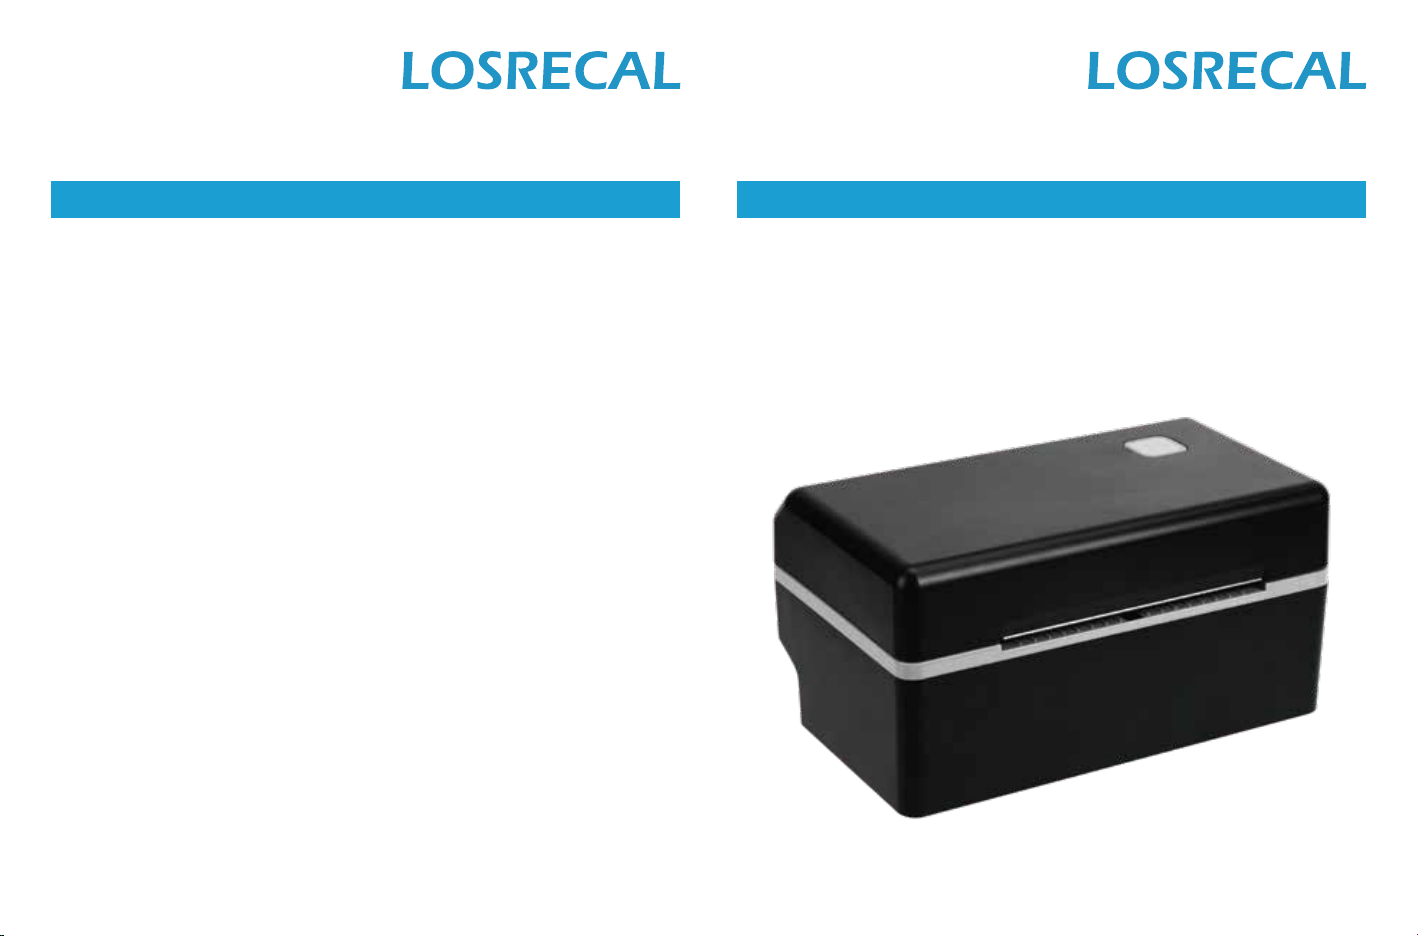
Logistics Label Printer
USER GUIDE
LOSRECAL
Far Beyond Printing
Version 1.0.0

Version 1.0.0 ITPP128 Page 1 of 11
1.0. Product Introduction 1
2.0. Quick Printer Installation 1
3.0. Label Setup 2
4.0. Driver Installation 3
5.0. Windows Driver Installation 3
6.0. Mac Driver Installation 5
7.0. “FEED” Button Instruction 7
8.0. LED Status 7
9.0. Platform(Online Store) Setup 8
9
10.0. FAQ
11.0. Support 10
12.0. Specifications 11
Contents 1.0. Product Introduction
2.0. Quick Printer Installation
① Printer ② Power Adapter ③ Power Cable ④ USB Cable
⑤ Labels ⑥ User Manual ⑦ Card ⑧ USB Flash Drive
Note:Please use the power adapter provided by LOSRECAL.
What’s in the box?
Power off
Power on
①
②
③
④
⑤
⑥
⑧
⑦

Version 1.0.0 ITPP128 Page 3 of 11
Version 1.0.0 ITPP128 Page 2 of 11
4.0. Driver Installation3.0. Label Setup
5.0. Windows Driver Installation
1. Load at least 4 consecutive sheets of label into the printer.
2. Press FEED button and hold on.
3. Release the button when you hear one “beep” sound.
4. Then, the printer will calibrate the label size.
1. Facing the front of the printer, press the cover open button to
open the top cover.
2. Install the label paper with the holders on both sides.
3. Finish the label paper installation, and then close the cover.
4. For new label paper, do the label size calibration again.
Label size calibration:
Support downloading driver files via download link.
Printer driver download link: https://bit.ly/128driver
The print head(TPH)will be extremely hot after printing.
Do not touch it or any parts around it.
Warning
Note: Please connect to the computer first and then turn on the printer.
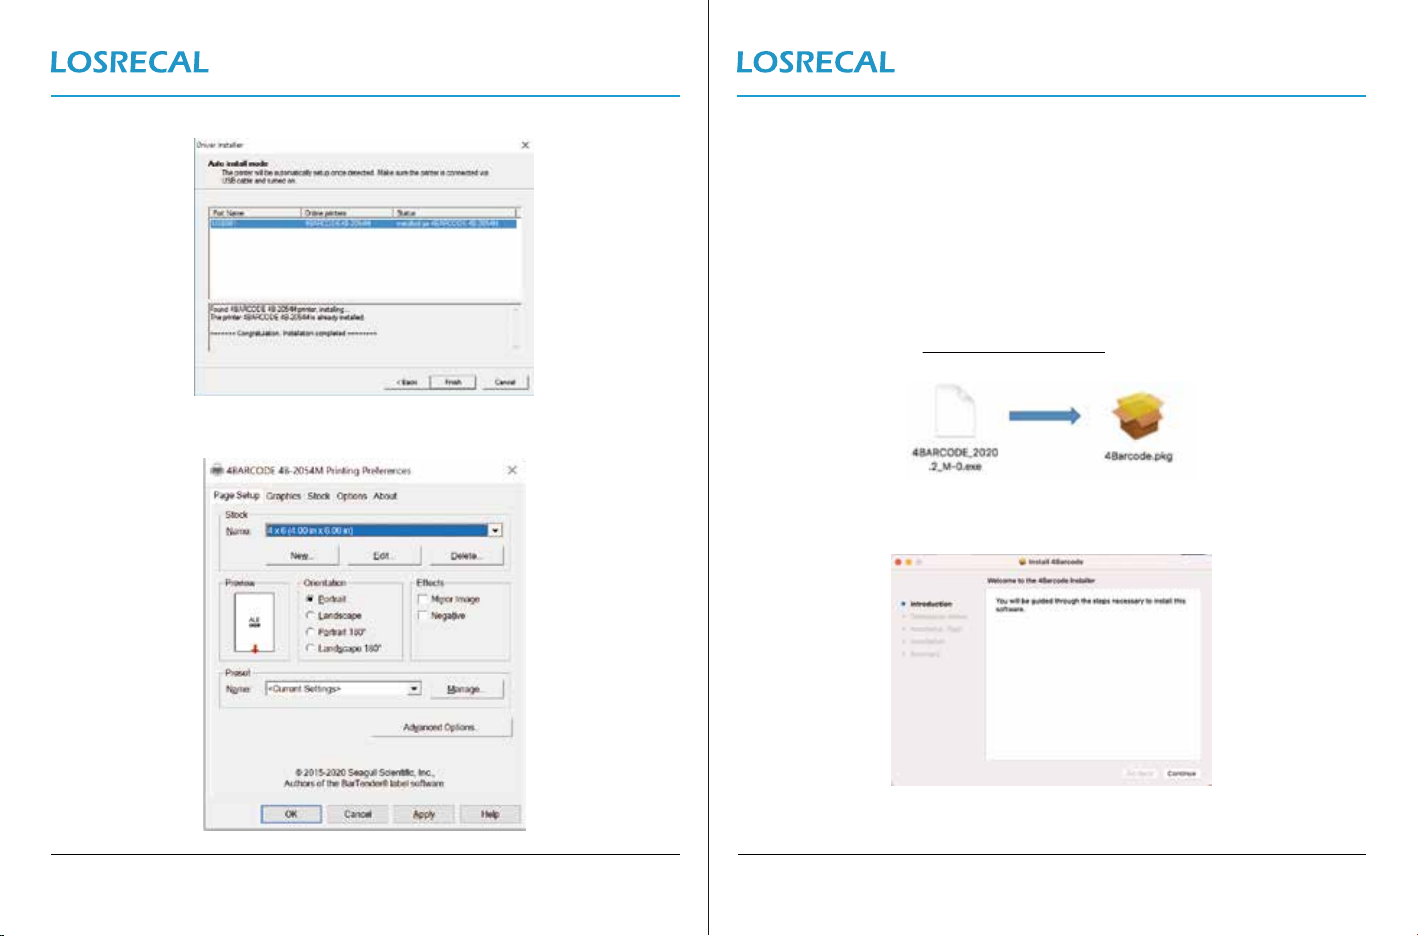
1. Open the driver file you downloaded.
The download link: https://bit.ly/128wind
2. Follow the instruction to install the driver.
Note : Before using the printer to print labels, please calibrate
the paper size.
Version 1.0.0 ITPP128 Page 5 of 11
Version 1.0.0 ITPP128 Page 4 of 11
6.0. Mac Driver Installation
Note : If the USB interface cannot be recognized during the installation
process, please restart the printer.
Note : Please connect to the computer first and then turn on the printer.
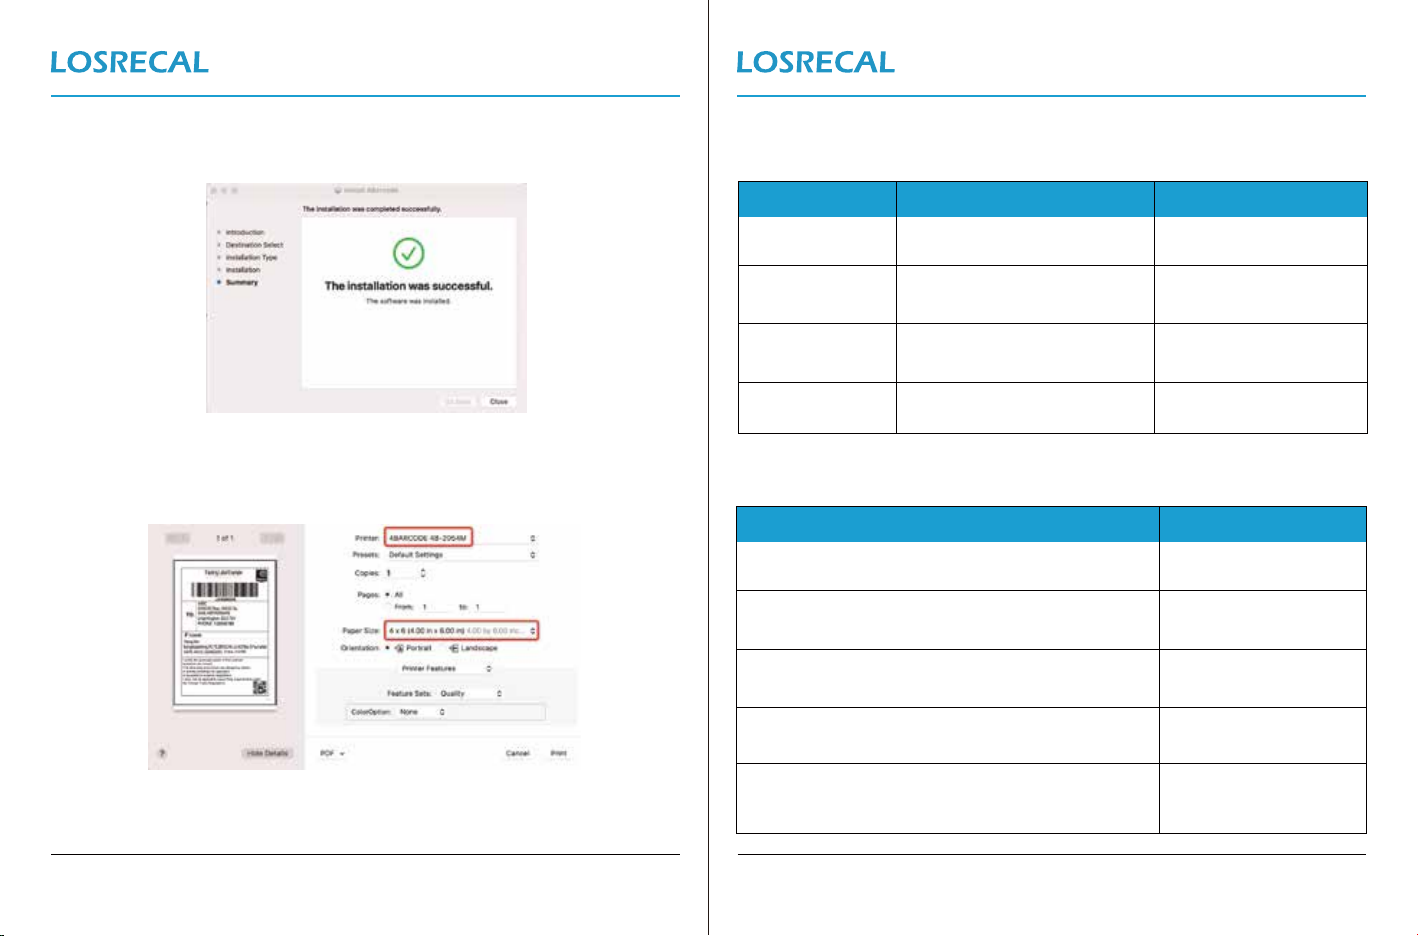
1. Open the driver software you downloaded.
The download link: https://bit.ly/128macd
3. Check the printer Page Setup (4 in×6 in)in Printing preferences.
2. Start installation.
Version 1.0.0 ITPP128 Page 7 of 11
Version 1.0.0 ITPP128 Page 6 of 11
3. Follow the guideline to install until "The installation was successful"
appears.
4. Page Setup, choose 4x6” (100x150 mm), then we can open the
document and select the printer to print shipping labels.
7.0. “FEED” Button Instruction
Standby
Standby
Standby
Standby
Short press the button(light) Feed in a blank paper
Print out Self-test page
Reset printer
Automatically calibrate
paper size
Long press the button(light)
untill beep once
Long press the button(light)
untill beep twice
Long press the button(light)
untill beep three times
Printer status Operation of FEED Function
Power on, waiting for printing instructions
The printer is downloading data or paused
The printer is clearing data
The cover is open
Blue light
Purple light
Red light
Printing errors, such as: out of paper,
paper jam, or memory error, etc. Red light flashing
Blue light flashing
Description LED indicator
8.0. LED Status
Version 1.0.0 ITPP128 Page 9 of 11
Version 1.0.0 ITPP128 Page 8 of 11
9.0. Platform(Online Store) Setup
1. Shopify, https://bit.ly/128-shopify
2. UPS, https://bit.ly/128-ups1
3. Etsy, https://bit.ly/128-etsy-1
4. Amazon, https://bit.ly/128-amazon
5. eBay, https://bit.ly/128-ebay
6. PayPal, https://bit.ly/128-paypal-1
7. Pirate Ship, https://bit.ly/128pirateship
8. Poshmark, https://bit.ly/128poshmark
9. Stamps, https://bit.ly/128stamps
10. Shipeasy, https://bit.ly/128shippingeasy
11.FedEx, https://bit.ly/128-fedex-1
12.USPS, https://bit.ly/128-usps1
13.Endica, https://bit.ly/128-endica
14.XPS, https://bit.ly/128xps-1
15. DHL, https://bit.ly/128dhl1
16. Canada Post, https://bit.ly/128-canadapost1
17. Royal Mail, https://bit.ly/128-royalmail-1
10.0. FAQ
Q1: What should I do when the printer flashes red?
A1: When the red light on the top of the printer turns on, please power off
the printer then on. Then the red light will change to blue, please follow
the steps below to calibrate:
1. Load at least 4 consecutive sheets of label into the printer.
2. When the loaded labels stop moving, press the FEED button(blue light)
and hold it until you hear one ‘beep’sound, then release the button.
3. It will spit out two blank labels, and the gap between labels will stop
on the printer’s edge.
Q2: When the printing is too faint, how to adjust the density and printing speed?
A2: For Windows : Printer Preferences → Page Setup → Seting;
For Mac OS: Can be set in drop-down menu under ‘Printer Features’
Q3: What can I do if paper is jammed or there are white spots in my print?
A3: Turn off the printer, and allow the printer head to cool down. Use the pad
with alcohol to wipe the printer head clean.
Q4: Why I am printing blank labels?
A4: Make sure your labels are ‘Direct Thermal’ labels and the label that you
peel off should be facing the ceiling when it comes out of the printer.
Q5: How can we print the label that is not in standard 4*6 size , such as the USPS?
A5: You can use the “Adobe Reader” to take a screenshot and print the
abel in correct size.
Adobe Reader download link: https://get.adobe.com/cn/reader/
The tutorial video: https://bit.ly/128-adobe

Version 1.0.0 ITPP128 Page 11 of 11
Version 1.0.0 ITPP128 Page 10 of 11
Q6: How to print self-test label?
A6: The self-test label can be used to determine whether the machine is
malfunctioning and whether the printing performance is good.
You can print self-test label as follows.
1. Turn on the printer.
2. Press FEED button and hold on.
3. Release the button when you hear two‘Beep’ sound.
FAQ download link : https://bit.ly/128faq
11.0. Support
Need Tech Support, contact us by:
Resolution
Max Printing Speed
Paper Width
Paper Thickness
203 DPI
108mm
0.06-0.25mm
Power Adapter 24V/2.5A
Printing Life TPH 30 Km
Connection USB
152mm/s
Method Direct Thermal
12.0. Specifications
Table of contents


