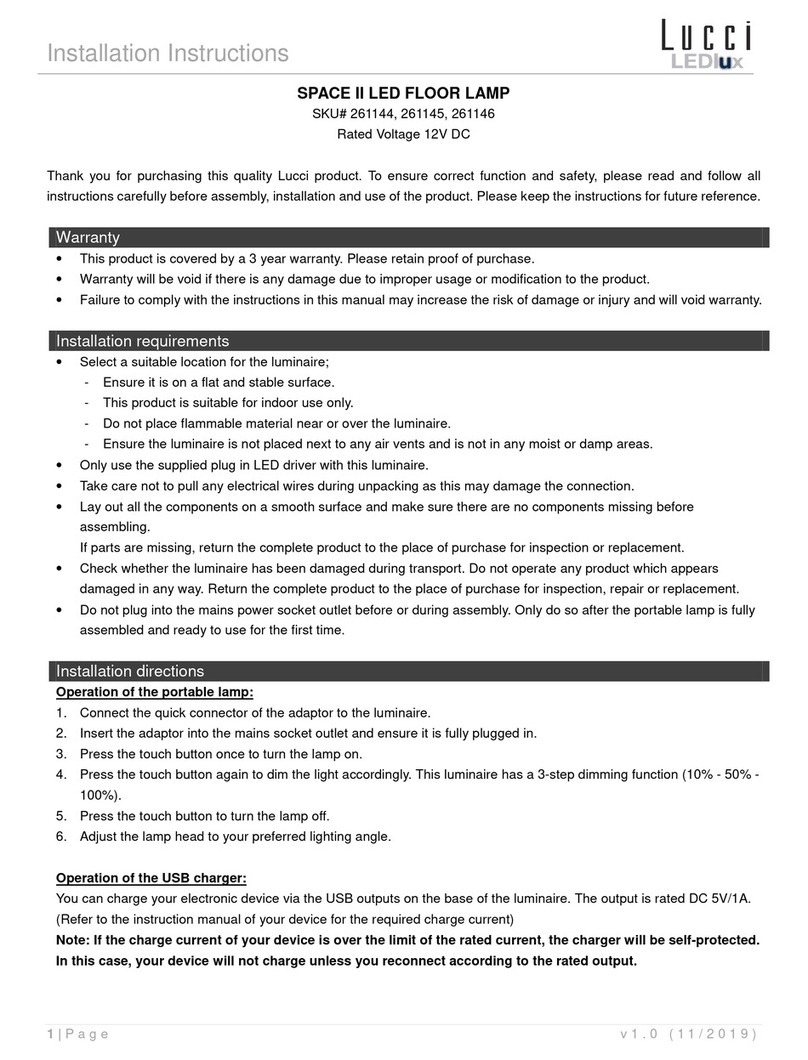
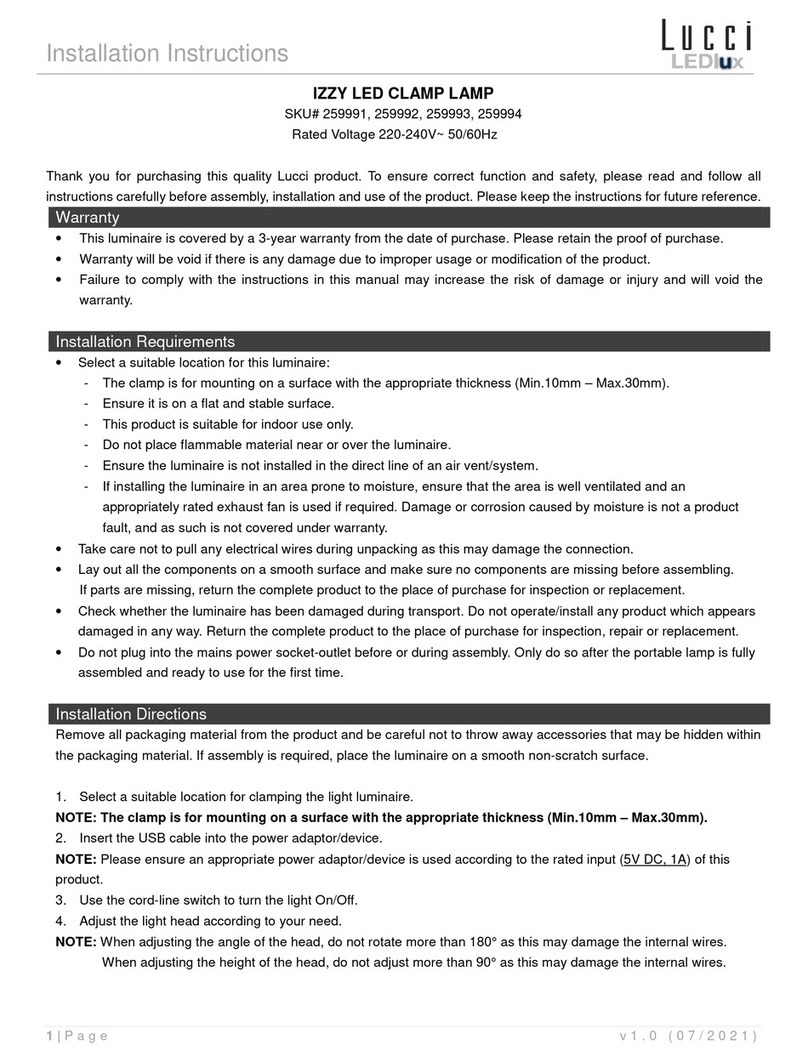
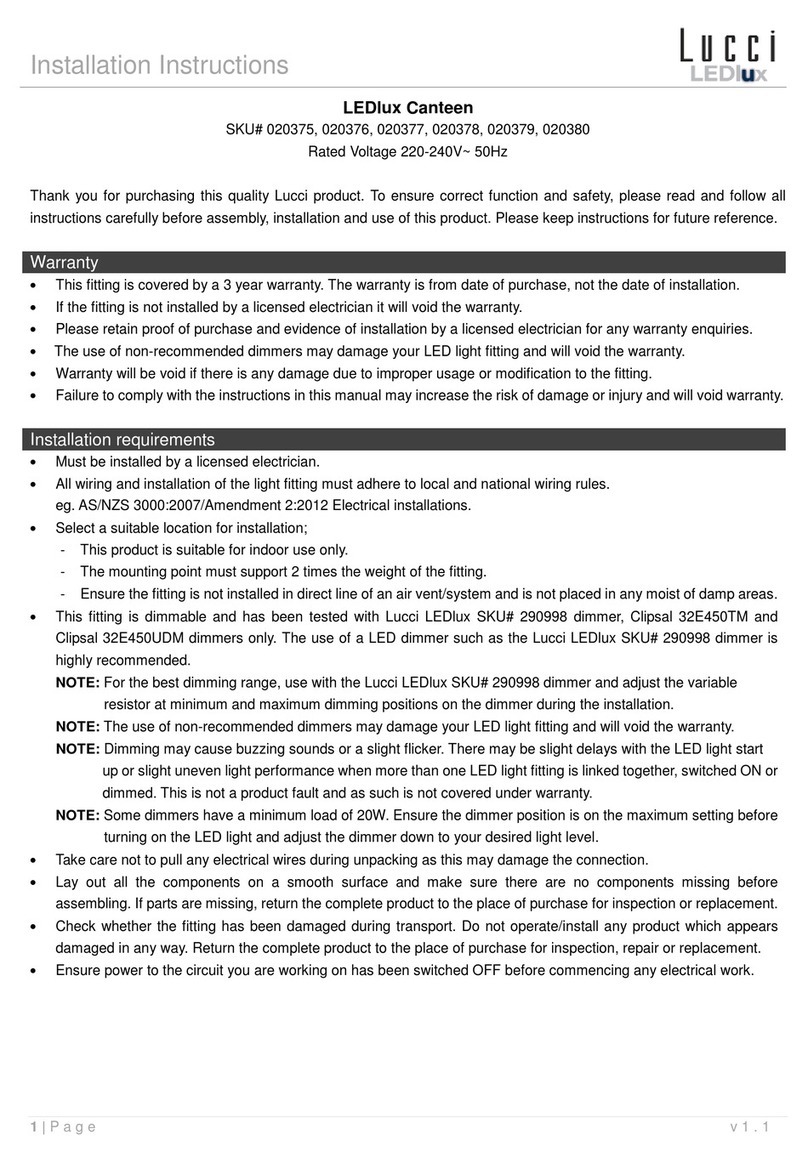
Lucci LEDlux SMITH 269391 User manual

Installation Instructions
1 | P a g e v 1 . 0 0 1 / 2 0 2 2
SMITH LED TABLE LAMP
SKU# 269391, 269392, 269393
Rated Voltage 12V 2A
Thank you for purchasing this quality Lucci product. To ensure correct function and safety, please read and follow all
instructions carefully before assembly, installation and use of this luminaire. Please keep instructions for future reference.
Warranty
•This portable luminaire is covered by a 5-year warranty valid for in-store replacement or refund only.
•The warranty period starts from the date of purchase. Please retain the proof of purchase.
•Warranty will be void if there is any damage due to improper usage or modification to the portable luminaire.
•Failure to comply with the instructions in this manual may increase the risk of damage or injury and will void the
warranty.
Installation Requirements
•Select a suitable location for the portable luminaire: - Ensure it is on a flat and stable surface.
- This portable luminaire is suitable for indoor use only.
- Do not place flammable material near or over the portable luminaire.
- Ensure the portable luminaire is not installed in direct line of an air vent/system.
- If the portable luminaire is placed in an area prone to moisture, ensure that the area is well ventilated, and an
appropriately rated exhaust fan is used if required. Damage or corrosion caused by moisture is not a product fault,
and as such is not covered under warranty.
•Only use the supplied plug in LED driver with this luminaire.
•Take care not to pull any electrical wires during unpacking as this may damage the connection.
•Lay out all the components on a smooth surface and make sure no components are missing before assembling.
If parts are missing, return the complete product to the place of purchase for inspection or replacement.
•Check whether the luminaire has been damaged during transport. Do not operate/install any product which appears
damaged in any way. Return the complete product to the place of purchase for inspection, repair or replacement.
•Do not plug into the mains power socket outlet before or during assembly. Only do so after the portable luminaire is
fully assembled and is ready to use for the first time.
Installation Directions
1. Remove all packaging material from the portable luminaire.
2. Select a suitable location for your portable lamp. See the requirements above.
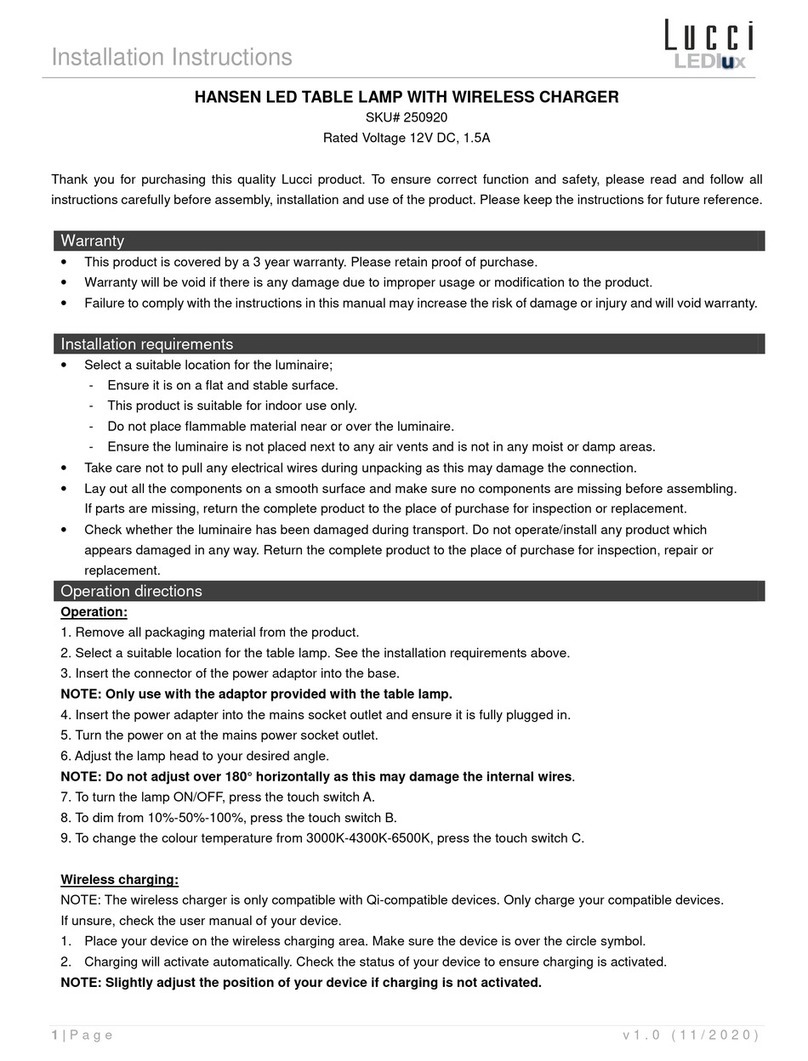
3. Plug the LED driver connector (B) into the luminaire socket (C).
4. Plug the LED driver (A) into the mains socket outlet and ensure it is fully plugged in.
5. Turn on the mains power socket outlet.
6. Press the switch button (D) to turn the luminaire on and off. Press and hold the switch button (D) to adjust the
brightness level of the luminaire.
Operation of the USB charger (E):
You can charge your electronic device via the USB output (E) on the base of the luminaire. The
USB output (E) is rated DC 5V 2 A.
(Refer to the instruction manual of your electronic device for the required charging current)
NOTE: If the charge current of your device is over the limit of the rated current, the charger will be self-
protected.
In this case, your device will not charge unless you reconnect according to the rated output.

Installation Instructions
2 | P a g e v 1 . 0 0 1 / 2 0 2 2
NOTE: If the charging current of your device is over the limit of the rated current, the charger will be self-
protected. In this case, your device will not charge unless you reconnect according to the rated output.
Safety Tips
•Always ensure the power is OFF and the portable luminaire has cooled down before performing any maintenance,
cleaning or making any adjustment to the portable luminaire.
•The external flexible cable or cord of this luminaire cannot be replaced; if the cable or cord is damaged, the luminaire
shall be destroyed.
•To avoid injury or damage to the luminaire, ensure that power leads and screws are secure before connecting the
power.
•Young children should be supervised to ensure that they do not play with the portable luminaire.
•Handle the luminaire and shade with care to avoid any damage or breakage.
•Select a suitable location away from liquids and hazards.
•To clean, wipe with a soft damp cloth. Do NOT soak or immerse the product in water or other liquids.
•Ensure that the luminaire does not come in contact with corrosive chemicals/solvents or abrasive cleaners etc..
•The light source of this luminaire is not replaceable; when the light source reaches its end of life, the whole luminaire
shall be replaced. There are no serviceable parts, do not attempt to dismantle or open the luminaire.
Specifications
SKU #
269391
269392
269393
Colour
Black
Aged Bronze
White
Rated Voltage
12V 2A
Rated Wattage
24W (12W LED light + 10W USB charger)
USB Charger
5V 2A
Lighting source
This product contains a light source of energy efficiency class < F >
LED Specs
710 lumens, Warm White 3000K, CRI>80, Dimmable
Weight
2.5kg
Dimensions
H:395mm Dia:280mm

Installation Instructions
3 | P a g e v 1 . 0 0 1 / 2 0 2 2
SMITH LED-TISCHLEUCHTE
SKU# 269391, 269392, 269393
Nennspannung 12 V 2 A
Vielen Dank, dass Sie sich für dieses Qualitätsprodukt von Lucci entschieden haben. Lesen und befolgen Sie bitte
sorgfältig alle Anleitungen, bevor Sie die Leuchte benutzen, um eine einwandfreie Funktion und Sicherheit bei Montage,
Installation und Gebrauch zu gewährleisten. Bitte bewahren Sie die Anleitungen zum Nachlesen auf.
Garantie
•Für diese tragbare Leuchte gilt eine 5-jährige Garantie, die nur für den Austausch oder die Rückerstattung im
Geschäft gilt.
•Die Garantiezeit beginnt mit dem Kaufdatum. Bitte bewahren Sie den Kaufbeleg auf.
•Die Garantie verliert ihre Gültigkeit, wenn Beschädigungen aufgrund unsachgemäßer Benutzung oder Änderungen an
der tragbaren Lampe verursacht werden.
•Die Nichtbeachtung der Anweisungen in diesem Handbuch kann das Risiko von Schäden oder Verletzungen erhöhen
und führt zum Erlöschen der Garantie.
Installationsanforderungen
•Wählen Sie einen geeigneten Aufstellort für die tragbare Leuchte: Stellen Sie sicher, dass sie auf einer ebenen und
stabilen Oberfläche steht.
- Diese tragbare Leuchte ist nur für den Innenbereich geeignet.
- Platzieren Sie kein brennbares Material in die Nähe oder über der tragbaren Leuchte.
- Stellen Sie sicher, dass die tragbare Leuchte nicht in direkter Linie einer Lüftungsöffnung/Lüftungsystems
installiert wird.
- Wenn Sie die tragbare Leuchte in einem Feuchtbereich installieren, achten Sie darauf, dass der Bereich gut
belüftet ist und gegebenenfalls ein Entlüftungsventilator mit entsprechender Nennleistung benutzt wird.
Beschädigung oder Korrosion durch Feuchtigkeit ist kein Produktmangel und wird daher nicht von der Garantie
abgedeckt.
•Verwenden Sie nur das mitgelieferten Kabel mit dieser Leuchte.
•Achten Sie darauf, beim Auspacken nicht an den elektrischen Kabeln zu ziehen, da dies die Verbindungen
beschädigen könnte.
•Breiten Sie alle Komponenten auf einer glatten Fläche aus und vergewissern Sie sich vor der Montage, dass keine
Komponenten fehlen.
Falls Teile fehlen, bringen Sie das komplette Produkt zwecks Überprüfung oder Austausch zu der Verkaufsstelle
zurück.
•Prüfen Sie, ob der Beleuchtungskörper während des Transports beschädigt wurde. Benutzen/Installieren Sie kein
Produkt, das in irgendeiner Weise beschädigt zu sein scheint. Bringen Sie das komplette Produkt zwecks
Überprüfung, Reparatur oder Austausch zu der Verkaufsstelle zurück.
•Vor oder während der Montage nicht an die Netzsteckdose anschließen. Tun Sie dies erst, nachdem die tragbare
Leuchte vollständig montiert und für den ersten Gebrauch einsatzbereit ist.
Installationsanweisungen
1. Entfernen Sie sämtliches Verpackungsmaterial von der tragbaren Leuchte.
2. Wählen Sie einen geeigneten Aufstellort für Ihre tragbare Lampe. Siehe oben aufgeführte Anforderungen.
3. Stecken Sie den Kabelstecker (B) in die Leuchtenbuchse (C).
4. Stecken Sie den Kabelstecker (A) in die Steckdose und vergewissern Sie sich, dass er vollständig eingesteckt ist.

Installation Instructions
4 | P a g e v 1 . 0 0 1 / 2 0 2 2
5. Schalten Sie die Netzsteckdose ein.
6. Drücken Sie die Schaltertaste (D), um die Leuchte ein- und auszuschalten. Halten Sie die Schaltertaste (D) gedrückt,
um die Helligkeit der Leuchte einzustellen.
Bedienung des USB-Ladegeräts (E):
Über den USB-Ausgang (E) am Fußder Leuchte können Sie Ihr elektronisches Gerät aufladen.
Der USB-Ausgang (E) ist für DC 5 V/2 A ausgelegt.
(Den erforderlichen Ladestrom finden Sie in der Bedienungsanleitung Ihres elektronischen Geräts.)
HINWEIS: Wenn der Ladestrom Ihres Geräts über der Grenze des Nennstroms liegt, schützt sich das Ladegerät
selbst.
In diesem Fall wird Ihr Gerät nicht aufgeladen, es sei denn, Sie verbinden es erneut gemäßder Nennleistung.
HINWEIS: Wenn der Ladestrom Ihres Geräts über der Grenze des Nennstroms liegt, schützt sich das Ladegerät
selbst. In diesem Fall wird Ihr Gerät nicht aufgeladen, es sei denn, Sie verbinden es erneut gemäßder
Nennleistung.
Sicherheitshinweise
•Stellen Sie immer sicher, dass der Strom ABGESCHALTET ist und der Beleuchtungskörper sich abgekühlt hat, bevor
Sie Wartungs- oder Reinigungsarbeiten durchführen oder Einstellungen am Beleuchtungskörper vornehmen.
•Das externe flexible Kabel oder Kabel dieser Leuchte kann nicht ersetzt werden; Bei Beschädigung des Kabels oder
der Leitung ist die Leuchte zu zerstören.
•Stellen Sie sicher, dass Stromkabel und Schrauben fixiert sind, bevor Sie das Produkt an die Stromversorgung
anschließen, um Verletzungen oder Beschädigungen am Beleuchtungskörper zu vermeiden.
•Kleine Kinder sollten beaufsichtigt werden, um sicherzustellen, dass sie nicht mit der tragbaren Leuchte spielen.
•Behandeln Sie die Leuchte und den Lampenschirm mit Sorgfalt, um Beschädigungen oder Brüche zu vermeiden.
•Wählen Sie einen geeigneten Ort fern von Flüssigkeiten und Gefahren.
•Wischen Sie das Produkt mit einem weichen, feuchten Tuch ab, um es zu reinigen. Tauchen Sie das Produkt NICHT
in Wasser oder andere Flüssigkeiten ein.
USB-Ladegerät
5V 2A

Installation Instructions
5 | P a g e v 1 . 0 0 1 / 2 0 2 2
•Achten Sie darauf, dass die Leuchte nicht mit ätzenden Chemikalien/Lösungsmitteln oder scheuernden
Reinigungsmitteln usw. in Berührung kommt.
•Die Lichtquelle dieser Leuchte ist nicht austauschbar; wenn die Lichtquelle ihr Lebensende erreicht hat, muss die
gesamte Leuchte ausgetauscht werden. Es gibt keine zu wartenden Teile, versuchen Sie nicht, die Leuchte zu
zerlegen oder zu öffnen.
Technische Daten
SKU #
269391
269392
269393
Farbe
Schwarz
Alte Bronze
Weiß
Nennspannung
12 V 2 A
Nennleistung
24 W (12 W LED-Licht + 10 W USB-Ladegerät)
USB-Ladegerät
5V 2A
Lichtquelle
Dieses Produkt enthält eine Lichtquelle der Energieeffizienzklasse < F >
LED-Spezifikationen
710 Lumen, Warmweiß3000K, CRI>80, Dimmbar
Gewicht
2,5 kg
Maße
H: 395 mm Durchmesser: 280 mm

Installation Instructions
6 | P a g e v 1 . 0 0 1 / 2 0 2 2
NL SMITH LED-TAFELLAMP
SKU# 269391, 269392, 269393
Nominale spanning 12V 2A
Bedankt voor uw aankoop van dit hoogwaardig Lucci-product. Om een correcte werking en veiligheid te garanderen, dient
u alle instructies zorgvuldig te lezen en op te volgen voordat u deze lamp monteert, installeert en gebruikt. Bewaar de
instructies voor toekomstig gebruik.
Garantie
•Deze draagbare lamp wordt gedekt door een garantie van 5 jaar die alleen geldig is voor een vervanging in de winkel
of een terugbetaling.
•De garantieperiode gaat in vanaf de datum van aankoop. Bewaar het aankoopbewijs.
•De garantie komt te vervallen als er schade ontstaat door verkeerd gebruik of wijziging van de draagbare lamp.
•Het niet opvolgen van de instructies in deze handleiding kan het risico op schade of letsel verhogen en de garantie
ongeldig maken.
Installatievoorschriften
•Kies een geschikte plaats voor de draagbare lamp: - Zorg ervoor dat deze op een vlak en stabiel oppervlak staat.
- Deze draagbare lamp is alleen geschikt voor gebruik binnenshuis.
- Plaats geen brandbaar materiaal in de buurt van of boven de draagbare lamp.
- Zorg ervoor dat de draagbare lamp niet in rechte lijn van een ventilatieopening/-systeem wordt geïnstalleerd.
- Als de draagbare lamp in een ruimte met een hoge vochtigheidsgraad wordt geplaatst, zorg dat de ruimte goed
wordt geventileerd en, indien nodig, er een afzuigventilator van een gepaste capaciteit in de ruimte aanwezig is.
Schade of roest veroorzaakt door vocht is geen productfout en wordt niet door de garantie gedekt.
•Gebruik alleen de inbegrepen aansluitbare LED-driver met deze lamp.
•Zorg ervoor dat er tijdens het uitpakken niet aan de elektrische draden wordt getrokken, omdat dit de verbinding kan
beschadigen.
•Leg alle onderdelen op een vlakke ondergrond en zorg ervoor dat alle onderdelen aanwezig zijn voor de montage.
Als er onderdelen ontbreken, stuur het volledig product terug naar de plaats van aankoop voor inspectie of
vervanging.
•Controleer of de verlichting tijdens het transport is beschadigd. Bedien/installeer geen product dat op welke wijze dan
ook beschadigd lijkt te zijn. Stuur het beschadigde product terug naar de plaats van aankoop voor inspectie of
vervanging.
•Steek de stekker niet in het stopcontact voor of tijdens de montage. Doe dit pas nadat de draagbare lamp volledig in
elkaar is gezet en gebruiksklaar is.
Installatie-instructies
1. Verwijder al het verpakkingsmateriaal van de draagbare lamp.
2. Kies een geschikte locatie voor uw draagbare lamp. Zie de vereisten hierboven.
3. Steek de connector van de LED-driver (B) in de lampaansluiting (C).
4. Steek de stekker van de LED-driver (A) op een juiste manier in het stopcontact.
5. Schakel het stopcontact in.
6. Druk op de schakelaar (D) om de lamp in en uit te schakelen. Houd de schakelaar (D) ingedrukt om het
helderheidsniveau van de lamp te regelen.

Installation Instructions
7 | P a g e v 1 . 0 0 1 / 2 0 2 2
Werking van de USB-lader (E):
U kunt uw elektronisch apparaat opladen via de USB-uitgang (E) aan de onderkant van de
lamp. De USB-uitgang (E) heeft een waarde van DC 5V 2 A.
(Raadpleeg de handleiding van uw elektronisch apparaat voor de vereiste laadstroom)
OPMERKING: Als de laadstroom van uw apparaat de limiet van de nominale stroom overschrijdt, dan wordt de
lader automatisch beschermd.
In dit geval wordt uw apparaat niet opgeladen, tenzij u opnieuw verbinding maakt volgens het nominaal
uitgangsvermogen.
OPMERKING: Als de laadstroom van uw apparaat de limiet van de nominale stroom overschrijdt, dan wordt de
lader automatisch beschermd. In dit geval wordt uw apparaat niet opgeladen, tenzij u opnieuw
verbinding maakt volgens het nominaal uitgangsvermogen.
Veiligheidstips
•Zorg er altijd voor dat de stroom is uitgeschakeld en de draagbare lamp is afgekoeld voordat u onderhoud, reiniging of
aanpassingen aan de draagbare lamp uitvoert.
•De externe flexibele kabel of het snoer van deze lamp kan niet worden vervangen; als de kabel of het snoer
beschadigd is, moet de volledige lamp worden weggegooid.
•Om letsel of schade aan de verlichting te voorkomen, moet u ervoor zorgen dat de voedingskabels en schroeven
goed vastzitten voordat u de stroom aansluit.
•Jonge kinderen moeten onder toezicht staan zodat ze niet met de draagbare lamp spelen.
•Behandel de lamp en de lampenkap met de nodige zorg om schade of breuk te voorkomen.
•Kies een geschikte locatie uit de buurt van vloeistoffen en gevaren.
•Reinig de lamp met een zachte, vochtige doek. Week of dompel het product NIET in water of een andere vloeistof.
•Zorg dat de lamp niet in aanraking komt met corrosieve chemicaliën/oplosmiddelen of agressieve reinigingsmiddelen
etc.
•De lichtbron is niet vervangbaar; wanneer de lichtbron het einde van haar levensduur heeft bereikt, moet de hele
lamp worden vervangen. Geen enkel onderdeel van deze lamp vergt onderhoud. Haal de lamp dus niet uit elkaar of
open deze niet.
USB-lader
5V 2A

Installation Instructions
8 | P a g e v 1 . 0 0 1 / 2 0 2 2
Specificaties
SKU #
269391
269392
269393
Kleur
Zwart
Verouderd brons
Wit
Nominale spanning
12V 2A
Nominaal vermogen
24W (12W LED-lamp + 10W USB-oplader)
USB-lader
5V 2A
Lichtbron
Dit product bevat een lichtbron van energie-efficiëntieklasse < F >
Specificaties van de
LED
710 lumen, Warm Wit 3000K, CRI>80, Dimbaar
Gewicht
2,5 kg
Afmetingen
H: 395 mm dia: 280 mm

Installation Instructions
9 | P a g e v 1 . 0 0 1 / 2 0 2 2
FR LAMPE DE TABLE LED SMITH
SKU# 269391, 269392, 269393
Tension nominale 12 V 2 A
Nous vous remercions d’avoir acheté ce produit de qualité Lucci. Afin de garantir un fonctionnement correct et sûr, veuillez
lire attentivement et respecter toutes les consignes avant d’assembler, d'installer et d'utiliser ce luminaire. Veuillez
conserver ce mode d’emploi pour pouvoir le consulter ultérieurement.
Garantie
•Ce luminaire portable est couvert par une garantie de 5 ans, valable uniquement pour un remboursement ou un
remplacement en magasin.
•La période de garantie commence àpartir de la date d'achat. Veuillez conserver la preuve d’achat.
•La garantie sera annulée en cas de dommages causés par une utilisation incorrecte ou une modification du
luminaire portable.
•Le non-respect des consignes de ces instructions peut augmenter le risque de dommage ou de blessure et
annulera la garantie.
Exigences d’installation
•Sélectionnez un emplacement appropriépour le luminaire portable : - Assurez-vous qu'il se trouve sur une
surface plane et stable.
- Ce luminaire portable est adaptéàune utilisation à l’intérieur uniquement.
- Ne placez pas de matériaux inflammables àproximitéou au-dessus du luminaire portable.
- Assurez-vous que le luminaire portable n'est pas installé à portée directe d'un évent/système d’aération.
- Si le luminaire portable est placédans un endroit sujet àl'humidité, assurez-vous que l’endroit est bien
ventilé et qu’un ventilateur d’extraction correctement dimensionnéest utilisési nécessaire. Les dommages ou la
corrosion causés par l’humidité ne sont pas considérés comme un défaut, et par conséquent, ne sont pas
couverts par la garantie.
•Utilisez uniquement le pilote LED enfichable fourni avec ce luminaire.
•Faites attention à ne pas tirer sur les câbles électriques lors du déballage sous peine d’endommager les
branchements.
•Étalez tous les composants sur une surface lisse et assurez-vous qu’il n’en manque aucun avant de commencer
le montage.
Si des pièces manquent, retournez le produit complet au lieu d'achat afin qu'il soit inspectéou remplacé.
•Vérifiez que le luminaire n'a pas été endommagé pendant le transport. N’utilisez/n’installez pas un produit
présentant des dommages de quelque nature que ce soit. Ramenez le produit dans son intégralitéau lieu d'achat afin
qu'il soit inspecté, réparéou remplacé.
•Ne branchez pas le produit sur la prise électrique secteur avant ou pendant le montage. Faites-le uniquement une
fois que le luminaire portable est entièrement assembléet prêt àêtre utilisépour la première fois.
Consignes d’installation
1. Retirez tous les éléments d’emballage du luminaire portable.
2. Sélectionnez un emplacement appropriépour votre lampe portable. Voir les exigences ci-dessus.
3. Branchez le connecteur du pilote LED (B) dans la douille du luminaire (C).
4. Branchez le pilote LED (A) dans la prise secteur et assurez-vous qu'il est complètement enfoncé.

Installation Instructions
10 | P a g e v 1 . 0 0 1 / 2 0 2 2
5. Mettez sous tension la prise électrique secteur.
6. Appuyez sur le bouton de commutation (D) pour allumer et éteindre le luminaire. Appuyez sur le bouton de
commutation (D) et maintenez-le enfoncépour régler le niveau de luminositédu luminaire.
Fonctionnement du chargeur USB (E) :
Vous pouvez charger votre appareil électronique via la sortie USB (E) sur la base du luminaire.
Les valeurs nominales de la sortie USB (E) sont 5 V CC 2 A.
(Consultez le manuel d'instructions de votre appareil électronique pour connaître le courant de charge requis)
REMARQUE : Si le courant de charge de votre appareil dépasse la limite du courant nominal, le chargeur se
mettra en auto-protection.
Dans ce cas, votre appareil ne se rechargera que si vous le rebranchez en tenant compte de la puissance
nominale.
REMARQUE : Si le courant de charge de votre appareil dépasse la limite du courant nominal, le chargeur se
mettra en auto-protection. Dans ce cas, votre appareil ne se rechargera que si vous le rebranchez en
tenant compte de la puissance nominale.
Conseils de sécurité
•Veillez toujours àcouper le courant et àlaisser refroidir le luminaire portable avant d'effectuer une opération
d'entretien, de nettoyage ou de réglage sur le luminaire portable.
•Le cordon ou le câble flexible externe de ce luminaire ne peut pas être remplacé; si le cordon ou le câble est
endommagé, le luminaire doit être détruit.
•Afin d’éviter tout risque de blessures corporelles ou d'endommagement du luminaire, assurez-vous que les fils
électriques et les vis sont bien fixés avant de mettre le courant.
•Il convient de surveiller les jeunes enfants pour s’assurer qu’ils ne jouent pas avec le luminaire portable.
•Manipulez le luminaire et l'abat-jour avec soin pour éviter de l’endommager ou de le casser.
•Choisissez un emplacement adaptéàl'écart de tout liquide ou danger.
•Pour nettoyer, essuyez avec un chiffon doux et humide. Ne trempez et ne plongez PAS le produit dans l’eau ou
d'autres liquides.
Chargeur USB
5V 2 A

Installation Instructions
11 | P a g e v 1 . 0 0 1 / 2 0 2 2
•Assurez-vous que le luminaire n’entre pas en contact avec des produits chimiques/solvants corrosifs, nettoyants
abrasifs, etc.
•La source lumineuse de ce luminaire n’est pas remplaçable ; en fin de vie, l’ensemble du luminaire doit être
remplacé. Le luminaire ne contient aucune pièce réparable, n'essayez pas de le démonter ou de l'ouvrir.
Spécifications
SKU #
269391
269392
269393
Couleur
Noir
Bronze vieilli
Blanc
Tension nominale
12 V 2 A
Puissance nominale
24 W (éclairage LED 12 W + chargeur USB 10 W)
Chargeur USB
5 V 2 A
Source lumineuse
Ce produit contient une source lumineuse de classe d'efficacitéénergétique < F >
Spécifications LED
710 lumens, blanc chaud 3000K, CRI > 80, intensitéréglable
Poids
2,5 kg
Dimensions
Hauteur : 395 mm Diamètre : 280 mm

Installation Instructions
12 | P a g e v 1 . 0 0 1 / 2 0 2 2
ES LÁMPARA LED DE SOBREMESA SMITH
SKU# 269391, 269392, 269393
Tensión nominal: 12 V 2 A
Gracias por adquirir este producto Lucci de gran calidad. Para garantizar un funcionamiento correcto y seguro, lea y siga
todas las instrucciones detenidamente antes de montar, instalar y usar esta lámpara. Conserve estas instrucciones para
consultas posteriores.
Garantía
•Esta lámpara portátil estácubierta por una garantía de 5 años válida solamente para el reemplazo o reembolso en
tienda.
•El período de la garantía comenzaráa partir de la fecha de compra. Por favor, conserve la prueba de compra.
•La garantía quedaráanulada si se produce algún daño como consecuencia de un uso indebido o modificación de la
lámpara.
•El incumplimiento de las instrucciones de este manual puede aumentar el riesgo de daños o lesiones y anularán la
garantía.
Requisitos de instalación
•Elija una ubicación adecuada para la lámpara portátil: - Asegúrese de que estésobre una superficie plana y estable.
- Esta lámpara portátil sólo es apta para uso en interiores.
- No coloque materiales inflamables cerca o sobre la lámpara portátil.
- Procure no instalar la lámpara en el paso directo del aire de una salida o conducto de ventilación.
- Cuando instale una luz en un lugar propenso a la humedad, asegúrese de que dicho lugar estébien ventilado y
que se utilice un ventilador de extracción apropiado si fuera necesario. Los daños o la corrosión causados por la
humedad no se consideran fallos del producto y por lo tanto no están cubiertos por la garantía.
•Utilice únicamente el controlador led conectable que se proporciona con esta lámpara.
•Procure no tirar de ninguno de los cables cuando desembale el producto, ya que podría dañar las conexiones.
•Antes de comenzar a montar el producto, deposite todas las piezas sobre una superficie lisa y asegúrese de que no
falte ninguno.
Si falta alguna pieza, devuelva el producto completo al lugar donde realizóla compra para que lo examinen o
reemplacen.
•Compruebe que la lámpara no haya sufrido daño alguno durante el transporte. Nunca utilice o instale un producto
que parezca sufrir algún daño. Devuelva el producto completo al lugar donde realizóla compra para que lo examinen,
reparen o sustituyan por otro.
•No la enchufe en la toma de corriente antes o durante el ensamblaje. Sólo debe hacerlo una vez que la lámpara
portátil estécompletamente ensamblada y lista para usarse por primera vez.
Instrucciones de instalación
1. Retire todo el material de embalaje de la lámpara portátil.
2. Elija una ubicación adecuada para su lámpara portátil. Consulte los requisitos anteriores.
3. Conecte el controlador led (B) en la toma de la lámpara (C).
4. Enchufe el controlador led (A) en la toma de corriente y asegúrese de que estébien insertado.
5. Abra el paso de la corriente.

Installation Instructions
13 | P a g e v 1 . 0 0 1 / 2 0 2 2
6. Pulse el interruptor (D) para encender o apagar la lámpara. Mantenga pulsado el interruptor (D) para ajustar el nivel
de brillo de la lámpara.
Funcionamiento del cargador USB (E):
Su dispositivo electrónico puede cargarse mediante la salida USB (E) de la base de la lámpara.
La salida USB (E) tiene una corriente nominal de 5 V CC y 2 A.
(Consulte el manual de instrucciones de su dispositivo electrónico para conocer la corriente de carga requerida)
NOTA: Si la corriente de carga de su dispositivo supera el límite de la corriente nominal, el puerto de carga
estaráautoprotegido.
En dichos casos, su dispositivo no se cargaráa menos que lo vuelva a conectar con la corriente de
salida nominal apropiada.
NOTA: Si la corriente de carga de su dispositivo supera el límite de la corriente nominal, el cargador estará
autoprotegido. En dichos casos, su dispositivo no se cargaráa menos que lo vuelva a conectar con la
corriente de salida nominal apropiada.
Consejos de seguridad
•Asegúrese siempre de que la lámpara portátil estéapagada y se haya enfriado antes de llevar a cabo tareas de
mantenimiento, limpieza, o algún otro ajuste.
•El cable flexible externo de esta lámpara no se puede reemplazar. Si el cable se daña, la lámpara deberá
desecharse.
•Para evitar lesiones o daños en la lámpara, asegúrese de que los cables de corriente y los tornillos estén bien
asegurados antes de abrir el paso de la corriente.
•Los niños pequeños deben ser supervisados para asegurarse de que no juegan con la lámpara portátil.
•Manipule la lámpara y la pantalla con cuidado para evitar daños o roturas.
•Elija una ubicación apropiada que estéalejada de líquidos y otros peligros.
•Pásele un paño suave y húmedo para limpiarla. NO remoje o sumerja el producto en el agua u otros líquidos.
•Asegúrese de que la lámpara no entre en contacto con disolventes o químicos corrosivos, limpiadores abrasivos, etc.
•La fuente de iluminación de esta lámpara no es reemplazable. La lámpara deberádesecharse cuando la fuente de
iluminación llegue al final de su vida útil. No intente desarmar o abrir la lámpara ya que no hay piezas reparables.
Puerto de carga USB
5 V 2 A

Installation Instructions
14 | P a g e v 1 . 0 0 1 / 2 0 2 2
Especificaciones
SKU #
269391
269392
269393
Color
Negro
Bronce envejecido
Blanco
Tensión nominal
12 V 2 A
Potencia nominal
24 W (led de 12 W + puerto de carga USB de 10 W)
Puerto de carga
USB
5 V 2 A
Fuente de
iluminación
Este producto contiene una fuente de iluminación con una eficiencia energética de
clase < F >
Especificaciones de
la led
710 lúmenes, blanco cálido 3000 K, CRI > 80, regulable
Peso
2,5 kg
Dimensiones
Altura: 395 mm; diámetro: 280 mm

Installation Instructions
15 | P a g e v 1 . 0 0 1 / 2 0 2 2
IT LAMPADA DA SCRIVANIA LED SMITH
SKU# 269391, 269392, 269393
Tensione nominale 12 V 2 A
Grazie per aver acquistato questo prodotto Lucci di alta qualità. Per assicurare un funzionamento corretto e sicuro, leggere
attentamente tutte le istruzioni prima di assemblare, installare e usare il prodotto. Conservare le istruzioni per futuro
riferimento.
Garanzia
•Questo prodotto ècoperto da una garanzia di 5 anni, valida esclusivamente per la sostituzione o il rimborso presso il
punto vendita.
•Il periodo di garanzia inizia dalla data di acquisto. Conservare la prova di acquisto.
•La garanzia non copre eventuali danni causati da un uso scorretto o modifiche al prodotto.
•Il mancato rispetto delle istruzioni riportate in questo manuale puòaumentare il rischio di danni o lesioni e annulla la
garanzia.
Requisiti di installazione
•Selezionare una posizione di installazione adatta, nel rispetto dei seguenti requisiti. - La superficie di installazione
deve essere piana e stabile.
- Questo prodotto èdestinato al solo uso in interni.
- Non posizionare materiali infiammabili sopra o in prossimitàdel prodotto.
- Non installare il prodotto in prossimitàdi sistemi o prese di ventilazione.
- In caso di installazione in un'area soggetta a umidità, assicurarsi che l'area sia ben ventilata e utilizzare
un'apposita ventola se necessario. Corrosione o danni dovuti all'umiditànon sono difetti del prodotto, pertanto non
sono coperti dalla garanzia.
•Utilizzare esclusivamente l'unitàdi alimentazione fornita insieme al prodotto.
•Prestare attenzione a non tirare i cavi elettrici durante il disimballaggio per evitare di danneggiarli.
•Disporre il contenuto della confezione su una superficie piana e, prima dell'assemblaggio, assicurarsi che siano
presenti tutti i componenti.
In caso di componenti mancanti, riportare il prodotto presso il rivenditore affinchévenga ispezionato o sostituito.
•Verificare che il prodotto non abbia subito danni durante il trasporto. Non usare/installare il prodotto se presenta danni
di qualsiasi tipo. Riportare il prodotto completo presso il rivenditore affinchévenga ispezionato, riparato o sostituito.
•Non collegare il prodotto alla presa di corrente prima o durante l'assemblaggio. Collegare il prodotto alla presa di
corrente esclusivamente quando ècompletamente assemblato e pronto all'uso.
Istruzioni di installazione
1. Rimuovere tutti i materiali di imballaggio dal prodotto.
2. Selezionare una posizione di installazione adatta, nel rispetto dei requisiti elencati in precedenza.
3. Collegare il connettore del cavo di alimentazione (B) al connettore della lampada (C).
4. Collegare l'unitàdi alimentazione (A) alla presa di corrente e assicurarsi che la spina sia inserita completamente.
5. Assicurarsi che la presa di corrente sia alimentata.
6. Premere l'interruttore (D) per accendere e spegnere la lampada. Tenere premuto l'interruttore (D) per regolare il livello
di luminositàdella lampada.

Installation Instructions
16 | P a g e v 1 . 0 0 1 / 2 0 2 2
Funzionamento della presa di ricarica USB (E)
La presa USB (E) situata sulla base della lampada permette di ricaricare dispositivi elettronici
esterni. L'uscita della presa USB (E) èCC 5 V 2 A.
(Consultare il manuale di istruzioni del dispositivo elettronico esterno per informazioni sulla corrente di ricarica adatta.)
NOTA: se la corrente di ricarica del dispositivo esterno èsuperiore alla corrente fornita dalla presa USB, si
attiveràil sistema di protezione.
In tal caso, il dispositivo non si ricaricheràfinchénon viene collegato a un'unitàdi alimentazione adatta.
NOTA: se la corrente di ricarica del dispositivo esterno èsuperiore alla corrente fornita dalla presa USB, si
attiveràil sistema di protezione. In tal caso, il dispositivo non si ricaricheràfinchénon viene collegato a
un'unitàdi alimentazione adatta.
Norme di sicurezza
•Assicurarsi che l'alimentazione elettrica sia disattivata e che la lampada si sia raffreddata prima di effettuare qualsiasi
operazione di manutenzione, pulizia o regolazione sulla lampada.
•Il cavo di alimentazione esterno della lampada non puòessere sostituito. Se èdanneggiato, l'intera lampada deve
essere smaltita.
•Per evitare il rischio di lesioni o danni alla lampada, assicurarsi che i cavi elettrici e le viti siano saldi prima di attivare
l'alimentazione elettrica.
•Sorvegliare i bambini per accertarsi che non giochino con la lampada.
•Manipolare la lampada e il paralume con attenzione per evitare di danneggiarli.
•Selezionare un luogo adatto, lontano da liquidi e pericoli.
•Per la pulizia, usare un panno umido. NON immergere il prodotto in acqua o altri liquidi.
•Assicurarsi che il prodotto non entri a contatto con sostanze chimiche corrosive, solventi, detergenti abrasivi, ecc.
•La fonte luminosa di questo apparecchio di illuminazione non èsostituibile. Al termine della vita utile della fonte
luminosa, l'apparecchio di illuminazione deve essere sostituito. All'interno del prodotto non sono presenti parti
riparabili dall'utente; non tentare di disassemblare o aprire la lampada.
Specifiche tecniche
SKU #
269391
269392
269393
Caricabatteria USB
5 V 2 A

Installation Instructions
17 | P a g e v 1 . 0 0 1 / 2 0 2 2
Colore
Nero
Bronzo anticato
Bianco
Tensione nominale
12 V 2 A
Potenza nominale
24 W (12 W luce LED + 10 W caricabatteria USB)
Caricabatteria USB
5 V 2 A
Fonte luminosa
Questo prodotto contiene una fonte luminosa con classe di efficienza energetica "F".
Specifiche LED
710 lumen, bianco caldo 3000 K, CRI>80, luminositàregolabile
Peso
2,5 kg
Dimensioni
Altezza: 395 mm Diametro: 280 mm

Installation Instructions
18 | P a g e v 1 . 0 0 1 / 2 0 2 2
CZ SMITH LED STOLNÍLAMPA
SKU# 269391, 269392, 269393
Jmenovité napětí 12 V 2 A
Děkujeme, že jste si zakoupili tento kvalitní výrobek Lucci. Pro zajištění správné funkce a bezpečnosti si před montáží,
instalacía používáním tohoto svítidla pečlivě přečtěte a dodržujte všechny pokyny. Uschovejte si pokyny pro budoucí
použití.
Záruka
•Na toto přenosné svítidlo se vztahuje 5letá záruka platná pouze pro výměnu v prodejně nebo vrácení peněz.
•Záruční doba začíná běžet od data nákupu. Uschovejte si doklad o koupi.
•Záruka bude neplatná, pokud dojde k poškození v důsledku nesprávného použití nebo úpravy přenosného
svítidla.
•Nedodržení pokynů v této příručce může zvýšit riziko poškození nebo zranění a bude mít za následek ztrátu
záruky.
Požadavky na instalaci
•Vyberte vhodné místo pro přenosné svítidlo: - Ujistěte se, že je na rovném a stabilním povrchu.
- Toto přenosné svítidlo je vhodné pouze pro vnitřní použití.
- Do blízkosti nebo nad přenosné svítidlo neumisťujte hořlavý materiál.
- Ujistěte se, že přenosné svítidlo není instalováno v přímé linii odvzdušňovacího otvoru/systému.
- Pokud je přenosné svítidlo umístěno v oblasti náchylnék vlhkosti, zajistěte dobré větrání této oblasti
a v případě potřeby použijte vhodně dimenzovaný odsávací ventilátor. Poškození nebo koroze způsobená
vlhkostínejsou chybou výrobku a jako takovénejsou kryty zárukou.
•S tímto svítidlem používejte pouze dodávaný napájecí ovladač LED.
•Dávejte pozor, abyste během vybalování netahali za žádné elektrické vodiče, protože by mohlo dojít k poškození
spojení.
•Položte všechny součásti na hladký povrch a před sestavením se ujistěte, že žádné součásti nechybí.
Pokud díly chybí, vraťte kompletní výrobek na místo nákupu ke kontrole nebo výměně.
•Zkontrolujte, zda svítidlo nebylo poškozeno během přepravy. Neprovozujte/neinstalujte žádný výrobek, který se
zdábýt jakýmkoliv způsobem poškozený. Vraťte kompletní výrobek na místo nákupu ke kontrole, opravě nebo
výměně.
•Nezapojujte do síťové zásuvky před nebo během montáže. Udělejte tak až poté, co je přenosné svítidlo
kompletně smontováno a připraveno k prvnímu použití.
Pokyny k instalaci
1. Odstraňte veškerý obalový materiál z přenosného svítidla.
2. Vyberte vhodné umístění pro přenosnou lampu. Viz výše uvedené požadavky.
3. Zapojte konektor ovladače LED (B) do objímky svítidla (C).
4. Zapojte ovladač LED (A) do síťové zásuvky a ujistěte se, že je plně zapojen.
5. Zapněte síťovou zásuvku.
6. Pro zapnutía vypnutí svítidla stiskněte tlačítko vypínače (D). Stisknutím a podržením spínacího tlačítka (D)
upravíte úroveň jasu svítidla.

Installation Instructions
19 | P a g e v 1 . 0 0 1 / 2 0 2 2
Provoz USB nabíječky (E):
Vaše elektronické zařízení můžete nabíjet přes USB výstup (E) na základně svítidla. USB
jmenovitývýstup (E) je 5 V= 2 A.
(Potřebný nabíjecí proud naleznete v návodu k obsluze vašeho elektronického zařízení)
POZNÁMKA: Pokud je nabíjecí proud vašeho zařízení nad limitem jmenovitého proudu, nabíječka bude mít
vlastníochranu.
V takovém případě se vaše zařízení nebude nabíjet, dokud jej znovu nepřipojíte podle jmenovitého výkonu.
POZNÁMKA: Pokud je nabíjecí proud vašeho zařízení nad limitem jmenovitého proudu, nabíječka bude mít
vlastníochranu. V takovém případě se vaše zařízení nebude nabíjet, dokud jej znovu nepřipojíte podle
jmenovitého výkonu.
Bezpečnostní tipy
•Před prováděním jakékoli údržby, čištěním nebo seřizováním přenosného svítidla se vždy ujistěte, že je napájení
vypnuto a že přenosné svítidlo vychladlo.
•Externí ohebný kabel nebo šňůru tohoto svítidla nelze vyměnit; pokud dojde k poškození kabelu nebo šňůry,
svítidlo musí být zničeno.
•Abyste předešli zranění nebo poškození svítidla, před připojením napájení se ujistěte, že jsou napájecí kabely
a šrouby zajištěny.
•Malé děti by měly být pod dozorem, aby bylo zajištěno, že si s přenosným svítidlem nebudou hrát.
•Se svítidlem a stínidlem zacházejte opatrně, aby nedošlo k poškození nebo rozbití.
•Vyberte vhodnémísto mimo dosah tekutin a nebezpečí.
•Pro čištění otřete měkkým vlhkým hadříkem. Výrobek NENAMÁČEJTE ani neponořujte do vody nebo jiných
kapalin.
•Zajistěte, aby svítidlo nepřišlo do kontaktu s korozivními chemikáliemi/rozpouštědly nebo abrazivními čisticími
prostředky atd.
•Světelný zdroj tohoto svítidla není vyměnitelný; když světelný zdroj dosáhne konce své životnosti, musí se
vyměnit celé svítidlo. Svítidlo neobsahuje žádné opravitelné díly, nepokoušejte se svítidlo rozebírat nebo otevírat.
Specifikace
USB nabíječka
5 V 2 A

Installation Instructions
20 | P a g e v 1 . 0 0 1 / 2 0 2 2
SKU #
269391
269392
269393
Barva
Černá
Starší bronz
Bílá
Jmenovité napětí
12 V 2 A
Jmenovitý příkon
24 W (12 W LED světlo + 10 W USB nabíječka)
USB nabíječka
5 V 2 A
Světelný zdroj
Tento výrobek obsahuje světelný zdroj třídy energetické účinnosti < F >
Specifikace LED
710 lumenů, teplá bílá 3 000 K, CRI > 80, stmívatelné
Hmotnost
2,5 kg
Rozměry
V: 395 mm Průměr: 280 mm
This manual suits for next models
2
Table of contents
Languages:
Other Lucci LEDlux Home Lighting manuals

Lucci LEDlux
Lucci LEDlux LEDlux Canteen 020375 User manual

Lucci LEDlux
Lucci LEDlux Moto User manual

Lucci LEDlux
Lucci LEDlux 250920 User manual

Lucci LEDlux
Lucci LEDlux SPACE II User manual

Lucci LEDlux
Lucci LEDlux Smith User manual

Lucci LEDlux
Lucci LEDlux 259310 User manual

Lucci LEDlux
Lucci LEDlux Poppy User manual

Lucci LEDlux
Lucci LEDlux MA02-BLK User manual