Lucky Reptile Thermo Socket PRO User manual

Bedienungsanleitung
Operating Instructions
Thermo Socket PRO

2
Operating Conditions
• The device may only be operated at 230V / 50/60HZ AC Voltage.
• The allowed ambient temperature may not exceed 45°C during operation.
• The device is designed for use in dry rooms.
• At formation of condensed water a period of acclimatisation of up to 2h has to
be ensured.
• The device has to be protected from moisture and spray water!
• Do not operate the device in environments in which flammable gases or vapours
exist or may be existent.
Installation:
Warning! The Thermo Socket PRO has been designed in way that a deconstruction is not necessary under normal circumstances. Thanks to the con-
nector and the supplied mounting accessories the lampholder can be attached to a surface without an electrical installation.
An electrical installation must only be done by a qualied expert. No liability will be assumed for damages originating from improper installation.
3.
1. 2. 4. 5.
b.
Installation Models HTSP-1, HTSP-2 and HTSP-3
1.
Remove topa.
b.
Pull through hole up to
the washer
2. 3. 4.
Remove nut Slide washer over cable
Secure nut Secure with
screws
5. 6.
• Remove the upper part of the connector case
• Make a hole of 16mm (22mm if you do not remove the upper part of the connector
case) into the surface onto which you want to attach the lamp. The surface should
not be thicker than 8 mm in order that the pull relieve can be installed properly.
• Lead the cable with connector through the hole until the washer touches the lower
side of the surface.
• Remove the nuts from the pull relieve and slide the washer with gap over the cable
below the nut. Secure the pull relieve with the nut against the surface.
• For models HTSP-1 and HTSP-2 you have to secure the lampholders with the supplied
screws and nuts on the surface. Drill two 6mm holes with the correct distances. The
cable lead through should be in the middle.
• We recommend to use a chain or other suitable devices to support model HTSP-3 in
its hanging position (not included)
• Connect the connector with the coupling on the power cord and plug the power
cord into a wall socket
a.
• Remove the upper part of the connector case
• Make a hole of 16mm (22mm if you do not remove the upper part of the connector
case) into the surface onto which you want to attach the lamp. The surface should
not be thicker than 15mm in order that the pull relieve can be installed properly.
• Lead the cable with connector and the rest of the mounting accessories through
the hole.
• Loosen the screw on the pull relieve and unscrew the pull relieve from the tube.
Make sure that the cable is not twisted in the process
• Slide the special washer over the cable below the pull relieve and secure the M10
tube from both sides with the nuts
• Reinstall the pull relieve and arrest the cable by tightening the screw
• Connect the connector with the coupling on the power cord and plug the power
cord into a wall socket
• A hinge allows for directing the lampholder of model HTSP-5 as desired.
Installation Models HTSP-4, HTSP-5 and HTSP-6
Designated Usage
This device is for indoor use only. All lamps indicated in this manual (see section Sui-
table Lamps) can be used. Mounting has to be made on a normal ammable surface.
Operation inside of terrariums
The installation of the lamp inside the terrarium is at one’s own risk. The manufac-
turer has no inuence on the conditions inside the terrarium (humidity, temperature,
place of installation etc.) therefore it’s up to the consumer to create optimal operating
conditions.
Remove pull
relieve
Remove top
Pull through hole up to
the washer
Slide washer
over cable
Secure pull
relieve
Manual - Thermo Socket PRO
GB

3
Initial operation and usage
• Screw a bulb into the E27 holder and insert the power cable in an appropriate
socket.
• Ensure sufficient ventilation in order to prevent abnormal heating of smaller rooms
by operating the lamp.
• Via the switch you can switch the lamp on and off.
• When installing with a clamp (available separately) pay attention to a secure foo-
ting. The lamp may not be affixed to pipes!
Please note that animals need a temperature gradient and places of refuge in the
terrarium. You should also ensure that the animals have to be able to retreat from
the bulbs sphere and that there are cooler hiding places available. Please follow the
instruction of the lamp-producers if you use bulbs with UV radiation.
Operation with Lucky Reptile Bright Sun UV
• For operating the Bright Sun UV a special ballast is required. We recommend the use
of the Lucky Reptile Bright Control and Bright Control PRO devices
• Put the connector on the lampholder into the coupling of the ballast
• Screw the Bright Sun UV lamp into the lampholder and make sure that the socket
has good contact to the lampholder
• Plug the ballast into the wall socket
• Make sure that the cable between lampholder and ballast does not exceed 3m
in length.
Security advice
• The lamp may not be hung on the power cable. For HTSP-3 hanging is allowed with
corresponding mounting.
• The holder, the power cable, the switch and the socket have to be checked regularly
for damages. In case of damage the lamp has to be put out of operation immedia-
tely or rather may not be put into operation. The same action should be taken if the
lamp came into contact with fluids. Checking and if necessary repairing the device
may only be done by a qualified expert!
• Generally it should be verified if the device is applicable for the application at hand
before putting it into operation! In case of doubt consultation of experts or the
manufacturer of the employed devices is required!
• The lamp may not be operated in rooms with high humidity.
• Previous to any bulb replacements you have to disconnect the power cable.
• It has to be ensured that no one can come into contact with the hot spots of the
lamp.
• The lamp may only be affixed on flame resistant fixing surfaces and may also not
be covered (e.g. a blanket). Danger of fire! Flame resistant surfaces have to show
an ignition point of at least 200°C and may not warp or soften plastically at this
temperature. For example they may consist of wood or materials on wood basis
with a thickness of more than 2 mm.
• Only the power cable provided by the manufacturer may be used for connection.
Moreover in case of replacement of a damaged power cable only a special power
cable or a power cable exclusively obtainable through the manufacturer or his ser-
vice representatives may be used. An Inspection by an expert is required before
putting the device into operation after inserting / replacing the power cable.
• The lamp must no be used with UV bulbs when installed in a room with human
access. Do not look into a UV lamp.
Technical specications
Operating voltage 230 V~ 50/60 Hz
Contact on current max. 1.3 A
Maximum ambient temperature: 45°C
Maximum input voltage: 300 W (see allowed lamps)
Safety Distance: Consult the manufacturers data sheets of the used bulbs for specication,
50 cm min. recommended
The following light bulbs can be used with this product:
• Incandescent Lamps up to 250W (e.g. Lucky Reptile Neo Sun)
• Halogen PAR lamps up to 150W (e.g. Lucky Reptile Halogen Sun)
• Self ballasted UV lamps up to 300W (e.g. Zoo Med PowerSun)
• UV Compact Fluorescent Lamps up to 26W (e.g. LR Compact UV Sun)
• Ceramic Heat Emitters with E27 socket up to 250W (e.g. Lucky Reptile Dark Spot)
• Lucky Reptile Bright Sun UV (separate ballast required)
Please read manufacturers instructions and data sheets fort he used light bulbs and
pay attention to minimum distances.
Warranty
The warranty expires in case of modication and repair attempts as well
as damaging by force or inappropriate usage.
Neither a gurarantee nor any liabilities for detriments or consequential
damages in relation with this product will be assumed. Repair, amend-
ments or exchange for a replacement are at the manufacturer’s disc-
retion.
No guarantee will be assumed by operation in terrariums.
In case of warranty claims or repairs please contact your specialist dea-
ler

4
Bedienungsanleitung - Thermo Socket PRO
D
Betriebsbedingungen
• Das Gerät darf nur an 230 V / 50/60 Hz Wechselspannung betrieben werden.
• Die zulässige Umgebungstemperatur darf während des Betriebes 45° C nicht über-
schreiten.
• Das Gerät ist für den Gebrauch in trockenen Räumen bestimmt.
• Bei Bildung von Kondenswasser muss eine Akklimatisierungszeit von bis zu 2 Stun-
den abgewartet werden.
• Schützen Sie das Gerät vor Feuchtigkeit und Spritzwasser!
• Betreiben Sie das Gerät nicht in Umgebungen in welchen brennbare Gase/Dämpfe
vorhanden sind oder sein können.
Montage:
Achtung! Der Thermo Socket PRO ist so entwickelt, dass eine Demontage unter normalen Umständen nicht erforderlich ist. Durch die Steckverbindung
und das mitgelieferte Montagezubehör kann die Fassung befestigt werden, ohne dass eine Elektroinstallation erforderlich ist.
Eine Elektroinstallation darf nur durch einen qualizierten Fachmann übernommen werden. Für Schäden durch unsachgemäße Installation kann
keine Haftung übernommen werden.
3.
1. 2. 4. 5.
b.
Installation Modelle HTSP-1, HTSP-2 und HTSP-3
1.
Kappe öffnena.
b.
Bis zur Unterlegscheibe
durch Loch ziehen
2. 3. 4.
Mutter lösen
Unterlegscheibe über
Kabel schieben
Mutter
festschrauben Festschrauben
5. 6.
• Nehmen Sie den oberen Teil des Zugentlastungsgehäuses des Steckers ab.
• Bohren Sie für die Kabeldurchführung ein ca. 16mm großes Loch (22mm wenn das
Oberteil des Zugentlastungsgehäuses nicht entfernt wird) in die Oberfläche, an der
Sie die Fassung befestigen wollen. Die Oberfläche muss normal oder schwer ent-
flammbar sein. Damit die Zugentlastung korrekt installiert werden kann, sollte die
Dicke der Oberfläche 8 mm nicht überschreiten.
• Führen Sie zuerst die Steckverbindung und Kabel bis zur großen Unterlegscheibe
durch das Loch.
• Lösen Sie die Mutter von der Zugentlastung und schieben Sie unterhalb der Mutter
die geschlitzte Unterlegscheibe über das Kabel. Fixieren Sie nun die Zugentlastung
durch Aufschrauben und Anziehen der Mutter an der Oberfläche.
• Bei den Modellen HTSP-1 und HTSP-2 befestigen Sie die Fassung jetzt mit den mit-
gelieferten Schrauben und Muttern an der Oberfläche. Bohren Sie hierzu zwei 6mm
Löcher im richtigen Abstand. Die Kabeldurchführung sollte dabei mittig sein.
• Für das Modell HTSP-3 empfehlen wir die Sicherung mit einer Kette oder ähnlichem
(nicht enthalten).
• Stecken Sie den Stecker der Fassung in die Buchse der Stromzuleitung und diese
in eine Wandsteckdose.
a.
• Nehmen Sie den oberen Teil des Zugentlastungsgehäuses des Steckers ab.
• Bohren Sie für die Kabeldurchführung ein ca. 16mm großes Loch (22mm wenn das
Oberteil des Zugentlastungsgehäuses nicht entfernt wird) in die Oberfläche, an der
Sie die Fassung befestigen wollen. Die Oberfläche muss normal oder schwer ent-
flammbar sein. Damit die Zugentlastung korrekt installiert werden kann, sollte die
Dicke der Oberfläche 15mm nicht überschreiten.
• Führen Sie zuerst die Steckverbindung und dann den Rest der Montageteile durch
das Loch.
• Lösen Sie die Feststellschraube an der Zugentlastung und schrauben Sie die Zugent-
lastung vom Gewinderohr. Achten Sie darauf, dass das Kabel sich nicht verdreht.
• Schieben Sie die Unterlegscheibe über das Kabel unterhalb der Zugentlastung
und arretieren Sie das Gewinderohr auf gewünschter Höhe durch festziehen der
Muttern.
• Schrauben Sie die Zugentlastung wieder auf und arretieren Sie das Kabel mit der
Feststellschraube.
• Stecken Sie den Stecker der Fassung in die Buchse der Stromzuleitung und diese
in eine Wandsteckdose.
• Mit dem Modell HTSP-5 kann die Fassung wie gewünscht durch ein Gelenk ausge-
richtet werden.
Installation Modelle HTSP-4, HTSP-5 und HTSP-6
Bestimmungsgemäße Verwendung
Der bestimmungsgemäße Einsatz des Gerätes ist der Betrieb in trockenen, geschlos-
senen Räumen. Als Leuchtmittel sind nur Lampen wie in dieser Anleitung ausgewie-
sen zulässig. Die Montage hat an einer normal brennbaren Oberäche zu erfolgen. Ein
anderer Einsatz als vorgegeben ist nicht zulässig!
Einsatz im Terrarium
Die Montage der Leuchte im Terrarium erfolgt auf eigene Gefahr. Auf die Bedingun-
gen im Terrarium (Luftfeuchtigkeit, Temperatur, Montageort, etc.) hat der Hersteller
keinen Einuss, so dass es dem Endverbraucher obliegt, optimale Einsatzbedingungen
zu schaffen.
Zugentlastung
lösen
Kappe öffnen
Bis zur Unterlegscheibe
durch Loch ziehen
Unterlegscheibe
über Kabel
schieben
Zugentlastung
befestigen

5
Betrieb
• Schrauben Sie ein Leuchtmittel in die E27 Fassung. Stecken Sie die Zuleitung in eine
geeignete Steckdose.
• Stellen Sie durch ausreichende Belüftung sicher, dass sich kleinere Räume durch den
Betrieb der Leuchte nicht unzulässig stark erwärmen.
• Über den Schalter lässt sich die Lampe ein- und ausschalten.
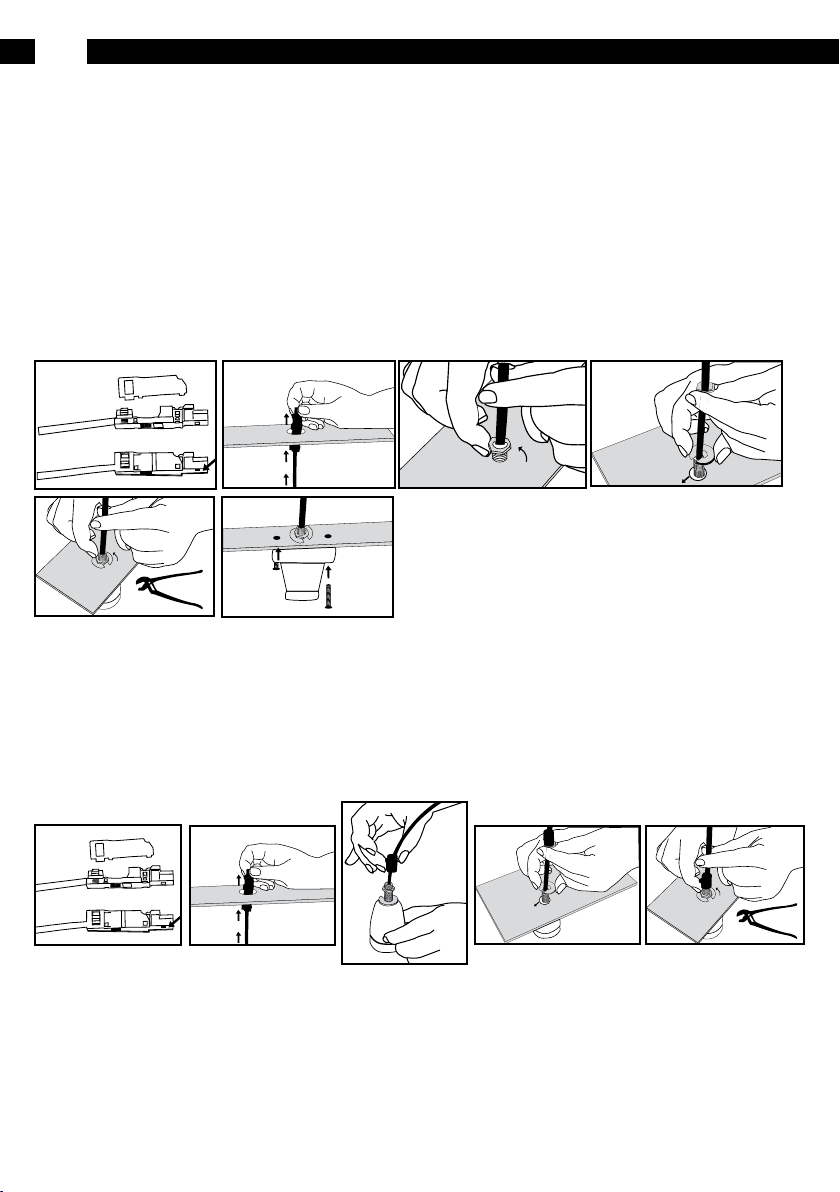
• Bei der Installation mit einer Klemme (optional erhältlich) ist auf einen sicheren
Halt zu achten. Die Leuchte darf nicht an Rohren befestigt werden!
Beachten Sie, dass Tiere ein Temperaturgefälle und Rückzugsmöglichkeiten im Ter-
rarium benötigen. Stellen Sie sicher, dass die Tiere sich aus dem Wirkungskreis der
Leuchtmittel zurückziehen können und auch kühlere Verstecke vorhanden sind. Beim
Einsatz von Leuchtmitteln mit UV-Strahlung beachten Sie bitte die Hinweise der Lam-
penhersteller.
Betrieb mit Lucky Reptile Bright Sun UV Strahlern
• Für den Betrieb der Bright Sun UV ist ein spezielles Vorschaltgerät erforderlich. Wir
empfehlen die Verwendung der Lucky Reptile Bright Control oder Bright Control
PRO Geräte
• Stecken Sie den Stecker der Fassung in die Buchse des Vorschaltgeräts
• Schrauben Sie den Bright Sun UV Strahler in die Fassung, dass ein korrekter Kontakt
hergestellt wird
• Stecken Sie den Stecker des Vorschaltgeräts in die Wandsteckdose
• Achten Sie darauf, dass die Kabellänge zwischen Fassung und Vorschaltgerät 3m
nicht überschreitet
Sicherheitshinweise
• Die Leuchte darf nicht an der Leitung aufgehängt werden. Bei HTSP-3 ist ein Hängen
nur mit entsprechender Vorrichtung zulässig.
• Die Fassung, Zuleitung, Schalter und Stecker sind regelmäßig auf Beschädigungen
zu überprüfen. Bei Beschädigungen muss die Leuchte unverzüglich außer bzw. darf
sie nicht in Betrieb genommen werden. Das Gleiche gilt, wenn die Leuchte mit
Flüssigkeiten in Berührung gekommen ist. Eine Überprüfung und gegebenenfalls
Reparatur des Gerätes muss durch einen qualifizierten Fachmann erfolgen!
• Es ist vor der Inbetriebnahme eines Gerätes generell zu prüfen, ob dieses Gerät
grundsätzlich für den Anwendungsfall, für den es verwendet werden soll, geeignet
ist! Im Zweifelsfalle sind Rückfragen bei Fachleuten, Sachverständigen oder dem
Hersteller der verwendeten Geräte notwendig!
• Die Leuchte darf nicht in Räumen mit hoher Luftfeuchtigkeit betrieben werden.
• Trennen Sie vor dem Lampenwechsel die Leuchte vom Netz.
• Es ist sicherzustellen, dass niemand in Berührung mit heißen Stellen an der Leuchte
kommen kann.
• Die Leuchte darf nur an normal entflammbaren oder an nicht brennbaren Befesti-
gungsflächen befestigt und nicht abgedeckt werden (z.B. mit einer Decke). Brandge-
fahr! Normal entflammbare Oberflächen müssen eine Entzündungstemperatur von
mindestens 200 °C aufweisen und dürfen bei dieser Temperatur weder erweichen
noch sich verformen, sie können z. B. aus Holz oder Werkstoffen auf Holzbasis mit
mehr als 2 mm Dicke bestehen.
• Zum Anschluss darf ausschließlich die vom Hersteller mitgelieferte Leitung ver-
wendet werden. Bei Austausch einer beschädigten Leitung darf nur eine spezielle
Leitung oder eine Leitung, die ausschließlich über den Hersteller oder seinen Ser-
vicevertreter erhältlich ist, verwendet werden. Vor Inbetriebnahme nach Anschluss/
Austausch der Leitung ist eine Überprüfung durch eine Fachkraft durchzuführen.
• Die Leuchte darf nicht mit UV Leuchtmitteln verwendet werden, wenn sich Men-
schen im gleichen Raum aufhalten. Schauen Sie nicht direkt in die Lampe.
Technische Daten
Betriebsspannung 230 V~ 50/60 Hz
Schaltstrom max. 1,3 A
Maximale Umgebungstemperatur: 45°C
Maximale Lampenleistung: 300 W, siehe zulässige Lampen
Sicherheitsabstand: Es gelten die Herstellerangaben der eingesetzten Leuchtmittel.
Empfohlen werden min. 50 cm
Zulässige Leuchtmittel:
Es können folgende Lampen in diesem Produkt verwendet werden:
• Reflektorlampen (Glühfaden) und Glübirnen bis 250W (z.B. Lucky Reptile Neo Sun)
• Halogen PAR Strahler bis 150W (z.B. Lucky Reptile Halogen Sun)
• UV Strahler (Mischlichtlampe mit integriertem Vorschaltgerät) bis 300W
• UV Kompaktlampen (Energiesparlampe mit integriertem Vorschaltgerät) bis 26W
(z.B. Lucky Reptile Compact UV Sun)
• Keramikheizstrahler mit E27 Sockel bis 250W (z.B. Lucky Reptile Dark Spot)
• Lucky Reptile Bright Sun UV Strahler (in Verbindung mit Bright Control Vorschalt-
gerät)
Beachten Sie bitte entsprechend die Gebrauchsanweisungen und Datenblätter der
Leuchtmittel und besonders die empfohlenen Mindestabstände zu angestrahlten
Flächen.
Garantie
Die Garantie erlischt bei Veränderung und Reparaturversuchen am Ge-
rät sowie bei Beschädigung durch Gewalteinwirkung oder unsachgemä-
ßem Gebrauch.
Es wird weder eine Gewähr noch irgendwelche Haftung für Schäden oder
Folgeschäden im Zusammenhang mit diesem Produkt übernommen.
Reparatur, Nachbesserung, Tausch gegen ein Neugerät nach Wahl des
Herstellers.
Für einen Einsatz im Terrarium wird keine Gewährleistung übernom-
men.
Im Garantiefall wenden Sie sich an Ihren Fachhändler

6
Instructions de mise en service
• L‘appareil ne peut que fonctionner à 230 V/ 50/ 60 Hz contrainte alternée.
• La température ambiante pendant le fonctionnement ne doit pas dépasser les
45° C.
• L‘appareil est destiné à l‘utilisation dans les secteurs secs et propres.
• Lors de la condensation de l‘eau , un temps d’acclimatation doit être attendu
jusqu‘à 2 heures.
• Protégez l‘appareil de humidité, de la brume et de l’effet de chaleur !
• N‘actionnez pas l‘appareil dans un endroit inflammable.
Montage:
Attention ! La Thermo Socket PRO est conçue de telle manière qu’un démontage n’est pas nécessaire dans des conditions normales. Grâce à la che
de raccordement et aux accessoires de montage livrés, le support peut être xé sans qu’une installation électrique soit nécessaire.
Les installations électriques doivent être uniquement réalisées par un spécialiste. Nous ne saurions être tenus responsables de dommages résultant
d’une installation non conforme.
3.
1. 2. 4. 5.
b.
Installation des modèles HTSP-1, HTSP-2 et HTSP-3
1.
Enlevez la partie supérieure
a.
b.
Introduisez la che de
raccordement dans le trou
2. 3. 4.
Dévissez l’écrou
Introduisez la rondelle
au-dessus du câble
Révissez l’écrou Fixez avec
les vis
5. 6.
• Enlevez la partie supérieure du boîtier de la décharge de traction de la prise.
• Percez un trou de 16 mm environ pour le passage du câble (22mm si vous n’avez pas
enlevé la partie supérieure du boîtier de la décharge de traction) sur laquelle vous
voulez fixer le support. Cette surface doit être non inflammable. Afin de bien instal-
ler la décharge de traction, l’épaisseur de la surface ne doit pas dépasser 8 mm.
• Tirez tout d’abord la fiche de raccordement et le câble jusqu’à la grande rondelle
à travers le trou.
• Dévissez l’écrou du collier de fixation et déplacez au dessus du câble la rondelle
rainurée située sous l’écrou. Fixez maintenant le collier de fixation sur la surface
en revissant et en recouvrant l’écrou.
• Pour les modèles HTSP-1 et HTSP-2, fixez le support avec les vis et les écrous livrés
au niveau de la surface. Percez deux trous de 6 mm à une distance suffisante. Le
passage des câbles doit se trouver bien au milieu.
• Pour le modèle HTSP-3, nous vous conseiller de sécuriser le système à l’aide d’une
chaîne (non incluse).
• Branchez la prise du support dans la prise femelle et le tout dans une prise mu-
rale.
a.
• Enlevez la partie supérieure du boîtier de la décharge de traction de la prise.
• Percez un trou de 16 mm environ pour le passage du câble (22mm si vous n’avez pas
enlevé la partie supérieure du boîtier de la décharge de traction) sur laquelle vous
voulez fixer le support. Cette surface doit être non inflammable. Afin de bien instal-
ler la décharge de traction, l’épaisseur de la surface ne doit pas dépasser 15 mm.
• Introduisez la fiche de raccordement puis le reste des parties du montage dans
le trou.
• Dévissez la vis de blocage au niveau de la décharge de traction et vissez la déchar-
ge de traction du tube fileté. Veillez à ce que le câble ne se torde pas.
• Introduisez la rondelle au-dessus du câble sous la décharge de traction et bloquez
le tube fileté à la hauteur souhaitée en tirant sur les écrous.
• Dévissez la décharge de traction et fixez le câble à l’aide de la vis de blocage.
• Branchez la prise du support dans la prise femelle et le tout dans une prise mu-
rale
• La douille du modèle HTSP-5 peut être orientée à volonté grâce à une articulation.
Installation des modèles HTSP-4, HTSP-5 et HTSP-6
Spécication d´utilisation
Cet appareil doit être utilisé dans des pièces fermées. Seuls les éclairages spéciés
dans le descriptif suivant devront être utilisés. Le montage devra être effectué sur
une surface normalement inammable. Une autre utilisation que celle spéciée n´est
pas permise !
Utilisation dans le terrarium
La mise en place de la lampe dans le terrarium est à vos propres risques. Le fabri-
cant n´a pas d´inuence sur les conditions dans le terrarium (humidité, température,
lieu de montage etc.) et il imcombe ainsi au consommateur d´avoir les conditions
optimales.
Enlevé la vis
de blocage
Enlevez la partie supérieure
Introduisez la che de
raccordement dans le trou
Introduisez la
rondelle au-dessus
du câble
xez la vis
de blocage
Mode d´emploi - Thermo Socket PRO
F

7
Mise en service et installation
• Visser une ampoule E27 dans la douille. Brancher le câble dans la prise.
• Vérifier qu´il y ait suffisamment d´aération afin que de petites pièces ne soient
pas surchauffées par l´utilisation de la lampe.
• L´interrupteur permet d´allumer et d´éteindre la lampe.
• Si vous fixer la lampe par une pince, veiller à ce qu´elle soit bien fixée. La lampe
ne doit pas être fixée aux tuyaux !
Veillez à ce que les animaux aient des possibilités de se retirer et que la température
soit moindre à ces endroits. Veillez à ce que les animaux puissent trouver des end-
roits plus frais pour se retirer. Dans les cas où des lampes à UV sont utilisées suivre
les indications du fabricant.
Fonctionnement avec l’émetteur de rayonnements UV Lucky
Reptile Bright Sun UV
• Pour le fonctionnement du Bright Sun UV, un appareil en amont spécial est néces-
saire. Nous vous conseillons d’utiliser les appareils Lucky Reptile Bright Control
ou Bright Control PRO.
• Fixez la prise du support dans la prise femelle de l’appareil en amont.
• Vissez l’émetteur de rayonnements Bright Sun UV dans le support afin qu’un contact
correct soit établi.
• Branchez la prise de l’appareil en amont dans la prise murale.
• Veillez à ce que la longueur du câble entre le support et l’appareil en amont ne
dépasse pas 3m.
Instructions de sécurité
• Pour le modèle HTSP-3, une suspension avec un dispositif approprié est autorisé.
• Vérifier régulièrement l´état de la douille, du câble, de l´interrupteur et de la prise.
La lampe ne doit plus être utilisée en cas de détérioration. Ceci est valable égale-
ment dans les cas où la lampe a été en contact avec des liquides. Une inspection et
éventuellement une réparation doivent être effectuées par un spécialiste.
• Avant le démarrage d‘un appareil , il faut examiner si cet appareil est approprié
pour l’utilisation voulue.
• La lampe ne doit pas être utilisée dans des pièces ayant une grande humidité
de l´air.
• Avant de changer l´ampoule débrancher la prise de courant.
• Vérifier que personne ne puisse toucher les parties chaudes de la lampe.
• La lampe doit être fixée à des surfaces non-inflammables et ne doit pas être re-
couvert (par ex. d´une couverture) Danger d´incendie! Des surfaces normalement
inflammables doivent tenir jusqu´à 200°C et ne doivent ni ramollir ni se déformer
par ex. utiliser du bois ou des matériaux à base de bois d´au moins de 2 mm
d´épaisseur.
• N´utiliser que le câble fournit par le fournisseur. En cas de changement du câble
endommagé, n´utiliser qu´un câble spécial ou fournit uniquement par le fabricant
ou un de ses représentants. Après changement du câble endommagé farie vérifier
le câble par un spécialiste.
• La lampe ne peut pas être utilisée avec des ampoules UV dans le cas où des per-
sonnes se trouveraient dans la même pièce. Ne pas regarder directement dans
la lampe.
Données techniques
Tension de marche 230 V – 50/60Hz
Courant de commutation max. 1,3 A
Température max. ambiante: 45 °C
Capacité max. de la lampe: 300 W
Distance de sécurité: Les informations indiquées par le fabricant des ampoules
devront être respectées.
Eclairages à utiliser :
Les lampes suivantes peuvent être utilisées avec ce produit.
• Réflecteurs (fil incandescent) et ampoules jusqu´ à 250 W (par ex. Lucky Reptile
Neo Sun)
• Spots halogènes PAR jusqu´à 150 W (par ex. Lucky Reptile Halogen Sun)
• Spots UV (Lampe avec éclairage mixte et dispositif intégré de pré-réglage) jusqu´à
300 W (par ex. Zoo Med PowerSun)
• Lampes UV compactes (lampe à faible consommation d´énergie avec dispositif
intégré de pré-réglage) jusqu´à 26 W (par ex. Lucky Reptile Compact UV Sun)
• Radiateur infrarouge céramique avec socle E27 jusqu´ à 250 W (par ex. Lucky Rep-
tile Dark Spot)
• Lucky Reptile Bright Sun UV (Appareil en amont séparé nécessaire)
Bien respecter les notices d´information et ches explicatives données avec les am-
poules en particulier la distance min. des surfaces éclairées.
Garantie:
La garantie expire avec une modication et des tentatives de réparation
de l‘appareil ainsi que lors des dégâts par un impact ou une utilisation
inadéquate.
Ni une garantie n‘est prise en charge des dommages en rapport avec ce
produit. Réparation, Amélioration, échange contre un autre appareil ;
sans décision du fabricant.
Aucune prestation de garantie n´est prise en charge pour une utilisation
dans le terrarium.

8
Istruzioni
• L’apparecchio può essere utilizzato solamente in 230 V / 50/60 Hz.
• Durante il funzionamento la temperatura dell’ambiente circostante non deve
superare i 45°C.
• L’apparecchio è espressamente indicato per l’uso in ambienti asciutti e puliti.
• In caso di sviluppo di condensa, bisognerà prevedere un tempo di acclimatizza-
zione di circa due ore.
• Proteggere l’apparecchio da umidità, spruzzi d’acqua e surriscaldamento!
• Da non utilizzare in presenza di gas o vapori infiammabili.
Montaggio:
Attenzione! Il Thermo Socket PRO è stato sviluppato in modo tale da non richiedere uno smontaggio in condizioni normali. Grazie al collegamento a
spina e gli accessori per il montaggio forniti il portalampade può essere ssato senza la necessità di una elettro-installazione.
Un’elettroinstallazione può essere eseguita solo da parte di uno specialista qualicato. Per danni causati da un’installazione non corretta non si
assume alcuna responsabilità.
3.
1. 2. 4. 5.
b.
Installazione modelli HTSP-1, HTSP-2 & HTSP-3
1.
Rimuovere la parte
superiore
a.
b.
Introdurre nel foro prima il
collegamento a spina
2. 3. 4.
Allentare il dado
Inserire la rondella
sul cavo
Riavvitare il dado
Fissare alla supercie
mediante el viti e i dati
5. 6.
• Rimuovere la parte superiore dell’alloggiamento del dispositivo antitrazione della
spina.
• Praticare per il passaggio del cavo un foro di circa 16mm (22mm se la parte
superiore dell’alloggiamento del dispositivo antitrazione non viene rimossa) nella
superficie sulla quale si desidera il portalampada. La superficie deve essere dif-
ficilmente e normalmente infiammabile. Per installare il dispositivo antitrazione
correttamente lo spessore della superficie non deve superare i 8 mm.
• Introdurre il collegamento a spina e il cavo nel foro fino alla rondella più grande.
• Allentare il dado del dispositivo antitrazione e sotto al dado inserire la rondella
tagliata sopra il cavo. Ora fissare il dispositivo antitrazione avvitando e stringendo
il dado sulla superficie.
• Per i modelli HTSP-1 e HTSP-2 fissare ora il portalampade alla superficie mediante
le viti e i dati forniti. A tale scopo praticare due fori di 6mm con la distanza corretta.
Il passaggio dei cavi deve essere centrata rispetto ai fori.
• Per il modello HTSP-3 consigliamo il bloccaggio con una catena o simili (non for-
nita).
• Inserire la spina del portalampade nella presa della conduttura elettrica e
quest’ultimo in una presa di corrente a muro.
a.
• Rimuovere la parte superiore dell’alloggiamento del dispositivo antitrazione della
spina.
• Praticare per il passaggio del cavo un foro di circa 16mm (22mm se la parte
superiore dell’alloggiamento del dispositivo antitrazione non viene rimossa) nella
superficie sulla quale si desidera il portalampada. La superficie deve essere dif-
ficilmente e normalmente infiammabile. Per installare il dispositivo antitrazione
correttamente lo spessore della superficie non deve superare i 15mm.
• Introdurre nel foro prima il collegamento a spina e poi il resto delle parti di mon-
taggio.
• Allentare la vite di bloccaggio sul dispositivo antitrazione e svitare il dispositivo
antitrazione dal tubo filettato. Fare attenzione che il cavo non si attorcigli.
• Inserire la rondella sul cavo sotto al dispositivo antitrazione e bloccare il tubo
filettato all’altezza desiderata stringendo i dadi.
• Riavvitare il dispositivo antitrazione e bloccare il cavo mediante la vite di bloc-
caggio.
• Inserire la spina del portalampade nella presa della conduttura elettrica e
quest’ultimo in una presa di corrente a muro.
• Il modello HTSP-5 prevede l’orientamento secondo i propri desideri grazie ad un
giunto flessible.
Installazione modelli HTSP-4, HTSP-5 & HTSP-6
Modo d’uso
L’apparecchio è per esclusivo utilizzo all’interno. Utilizzare solo lampade come de-
scritto in questo contesto. Il montaggio deve essere eseguito su di una supercie a
luminosità normale. Non è consentito un utilizzo diverso da quello prescritto !
Utilizzo in terrario
L’assemblaggio del riettore nel terrario è a vostro pericolo. Poiché il produttore
non è in grado di determinare le condizioni del terrario (livello di umidità dell’aria,
temperatura, luogo di allestimento, etc.), spetterà all’utilizzatore nale creare le
condizioni ottimali di installazione.
svitare il
dispositivo
antitrazione dal
tubo lettato
Rimuovere la parte superiore
Introdurre nel foro prima il
collegamento a spina
Inserire la rondella
sul cavo
Riavvitare il dispo-
sitivo antitrazione
Manuale d’uso - Thermo Socket PRO
IT

9
Accensione e funzionamento
• Avvitare la fonte luminosa nel portalampada E27. Inserire il cavo nella presa
adatta.
• Negli ambienti piccoli accertarsi sempre che ci sia una buona aerazione affinché il
riflettore non scaldi in modo eccessivo durante il funzionamento.
• Il riflettore può essere acceso o spento grazie all’interruttore.
• Se viene installato un morsetto (disponibile come optional) verificare che sia posi-
zionato in maniera stabile. Non fissare il riflettore su tubi !
Tenere presente che gli animali del terrario hanno bisogno di dislivelli di temperatura
e possibilità di ritirarsi. Accertarsi che agli animali sia data la possibilità di uscire dal
raggio di azione delle luci e che possano avere a disposizione zone in cui nascondersi.
Se vengono installati apparecchi a raggi UV osservare le indicazioni del produttore.
Funzionamento con radiatore UV Lucky Reptile Bright Sun
• Per il funzionamento dei radiatori UV Bright Sun è necessario un alimentatore
speciale. Consigliamo l’utilizzo degli apparecchi Lucky Reptile Bright Control o
Bright Control PRO
• Inserire la spina del portalampade nella presa dell’adattatore
• Avvitare il radiatore UV Bright Sun nel portalampade, in modo tale da creare un
contatto corretto
• Inserire la spina dell’adattatore nella presa del muro
• Fare attenzione che la lunghezza del cavo tra il portalampade e l’adattatore non
superi i 3m
Norme di Sicurezza
• Per il modello HTSP-3 utilizzare un gancio con relativa attrezzatura.
• Verificare frequentemente che la montatura, il cavo di alimentazione e la spina non
siano in alcun modo danneggiati. In caso di danni la lampada deve essere spenta
o messa fuori funzionamento. Lo stesso dicasi nel caso in cui la lampada venga
a contatto con liquidi. Manutenzioni o riparazioni dell’apparecchio devono essere
eseguiti da uno specialista !
• Prima dell’utilizzo di un apparecchio, verificare che sia effettivamente adatto ed
indicato per l’uso che se ne intende fare!
• Non utilizzare la lampada in luoghi ad alta concentrazione di umidità.
• Prima di ogni sostituzione della lampada staccare la spina della rete.
• Accertarsi che nessuno possa in alcun modo venire a contatto con i punti più caldi
della lampada.
• La lampada deve essere fissata solo ad una superficie scarsamente infiammabile
o ignifuga. Non deve venire coperta (per esempio con una coperta). Pericolo di
incendio ! Superfici normalmente infiammabili devono sopportare un temperatura
di infiammabilità di almeno 200°C e non devono né ammorbidirsi né deformarsi,
devono per esempio essere composti di legno o di materiali con una base di legno
di almeno 2 mm di spessore.
• Per il collegamento alla rete utilizzare esclusivamente il cavo fornito dal produtto-
re. In caso di sostituzione utilizzare solo cavi appositi o cavi messi a disposizione
dal produttore o dal suo servizio clienti. Prima della messa in funzione o dopo la
sostituzione del cavo fare eseguire un controllo da un tecnico specializzato.
• Non utilizzare lampade con sistemi di illuminazione UV se nella stessa area sosta-
no persone. Non osservare mai direttamente la lampada.
Dati tecnici
Tensione nominale 230 V~ 50/60 Hz
Tensione di innesto : max. 1,3 A
Temperatura massima dell’ambiente : 45°C
Potenza massima lampada: 300 W (vedere tabella dei sistemi di illuminazione prescritti)
Distanza di sicurezza :: Valgono i dati del produttore sugli impianti di illuminazione installati
Sistemi di illuminazione prescritti .
Con questo prodotto possono essere utilizzate le seguenti fonti di illumninazione:
• Riflettori (a incandescenza) e lampadine fino a 250W (per es. Lucky Reptile Neo
Sun)
• Faretti alogeni fino a 150W (per es. l’alogena Lucky Reptile Halogen Sun)
• Faretti UV (lampade a luce mista con interruttore integrato) fino a 300W
• Lampade compatte UV (lampade a risparmio energetico con interruttore integrato)
fino a 26W (es. Lucky Reptile Compact UV Sun)
• Faretti ceramici riscaldanti con attacco tipo E27 fino a 250W (es. Lucky Reptile
Dark Spot)
• Radiatore UV Lucky Reptile Bright Sun (è necessario un adattatore separato)
Seguire scrupolosamente quanto descritto nelle istruzioni e nelle tabelle dati dei sis-
temi di illuminazione e in particolare attenersi alle distanze di sicurezza prestabilite
dalle superci irradiate.
Garanzia
La garanzia decade in caso di modiche, manomissioni, danneggiamenti,
tentativi di riparazione o utilizzo non corretto dell’apparecchio.
Non sono riconosciuti i danni o le responsabilità causati dall’apparecchio.
La scelta di riparare, migliorare, o sostituire l’apparecchio con uno nuovo
compete esclusivamente al produttore.
Non viene riconosciuta alcuna garanzia per l’utilizzo in terrario.

10
Condiciones de empleo
• El equipo solamente debe ser usado con tensión alterna de 230 V / 50.60 Hz.
• La temperatura del ambiente permitida no debe sobrepasar 45°C durante el ser-
vicio.
• El equipo está destinado al uso en sitios secos y limpios.
• Al formarse agua de condensación, hay que esperar un período de aclimatación
hasta dos horas.
• Tenga Ud. cuidado a que el equipo no tenga contacto con humedad, agua y calor!
• No uitlice Ud. el equipo en un ambiente donde se produzcan o puedan producirse
gases o vapores inflamables.
Montaje:
Atención: El Thermo Socket PRO está desarrollado de tal manera que no es usualmente necesario desmontarlo. Gracias a la unión enchufable y los
accesorios de montaje suministrados puede jarse el engaste, sin que sea necesario instalar sistema eléctrico alguno.
La instalación de sistemas eléctricos sólo la deben realizar electricistas cualicados. No nos responsabilizamos de daños ocasionados por una in-
stalación inadecuada.
3.
1. 2. 4. 5.
b.
Instalación de los modelos HTSP-1, HTSP-2 y HTSP-3
1.
Extraer la parte superior
a.
b.
Pasar la unión enchufable
2. 3. 4.
Soltar la tuerca
Deslizar la arandela por
encima del cable
Fijar la tuerca Fijar con los
tornillos
5. 6.
• Extraer la parte superior del armazón de la descarga de tracción del enchufe.
• Taladrar un orificio de aprox. 16 mm en la superficie para el paso del cable, donde
desee fijar el engaste (de 22 mm si no se extrae la parte superior del armazón de la
descarga de tracción). La superficie debe ser normal o difícilmente inflamable. Para
poder instalar correctamente la descarga de tracción, el grosor de la superficie no
debería superar los 8 mm.
• Pasar primero la unión enchufable y el cable hasta la arandela grande a través
del orificio.
• Soltar la tuerca de la descarga de tracción y deslizar por debajo de la tuerca la
arandela ranurada por encima del cable. Fijar ahora la descarga de tracción a la
superficie, desatornillando y apretando para ello la tuerca.
• En el caso de los modelos HTSP-1 y HTSP-2, fijar ahora el engaste a la superficie con
los tornillos y las tuercas suministradas. Taladrar para ello dos orificios de 6 mm a
una distancia adecuada. El cable debería pasar por el centro.
• El modelo HTSP-3 recomendamos asegurarlo con una cadena o cosa parecida (no
incluida).
• Colocar el enchufe del engaste en el casquillo de la alimentación de corriente y
enchufarlo a una caja de empalme.
a.
• Extraer la parte superior del armazón de la descarga de tracción del enchufe.
• Taladrar un orificio de aprox. 16 mm en la superficie para el paso del cable, donde
desee fijar el engaste (de 22 mm si no se extrae la parte superior del armazón de la
descarga de tracción). La superficie debe ser normal o difícilmente inflamable. Para
poder instalar correctamente la descarga de tracción, el grosor de la superficie no
debería superar los 15 mm.
• Pasar primero la unión enchufable, y luego el resto de las piezas de montaje por
el orificio.
• Soltar el tornillo de fijación de la descarga de tracción y desatornillar ésta del tubo
roscado. Procurar que no se torsione el cable.
• Deslizar la arandela por encima del cable, debajo de la descarga de tracción, y
enclavar el tubo roscado a la altura deseada, apretando para ello las tuercas.
• Volver a desatornillar la descarga de tracción, y enclavar el cable con el tornillo
de fijación.
• Colocar el enchufe del engaste en el casquillo de la alimentación de corriente y
enchufarlo a una caja de empalme.
• Con el modelo HTSP-5, puede orientar el soporte como usted quiera gracias a una
articulación.
Instalación de los modelos HTSP-4, HTSP-5 y HTSP-6
Uso correcto
El uso correcto del aparato consiste en un servicio en localidades cerrados. Como u-
orescentes son admitidos solamente lámparas del tipo mencionado en las instruccio-
nes presentes. El montaje ha de ser llevado a cabo en una supercie de inamabilidad
normal. Otro n de empleo que el citado no está admitido!
Empleo en el terrario
El montaje de la lámpara en el terrario se hace a propio riesgo. En las condiciones
dentro del terrario (como la humedad del aire, temperatura, lugar del montaje, etc.) la
entidad fabricante no tiene inuencia, así que es tarea exclusiva del empleador crear
condiciones de empleo óptimas.
desatornillar
la descarga
de tracción
Extraer la parte superior
Pasar la unión enchufable
Deslizar la aran-
dela por encima
del cable
Volver a desatornil-
lar la descarga de
tracción
Guia de Empleo - Thermo Socket PRO
ES

11
Puesta en servicio y servicio
• Atornille Ud. un fluorescente en el portalámparas E 27. Introduzca el cable de
alimentación en un enchufe adecuado.
• Compruebe que la ventilación sea suficiente, para que sitios más pequeños no se
calienten excesivamente a causa del empleo de la lámpara.
• Por medio del interruptor se puede encender y apagar la lámpara.
• En caso de realizar la instalación con una pinza (adquirible opcionalmente!), es
imprescindible comprobar que el apoyo sea estable. No está permitido fijar la
lámpara en tubos!
Tenga Ud. en cuenta que los animales necesiten variaciones de temperatura así como
posibilidades de retirada dentro del terrario. Asegúrese que los animales puedan
retirarse del ámbito de eciencia de los uorescentes y encuentren escondrijos más
frescos. En caso de empleo de uorescentes observe Ud. las advertencias del fabri-
cante de las lámparas.
Funcionamiento con focos Lucky Reptile Bright Sun UV
• Para hacer funcionar el Bright Sun UV, es necesario un reactor especial. Recomenda-
mos usar los aparatos Lucky Reptile Bright Control o Bright Control PRO.
• Colocar el enchufe del engaste en el casquillo del reactor.
• Atornillar el foco Bright Sun UV al engaste, de forma que se realice un contacto
correcto.
• Colocar el enchufe del reactor en una caja de empalme.
• Procurar que el cable entre el engaste y el reactor no supere una longitud de 3 m.
Avisos de seguridad
• El modelo HTSP-3 puede ser colgado, siempre que se utilice un accesorio corre-
spondiente.
• El portalámpara, el cable de alimentación, los interruptores así como los enchufes
deben ser examinados respecto a defectos y daños. En caso de defectos, la lámpara
tiene que ser inmediatamente puesta fuera de servicio, respectivamente no debe
ser puesta en servicio. Lo mismo vale en caso de que la lámpara tuviera contacto
con líquidos.Inspecciones y reparaciones eventuales del equipo son tarea exclusiva
de un especialista profesional y calificado!
• Antes de la puesta en servicio del equipo hay que controlar si este equipo es adecu-
ado y apto en general para el caso de empleo, para el que está previsto!
• La lámpara no debe ser empleada en sitios con un alto grado de humedad del
aire.
• Antes de cambiar la lámpara, desconecte Ud. el equipo de la red eléctrica.
• Es preciso prevenir que nadie pueda tocar las areas calientes de la lámpara y por
lo tanto sufrir quemaduras.
• La lámpara sólo debe ser sujetada en superficies normalmente inflamables, re-
spectivamente no inflamables, y no debe ser cubrida con alguna cosa (p.e. con una
manta!). Existe peligro de incendio! Superficies no altamente inflamables tienen
que tener una temperatura de inflamación que no es por debajo de 200°C. Estas
superficies no deben ablandarse o deformarse a consecuencia de estas tempera-
turas; p. e. pueden consistir en madera o materiales en base de madera con un
espesor de más de 2mm.
• Para fines de conexión a la red eléctrica sólo hay que emplear el cable sumi-
nistrado. Un cable defectuoso sólo debe ser recambiado por un cable indicado o
por uno que exclusivamente es adquirible a través de la entidad fabricante o por
representantes de servicio. A continuación de la conexión/del recambio del cable/
y antes de una nueve puesta en servicio es preciso llevar a cabo una revisión,
realizada por un especialista.
• La lámpara no debe ser utilizada con fluorescentes ultravioletas siempre que se
encuentren personas en la misma localidad. Evite Ud. mirar directamente a la
lámpara!
Datos técnicos
Tensión de servicio 230 V~ 50/60 Hz
Intensidad de conexión max. 1,3 A
Temperatura del ambiente máxima: 45°C
Potencia de lámpara máxima: 300 Watt (Observe Ud. la tabla que contiene los uorescentes admitidos)
Distancia de seguridad: Véanse los datos del fabricante referente a los
medios uorescentes empleados
Fluorescentes admitidos:
Se puede utilizar las siguientes lámparas junto con este producto:
• Lámparas reflectoras (Filamento incandescente) y bombillas hasta 250W (p.e. Lucky
Reptile Neo Sun)
• Proyector de halógeno PAR hasta 150W (p.e. Lucky Reptile Halogen Sun)
• Proyector de rayos ultravioleta (Lámpara de luz compuesta con aparato intercalado
integrado) hasta 300W
• Lámparas compactas de rayos ultravioleta (Lámpara de ahorro energético con apa-
rato intercalado integrado) hasta 26W (p.e. Lucky Reptile Compact UV Sun)
• Radiador de cerámica con portalámparas E 27 hasta 250W (p.e. Lucky Reptile Dark
Spot)
• Lucky Reptile Bright Sun UV (es necesario un reactor separado)
Observen Uds. las instrucciones de servicio así como los datos particulares de los
uorescentes. Tengan en cuenta en particular las distancias mínimas recomendadas
a las supercies radiadas.
Garantía
La garantía caduca en caso de modicaciones técnicas e intentos de re-
paraciones del equipo así como en caso de deterioros y daños a causa de
fuerza o uso impropio.
No se garantiza ni se responsabiliza de cualquier forma de daños o daños
consecutivos en relación con este producto. Reparaciones, retoques, cam-
bios contra un equipo nuevo se arreglan a elección del productor.
No se asumen ni la garantiá ni la responsabilidad del empleo del equipo
en el ámbito del terrario.

12
Betriebsbedingungen
• U mag het toestel enkel laten werken met een wisselspanning van 230V/
50/60Hz.
• De toegestane omgevingstemperatuur mag tijdens het gebruik niet hoger dan
45°C zijn.
• Het toestel is bedoeld voor gebruik in droge en schone ruimtes.
• Bij de vorming van gecondenseerd water moet een acclimatiseringstijd afgewacht
worden van tot en met 2 uren.
• Bescherm het toestel tegen vochtigheid, waterspatten en hitte!
• Gebruik het apparaat niet in omgevingen waar brandbare gassen/dampen zijn of
zouden kunnen zijn.
Montage:
Opgelet! De Thermo Socket PRO is zo ontwikkeld, dat een demontage onder normale omstandigheden niet noodzakelijk is. Door de steekverbinding
en de meegeleverde montagetoebehoren kan de tting worden bevestigd, zonder dat een elektrische installatie noodzakelijk is.
Een elektrische installatie mag alleen door een gekwaliceerde vakman worden uitgevoerd. Voor schade door ondeskundige installatie zijn wij niet
aansprakelijk.
3..
1. 2. 4. 5.
b.
Installatie modellen HTSP-1, HTSP-2 en HTSP-3
1.
Neem het bovenste gedeelte
a.
b.
Voer de steekverbinding
door het gat
2. 3. 4.
Los de moer Schuif het onderlegplaatje
over de kabel
Fixeer de moer Bevestigt met
de schroeven
5. 6.
• Neem het bovenste gedeelte van het trekontlastingshuis van de stekker af.
• Boor voor de kabeldoorvoer een ca. 16mm groot gat (22mm als het bovendeel
van het trekontlastingshuis niet wordt verwijderd) in de oppervlakte waaraan u de
fitting wilt bevestigen. De oppervlakte moet normaal of zwaar ontvlambaar zijn.
Opdat de trekontlasting correct geïnstalleerd kan worden, mag de dikte van de
oppervlakte 8 mm niet overschrijden.
• Schuif eerst de steekverbinding en de kabel tot de grote onderlegschijf door het
gat.
• Los de moer van de snoerontlasting en schuif onder de moer de doorkliefde on-
derlegschijf over de kabel. Fixeer nu de snoerontlasting door de moer aan het
oppervlak vast te schroeven.
• Bij de modellen HTSP-1 en HTSP-2 bevestigt u de fitting nu met de meegeleverde
schroeven en moeren aan de oppervlakte. Boor hiervoor twee 6mm gaten in de
juiste afstand. De kabeldoorvoer moet daarbij centrisch zijn.
• Voor het model HTSP-3 bevelen wij de beveiliging met een ketting of iets dergelijks
aan (behoort niet tot de levering).
• Steek de stekker van de fitting in de bus van de stroomtoevoer en deze in een
wandcontactdoos.
a.
• Neem het bovenste gedeelte van het trekontlastingshuis van de stekker af.
• Boor voor de kabeldoorvoer een ca. 16mm groot gat (22mm als het bovendeel
van het trekontlastingshuis niet wordt verwijderd) in de oppervlakte waaraan u de
fitting wilt bevestigen. De oppervlakte moet normaal of zwaar ontvlambaar zijn.
Opdat de trekontlasting correct geïnstalleerd kan worden, mag de dikte van de
oppervlakte 15mm niet overschrijden.
• Voer eerst de steekverbinding en dan de rest van de montagedelen door het gat.
• Draai het arrêt aan de trekontlasting los en schroef de trekontlasting van de draad-
buis los. Let erop dat de kabel niet wordt verdraaid.
• Schuif het onderlegplaatje over de kabel onder de trekontlasting en arrêteer de
draadbuis op de gewenste hoogte door aandraaien van de moeren.
• Schroef de trekontlasting weer op en arrêteer de kabel met het arrêt.
• Steek de stekker van de fitting in de bus van de stroomtoevoer en deze in een
wandcontactdoos.
• Bij model HTSP-5 kan de fitting naar believen gericht worden dankzij de beweeg-
bare koppeling.
Installatie modellen HTSP-4, HTSP-5 en HTSP-6
Het gebruik volgens de bepalingen
Het apparaat moet volgens de bepalingen in gesloten ruimtes worden gebruikt. Als
lichtmiddel zijn alleen lampen toegestaan zoals de in deze handleiding aangegeven
lampen. Het apparaat moet worden gemonteerd op een normaal brandbaar opperv-
lak. Een ander gebruik dan hier aangegeven is niet toegestaan!
Gebruik in terrarium
De montage van de lamp in het terrarium is op eigen risico. Op de omstandigheden
in het terrarium (luchtvochtigheid, temperatuur, plaats van montage, etc.) heeft de
fabrikant geen invloed zodat het de taak van de consument is om voor optimale
gebruiksvoorwaarden zorg te dragen.
schroef de
trekontlas-
ting van de
draadbuis
los
Neem het bovenste gedeelte
Voer de steekverbinding
door het gat
Schuif het
onderlegplaatje
over de kabel
Schroef de
trekontlasting
Handleiding - Thermo Socket PRO
NL

13
Gebruik
• Schroef een lamp in de E27 fitting. Stop de leiding in een geschikt stopcontact.
• Zorg voor voldoende ventilatie zodat zich kleine ruimtes door het gebruik van de
lamp niet gevaarlijk sterk verwarmen.
• Middels de schakelaar kan de lamp aan en uit worden gezet.
• Bij de installatie met een klem (optioneel verkrijgbaar) is voor een veilige bevesti-
ging te zorgen. De lamp mag niet aan buizen worden bevestigd!
Let erop dat dieren in het terrarium een temperatuurniveauverschil en mogelijkheden
voor terugtrekking nodig hebben. Zorg ervoor dat de dieren zich uit de warmtezone
van de lamp kunnen terugtrekken, en dat er ook koelere verstopplaatsen beschik-
baar zijn. Voor het gebruik van lichtmiddelen met UV-straling dient u de aanwijzingen
van de lampenfabrikant in acht te nemen.
Bedrijf met Lucky Reptile Bright Sun UV stralers
• Voor het bedrijf van de Bright Sun UV is een speciaal voorschakelapparaat noodz-
akelijk. Wij raden aan de Lucky Reptile Bright Control of Bright Control PRO appa-
raten te gebruiken
• Steek de stekker van de fitting in de bus van het voorschakelapparaat
• Schroef de Bright Sun UV straler in de fitting, zodat een correct contact tot stand
wordt gebracht
• Steek de stekker van het voorschakelapparaat in de wandcontactdoos
• Let erop dat de kabellengte tussen fitting en voorschakelapparaat 3m niet over-
schrijdt
Veiligheidsaanwijzingen
• De lamp mag niet aan de leiding worden opgehangen. Bij HTSP-3 is het ophangen
met de passende installatie wel toegestaan.
• De fitting, leiding, schakelaar en stekker zijn regelmatig op beschadigingen te con-
troleren. In het geval van beschadigingen moet de lamp onmiddellijk buiten respec-
tievelijk niet in werking worden gesteld. Hetzelfde geldt voor het geval dat de lamp
met vloeistoffen in aanraking is gekomen. Een controle en indien nodig reparatie
van het apparaat moet door een gekwalificeerde vakman worden uitgevoerd!
• Vóór het eerste gebruik van het apparaat dient altijd gecontroleerd te worden of
het apparaat principieel geschikt is waarvoor het gebruikt zal worden! In het geval
van twijfel zijn wedervragen bij vakmensen, deskundigen of de fabrikant van het
gebruikte apparaat noodzakelijk!
• De lamp mag niet in ruimtes met een hoge luchtvochtigheid worden gebruikt.
• Haal voor het wisselen van de lamp de stekker uit het stopcontact.
• Vermijd contact met hete gedeeltes van de lamp.
• De lamp mag alleen aan normaal ontvlambare of aan niet brandbare bevesti-
gingsvlakken worden bevestigd en mag niet worden afgedekt (bijv. met een deken).
Brandgevaar! Normaal ontvlambare oppervlakken moeten een ontstekingstempe-
ratuur van minmaal 200°C hebben en mogen bij deze temperatuur niet week wor-
den en niet vervormen. Oppervlakken kunnen bijv. uit hout of uit werkstoffen op
houtbasis van meer dan 2mm dikte bestaan.
• Voor het aansluiten mag uitsluitend de van de fabrikant meegeleverde leiding wor-
den gebruikt. Bij vervanging van een beschadigde leiding mag alleen een speciale
leiding of een leiding die uitsluitend via de fabrikant of diens servicevertegen-
woordiger verkrijgbaar is, worden gebruikt. Vóór de ingebruikname na aansluiting/
vervanging van de leiding is een controle door een vakman uit te voeren.
• De lamp mag niet met UV lichtmiddelen worden gebruikt als ook mensen in dezelf-
de ruimte verblijven. Kijk niet direct in de lamp.
Technische data
Bedrijfsspanning 230 V~ 50/60 Hz
Schakelelektriciteit max. 1,3 A
Maximale omgevingstemperatuur 45°C
Maximale lampvermogen 300 W (let op tabel met toegestane lichtmiddelen)
Veiligheidsafstand Het gelden de gegevens van de fabrikant van de gebruikten lichtmiddelen.
Toegestane lichtmiddelen
De volgende lampen kunnen in dit product worden gebruikt:
• Reflectorlampen (gloeidraad) en gloeilampen tot 250W (bijv. Lucky Reptile Neo
Sun)
• Halogeen PAR spots tot 150W (bijv. Lucky Reptile Halogen Sun)
• UV spot (mixlichtlamp met geïntegreerd voorschakelapparaat) tot 300W
• UV compactlampen (energiespaarlamp met geïntegreerd voorschakelapparaat) tot
26W (bijv. LR Compact UV Sun)
• Ceramieke warmtespots met E27 voetstuk tot 250W (bijv. Lucky Reptile Dark Spot)
• Lucky Reptile Bright Sun UV (afzonderlijk voorschakelapparaat noodzakelijk)
Let op de bijbehorende handleidingen en databladen van de lichtmiddelen en in het
bijzonder op de geadviseerde minimumafstand ten opzichte van de bestraalde vl-
akken.
Garantie
De garantie vervalt bij verandering en reparatiepogingen aan het ap-
paraat, evenals bij beschadiging door invloed van geweld of onjuist ge-
bruik van het product.
De fabrikant staat niet in en stelt zich niet aansprakelijk voor schade
of gevolgschade in verband met dit product. Reparatie, bijwerking, ruil
tegen een nieuw apparaat naar keuze van de fabrikant.
Voor een gebruik in het terrarium stelt de fabrikant zich niet aanspra-
kelijk.

Lucky Reple
Lucky Reple
Lucky Reple Lucky Reple
HTSP- (1 - 6)
HTSP- (1 - 6)
HTSP- (1 - 6) HTSP- (1 - 6)
A++
A+
A
B
C
D
E
A++
A+
A
B
C
D
E
A++
A+
A
B
C
D
E
A++
A+
A
B
C
D
E
A++
A+
A
B
C
D
E
A++
A+
A
B
C
D
E
874/2012
874/2012
874/2012 874/2012
874/2012 874/2012
This luminaire is
compable with bulbs
of the energy classes:
Esta luminaria es
compable con
bombillas de las clases
energécas:
Diese Leuchte ist ge-
eignet für Leuchtmiel
der Energieklassen:
Questo disposivo
è compabile con
lampadine di classi
energeche:
Ce luminaire est
compable avec des
ampoules des classes
énergéques
In deze armatuur
passen lampen von
energieklassen:

15
Lucky Reptile
August-Jeanmaire-Straße 12
D-79183 Waldkirch
Germany
www.lucky-reptile.com
Distributed by:
Bei Garantieansprüchen oder Reparaturen wenden Sie sich an Ihren Fachhändler.
In case of warranty claims or repairs contact your specialist dealer.
Avec des exigences de garantie, veuillez vous adresser à votre commerçant spécialisé pour d’éventuelles réparations.
En caso de reclamaciones, reivindicaciones de garantía o reparaciones, diríjanse a su especialista.
In caso di richieste in garanzia o di sostituzioni rivolgersi al proprio rivenditore di zona.
Bij recht op waarborg of herstelling gelieve zich te wenden tot uw speciaalzaak.
D
NL
IT
GB
FR
ES
Garantiekarte / Warranty Card
Bitte bei Defekt ausfüllen
In case of Malfunction please ll out
Name
Straße / Street
PLZ / Zip Code Ort / City
Land / Country
Telefon / Phone
Fax
Email
Kaufdatum / Purchasing Date:
(bitte Nachweis beilegen / please attach proof)
Gekauft bei / Purchased from:
Fehlerbeschreibung / Description of Problem:
(bitte so genau wie möglich / as accurate as possible please)
Anmerkungen / other Comments:

Lucky Reptile
August-Jeanmaire-Straße 12
D-79183 Waldkirch
Germany
www.lucky-reptile.com
Distributed by:
Explanation of used Symbols:
CE-Kennzeichnung gem. Richtlinien 73/23/EWG („Niederspannungsrichtlinie“) in Verbindung mit 90/683/EWG
CE-marking according to directives 73/23/EWG („low voltage directive“) in conjunction with 90/683/EWG
Indications CE selon les normes 73/23/EWG en relation avec 90/683/EWG
Señalización comunitária con arreglo a las normas 73/23/CEE (“Norma de baja tensión”), en relación con 90/683/CEE
Marchio CE in conformità alle disposizioni 73/23/EWG (Direttive sulla bassa tensione) relative alla 90/683/EWG.
CE-kenmerk overeenkomstig de richtlijnen 73/23/EWG (“laagspanningsrichtlijn”) in verband met 90/683/EWG
Schutzklasse II
Protection class II
Classe de protection II
Categoría protegida II
Classe di protezione II
Beveiligingsklasse II
Achtung, Begleitpapiere beachten
Attention, pay regard to the accompanying documents
Attention! faire attention aux papiers d´accompagnement
Atención! Observen la documentación anexa a la mercancía
Attenzione, leggere la documentazione allegata
Attentie! Let op begeleidende documenten
Leuchten, geeignet zur Montage auf normal entammbaren Befestigungsächen
Lamps, suited for installation on ame resistant surfaces
Lampes pouvant être xées sur des surfaces normalement inammables.
Lámparas aptas para el montaje en supercies de sujeción no altamente inamables
Luci adatte alla installazione su superci di ssaggio a normale inammabilità
Lampen, geschikt voor montage op normaal ontvlambare bevestigingsvlakken
Table of contents
Languages:
Other Lucky Reptile Accessories manuals
Popular Accessories manuals by other brands

Omron
Omron E3V3 Commissioning and maintenance guide

Pepperl+Fuchs
Pepperl+Fuchs UC6000-30GM-2EP-IO-V15 quick start guide

Jung
Jung DS 4092 TS Product documentation

Jaypro Sports
Jaypro Sports CV553B Assembly instructions and owner's manual

Racelogic
Racelogic VBSS100SL quick start guide

American Standard
American Standard Acrylux 36" x 36" Shower Kit 3636Y1K.ST Specification sheet