manuals.online logo
Brands
  1. Home
  2. •
  3. Brands
  4. •
  5. Luma Surveillance
  6. •
  7. Camera Accessories
  8. •
  9. Luma Surveillance LUM-MNT-PND-FISH User manual

Luma Surveillance LUM-MNT-PND-FISH User manual

Pendant Mount for Fisheye Cameras
Version 180207-0830
Introduction
Before you start, ensure that the hardware is in good condition and all
assembly parts are included.
Check that the mounting surface is strong enough to withstand three
times the weight of the mount and camera.
If installing on a cement surface, use the included expansion anchors to
install the mount. If installing on a wood surface, use self-tapping wood
screws (not included) to secure the mount.
Take care that all equipment is powered o during installation.
Caution! To avoid damaging your camera lens during installation, keep it
away from walls and other objects. Do not remove the protective coating
from the sheye until aer the camera is installed.
If the product does not assemble properly, contact technical support.
Box Contents
}Base with gasket
}Cap with gasket
}2 extenders
}4 cement anchors
}4 locking screws
}3 screws to mount the camera
Other Required Equipment
}Fisheye camera
}Phillips screwdriver (for mounting screws)
}Monkey wrench (for cement anchors)
}Small standard screwdriver (for locking screws)
Pendant Mount
Surveillance Accessory
for Fisheye Cameras
Installation
Manual
Compatibility
is can be used only with the Luma Surveillance 500-series sheye
camera. It does not work with any other Luma camera.
Pendant Mount for Fisheye Cameras
Version 180207-0830
Attach the Camera
Remove the skirt from the sheye camera. Install an SD card if desired.
Insert the three mounting screws into the cap loosely.
read the cables through the cap. Align the camera mounting grooves
with the screws, then rotate the camera to lock it into place.
Tighten the mounting screws to secure the camera. Replace the skirt.
Install the Base
You may need to modify the mount gasket before installation.
If you will be running your wires through the side of the base, trim
the tab from the rubber gasket so the wires can exit the mount.
If you will be running your wires through the mounting surface, no
modications are necessary.
Drill pilot holes as needed, (as well as a cable hole if desired). If attaching
to a wood surface, using standard wood screws to attach the mount base.
If using the expansion bolts, remove the nut, locking washer, and at
washer from each bolt. Insert the expansion bolts into the pilot holes.
Align the mount base with the bolts, then reattach the at washer, locking
washer, and nut. Tighten each nut securely.
Add the desired number of extenders, pulling the wires from your
surveillance system through each. Aer adding each extender, insert and
tighten a locking screw to secure it.
Connect the sheye cables to the system, attach the dome to the extender,
then insert and tighten a locking screw.
Weatherproofing
While the gaskets provided both help block moisture, we recommend you
run a silicone bead between the mount and the mounting surface, as well
as around the wire (if you cut the gasket tab for on-wall wire placement).
Support
If you need help, email TechSupport@SnapAV.com. For more
information, instructional videos, support documentation, or ideas, visit
our website.
5-Year Limited Warranty
is Luma Surveillance™ product has a 5-Year Limited Warranty. is warranty includes parts and
labor repairs on all components found to be defective in material or workmanship under normal
conditions of use. is warranty shall not apply to products that have been abused, modied
or disassembled. Products to be repaired under this warranty must be returned to a designated
service center with an assigned return authorization (RA) number. Contact technical support for
an RA number.
Copyright ©2018 Luma Surveillance. All rights reserved.

Other Luma Surveillance Camera Accessories manuals

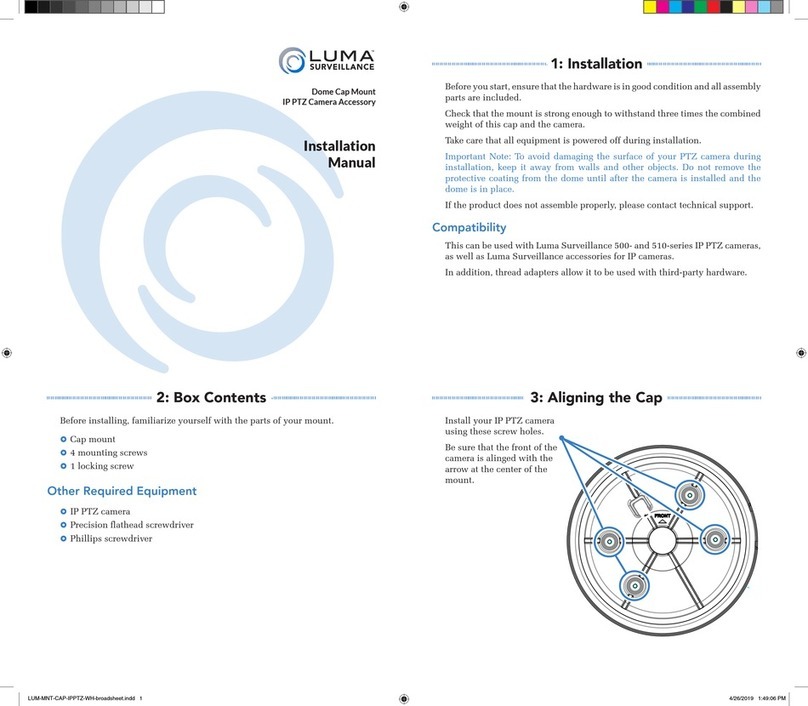
Luma Surveillance LUM-MNT-CAP-IPPTZ-WH User manual

Luma Surveillance

Luma Surveillance LUM-MNT-CAP-IPPTZ-WH User manual

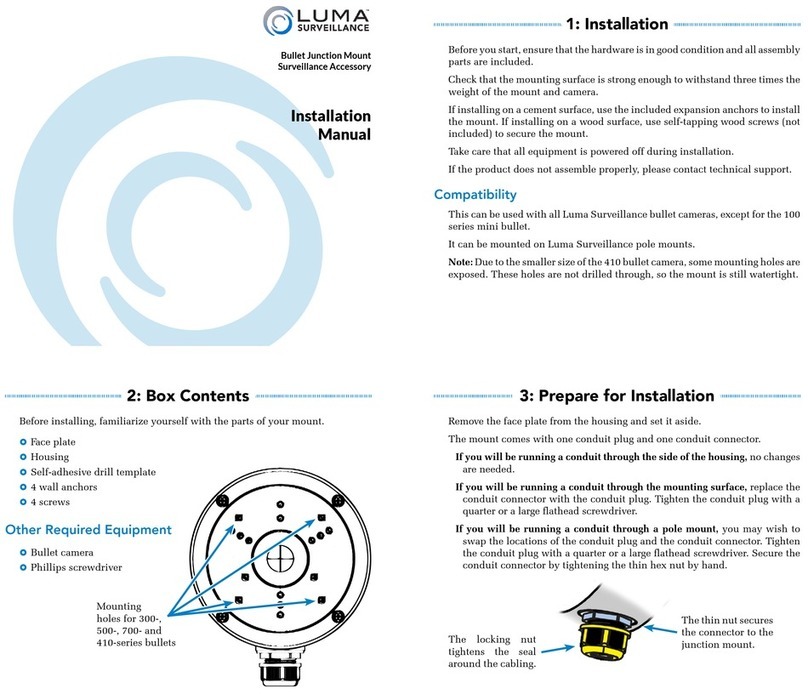
Luma Surveillance LUM-MNT-JNT-BUL-WH User manual

Luma Surveillance

Luma Surveillance LUM-MNT-JNT-BUL-WH User manual

Popular Camera Accessories manuals by other brands

Voltacon ESS12100 user manual

Voltacon

Voltacon ESS12100 user manual

Vicon V9315H Series Installation & operation manual

Vicon

Vicon V9315H Series Installation & operation manual

Kaidan Meridian TM-400 user guide

Kaidan

Kaidan Meridian TM-400 user guide

Rushworks BABYZOOMER Assembly

Rushworks

Rushworks BABYZOOMER Assembly

Hummer H24 user manual

Hummer

Hummer H24 user manual

BENRO DJ Series operating instructions

BENRO

BENRO DJ Series operating instructions

FujiFilm FUJICHROME 64T TYPE II Professional datasheet

FujiFilm

FujiFilm FUJICHROME 64T TYPE II Professional datasheet

Sony VG-C77AM operating instructions

Sony

Sony VG-C77AM operating instructions

Vocas MB-436 user manual

Vocas

Vocas MB-436 user manual

Filmcity FC-10 instruction manual

Filmcity

Filmcity FC-10 instruction manual

Vivotek AE-252 installation guide

Vivotek

Vivotek AE-252 installation guide

Panther T 10 manual

Panther

Panther T 10 manual

Airpixel AIR Commander Entire user manual

Airpixel

Airpixel AIR Commander Entire user manual

Feiyu FY WG manual

Feiyu

Feiyu FY WG manual

Fantasea Nano LED Pro Set Operator's manual

Fantasea

Fantasea Nano LED Pro Set Operator's manual

Pentax 67 Auto Bellows operating manual

Pentax

Pentax 67 Auto Bellows operating manual

Jabra GN9120 Flex instructions

Jabra

Jabra GN9120 Flex instructions

MYERS MP Series Installation, operation & maintenance manual

MYERS

MYERS MP Series Installation, operation & maintenance manual

manuals.online logo
manuals.online logoBrands
  • About & Mission
  • Contact us
  • Privacy Policy
  • Terms and Conditions

Copyright 2025 Manuals.Online. All Rights Reserved.