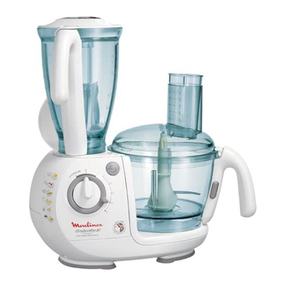
Lumina MD 10157 User manual

Model Number MD 10157
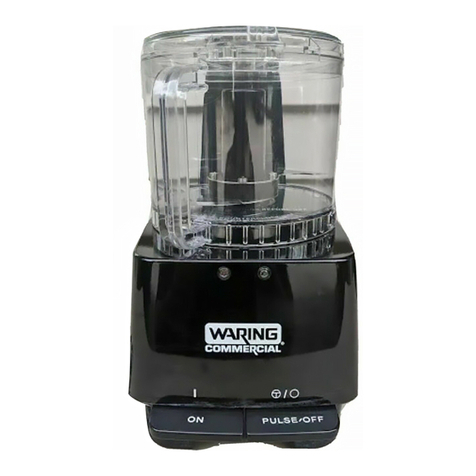
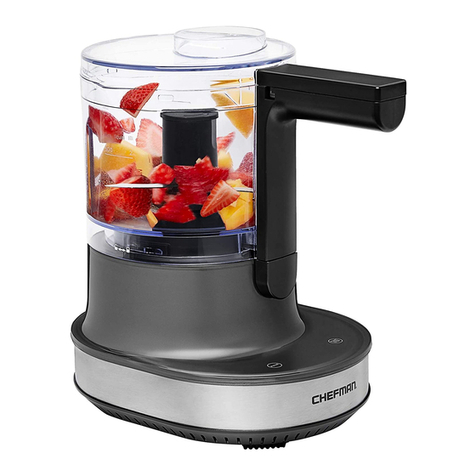
Mini Food Chopper
INSTRUCTION MANUAL
1300 884 987
03/2012
Email
C
M
Y
CM
MY
CY
CMY
K
10157 EN Aldi AUS Final Cover RV 47362737.ai 1 07.12.2011 10:53:3710157 EN Aldi AUS Final Cover RV 47362737.ai 1 07.12.2011 10:53:37

After Sales Support
Telephone: 1300 884 987
Email: [email protected]
Contents
03 Warranty Details
04 Welcome Section
05 General Information and Safety
Instruction
10 Assembly and Parts List
11 Getting Started
15 Recipe Suggestions
16 Disposal
17 Repair and Refurbished Notice
18 Technical data
2
C
M
Y
CM
MY
CY
CMY
K
10157 EN Aldi AUS Final Cover RV 47362737.ai 2 07.12.2011 10:53:4610157 EN Aldi AUS Final Cover RV 47362737.ai 2 07.12.2011 10:53:46

3
Mini Food Chopper
Warranty Details
The product is guaranteed to be free from defects in workmanship
and parts for a period of 12 months from date of purchase. Defects
that occur within this warranty period, under normal use and care,
will be repaired, replaced or refunded at our discretion, solely at
our option with no charge for parts and labour. The benefits
conferred by this warranty are in addition to all rights an remedies
in respect of the product that the consumer has under the Trade
Practices Act and similar state and territory laws.
Our goods come with guarantees that cannot be excluded under
the Australian Consumer Law. You are entitled to a replacement or
refund for a major failure and for compensation for any other
reasonably foreseeable loss or damage. You are also entitled to
have the goods repaired or replaced if the goods fail to be of
acceptable quality and the failure does not amount to a major
failure.

4
Welcome Section
Congratulations on choosing to buy a Lumina®product.
All products brought to you by Lumina®are manufactured to the
highest
standards of performance and safety, and, as part of our
philosophy of customer
service and satisfaction, are backed by our comprehensive 1 Year
Warranty.
We hope you will enjoy using your purchase for many years to
come.

5
General Information
and Safety
Instructions
A
bout these instructions
Read the safety instructions carefully before use. Note
the warnings on the appliance and in the operating
instructions.
Always keep the operating instructions close to hand.
If you sell the appliance or pass it on, please ensure
that you also pass on these instructions.
Symbols and key words used in these instructions
Danger!
Warning: immediate mortal danger!
Warning!
Warning: possible mortal danger and/or serious
irreversible injuries
Caution!
Please follow the guidelines to prevent injuries and/or
property damage!
Caution!
Please follow the guidelines to prevent property
damage!
Warning!
Warning: danger of electric shock.
Warning!
Danger: sharp edges.

6
Note
Additional information on using the appliance.
This appliance is not intended for use by persons (including
children) with reduced physical, sensory or mental capabilities, or
lack of experience and knowledge, unless they have been given
supervision or instruction concerning use of the appliance by a
person responsible for their safety. Children should be supervised
to ensure that they do not play with the appliance.
Danger!
Packaging material is not a toy. Children must not play
with the plastic bags. There is a risk of suffocation.
Setting up the chopper safely
This appliance is designed for private indoor use.
Only ever operate the appliance on a stable, level work surface.
Never place the appliance near gas or electric cookers or
heaters.
Protect the appliance from moisture and do not expose it to
dripping water or spray.
Do not allow foreign bodies or liquid to penetrate the appliance.

7
Working safely with the chopper
Handle the blades carefully, including when emptying the bowl or
other receptacles.
Warning!
Avoid all contact with moving parts. The chopper
blades are very sharp. There is a risk of injury!
The appliance is only designed for processing the usual
household amounts.
Always disconnect the appliance from the mains supply if it is left
unattended and before assembling, disassembling or cleaning.
Only fill the bowl to the “max” marking on the glass.
After every 10 seconds of continuous use, pause the machine for
1 minute.
Do not remove the lid until the blade has stopped moving.
Never touch the blade while it is still moving.
Do not use the chopper if the blades are jammed, if they only
turn slowly or if the attachments are faulty!
Do not insert any utensils (such as spoons or knives, etc.) into
the moving blades or other moving parts and under no
circumstances place your hands in the bowl.

8
Mains connection
Only connect the machine to an easily accessible, properly
installed power point (220 -240 V ~ 50 Hz), close to where you
have set up the appliance. The power point must be freely
accessible, in case you need to unplug the appliance quickly.
To avoid the risk of tripping, avoid using extension cables.
Do not kink, crush, tug or run anything over the connecting
cable. Do not allow the cable to hang down from the work
surface. Protect it from sharp edges, oil and heat.
Never carry out repairs yourself
If the cable or appliance is damaged, unplug it from the mains
immediately.
Warning!
Never try to open and/or repair the appliance yourself.
There is a risk of electric shock.
In the event of a fault, please contact the After Sales Support or
an approved repair centre.
To avoid danger: always have damaged mains cable on
appliances replaced by the manufacturer, an official customer
service agent or other suitably qualified person.

9
Cleaning
Disconnect from the mains and detach the motor unit.
Clean the motor unit on the outside using only a damp cloth and
some mild washing-up liquid, if necessary.
Do not use any abrasive items or products which could damage the
glass when cleaning the bowl!
To prevent injuries, use only a washing-up brush or a similar
suitable cleaning utensil to clean the blade.
After using heavily staining foods (carrots, tomatoes, etc.) clean the
bowl immediately to prevent discolouration.
Before cleaning, pull out the plug.
Never immerse the motor unit in water or other liquids. Clean the
housing using only a damp cloth.
Clean the bowl, splash guard lid and whisking disc with a mild
soap solution. To prevent injuries, use only a washing-up brush
or a similar suitable cleaning utensil to clean the blades.
After using heavily staining foods (carrots, tomatoes, etc.) clean
the parts immediately, to prevent discolouration.
Proper use
The chopper is intended for chopping solid foodstuffs in normal
kitchen quantities. The appliance is designed for use in indoor areas
only. The appliance is intended solely for use in private homes. The
appliance is not suitable for commercial purposes.
Package contents
Danger!
Do not let children play with plastic film.
There is a risk of suffocation.

10
Assembly and Parts
list
1Motor unit
2Splash guard lid
3Whisking disc
4Chopping blade
5Mixing bowl
6Non-slip mat

11
Getting Started
Before using the appliance for the first time, wash the bowl, splash
guard lid, whisking disc and chopping blade in a mild soap solution
or in the dishwasher. Grip the bowl using the handles only, do not
attempt to lift it by the guide pin at the bottom of the bowl.
Instructions
1Place the anti-slip mat on an even, stable work surface.
2Place the bowl on the anti-slip mat.
3Place the chopping blade on the guide pin you see at the centre
of the bowls bottom and make sure that it rotates easily.
4Put the prepared ingredients into the bowl (please see page 11
for a guide on how to properly prepare ingredients).
5Place the splash guard lid on the bowl so that the spaces on the
edge of the lid are precisely above the bowl handles.
6Press the lid gently downwards until it sits firmly on the bowl.
7Place the motor unit in the lid recess so that both side lugs slide
into the proper spaces in the lid and the star-shaped chopper
blade bracket clicks into place in the bracket under the motor
unit.
You can turn the motor unit slightly from side to side to make it
easier to click into place.
Please note that the appliance cannot be switched on if the motor
unit has not been properly attached.

12
Chopping
When the bowl has been filled and the lid placed on top, insert
the plug in the mains socket.
Hold the bowl firmly with one hand and press the upper part of
the motor unit gently downwards. The blade starts to rotate and
chops up the food.
Note
For best results, work in pulses. Operating for longer
periods will chop the food too smaller pieces.
Caution!
After 10 seconds, stop the appliance for one minute, to
prevent damage from overheating.
If pieces of food remain stuck to the inside of the bowl (e.g. in the
case of herbs or other moist foods), remove them with a flat
stirrer or spatula, spread them around the bowl and also chop
them up with two or three pulses.
When the food has been chopped small enough, wait until the
blade stops. Unplug the appliance from the mains.
Detach the motor unit and carefully remove the blade. Then you
can take out the chopped ingredients.

13
Milk shakes
Place the whisking disc on the guide pin and make sure that it
rotates easily.
Fill the bowl with a maximum of 150 ml milk and 2 tbsp fruit
syrup, such as raspberry or strawberry syrup.
Place the splash guard lid on the bowl so that the spaces on the
edge of the lid are precisely above the bowl handles.
Press the lid gently downwards until it sits firmly on the bowl.
Place the motor unit in the lid recess so that both side lugs slide
into the proper spaces in the lid and the star-shaped whisking
disc bracket clicks into place in the bracket under the motor unit.
Plug into the mains.
Hold the bowl firmly with one hand and press the upper part of
the motor unit gently downwards, pulsing briefly two or three
times.
The whisking disc blade starts to rotate and whisks the food.
When the food has been beaten enough, wait until the whisking
disc stops. Unplug the appliance from the mains.
Detach the motor unit and carefully remove the whisking disc.
Then you can take out the mixed ingredients.

14
General hints for use
Fill the bowl according to the directions in the table below.
Cut up larger pieces of food so that they are small enough to fit
into the bowl without being squashed.
Food Max. filling
quantity
Preparation Mixing
time
Meat 400 g Remove bones, fat and
cartilage. Cut the meat into
pieces of 1–2 cm.
10 sec.
Herbs 50 g Remove the stalks and stems 5 pulses
Nuts 300 g Remove the shells 10 sec.
Cheese 100 g Cut the cheese into pieces of
1–2 cm.
8 sec.
Bread 75 g Cut the bread into pieces of
1–2 cm.
10 sec.
Hard-
boiled eggs
6 Halve or quarter the eggs 5 pulses
Onions 250 g Cut the onion into pieces of
1–2 cm.
8 pulses
Soft fruit 300 g Remove the stalks and stems 8 sec.
Stale rolls 150 g Cut the rolls into small pieces 10 sec.
Use the chopping blade for all the examples in this table.
Caution!
The chopping blade supplied is suitable only for the
foods mentioned or for similar ones. If not used
properly, e.g. with extremely hard foods (e.g. ice
cubes, nutmeg, coffee beans and grain) there is a risk
of the blade breaking.

15
Recipe Suggestions
Vanilla, honey and plum spread
(use the chopping blade)
Ingredients:
60 g creamed honey
50 g dried plums
30 ml water
vanilla flavouring
Directions:
Put the honey and the plums into the bowl and mix for approx. 10
seconds. Then add the water and the vanilla flavouring and mix
everything until it reaches a creamy consistency, using 4–5 pulses.
Orange salad dressing
(use the whisking disc)
Ingredients:
juice of half a lemon
juice of half an orange
4 tbsp sunflower oil
1 teaspoon mustard
herb salt
curry powder
Directions:
Put the mustard and the other ingredients in the bowl, using three
pulses to mix. Then season with salt and curry powder.

16
Disposal
Packaging
This appliance and its packaging are, as far as possible,
made of material that can be disposed of in an
environmentally friendly way and can be properly recycled.
A
ppliance
At the end of its service life, the appliance should not be
disposed of with the household rubbish. Please consult your
local authority for advice on correct and eco-friendly
methods of disposal.

17
Mini Food Chopper
Repair and Refurbished
Goods or Parts Notice
Unfortunately, from time to time, faulty product are manufactured
which need to be returns to the Supplier for repair.
Please be aware that if your product is capable of retaining user-
generated data (such as files stored on a computer hard drive,
telephone numbers stores on am mobile telephone, songs stored
on a portable media player, games saved on a games console or
files stored on a USB memory Stick) during the process of repair,
some or all of your stored data may be lost.
We recommend you save this data elsewhere prior to sending the product for
repair.
You should also be aware that rather than repairing gods, we may
replace them with refurbished goods of the same type or use
refurbished parts in the repair process.
Please be assured though, refurbished parts or replacements are only used where
they meet ALDI´s stringent quality specifications.
If any time you feel your repair is being handled unsatisfactorily,
you may escalate your complaint. Please telephone us on 1300884
987 or write to us.
MEDION Australia Pty Ltd.
St Leonards, NSW 2065

18
Technical data
Power rating 500 watt
Short-term operation: 10 seconds (one minute to cool down)
Power supply: 220–240 V ~ 50 Hz
Protection category: II

Model Number MD 10157
Mini Food Chopper
INSTRUCTION MANUAL
1300 884 987
03/2012
Email
C
M
Y
CM
MY
CY
CMY
K
10157 EN Aldi AUS Final Cover RV 47362737.ai 1 07.12.2011 10:53:3710157 EN Aldi AUS Final Cover RV 47362737.ai 1 07.12.2011 10:53:37
Table of contents
