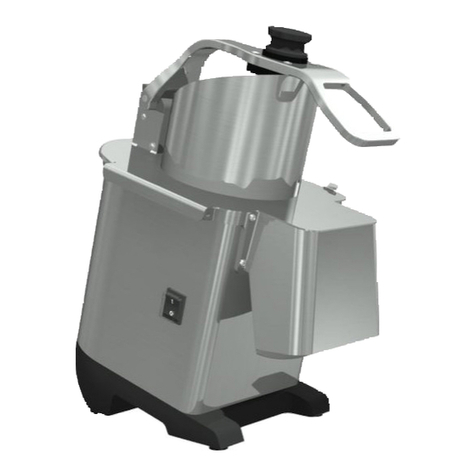
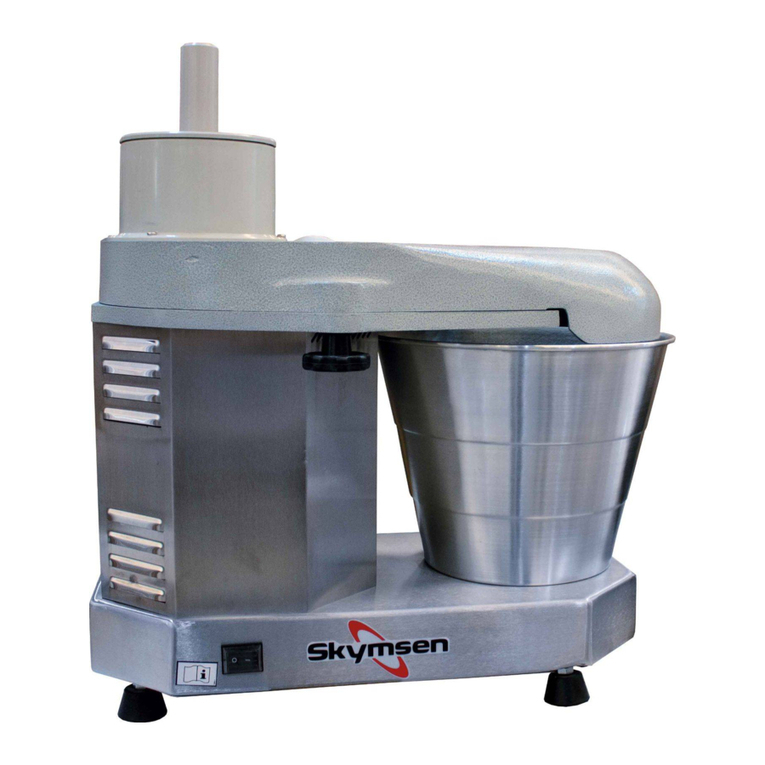
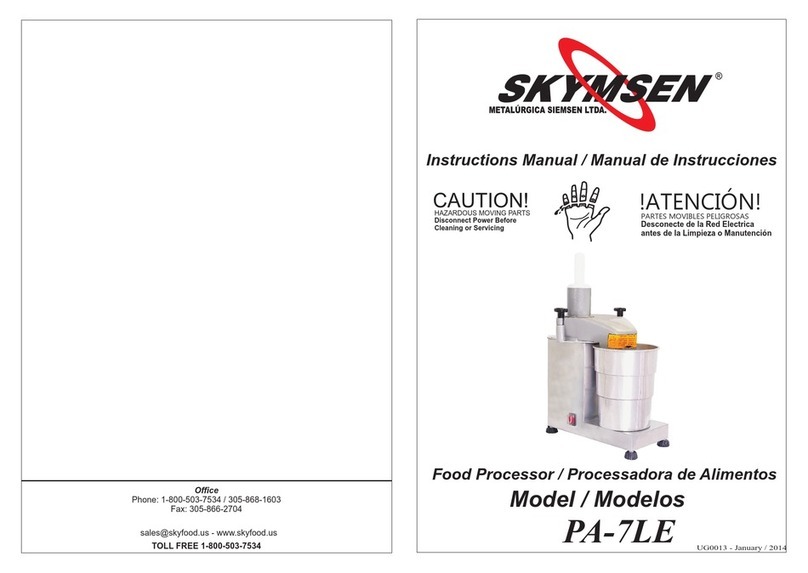
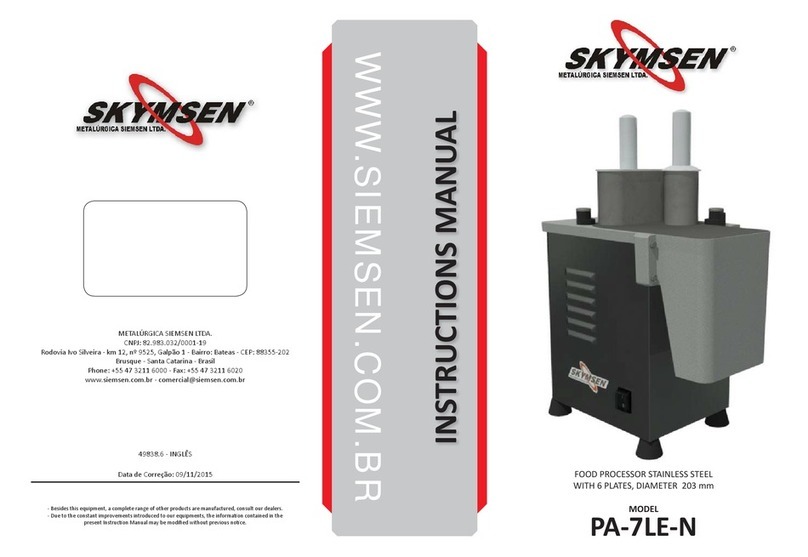
Skymsen PA-7 User manual

WWW.SIEMSEN.COM.BR
59008.8 - ENGLISH/ESPAÑOL
Data de Correção: 16/11/2016
METALÚRGICA SIEMSEN LTDA.
CNPJ: 82.983.032/0001-19
Rodovia Ivo Silveira - km 12, nº 9525, Galpão 1 - Bairro: Bateas - CEP: 88355-202
Brusque - Santa Catarina - Brasil
Fone: +55 47 3211 6000 - Fax: +55 47 3211 6020
- ALÉM DESTAS EQUIPAMENTOS, FABRICAMOS UMA LINHA COMPLETA DE EQUIPAMENTOS. CONSULTE SEU REVENDEDOR.
- ESTE PRODUTO CONTA COM ASSISTÊNCIA TÉCNICA, REPRESENTANTES E REVENDEDORES EM TODO TERRITÓRIO NACIONAL.
- DEVIDO À CONSTANTE EVOLUÇÃO DOS NOSSOS PRODUTOS, AS INFORMAÇÕES AQUI CONTIDAS PODEM SER MODIFICADAS
SEM AVISO PRÉVIO.
INSTRUCTIONS MANUAL
FOOD PROCESSOR, STAINLESS STEEL
WITH 6 PLATES 203mm
MODELO
PA-7

2
SUMMARY
1. IntroducƟon ......................................................................................3
1.1 Safety .................................................................................................................... 3
1.2 Main Components ................................................................................................. 5
1.3 Technical CharacterisƟcs ........................................................................................ 6
1.4 SelecƟng the Plates................................................................................................ 6
1.5 Plates coming along with the Processor and OpƟonal Plates ................................. 8
1.6 Labels .................................................................................................................... 9
2 InstallaƟon and Pre OperaƟon .......................................................... 10
2.1 InstallaƟon ...........................................................................................................10
2.2 Pre OperaƟon .......................................................................................................12
3. OperaƟon ........................................................................................ 14
3.1 StarƟng.................................................................................................................14
3.2 OperaƟon Procedures...........................................................................................15
3.3 Cleaning and SaniƟzing .........................................................................................16
3.4 CauƟons with Stainless Steel ................................................................................18
4. General Safety PracƟces .................................................................. 20
4.1 Basic OperaƟon PracƟces......................................................................................20
4.2 Safety Procedures and Notes before Turning the Machine ....................................21
4.3 RouƟne InspecƟon................................................................................................22
4.4 OperaƟon .............................................................................................................22
4.5 AŌer Finishing The Work.......................................................................................22
4.6 Maintenance ........................................................................................................23
4.7 Warning................................................................................................................23
5. Analysis and Problems Solving.........................................................24
5.1 Problems, causes and soluƟons ............................................................................24
6. Applicable Norms ............................................................................ 26
7. Electric Diagram............................................................................... 28
47
___________________________________________________________
___________________________________________________________
___________________________________________________________
___________________________________________________________
___________________________________________________________
___________________________________________________________
___________________________________________________________
___________________________________________________________
___________________________________________________________
___________________________________________________________
___________________________________________________________
___________________________________________________________
___________________________________________________________
___________________________________________________________
___________________________________________________________
___________________________________________________________
___________________________________________________________
___________________________________________________________
___________________________________________________________
___________________________________________________________
___________________________________________________________
___________________________________________________________
___________________________________________________________
___________________________________________________________
___________________________________________________________
___________________________________________________________
___________________________________________________________
___________________________________________________________
___________________________________________________________
___________________________________________________________
___________________________________________________________
___________________________________________________________
___________________________________________________________
___________________________________________________________
___________________________________________________________
___________________________________________________________
___________________________________________________________

46
___________________________________________________________
___________________________________________________________
___________________________________________________________
___________________________________________________________
___________________________________________________________
___________________________________________________________
___________________________________________________________
___________________________________________________________
___________________________________________________________
___________________________________________________________
___________________________________________________________
___________________________________________________________
___________________________________________________________
___________________________________________________________
___________________________________________________________
___________________________________________________________
___________________________________________________________
___________________________________________________________
___________________________________________________________
___________________________________________________________
___________________________________________________________
___________________________________________________________
___________________________________________________________
___________________________________________________________
___________________________________________________________
___________________________________________________________
___________________________________________________________
___________________________________________________________
___________________________________________________________
___________________________________________________________
___________________________________________________________
___________________________________________________________
___________________________________________________________
___________________________________________________________
___________________________________________________________
___________________________________________________________
___________________________________________________________
3
1. IntroducƟon
1.1 Safety
When incorrectly used this equipment is a potenally DANGEROUS machine.
Before using this equipment, read this Instrucons Manual carefully and keep it accessible
for future consulng.
To avoid accidents, injure or damages to the equipment, respect the following instrucons:
1.1.1 In order to avoid the risk of electric shocks and damage to the machine, never operate
it wearing wet clothes or shoes, install the equipment on a wet or humid surface nor dip it
in water or any other liquid, and do not spray water directly on it.
1.1.2 The use of the equipment must be always supervised specially when used next to
children.
1.1.3 Before cleaning and when not in use or before inserng or removing accessories,
maintenance, or other services, disconnect machine from power source.
1.1.4 Do not use the equipment if the cord or the plug is damaged. Do not leave the electric
cable on the edge of the table or counter nor let it touch hot surfaces.
1.1.5 Do not use the equipment if it is not working correctly, nor if it has been damaged in
any way. In case that happens, take the equipment to the nearest Technical Assistance to
check it up.
1.1.6 The use of accessories not recommended by the manufacturer may cause personal
hurt.
1.1.7 Keep your hands or any tool out of the machine while operang to avoid personal
hurt or any damage to the equipment.
1.1.8 During operaon, never wear loose clothes with wide sleeves principally around the
wrists.
1.1.9 Make sure the equipment voltage is the same as the network voltage and that the
equipment is duly grounded.
1.1.10 Before switching the equipment ON, check if the Expeller Dish, the Plate and the
Chamber Lid are correctly placed.
1.1.11 Never introduce the fingers or any other object inside the feeding opening. Always
use the Stumpers.
1.1.12 Never introduce the fingers or any other object inside the opening where processed
food comes out.
This equipment has been designed to be used in commercial kitchens, such as: restaurants,
cafeterias, hospitals, bakeries, butcheries and so on.
This equipment is not recommended to be used:
- when connuous industrial producon is necessary.
- work place has a corrosive or explosive atmosphere or it is contaminated with steam,
dust or gas.


4
IMPORTANT
For the operator safety this equipment has a safety system not allowing to be
accidentally started aŌer an eventual electricity failure.
IMPORTANT
Make sure the cord is in perfect condiƟons for use. If it is not, change it for a new
one in accordance with the technical specificaƟons and safety rules.
The subsƟtuƟon shall be made by a qualified professional, and shall respect the
local safety norms.
IMPORTANT
This equipment must not be used by children or any persons with reduced
physical or mental aptness, lack of experience or knowledge, unless they are
under supervision or have received from the person responsible for safety proper
instrucƟons on how to use the equipment.
IMPORTANT
Children shall be watched in order to avoid them to play with the equipment.
IMPORTANT
In case of emergency, unplug the equipment.
IMPORTANT
Never spray water directly on the equipment.
IMPORTANT
This equipment has a security system to guarantee the operator integrity.
The operaƟon of this equipment must be performed as described in the item
“OperaƟon” of this manual. Other procedures to operate this equipment are not
safe and must not be used.
45

44
7. Diagrama Eléctrico
5
1.2 Main Components
All components are made with carefully selected materials, in accordance with Siemsen
experience and standard tesng procedures.
PICTURE 01
01 – Plunger
02 – Chamber Lid
03 – ON Switch
04– OFF Switch
05 - Small Plunger
05– Lid Fastenings
07 – Housing
08 - Equipotenal Terminal
09 – Cord
10 – General Switch
11 - Plates
12 - Expeller Dish
11
01
12
02
05
03
04
10
06
07
08
09

6
TABLE 01
1.3 Technical CharacterisƟcs
This equipment is suited to execute several cut types such as slice, shred and grate. It can
process a great variety of vegetables, keeping its nutrious propriees, color and juice,
avoiding waste and saving the cung uniformity.
1.4 SelecƟng the Plates
EXPELLER DISH
The Expeller Dish is responsible to expel the processed food in the Chamber. The dish shall
always be used along with any plate.
SLICERS PLATES - E.
Used to Slice products (*) (except leaves and stringy products ).
(*)Tomatoes, cabbage, cucumber, kale, carrot, beetroot, radish, potato, turnip, chayote
and similar.
DENTED SLICERS PLATES - EH.
Specially used to slice products with skin and leaves packs (*).
(*) Tomatoes, cabbage, cucumber, kale leaves and similar.
SLICER SCALLOP CUT - W.
Used to Slice products (*) (except leaves), to result as scallop aer the process.
(*) Potatoes, cucumber, carrot, beetroot, radish, turnip and similar.
SHREDDER PLATES - Z.
Used to shred products (*) that will show a half moon shape aer the process.
(*) Carrot, beetroot, radish, potato, chayote, turnip and similar.
CHARACTERISTIC UNIT PA-7 PA-7
Voltage V 127 220
Frequency Hz 60 60
Power rang W 600 600
Height mm 640 640
Width mm 480 480
Depth mm 280 280
Net Weight kg 24 24
Gross Weight kg 26,4 26,4
43
6. Mantenimiento
El mantenimiento debe ser considerado como un conjunto de procedimientos con el
objevo de conservar el equipo en las mejores condiciones de funcionamiento propiciando
un aumento de su vida úl y de su seguridad.
* Limpieza - verificar el ítem No. 3.3 de este manual.
* Cableado - verifique todos los cables cuanto a su deterioración y todos los terminales
cuanto a su aprieto y corrosión.
* Contactos – Llave prender/apagar, botón de emergencia, botón rearme, circuitos
electrónicos, etc. Verifique el equipo para que todos los componentes estén funcionando
correctamente y que la operación del equipo sea normal.
* Instalación – Verifique la instalación de su equipo de acuerdo con el ítem 2.1 de este
manual.
Vida úl de este equipo- 2 años en turno de trabajo normal
1. verificaciones a ejecutar mensualmente:
. Verificar la instalación eléctrica.
. Controlar la tensión de la toma eléctrica
. Medir la corriente eléctrica y compararla con la corriente nominal
. Verificar el aprieto de todos los terminales eléctricos para evitar malos contactos.
. Verificar posibles holguras del eje del motor eléctrico
. Controlar el cableado eléctrico para idenficar señales de sobrecalentamiento, aislamiento
deficiente o avería mecánica.
2. verificaciones a ejecutar cada tres meses:
.Verificar los componentes eléctricos como la llave prender/apagar el botón de emergencia,
botón rearme, y circuitos electrónicos con respecto a sobrecalentamiento, aislamiento
deficiente o avería mecánica.
. Verificar posibles holguras en los ejes y rodamientos.
. Verificar retenedores, anillos O ‘ring, anillos V’ring, y otros sistemas de vedamiento.

42
TABLA 04
PROBLEMAS CAUSAS SOLUCIONES
El equipo no prende
Procedimiento de accionar
incorrecto
Falta de energía eléctrica
Protector térmico del motor
está actuando
Problemas con el circuito
eléctrico
Leer el ítem 3.1 –
accionamiento
Verifique se hay energía
Aguarde algunos minutos y
tente nuevamente
Llame el servicio técnico
El equipo para o reduce su
velocidad cuando procesa los
alimentos
La correa ene holgura
El disposivo de seguridad de la
Tapa de la Cámara ene falla de
contacto
Problema con el motor eléctrico
Ajustar la tensión de las
correas
Llame el servicio técnico
El producto procesado queda
retenido en el interior del
equipo
Hace falta el plato expulsor
Boca de salida obstruida
Coloque el plato expulsor
Desobstruya la boca de salidaa
Corte del producto está
irregular
Las cuchillas han perdido el hilo
o están con daño
Afile las cuchillas o cambie el
disco
Olor de humo o/y quemado Problema en el circuito eléctrico Llame el servicio técnico
Cable eléctrico con daño Falla en el transporte del equipo Llame el servicio técnico
Ruidos anormales Problemas con los rodamientos Llame el servicio técnico
7
SQUARE SHREDDER PLATES - H.
Used to shred products (*) that will show a square shape aer the process.
(*) Carrot, beetroot, radish, potato, chayote, turnip and similar.
GRATER PLATE - V.
Used to great products (*) (except leaves).
(*) Bread, cheese, coconut, nut and similar.
SELECTING CUT TABLE
PRODUCT CUT TYPES PLATES
Beetroot Slices E1, E3
Shredder Z3, Z5 ,Z8
Carrot*
Slices E1, E3
Shredder Z3, Z5, Z8
Grater V
Cabbage Strips E1, E3
Shredder Z3, Z5 ,Z8
Mushroom Slices E1,E3
Onion Slices E3
Tomato Slices E3
Cucumber* Slices E1, E3
Pepper Slices E1, E3
Radish Slices E1, E3
Shredder Z3, Z5, Z8
Potato Slices - Chip´s E1, E3
Straw Z3, Z5, Z8
Banana* Slices E3
Apple Slices E1, E3
Coconut Shredder Z3, Z5, Z8
Grater V
TABLE 02
IMPORTANT
TABLE 02 (SelecƟng Cut Table) gives a hint to select the kind of cut usually desired
in kitchens and restaurants. The resulƟng cuts will depend of the state, the type
and the quality of the product to be processed.
*For these products, we recommend to use only the small throat. Using the big
throat will result in a bad product processing quality.

8
1.5 Plates coming along with the Processor and OpƟonal Plates:
In the following Table 03 you will find the available Plates for your processor:
TABLE 03
PLATES COMING ALONG WITH THE EQUIPMENT
NAME MODEL
SLICER PLATE - 1 mm E1
SLACER PLATE - 3 mm E3
SHREDDER PLATE - 3 mm Z3
SHREDDER PLATE - 5 mm Z5
SHREDDER PLATE - 8 mm Z8
GRATER PLATE V
OPTIONAL PLATES
(SOLD IN SEPARATE)
NAME MODEL
SLICER PLATE - 5 mm E5
SLICER PLATE - 10 mm E10
DENTED SLICER PLATE - 3 mm EH3
DENTED SLICER PLATE - 7 mm EH7
SLICER SCALLOP CUT - 2mm W2
SLICER SCALLOP CUT - 3 mm W3
SLICER SCALLOP CUT- 4 mm W4
SQUARE SHREDDER PLATE (JULIENE) - 2,5 mm H2,5
SQUARE SHREDDER PLATE (JULIENE) - 3 mm H3
SQUARE SHREDDER PLATE (JULIENE) - 7 mm H7
41
Nunca limpie la maquina antes de su PARADA COMPLETA.
Recoloque todos los componentes de la maquina en sus lugares, antes de prenderla otra
vez.
Con frecuencia controle la tensión de las correas o de las cadenas, NO coloque los dedos
entre las correas y las poleas ni entre las cadenas y sus engranajes.
4.6 Mantenimiento
4.6.1 Peligros
Con la maquina prendida cualquier operación de mantenimiento es peligrosa.
DESPRENDALA FÍSICAMENTE DE LA RED ELÉCTRICA, DURANTE TODA LA OPERACIÓN DE
MANTENIMIENTO
IMPORTANTE
Siempre reƟre la flecha de su enchufe en casos de emergencia.
4.7 Avisos
El mantenimiento eléctrico o mecánico debe ser hecho por una persona calificada para
hacer el trabajo.
La persona encargada por el mantenimiento debe cerficarse que la maquina trabaje bajo
condiciones TOTALES DE SEGURIDAD.
5. Análisis y Resolución de Problemas
5.1 Problemas, Causas y Soluciones
Este equipo fue diseñado para necesitar un mínimo de manutención. Sin embargo, pueden
ocurrir algunas irregularidades en su funcionamiento debido al desgaste natural causado
por su uso.
Caso ocurra algún problema verifique la Tabla a seguir, donde están algunas soluciones
recomendadas.

40
4.2.3 Cuidados
El cable de alimentación de energía eléctrica de la maquina, debe tener una sección
suficiente para soportar la potencia eléctrica consumida.
Cables eléctricos que estuvieran en el suelo cerca de la maquina, deben ser protegidos
para evitar corto circuitos.
Los tanques de aceite deben estar siempre llenos. Reponga aceite cuando necesario.
4.3 Inspección de RuƟna
4.3.1 Aviso
Al averiguar la tensión de las correas o de las cadenas, NO coloque los dedos entre las
correas y las poleas, ni entre las cadenas y sus engranajes.
4.3.2 Cuidados
Verifique los motores, correas, cadenas o engranajes y las partes deslizantes o girantes de
la maquina, con relación a ruidos anormales.
Al verificar la tensión de las correas o de las cadenas, sustuya el conjunto, caso alguna
correa, cadena o engranaje, tenga desgaste.
Verifique las protecciones y los disposivos de seguridad para que siempre funcionen
adecuadamente.
4.4 Operación
4.4.1 Avisos
No trabaje con pelo largo, que pueda tocar cualquier parte de la maquina, pues el mismo
podría causar serios accidentes. Manténgalo recogido, ó cúbralo con una gorra o pañuelo.
- Solamente operadores entrenados y calificados pueden operar la maquina.
- Nunca toque con las manos o de cualquier otra manera, partes girantes de la maquina.
- JAMÁS opere la maquina, sin algún de sus accesorios de seguridad.
4.5 Después de Terminar el Trabajo
4.5.1 Cuidados
Al terminar el día de trabajo proceda con la limpieza de la maquina. Para tanto, despréndala
sicamente de la toma.
9
PICTURE 02
2 InstallaƟon and Pre OperaƟon
2.1 InstallaƟon
2.1.1 Placing
Place the equipment on a dry, stable and level surface having a preferenal 850 mm height
above the floor.
850 mm
To know the necessary installaon area, see at PICTURE 02 the equipment dimensions.

10
PICTURE 03
IMPORTANT
Do not operate the equipment when it is placed near a table edge (PICTURE 03).
2.1.2 Electrical Installaon
Before plugging the equipment on the socket, make sure the network voltage is the same
as indicated on the cord label.
The power plug has 3 (three) pins, the middle one is designed to grounding – Ground Pin.
All the 3 (three) pins must be properly connected before operang the equipment.
The picture shown below indicates the external equipotenal connecon terminal.
The connecon shall be used to make sure that there are no potenal differences among
the different equipment connected to the network, avoiding as much as possible electric
shock risks.
The different equipment shall be connected one to the other by means of their
equipotenal terminals.
PI
CT
39
peligroso el piso. Para evitar accidentes, el piso debe estar seco y limpio.
ntes de accionar cualquier comando manual (botones, llaves eléctricas, palancas, etc.)
verifique siempre si el comando es el correcto, o en caso de dudas , consulte este Manual.
Nunca toque ni accione un comando manual (botones, llaves eléctricas, palancas etc.) por
acaso.
Si un trabajo debe ser hecho por dos o más personas, señales de coordinación deben ser
dados antes de cada operación. La operación siguiente no debe ser comenzada sin que la
respecva señal sea dada y respondida.
4.1.3 Avisos
En el caso de falta de energía eléctrica, desligue inmediatamente la llave prende/apaga.
Use solamente óleos lubrificantes o grasas recomendadas o equivalentes. Evite choques
mecánicos, ellos pueden causar fallas o malo funcionamiento. Evite que agua, suciedad o
polvo entren en los componentes mecánicos y eléctricos de la maquina.
-No altere las caracteríscas originales de la maquina.
- No sucie, rasgue o rere cualquier equeta de seguridad o de idenficación.
- Caso alguna esté ilegible o fuera perdida, solicite otra al asistente técnico mas cercano.
- Lea atentamente y con cuidado las equetas de seguridad y de idenficación
- Contenidas en la maquina, así como las instrucciones y las tablas técnicas contenidas en
este manual.
4.2 Cuidados y Observaciones Antes de Prender la Maquina
IMPORTANTE
Lea con atención y cuidado las INSTRUCCIONES contenidas en este Manual, antes
de prender la maquina . CerƟİquese que entendió correctamente todas las
informaciones. En caso de duda, consulte su superior o el Vendedor.
4.2.1 Peligro
Cables o hilos eléctricos con aislamiento dañado, pueden provocar choques eléctricos.
Antes de usarlos verifique sus condiciones.
4.2.2 Avisos
Esté seguro que las INSTRUCCIONES contenidas en este Manual, estén completamente
entendidas. Cada función o procedimiento de operación y de mantenimiento debe estar
perfectamente claro.
El accionamiento de un comando manual (botón, llave eléctrica, palanca, etc.) debe ser
hecho siempre después que se tenga la certud de que es el comando correcto.

38
4.1 PracƟcas Básicas de Operación
4.1.1 Peligros
Algunas partes del accionamiento eléctrico presentan pontos o terminales con altos
voltajes. Cuando tocados pueden ocasionar graves choques eléctricos, o hasta la muerte
de una persona.
Nunca toque un comando manual (botón, llave eléctrica, palancas etc.) con las manos,
zapatos o ropas mojadas, no obedecer esta recomendación, también podrá provocar
choques eléctricos, o hasta la muerte de una persona.
4.1.2 Advertencias
El local de la llave prende/apaga debe ser bien conocido, para que sea posible accionarla a
cualquier momento sin la necesidad de procurarla.
Antes de cualquier manutención desconecte la maquina de la red eléctrica. Proporcione
espacio suficiente para evitar caídas peligrosas. Agua o aceite podrán hacer resbaloso y
IMPORTANTE
Si cualquiera de las recomendaciones no fuera aplicable, ignórela.
4. Nociones Generales de Seguridad
IMPORTANTE
Cualquier Ɵpo de alteración en los sistemas de protección y disposiƟvos de
seguridad del equipo implicarán en serios riesgos a la integridad İsica de las
personas en las fases de operación, limpieza, mantenimiento y transporte del
mismo.
Las Nociones Generales de Seguridad fueran preparadas para orientar y instruir
adecuadamente a los operadores de las maquinas, así como aquellos que serán
responsables por su mantenimiento.
La maquina solamente debe ser entregue al operador en buenas condiciones de uso, al
que el operador debe ser orientado cuanto al uso y a la seguridad de la maquina por el
Vendedor. El operador solamente debe usar la maquina con el conocimiento completo de
los cuidados que deben ser tomados, luego de LEER ATENTAMENTE TODO ESTE MANUAL.
Principais substâncias que causam a corrosão dos aços inoxidáveis:
Poeiras, graxas, soluções ácidas como o vinagre, sucos de frutas e demais ácidos, soluções
salinas (salmoura), sangue, detergentes (exceto os neutros), parculas de aços comuns,
resíduos de esponjas ou palhas de aço comum, além de outros pos de abrasivos.
11
PICTURE 04
01
2.2 Pre OperaƟon
First, make sure the equipment is stable in its posion. Before using the equipment, the
parts that will be in contact with the product that will be processed shall be washed with
water and soap (see item 3.3 Cleaning and Sanizing).
2.2.1 Disassembling the Plates
Step 1: Open the Lid fastenings (#01 Pic.05) and lt the Chamber Lid (#02 Pic.05);
IMPORTANT
Before opening the Chamber Lid #02 (Pic. 05), make sure the Plate #03 (Pic. 05) is
stopped.
IMPORTANT
Steel Gloves should be used to handle the Plates, since the knife edges are sharp
and may wound the operator.
Step 2: Carefully remove the Plate #03 (Pic. 5), turning it anclockwise and pulling it up;
Step 3: Remove the Expeller Dish #04 (Pic. 05), liing it up.
2.2.2 Assembling the Plates
Step 1: Place the Expeller Dish #04 (Pic. 05);
Step 2: Carefully place the Plate #03 (Pic. 05) chosen for the operaon;
Step 3: Close the Chamber Lid #02 (Pic. 05);
Step 4: Lock the Lid Fastenings #01 (Pic. 05) to fix the Chamber Lid in the right posion.

12
PICTURE 05
02
04
01
03
To start the equipment, follow these steps:
Step 1: Press the OFF Switch to reset the machine;
Step 2: Press the ON Switch to start the machine;
Aer this procedure, the equipment should start. If this does not happen, verify the
possible causes and soluons stated on item 5 of this manual. (Analyses and Problem
Solving).
3. OperaƟon
3.1 StarƟng
Before turning the equipment ON:
-Make sure the Chamber Lid is closed and properly locked;
-Make sure the Small Stumper is properly placed inside the Opening;
-Make sure the General Switch is on posion “I” (ON) and if the plug is connected;
37
3.4 Cuidados con los aceros inoxidables
Los aceros inoxidables pueden presentar puntos de “corrosión”, que SIEMPRE SON
PROVOCADOS POR AGENTES EXTERNOS, principalmente cuando el cuidado con la limpieza
o higienización no sea constante y adecuado.
La resistencia a la corrosión del acero inoxidable se debe principalmente a la presencia
del cromo que, en contacto con el oxígeno, permite la formación de una finísima camada
protectora. Esta camada protectora se forma sobre toda la superficie del acero, bloqueando
la acción de los agentes externos que provocan la corrosión.
Cuando la camada protectora sufre un rompimiento, el proceso de corrosión es iniciado,
pudiendo ser evitado a través de la limpieza constante y adecuada.
Inmediatamente después de la ulización del equipamiento, es necesario proceder con
la limpieza, ulizando agua, jabón o detergentes neutros, aplicados con un paño suave o
esponja de nylon. A seguir, enjuagar con agua corriente, se debe enjugar e, inmediatamente
secar, con un paño suave, evitando la permanencia de humedades en las superficies y
principalmente en las grietas.
El enjuague y el secado son extremamente importantes para evitar el aparecimiento de
huellas o corrosiones.
IMPORTANTE
Soluciones ácidas, soluciones salinas, desinfectantes y determinadas soluciones
para esterilizar (hipocloritos, sales de amoníaco tetravalente, compuestos de
iodo, acido nítrico y otros), deben ser EVITADAS por no poder permanecer mucho
Ɵempo en contacto con el acero inoxidable.
Visto que generalmente poseen CLORO en su composición, tales sustancias atacan el acero
inoxidable, causando puntos de corrosión.
Mismo los detergentes ulizados en la limpieza domésca, no deben permanecer en
contacto con el acero inoxidable más de lo necesario, debiendo ser también removidos
con agua y la superficie deberá ser completamente seca.
Uso de abrasivos:
Esponjas o estropajos de acero y cepillos de acero en general, además de rallar la
superficie y comprometer la protección del acero inoxidable, dejan parculas que oxidan
y reaccionan, contaminando el acero inoxidable. Por eso, tales productos no deben ser
usados en la limpieza e higienización. Raspados hechos con instrumentos punagudos o
similares también deberán ser evitados

36
IMPORTANTE
Nunca haga la limpieza con el equipamiento encendido a la red eléctrica.
IMPORTANTE
Nunca uƟlice chorros d’agua directamente sobre el equipamiento, excepto las
partes desmontables.
IMPORTANTE
UƟlice guantes de mallas de aceroo para manosear los discos de corte. Sus aristas
cortantes pueden herir el usuario.
3.3 Limpieza e Higienización
Paso 1: Desligue la Llave General y desconecte el plugue del enchufe.
Paso 2: Realice el desmontaje del equipamiento (Ítem 2.2.1).
Paso 3: Lave las partes desmontables con agua caliente y jabón neutro.
Paso 5: Pase un pañuelo humedecido con agua caliente y jabón neutro en el Gabinete y en
la Cámara dos Discos.
IMPORTANTE
No es indicado dejar el equipamiento encendido sin ningún producto en
procesamiento. Para aumentar la vida úƟl de su máquina, deslíguela cuando no
esté uƟlizando.
IMPORTANTE
La salida de los productos sucede por gravedad. Se debe efectuar regularmente la
limpieza en el interior de la Cámara y en el Bocal de Salida para su obstrucción.
Paso 4: Al lavar los discos, manoséalos con cuidado. No re los discos unos contra los otros
o en otros objetos, para así preservar las láminas.
c - El tercero disposivo desliga el motor de la máquina en caso de sobrecalentamiento.
Aguarde algunos minutos hasta la máquina enfriar y vuelve a encender presionando el
botón Enciende.
13
3.2 OperaƟon Procedures
3.2.2 Feeding the Throats
PICTURE 06
02
01
IMPORTANT
Always use the Stumpers in their throat, never use other tools, and principally do
not use the hands to push the food. If the stumpers get lost, contact your dealer to
replace them.
Obs.: For the operator safety, this equipment has three devices capable of turning
the machine OFF and avoid accidents.
a - The first one turns the machine OFF automacally when the Chamber Lid is removed.
When it is back to its posion, the machine goes back to work automacally .
b - The second device interrupts the machine operaon when the Great Stumper is lied,
opening the Great Throat. When the Stumper is returned to its posion, the machine goes
back to work automacally.
The food processor has two Feeding Throats, each one of them featuring its
Parcularies.
-The Great Throat #01 (Pic. 06) is used to process large quanes of food (such as onions
or potatoes), products having great dimensions (such as cabbage or beetroot) and also
when slices should follow a special direcon (such as lemons or tomatoes).
- The Small Throat #02 (Pic. 06) is used to cut long products (such as carrot or cucumber).

14
IMPORTANT
Do never clean the equipment if connected to the electric network.
IMPORTANT
Never spray water on the equipment, excepƟng the removable parts, when
removed.
IMPORTANT
Use steel gloves to handle the plate The knife have sharp edge that may wound the
operator.
3.3 Cleaning and SaniƟzing
Step 1: Turn the General Switch OFF and unplug the equipment.
Step 2: Disassemble the equipment (Item 2.2.1).
Step 3: Wash the removable parts with warm water and neutral soap.
Step 5: To clean the Motor Housing and the Plate Chamber use a wet cloth with hot water
and neutral soap.
IMPORTANT
It is not recommended to let the equipment running without any product inside.
To increase the equipment´s life span, switch it OFF when not in use.
IMPORTANT
The out load of the products happens by gravity. Inside of the Chamber and the
out load Throat shall be regularly cleaned to avoid obstrucƟon.
Step 4: When washing the plates, handle them with care. Do not throw them one against
the other neither against other objects, in order to save the knives.
c – The third device turns the motor of the machine OFF in case of overheang. Wait for
some minutes unl the machine gets cold and turn it back ON, pressing the ON Switch.
35
3.2 Procedimiento para Operación
3.2.2 Alimentación de los Bocales
FIGURA 06
02
01
IMPORTANTE
Siempre uƟlice los Soquetes Empujadores en sus respecƟvos bocales y nunca
uƟlice otros instrumentos para empujar los alimentos, mucho menos las manos.
En caso de daño, pierda o extravío de los Soquetes, solicite su reposición vía red de
Asistencia Técnica Autorizada.
Obs.: Para la seguridad del operador, este equipamiento posee tres disposiƟvos capaces
de desligar la máquina y así prevenir accidentes.
a – El primero desliga la máquina automácamente al rerar la Tapa de la Cámara. Al
retornar la posición la máquina vuelve a funcionar automácamente.
b - O segundo disposivo interrumpe el funcionamiento de la máquina cuando el
empujador mayor es levantado, abriendo el bocal mayor. Al retornar el empujador mayor
a su posición, la máquina vuelve a funcionar automácamente.
El Procesador de Alimentos posee dos bocales de alimentación, cada uno con sus
peculiaridades.
-El Bocal Mayor N° 01 (Fig. 07) desnado para el procesamiento de candades mayores
de alimentos (ej.: cebollas y patatas), para productos de mayor dimensión (el.: repollo y
remolacha) y también para cortes en determinada dirección (ex.: limones y tomates).
-Y el Bocal Menor N° 03 (Fig. 07) desnado para l corte de productos alargados (ex.:
zanahorias y pepinos).

34
FIGURA 05
04
01
03
Para acionar o equipamento siga os seguintes passos:
Passo 1: Pressione a Chave Desliga para fazer a resetagem;
Passo 2: Pressione a Chave Liga para que o equipamento comece a funcionar.
Após esse procedimento o equipamento deve ligar. Caso isso não ocorra verifique as
possíveis causas e soluções no item 5 deste manual (Análise e Resolução de Problemas).
3. Operação
3.1 Acionamento
Antes de ligar o equipamento faça as seguintes verificações:
- Verifique se a Tampa da Câmara está fechada e devidamente travada;
- Verifique se o Empurrador menor está devidamente posicionado dentro do Bocal;
- Verifique se a Chave Geral está na posição “I” (ligado) e se o plugue está conectado;
15
3.4 CauƟons with Stainless Steel
The Stainless Steel may present rust signs, which are ALWAYS CAUSED BY EXTERNAL
AGENTS, especially when the cleaning or sanizaon is not constant and appropriate.
The Stainless Steel resistance towards corrosion is mainly due to the presence of chrome,
which in contact with oxygen allows the formaon of a very thin protecve coat.
This protecve coat is formed through the whole surface of the steel, blocking the acon
of external corrosive agents.
When the protecve coat is broken, the corrosion process begins, being possible to avoid
it by means of constant and adequate cleaning.
Cleaning must always be done immediately aer using the equipment. For such end, use
water, neutral soap or detergent, and clean the equipment with a socloth or a nylon
sponge.
Then rinse it with plain running water, and dry immediately with a socloth, this way
avoiding humidity on surfaces and especially on gaps. The rinsing and drying processes are
extremely important to prevent stains and corrosion from arising.
IMPORTANT
Acid soluƟons, salty soluƟons, disinfectants and some sterilizing soluƟons
(hypochlorites, tetravalent ammonia salts, iodine compounds, nitric acid and
others), must be AVOIDED, once it cannot remain for long in contact with the
stainless steel.
These substances aack the stainless steel due to the CHLORINE on its composion,
causing corrosion spots (ping). Even detergents used in domesc cleaning must not
remain in contact with the stainless steel longer than the necessary, being mandatory to
remove it with plain water and then dry the surface completely.
Use of abrasives:
Sponges or steel wool and carbon steel brushes, besides scratching the surface
and compromising the stainless steel protecon, leave parcles that rust and react
contaminang the stainless steel. That is why such products must not be used for cleaning
and sanizaon. Scrapings made with sharp instruments or similar must also be avoided.
Main substances that cause stainless steel corrosion:
Dust, grease, acid soluons such as vinegar, fruit juices, etc., saltern soluons (brine),
blood, detergents (except for the neutral ones), common steel parcles, residue of sponges
or common steel wool, and also other abrasives.

16
4.1 Basic OperaƟon Procedures
4.1.1 Dangers
Some areas of the electric device have parts that are connected or have parts connected
to high voltage. These parts when touched may cause severe electrical shocks or even be
lethal.
Never touch manual commands such as switches, buons, turning keys and knobs with
your hands wearing wet clothes and/or wet shoes. By not following these instrucons
operator could be exposed to severe electrical shocks or even to a lethal situaon.
4.1.2 Warnings
* The operator has to be well familiar with the posion of ON/OFF Switch to make sure the
Switch is easy to be reached when necessary.
* Before any kind of maintenance, physically remove plug from the socket.
* Provide space for a comfortable operaon thus avoiding accidents.
* Water or oil spilled on the floor will turn it slippery and dangerous. Make sure the floor
is clean and dry.
* Before using any commands (switch, buons, lever), be sure it is the correct one. In case
of doubt, consult this manual.
* Never touch any manual commands (switch, buons, lever) unadvisedly.
* If any work is to be made by two or more persons, coordinaon signs will have to be
given for each operaon step. Every step of the operaon shall be taken only if a sign has
IMPORTANT
If any recommendaƟon is not applicable to your equipment, please ignore it.
4. General Safety PracƟces
IMPORTANT
Any change in the protecƟon systems and safety devices will during operaƟon,
create serious risks to the operator physical integrity.
The following safety instrucons are addressed to both the operator of the machine as
well as the person in charge of maintenance.
The machine has to be delivered only in perfect condions of use by the Distributor to the
user. The user shall operate the machine only aer being well acquainted with the safety
procedures described in the present manual. READ THIS MANUAL WITH ATTENTION.
33
FIGURA 04
01
2.2 Pre-Operación
Inicialmente, verifique se el equipamiento está firme en su posición. Antes de usarlo, se
debe lavar con agua y jabón, las partes que entran en contacto con el producto a ser
procesado. (lea el ítem 3.3 Limpieza).
2.2.1 Desmontaje de los Discos
Abra lós cierres de la tapa (Nº1 Fig.5) y bascule la tapa de la cámara (Nº2 Fig.5);
IMPORTANTE
Antes de abrir la Tapa de la Cámara N° 02 (Fig. 05), se cerƟfique de que el Disco N°
03 (Fig. 05) no esté más en movimiento.
IMPORTANTE
Es aconsejable la uƟlización de guantes de malla de acero para manosear los discos
de corte. Sus aristas cortantes pueden herir el usuario.
Paso 2: Rere cuidadosamente el Disco Nº3 (Fig. 5), girándolo en el sendo an-horario y
jalándolo para arriba;
Paso 3: Rere el plato expulsador N° 04 (Fig. 05), jalándolo para arriba.
2.2.2 Montaje de los Discos
Paso 1: Encaje el plato expulsador N° 04 (Fig. 05);
Paso 2: Encaje cuidadosamente el Disco N° 03 (Fig. 05) escogido para el procesamiento;
Paso 3: Cierre la Tapa de la Cámara N° 02 (Fig. 05);
Paso 4: Trabe los cierres de la tapa (N° 01 Fig. 05) de modo que fije la Tapa de la Cámara
en su posición.

32
FIGURA 02
IMPORTANTE
Nunca opere la maquina cuando posicionada cerca del borde de la superficie de
trabajo.
2.1.2 Instalación Eléctrica
Antes de conectar la flecha al enchufe eléctrico, verifique el voltaje indicado en la equeta
del cable de alimentación. El cable de alimentación posee 3 pernos, el perno central es
para la conexión de la erra.
Es obligatorio que los tres pernos estén debidamente conectados en el enchufe antes de
accionar el equipo.
La figura presentada abajo indica el terminal de conexión equipotencial externo.
Este debe ser ulizado para garanzar que no haya diferencia de potencial entre diferentes
equipamientos encendidos a la red eléctrica, disminuyendo al máximo riesgos de choques
eléctricos.
Los disntos equipamientos deben ser encendidos un al otro por sus respecvos terminales
de conexión equipotencial.
17
been made and responded.
4.1.3 Advices
* In case of power shortage, immediately switch the machine off.
* Use recommended or equivalent lubricants, oils or greases.
* Avoid mechanical shocks, once they may cause damages or bad funconing.
* Avoid water, dirt or dust contact to the mechanical and electrical components of the
machine.
* DO NOT change the standard characteriscs of the machine.
* DO NOT remove, tear offor maculate any safety or idenficaon labels stuck on the
machine. If any labels have been removed or are no longer legible, contact your nearest
dealer for replacement.
4.2 Safety Procedures and Notes before Switching the Machine ON
IMPORTANT
Carefully read ALL INSTRUCTIONS of this manual before turning the machine ON.
Be sure to well understand all the informaƟon contained in this manual. If you
have any quesƟon contact your supervisor or your nearest Dealer.
4.2.1 Danger
An electric cable or electric wire with damaged jacket or bad insulaon might cause
electrical shocks as well as electrical leak. Before use, check the condions of all wires
and cables.
4.2.2 Advices
Be sure to well understand all the informaon contained in this manual. Every operaon
funcon or procedure has to be thoroughly clear.
Before using any commands (switch, buons, lever), be sure it is the correct one. In case
of doubt, consult this manual.
4.2.3 Precauons
The electric cable has to be compable with the power required by the machine.
Cables touching the floor or close to the machine need to be protected against short

18
circuits.
The oil reservoirs have to be filled unl the indicated level. Check and refill if necessary.
4.3 RouƟne InspecƟon
4.3.1 Advice
When checking the tension of the belts or chains, DO NOT insert your fingers between the
belts and the pulleys and nor between the chain and the gears.
4.3.2 Precauons
Check the motor and sliding or turning parts of the machine in case of abnormal noises.
Check the tension of the belts and chains and replace the set when belts or chains show
signs of wearing.
When checking the tension of belts or chains DO NOT insert your fingers between belts
and pulleys, nor between the chains and gears.
Check protecons and safety devices to make sure they are working properly.
4.4 OperaƟon
4.4.1 Warnings
Do not use the machine with long hair that could touch any part of the machine. This might
lead to a serious accident. Tie your hair up well and/or cover it with a scarf.
Only trained or skilled personnel shall operate this machine.
Never touch turning parts with your hands or any other way.
NEVER operate the machine without any original safety devices under perfect condions.
4.5 AŌer Finishing The Work
4.5.1 Precauons
Always TURN THE MACHINE OFF before cleaning by removing the plug from the socket.
Never clean the machine unless it has come to a complete stop.
Put all the components back to their funconal posions before turning the machine ON
again.
31
2 Instalación y Pre Operación
2.1 Instalación
2.1.1 Posicionamiento
Posicione el equipo sobre una superficie seca, firme y nivelada, con una altura preferencial
de 850 mm.
850 mm
FIGURA 02
Para saber la área necesaria para instalación, vea en la FIGURA 02 las dimensiones
del equipamiento.

30
1.5 Discos proveídos con el equipo Y discos disponibles:
En la tabla abajo están listados los modelos de discos disponibles para el procesador.
TABLA 03
DISCOS PROVEIDOS CON EL EQUIPO
DENOMINACIÓN MODELO
DISCO REBANADOR - 1 mm E1
DISCO REBANADOR - 3 mm E3
DISCO DESHILADOR - 3 mm Z3
DISCO DESHILADOR - 5 mm Z5
DISCO DESHILADOR - 8 mm Z8
DISCO RALLADOR V
DISCOS OPCIONALES
(Vendidos en Separado)
DENOMINACIÓN MODELO
DISCO REBANADOR - 5 mm E5
DISCO REBANADOR - 10 mm E10
DISCO REBANADOR DENTADO - 3 mm EH3
DISCO REBANADOR DENTADO - 7 mm EH7
DISCO REBANADOR ONDULADO - 2mm W2
DISCO REBANADOR ONDULADO - 3 mm W3
DISCO REBANADOR ONDULADO - 4 mm W4
DISCO DESHILADOR CUADRADO (JULIENE) - 2,5 mm H2,5
DISCO DESHILADOR CUADRADO (JULIENE) - 3 mm H3
DISCO DESHILADOR CUADRADO (JULIENE) - 7 mm H7
19
Check the level of oil.
Do NOT insert your fingers in between belts and pulleys nor chains and gears.
4.6 Maintenance
4.6.1 Danger
Any maintenance with the machine in working situaon is dangerous.
TURN IT OFF BY PULLING THE PLUG OFF THE SOCKET DURING MAINTENANCE.
IMPORTANT
Always remove the plug from the socket in any emergency situaƟon.
4.7 Warning
Electrical or mechanical maintenance has to be undertaken by qualified personnel.
The person in charge of maintenance has to be sure that the machine is under TOTAL
SAFETY condions when working.
5. Analyses and Problem Solving
5.1 Problems Causes and SoluƟons
The equipment has been designed to need minimum maintenance, however, some
performance failures may happen due mainly to natural worn out, caused by the use of
the Processor.
If some problems arise with your Processor check Table - 04 below where there are detailed
some possible soluons

20
TABLE 04
PROBLEM CAUSES SOLUTIONS
The equipment does not
switch ON.
Wrong starng procedure.
Motor thermal protecon
turned ON.
Electricity shortage.
Problem with the electric circuit.
Read item 3.1 Starng.
Wait some minutes and try
again.
Check network.
Call Technical Assistance.
The equipment stops or slows
down when processing the
product.
The belt is sliding.
The safety device on the lid
contact is failing.
Problem with the electric motor.
Adjust the belt tension.
Call Technical Assistance.
The processed product
remains inside the equipment.
The expeller dish is missing.
Offload throat obstructed.
Place the dish.
Clean the throat.
Irregular cut. Blunt blades or damaged
blades. Change the plate.
Burnt smell or smoke. Problem with the electric circuit. Call Technical Assistance.
Damaged cord. Problems with equipment
transportaon. Call Technical Assistance.
Abnormal noises. Problem with the bearings. Call Technical Assistance.
29
DISCOS DESFIADORES QUADRADOS - H.
Ulizados para desfiar produtos (*) que após o processamento, apresentarão seções
quadradas.
(*) Cenoura, beterraba, rabanete, batata, chuchu, nabo e similares.
DISCO RALADOR - V.
Ulizado para ralar produtos (*) (exceto folhas). (*) Pão, queijo, coco, castanha de caju e
similares.
CUADRO DE SELECCIÓN DE CORTES
PRODUCTO TIPOS DE CORTE DISCOS
Remolacha Faas E1, E3
Desfiadas Z3, Z5 ,Z8
Zanahoria*
Faas E1, E3
Desfiadas Z3, Z5, Z8
Raladas V
Repollo Tiras E1, E3
Desfiados Z3, Z5 ,Z8
Cogumelo Faas E1,E3
Cebolla Faas E3
Tomate Faas E3
Pepino* Faas E1, E3
PimIento Faas E1, E3
Rábano Faas E1, E3
Desfiados Z3, Z5, Z8
Patata Faas - Chip´s E1, E3
Palha Z3, Z5, Z8
Plátano* Faas E3
Manzana Faas E1, E3
Coco Desfiados Z3, Z5, Z8
Ralados V
CUADRO 02
IMPORTANTE
El CUADRO 2 (Cuadro de selección de cortes) sugerir Ɵpos de cortes para algunos
productos comúnmente procesados en cocinas y restaurantes. El resultado dos
cortes, van a depender del estado, del Ɵpo y de la cualidad del producto a ser
procesado.
*Para estos productos se recomienda solamente la uƟlización del bocal menor.
El uso del bocal mayor resultará en caída en la cualidad del procesamiento del
producto.
Other manuals for PA-7
1
Table of contents
Other Skymsen Food Processor manuals

Skymsen
Skymsen PA-7LE-N User manual

Skymsen
Skymsen PA-141 User manual

Skymsen
Skymsen PA-7 User manual

Skymsen
Skymsen PA-7S User manual

Skymsen
Skymsen Master-SS User manual

Skymsen
Skymsen PA-14-N User manual

Skymsen
Skymsen PAIE User manual

Skymsen
Skymsen PC-7L User manual

Skymsen
Skymsen PA-14-N User manual

Skymsen
Skymsen PAIE User manual
Popular Food Processor manuals by other brands

Tower Hobbies
Tower Hobbies T80435 Safety and instruction manual

Cuisinart
Cuisinart EVOLUTIONX CORDLESS RMC-100C Instruction/recipe booklet

Bellini
Bellini BTGW10 Gourmet Wizard manual

Ovente
Ovente PF1007 Series quick start guide

Silvercrest
Silvercrest MONSIEUR CUISINE CONNECT operating instructions

KitchenAid
KitchenAid KSM60SP Series manual