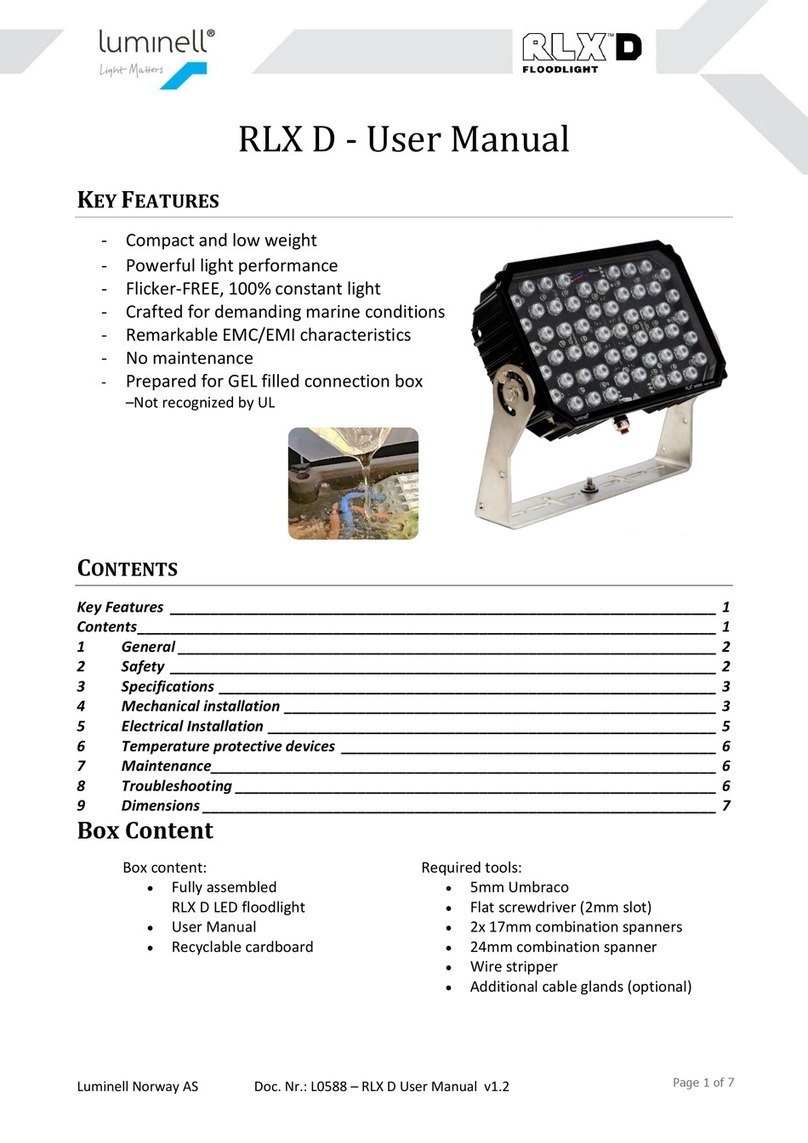
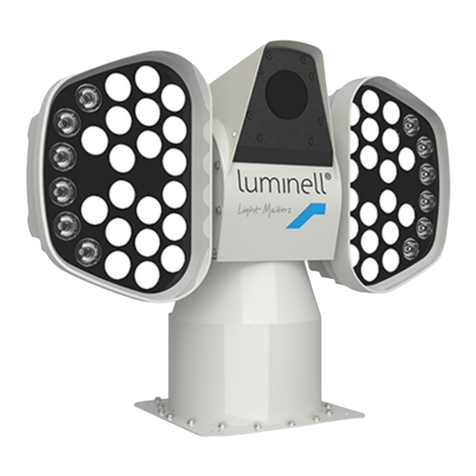
LUMINELL SL1 Instruction Manual

LUMINELL SWEDEN AB 1
BY LUSEARCHLIGHT SYSTEM
BY LUMINELL
INSTALLATION & USER'S MANUAL
November 2021
V 1.3
Doc no: CLN0862

LUMINELL SWEDEN AB 2
Dear Customer.
Thank you for choosing a searchlight from Luminell.
Our Searchlight products are assembled in Sweden by a dedicated team of technicians,
where the components used are chosen with special focus on both performance and quality.
If you have a question or if you experience a problem, please don't hesitate to contact us.
Luminell Sweden AB
Service & Technical Support
service.sweden@glamox.com
Phone: +46 35 38280
All information in this manual was correct at time of publication. However, as our engineers
are always updating and improving our products, your system's software might provide a
slightly different appearance or modified functionality than presented in this manual.
If your system lacks any function presented in this manual, there is possibly a software
update available to resolve this, please contact Luminell for more information.
With new firmware updates come new features that are not currently described in this
manual, for the latest firmware and manual update information contact Luminell Service &
Technical Support or check Glamox homepage for info.
https://glamox.com/gmo/products#

LUMINELL SWEDEN AB 3
DISCLAIMER
Luminell makes no representations or warranties with respect to this manual and, to the
maximum extent permitted by law, expressly limits its liability for breach of any warranty that
may be implied to the replacement of this manual with another. Furthermore, Luminell
reserves the right to revise this publication at any time without incurring an obligation to notify
any person of the revision.
The information provided in this documentation contains general descriptions and/or
technical characteristics of the performance of the products contained herein. This
documentation is not intended as a substitute for and is not to be used for determining
suitability or reliability of these products for specific user applications. It is the duty of any
such user or integrator to perform the appropriate and complete risk analysis, evaluation and
testing of the products with respect to the relevant specific application or use thereof.
Luminell shall not be responsible or liable for misuse of the information that is contained
herein. If you have any suggestions for improvements or amendments or have found errors
in this publication, please notify us.
All pertinent state, regional, and local safety regulations must be observed when installing
and using this product. For reasons of safety and to ensure compliance with documented
system data, only the manufacturer or any of their registered service partner shall perform
repairs on this product.
Failure to observe this information can result in injury or equipment damage.
Copyright © 2021 by Luminell.
All rights reserved. No part of this publication may be reproduced, distributed, or transmitted
in any form or by any means, including photocopying, recording, or other electronic or
mechanical methods, without the prior written permission of the publisher.
For permission requests, contact us at the address: esther.volstad@glamox.com.

LUMINELL SWEDEN AB 4
Product Modifications
Date
Type
Modifications
2020
A1
Initial product release
Document versions
Date
Version
Document Changes
Required
firmware
pack
19-11-2019
0.1
Initial draft
Beta 1
16-03-2020
1.0
Release 1
1.0
18-09-2020
1.1
Firmware update added, other minor changes
1.0
01-02-2021
1.2
Features added: surveillance, language, sync
1.8
22-11-2021
1.3
Feature added: Wave compensation.links and mail
contacts updated to Glamox
1,18
Approvals
This document requires following approvals:
Name
Title
Anders Holst
Technical manager - Luminell Sweden AB
Markus Lundqvist
Product Manager - Luminell Sweden AB
Aprovals
Title
Written and approved by:
Reviewed and approved by:
Anders Holst
Markus Lundqvist

LUMINELL SWEDEN AB 6
Connection example AC using an external PSU (optional) 27
1xSL1 and 2xOperator panels 28
2xSL1 and 1xOperator panels 29
Light dim level 36
Light beam angel 37
How does it work? 38
Change the function shortcuts on the homescreen 40
Set fixed position 41
Modify sweep 42
Start surveillance 43
Modify surveillance 43
Surveillance settings 44
Set surveillance positions 45
Switch system 46
Park all 47
Start Sync 47

1 WARRANTY CONDITIONS
LUMINELL SWEDEN AB 8
1 WARRANTY CONDITIONS
General Terms and Conditions can be found on our website
https://glamox.com/gmo/general-terms-and-conditions-for-delivery-and-sale
Warranty period
LUMINELL offer a warranty for the following products:
- LED-based lamps: warranty period: 60 months
- HMI-based lamps: warranty period: 24 months
- Spare parts: warranty period: 12 months
Warranty period starts from the date the goods is shipped from LUMINELL factory.
Product specific conditions
A correctly installed searchlight system from Luminell requires no planned regular
maintenance or service other than regular cleaning and care during the first 10 years of
operation.
The “Preventive maintenance”plan describes how to keep the product in good condition.
The warranty is conditioned by below mentioned key points.
Before powering up the unit, make sure that:
The mechanical fundament where the searchlight is placed is robust.
Outgoing cable radius from the searchlight is smooth and not stressed.
Ethernet cable not placed together with high power cables.
Electrical connections are made according to electrical scheme and wiring diagram.
Length of cables are not exceeding the recommended maximum lengths as stated
below:
1. Remote cable / Ethernet cable between E-box and remote control: Max 100 meter
(longer distance requires an amplifier or fibre optic version).
The remote panel (OP) is bridge mounted in an IP56 environment. If placed outside, it
must be under a protection hood when not in use.
After above checkpoints are verified, the system should be started up as per this
manual to verify the functionalities.
In case of any questions related to the warranty, please contact us at
service.sweden@glamox.com for additional support.

2 PREFACE
LUMINELL SWEDEN AB 9
2 PREFACE
2.1 SHORT PRESENTATION OF SL1
Luminell sweden AB manufactures professional marine searchlights and has done so since
the early 90's.
The SL1 is a compact and extremely powerful LED searchlight with wave-compensated
movement and digital controlled spot / flood light beam.
Developed for and targeting Civil/Naval High Speed and Light Craft as well as Yachts. Built
to last with same quality standards as the bigger sisters but in a more compact format.
Performance, ease of use, quality and design are combined into an extremely robust unit
with innovative technology that sets a new standard for LED-searchlight of this size.
2.2 ABOUT THIS MANUAL
The purpose of this manual is to describe the functions and to provide instructions for
installation, operation, maintenance and troubleshooting of the SL1 searchlight system.
This manual contains application and functionality descriptions and lists function blocks,
electrical diagrams, input and output signals, setting parameters and technical data.
The manual can be used as a technical reference during the engineering phase, installation
and commissioning phase, and during normal use.
Obtaining Documentation and Information
The latest version of this manual is also available as a digital PDF file and can be
downloaded from Glamox homepage for SL1:
https://glamox.com/gmo/products/gmo-sl1-led-searchlight
Other languages
This is the English user manual. Manuals in other languages might become available upon
request, contact us for more information.
Ordering Documentation
Documentation, user instructions and other technical information can be ordered by mailing
service.sweden@glamox.com or call +46 35 382 80
Documentation Feedback
If you want to give us documentation feedback, please send a mail to
service.sweden@glamox.com. We appreciate all your comments.

2 PREFACE
LUMINELL SWEDEN AB 10
2.3 FINDING AND RECORDING THE SERIAL NUMBERS
For all support and service requests you will be asked for the product serial number.
Please locate the model plates on the equipment and write down the serial numbers to the
fields on the right for future use. You can locate the plate by the pictures below.
SL1
SL1 Operator panel
Sn SL1: _______________
Date: _______________
HW ver: _______________
Sn SL1-OP: _______________
Date: _______________
HW ver: _______________

3 SAFETY
LUMINELL SWEDEN AB 11
3 SAFETY
3.1 EXPLANATION OF SAFETY WARNINGS AND OTHER SYMBOLS
Danger indicates a hazard with a high level of risk which, if not avoided, will result in death or
serious injury.
Warning indicates a hazard with a medium level of risk which, if not avoided, could result in
death or serious injury.
Caution indicates a hazard with a low level of risk which, if not avoided, could result in minor
or moderate injury.
Notice indicates installation, operation, or maintenance information that is NOT HAZARD
RELATED.
This is not a safety symbol. This symbol indicates important notes.
General warning.
Symbol followed by accompanying warning text.
Warning: Hot surface, avoid touching.
The LED module becomes hot during prolonged use, do not touch the
surface but allow to cool for at least 15 minutes before handling.
Warning: Automatic rotation at power on.
Searchlight will start rotating during calibration process.
To avoid accident, cut power before any work on or nearby the searchlight.
Warning: Optical Radiation.
This fixture generates powerful visible light.
Avoid looking directly at the light source as this may injure the eyes.

3 SAFETY
LUMINELL SWEDEN AB 12
3.2 RETAINING INSTRUCTIONS
Read and understand this manual and its safety instructions before using this product.
Failure to do so can result in serious injury or death.
Follow all the instructions. This will avoid electric shocks or other hazards that may
result in damage to property and/or severe or fatal injuries.
The product shall only be used by persons who have fully read and understand the
contents of this user manual.
Ensure that each person who uses the product has read these warnings and
instructions and follows them.
Keep all safety information and instructions for future reference and pass them on to
subsequent users of the product.
The manufacturer is not liable for cases of material damage or personal injury caused
by incorrect handling or non-compliance with the safety instructions. In such cases, the
warranty will be voided.

4 Technical Data
LUMINELL SWEDEN AB 13
4 TECHNICAL DATA
4.1 SL1
Technical Data SL1
Input
Nominal voltage
24VDC (20...28VDC)
Power consumption in operation
Max 500W
Power consumption in standby
mode (light off)
5W
Current at 24V
Max 20,8A
Installation
Mounting position
- Standing (default factory setting)
- Hanging (see manuals “Installation Menu Settings”)
Electrical interface to vessel
- DC power 3 wires (+/-/earth) (see drawing in manual for
details)
- Ethernet to operator control panel or switch (if any)
Mechanical interface to vessel
- 4 x threaded rod M8 in the searchlight base
- Sealing between vessel and searchlight mechanical hub for
galvanic insulation
Light performance
Spot beam
3.5°/ 1 800 kCd / 1340 m
Wide beam
15 °/ 420 kCd / 12 000 lm
Initial luminous flux
20 000 lm
CRI
Min. 70
Color temp
6000 K
Start-up
System boot time
(from power off)
≈30 sec (searchlight homing procedure)
Environmental
Operating ambient temperature
-25ºC to +55ºC (-13°F to 131°F)
Storage temperature
-25°C to +70°C (-13°F to +158°F)
IP class
IP66/67
Vibration
Designed for IEC 60945
Shock
Designed for IEC 60945
Dimensions & weight
Static size
19 x 40 x 42 cm (see drawing in manual for details)
Weight
18 kg
Materials & Colors
Body / casing
Seawater resistant; casted, anodized, and powder coated aluminum
Base, bolts
Stainless steel AISI 316L (1.4404), A4
Glass
Tempered glass
Standard Colors
- White RAL 9016 gloss level 70
- Matt Jet Black RAL 9005 gloss level 20
Pan/ tilt performance
Horizontal (Pan)
- Unlimited movement with slipring technology
- Horizontal movement max speed 33°/second
Vertical (Tilt)
- + 90°/ - 30 movement
- Vertical movement max speed 68°/second
- Wave compensation function (firmware update might be
required, contact Luminell)

4 Technical Data
LUMINELL SWEDEN AB 14
4.2 OPERATOR PANEL
Technical Data Operator Panel
Input
Nominal voltage
24VDC (20...28VDC)
Power consumption in operation
Max 10W
Power consumption in standby
mode (parked, light off)
2,2W
Current at 24V
Max 0,4A
Installation
Electrical interface to vessel
- DC power 3 wires (+/-/earth) (see drawing in manual for details)
- Ethernet to operator control panel or switch (if any)
Mechanical interface to vessel
- 3 x threaded rod M4 in panel base
- Sealing between console and panel
Start-up
System boot time
(from power off)
≈30 sec (searchlight homing procedure)
Environmental
Operating ambient temperature
-25ºC to +55ºC (-13°F to 131°F)
Storage temperature
-25°C to +70°C (-13°F to +158°F)
IP class
IP56
Vibration
IEC 60945
Shock
IEC 60945
Dimensions & weight
Static size
19 x 40 x 42 cm (see drawing in manual for details)
Weight
0,5kg
Materials & Colors
Body / casing
Operator panel made in PC-ABS
Base, bolts
Stainless steel AISI 316L (1.4404), A4
Functions
Direct button functions
- Horizontal and vertical movement
- Light on/off
- Wave compensation on/off (firmware update might be required,
contact Luminell)
- Beam angle spot/flood
- Dimming step by step
Standard menu functions
- Custom home screen –set your 4 most used functions
- Up to 4 programmable fixed positions
- Sweep in horizontal direction
- Surveillance in horizontal and vertical direction
- Switch –to another potential SL1 in the network
- Sync

5 PREPARATION OF THE PRODUCT FOR USE
LUMINELL SWEDEN AB 15
1. Lift away the accessory box and put
aside.
3. With both hands grab under the LED
housing and lift the complete package
up and out of the box.
4. The foam around the base protects the
searchlight and the cables from damage
during transport and handling and can
also be used as a temporary stand.
2. Remove the protective foam from the
support arms.
5 PREPARATION OF THE PRODUCT FOR USE
5.1 UNPACKING THE PRODUCT AND CHECKING THE CONTENTS
The system is delivered in a cardboard box containing 1 x SL1 searchlight with 3m
powercable and 0,9m circular LAN cable mounted to the searchlight base.
Make sure the box is placed with the correct side up, see the symbols on the box.
To unpack follow the steps below:
Accessory box contains:
•1 x SL1 operator panel.
•1 x Operator powercable 3m.
•3 x Lan cables 2m circular to RJ45.
•2 x keystone adapters RJ45 to RJ45.
•1 x User and installation manual.
•1 x Quick start guide.
•1 x Warranty registration card.

5 PREPARATION OF THE PRODUCT FOR USE
LUMINELL SWEDEN AB 16
5.2 LIFTING, HANDING AND TRANSPORTING THE PRODUCT
It is important that the searchlight is transported and stored safely, follow the instructions
below.
To lift the product safely:
1. When carrying the product, it is most convenient to transport it in its box where it
is most protected. Use the carrying handle and be careful when putting it down.
2. When the searchlight is unpacked and is to be transported, the grip should be as
shown in the picture to the right, the wiring must be relieved during this transport.
By mounting four M8 bolts in the base it can be placed upright without damaging
protruding wiring or cable gland.
Storing the product
Storage temperature -25°C to +70°C (-13°F to +158°F).

6 Install the Product
LUMINELL SWEDEN AB 17
6 INSTALL THE PRODUCT
6.1 MECHANICAL INSTALLATION OF SL1
The searchlight is mounted standing or hanging in a foundation using four hex socket
threaded rods (M8x60) in its base, the threaded rods come with the delivery along with
washers and lock nuts.
1. Apply Loctite 243 or equivalent on the rods, screw them into the searchlight base and
tighten firmly. Let it cure for 30 minutes.
2. Mount the foundation isolator/gasket.

6 Install the Product
LUMINELL SWEDEN AB 18
3. Pull the cables through the center hole without damaging the cable jacket. The
threaded bolts must fit perfectly in the holes, don’t use violence if they don’t as this
can damage the bolts. Enlarge the holes with file or drill until the bolts fit.
If the bolts must pass through the roof, an appropriate sealant must be used to prevent water
penetration into the vessel, the gasket delivered with the product should in these cases not
be seen as the only seal but should be supplemented with a suitable sealant.
4. Mount the supplied washers and lock nuts on the threaded rods and tighten, the
recommended torque for rigid surfaces is??

6 Install the Product
LUMINELL SWEDEN AB 19
Mechanical drawing SL1

6 Install the Product
LUMINELL SWEDEN AB 20
Mechanical drawing SL1, base measurements
Other manuals for SL1
1
Table of contents
Other LUMINELL Floodlight manuals

LUMINELL
LUMINELL SL2 Instruction Manual

LUMINELL
LUMINELL RLX D User manual

LUMINELL
LUMINELL SL1 Instruction Manual

LUMINELL
LUMINELL RLX CxZ1.21 User manual

LUMINELL
LUMINELL RLX DxZ1.21 User manual

LUMINELL
LUMINELL RLX Series User manual

LUMINELL
LUMINELL RLX E User manual

LUMINELL
LUMINELL RLX DxZ2.21 User manual
Popular Floodlight manuals by other brands

Good Earth Lighting
Good Earth Lighting SE1249-WH3-02LF7-G manual

brennenstuhl
brennenstuhl OL 1650 operating instructions

EuroLite
EuroLite SLS-184 user manual

XCell
XCell WORKcompact quick start guide

FLUXON
FLUXON LB90VR Installation and operating instructions

DMK
DMK SEITO G Installation and operating instructions