manuals.online logo
Brands
  1. Home
  2. •
  3. Brands
  4. •
  5. luminii
  6. •
  7. Light Fixture
  8. •
  9. luminii Kendo-45M Series User manual

luminii Kendo-45M Series User manual

REV1.0 June 12, 2020 11:52 AM
Kendo-45M- Installation Instructions
*LUMINII RESERVES THE RIGHTS TO CHANGE SPECIFICATION & INSTRUCTION WITHOUT NOTICE
Models K45M-XX
Page 1 of 4
7777 N. Merrimac Ave
Niles, IL 60714
T 224.333.6033
F 224.757.7557
[email protected]
www.luminii.com
Please read complete instruction prior to installation
and keep for future reference!
Instruction page index:
Mounting bracket installation 2
Connect to Power 3
Power feed layout guide 4
Kendo-45M with
angular profile
Kendo-45M with
round profile
REV1.0 June 12, 2020 11:52 AM
Kendo-45M- Installation Instructions
*LUMINII RESERVES THE RIGHTS TO CHANGE SPECIFICATION & INSTRUCTION WITHOUT NOTICE
Please read complete instruction prior to installation and keep for future reference!
Models K45M-XX
1. Product to be installed by a qualified electrician.
2. Prior to installation ensure power is off at fuse box to prevent electrical shock. Page 2 of 4
7777 N. Merrimac Ave
Niles, IL 60714
T 224.333.6033
F 224.757.7557
[email protected]
www.luminii.com
1
lead wires
0.75”
0.74”
0.77”
0.75”
0.60”
0.75”
1.1 Determine the location of where the fixture(s) will be installed. Lay the fixture(s) on the surface, and make any necessary reference marks for the
concealed bracket. Make marks 4” from each end of the fixture(s) and also every 30” in between. Use the fixture profile and mounting bracket detail,
for any additional details. NOTE: If mounting next to a wall, leave a 0.25” gap. To later remove if needed.
1.2 Lay the concealed bracket onto the reference mark points and secure using the provided hardware.
Kendo 45M,
w/round profile
Kendo 45M,
w/angular profile
1.1
4”
every 30”
fixture
concealed bracket
4”
2screw
concealed bracket
2.1 Align the mounting brackets to the marks, followed by securing each mounting bracket with 1 screws. Snap the extrusion into the mounting brackets.
2.2 To remove the extrusion from the mounting brackets, carefully insert a flat screwdriver to the bottom edge of the extrusion then pull up until the extrusion
pops up.
REV1.0 June 12, 2020 11:52 AM
Kendo-45M- Installation Instructions
*LUMINII RESERVES THE RIGHTS TO CHANGE SPECIFICATION & INSTRUCTION WITHOUT NOTICE
Please read complete instruction prior to installation and keep for future reference!
Models K45M-XX
1. Product to be installed by a qualified electrician.
2. Prior to installation ensure power is off at fuse box to prevent electrical shock. Page 3 of 4
7777 N. Merrimac Ave
Niles, IL 60714
T 224.333.6033
F 224.757.7557
[email protected]
www.luminii.com
3lead wires
pass through hole
for power feed
3.1
3.1 If necessary make any pass through holes for wire lead/connector to the surface, depending on the power feed option. Then snap the fixture
into the fixed mounting clip to secure in place. Diagram on the right side illustrates the common way of connecting multiple fixtures to each other,
depending on the location of the power feed wires.
Female quick
connect end
Male quick
connect end
0.38”
Lead wire
end
Female/male
adapter
0.45”
44.1 Follow one of the two options to connect the fixture to the power supply.
Option 1 - Secure female quick connect to
male quick connect. Feed male quick connect wire
through conduit to power supply.
Option 2 - Feed wire leads to the power supply.
3.1
3.1
OR
to power supply
to power supply
fixture
fixture
female quick
connect
wire leads
male quick
connect
55.1 Connect +24 VDC red wire from the fixture to the power supply +24V DC red wire with a wire nut. Connect -24V DC black wire from the
fixture to power supply -24V DC black wire with a wire nut.
4.1
class II power supply
12 0 V A C 24 VDC to fixture
+24 VDC RED
-24 VDC BLACK -24 VDC BLACK
+24 VDC RED
0.45” 0.20”
REV1.0 June 12, 2020 11:52 AM
Kendo-45M- Installation Instructions
*LUMINII RESERVES THE RIGHTS TO CHANGE SPECIFICATION & INSTRUCTION WITHOUT NOTICE
Please read complete instruction prior to installation and keep for future reference!
Models K45M-XX
1. Product to be installed by a qualified electrician.
2. Prior to installation ensure power is off at fuse box to prevent electrical shock. Page 4 of 4
7777 N. Merrimac Ave
Niles, IL 60714
T 224.333.6033
F 224.757.7557
[email protected]
www.luminii.com
Multiple powerfeed layouts
power supply
low voltage wires
fixture 1
power supplies at the
end of the run
power supplies in the
middle of the run
consecutive layout,
NOT RECOMMENDED
fixture 1
fixture 1
fixture 2
fixture 2
fixture 2
low voltage wires
low voltage wireslow voltage wires
power supply
power supplypower supply

Other luminii Light Fixture manuals

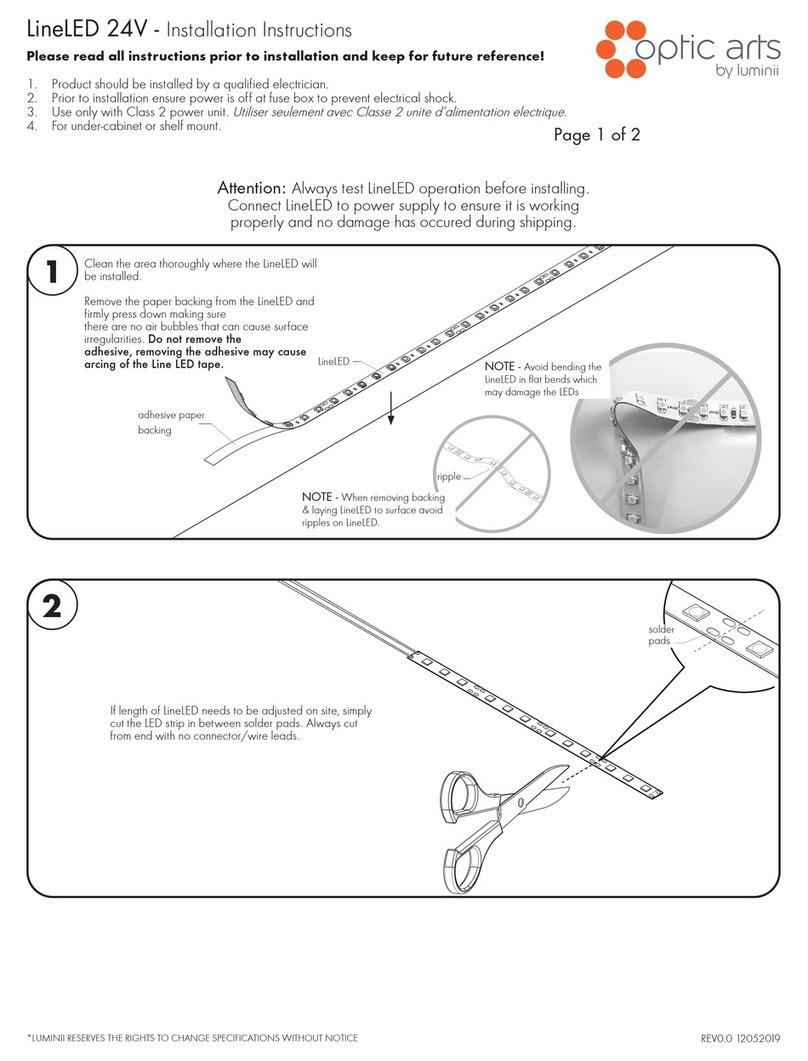
luminii Optic Arts LineLED User manual

luminii

luminii Optic Arts LineLED User manual

luminii Teava User manual

luminii

luminii Teava User manual

Popular Light Fixture manuals by other brands

LIGHTSAFE EBLED2 quick start guide

LIGHTSAFE

LIGHTSAFE EBLED2 quick start guide

Viabizzuno c2 Installing instructions

Viabizzuno

Viabizzuno c2 Installing instructions

Exitronix ILX Series Installation instuctions

Exitronix

Exitronix ILX Series Installation instuctions

Schrack Technik ILAS LED Series Assembly instructions

Schrack Technik

Schrack Technik ILAS LED Series Assembly instructions

Philips Lytespan 83B39LE specification

Philips

Philips Lytespan 83B39LE specification

DS Produkte Z 08550 instructions

DS Produkte

DS Produkte Z 08550 instructions

Seiwa LZLA Series instruction manual

Seiwa

Seiwa LZLA Series instruction manual

Volt Low Voltage Landscape Lighting installation instructions

Volt

Volt Low Voltage Landscape Lighting installation instructions

Patlite LA6 series Operation manual

Patlite

Patlite LA6 series Operation manual

Cooper Crouse-Hinds Champ FMV Series Installation & maintenance information

Cooper Crouse-Hinds

Cooper Crouse-Hinds Champ FMV Series Installation & maintenance information

Philips 33610-11-16 user manual

Philips

Philips 33610-11-16 user manual

enLighten Vico BL06 Series installation instructions

enLighten

enLighten Vico BL06 Series installation instructions

Orphek Atlantik P300 Operational & Safety Guide

Orphek

Orphek Atlantik P300 Operational & Safety Guide

Robe Anolis ArcSource 4 MC II user manual

Robe

Robe Anolis ArcSource 4 MC II user manual

ADJ Inno Spot Elite User instructions

ADJ

ADJ Inno Spot Elite User instructions

Elation Color Spot 575 user manual

Elation

Elation Color Spot 575 user manual

Lightolier Lytecaster 604SQMR specification

Lightolier

Lightolier Lytecaster 604SQMR specification

Draper 19546 manual

Draper

Draper 19546 manual

manuals.online logo
manuals.online logoBrands
  • About & Mission
  • Contact us
  • Privacy Policy
  • Terms and Conditions

Copyright 2025 Manuals.Online. All Rights Reserved.