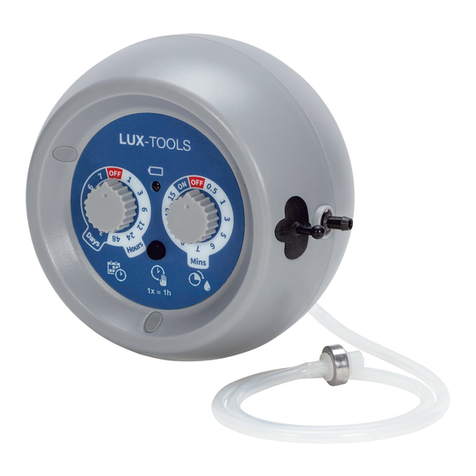
Lux Tools EWSU-8 B User manual

EWSU-8 B
101907
DE Digitaler Bewässerungscomputer
IT Computer di irrigazione digitale
FR Ordinateur d’irrigation numérique
GB Digital irrigation computer
CZ Digitální poítazavlažování
SK Digitálny zavlažovací poíta
PL Cyfrowy komputer do nawadnia-
nia
SI Digitalni namakalni raunalnik
HU Digitális öntözszámítógép
BA/HR
Digitalni kompjuter za navodnja-
vanje
RU -
GR -
NL Digitale bewateringscomputer
SE Digital bevattningsdator
FI Digitaalinen kastelutietokone
KAZ
-

2
DE Originalbetriebsanleitung . . . . . . . . . . . . . . . . . . . . . . . . . . . . . 4
IT Istruzioni originali . . . . . . . . . . . . . . . . . . . . . . . . . . . . . . . . . . . 8
FR Notice originale . . . . . . . . . . . . . . . . . . . . . . . . . . . . . . . . . . . . 12
GB Original instructions . . . . . . . . . . . . . . . . . . . . . . . . . . . . . . . . 16
CZ Pvodní návod k používání . . . . . . . . . . . . . . . . . . . . . . . . . . . 20
SK Pôvodný návod na použitie . . . . . . . . . . . . . . . . . . . . . . . . . . . 24
PL Instrukcja oryginalna . . . . . . . . . . . . . . . . . . . . . . . . . . . . . . . . 28
SI Izvirna navodila . . . . . . . . . . . . . . . . . . . . . . . . . . . . . . . . . . . . 32
HU Eredeti használati utasítás . . . . . . . . . . . . . . . . . . . . . . . . . . . 36
BA/HR
Originalno uputstvo za upotrebu . . . . . . . . . . . . . . . . . . . . . . . 40
RU . . . . . . . . . . . 44
GR . . . . . . . . . . . . . . . . . . . . . . . . . 48
NL Oorspronkelke gebruiksaanwzing . . . . . . . . . . . . . . . . . . . . 52
SE Bruksanvisning i original . . . . . . . . . . . . . . . . . . . . . . . . . . . . . 56
FI Alkuperäiset ohjeet . . . . . . . . . . . . . . . . . . . . . . . . . . . . . . . . . 60
KAZ
. . . . . . . . . . . . . . 64

3
1
10
3
8
7
9
11
2
4
6
5
12
1

DE
4
OriginalbetriebsanleitungDigitaler Bewässerungscomputer
Inhaltsverzeichnis
Bevor Sie beginnen… . . . . . . . . . . . . . . . . . . . . 4
Zu Ihrer Sicherheit . . . . . . . . . . . . . . . . . . . . . . . 4
Ihr Gerät im Überblick . . . . . . . . . . . . . . . . . . . . 5
Inbetriebnahme . . . . . . . . . . . . . . . . . . . . . . . . . . 5
Programmierung . . . . . . . . . . . . . . . . . . . . . . . . . 5
Nützliche Hinweise . . . . . . . . . . . . . . . . . . . . . . . 6
Reinigung und Wartung . . . . . . . . . . . . . . . . . . . 6
Störungen und Hilfe . . . . . . . . . . . . . . . . . . . . . . 6
Entsorgung . . . . . . . . . . . . . . . . . . . . . . . . . . . . . 7
Technische Daten . . . . . . . . . . . . . . . . . . . . . . . . 7
Mängelansprüche . . . . . . . . . . . . . . . . . . . . . . . 70
Bevor Sie beginnen…
Bestimmungsgemäßer Gebrauch
Das Gerät ist für den ausschließlichen Einsatz im
Außenbereich zur Steuerung von Regnern und
Bewässerungssystemen bestimmt. Das Gerät kann
zur automatischen Bewässerung während des
Urlaubs eingesetzt werden.
Das Gerät ist nicht für den gewerblichen Gebrauch
konzipiert. Allgemein anerkannte Unfallverhütungs-
vorschriften und beigelegte Sicherheitshinweise
müssen beachtet werden.
Führen Sie nur Tätigkeiten durch, die in dieser
Gebrauchsanweisung beschrieben sind. Jede
andere Verwendung ist unerlaubter Fehlgebrauch.
Der Hersteller haftet nicht für Schäden die hieraus
entstehen.
Was bedeuten die verwendeten Symbole?
Gefahrenhinweise und Hinweise sind in der
Gebrauchsanweisung deutlich gekennzeichnet. Es
werden folgende Symbole verwendet:
Zu Ihrer Sicherheit
Allgemeine Sicherheitshinweise
•Für einen sicheren Umgang mit diesem Gerät
muss der Benutzer des Gerätes diese
Gebrauchsanweisung vor der ersten Benutzung
gelesen und verstanden haben.
•Beachten Sie alle Sicherheitshinweise! Wenn Sie
die Sicherheitshinweise missachten, gefährden
Sie sich und andere.
•Bewahren Sie alle Gebrauchsanweisungen und
Sicherheitshinweise für die Zukunft auf.
•Wenn Sie das Gerät verkaufen oder weiterge-
ben, händigen Sie unbedingt auch diese
Gebrauchsanweisung aus.
•Das Gerät darf nur benutzt werden, wenn es ein-
wandfrei in Ordnung ist. Ist das Gerät oder ein
Teil davon defekt, muss es außer Betrieb genom-
men und fachgerecht entsorgt werden.
•Verwenden Sie das Gerät nicht in explosionsge-
fährdeten Räumen oder in der Nähe von brenn-
baren Flüssigkeiten oder Gasen!
•Ausgeschaltetes Gerät immer gegen unbeab-
sichtigtes Einschalten sichern.
•Benutzen Sie keine Geräte, bei denen der Ein-
Aus-Schalter nicht ordnungsgemäß funktioniert.
•Halten Sie Kinder vom Gerät fern! Bewahren Sie
das Gerät sicher vor Kindern und unbefugten
Personen auf.
•Überlasten Sie das Gerät nicht. Benutzen Sie
das Gerät nur für Zwecke, für die es vorgesehen
ist.
•Immer mit Umsicht und nur in guter Verfassung
arbeiten: Müdigkeit, Krankheit, Alkoholgenuss,
Medikamenten- und Drogeneinfluss sind unver-
antwortlich, da Sie das Gerät nicht mehr sicher
benutzen können.
•Dieses Gerät ist nicht dafür bestimmt, durch Per-
sonen (einschließlich Kinder) mit eingeschränk-
ten physischen, sensorischen oder geistigen
Fähigkeiten oder Mangel an Erfahrung und/oder
Wissen benutzt zu werden, es sei denn, sie wer-
den durch eine für ihre Sicherheit zuständige
Person beaufsichtigt oder erhielten von dieser
Anweisungen, wie das Gerät zu benutzen ist.
•Stellen Sie sicher, dass Kinder nicht mit dem
Gerät spielen.
•Immer die gültigen nationalen und internationa-
len Sicherheits-, Gesundheits- und Arbeitsvor-
schriften beachten.
Umgang mit batteriebetriebenen Geräten
•Nur vom Hersteller zugelassene Batterien benut-
zen.
•Brandgefahr! Batterien niemals aufladen.
•Batterien bei Nichtbenutzung von Metallgegen-
ständen fernhalten, die einen Kurzschluss verur-
sachen könnten. Es besteht die Gefahr von Ver-
letzungen und Brandgefahr.
•Bei falscher Benutzung kann Flüssigkeit aus der
Batterie austreten. Batterieflüssigkeit kann zu
Hautreizungen und Verbrennungen führen. Kon-
takt unbedingt vermeiden! Bei zufälligem Kontakt
gründlich mit Wasser abspülen. Bei Augenkon-
takt zusätzlich umgehend ärztliche Hilfe in
Anspruch nehmen.
Gerätespezifische Sicherheitshinweise
•Keine wiederaufladbaren Batterien (Akkus)
benutzen.
•Gerät nur senkrecht mit der Überwurfmutter nach
oben montieren, um ein Eindringen von Wasser
in das Batteriefach zu verhindern.
•Die zulässige Maximaltemperatur des durchflie-
ßenden Wassers darf nicht überschritten werden
(Technische Daten – S. 7).
GEFAHR! Unmittelbare Lebens- oder
Verletzungsgefahr! Unmittelbar gefährli-
che Situation, die Tod oder schwere Verlet-
zungen zur Folge haben wird.
WARNUNG! Wahrscheinliche Lebens-
oder Verletzungsgefahr! Allgemein
gefährliche Situation, die Tod oder schwere
Verletzungen zur Folge haben kann.
VORSICHT! Eventuelle Verletzungsge-
fahr! Gefährliche Situation, die Verletzun-
gen zur Folge haben kann.
ACHTUNG! Gefahr von Geräteschäden!
Situation, die Sachschäden zur Folge
haben kann.
Hinweis: Informationen, die zum besseren
Verständnis der Abläufe gegeben werden.

DE
5
•Nur sauberes Süßwasser verwenden.
•Das Gerät darf nur im zulässigen Druckbereich
betrieben werden (Technische Daten – S. 7).
•Zugbelastungen vermeiden. Nicht am ange-
schlossenen Schlauch ziehen.
•Symbole, die sich an Ihrem Gerät befinden, dür-
fen nicht entfernt oder abgedeckt werden. Nicht
mehr lesbare Hinweise am Gerät müssen umge-
hend ersetzt werden.
Ihr Gerät im Überblick
S. 3, Punkt 1
1. EZGrip-Drehkupplung
2. LCD-Anzeige
3. Stellungsanzeige
4. Manuelle Ein/Aus-Taste
5. Batteriefach
6. Einstellrad
7. [L/R]-Taste
8. [+]/[]Tasten
9. Sensoranschluss
10. Einlass
11. Auslass
12. Klappe
Lieferumfang
•Gebrauchsanweisung
•Bewässerungscomputer
•Steckverbinder für Gartenschlauch
Inbetriebnahme
Batterie einlegen
– Batteriefach auf der Geräterückseite herauszie-
hen.
– Batterien einlegen. Auf richtige Polarität ach-
ten.
– Batteriefach wieder einsetzen. Auf richtige
Lage der Dichtung achten.
Anschluss
– Wasserhahn zudrehen.
– Überwurfmutter (10) von Hand auf den Wasser-
hahn schrauben. Keine Zange verwenden.
– Wasserhahn aufdrehen.
Programmierung
– Drehen Sie das Einstellrad auf die für die Einrich-
tung angegebenen Positionen.
– Drücken Sie die Taste [L/R], um für alle Pro-
gramme zwischen linkem und rechtem Ausgang
zu wechseln.
•Der linke und rechte Ausgang können gleichzei-
tig funktionieren (der Wasserdurchfluss nimmt
ab, wenn beide Seiten gleichzeitig genutzt wer-
den.)
Einstellen der Uhr
– Drehen Sie das Einstellrad in Position [].
– Die Uhr arbeitet im 24-Stunden-Modus. Drücken
Sie die Taste [+] oder die Taste [], um die rich-
tige Zeit auszuwählen (Wenn Sie die Tasten [+]
oder []gedrückt halten, ändern sich die Zahlen
schneller.)
Einstellen der Startzeit
– Drehen Sie das Einstellrad auf [].
– Drücken Sie die Taste [+] oder [], um die
gewünschte Startzeit auszuwählen (Wenn Sie
die Tasten [+] oder []gedrückt halten, ändern
sich die Zahlen schneller.)
•Die Standard-Startzeit ist auf 5:00 Uhr voreinge-
stellt.
Einstellen der Bewässerungsdauer
– Drehen Sie das Einstellrad auf [].
– Drücken Sie die Tasten [+] oder, um die
gewünschte Bewässerungszeit auszuwählen
(Wenn Sie die Tasten [+] oder []gedrückt hal-
ten, ändern sich die Zahlen schneller.)
•Der Bewässerungszeitraum ist zwischen 1
Minute und 360 Minuten minütlich einstellbar.
(Die Standardbewässerungsdauer beträgt 15
Minuten.)
•Wenn []auf 0 gesetzt ist, funktioniert das Gerät
nicht.
Einstellen der Bewässerungsfrequenz
– Drehen Sie das Einstellrad auf [].
– Drücken Sie die Tasten [+] oder [], um die
gewünschte Frequenz auszuwählen.
– Der Bewässerungsfrequenzbereich liegt zwi-
schen 1 Stunde und 7 Tagen. Die Standardbe-
wässerungsfrequenz beträgt 12 Stunden.
Bewässerungshäufigkeits-Diagramm
1 HRS, 2 HRS, 4 HRS, 12 HRS, 1 DAYS, 2 DAYS,
3 DAYS, 4 DAYS, 5 DAYS, 6 DAYS, 7 DAYS
– Nachdem Sie alle oben genannten Einstellungen
vorgenommen haben, drehen Sie das Einstellrad
auf [ON]. Das Programm läuft gemäß der von
Ihren eingestellten Zeiten ab.
Einstellung einer Beregnungsverzögerung
(während der Beregnung einrichten, um die
Bewässerung vorübergehend zu verzögern)
– Drehen Sie das Einstellrad auf [ON].
– Drücken Sie einmal die Taste [+], bis die Wör-
ter [DELAY] zu sehen sind.
Vor Inbetriebnahme Gebrauchsanweisung
lesen und beachten.
Hinweis: Wir empfehlen, das Gerät vor
dem Anschluss an einen Wasserhahn zu
programmieren.
Hinweis: Das Einstellrad sollte sich in der
Position [ON] befinden, damit der Timer
funktioniert (programmierter Modus oder
Handbetrieb).
Hinweis: Wenn neue Batterien eingelegt
wurden, ist die Standarduhrzeit auf 12:00
Uhr voreingestellt.
Hinweis: Das Programm wird nicht ausge-
führt, wenn der von Ihnen einge-
stellte Wert []größer als []ist.

DE
6
– Drücken Sie die Taste [+] erneut, um die Anzahl
der Tage auszuwählen, um die Sie die Bewässe-
rung verzögern möchten. (z.B. 24, 48, 72 Stun-
den)
•Wenn innerhalb von 5 Sekunden keine weiteren
Einstellungen vorgenommen werden, speichert
der Computer die aktuelle Einstellung und wech-
selt zum Startbildschirm (Uhr).
•Das Display wechselt dann zwischen der Uhr
und der Beregnungsverzögerungszeit (in Stun-
den).
– Drehen Sie das Einstellrad auf [OFF] oder [ON],
oder stellen Sie die Beregnungsverzögerungs-
zeit auf [0], wenn Sie die Beregnungsverzöge-
rungsfunktion ausschalten möchten.
Beregnungsverzögerungszeit-Diagramm
0 HRS, 24 HRS, 48 HRS, 72 HRS
–[]: Drücken Sie diese Taste, um den manuellen
Bewässerungsmodus zu aktivieren.
Nützliche Hinweise
•Das LCD-Display zeigt die Countdown-Zeit bis
zur nächsten Bewässerung an. Wenn Sie das
Einstellrad von [ON] in eine andere Position dre-
hen, wird die Bewässerung sofort gestoppt.
•Wenn Sie das Einstellrad auf [ON] stellen und
die Taste []drücken, wechselt der Computer in
den manuellen Modus und die Bewässerung
beginnt sofort.
•Wenn Sie im manuellen Modus die Taste []
erneut drücken oder das Einstellrad in eine belie-
bige Position außer [ON] drehen, wird die
Bewässerung sofort gestoppt.
•Wenn die Beregnungsverzögerungszeit im
Handbetrieb eingestellt wurde, zeigt der Compu-
ter die Beregnungsverzögerungszeit nicht an.
•Die standardmäßige manuelle Bewässerungs-
zeit beträgt 0 Minuten, der Einstellbereich ist 0
bis 240 Minuten.
• [OFF]: Wenn Sie das Einstellrad auf [OFF] stel-
len, schaltet sich der Computer aus.
•Die minimale Betriebsspannung beträgt 2,4 V.
Wenn die Batteriespannung geringer als 2,4 V
ist, blinkt das Symbol für niedrigen Batteriestand
auf dem Display und der Computer funktioniert
nicht mehr.
•Um Ihren Computer vor Witterungseinflüssen zu
schützen, vergewissern Sie sich, dass die Vor-
derseite des Computers nach dem Einstellen der
Programmierung mit der eingebauten Abde-
ckung abgedeckt wurde.
Reinigung und Wartung
Reinigung
– Gerät äußerlich mit leicht angefeuchtetem Tuch
abwischen.
– Filtersieb in Wasserhahn-Anschluss (10) regel-
mäßig mit einer Bürste reinigen.
Aufbewahrung
Bei Frostgefahr Gerät und Zubehör abbauen, reini-
gen und frostgeschützt aufbewahren.
Störungen und Hilfe
Wenn etwas nicht funktioniert…
Oft sind es nur kleine Fehler, die zu einer Störung füh-
ren. Meistens können Sie diese leicht selbst behe-
ben. Bitte sehen Sie zuerst in der folgenden Tabelle
nach, bevor Sie sich an den Händler wenden. So
ersparen Sie sich viel Mühe und eventuell auch Kos-
ten.
Hinweis: Vor Abnehmen des Gerätes vom
Wasserhahn, Hahn vollständig schließen.
ACHTUNG! Gefahr von Geräteschäden!
Frost zerstört Gerät und Zubehör, da diese
stets Wasser enthalten!
GEFAHR! Verletzungsgefahr! Unsachge-
mäße Reparaturen können dazu führen,
dass Ihr Gerät nicht mehr sicher funktio-
niert. Sie gefährden damit sich und Ihre
Umgebung.
Fehler/Störung Ursache Abhilfe
Display zeigt keine Informationen
an. Batterie nicht richtig eingelegt? Batterie einlegen – S. 5
Batterie schwach?
Temperatur am Display zu hoch? Anzeige erscheint nach Abkühlung.
Bewässerungszyklus am Gerät
nicht festlegbar. Tag/Zeit falsch eingestellt? Tag und Zeit erneut eingeben.
Bewässerungszyklus nicht ausge-
führt. Programmierung unvollständig? Gerät erneut programmieren.
Tag/Zeit falsch eingestellt? Tag und Zeit erneut eingeben.
Programm ausgeschaltet? Programm auf [ON] stellen.
Batterie nach kurzer Zeit schon leer. Batterie schwach? Batterie einlegen – S. 5
Wasserdruck zu niedrig. Filter verstopft? Filtersieb reinigen
Hahn nur teilweise aufgedreht? Hahn ganz aufdrehen.
Schlauch geknickt oder beschädigt? Schlauch überprüfen.
Wasserverteilung auf zu viele Gerä-
te? Anzahl der Geräte reduzieren.

DE
7
Können Sie den Fehler nicht selbst beheben, wenden
Sie sich bitte direkt an den Händler. Beachten Sie
bitte, dass durch unsachgemäße Reparaturen auch
der Gewährleistungsanspruch erlischt und Ihnen ggf.
Zusatzkosten entstehen.
Entsorgung
Gerät entsorgen
Das Symbol der durchgestrichenen Müll-
tonne bedeutet: Batterien und Akkus, Elek-
tro- und Elektronikgeräte dürfen nicht in den
Hausmüll. Sie können umwelt- und gesund-
heitsschädigende Stoffe enthalten.
Verbraucher sind verpflichtet, Elektro-Altgeräte,
Gerätealtbatterien und Akkus getrennt vom Hausmüll
über eine offizielle Sammelstelle zu entsorgen um
eine sachgerechte Weiterverarbeitung zu gewähr-
leisten. Informationen zur Rückgabe erhalten Sie bei
Ihrem Verkäufer. Die Rücknahme erfolgt kostenfrei.
Batterien und Akkus, die nicht fest in Elektro-
Altgeräten verbaut sind, müssen vor der Ent-
sorgung entnommen und getrennt entsorgt
werden. Lithiumbatterien und Akkupacks
aller Systeme sind nur im entladenen Zustand bei
den Rücknahmestellen abzugeben. Die Batterien
sind immer durch abkleben der Pole vor Kurzschlüs-
sen zu sichern.
Jeder Endnutzer ist selbst für die Löschung perso-
nenbezogener Daten auf den zu entsorgenden Altge-
räten verantwortlich.
Verpackung entsorgen
Die Verpackung besteht aus Karton und
entsprechend gekennzeichneten Kunststof-
fen, die wiederverwertet werden können.
– Führen Sie diese Materialien der Wie-
derverwertung zu.
Technische Daten
Zubehör
Zubehörteile sind bei Ihrem Händler erhältlich.
Artikelnummer 101907
Anschlussgewinde
•für Wasserhahn
•für Gartenschlauch
26,5 mm (G ¾")
33,3 mm (G 1")
Zul. Betriebsdruckbereich 0,5–8 bar
Zul. Temperaturbereich 5–70 °C
Max. Wassertemperatur 35 °C
Batterie (nicht im Lieferumfang) 2×, LR6, AA, 1,5 V
Strom im Bereitschaftszustand 100 A
Schutzart IPX6

IT
8
Istruzioni originaliComputer di irrigazione digitale
Indice
Prima di cominciare… . . . . . . . . . . . . . . . . . . . . 8
Per la vostra sicurezza . . . . . . . . . . . . . . . . . . . . 8
Panoramica dell’apparecchio . . . . . . . . . . . . . . 9
Messa in funzione . . . . . . . . . . . . . . . . . . . . . . . . 9
Programmazione . . . . . . . . . . . . . . . . . . . . . . . . 9
Indicazioni utili . . . . . . . . . . . . . . . . . . . . . . . . . 10
Pulizia e manutenzione . . . . . . . . . . . . . . . . . . 10
Anomalie e rimedi . . . . . . . . . . . . . . . . . . . . . . . 10
Smaltimento . . . . . . . . . . . . . . . . . . . . . . . . . . . 11
Dati tecnici . . . . . . . . . . . . . . . . . . . . . . . . . . . . 11
Reclami per difetti . . . . . . . . . . . . . . . . . . . . . . 70
Prima di cominciare…
Utilizzo conforme alla destinazione d’uso
Questo apparecchio è destinato esclusivamente per
l’uso all’aperto, per il controllo degli irroratori e degli
impianti di irrigazione. L’apparecchio può essere uti-
lizzato durante le vacanze per l’irrigazione automa-
tica.
Questo apparecchio non è destinato all’uso commer-
ciale. Osservare le norme generali relative alla pre-
venzione degli incidenti e le indicazioni di sicurezza in
dotazione.
Eseguire unicamente le attività descritte nel presente
manuale di istruzioni. Qualsiasi altro impiego verrà
considerato come un utilizzo improprio. Il produttore
non risponde per eventuali danni derivanti da tale uti-
lizzo.
Cosa significano i simboli usati?
Indicazioni di pericolo e note sono contraddistinte
chiaramente nel manuale di istruzioni. Si utilizzano i
simboli seguenti:
Per la vostra sicurezza
Precauzioni generali
•Per lavorare e gestire questo apparecchio in
sicurezza è necessario che l’utilizzatore se ne
serva per la prima volta dopo aver letto e ben
compreso le presenti istruzioni per l’uso.
•Osservare tutte le precauzioni! Se non si osser-
vano le indicazioni di sicurezza, si mettono in
pericolo se stessi e gli altri.
•Conservare tutti i documenti con le istruzioni per
l’uso e le precauzioni per il futuro.
•In caso di vendita o di cessione dell’apparecchio,
è indispensabile consegnare insieme anche le
presenti istruzioni per l’uso.
•L’apparecchio può essere utilizzato esclusiva-
mente se si trova in perfette condizioni operative.
Se il dispositivo o una parte di esso presenta un
difetto bisogna subito spegnerlo e smaltirlo nel
modo corretto.
•Non utilizzare mai l’apparecchio in ambienti a
rischio d’esplosione o nelle vicinanze di liquidi o
gas infiammabili!
•Assicurarsi sempre che l’apparecchio sia spento
per evitare riaccensioni involontarie.
•Non usare apparecchi nei quali l’interruttore on/
off non funziona correttamente.
•Tenga lontani i bambini dall’apparecchio! Con-
servi l’apparecchio al sicuro da bambini e per-
sone non autorizzate.
•Non sovraccaricare l’apparecchio. Utilizzare
l’apparecchio solo per gli scopi previsti.
•Lavorare sempre con prudenza e in perfette con-
dizioni personali: stanchezza, malattie, uso di
alcol, influenze di medicinali o droghe non per-
mettono di avere un comportamento responsa-
bile poiché non consentono di utilizzare l’appa-
recchio con sicurezza.
•Questo dispositivo non è concepito per essere
utilizzato da persone (inclusi i bambini) con limi-
tazioni fisiche, psichiche o sensoriali o prive di
esperienza riguardo all’uso del dispositivo stesso
e le stesse dovrebbero essere sorvegliate da una
persona competente, la quale dovrebbe istruirli
sull’uso corretto del dispositivo.
•Assicurarsi che i bambini non giochino con
l’apparecchio.
•Osservare sempre le normative nazionali e inter-
nazionali in vigore e inerenti alla sicurezza, alla
salute e al lavoro.
Gestione degli apparecchi a batteria
•Utilizzare esclusivamente le batterie consentite
dal produttore.
•Pericolo di incendio! Non ricaricare mai le batte-
rie.
•Quando non utilizzate, mantenere le batterie lon-
tane dagli oggetti in metallo che potrebbero pro-
vocare un cortocircuito. Pericolo di lesioni e
incendio.
•Nel caso di utilizzo inadeguato dalla batteria può
fuoriuscire del liquido. Il liquido della batteria può
provocare irritazioni cutanee ed ustioni. Evitare
assolutamente il contatto! Nel caso di contatto
accidentale, lavare a fondo con abbondante
acqua. Nel caso di contatto con gli occhi rivol-
gersi immediatamente ad un medico.
Indicazioni specifiche sull’apparecchio
•Non usare batterie (accumulatori) ricaricabili.
•Montare l’apparecchio solo verticalmente, con il
dado a risvolto rivolto verso l’alto, onde evitare la
penetrazione di acqua nel vano batterie.
•Il flusso d’acqua passante non deve mai supe-
rare la temperatura massima consentita (Dati
tecnici – p. 11).
PERICOLO! Elevato pericolo di lesioni
gravi o mortali! Situazione altamente peri-
colosa che può comportare lesioni gravi o
mortali.
AVVERTENZA! Probabile pericolo di
lesioni gravi o mortali! Situazione gene-
ralmente pericolosa che può comportare
lesioni gravi o mortali.
ATTENZIONE! Potenziale pericolo di
lesioni! Situazione pericolosa che può
comportare lesioni.
AVVISO! Pericolo di danni all’apparec-
chio! Situazione che può comportare danni
materiali.
Nota: Informazioni indicate per una
migliore comprensione dei procedimenti.

IT
9
•Impiegare soltanto acqua dolce e pulita.
•L’apparecchio può essere utilizzato solo nel
campo di pressione consentito (Dati tecnici –
p. 11).
•Evitare sollecitazioni da trazione. Non tirare il
cavo collegato.
•Non rimuovere o coprire i simboli riportati
sull’apparecchio. Gli avvisi non più leggibili
sull’apparecchio si devono immediatamente
sostituire.
Panoramica dell’apparecchio
P. 3, punto 1
1. Raccordo rotante EZGrip
2. Display LCD
3. Indicatore di posizione
4. Tasto manuale On/Off
5. Vano batteria
6. Rotella di regolazione
7. Tasto [L/R] (S/D)
8. Tasti [+]/[]
9. Collegamento sensore
10. Ingresso
11. Uscita
12. Coperchio
Volume di fornitura
•Istruzioni per l’uso
•Computer d’irrigazione
•Connettore per canna irrigatrice
Messa in funzione
Inserimento batterie
– Estrarre il vano batterie sul retro dell’apparec-
chio.
– Inserire le batterie. Prestare attenzione alla
corrette polarità.
– Reinserire il vano batterie. Prestare attenzione
alla corretta posizione della guarnizione.
Collegamento
– Chiudere il rubinetto.
– Avvitare il dado a risvolto (10) manualmente sul
rubinetto. Non utilizzare pinze.
– Aprire il rubinetto.
Programmazione
– Portare la rotella di regolazione nelle posizioni
indicate per l’impostazione.
– Premere il tasto [L/R] per commutare per tutti i
programmi tra uscita sinistra e destra.
•Le uscite sinistra e destra possono funzionare
contemporaneamente (il flusso d’acqua diminui-
sce quando entrambi i lati vengono utilizzati con-
temporaneamente).
Impostazione dell’ora
– Ruotare la manopola di regolazione in posi-
zione[].
– L’orologio funziona nella modalità 24 ore. Pre-
mere il tasto [+] o il tasto [], per selezionare
l’ora corretta (Tenendo premuti i tasti [+] o [], i
numeri cambiano più velocemente.)
Impostazione dell’ora di avvio
– Ruotare la manopola di regolazione in posi-
zione [].
– Premere il tasto [+] o [], per selezionare l’ora di
avvio desiderata (Tenendo premuti i tasti [+]
o[], i numeri cambiano più velocemente.)
•L’ora di avvio standard è preimpostata sulle ore
5:00.
Impostazione della durata dell’irrigazione
– Ruotare la manopola di regolazione in posi-
zione [].
– Premere i tasti [+] o [], per selezionare la durata
dell’irrigazione desiderata (Tenendo premuti i
tasti [+] o [], i numeri cambiano più veloce-
mente.)
•La durata dell’irrigazione può essere impostata
tra 1 minuto e 360 minuti. (La durata standard di
irrigazione è 15 minuti.)
•Se []è impostato su 0, l’apparecchio non fun-
ziona.
Impostazione della frequenza dell’irrigazione
– Ruotare la manopola di regolazione in posi-
zione [].
– Premere i tasti [+] o [], per selezionare la fre-
quenza desiderata.
– Il campo di frequenza dell’irrigazione è compreso
tra 1 ora e 7 giorni. La frequenza di irrigazione
standard è 12 ore.
Diagramma della frequenza dell’irrigazione
1 HRS, 2 HRS, 4 HRS, 12 HRS, 1 DAYS, 2 DAYS,
3 DAYS, 4 DAYS, 5 DAYS, 6 DAYS, 7 DAYS
– Dopo avere eseguito tutte le suddette imposta-
zioni, ruotare la manopola di regolazione
su [ON]. Il programma viene eseguito secondo i
tempi da voi impostati.
Impostazione di un ritardo dell’irrigazione
(impostare in caso di pioggia per ritardare
temporaneamente l’irrigazione)
– Ruotare la manopola di regolazione su [ON].
– Premere una volta il tasto [+], fino a quando sono
visibili le parole [DELAY].
Prima della messa in funzione leggere le
istruzioni per l’uso ed attenersi ad esse.
Nota: si raccomanda di programmare
l’apparecchio prima di collegarlo a un rubi-
netto dell’acqua.
Nota: La rotella di regolazione dovrebbe
trovarsi in posizione [ON] affinché il timer
possa funzionare (modalità programmata o
manuale).
Nota: Se sono state inserire batterie nuove,
l’ora standard è preimpostata sulle ore
12:00.
Nota: Il programma non viene eseguito se
il valore da voi impostato []è superiore
a [].

IT
10
– Premere nuovamente il tasto [+], per selezionare
il numero di giorni dei quali si desidera ritardare
l’irrigazione. (p. es. 24, 48, 72 ore)
•Se entro 5 secondi non vengono eseguite ulte-
riori impostazioni, il computer memorizza l’impo-
stazione attuale e passa alla schermata iniziale
(orologio).
•A quel punto il display alterna l’ora e il ritardo
dell’irrigazione (in ore).
– Ruotare la manopola di regolazione su [OFF]
o[ON], oppure impostare il ritardo dell’irriga-
zione su [0], se desiderate disattivare la funzione
di ritardo dell’irrigazione.
Diagramma del ritardo dell’irrigazione
0 HRS, 24 HRS, 48 HRS, 72 HRS
–[]: Premere questo tasto per attivare la modalità
di irrigazione manuale.
Indicazioni utili
•Il display LCD indica il tempo di countdown fino
all’irrigazione successiva. Ruotando la manopola
di regolazione da [ON] in un’altra posizione, l’irri-
gazione viene interrotta immediatamente.
•Impostando la manopola di regolazione su [ON]
e premendo il tasto [], il computer passa alla
modalità manuale e l’irrigazione inizia subito.
•Premendo nuovamente il tasto []oppure ruo-
tando la manopola di regolazione in una posi-
zione qualsiasi tranne [ON] nella modalità
manuale, l’irrigazione viene interrotta immediata-
mente.
•Se il ritardo dell’irrigazione viene impostato nella
modalità manuale, il computer non lo indica.
•La durata standard manuale dell’irrigazione cor-
risponde a 0 minuti, il campo di regolazione è
compreso tra 0 e 240 minuti.
• [OFF]: Impostando la manopola di regolazione
su [OFF], il computer si spegne.
•La tensione di esercizio minima corrisponde a
2,4 V. Se la tensione della batteria è inferiore a
2,4 V, sul display lampeggia il simbolo per il livello
basso della batteria e il computer smette di fun-
zionare.
•Per proteggere il vostro computer dagli influssi
atmosferici, assicurarsi che il lato anteriore dello
stesso venga coperto con la copertura montata
dopo avere impostato la programmazione.
Pulizia e manutenzione
Pulizia
– Pulire l’apparecchio esteriormente con un panno
leggermente inumidito.
– Pulire regolarmente il filtro del collegamento
dell’acqua (10) con una spazzola.
Conservazione
Se ci sono possibilità di gelate, smontare la pompa ed
gli accessori, pulirli e tenerli al riparo dal gelo.
Anomalie e rimedi
Se qualcosa non funziona…
Spesso sono solo piccoli difetti che portano a un gua-
sto. Di solito essi possono essere risolti facilmente
dall’utente stesso. Si prega di controllare nella
seguente tabella prima di rivolgersi al rivenditore. In
tal modo si risparmiano molta fatica ed anche even-
tuali spese.
Nota: prima di scollegare l’apparecchio dal
rubinetto dell’acqua, chiuderlo completa-
mente.
AVVISO! Pericolo di danni all’apparec-
chio! Il gelo distrugge l’apparecchio e gli
accessori, perché contengono costante-
mente dell’acqua.
PERICOLO! Pericolo di lesioni! Ripara-
zioni non appropriate possono provocare il
malfunzionamento dell’apparecchio e pre-
giudicarne la sicurezza. In tal modo si dan-
neggia se stessi e l’ambiente.
Errore/Anomalia Causa Rimedio
Il display non visualizza alcuna in-
formazione. Batteria inserita correttamente? Inserimento batterie – p. 9
Batterie scariche?
Temperatura del display troppo al-
ta? L’indicazione è visualizzata dopo il
raffreddamento.
Ciclo d’irrigazione non definibile
sull’apparecchio. Giorno/ora impostati in modo erra-
to? Reinserire il giorno/l’ora.
Ciclo di irrigazione non eseguito. Programmazione incompleta? Riprogrammare l’apparecchio.
Giorno/ora impostati in modo erra-
to? Reinserire il giorno/l’ora.
Programma spento? Mettere il programma su [ON].
Batteria scarica dopo un breve pe-
riodo di funzionamento. Batterie scariche? Inserimento batterie – p. 9
Pressione dell’acqua troppo bassa. Filtro intasato? Pulire il filtro
Rubinetto aperto solo parzialmente? Aprire completamente il rubinetto.
Canna piegata o danneggiata? Controllare la canna.
acqua distribuita su troppi apparec-
chi? Ridurre il numero dei dispositivi.

IT
11
Se non si è in grado di eliminare l’errore da soli, si
prega di rivolgersi direttamente al rivenditore. Le ripa-
razioni inappropriate invalidano la garanzia e pos-
sono causare costi aggiuntivi a suo carico.
Smaltimento
Smaltimento dell’apparecchio
Il simbolo del bidone della spazzatura bar-
rato vuol dire che: batterie e accumulatori,
apparecchiature elettriche ed elettroniche
non vanno smaltiti nei rifiuti domestici. Que-
sti potrebbero contenere sostanze dannose
per l’ambiente e la salute.
I consumatori hanno l’obbligo di differenziare le appa-
recchiature elettroniche, le batterie vecchie delle
apparecchiature e gli accumulatori dai rifiuti dome-
stici e di smaltirle presso il centro di raccolta ufficiale
per garantire un riutilizzo consono. Le informazioni
sulla restituzione sono fornite dal venditore. Il ritiro è
gratuito.
Batterie e accumulatori non integrati in modo
fisso nei rifiuti di apparecchiature elettriche
vanno tolti prima dello smaltimento e smaltiti
separatamente. Le batterie al litio e gli accu-
mulatori di tutti i sistemi vanno consegnati ai punti di
raccolta solo una volta scarichi. Le batterie vanno
sempre assicurate da possibili cortocircuiti appli-
cando del nastro adesivo sui poli.
L’utente finale è responsabile della cancellazione dei
dati personali dalle apparecchiature da smaltire.
Smaltimento dell’imballaggio
L’imballaggio è composto da cartone e par-
ticolari in plastica adeguatamente contras-
segnati per essere riciclati.
– Si raccomanda di inviare questi mate-
riali al riciclaggio.
Dati tecnici
Accessori
Gli accessori sono disponibili presso il vostro rivendi-
tore.
Codice articolo 101907
Filettatura del collegamento
•del rubinetto dell’acqua
•per la canna irrigatrice
26,5 mm (G ¾")
33,3 mm (G 1")
Intervallo della pressione opera-
tiva cons. 0,5–8 bar
Intervallo di temperatura cons. 5–70 °C
Temperatura max. dell’acqua 35 °C
Batteria (non compresa) 2×, LR6, AA, 1,5 V
Corrente nella modalità di stan-
dby 100 A
Grado di protezione IPX6

FR
12
Notice originaleOrdinateur d’irrigation numérique
Table des matières
Avant de commencer… . . . . . . . . . . . . . . . . . . 12
Pour votre sécurité . . . . . . . . . . . . . . . . . . . . . . 12
Vue d’ensemble de votre appareil . . . . . . . . . 13
Mise en service . . . . . . . . . . . . . . . . . . . . . . . . . 13
Programmation . . . . . . . . . . . . . . . . . . . . . . . . . 13
Remarques utiles . . . . . . . . . . . . . . . . . . . . . . . 14
Nettoyage et maintenance . . . . . . . . . . . . . . . . 14
Dysfonctionnements et aide . . . . . . . . . . . . . . 14
Mise au rebut . . . . . . . . . . . . . . . . . . . . . . . . . . 15
Caractéristiques techniques . . . . . . . . . . . . . . 15
Réclamations . . . . . . . . . . . . . . . . . . . . . . . . . . 70
Avant de commencer…
Utilisation conforme
L’appareil est uniquement destiné à une utilisation à
l’extérieur pour commander des arroseurs et des sys-
tèmes d’arrosage. L’appareil peut être utilisé pour un
arrosage automatique pendant les vacances.
L’objet n’est pas conçu pour une utilisation commer-
ciale. Les directives généralement reconnues en
matière de prévention des accidents et les consignes
de sécurité jointes doivent impérativement être res-
pectées.
Réalisez uniquement des activités qui sont décrites
dans ce mode d’emploi. Toute autre utilisation est
une utilisation non conforme et non autorisée. Le
fabricant décline toute responsabilité pour les dom-
mages en résultant.
Signification des symboles utilisés
Les mises en garde contre des dangers éventuels et
les consignes de sécurité sont distinctement identi-
fiables dans le mode d’emploi. Les symboles sui-
vants seront utilisés :
Pour votre sécurité
Consignes générales de sécurité
•Pour garantir une utilisation sûre de cet appareil,
l’utilisateur doit avoir lu et compris le présent
mode d’emploi avant la première mise en service
de l’appareil.
•Veuillez observer toutes les consignes de sécu-
rité ! La non-observation des consignes de sécu-
rité vous met en danger, vous et votre entourage.
•Conservez soigneusement le mode d’emploi et
les consignes de sécurité pour les consulter en
cas de besoin.
•Si vous vendez ou donner l’appareil à un tiers,
remettez-lui toujours le manuel d’utilisation cor-
respondant.
•L’appareil peut uniquement être utilisé lorsqu’il
est en parfait état. Si l’appareil ou une partie de
l’appareil est défectueuse, l’appareil doit être mis
hors service et être éliminé de manière ade-
quate.
•Ne faites pas fonctionner l’appareil dans un local
à risque d’explosion, ni à proximité de liquides ou
gaz inflammables !
•Sécurisez toujours l’appareil à l’arrêt contre toute
remise en marche intempestive.
•N’utilisez aucun appareil dont le commutateur
marche-arrêt ne fonctionne pas correctement.
•Ne laissez pas les enfants s’approcher de l’appa-
reil ! Ne laissez pas l’appareil à proximité
d’enfants ou de personnes non autorisées à s’en
servir.
•Ne surchargez pas l’appareil. N’utilisez l’appareil
que pour les travaux pour lesquels il a été conçu.
•Soyez toujours prudent lors du maniement de
l’appareil et veillez à ne l’utiliser que lorsque
votre état vous le permet : travailler par fatigue,
maladie, sous la consommation d’alcool,
l’influence de drogues et de médicaments sont
des comportements irresponsables étant donné
que vous ne pouvez plus utiliser l’appareil avec
sécurité.
•L’utilisation de cet appareil n’est pas prévu
pardes personnes (y compris des enfants) avec
des aptitudes physiques, sensorielles ou men-
tales limitées ou des déficits dans l’expérience et/
ou les connaissances, sauf si elles sont surveil-
lées par une personne responsable de leur sécu-
rité ou si elles ont reçues des instructions de ces
personnes stipulant de quelle manière l’appareil
doit être utilisé.
•Assurez-vous que les enfants ne jouent pas avec
l’appareil.
•Respectez systématiquement les règles de
sécurité, d’hygiène et de travail en vigueur à
l’échelle nationale et internationale.
Maniement des appareils fonctionnant avec
des piles
•N’utilisez que des piles autorisées par le fabri-
cant.
•Risque d’incendie ! Ne rechargez jamais des
piles.
•Quand vous ne les utilisez pas, gardez les piles
loin d’objets métalliques qui pourraient provoquer
un court-circuit. Il existe un risque de blessures et
d’incendie.
•En cas d’utilisation incorrecte, du liquide peut
s’écouler des piles. Le liquide des piles peut pro-
voquer des irritations cutanées et des brûlures.
Évitez impérativement tout contact ! En cas de
DANGER ! Danger de mort ou risque de
blessure immédiat ! Situationdangereuse
directe qui a pour conséquence de graves
blessures ou la mort.
AVERTISSEMENT ! Danger de mort ou
risque de blessure probable ! Situation
dangereuse générale qui peut avoir pour
conséquence de graves blessures ou la
mort.
ATTENTION ! Éventuelle risque de bles-
sure ! Situation dangereuse qui peut avoir
des blessures pour conséquence.
AVIS ! Risque de dommages matériels !
Situation qui peut avoir des dommages
matériels pour conséquence.
Remarque : Informations qui aident à une
meilleure compréhension des opérations.

FR
13
contact, rincez abondamment à l’eau. En cas de
contact avec les yeux, demandez en plus conseil
à une aide médicale.
Consignes propres à l’appareil
•N’utilisez pas d’accus rechargeables.
•Montez uniquement l’appareil en position verti-
cale avec l’écrou d’accouplement tourné vers le
haut pour éviter que de l’eau pénètre dans le
logement de la pile.
•La température maximale admissible de l’eau qui
s’écoule ne doit pas être dépassée (Caracté-
ristiques techniques – p. 15).
•N’utilisez que de l’eau douce propre.
•L’appareil ne doit être utilisé que dans la plage de
pression admissible (Caractéristiques tech-
niques – p. 15).
•Évitez les décharges de traction. Ne tirez pas sur
le tuyau raccordé.
•Les symboles apposés sur votre appareil ne
doivent être ni retirés ni recouverts. Si certaines
informations apposées sur l’appareil deviennent
illisibles, elles doivent être immédiatement rem-
placées.
Vue d’ensemble de votre appareil
P. 3, point 1
1. Accouplement rotatif EZGrip
2. Écran LCD
3. Indicateur de position
4. Touche Marche/Arrêt
5. Compartiment à piles
6. Molette de réglage
7. Touche [L/R]
8. Touches [+]/[]
9. Connecteur du capteur
10. Entrée
11. Sortie
12. Valve
Contenu de la livraison
•Instructions d’utilisation
•Programmateur d’arrosage
•Connecteurs pour tuyau d’arrosage
Mise en service
Mise en place de la pile
– Retirer le compartiment batterie à l’arrière de
l’appareil.
– Placez les piles. Veiller à la bonne polarité.
– Remettre le compartiment batterie en place.
Faites attention au bon positionnement du
joint.
Raccordement
– Fermez le robinet.
– Vissez à la main l’écrou d’accouplement (10) au
robinet. N’utilisez pas de pinces.
– Ouvrez le robinet.
Programmation
– Tournez la molette de réglage sur les positions
indiquées pour l’installation.
– Appuyez sur la touche [L/R] pour passer à tous
les programmes entre la sortie gauche et droite.
•La sortie gauche et droite peuvent fonctionner en
même temps (le débit d’eau diminue lorsque les
deux côtés sont utilisés en même temps.)
Réglage de l’heure
– Tournez la molette de réglage en position [].
– L’horloge fonctionne en mode 24 heures.
Appuyer sur le bouton [+] ou sur le bouton []
pour sélectionner l’heure exacte (si vous mainte-
nez le bouton [+] ou []enfoncé, les chiffres
défilent plus rapidement.)
Réglage de l’heure de démarrage
– Tournez la molette de réglage [].
– Appuyez sur le bouton [+] ou []pour sélection-
ner l’heure de démarrage souhaitée (si vous
maintenez le bouton [+] ou []enfoncé, les
chiffres défilent plus rapidement.)
•L’heure de démarrage standard est pré-réglée
sur 5h00.
Réglage de la durée d’irrigation
– Tournez la molette de réglage [].
– Appuyer sur le bouton [+] ou sur le bouton []
pour sélectionner l’heure d’irrigation souhaitée
(si vous maintenez le bouton [+] ou []enfoncé,
les chiffres défilent plus rapidement.)
•La durée d’irrigation est comprise entre 1 minute
et 360 minutes, réglable par minute. (La durée
d’irrigation standard est de 15 minutes).
•Lorsque []est réglé sur 0, l’appareil ne fonc-
tionne pas.
Réglage de la fréquence d’irrigation
– Tournez la molette de réglage [].
– Appuyez sur le bouton [+] ou []pour sélection-
ner la fréquence souhaitée.
– La fréquence d’irrigation est comprise entre 1
heure et 7 jours. La fréquence d’irrigation stan-
dard est de 12 heures.
Graphique de fréquence d’irrigation
1 HRS, 2 HRS, 4 HRS, 12 HRS, 1 DAYS, 2 DAYS,
3 DAYS, 4 DAYS, 5 DAYS, 6 DAYS, 7 DAYS
Veuillez lire les instructions d’utilisation avant
la mise en service de l’appareil et les respec-
ter.
Remarque : Nous vous recommandons de
programmer l’appareil avant de le raccorder
au robinet.
Remarque : La molette de réglage doit se
trouver en position [ON] pour que la minu-
terie fonctionne (mode programmé ou fonc-
tionnement manuel).
Remarque : When the new batteries are
inserted, the default clock time is 12 :00
PM.
Remarque : Le programme n’est pas exé-
cuté si la valeur que vous avez entrée
pour []est supérieure à celle de [].

FR
14
– Une fois que vous avez effectué ces réglages,
tournez la molette de réglage sur [ON]. Le pro-
gramme s’exécute selon les temps que vous
avez entrés.
Réglage du retardement de l’arrosage (à régler
lors de l’arrosage pour retarder l’irrigation)
– Tournez la molette de réglage sur [ON].
– Appuyez une fois sur le bouton [+] jusqu’à ce
que [DELAY] apparaisse.
– Appuyez à nouveau sur le bouton [+] pour sélec-
tionner le nombre de jours pendant lesquels vous
souhaitez retarder l’irrigation. (par ex. 24, 48, 72
heures)
•Si aucun autre réglage n’est effectué dans les
5 secondes, l’ordinateur sauvegarde le réglage
actuel et passe à l’écran de démarrage (heure).
•L’écran passe ensuite entre l’heure et le temps
de retardement de l’arrosage (en heures).
– Tournez la molette de réglage sur [OFF] ou
sur [ON], ou réglez le temps de retardement de
l’arrosage sur [0] si vous souhaitez désactiver la
fonction de retardement de l’arrosage.
Temps de retardement de l’arrosage –
Graphique
0 HRS, 24 HRS, 48 HRS, 72 HRS
–[]: Appuyez sur ce bouton pour activer le mode
d’irrigation automatique.
Remarques utiles
•L’écran LCD indique le compte à rebours jusqu’à
la prochaine irrigation. Si vous tournez la molette
de réglage sur une autre position que [ON], l’irri-
gation est immédiatement interrompue.
•Si vous positionnez la molette de réglage
sur [ON] et que vous appuyez sur [], l’ordina-
teur passe en mode manuel et l’irrigation com-
mence immédiatement.
•En mode manuel, si vous appuyez à nouveau sur
le bouton []ou que vous réglez la molette de
position autre que [ON], l’irrigation est immédia-
tement interrompue.
•Si le temps de retardement de l’arrosage a été
réglé manuellement, l’ordinateur ne montre pas
le temps de retardement de l’arrosage.
•Le temps d’irrigation manuelle standard est de
0 minutes, la plage de réglage s’étend de 0 à
240 minutes.
• [OFF] : When you turn the dial to [OFF], the
timer will turn off.
•La tension de service minimale est de 2,4 V. Si la
tension de service est inférieure à 2,4 V, le sym-
bole de niveau de batterie faible clignote à l’écran
et l’ordinateur arrête de fonctionner.
•Pour protéger votre ordinateur des conditions
atmosphériques, assurez-vous que l’avant de
l’ordinateur soit protégé par le couvercle intégré
après le réglage de la programmation.
Nettoyage et maintenance
Nettoyage
– Nettoyez l’extérieur de l’appareil à l’aide d’un
chiffon légèrement humide.
– Nettoyez régulièrement le filtre du raccord pour
robinet (10) avec une brosse.
Stockage
Lorsqu’il y a un risque de gel, démontez l’appareil et
les accessoires, nettoyez-les et rangez-les à l’abri du
gel.
Dysfonctionnements et aide
En cas de dysfonctionnement…
Il s’agit souvent de petits défauts qui conduisent à
une défectuosité. Vous pouvez souvent éliminer le
problème par vous-même. Veuillez tout d’abord
consulter le tableau suivant avant de vous adresser à
votre revendeur. Vous économisez ainsi un dérange-
ment et éventuellement aussi des coûts.
Remarque : Fermez complètement le robi-
net avant de retirer l’appareil du robinet.
AVIS ! Risque de dommages de l’appa-
reil ! Le gel détruit l’appareil et les acces-
soires car il y a toujours de l’eau à l’inté-
rieur !
DANGER ! Risque de blessures ! Toute
réparation impropre peut amener votre
appareil à ne plus fonctionner sûrement. En
procédant de la sorte, vous vous mettez en
danger ainsi que votre environnement.
Erreur/dysfonctionnement Cause Mesure corrective
L’écran n’affiche aucune informa-
tion. La pile est mal mise ? Mise en place de la pile – p. 13
La pile est faible ?
La température à l’écran est trop
haute ? L’affichage apparaît après refroidis-
sement.
Le cycle d’arrosage sur l’appareil ne
peut pas être déterminé. Le jour et l’heure sont mal réglés ? Entrez à nouveau le jour et l’heure.
Le cycle d’arrosage n’a pas été ef-
fectué. La programmation n’est pas com-
plète ? Programmez à nouveau l’appareil.
Le jour et l’heure sont mal réglés ? Entrez à nouveau le jour et l’heure.
Le programme est arrêté ? Réglez le programme sur [ON].
La pile est déchargée en peu de
temps. La pile est faible ? Mise en place de la pile – p. 13
La pression d’eau est trop faible. Le filtre est encrassé ? Nettoyez le filtre

FR
15
Si vous n’êtes pas en mesure d’éliminer la panne par
vous-même, veuillez vous adresser directement à
votre revendeur. Notez que la réalisation de répara-
tions non conformes entraîne l’annulation de la
garantie et vous entraîne éventuellement des coûts
supplémentaires.
Mise au rebut
Mise au rebut de l’appareil
Le symbole de la poubelle barrée signifie :
Les batteries et les accus, les appareils élec-
triques et électroniques ne doivent pas être
jetées avec les ordures ménagères car ils
pourraient contenir des substances nocives
pour l’environnement et la santé.
Les consommateurs sont tenus d’éliminer appareils
électriques usagés, les batteries et accus usagés
d’appareils électriques séparément en les remettant
à un point de collecte officiel afin de garantir un trai-
tement adéquat. Pour de plus amples informations
sur le retour, adressez-vous auprès de votre reven-
deur. La reprise est gratuite.
Les batteries et les accus qui ne sont pas
intégrés dans les appareils électriques usa-
gés doivent être retirés et éliminés séparé-
ment avant l’élimination. Les batteries au
lithium et les pack accus de tous les systèmes
doivent être remis aux points de collecte uniquement
en état déchargé. Les batteries doivent toujours être
protégées contre les courts-circuits en collant les
pôles.
Chaque utilisateur final est responsable pour la sup-
pression des données personnelles qui se trouvent
sur les appareils usagés à éliminer.
Mise au rebut de l’emballage
L’emballage se compose de carton et de
matières plastiques marquées en consé-
quence qui peuvent être recyclés.
– Eliminez ces matériaux en les condui-
sant au recyclage.
Caractéristiques techniques
Accessoires
Les accessoires sont disponibles auprès de votre
revendeur.
Le robinet n’est pas complètement
ouvert ? Ouvrez complètement le robinet.
Le tuyau est plié ou endommagé ? Vérifiez le tuyau.
La répartition de l’eau est effectuée
sur trop d’appareils ? Réduisez le nombre d’appareils.
Erreur/dysfonctionnement Cause Mesure corrective
Référence 101907
Filetage
•pour le robinet
•pour le tuyau d’arrosage
26,5 mm (G ¾")
33,3 mm (G 1")
Plage de pression de service
adm. 0,5–8 bar
Plage de température adm. 5–70 °C
Température max. de l’eau 35 °C
Pile (non fournie) 2×, LR6, AA, 1,5 V
Courant en mode veille 100 A
Type de protection IPX6

GB
16
Original instructionsDigital irrigation computer
Table of contents
Before you begin… . . . . . . . . . . . . . . . . . . . . . . 16
For your safety . . . . . . . . . . . . . . . . . . . . . . . . . 16
Your unit at a glance . . . . . . . . . . . . . . . . . . . . 17
Using for the first time . . . . . . . . . . . . . . . . . . . 17
Programming . . . . . . . . . . . . . . . . . . . . . . . . . . 17
Handy Hints . . . . . . . . . . . . . . . . . . . . . . . . . . . . 17
Cleaning and maintenance . . . . . . . . . . . . . . . 18
Troubleshooting . . . . . . . . . . . . . . . . . . . . . . . . 18
Disposal . . . . . . . . . . . . . . . . . . . . . . . . . . . . . . . 18
Technical data . . . . . . . . . . . . . . . . . . . . . . . . . . 19
Claims for defects . . . . . . . . . . . . . . . . . . . . . . 70
Before you begin…
Intended use
The unit is designed for exclusive use outdoors to
control rain and irrigation systems. The unit can be
used for automatic irrigation when away.
This product is not intended for commercial use. Gen-
erally acknowledged accident prevention regulations
and enclosed safety instructions must be observed.
Only perform work described in these instructions for
use. Any other use is improper. The manufacturer will
not assume responsibility for damage resulting from
such use.
What are the meanings of the symbols used?
Danger notices and information are clearly marked
throughout these instructions for use. The following
symbols are used:
For your safety
General safety instructions
•To operate this device safely, the user must have
read and understood these instructions for use
before using the device for the first time.
•Observe all safety instructions! Failure to do so
may cause harm to you and others.
•Retain all instructions for use, and safety instruc-
tions for future reference.
•If you sell or pass the device on, you must also
hand over these operating instructions.
•The device must only be used when it functions
properly. If the product or part of the product is
defective, it must be taken out of operation and
disposed of correctly.
•Never use the device in a room where there is a
danger of explosion or in the vicinity of flammable
liquids or gases.
•Always ensure that a device which has been
switched off cannot be restarted unintentionally.
•Do not use devices with an on/off switch that
does not function correctly.
•Keep children away from the device! Keep the
device out of the way of children and other unau-
thorised persons.
•Do not overload the device. Do not use the
device for purposes for which it is not intended.
•Exercise caution and only work when in good
condition: If you are tired, ill, if you have ingested
alcohol, medication or illegal drugs, do not use
the device, as you are not in a condition to use it
safely.
•This product is not intended to be used by per-
sons (including children) or who are limited in
their physical, sensory or mental capacities or
who lack experience and/or knowledge of the
product unless they are supervised, or have been
instructed on how to use the product, by a person
responsible for their safety.
•Ensure that children are not able to play with the
device.
•Always comply with all applicable domestic and
international safety, health, and working regula-
tions.
Using battery-operated devices
•Only use batteries approved by the manufac-
turer.
•Danger of fire! Never charge the batteries.
•Keep batteries away from metal objects that
could cause short circuiting when not in use.
There is a risk of injuries and fires.
•Fluid can escape from the battery when used
incorrectly. Battery fluid may result in skin irrita-
tions and burns. Avoid contact! In the event of
accidental contact, rinse thoroughly with water.
Immediately seek the aid of a physician in the
event of eye contact.
Device-specific safety instructions
•Do not use rechargeable batteries.
•Only set the unit up upright with the coupling nut
facing upwards to prevent water from entering
into the battery compartment.
•The permitted maximum temperature of the
water flowing through the system may not be
exceeded (Technical data – p. 19).
•Only use clean freshwater.
•The unit may only be operated in the permitted
pressure range (Technical data – p. 19).
•Prevent torsion loads. Do not pull on the con-
nected hose.
DANGER! Direct danger to life and risk
of injury! Directly dangerous situation that
may lead to death or severe injuries.
WARNING! Probable danger to life and
risk of injury! Generally dangerous situa-
tion that may lead to death or severe inju-
ries.
CAUTION! Possible risk of injury! Dan-
gerous situation that may lead to injuries.
NOTICE! Risk of damage to the device!
Situation that may lead to property damage.
Note: Information to help you reach a better
understanding of the processes involved.

GB
17
•Symbols affixed to your tools may not be
removed or covered. Information on the device
that is no longer legible must be replaced imme-
diately.
Your unit at a glance
P. 3, item 1
1. EZGrip swivel coupling
2. LCD Display
3. Dial position indicator
4. Manual on/off button
5. Battery tray
6. Dial
7. [L/R] Button
8. [+]/[]Button
9. Sensor connection
10. Inlet
11. Outlet
12. Flap
Scope of delivery
•Operating manual
•Irrigation computer
•Connector for garden hose
Using for the first time
Insert the battery
– Pull out the battery compartment on the back of
the unit.
– Insert the batteries. Pay attention to correct
polarity.
– Replace the battery compartment. Make sure
the gasket is in the correct position.
Connection
– Turn off the water tap.
– Screw the coupling nut (10) manually onto the
water tap. Do not use tools.
– Turn on the water tap.
Programming
– Rotate the dial to positions indicated for setup.
– Press [L/R] button to switch between left and
right outlet for all programming
•Left and right outlets can function at the same
time (Water flow will decrease when both sides
are used at once.)
Setting the clock
– Turn the dial to the []position.
– The clock functions in 24hr mode. Press [+] but-
ton or []button to select the correct time (If you
press and hold the [+] or []buttons, the num-
bers will change more rapidly.)
Setting the start time
– Turn the dial to [].
– Press [+] or []button to select the desired time
to start (If you press and hold the [+] or []but-
tons, the numbers will change more rapidly.)
•The default start time is 5:00AM.
Setting the watering duration
– Turn the dial to [].
– Press [+] or buttons, to select the desired water-
ing time (If you press and hold the [+] or []but-
tons, the numbers will change more rapidly.)
•The watering period can be set in minutes, any-
where between 1 and 360 minutes. (The default
watering period is 15 minutes.)
•If the []is set to 0, the device will not operate.
Setting the watering frequency
– Turn the dial to [].
– Press [+] or []buttons to select the desired fre-
quency.
– The watering frequency range is between 1 hour
to 7 days. The default watering frequency is 12
hours.
Watering Frequency Chart
1 HRS, 2 HRS, 4 HRS, 12 HRS, 1 DAYS, 2 DAYS,
3 DAYS, 4 DAYS, 5 DAYS, 6 DAYS, 7 DAYS
– Once you have set all of the above, turn the dial
to [ON]. The timer will run as per your set times.
Setting a rain delay (Set up when raining to
temporarily delay watering)
– Turn the dial to [ON].
– Press [+] button once to see the words [DELAY].
– Press [+] button again to select the number of
days you would like to delay watering. (eg. 24,
48, 72 Hrs)
•If no additional settings are made in 5 seconds,
the timer will save the current setting and exit to
the home screen (clock)
•The screen will then flash between the clock and
the rain delay time (in hours).
– Turn the dial to [OFF] or [ON], or set the rain
delay time to [0],if you would like turn off the rain
delay function.
Rain Delay Time Chart
0 HRS, 24 HRS, 48 HRS, 72 HRS
–[]: Press this button to activate manual watering
mode.
Handy Hints
•The LCD screen shows the countdown time until
the next watering. If you turn the dial from [ON] to
any other position, the watering will stop immedi-
ately.
Before putting the unit into operation, read
and observe the instructions for use.
Note: We recommend programming the
unit before you connect it to a water tap.
Note: The dial should be in the [ON] posi-
tion for the Timer to operate (programmed
mode or Manual mode)
Note: When the new batteries are inserted,
the default clock time is 12:00 PM.
Note: the timer will not run when the []you
set is greater than [].

GB
18
•When you turn the dial to [ON] and press []but-
ton, the timer will shift to manual mode and
watering will begin immediately.
•In manual mode, when you press []button
again, or turn the dial to any position
except [ON], then watering will stop immediately.
•In manual mode, if the rain delay time is set, the
timer will not display the rain delay time.
•Default manual watering time is 0 minutes, the
setting range is 0 to 240 minutes.
• [OFF]: When you turn the dial to [OFF], the timer
will turn off.
•Minimum working voltage is 2.4 V. When the bat-
tery is lower than 2.4 V, the low battery sign will
flash on the screen, and timer will stop working.
•To protect your timer from the weather ensure the
front panel of the timer is covered with the cover
provided once your timer is set.
Cleaning and maintenance
Cleaning
– Wipe the outside of the unit with a damp cloth.
– Regularly clean the filter sieve in the water hose
connection (10) using a brush.
Storage
In the event of frost, disassemble the unit and acces-
sories, clean and store away from frost.
Troubleshooting
What to do when something doesn’t work…
Malfunctions are often caused by minor faults. You
can easily remedy most of these yourself. Please
consult the following table before contacting the ven-
dor. You will save yourself a lot of trouble and possibly
money too.
If you can’t fix the fault yourself, contact your nearest
vendor. Please be aware that any improper repairs
will also invalidate the warranty and additional costs
may be incurred.
Disposal
Disposal of the appliance
A crossed-out wheelie bin icon means: Bat-
teries and rechargeable batteries, electrical
or electronic devices must not be disposed of
with household waste. They may contain
substances that are harmful to the environ-
ment and human health.
Consumers must dispose of waste electrical devices,
spent portable batteries and rechargeable batteries
separately from household waste at an official collec-
tion point to ensure that these items are processed
correctly. Information on returning these items is
available from the seller. Sellers are required to
accept these items free of charge.
Batteries and rechargeable batteries, which
are not permanently installed in waste elec-
trical devices, must be removed prior to dis-
posal and must be disposed of separately.
Lithium batteries and battery packs in all systems
must only be retuned to a collection point when dis-
charged. Batteries must always be protected against
short circuits by covering the poles with adhesive
tape.
All end users are responsible for deleting any per-
sonal data stored on waste devices prior to their dis-
posal.
Note: Before removing the unit from the
water tap, shut off the tap completely.
NOTICE! Risk of damage to the unit!
Frost will damage the unit and the accesso-
ries because they always contain water!
DANGER! Risk of injury! Unprofessional
repairs may mean that your unit will no
longer operate safely. This endangers you
and your environment.
Error/Fault Cause Remedy
Display shows no information. Battery has not been inserted prop-
erly? Insert the battery – p. 17
The battery is weak?
Temperature at the display is too
high? Display appears after cooling down.
Irrigation cycle cannot be specified
on the unit Is the wrong day/time set? Enter the day/time again.
Irrigation cycle is not executed. Programming incomplete? Programme the unit again.
Is the wrong day/time set? Enter the day/time again.
Programme is switched off? Set the programme to [ON].
Battery is empty after a short period. The battery is weak? Insert the battery – p. 17
Water pressure too low? Is the filter blocked? Clean the filter sieve
Tap has only been opened partially? Fully open the tap.
Hose is kinked or damaged? Check the hose.
Water distribution across too many
units? Reduce the number of units in use.

GB
19
Disposal of the packaging
The packaging consists of cardboard and
correspondingly marked plastics that can
be recycled.
– Make these materials available for
recycling.
Technical data
Accessories
Accessories are available from your local vendor.
Part number 101907
Connection thread
•for the water tap
•for garden hose
26,5 mm (G ¾")
33,3 mm (G 1")
Permissible operating pressure
range 0,5–8 bar
Permitted temperature range 5–70 °C
Max. water temperature 35 °C
Battery (not included in the
scope of delivery) 2×, LR6, AA, 1,5 V
Standby current 100 A
Protection type IPX6

CZ
20
Pvodní návod k používáníDigitální poítazavlažování
Obsah
Díve než zanete… . . . . . . . . . . . . . . . . . . . . . 20
Pro Vaši bezpenost . . . . . . . . . . . . . . . . . . . . . 20
Pehled – váš pístroj . . . . . . . . . . . . . . . . . . . . 21
Uvedení do provozu . . . . . . . . . . . . . . . . . . . . . 21
Programování . . . . . . . . . . . . . . . . . . . . . . . . . . 21
Užitená upozornní . . . . . . . . . . . . . . . . . . . . 22
ištní a údržba . . . . . . . . . . . . . . . . . . . . . . . . 22
Porucha a náprava . . . . . . . . . . . . . . . . . . . . . . 22
Likvidace . . . . . . . . . . . . . . . . . . . . . . . . . . . . . . 22
Technické údaje . . . . . . . . . . . . . . . . . . . . . . . . 23
Reklamace . . . . . . . . . . . . . . . . . . . . . . . . . . . . . 70
Díve než zanete…
Použití pimené urení
Pístroj urený výhradnk použití venku slouží k
ovládání postikova a zavlažovacích systém. Pí-
stroj lze používat na automatické zavlažování bhem
dovolené.
Pístroj není uren k použití pi podnikání. Musí se
dodržovat obecnuznávané pedpisy úrazové pre-
vence a piložené bezpenostní pokyny.
Vykonávejte pouze innosti popsané v tomto návodu
k použití. Jakékoli jiné používání je považováno za
neoprávnné chybné použití. Výrobce neodpovídá za
škody, které z toho plynou.
Co znamenají použité symboly?
Upozornní na nebezpeí a pokyny jsou v návodu k
použití zetelnvyznaeny. Používají se následující
symboly:
Pro Vaši bezpenost
Všeobecné bezpenostní pokyny
•Pro bezpené zacházení s tímto pístrojem si
jeho uživatel musí ped prvním použitím peíst
tento návod k použití a porozumt mu.
•Respektujte všechny bezpenostní pokyny!
Pokud nebudete dbát bezpenostních pokyn,
ohrožujete sebe i ostatní.
•Všechny návody k použití a bezpenostní
pokyny si dobe uložte pro pozdjší použití.
•Když pístroj prodáváte nebo pedáváte dál, bez-
podmínenpedejte i tento návod k použití.
•Pístroj se smí používat pouze tehdy, pokud je
bez závady. Jsou-li na pístroji nebo na nkteré
jeho souásti závady, musí být vyazen z pro-
vozu a odbornzlikvidován.
•Pístroj nepoužívejte v prostorech ohrožených
výbuchem nebo v blízkosti holavých kapalin
nebo plyn!
•Vypnutý pístroj vždy zajistte proti neúmysl-
nému zapnutí.
•Nepoužívejte náadí, u nhož spínaZap/Vyp
ádnnefunguje.
•Zabrate dtem v pístupu k pístroji! Uložte pí-
stroj tak, aby byl bezpenchránn ped dtmi a
nepovolanými osobami.
•Nepetžujte pístroj. Používejte pístroj pouze
pro úely, pro které byl uren.
•Pracujte vždy opatrna v dobré fyzické kondici:
Pracovat bhem únavy, onemocnní, požití alko-
holu, pod vlivem léka omamných látek je
nezodpovdné, protože pístroj nemžete bez-
penpoužívat.
•Nepoužívejte topné tleso s asovým spínaem
nebo s jiným spínaem, který automaticky spíná
pístroj, hrozilo by nebezpení požáru.
•Zabezpete, aby si dti nehrály s výrobkem.
•Dodržujte vždy platné národní a mezinárodní
bezpenostní, zdravotní a pracovní pedpisy.
Zacházení s pístroji pohánnými bateriemi
•Používejte pouze baterie schválené výrobcem.
•Nebezpeí požáru! Baterie nikdy nenabíjejte.
•Pokud baterie nepoužíváte, neukládejte je do
blízkosti kovových pedmt, které by mohly
zpsobit zkrat. Hrozí nebezpeí poranní a
vzniku požáru.
•Pi nesprávném použití mže z baterie vytéct
kapalina. Kapalina z baterie mže zpsobit pod-
ráždní pokožky a popáleniny. Bezpodmínen
zabrate kontaktu s kapalinou! V pípadnáhod-
ného kontaktu dkladnopláchnte zasáhnuté
místo vodou. Pi kontaktu s oima vyhledejte
okamžitlékaskou pomoc.
Upozornní specifická pro pístroj
•Nepoužívejte dobíjitelné baterie (akumulátory).
•Pístroj montujte pouze ve svislé poloze s pe-
vlenou maticí smrem nahoru, aby se zabránilo
vniknutí vody do pihrádky na baterie.
•Maximální pípustná teplota protékající vody se
nesmí pekroit (Technické údaje – s. 23).
•Používejte pouze istou sladkou vodu.
•Pístroj se smí používat pouze v pípustném roz-
sahu tlaku (Technické údaje – s. 23).
•Zabrate zatížením tahem. Netahejte uchope-
ním za pipojenou hadici.
•Symboly, které se nacházejí na vašem pístroji,
se nesmjí odstraovat ani zakrývat. Neitelné
pokyny na pístroji se musejí okamžitvymnit.
NEBEZPEÍ! Bezprostední nebezpeí
zranní nebo ohrožení života! Bezpro-
stední nebezpená situace s následkem
tžkého zranní nebo usmrcení.
VAROVÁNÍ! Pravdpodobné nebezpeí
zranní nebo ohrožení života! Obecn
nebezpená situace s možným následkem
tžkého zranní nebo usmrcení.
UPOZORNNÍ! Pípadné nebezpeí zra-
nní! Nebezpená situace s možným
následkem zranní.
OZNÁMENÍ! Nebezpeí poškození pí-
stroje! Situace s možným následkem vc-
ných škod.
Poznámka: Informace, které jsou uvedeny
pro lepší pochopení postup.
Ped uvedením do provozu si pette návod
na použití.
This manual suits for next models
1
Table of contents
Languages:
Other Lux Tools Irrigation System manuals
Popular Irrigation System manuals by other brands

Viking
Viking QUICK RESPONSE ELO VK377 Technical data

Senninger
Senninger i-Wob UP3 Recommended installation

Perrot
Perrot ZX30 Series Operation manual

Westfalia
Westfalia Garten Meister 95 88 11 Original instructions

Tyco Fire Product
Tyco Fire Product TFR MAX instruction manual

Viking
Viking VK3101 Technical data