M-Audio Keystation User manual

Table of Contents
FCC Class B and European CE Compliance .......................... 2
Overview .................................................................................... 3
Features ....................................................................................... 4
What is MIDI .............................................................................. 4
Connecting the Keystation ....................................................... 6
Connecting Keystation to a Computer ............................. 6
Connecting Keystation to a Tone Module ........................ 6
Keystation Default Settings ...................................................... 7
Keystation Controls ................................................................... 7
Example ................................................................................ 9
Keystation Rear Panel ............................................................. 10
Basic Trouble-Shooting ........................................................... 10
Keystation MIDI Implementation ...........................................11
90 Day Limited Warranty ....................................................... 12
Keystation
™ MANUAL
1
Version KEY 020199

2
FCC Class B and European CE
Compliance
The Keystation complies with Class B, Part 15 of the FCC rules.
WARNING: This equipment has been tested and found to comply with the lim-
its for a CLASS B digital device, pursuant to Part 15 of the FCC Rules. These lim-
its are designed to provide reasonable protection against harmful interference in
a residential installation. This equipment generates, uses and can radiate radio
frequency energy and, if not installed and used in accordance with the instruc-
tions contained in this manual, may cause harmful interference to radio and tele-
vision communications. However, there is no guarantee that interference will
not occur in a particular installation.
If this equipment does cause harmful interference to radio or television recep-
tion, which can be determined by turning the equipment off and on, the user is
encouraged to try to correct the interference by one or more of the following
measures: 1) reorient or relocate the receiving antenna; 2) increase the separation
between the equipment and the receiver; 3) connect the equipment into an outlet
on a circuit different from that of the receiver; 4) consult the dealer or an experi-
enced audio television technician.
NOTE: Connecting this device to peripheral devices that do not comply with
CLASS B requirements or using an unshielded peripheral data cable could also
result in harmful interference to radio or television reception.
The user is cautioned that any changes or modifications not expressly approved
by the party responsible for compliance could void the user's authority to oper-
ate this equipment.
To ensure that the use of this product does not contribute to interference, it is
necessary to use shielded I/O cables.
This product also complies with European CE requirements.

3
Overview
Thank you for purchasing the Keystation. Keystation is an entry level
MIDI keyboard controller that will easily connect to any standard com-
puter MIDI interface or MIDI sound module.
The Keystation has no built-in sound making capabilities. This is why it
is called a controller keyboard. It is normally used with a standard MIDI
sound module or a computer equipped with a MIDI interface and/or
some kind of sound card.
If you have any questions, comments, or suggestions about Keystation
or any MIDIMAN product, we invite you to contact us directly at:
MIDIMAN
Technical Support: (626) 445-8495
45 E. Saint Joseph Street
Arcadia CA 91006-2861
MIDIMAN Fax: (626) 445-7564
World Wide Web: www.midiman.net
E-Mail: [email protected]

4
Features
Keystation has the following features:
• MIDI master controller keyboard with 49 undersized keys.
• On/Off Power switch
• Full control of velocity, bank switching, and channel select.
• GM (General MIDI) Reset button.
• Change Program by paging up/down or direct access.
• MIDI OUT connects to computer or directly to synthesizer.
• Uses a standard 9 volt dc, 300 milliamp power adaptor.
• Jack (on back) for use with an optional sustain-foot switch.
What is MIDI
MIDI (Musical Instrument Digital Interface) is a series of commands and
messages that allow different (mostly musical devices) to talk with each
other and work on the same tasks all together.
MIDI is not sound. As a matter of fact, many modern applications for
MIDI have nothing to do with sound. MIDI is now being used to control
many different things including lighting, robotics and anything that
needs to respond to real-time controls. MIDI commonly sends instruc-
tions to a device to turn something on or off. It can however, also send a
great deal of other information such as controller information.
Controller information is used to modify many different things includ-
ing pitch bend, modulation, reverb depth, volume, etc..
If you are using a computer to work with MIDI, your computer can
receive and store this MIDI information using a program called a MIDI
sequencer. You can think of a sequencer as a “virtual”tape recorder.
Anything you play can be recorded and played back. Unlike a regular
tape recorder, the sequencer can also take what you have played and
change it. And if you accidentally play a wrong note, you can use the
program to correct it instead of having to re-record any of your perfor-
mance. If you are not a very good keyboard player you can record a
part very slowly or even one note at a time, and then play it back at the
right tempo so that it sounds as if you have been playing for years.
One standard MIDI connection provides 16 different “channels”. Each
of these channels can be used to control different sounds. GM tone mod-
ules can receive on all 16 channels at the same time. Other older synthe-

5
sizers can only receive on a few channels and play only a few voices at a
time. And, some of the very earliest synths can only receive on one chan-
nel. If you are using an older synthesizer you will have to look at the
manual to determine just what it can do.
If you are interested in learning more about MIDI there are many fine
books available.

6
Connecting the Keystation
Connecting Keystation to a Computer
Using a standard 5-pin MIDI cable connect one end to the MIDI Out jack
of the Keystation and the other end to the MIDI In Jack of your comput-
er’s MIDI interface (See figure 1). If your set-up includes a separate tone
module, like the Midiman G-Man, be sure that you also have a second
MIDI cable connected from your computer’s MIDI Out to the tone mod-
ule's MIDI In.
Connecting Keystation to a MIDI Tone Module
Using a standard 5-pin MIDI cable connect one end to the MIDI Out jack
of the Keystation and the other end to the MIDI In jack of your tone
module. If you will be using more than one tone module, you should
consult your Tone Module manual to get additional information about
how to hookup more than one MIDI module. If you are using an older
MIDI tone module that responds to only one MIDI channel you must
make sure that the Keystation MIDI transmit channel (see below) match-
es the MIDI receive channel set on your module.
l
KEYSTATION™MIDIKEYBOARD
MIDI Sound Module
Computer
KEYSTATION™
MIDI OUT
MIDI
Out
MIDI
In
MIDI
In
Foot Pedal
SUSTAIN

7
Keystation Default Settings
When you first turn the Keystation on make sure that the 9 volt DC
power adapter is plugged into the back of the Keystation and the AC
end plugged in to a power outlet. Next, slide the power switch on the
back of the Keystation to On. When you turn on your Keystation it will
always set itself to the following values:
•Transmit on MIDI Channel no. 1.
•Default Octave will be from C2 (Note #36) to C6 (Note #84)
•A Control Change (CC-00=0, CC-32=0) message will be transmit-
ted. This sets the Program Bank to Bank 0 for General MIDI.
•A Program Change #1 message will be transmitted.
Keystation Controls
The Keystation top controls, from left to right, function as follows:
"Reset Extern" Button: Pressing this button resets the Keystation to its
default setting and sends out a message to return all external MIDI
instruments to their default setting as well.
"Octave Down" and "Octave Up" Buttons: Pressing these buttons shifts
the key numbers that the Keystation transmits either down or up an
octave. If you have Keystation connected to an external MIDI tone mod-
ule play any key and listen to the pitch of the sound. If you now press
the Octave Down button and play the same key you will here it play the
same sound an octave lower. Pressing both the Octave Down and
Octave Up buttons simultaneously resets the keyboard octave range to
the default value. The default values are C2 (36) to C6 (84).
"Program - " and "Program +" Buttons: When you first turn on the
Keystation it transmits a default program (patch) # 01 (which is Grand
Piano patch on the GM sound list). Pressing the "Program -" button
makes the Keystation transmit the last program number. Pressing the
"Program +" button makes the Keystation transmit the next program
number. So, these buttons can be used to cycle backwards and forwards
through the available programs (patches). You can also select any pro-
gram number with the Keystation by pressing the desired numbers and
then pressing the Enter button.
2
RESET
EXTERN
OCTAVE
DOWN
OCTAVE
UP
PROG
--
PROG
+
MIDI
CHANNEL BANK VELOCITY
ENTER
1 2 99 0

8
Numbers "1" to "0" Buttons: These buttons are used to set and enter the
values of the different Keystation parameters including program num-
ber, MIDI transmit channel, bank number and key velocity. When using
the numeric buttons to select a program number simply press the
desired numbers followed by the Enter button. Any program between 1
and 128 can be selected. When modifying Keystation parameters, such
as MIDI transmit channel, bank number or velocity, first press the para-
meter button you want to modify (e.g. "Bank"), then enter the number(s)
you want to modify the parameter to and then press the Enter button.
MIDI Channel Button: Pressing the "MIDI Channel" Button allows you
to select which MIDI channel the Keystation transmits on. This can be
any MIDI channel between 1 and 16. When the Keystation is powered
up this transmit MIDI channel defaults to 1. To set the transmit channel
to a given value first press the MIDI Channel Button, then enter the
desired channel number and then press the Enter button. For example,
if you want to set the MIDI transmit channel to 10, first press the MIDI
Channel button, then "1," then "0" and then the Enter button.
Bank (Select) Buttons: This button allows you to transmit a MIDI bank
select command. Most contemporary synthesizers and sound modules
offer several sound banks which each can contain up to 128 different
programs. If you are using Keystation with one of these external MIDI
tone modules you may want to select different banks to hear the various
patches. With most sound modules there are only 3 or so available
banks. To transmit any given bank select command first press the Bank
Button, then enter the desired bank number and then press "Enter." For
example, if you want to select bank number 3 first press the Bank but-
ton, then "3" and then Enter.
Velocity Button: The Velocity Button is used to set the MIDI velocity
that Keystation transmits. The MIDI velocity is equivalent to how hard
the note is played. The greater the velocity, the harder (and usually
louder) the note is sounded. The Keystation defaults to a transmitted
MIDI velocity of 127. You can however, use the Velocity Button to set
the transmitted velocity to any value between 0 and 127. To set the
transmit velocity to any value, first press the Velocity button, then enter
the desired velocity value and then press Enter. For example, if you
want to set the velocity to 64 first press the Velocity button, then "6,"
then "4" and then "Enter." Keystation defaults to a MIDI velocity of 100
when first turned on.
9
Example
Here is a simple example you might perform on the Keystation: if you
would like to send on MIDI channel 9, sound bank 3, program number
10 with a velocity value of 119 and play notes shifted down by 2 octaves
you would need to do the following:
The following sets the MIDI transmit channel to 9.
•Press the MIDI channel button.
•Press the number 9 key .
•Press the Enter key.
The following selects sound bank 4.
•Press the Bank select key.
•Press the number 4 key .
•Press the Enter key.
The following selects program number 10.
•Press the number 1 key.
•Press the number 0 key.
•Press the Enter key.
The following sets the MIDI transmit velocity to 128.
•Press the Velocity key
•Press the number 1 key.
•Press the number 2 key.
•Press the number 8 key.
•Press the Enter key.
The following transposes the Keystation down two octaves.
•Press the Octave Down button twice.

10
Keystation Rear Panel
If you look at the back of your Keystation keyboard you will see the fol-
lowing:
Sustain Jack: This switch allows you to connect an optional standard
foot switch to your Keystation. when the foot switch is depressed notes
played on the Keystation will be sustained, i.e. they will continuously
sound as long as the foot switch is held down.
MIDI Out Jack: This standard MIDI jack is used to send all MIDI mes-
sages out from the Keystation. A standard 5 pin MIDI cable would nor-
mally be used to connect this jack to the MIDI In jack of a computer or
other MIDI instrument.
Power On/Off Switch: The Power Switch turns the Keystation's power
on and off. This switch must be turned on in order to use the
Keystation. Also, make sure the power supply is properly plugged into
the Keystation.
Basic Trouble-Shooting
If you are having problems with the Keystation you should first check
the following common scenarios:
1. Are all your cables working?
2. Are all your cables plugged in properly (i.e. the Keystation MIDI
Out connected to your computer or MIDI module MIDI In)?
3. Is the power adaptor plugged into your Keystation? Is the power
switch on the back of the Keystation turned on and is the
Keystation red power LED lit?
4. Is everything powered up?
POWER
ON/OFF MIDI OUT
DC-9V SUSTAIN
KEYSTATION™Rear Panel

11
5. Is your computer sequencer properly configured (see the manual
for your particular sequencer)?
6. If you are using an external MIDI tone module, does the MIDI
transmit channel on the Keystation match the receive channel on
the module?
7. If you are using Keystation with a computer, is your MIDI inter-
face working properly. Check your MIDI interface manufacturer
manual and make sure any diagnostic tests have been run and are
passing.
Keystation MIDI Implementation
Function Transmitted Recognized Remarks
Basic Channel Default 1 x
Changed 1 to 16 x
Mode Default Mode 3 x
Message x x
Altered x –
Note Number True 0 to 127 x With Octave Change
Voice –x
Velocity Note ON 0 x Selectable (0 to 127)
Note OFF x x
After Touch Keys x x
Channels x x
Pitch Bender xx
Control Change 0 x Bank Select
Program Change 0x
True # 0 to 127 x
System Exclusive xx
System Common Song Pos x x
Song Sel x x
Tune x x
System Real Time Clocks x x
Commands x x
Aux Messages Local ON/Off x x
All Notes OFF 0 x Send with ResExt
Active Sensing 0 x
Reset 0 x Send with ResExt
Notes: Bank=select CC-00 (cc-32=00) 0 = Yes, x = No

12
90 Day Limited Warranty
MIDIMAN warrants that this product is free of defects in materials and
work1from MIDIMAN and a nominal handling charge shall be born by
the purchaser. In the event that repair is required, a Return
Authorization number must be obtained from MIDIMAN. After this
number is obtained, the unit should be shipped back to MIDIMAN in a
protective package with a description of the problem and the Return
Authorization clearly written on the package.
In the event that MIDIMAN determines that the product requires repair
because of user misuse or regular wear, it will assess a fair repair or
replacement fee. The customer will have the option to pay this fee and
have the unit repaired and returned, or not pay this fee and have the
unit returned unrepaired.
The remedy for breach of this limited warranty shall not include any
other damages. MIDIMAN will not be liable for consequential, special,
indirect, or similar damages or claims including loss of profit or any
other commercial damage, even if its agents have been advised of the
possibility of such damages, and in no event will MIDIMAN's liability
for any damages to the purchaser or any other person exceed the price
paid for the product, regardless of any form of the claim. MIDIMAN
specifically disclaims all other warranties, expressed or implied.
Specifically, MIDIMAN makes no warranty that the product is fit for any
particular purpose.
This warranty shall be construed, interpreted, and governed by the laws
of the state of California. If any provision of this warranty is found void,
invalid or unenforceable, it will not affect the validity of the balance of
the warranty, which shall remain valid and enforceable according to its
terms. In the event any remedy hereunder is determined to have failed
of its essential purpose, all limitations of liability and exclusion of dam-
ages set forth herein shall remain in full force and effect.
Table of contents
Other M-Audio Controllers manuals

M-Audio
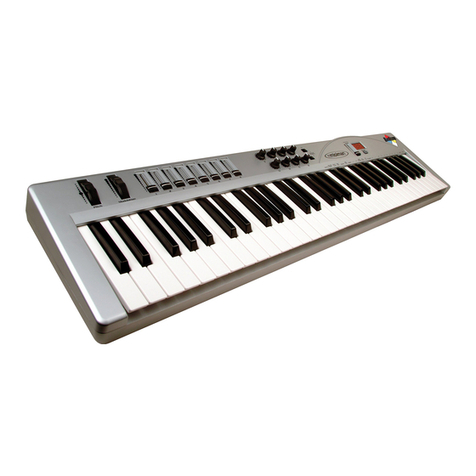
M-Audio Radium User manual

M-Audio
M-Audio Keyboard Controller Series User manual

M-Audio
M-Audio Axiom AIR 25 User manual

M-Audio
M-Audio Controller MIDI USB Wireless MidAir 25/37 Service manual

M-Audio
M-Audio Oxygen Series User manual

M-Audio
M-Audio Keystation 61es User manual

M-Audio
M-Audio iContro User manual
Popular Controllers manuals by other brands

FoamPRO
FoamPRO AccuMax 3040 Installation and operation manual

Mercoid
Mercoid MPCJR Series Specifications-installation and operating instructions

EIS
EIS New 100 Series User and installation manual

Mitsubishi Electric
Mitsubishi Electric FX3U-2HSY-ADP installation manual

GE
GE IC3645SR4R333AS2 Installation and operation manual

Ikelite
Ikelite EV-Controller instruction manual