M3 Mobile SM10 Installation guide

www.m3mobile.co.kr
SM10
Ver.1.0
Quick Manual
01
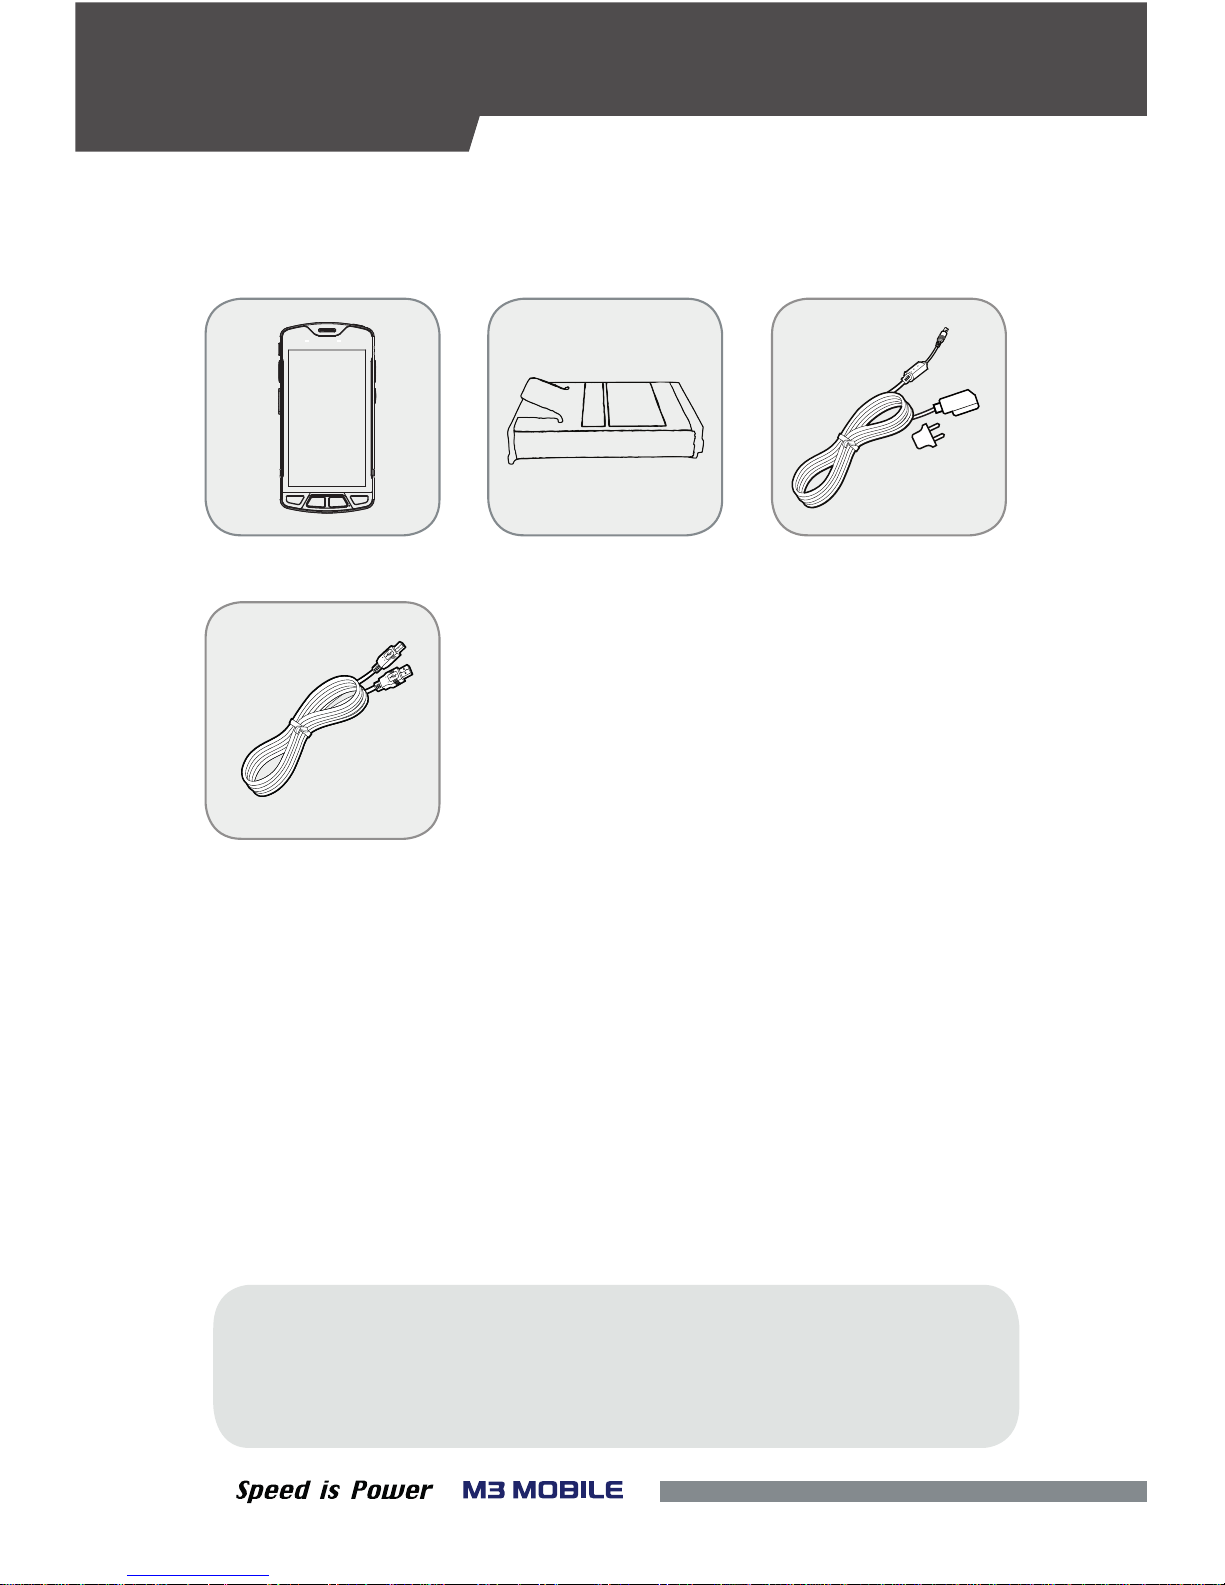
▪Please check all items below are included in package box.
※Warning
Use of controls or adjustments or performance of procedures other than
those specied herein may result in hazardous radiation exposure.
< Micro-USB Cable >
<Adaptor >
< Battery >
< M3 SM10>
PACKAGE
02
DEVICE
1
2
3
4
5
6
7
8
9
10
19
21
20
14
15
16
17
18
11
12
13
22
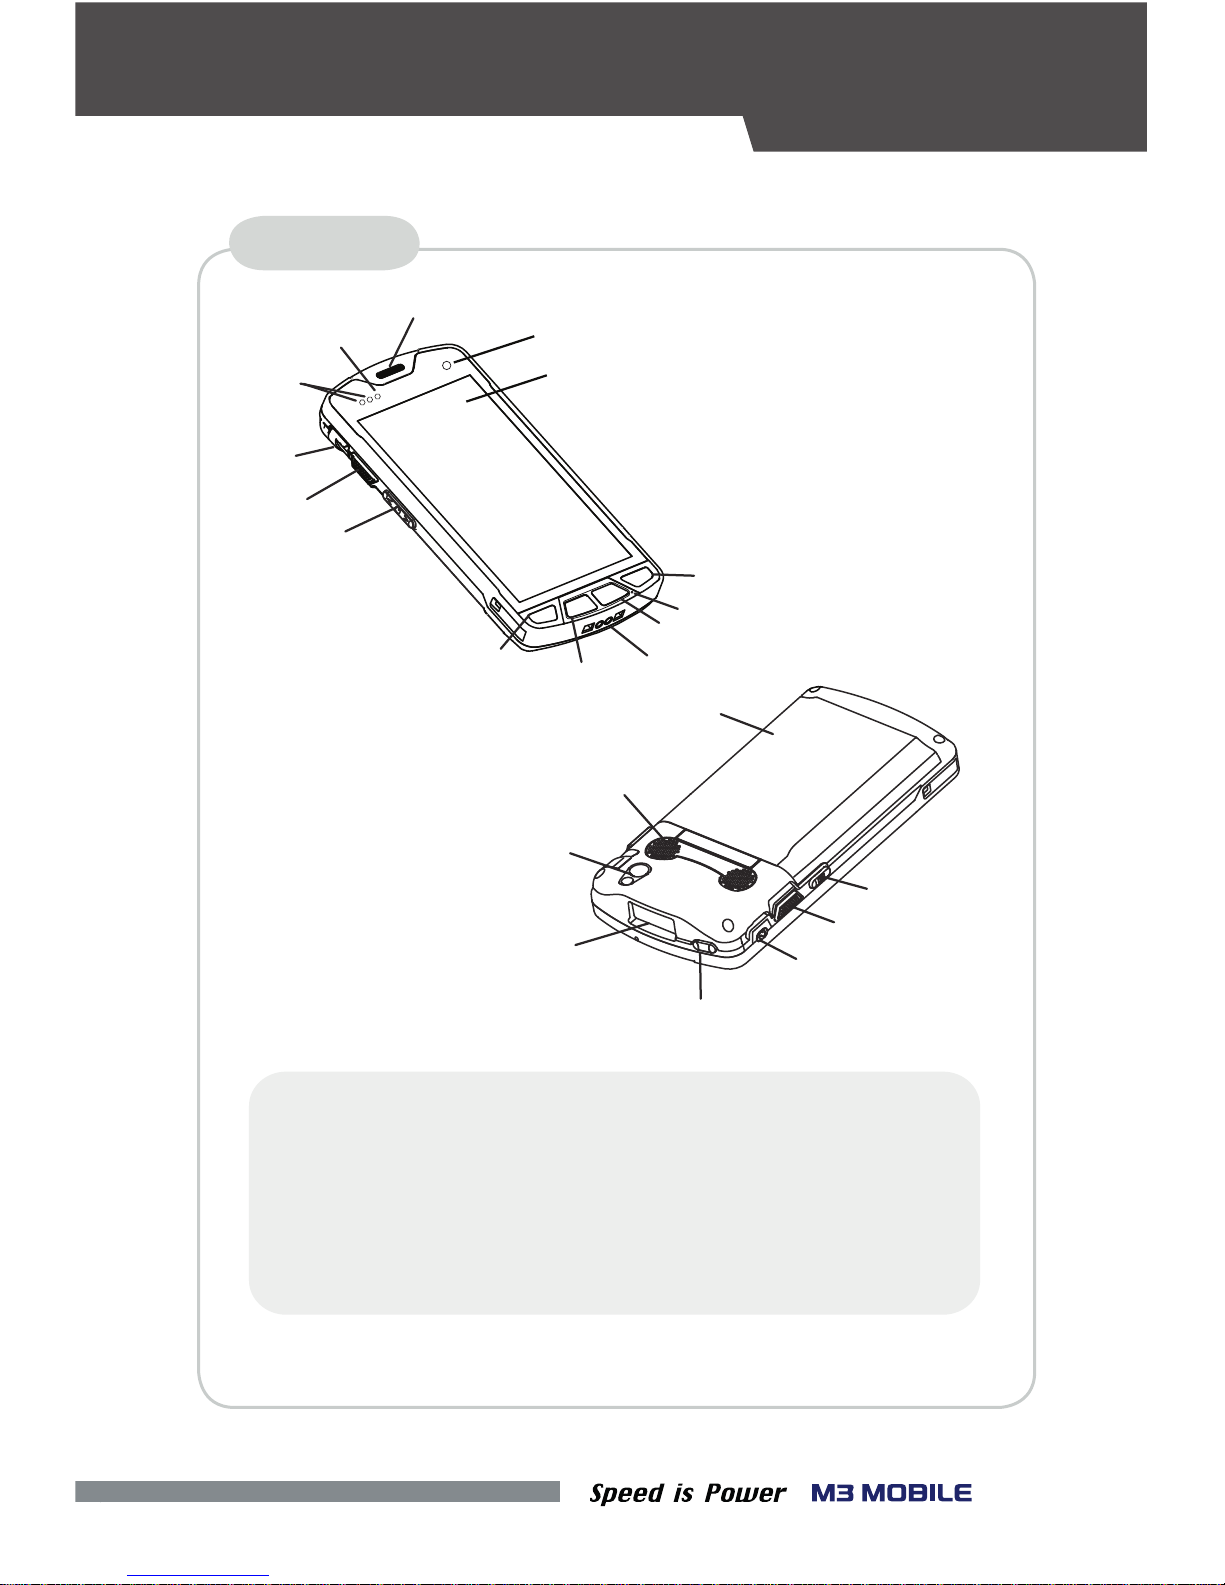
FEATURES
1.
3. Screen
5.
6. Menu Button
7. Charging Contacts
Receiver 9.
10.
11.
12.
13.
14.
Volume Button
Scanner Button
Micro-USB Connector
Battery Cover
Camera Button
Camera2.
4.
Microphone
Function Button
Home Button
Back Button
Sensor
Charging LED
17.
18.
Scanner Button
Ear Jack Hole
Scan Window
Camera
Speaker
Power Button19.
20.
21.
22.
8.
15.
16.

03
•
Button
•Home Screen
If the device is turned on, the following screen will be displayed.
The screen is divided into four sections as follows:
Status BarNotication Bar
Home Screen
Dock Bar
DescriptionButton
Scanner Operate the scanner while executing the scanner program.
Volume High Increase the volume.
Volume Low Decrease the volume.
Camera Take pictures while executing the camera program.
Back Return to the previous stage.
Home Go to the Home screen.
Menu Display the menu.
Execute the work set to the button.Action
FEATURES
KEYPAD
04
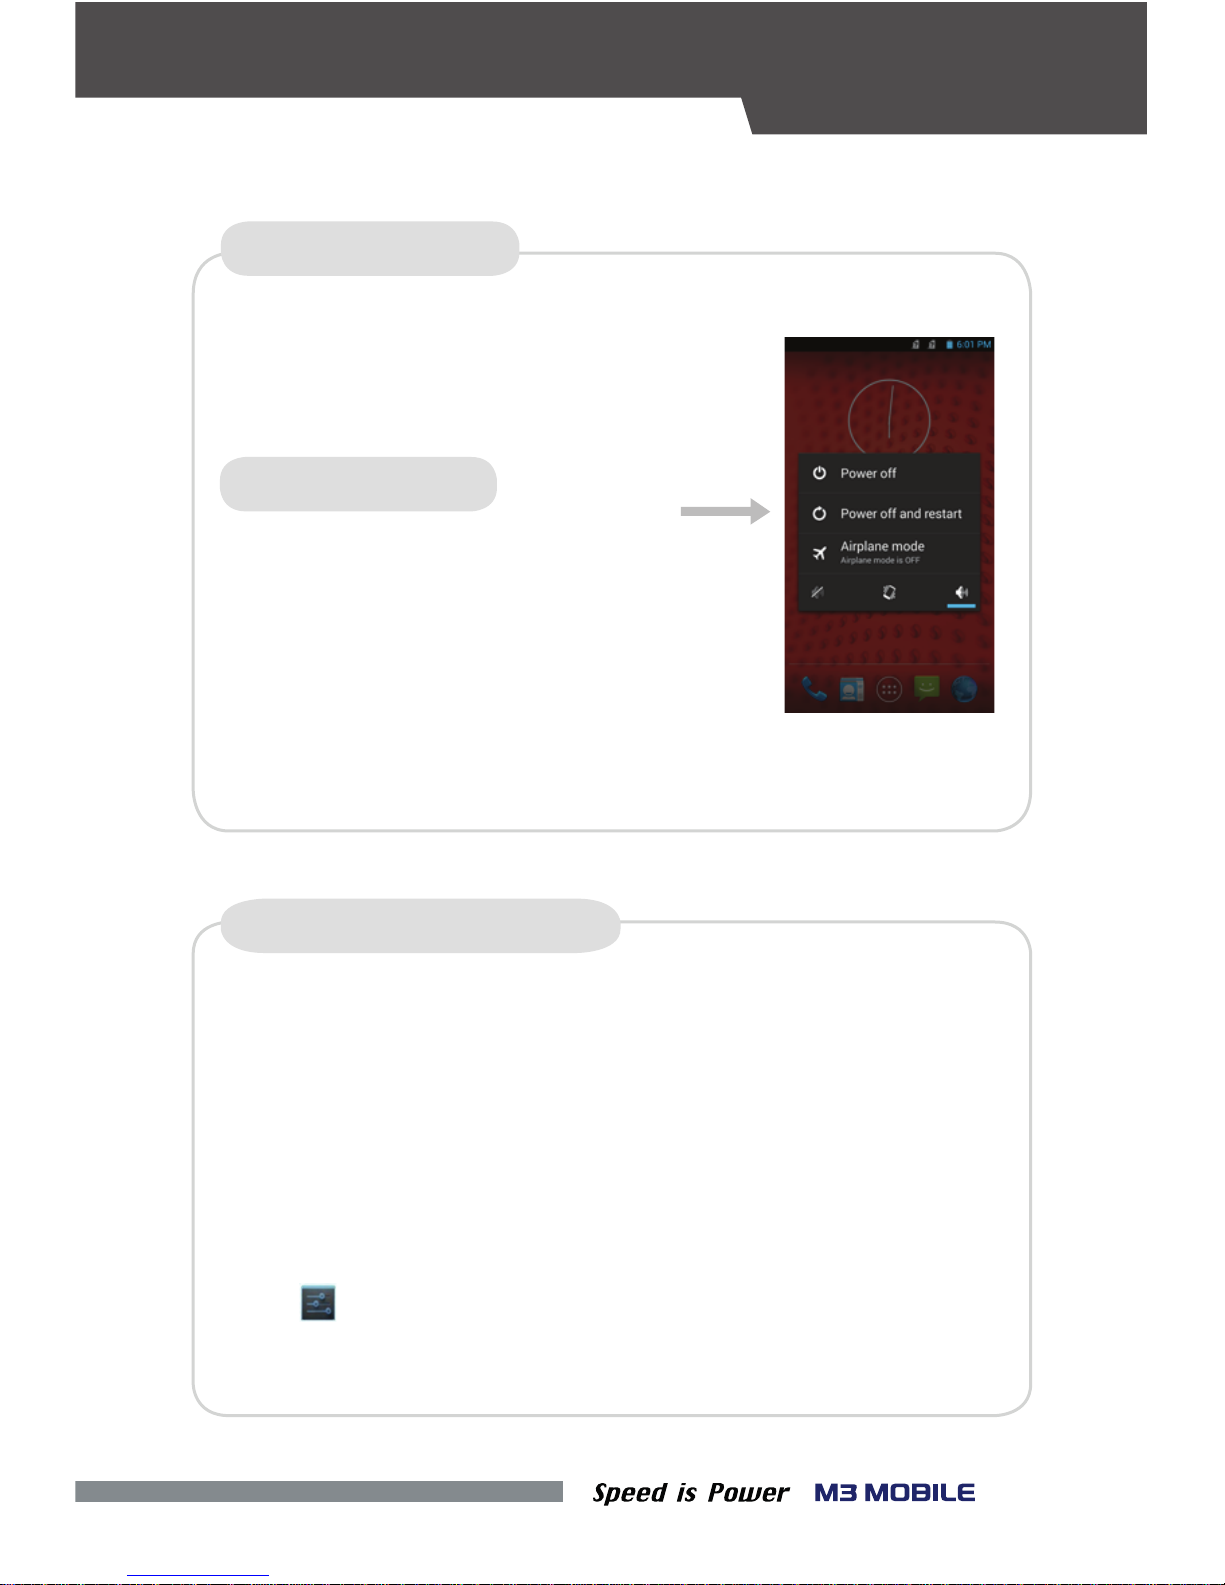
Press and hold the Power button to
display the power management menu. Select the
For factory reset, perform the following procedure.
•
SOFT RESET (1)
FACTORY DATA RESET
If a serious problem occurs in the device or a problem is not resolved
through soft reset, perform factory reset.
According to the options, the document in the internal SD card or the
Micro-SD card may be deleted. As such, please check the options.
All settings will be reset.
Tap Backup & reset →Factory data reset→
“Power O and Restart” menu.
If the device stops its operation for a long time,
and the data or le being used will also be
deleted. However, the stored data or le will
The program being executed will end, and
not be aected by the soft reset.
press the Volume Down button + the Back button
+ the Camera button to perform soft reset.
Chek if Erase internal SD-Card is checked
→
Reset Phone
→
Erase everthing
SOFT RESET (2)
RESET
•

05
CARD INSTALLATION
Inserting the SIM Card
•To insert the SIM card, remove the battery cover on the rear of the device
•Either the front or back of the SIM card can be connected to the dual slot.
Inserting an External Memory Card
•The Micro-SD card is used as an external memory of M3 SM10.
After removing the battery, insert the SD memory card into the
Micro-SD card slot.
Micro-SD Card
SIM Card
SIM
ONLY SAM
SIM
아래 위
DEVICE SETUP
and pull out the battery.

06
BATTERY
▪
▪
※Caution
If an unapproved battery is used, it may explode.
Check if the battery is inserted in the right direction.
Inserting the Battery
•Insert the battery from the bottom in the right direction.
•After inserting the battery, slide the Slide button to the left to x the
Removing the Battery
locking device.
DEVICE SETUP

07
Charging the Battery
• Use a portable adaptor to connect with the micro-USB port to supply
CHARGING
Description
LED Color
Battery is being charged.
Red
Battery is fully charged.
Green
※Caution
Use only an M3 Mobile-approved adaptor. If not, the device may malfunction or
be damaged during or after its charging, or the battery performance may degrade.
•Alternatively, you may connect the device to a cradle that you can additionally
DEVICE SETUP
external power.
purchase to charge the battery.
08
•
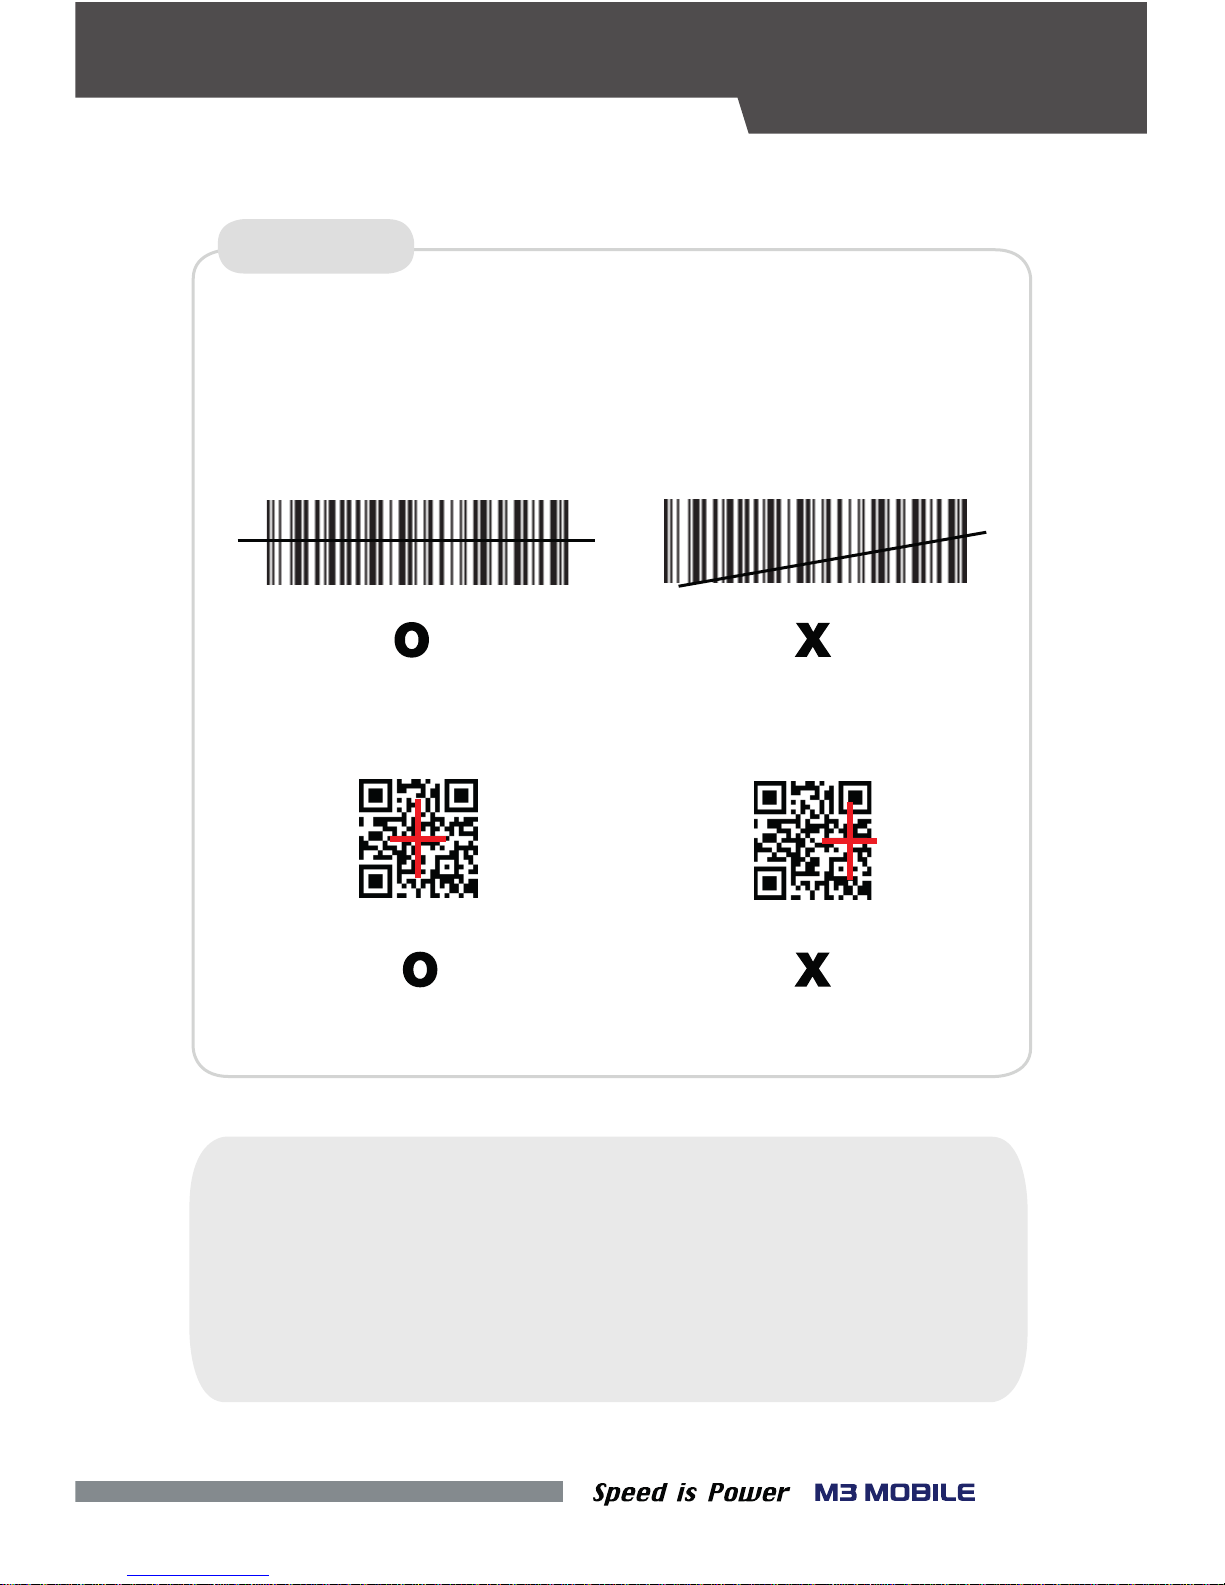
Place the device toward to the barcode desired, and press the Scan button.
The laser beam of the scanner should completely cover the bar code as shown
SCANNER
※Warning
If the device is used for purposes other than that described in this manual,
DATA CAPTURE
in the following.
<1D Scanner>
<2D Scanner>
Do not look at the laser beam directly.
a user may be exposed to harmful electromagnetic waves.
(Class 2 Laser product 1.0 mW, Max Output: 650 nm)
09
Taking pictures
•Run the Camera program.
•Tab the Capture button to take a picture.
Taking videos
•Run the Camera program.
•Tab the Video Mode button to take a video.
CAMERA
※Warning
It may cause signicant damages to your eyes if you directly look the
ash attached at camera module.
Connecting with the NFC Device
•Open a Web page or the screen of a video, photo, or contact.
•Place the back part of the NFC device toward the back of the M3 SM10.
Connecting to the NFC Chip / Tag Card
•Hold the M3 SM10 as shown below. Do not cover the antenna area of the
•Place the M3 SM10 near the NFC chip or tag card until the data transfer is
•Touch the screen. Data transfer would then start.
completed. (Generally, data is displayed in the application.)
DATA CAPTURE
NFC
battery cover with your hands.
Table of contents
Other M3 Mobile Cell Phone manuals


