mabe LMD7023PBBP0 User manual

1
owner's manual
twin tub washing machine
models
read this owner's manual before installing your new twin tub washing machine
PM01
LMD7023PBBP0
LMD9023PBBP0
LMD1123PBBP0

2

3
list of packaged parts
Owner's manual
welcome
We invite you to get to know your product, read this manual and get
the most out of
it.
Part
Twin tub washer
Spinning tub plate
Lint filter (only on models
LMD7023PBBP0 and
LMD9023PBBP0).
Drain hose
Quantity
One piece
One piece
Onepiece
One piece
One piece
contents
List of packaged parts ............................................................................ 3
Important Safety Instructions ................................................................. 4
Parts of your new twin tub washer ......................................................... 8
Installation instructions ........................................................................... 9
Preparation before washing ................................................................. 13
Washing tips ......................................................................................... 14
Proper use of laundry products ............................................................. 15
Control panel ........................................................................................ 15
Washing sequence ............................................................................... 16
After washing a load ............................................................................. 19
Cleaning the unit .................................................................................. 22
Troubleshooting tips ............................................................................. 24
Rated electrical specifications .............................................................. 25

4
• Your own safety is important for us. Please read this information
before using your new product.
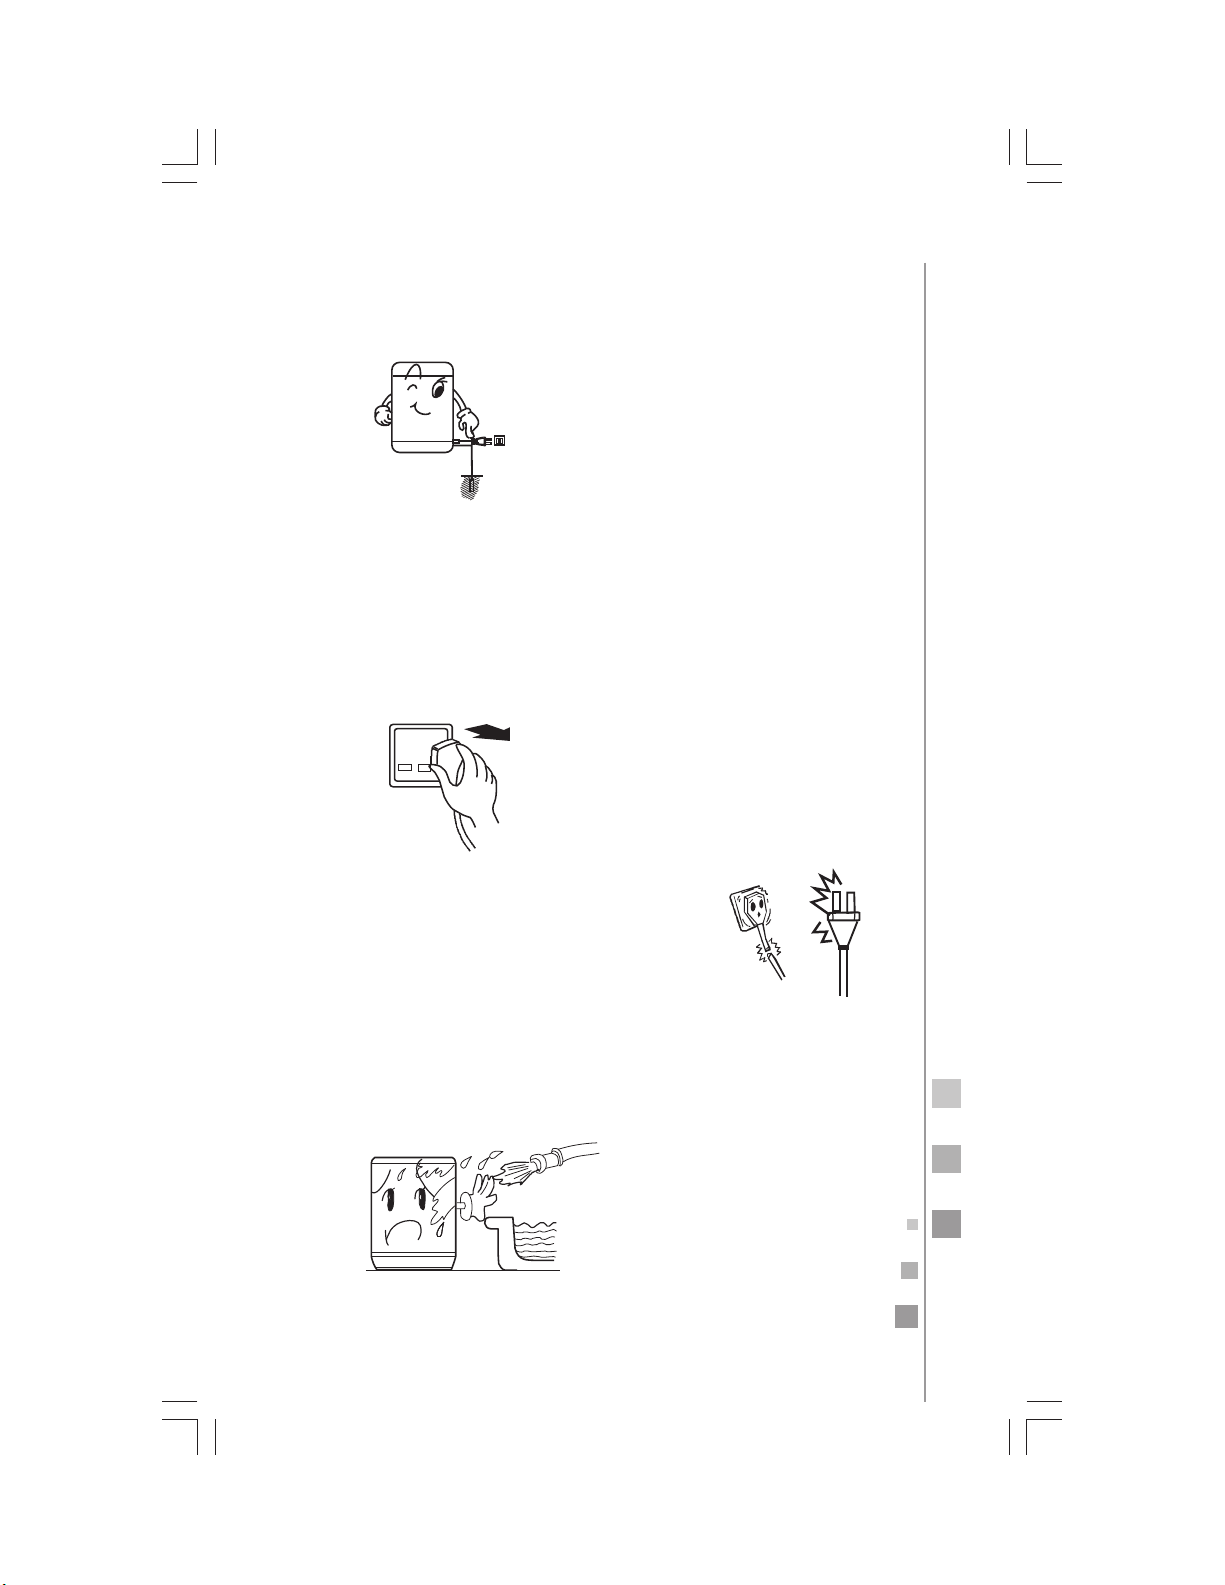
• Do not use extension cords.
• Do not plug other electric appliances to the same power outlet.
• Hold the connector by the power plug, not by the cord.
• This product is equipped with a "Y" type polarized plug having a
built-in grounding wire.
• Do not remove the grounding terminal or use outlet adapters.
• If the power cord is damaged, it must be replaced by the manufac-
turer, its authorized service agent or by qualified personnel in or-
der to avoid a hazard.
• If voltage variations are usual in your area, have a voltage regula-
tor installed.
• This appliance is not intended for use by persons (including chil-
dren) having reduced physical, sensory or mental capabilities, or
lack of experience and knowledge, unless they have been given su-
pervision or instruction concerning the use of the appliance by a
person responsible for their safety.
• Children should be supervised to make sure they do not play with
the appliance.
• IMPORTANT: Failure to follow these warnings, will make you en-
tirely responsible for personal injuries or material damages that
may occur from using this equipment.
important safety instructions
The following conditions are not considered as a normal use of the
appliance:
• If it has not been operated in accordance with the provided opera-
tion instructions.
• Damages caused by accidents, electrical overloads, voltage fluctua-
tions, using an energy other than the specified, or catastrophes.
• If it has been used with commercial or industrial purposes, or for
other than the indicated in the operation instructions.
• If the product has been repaired by unauthorized persons and/or
service workshops.

5
Please insert the power cord into special receptacle with rated volt-
age. Be sure to use single-phase three pins receptacle.
If possible, install an electric leakage protector.
Make sure the electrical outlet is located at an easy and accessible
place so the power plug can be easily connected and disconnected.
Be sure to pull the plug off when there's a power failure, or before
moving or cleaning the machine, and when it's idle.
If the power cord is damaged, it must be replaced
by the manufacturer, its authorized service agent
or by qualified personnel in order to avoid a haz-
ard.
Never wash the unit with water. Do not place wet clothes on
panel.
the control

6
If the washing machine is installed on a carpet, do not block the
ventilation hole with the carpet.
Do not let the machine share the power outlet
with other electric appliances. If the power outlet
is damaged do not use it anymore until it is
checked by a qualified electrician.
Do not reach into the working machine. It is danger-
ous even if the rotation is slow. Take special care with
the children.
Do not try to disassemble, repair or alter the
machine by yourself.

7
Do not put any hot or heavy items on the
washing machine such as a kettle with hot wa-
ter.
Do not wash items that have been stained
with volatile substances such as thinner,
petrol, etc.
Keep the machine away from direct sun-
light and heat sources like heaters.
To protect your clothes as well as the washing ma-
chine, please take out coins, sand, hairpins and
other foreign materials from clothes before wash-
ing.
•The Maximum water level should not be exceeded when filling the
tub.
•Make sure that the connection of the water inlet hose is proper.

8
parts of your new washing machine
1. Wash Type Selector.
2. Wash Timer Selector.
3. Water Inlet Port.
4. Water Inlet Selector.
5. Control Panel.
6. Lint Filter (must be installed by
the end user).
7. Overflow Filter.
8. Washing Tub.
9. Drain Hose.
10. Outer Cover of the Spinning
Tub.
11. Inner Cover of the Spinning
Tub.
12. Main Frame.
13. Spinning Tub.
14. Cabinet.
15. Base Frame.
Important notes:
•All illustrations contained in this manual have a reference purpose
only. Your washing machine as well as the accessories may look dif-
ferent from these illustrations
.

9
installation instructions
Install and adjust the washing machine according to the instructions
contained in this manual. It is very important for your own safety
and the correct operation of the machine.
install the lint filter (on models LMD7023PBBP0
and LMD9023PBBP0)
After unpacking your washing machine, take out the lint filter from
the documentation bag.
Install the lint filter in the overflow filter located inside the washing
tub. See the illustration.
install the lint filter on model LMD1123PBBP0
Put the underside of the lint filter into overflow filter, then push the
upside into overflow filter.
Make sure that the lint filter is firmly placed in the overflow filter,
otherwise the lint filter may fall off when washing, adversely affect-
ing the operation of the machine.

10
drain hose
The drainage of the machine should be smooth and fluid.
•The height of the drain hose when placed down on the floor
should be less than 10 cm, or the drainage will not be smooth
enough causing an incomplete drainage.
•Do not step on or crush the drain hose.
If the extra section of the drain hose is too long, you can cut it at ei-
ther point indicated "A" or "B".
Once the washing or rinsing process is completed, and you need
to flush the water, it is necessary to place the drain hose on the
floor at a height not greater than 10 cm, and turn the control
panel knob to the function “Drained”.

11
Turn 90° the
fixing hook
Take off the fixing
hook downwards
Drain hose
fixing hook
Slightly
pull out
Drain hose
Take off drain hose
Side Section View
Fixing hook
installation
hole
Drain Hose
Fixing Hook
how to change the direction of the drain hose
Figure 1 shows the factory installation position of the drain hose.
Extend the drain hose from the spin tub side
1. Remove the drain hose from the hanging hole on the cabinet.
Pull the drain hose fixing hook outwards gently to take out the
drain hose from the two fixing hooks. (See Figure 2).
Turn 90° the
hook to fix it
nsert the fixing hook into the
nstallation hole upwards
2. Turn 90° the drain hose fixing hook to re-
move it from the installation hole (see Fig-
ure 3).
3. Install the two drain hose fixing hooks taken
out, into the installation hole at the other
side of the base frame (to aim at the instal-
lation hole accurately you can lean the
washing machine forward slightly). Then
turn 90° (see Figure 4).
Figure 1
Figure 2
Figure 3
Figure 4

12
4. Pull the fixing hook outwards slightly. Inlay the drain hose into
the fixing hooks reliably along the groove at spin tub side, and
make it extend towards spin tub side.
5. Then hang the drain hose into the hanging hole at the spin tub
side. (See Figure 5).
Extend the drain hose from the back side
Take out the drain hose from the fixing hook. Extend it from the
back side.
When the drain hose is extended from the rear side, it can be
hanged on the point for drain hose at either side of the cabinet.
(See to Figure 6).
Figure 5
Figure 6

13
install the water supply hose and select the water
level
insert the water supply hose into the water
panel.
To remove the water supply hose, just push the control handle as in-
dicated in the figure and pull it out.
Select water level according to the size of the load to be washed.
Set the water level adjusting lever to the proper line.
Important: The appliance must be connected to the water mains
using a new water supply hose. Do not use previous or old hose.
preparation before washing
1. Connect the water supply hose.
2. Make sure that the washing machine is properly grounded, then
insert the power plug into the outlet. Do not connect the ground
terminal to a gas or water pipe.
3. Lower the drain hose to the floor.
Important: An uneven or slanted floor may result in unstable work-
ing and abnormal noise. Make sure the machine stands firmly on an
even floor.
Model LMD1123PBBP0Models LMD7023PBBP0 and
LMD9023PBBP0
inlet port on the control
On the models that apply
make sure that the end of the coupling
hose is firmly inserted into the inlet port. Failure to do so will result in
leaks that could damage your washer”.
Never exceed the maximum filling level shown on the lint filters.

14
before washinga load pay attention to the
following
•Check clothes care labels looking for special washing instructions.
•Clear pockets. Take out coins, sand, hairpins etc.
•Tie the long strips, fasten buttons and close zippers.
•The size of the load to be washed should not be too
large. Stretch and loosen the items before putting them
in the tub.
•Sort non-colorfast from colorfast items.
•Dip with your hands items difficult to absorb water.
•For items with heavy soil, please first remove the dirt like mud or
dust. For hard spots, apply detergent on them in advance. This will
make them easier to remove.
•For items that may get lint ball and those with long fibers, turn
them over before loading.
•Do not wash items spotted with chemicals using this appliance.
washing tips
•The washing and spinning capacities of the machine refer to the
largest weight of standard items under dry condition that can be
washed or spined at once.
•The size of the load in any washing cycle must be smaller than the
rated capacity.
•The thickness, size and type of clothes will affect the actual wash-
ing capacity. Load a proper amount of items each time. Items
loaded should freely move inside the tub.
•Do not select the maximum water level for few items, so as to
avoid splashing of water. Do not use high suds detergents.
•When the washing tub pulsator is running, the buttons
of clothes may cause noise. Load more items without
buttons to minimize the noise.

15
Wate inlet
po t
wash spin
time
To select a time below 2
minutes, turn the knob to
the 5 minutes setting and
then turn it back to the
desired position.
You can select between
LIGHT, ORMAL and DRAI .
wash type
To select a time below 1
minute, turn the knob to
the 2 minutes setting and
then turn it back to the
desired position.
spin
proper use of laundry products
Using bleach
• Fill water to proper level. Dilute bleach in a suitable container.
Pour it slowly into the washing tub.
• Avoid using bleach on items with color or pattern as they are
prone to lose color.
• Bleach should not directly contact clothes.
• Refer to the bleach manufacturer instructions for the proper use
and amounts.
• For powder bleach, dissolve it before using.
Using powder detergent
• Powder detergent can be dissolved in the washing tub:
1. Let a small quantity of water into the tub.
2. Add the powder detergent. Run for 30 seconds to completely
dissolve it.
3. Load items into the tub. Select a suitable water level.
control panel
• You can also dissolve the powder detergent before adding it to
the washing tub:
1. Prepare warm water at 30 °C in a suitable container.
2. Add the powder detergent while stirring to fully dissolve it.
• Powder detergent tends to spot clothes more than liquid deter-
gent. Be careful with the amount of detergent.
• The amount of detergent to be used varies with the type of deter-
gent. Always refer to the manufacturer of the detergent instruc-
tions for proper use and amounts.

16
washing sequence
wash type
drain
normal
light
time
wash type
drain
normal
light
1. Fill selection. Set the water inlet selector
to WASH. (Figure 1). Adjust water level
rod to a position as needed.
wash spin
2. Let water into the tub and add dissolved
powder detergent until water reaches a
suitable level. (Figure 2). It begins to
wash and dispense detergent evenly.
3. Add the wash load, and supply water if
necessary.
4. Select the proper WASH TYPE according
to the load.
5. Select the WASH TIME according to the
load.
6. After washing, set the WASH TYPE SE-
LECTOR to DRAIN.

17
Oute cove
of spinning tub
Inne cove
of spinning tub
P ess down
the spinning
tub plate
Co ect
position
Load is
not level
P ess down
Co ect Without
spinning
tub plate
spin
1. Evenly load the items into de spin tub.
2. Spin the load.
Properly place the spinning tub plate on the load, even when the
load is small.
3. Close the inner and outer covers of the spinning tub.
4. Spin the load for 1-2 minutes.
foam-removing spinning
1. Place the water inlet selector at the SPIN position. Let the water
into the spinning tub for about 1 minute. If the water quantity is
too large, then it may flow out to the wash tub side. Please regu-
late the water supply tap to limit water filling.
2. Close the outer cover of the spin tub and set a spinning time of 1
or 2 minutes.
wash spin

18
water saving rinse
Rinsing and spinning may be repeated 2 to 3 times using stored wa-
ter.
1. Load the items into the washing tub. Select a suitable WASH TYPE
according to the type of the load.
2. Let the tub to be filled with water to the selected water level.
3. To rinse, adjust the wash timer to 2-3 minutes of operation.
When rinsing a small load, you can select the LIGHT wash type. If
you select the NORMAL wash type water may splash outside the tub.
spinning
1. Arrange the items into the spinning tub evenly and smoothly.
2. Press the spinning plate inside the tub properly. Close the inner
and outer covers of the spinning tub.
3. Select a suitable spin time according to the type of the load.
During spinning, you may hear abnormal noises; generally they are
caused by an uneven load arrangement inside the tub. Stop the ma-
chine and rearrange the load.
If you open the outer spinning tub cover the machine will pause.
Close the outer cover to resume the spinning.
rinsing
1. Load items to rinse into the washing tub. Select suitable WASH
TYPE according to the items to wash.
2. Set a proper water level using the adjusting lever according to the
size of the load. Let the water into the tub continuously.
3. Use the TIME knob to set a time between 5 and 7 minutes to per-
form the rinsing.
important
To spin and drain or to rinse with water-filling to-
gether, first spin for about 1 minute, then drain or
rinse with water-filling. Otherwise the spinning
will stop due to too much water stored in the spin
tub.

19
when finishing
After using, remove lint and foreign materials from the lint and
overflow filters. Otherwise this will adversely affect the operation of
the machine.
WARNING: UNPLUG THE WASHING MACHINE
FROM THE POWER SUPPLY BEFORE PERFORM-
ING ANY CLEANING JOB.
THE LINT FILTER MUST BE USED DURING WASHING AND MUST BE
CLEANED AFTER EACH USE.
cleaning the lint filter on models LMD7023PBBP0
and LMD9023PBBP0
1. Remove the lint filter.
Place your hand in the shown position. Push down to remove the
filter (Figure 1).
2. Remove collected lint.
Place the filter in water and remove lint while
wet (Figure 2).
Figure 1
Figure 2
3. Replace the lint filter.
After cleaning, insert the bottom of the lint filter
(marked DOWN SIDE) into the overflow filter.
Now push the top of the lint filter (marked UP
SIDE). (Figure 3).
Figure 3

20
•Too much lint on the overflow filter will affect the normal opera-
tion of the machine. Clean it every two months.
•Take off the overflow filter as shown in the figure. Nip the elastic
fixing claw and pull it in the direction of the arrow to take it off.
cleaning the overflow filter on models
LMD7023PBBP0 and LMD9023PBBP0
THE LINT FILTER MUST BE USED DURING WASHING AND MUST BE
CLEANED AFTER EACH USE.
cleaning the lint filter on model LMD1123PBBP0
1. Press the elastic piece at the top of lint filter to re-
lease the tab from the filter cover, and pull the lint
filter outward to remove it. (See Figure 1).
2. Remove the collected lint. Pull out the bottom of the lint filter
rear cover to disassemble it from the front cover. Remove lint
completely using clear water. (See Figure 2).
Figure 1
Figure 2
3. Reassemble and replace the lint filter.
This manual suits for next models
2
Table of contents
Other mabe Washer manuals

mabe
mabe CLME71214BAT User manual

mabe
mabe aqua saver User manual

mabe
mabe GBVH5140H Service manual

mabe
mabe LMA80BYI1 User manual

mabe
mabe LMD6124PBEB0 User manual

mabe
mabe LMD3123PBEB0 User manual

mabe
mabe LMD3124PBAB0 User manual

mabe
mabe LMD1841B User manual

mabe
mabe LMC0686XBBY User manual

mabe
mabe WMA07DXESXS User manual
Popular Washer manuals by other brands

Milnor
Milnor 30015T6X Mechanical Parts and Service

Electrolux
Electrolux EWS 86110W user manual

Zanussi Electrolux
Zanussi Electrolux ZWF 14109 Instruction booklet

Haier
Haier Thermocool HMS800TVE user manual

Bradley
Bradley Terreon Quadra-Fount MF2944/BIR3 Installation

Bravo
Bravo 2-STATION Product instructions