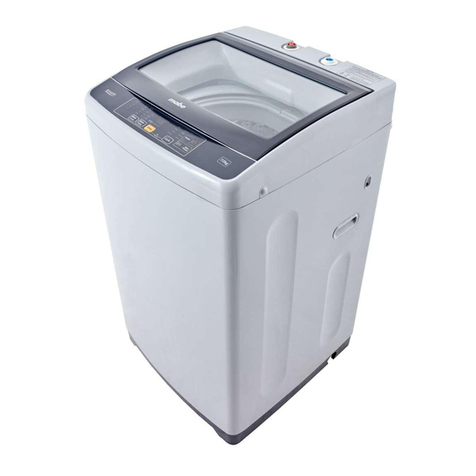
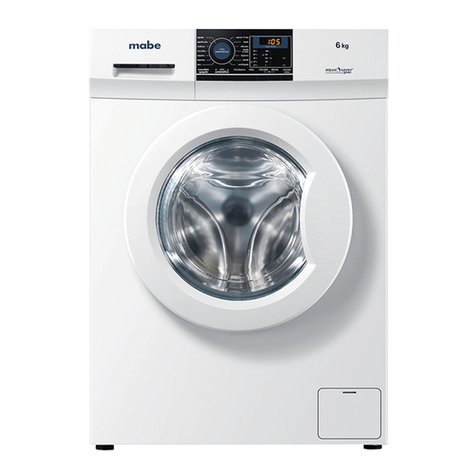
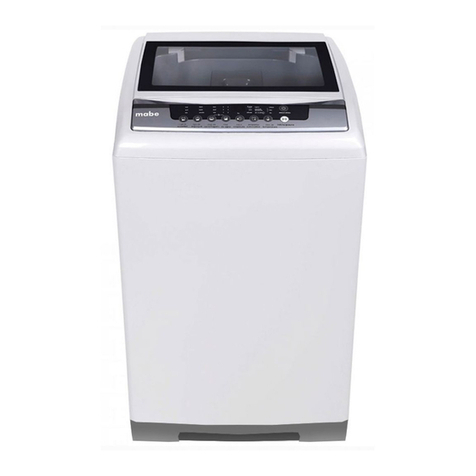
mabe LMD1841B User manual

1
owner's manual
washer
models
LMD1841B
LMD1842B
PM01
read this manual before installing your washer


3
contents
Before using the washer, please carefully read this owner's manual.
Keep this manual for future reference.
Parts of your new washer ..................................................................... 4
Safety Precautions ................................................................................. 5
Installation and Setup ........................................................................... 7
Installing the Lint Filter ......................................................................... 7
Drain Hose .............................................................................................. 7
Drain Hose Direction ............................................................................. 9
Preparation Before Washing .............................................................. 10
Tips and Notes ...................................................................................... 11
Bleach and Detergent ......................................................................... 12
Using Bleach ......................................................................................... 12
Using Powder Detergent ..................................................................... 12
Wash Instructions ................................................................................ 13
Wash Sequence ..................................................................................... 14
Spinning a Load at the Middle of the Cycle ...................................... 15
Rinse ..................................................................................................... 16
Spinning ............................................................................................... 16
Cleaning the filters after a wash cycle ............................................... 17
Maintenance of the Unit ..................................................................... 18
Troubleshooting .................................................................................. 19
Parts Included ...................................................................................... 20
Specifications ....................................................................................... 21

4
parts of your new washer
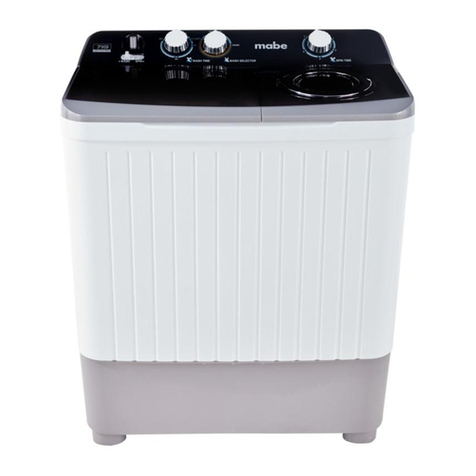
1. Drain Selector Knob
2. Wash Selector Knob
3. Wash Timer Knob
4. Water Inlet
5. Water Inlet Selector
6. Control Panel
7. Water Spout
8. Water Level Setting
9. Overflow Filter
10. Lint Filter
11
10
9
8
7
6
5
4
3
2
1
12
13
14 15
21
20
19
18
17
16
11. Drain Hose
12. Pulsator
13. Cabinet Handle
14. Wash Tub
15. Base
16. External Cap of the Spin Tub
17. Internal Cap of the Spin Tub
18. Spin Timer Knob
19. Spin Tub Frame
20. Spin Tub
21. Cabinet
Note: Illustrations in this owner's manual are for reference only.
Product and accessories could show differences against illustrations
due to our continuous improvement program.

5
safety precautions
For your own safety, before us-
ing the washer carefully check
the outlet and the ground con-
nection.
Connect the power plug into an
outlet that supplies the specified
voltage. Make sure the outlet is
grounded. The outlet's ground
terminal must have reliable
ground connection. If possible,
use a protector against electrical
leakage.
Make sure that the power outlet
is located so that it can be easily
reached. Unplug the unit when
there is a power supply failure or
if the machine will be moved,
cleaned, or if you are not using
it.
If the power supply cord is dam-
aged, it must be replaced by the
manufacturer or service agent or
by qualified personnel in order
to avoid hazards.
To prevent abnor-
mal vibration dur-
ing the spin cycle,
do not wash
clothes such as
raincoats
Do not connect
the washer to
an outlet that
feed other ap-
pliances.
If you install the washer on a car-
peted floor, be sure that all ven-
tilation holes are unobstructed
by the carpet.
Do not use wa-
ter exceeding
50 °C.
Do not install the washer in a
damp area, for example in a
bathroom. Never clean the
washer with water or put damp
clothes on the control panel.
6
Before washing a load, make
sure the water tap is open and
the washer is correctly connected
to the water inlet.
To protect your clothes and the
washer, remove coins, buttons,
sand, pins, and other materials
that may be inside the clothes
pockets before washing.
Do not leave the machine unat-
tended near children.
Do not place hot or heavy items
(such as a pan of hot water) on
top of the washer.
Do not reach into a machine in
operation. It is dangerous even
though the spin rotation is slow.
Be specially careful to keep chil-
dren away from the machine.
Do not disassemble, repair or
modify the machine yourself.
Do not wash items that are
dampened or soiled with volatile
substances, such as paint, sol-
vents or gasoline.
Keep the machine away from di-
rect sunlight and heat sources
(such as a radiators or room
heaters).

7
The washer must be installed and adjusted in accordance with the
instructions contained in this manual. It is very important for your
safety that you have the correct operating conditions for the ma-
chine.
installation and setup
how to install the lint filter
Place the bottom portion of the filter inside the overflow filter, then
push in the top portion.
After installation, make sure that the lint filter is correctly placed,
otherwise it could fall off and will not work when the washer is in
use.
drain hose
When the drain hose is properly installed, the machine will drain
with no problems.
•The height of the drain hose must be less than 10 cm, otherwise it
is likely that the machine will not drain completely.
•Do not stand on or bend the drain hose.

8
•If the drain hose is too long, cut it to the correct length. For best
results, cut the drain hose with an angle at the front end.
•If a longer drain hose is needed, please buy a new one. The inside
diameter of the hose must not be less than 40 mm, and the length
must not exceed 1,5 m
If the new drain hose is too long, cut it at point A or point B.

9
changing the drain hose direction
1. The following illustration shows the factory position of the drain
hose.
2. Place a soft item on the floor. Gently tilt the machine with the
front surface facing the floor. Remove the drain hose from the
cabinet. Remove the hose from its slot.
3. Install drain hose into the slot on the side of the spin tub, in the
order of 1 to 3, towards the side of the spin tub.
4. Using your hands, install the drain hose into the slot. Make sure
you do not damage the hose when locking the fixing clamp.
Note: Extend the drain hose from the side of the spin tub.

10
install the water inlet hose and select the water
level
1. Insert the fill hose in the water inlet port located in the control
panel (to disassemble the water inlet pipe, simply press the con-
trol panel as shown in the figure and pull outward).
2. Select the level of water depending on the size of the load. Set
the water level by moving the lever to the desired setting.
1. Connect the water inlet hose.
2. Make sure that the washer is properly grounded. Plug the power
cord into the outlet. Do not connect the ground terminal to gas
or water pipes.
preparation before washing
3. Lower the drain hose.
4. An inclined or uneven floor may cause abnormal noise or a poor
performance. Make sure that the washer is horizontally leveled.
pay attention to the following before using the
washer
•Check clothes looking for special washing instructions.
•Empty pockets. Remove coins, sand, pins, etc.
•Tie long ties, button up clothes and close zippers.

11
•Make sure all clothes can be machine washed.
•Separate dark color clothes which may stain light color clothes.
•Soak garments that do not absorb water easily.
•For heavily soiled clothes, first remove mud or dirt. For best re-
sults, apply detergent directly on stains.
•Turn inside out garments that have a tendency to generate or col-
lect lint.
•Do not wash items that have been in contact with chemicals.
tips and notes
•The capacity of the machine indicates the maximum weight of dry
clothes that the machine can wash or spin at once. Each load must
weigh less than the capacity indicated for the machine.
•The thickness, size and fabric of garments affect the actual wash-
ing capacity. Please wash only a load that will have enough room
to turn and spin inside the tub.
•To avoid splashing water, do not use the highest water level to
wash a small load.
•Do not use detergents that generate high suds.
•Do not overload the washer.
•When the propeller is operating, the buttons from clothes may
cause noise. To obtain a quiet operation, wash garments that have
buttons with clothes that do not have buttons.

12
bleach and detergent
using bleach
1. Fill the tub with water to the desired level. In a separate con-
tainer, dilute bleach in water.
2. Slowly pour the diluted solution in the wash tub.
•Avoid using bleach with clothes having patterns and colors, as
they will discolor or stain.
•Do not let the bleach to have direct contact with the clothes.
Read the instructions of the bleach manufacturer to learn more
about the use and amount to be used.
•If you are using powdered bleach, it is recommended to dissolve
it in water before using it.
recommended load sizes
9 pieces
10 pieces
10 pieces
6 pieces
16 pieces
Dressing pants
Dressing shirts
T-shirts
Sweatshirts
Underwear
Normal Load
10 pieces
10 pieces
10 pieces
Bed Sheets
Pillow Cases
Towels
Bedding Load
powder detergent
Dissolving it in the wash tub.
1. Fill the washer with a small amount of water.
2. Add the powder detergent. Operate the washer for 30 seconds to
completely dissolve the detergent.
3. Add the load and select the desired water level.
Instant dissolving powdered detergent
1. Prepare hot water at approximately 30 ° C in a separate container.
2. Add the powder while mixing continuously until the detergent is
completely dissolved.
It is more likely that powdered detergent stains clothes than liquid
detergent, therefore use only the recommended amounts.
Different powdered detergents dosage varies. Refer to the instruc-
tions provided by the manufacturer of the powder detergent for de-
tailed dosing requirements.

13
washing instructions
wash
1. Place the water inlet selector in the WASH setting
and the water level selector in the desired setting.
2. Fill the tub up to the desired level and add liquid detergent or
dissolved in water powder detergent. Run the wash cycle for a
few minutes to completely dissolve the detergent in the water.
3. Place the load into the tub and add more water if necessary.
4. Select the proper wash type, NORMAL or HEAVY according to the
load.
5. Select the wash time according to the load.
•Up to 15 minutes is normal.
•From 15 to 45 minutes the active soak turns on. During active
soak, the impeller works 2 minutes every 8 minutes. Once the
active soak is completed, the impeller will work normally for 15
minutes.
•To select the active soak, turn the wash timer knob to a position
between 15 and 45 minutes. Be sure to previously dissolve the
powder detergent, otherwise the powder detergent may dam-
age your clothes.
6. Once the wash cycle is completed, place the drain selector in the
DRAIN setting.

14
wash sequence
wash
1. Place the wash/spinselector in the "wash" position,
and the water level selector in the desired setting.
2. Fill with water and add liquid detergent or diluted powder deter-
gent until the water reaches the desired level.
While washing, the detergent will be equally dis-
tributed.
3. Place the wash load in the tub and add more
water if necessary.
4. Select the proper wash type setting, NORMAL
or HEAVY according to the load.
5. Select the wash time according to the load.
6. After wash is finished, place the drain selector
in the DRAIN position.
Wash timer
If you want to set less than 2
minutes, go to the 6 minutes set-
ting, then back.
Wash Type
You can select Normal or Heavy.
drain selector
During washing, do not select
the drain position.
Spin timer
If you want to set less than a
minute, go to the 2 minutes set-
ting and then back up.

15
1. Load the clothes in the tub, evenly distribute the load.
2. Spinning:
a. Place the top cover of the spin tub properly. The top cover
should be properly placed even if the load is small.
spinning a load at the middle of the
cycle
b. Close the internal and external covers of the spin tub.
c. Spin the load for 1 to 2 minutes.
3. Spin to remove detergent suds.
a. Place the water inlet selector in the SPIN setting and fill with
water for 1 minute approximately. If the water overflows by
the side of the wash tub, reduce the water level.
b. Close the external cover of the spin tub and spin for 1 to 2 min-
utes.

16
rinse
rinsing with clear water
1. Place the clothes in the wash tub. Select the desired water flow
according to the load.
2. Adjust the water level: Set the water level with the water level
adjustment lever according to the size of the load. Then fill the
tub continuously until reaching the desired water level.
rinsing with used water
1. Place the clothes in the wash tub. Select the water flow according
to the size of the load.
2. Fill with water until reaching the preset water level.
3. Rinse. Set the wash timer for 2 to 3 minutes of rinsing. When the
load is small, use the GENTLE setting, if you use the NORMAL set-
ting instead, water could splash.
When water comes out
from this window, reduce
the water supply rate.
3. Rinse. Set the WASH timer in 5-7 minutes of rinsing. Repeat the
spin at the middle of the cycle and rinse with used water 2 to 3
times.
spin
1. Place clothes in the spin tub and distribute them evenly.
2. Push the top cover against the load. Close internal and external
covers of the spin tub.
3. Select a suitable spin time according to the size of the load and
start spinning.
•During spin cycle, abnormal sounds are usually caused by un-
even distribution of the load or the load being piled up on one
portion of the tub. You must stop the machine and evenly redis-
tribute the load.
•If you open the external cover of the spin tub, the spin cycle
stops. Close the lid to restart the spin cycle.
•To spin and drain, or to rinse and fill the tub with water simulta-
neously, you must first spin only for a minute. Then, drain or
rinse while filling the tub with water. Otherwise, the spin will
stop because there will be too much water stored in the spin
tub.

17
cleaning the filters after a wash cycle
The lint and overflow filters should be cleaned as recommended.
The washer will not work properly if lint and foreign materials are
left inside it.
UNPLUG THE APPLIANCE FROM THE POWER SUP-
PLY BEFORE PERFORMING ANY CLEANING AND
MAINTENANCE JOB.
cleaning the lint filter
The lint filter should be used during washing and should be cleaned
after every wash cycle.
1. Press the elastic piece on the upper end of the lint
filter to release the tab on the filter cover and pull
out the lint filter.
2. Remove lint. Pull out the bottom of the back cover
of the lint filter, to separate the front and rear caps.
Remove lint thoroughly with clear water.
3. To replace the lint filter, see page 7.
cleaning the overflow filter
If there is too much lint in the overflow filter, the performance of
the washer will be affected. You should clean it every two months.
1. Remove the overflow filter. As shown in the diagram, take the fix-
ing clip and pull in the direction of the arrow to remove it.

18
2. Remove the corrugated hose. Disassemble the upper part of the
corrugated hose which is located inside the overflow filter.
3. Clean the lint around the filter and rinse it under running water.
4. Reinstall the overflow filter:
a. Replace the corrugated hose.
b. Insert the mounting plate at the bottom of the filter in the
valve cover.
c. Replace the hook on the upper left side.
d. Push in the upper portion.
maintenance of the unit
•Clean the entire unit with a slightly damped soft cloth.
•Clean the washer with a mild detergent if it is very dirty.
•Do Not wash the appliance using water.
•After washing, remove the water inlet hose.
•Do not store water in the tub for prolonged periods of time.
Empty the tub after each use.
•Disconnect the plug from the power supply and hang power cord.
•Hang the drain hose. Wipe dry drops of water from the exterior
surface of the machine and from the inside of the tub with a
clean, soft cloth.
•Open the lid of the wash tub, the internal and external covers
from the spin tub for about an hour, then close them.

19
if clothes get trapped on the outer side of the
spin tub
If clothes fall on the outer side of the spin tub, contact the nearest
service center. Do not try to repair the appliance yourself.
troubleshooting
if the residual water is frozen
Prevent the water to freeze by draining all the water after each use.
After completing the drain, place the DRAIN selector in the off posi-
tion. If you leave it in the drain position, it will be difficult for the
frozen water to melt down.
If the water freezes, pour warm water (not exceeding 50 °C) in the
wash tub so that the frozen section is completely wet. Then, gently
turn the propeller by hand. Make sure that the drain will operate
normally before the next use.
troubleshooting chart
If the unit is malfunctioning, disconnect it before trying to find the
problem. The following situations are not always indicative of a bro-
ken machine.
Refer to this chart before contacting the nearest authorized service
center. If the washer is broken, contact an authorized service center.
Do not try to repair the washer by yourself.
Problem Check
The washer won't
work
•Is there is a power failure in your area?
•Is the plug properly connected into the out-
let?
•Are there are foreign materials obstructing
the propeller?
•Did you lower the drain hose?
•Is the drain hose frozen?
•Is the drain hose clogged by foreign materi-
als?
•Are there items that fall on the outer side of
the spin tub?
The unit won't
drain

20
parts included
•This is normal. It is water remaining from the
final inspection at the factory.
During the first use
of the machine
there is water
flowing from the
drain hose.
•Is the machine located on an uneven or
slanted floor?
•Is the top cover is evenly placed over the
load?
•Are there items that fall on the outer side of
the spin tub?
•Are clothes spined too much?
There are abnor-
mal sounds and vi-
bration during the
spin cycle.
•Are there pins, coins or metallic objects in-
side the tub?
Abnormal sound
during wash.
Problem Check
User's Manual: one piece
Water inlet hose: one piece
Top cover: one piece
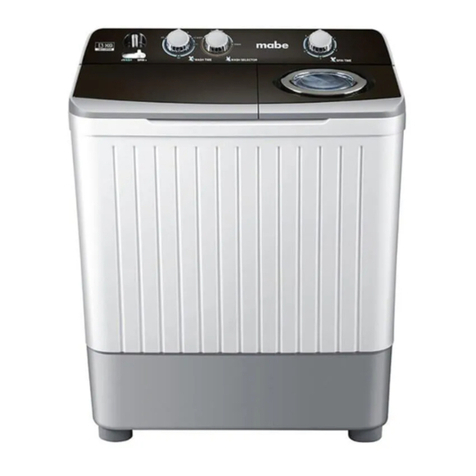
Twin tub washing machine: one piece
clothes/weight rate
200 g
80 g
300 g
300 g
50 g
Shirt
T-shirts
Pants
Sweatshirts
Underwear
300 g
60 g
500 g
Bed Sheets
Pillow Cases
Towels
Unit weight thgiewtinUmetI Item
This manual suits for next models
1
Table of contents
Other mabe Washer manuals

mabe
mabe PTAN9150MWW How to use

mabe
mabe WMA06DXESXS User manual

mabe
mabe CLME71214BAT User manual

mabe
mabe aqua saver User manual

mabe
mabe LMD7023PBBP0 User manual

mabe
mabe LMC0686XBBY User manual

mabe
mabe LMD6124PBEB0 User manual

mabe
mabe WMA07DXESXS User manual

mabe
mabe LMA80BYI1 User manual

mabe
mabe GBVH5140H Service manual
Popular Washer manuals by other brands

Wascom
Wascom EX 7 ES operating & maintenance manual

Hotpoint Ariston
Hotpoint Ariston WMD 942 Instructions for use

Tricity Bendix
Tricity Bendix AW 1001 W Operating and installation instructions

Samsung
Samsung SW-D7R1 Owner's instructions

Hoover
Hoover VHD 616 ZI User instruction

Siemens
Siemens WM10N159IL User manual and installation instructions