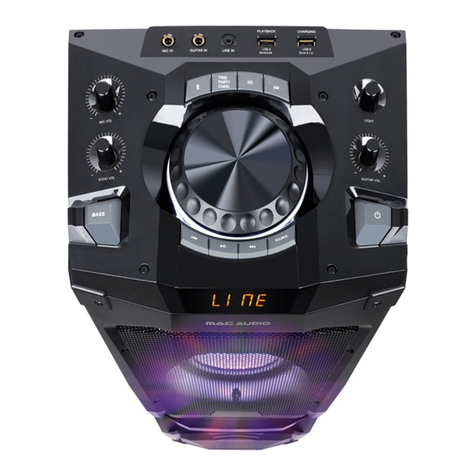
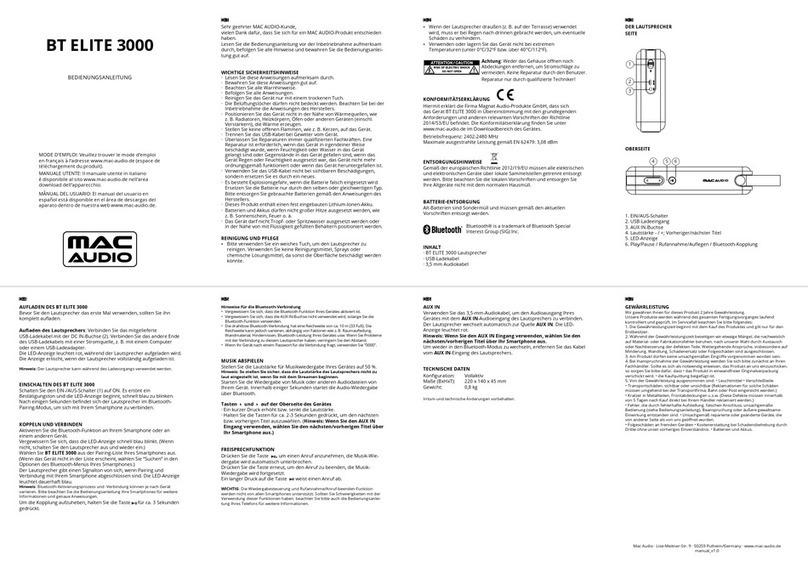
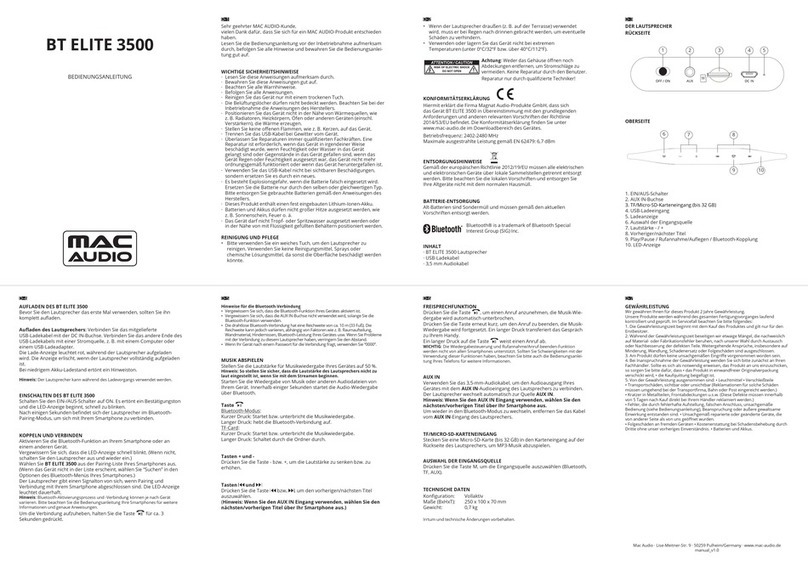
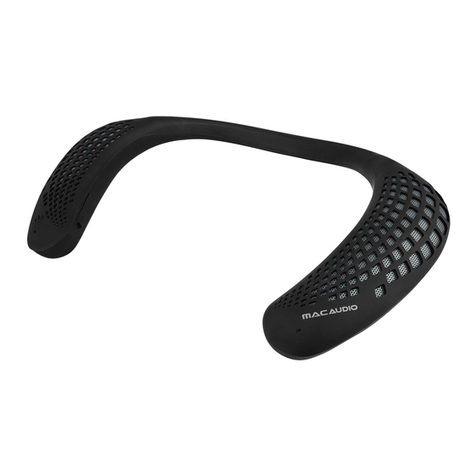
MAC Audio BT TEC 3000 User manual

BTTEC3000
BEDIENUNGSANLEITUNG
Sehr geehrter MAC AUDIO-Kunde,
vielen Dank dafür, dass Sie sich für ein MAC AUDIO-Produkt entschieden
haben.
Lesen Sie die Bedienungsanleitung vor der Inbetriebnahme aufmerksam
durch, befolgen Sie alle Hinweise und bewahren Sie die Bedienungsanlei-
tung gut auf.
WICHTIGE SICHERHEITSHINWEISE
· Lesen Sie diese Anweisungen aufmerksam durch.
· Bewahren Sie diese Anweisungen gut auf.
· Beachten Sie alle Warnhinweise.
· Befolgen Sie alle Anweisungen.
· Reinigen Sie das Gerät nur mit einem trockenen Tuch.
· Die Belüftungslöcher dürfen nicht bedeckt werden. Beachten Sie bei der
Inbetriebnahme die Anweisungen des Herstellers.
· Positionieren Sie das Gerät nicht in der Nähe von Wärmequellen, wie
z. B. Radiatoren, Heizkörpern, Öfen oder anderen Geräten (einschl.
Verstärkern), die Wärme erzeugen.
· Stellen Sie keine oenen Flammen, wie z. B. Kerzen, auf das Gerät.
· Trennen Sie das USB-Kabel bei Gewitter vom Gerät.
· Überlassen Sie Reparaturen immer qualizierten Fachkräften. Eine
Reparatur ist erforderlich, wenn das Gerät in irgendeiner Weise
beschädigt wurde, wenn Feuchtigkeit oder Wasser in das Gerät
gelangt sind oder Gegenstände in das Gerät gefallen sind, wenn das
Gerät Regen oder Feuchtigkeit ausgesetzt war, das Gerät nicht mehr
ordnungsgemäß funktioniert oder wenn das Gerät heruntergefallen ist.
· Verwenden Sie das USB-Kabel nicht bei sichtbaren Beschädigungen,
sondern ersetzen Sie es durch ein neues.
· Es besteht Explosionsgefahr, wenn die Batterie falsch eingesetzt wird.
Ersetzen Sie die Batterie nur durch den selben oder gleichwertigen Typ.
Bitte entsorgen Sie gebrauchte Batterien gemäß den Anweisungen des
Herstellers.
· Dieses Produkt enthält einen fest eingebauten Lithium-Ionen-Akku.
· Batterien und Akkus dürfen nicht großer Hitze ausgesetzt werden, wie
z.B. Sonnenschein, Feuer o.ä.
· Das Gerät darf nicht Tropf- oder Spritzwasser ausgesetzt werden oder
in der Nähe von mit Flüssigkeit gefüllten Behältern positioniert werden.
REINIGUNG UND PFLEGE
• Bitte verwenden Sie ein weiches Tuch, um den Lautsprecher zu
reinigen. Verwenden Sie keine Reinigungsmittel, Sprays oder
chemische Lösungsmittel, da sonst die Oberäche beschädigt werden
könnte.
• Wenn der Lautsprecher draußen (z. B. auf der Terrasse) verwendet
wird, muss er bei Regen nach drinnen gebracht werden, um eventuelle
Schäden zu verhindern.
• Verwenden oder lagern Sie das Gerät nicht bei extremen
Temperaturen (unter 0°C/32ºF bzw. über 40°C/112ºF).
Achtung: Weder das Gehäuse önen noch
Abdeckungen entfernen, um Stromschläge zu
vermeiden. Keine Reparatur durch den Benutzer.
Reparatur nur durch qualizierte Techniker
!
KONFORMITÄTSERKLÄRUNG
Hiermit erklärt die Firma Magnat Audio-Produkte GmbH, dass sich
das Gerät BTTEC3000 in Übereinstimmung mit den grundlegenden
Anforderungen und anderen relevanten Vorschriften der Richtlinie
2014/53/EU befindet. Die Konformitätserklärung finden Sie unter
www.mac-audio.de im Downloadbereich des Gerätes.
Betriebsfrequenz: 2402-2480 MHz
Maximale ausgestrahlte Leistung gemäß EN 62479: 1,77 dBm
ENTSORGUNGSHINWEISE
Gemäß der europäischen Richtlinie 2012/19/EU müssen alle elektrischen
und elektronischen Geräte über lokale Sammelstellen getrennt entsorgt
werden. Bitte beachten Sie die lokalen Vorschriften und entsorgen Sie
Ihre Altgeräte nicht mit dem normalen Hausmüll.
BATTERIE-ENTSORGUNG
Alt-Batterien sind Sondermüll und müssen gemäß den aktuellen
Vorschriften entsorgt werden.
Bluetooth® is a trademark of Bluetooth Special
Interest Group (SIG) Inc.
INHALT
· BTTEC3000 Lautsprecher
· USB-Ladekabel
· 3,5 mm Audiokabel
DER LAUTSPRECHER
1 2 3 4 5
ON OFF
6 10 11
12
7 8 9
OPEN
1. EIN/AUS-Schalter
2. TF/Micro-SD-Karteneingang (bis 32 GB)
3. AUX IN-Buchse
4. Ladeanzeige
5. USB-Ladeeingang (DC IN)
6. EIn/Aus-Taste (Bluetooth/FM/Alarm)
7./9. Lautstärke - / +; Vorheriger/nächster Titel
8. Play/Pause / Rufannahme/Auflegen
10. Auswahl der Eingangsquelle
11. Uhrzeit/Alarm
12. LED-Anzeige
• Die drahtlose Bluetooth-Verbindung hat eine Reichweite von ca. 10 m (33 Fuß). Die
Reichweite kann jedoch variieren, abhängig von Faktoren wie z. B. Raumaufteilung,
Wandmaterial, Hindernissen, Bluetooth-Leistung Ihres Gerätes usw. Wenn Sie Probleme
mit der Verbindung zu diesem Lautsprecher haben, verringern Sie den Abstand.
• Wenn Ihr Gerät nach einem Passwort für die Verbindung fragt, verwenden Sie “0000”.
MUSIK ABSPIELEN
Stellen Sie die Lautstärke für Musikwiedergabe Ihres Gerätes auf 50 %.
Hinweis: So stellen Sie sicher, dass die Lautstärke des Lautsprechers nicht zu
laut eingestellt ist, wenn Sie mit dem Streamen beginnen.
Starten Sie die Wiedergabe von Musik oder anderen Audiodateien von
Ihrem Gerät. Innerhalb einiger Sekunden startet die Audio-Wiedergabe
über Bluetooth.
Taste
Startet bzw. unterbricht die Musikwiedergabe.
Tasten + und -
· Ein kurzer Druck erhöht bzw. senkt die Lautstärke.
· Halten Sie die Tasten für ca. 2-3 Sekunden gedrückt, um den nächsten
bzw. vorherigen Titel auszuwählen. (Hinweis: Wenn Sie den AUX IN
Eingang verwenden, wählen Sie den nächsten/vorherigen Titel über
Ihr Smartphone aus.)
UHRZEIT / ALARM-FUNKTION
Uhrzeit einstellen:
Halten Sie die TIME-Taste gedrückt. Die Stundenanzeige blinkt. Stel-
len Sie die Stunden mit den Tasten + und - ein, und drücken Sie zur
Bestätigung die -Taste. Nun blinkt die Minutenanzeige. Stellen Sie die
Minuten mit den Tasten + und - ein, und drücken Sie zur Bestätigung die
-Taste. Um die Uhrzeit zu speichern, drücken Sie die TIME-Taste.
Alarm einstellen:
• Drücken Sie kurz die TIME-Taste. Die Stundenanzeige blinkt. Stellen Sie
die Stunden mit den Tasten + und - ein, und drücken Sie zur Bestäti-
gung die -Taste. Nun blinkt die Minutenanzeige. Stellen Sie die Mi-
nuten mit den Tasten + und - ein, und drücken Sie zur Bestätigung die
-Taste. Um die Alarmzeit zu speichern, drücken Sie die TIME-Taste.
• Auf dem Display erscheint nun ON bzw. OFF. Drücken Sie die Taste +
oder -, um den Alarm ein- bzw. auszuschalten.
• Drücken Sie nun die Taste . Nun können Sie mit den Tasten + und -
den Weckton auswählen:
S-1: Alarm 1
S-2: Alarm 2
S-3: Alarm 3
S-P3: MP3 (SD-Karte)
S-FM: zuletzt eingestellter Radiosender.
Drücken Sie die TIME-Taste, um die Auswahl zu bestätigen.
• Um den aktiven Alarm abzuschalten, drücken Sie die TIME-Taste.
RADIO-BETRIEB
• Drücken Sie die Taste M, um in den Radio-Modus zu wechseln.
• Halten Sie die -Taste gedrückt, um den automatischen
Sendersuchlauf zu starten. Es werden bis zu 60 gefundene Sender
gespeichert. Um durch die gespeicherten Sender zu schalten, halten
Sie die Taste + oder - jeweils für ca. 3 Sekunden gedrückt.
AUX IN
Verwenden Sie das 3,5-mm-Audiokabel, um den Audioausgang Ihres
Gerätes mit dem AUX IN-Audioeingang des Lautsprechers zu verbinden.
Der Lautsprecher wechselt automatisch zur Quelle AUX IN.
Hinweis: Wenn Sie den AUX IN Eingang verwenden, wählen Sie den
nächsten/vorherigen Titel über Ihr Smartphone aus.)
Um wieder in den Bluetooth-Modus zu wechseln, drücken Sie die Taste M.
TF/MICRO-SD-KARTENEINGANG
Stecken Sie eine Micro-SD-Karte (bis 32 GB) in den Karteneingang auf der
Rückseite des Lautsprechers, um MP3-Musik abzuspielen.
AUSWAHL DER EINGANGSQUELLE
Drücken Sie die Taste M, um die Eingangsquelle auszuwählen (Bluetooth,
TF, AUX, FM).
FREISPRECHFUNKTION
Drücken Sie die Taste ,um einen Anruf anzunehmen, die Musik-Wieder-
gabe wird automatisch unterbrochen.
Drücken Sie die Taste erneut, um den Anruf zu beenden, die Musik-
Wiedergabe wird fortgesetzt.
Ein langer Druck auf die Taste weist einen Anruf ab.
WICHTIG: Die Wiedergabesteuerung und Rufannahme/Anruf-beenden-Funktion
werden nicht von allen Smartphones unterstützt. Sollten Sie Schwierigkeiten mit der
Verwendung dieser Funktionen haben, beachten Sie bitte auch die Bedienungsanlei-
tung Ihres Telefons für weitere Informationen.
DISPLAY-HELLIGKEIT
Drücken sie wiederholt die Taste M für ca. 3 Sekunden, um die gewünschte
Display-Helligkeit zu wählen (dunkel /mittel / hell / aus).
TECHNISCHE DATEN
Konguration: Vollaktiv
Maße (BxHxT): 190 x 77 x 61 mm
Gewicht: 0,46 kg
Irrtum und technische Änderungen vorbehalten.
GEWÄHRLEISTUNG
Wir gewähren Ihnen für dieses Produkt 2 Jahre Gewährleistung.
Unsere Produkte werden während des gesamten Fertigungsvorganges laufend
kontrolliert und geprüft. Im Servicefall beachten Sie bitte folgendes:
1. Die Gewährleistungszeit beginnt mit dem Kauf des Produktes und gilt nur für den
Erstbesitzer.
2. Während der Gewährleistungszeit beseitigen wir etwaige Mängel, die nachweislich
auf Material- oder Fabrikationsfehler beruhen, nach unserer Wahl durch Austausch
oder Nachbesserung der defekten Teile. Weitergehende Ansprüche, insbesondere auf
Minderung, Wandlung, Schadenersatz oder Folgeschäden sind ausgeschlossen.
3. Am Produkt dürfen keine unsachgemäßen Eingriffe vorgenommen worden sein.
4. Bei Inanspruchnahme der Gewährleistung wenden Sie sich bitte zunächst an Ihren
Fachhändler. Sollte es sich als notwendig erweisen, das Produkt an uns einzuschicken,
so sorgen Sie bitte dafür, dass • das Produkt in einwandfreier Originalverpackung
verschickt wird, • die Kaufquittung beigefügt ist.
5. Von der Gewährleistung ausgenommen sind: • Leuchtmittel • Verschleißteile
•Transportschäden, sichtbar oder unsichtbar (Reklamationen für solche Schäden
müssen umgehend bei der Transportfirma, Bahn oder Post eingereicht werden.)
•Kratzer in Metallteilen, Frontabdeckungen u.s.w. (Diese Defekte müssen innerhalb
von 5 Tagen nach Kauf direkt bei Ihrem Händler reklamiert werden.)
•Fehler, die durch fehlerhafte Aufstellung, falschen Anschluss, unsachgemäße
Bedienung (siehe Bedienungsanleitung), Beanspruchung oder äußere gewaltsame
Einwirkung entstanden sind. •Unsachgemäß reparierte oder geänderte Geräte, die
von anderer Seite als von uns geöffnet wurden.
• Folgeschäden an fremden Geräten • Kostenerstattung bei Schadensbehebung durch
Dritte ohne unser vorheriges Einverständnis. • Batterien und Akkus.
AUFLADEN DES BTTEC3000
Bevor Sie den Lautsprecher das erste Mal verwenden, sollten Sie ihn
komplett auaden.
Auaden des Lautsprechers: Verbinden Sie das mitgelieferte
USB-Ladekabel mit der DC IN-Buchse. Verbinden Sie das andere Ende des
USB-Ladekabels mit einer Stromquelle, z.B. mit einem Computer oder
einem USB-Ladeadapter.
Die Lade-Anzeige leuchtet rot, während der Lautsprecher aufgeladen
wird. Die Anzeige erlischt, wenn der Lautsprecher vollständig aufgeladen
ist.
Bei niedrigem Akku-Ladestand ertönt ein Hinweiston.
Hinweis: Der Lautsprecher kann während des Ladevorgangs verwendet werden.
EINSCHALTEN DES BTTEC3000
Schalten Sie den EIN-/AUS-Schalter (1) auf ON. Die Zeitanzeige ist nun
eingeschaltet. Um die Bluetooth-/Radio-/Alarm-Funktionen zu aktivieren,
halten Sie die -Taste gedrückt. Es ertönt ein Bestätigungston und die
LED-Anzeige beginnt, schnell zu blinken.
Nach einigen Sekunden befindet sich der Lautsprecher im Bluetooth-
Pairing-Modus, um sich mit Ihrem Smartphone zu verbinden.
KOPPELN UND VERBINDEN
Aktivieren Sie die Bluetooth-Funktion an Ihrem Smartphone oder an
einem anderen Gerät.
Vergewissern Sie sich, dass die LED-Anzeige schnell blinkt. (Wenn nicht,
schalten Sie den Lautsprecher aus und wieder ein.)
Wählen Sie BTTEC3000 aus der Pairing-Liste Ihres Smartphones aus.
(Wenn das Gerät nicht in der Liste erscheint, wählen Sie “Suchen” in den
Optionen des Bluetooth-Menüs Ihres Smartphones.)
Der Lautsprecher gibt einen Signalton von sich, wenn Pairing und
Verbindung mit Ihrem Smartphone abgeschlossen sind. Die LED-Anzeige
leuchtet dauerhaft.
Hinweis: Bluetooth-Aktivierungsprozess und -Verbindung können je nach Gerät
variieren. Bitte beachten Sie die Bedienungsanleitung Ihre Smartphones für weitere
Informationen und genaue Anweisungen.
Um die Verbindung aufzuheben, halten Sie die Taste für ca. 3 Sekunden
gedrückt.
Hinweise für die Bluetooth-Verbindung
• Vergewissern Sie sich, dass die Bluetooth-Funktion Ihres Gerätes aktiviert ist.
• Vergewissern Sie sich, dass die AUX IN-Buchse nicht verwendet wird, solange Sie die
Bluetooth-Funktion verwenden.
Mac Audio · Lise-Meitner-Str. 9 · 50259 Pulheim/Germany · www.mac-audio.de
manual_v1.0
D-1 D-2 D-3
D-5 D-6 D-7D-4

Dear MAC AUDIO Customer,
Thank you for choosing an MAC AUDIO product.
Please read through the instruction manual carefully before starting to
use the device. It is imperative you observe all of the information. Keep
the manual in a safe location.
IMPORTANT SAFETY INSTRUCTIONS
· Read these instructions.
· Keep these instructions.
· Heed all warnings.
· Follow all instructions.
· Clean only with dry cloth.
· Do not block any ventilation openings. Install in accordance with the
manufacturer’s instructions.
· Do not install near any heat sources such as radiators, heat registers,
stoves, or other apparatus (including amplifiers) that produce heat.
· No naked flame sources, such as lighted candles, should be placed on
the device.
· Unplug the USB charging cable during lightning storms.
· Refer all servicing to qualified service personnel. Servicing is required
when the apparatus has been damaged in any way, such as liquid has
been spilled or objects have fallen into the apparatus, the apparatus
has been exposed to rain or moisture, does not operate normally, or
has been dropped.
· The USB cable should not continue to be operated if there is visible
damage. A damaged cable must be replaced.
· Danger of explosion if battery is incorrectly replaced. Replace only with
the same or equivalent type. Dispose of used batteries according to the
manufacturer’s instructions.
· This product contains a non-removable Lithium Ion rechargeable
battery.
· Batteries (battery pack or batteries installed) shall not be exposed to
excessive heat, such as sunshine, fire and the like.
· The apparatus shall not be exposed to dripping or splashing or placed
nearobjects filled with liquids.
CARE AND MAINTENANCE
· Please use a soft, dry cloth with no cleaning agents, sprays or chemical
solvents, as these could damage the surfaces.
· If the speaker are used outside on a deck or patio, make sure you take
them indoors in the event of a rainstorm to prevent possible damage.
· Do not operate or store the system in extreme temperatures (below
32ºF/0ºC and above 112ºF/40ºC).
Caution: To reduce the risk of electric
shock, do not remove cover (or back). No
user serviceable parts inside. Refer
servicing to qualified service personnel.
DECLARATION OF CONFORMITY
Hereby, Magnat Audio-Produkte GmbH declares that the BTTEC3000 is in
compliance with the essential requirements and other relevant provisions
of directive 2014/53/EU. The Declaration of Conformity can be found at
www.mac-audio.de in the download area of the device.
Operating frequency: 2402-2480 MHz
Maximum power transmitted acc. EN62479: 1.77 dBm
INSTRUCTIONS FOR DISPOSAL
In accordance with European Directive 2012/19/EU all electrical and
electronic appliances must be disposed of separately via local collection
points. Please observe the local regulations and do not dispose of your
old appliances with normal household waste.
BATTERY DISPOSAL
Old batteries are hazardous waste and must be disposed of in accordance
with current regulations.
Bluetooth® is a trademark of Bluetooth Special
Interest Group (SIG) Inc.
CONTENTS
· BTTEC3000 loudspeaker
· USB charging cable
· 3.5 mm audio cable
THE LOUDSPEAKER
1 2 3 4 5
ON OFF
6 10 11
12
7 8 9
OPEN
1. ON/OFF SWITCH
2. TF/Micro SD card input (up to 32 GB)
3. AUX IN input
4. Charging indicator
5. USB charging input (DC IN)
6. On/Off (Bluetooth/FM/Alarm)
7./9. Volume -/+ / Previous/next track
8. Play/Pause / answer calls
10. Input source
11. Uhrzeit/Alarm
12. LED indicator
PLAY MUSIC
Set your device’s volume for music to 50%.
Note: This is to make sure the sound from the speaker isn’t too loud when you
start streaming.
Start playing music or other audio on your device. Within seconds, the
speaker starts streaming the audio wirelessly via Bluetooth.
button
Press this button to start/pause the music playback.
+ and - buttons
· A short press increases / decreases the volume.
· Press and hold the buttons for approx. 2-3 seconds, to select the next/
previous track. (Note: If the AUX IN is used, use your smartphone to
select the next/previous track.)
CLOCK / ALARM FUNCTION
Setting the clock:
Press and hold the TIME button. The hour indication is flashing. Set the
hours with the buttons + and - and confirm with the button.
Now the minutes indication is flashing, set the minutes with the buttons +
and - and confirm with button.
Press the TIME button to save the setting.
Setting the alarm:
• Briey press the TIME button. The hour indication is flashing. Set the
hours with the buttons + and - and confirm with the button.
Now the minutes indication is flashing, set the minutes with the but-
tons + and - and confirm with button.
Press the TIME button to save the setting.
• The display shows ON or OFF. Press the + or - button to activate or
deactivate the alarm function.
• Now press the button. Select the alarm sound with the buttons
+ and -:
S-1: Alarm 1
S-2: Alarm 2
S-3: Alarm 3
S-P3: MP3 (SD card)
S-FM: FM mode.
Press the TIME button to save the setting.
• While the alarm is active press the TIME button to turn off the alarm.
RADIO OPERATION
• Press the button M to switch to radio mode.
• Press and hold the button to start the automatic search. Up to 60
stations will be stored. Press and hold the buttons + or - to select
one of the stored stations.
USING THE AUX IN INPUT
Use the 3.5mm audio cable to connect the audio output from your device
to the speaker‘s AUX IN audio input.
The speaker automatically switches to the AUX IN audio.
To listen to Bluetooth audio again, press the M button and select
Bluetooth mode.
TF/MICRO SD CARD
Insert a Micro SD card (up to 32 GB) into the input on the rear of the
speaker, in order to play MP3 music.
INPUT SOURCE
Press the M button to select the input source (Bluetooth, TF, AUX, FM).
HANDS-FREE SPEAKING
• Press the accept-call button to take a call. Music playback will be
automatically interrupted.
• Press this button again to end the call. Playback will be continued.
• Press and hold the button to reject a call.
IMPORTANT: Not all phones support playback control and phone answer/end control.
Check your phone’s user manual for more information if you’re having trouble with
these functions.
DISPLAY BRIGHTNESS
Press and hold the M button repeatedly to select the display brightness
(dark / mid / bright / off).
SPECIFICATIONS
Configuration: Fully active
Dimensions (wxhxd): 190 x 77 x 61 mm
Weight 0.46 kg
Errors and technical modications reserved.
WARRANTY INFORMATION
We grant a 2-years warranty for this product.
The equipments are checked and tested continuously during the entire production
process. In case you have problems with your equipment, kindly observe the following:
1. The warranty period commences with the purchase of the component and is
applicable only to the original owner.
2. During the warranty period we will rectify any defects due to faulty material or
workmanship by replacing or repairing the defective part at our discretion. Further
claims, and in particular those for price reduction, cancellation of sale, compensation
for damages or subsequential damages, are excluded.
3. Unauthorized tampering with the equipment will invalidate this warranty.
4. Consult your authorized dealer first, if warranty service is needed. Should it prove
necessary to return the component to the factory, please insure that • the component
is packed in original factory packing in good condition • your enclose your receipt as
proof of purchase.
5. Excluded from the warranty are: • Illuminates • Wear parts • Shipping damages, either
readily apparent or concealed (claims for such damages must be lodged immediately
with forwarding agent, the railway express office or post office). • Scratches in cases,
metal components, front panels, etc. (You must notify your dealer directly of such defects
within three days of purchase.) • Defects caused by incorrect installation or connection,
by operation errors (see operating instructions), by overloading or by external force. •
Equipments which have been repaired incorrectly or modified or where the case has
been opened by persons other than us. • Consequential damages to other equipments.
• Reimbursement of cools, without our prior consent, when repairing damages by third
parties • Batteries and battery packs.
CHARGE YOUR SPEAKER
Before you start using the speaker for the first time, it’s a good idea to
charge it completely.
To charge the speaker: Plug the included USB charging cable into the
DC IN jack. Plug the other end of the USB charging cable into a power
source, like a computer or a USB charging adapter.
The charging indicator is red while the speaker is charging. It turns off
when the speaker is fully charged.
If the battery charge level is low there will be a tone.
Note: You can use the speaker while it’s charging.
TURN ON
Switch the ON/OFF switch (1) to position ON. The clock time is activated.
Press and hold the button, to activate the Bluetooth/FM/alarm
functions. The power up tone sounds and the LED indicator starts
blinking rapidly.
After a few seconds, the speaker goes to Bluetooth pairing mode to set
up with your smartphone.
PAIR AND CONNECT
Enable Bluetooth on your smartphone or other device.
Make sure the LED indicator is blinking rapidly. (If it isn’t, switch the
speaker off and on again.)
Choose BTTEC3000 from the pairing options on your smartphone. (If it’s
not in the list, choose “Scan” from your phone’s Bluetooth menu.)
The speaker gives an audio signal when it’s finished pairing and
connecting to your smartphone. The LED indicator lights up permanently.
Note: The process of enabling Bluetooth and connecting varies from device to device.
See your device’s owners manual for more information and specific instructions.
Press and hold the button for approx. 3 seconds to disable Bluetooth
connection.
Bluetooth Wireless Connection Tips
• Make sure the Bluetooth capability of your device is turned on.
• Make sure there’s nothing plugged into the speaker’s AUX IN jack when you’re trying
to use Bluetooth.
• The Bluetooth wireless connection works up to a range of roughly 33 feet (10me-
ters). This range may vary, however, based on other factors, such as room layout,
wall material, obstacles, your device’s Bluetooth performance, etc. If you’re having
problems connecting to this speaker, move closer to it.
• If your device asks you for a password to connect, use “0000”. Mac Audio · Lise-Meitner-Str. 9 · 50259 Pulheim/Germany · www.mac-audio.de
manual_v1.0
EN-4 EN-5 EN-6 EN-7
EN-1 EN-2 EN-3
BTTEC3000
OWNER‘S MANUAL

Très cher client,
Félicitations: vous venez d’acquérir de nouvelles enceintes d’excellente
qualité et nous vous remercions d’avoir choisi MAC AUDIO!
Veuillez lire attentivement le mode d‘emploi avant d‘utiliser l‘appareil.
Vous devez impérativement respecter toutes les informations. Conservez
ce mode d‘emploi dans un endroit sûr.
INSTRUCTIONS DE SÉCURITÉ IMPORTANTES
• Lire ces instructions.
• Conserver ces instructions.
• Respecter tous les avertissements.
• Suivre toutes les instructions.
• Nettoyer seulement avec un chion sec.
• Ne bloquer aucune ouverture de ventilation. Installer conformément
aux instructions du fabricant.
• Ne pas installer près d’une source de chaleur, par exemple des
radiateurs, des registres de chaleur, des poêles ou autres appareils
(amplicateurs, par exemple) qui produisent de la chaleur.
• Tenez l‘appareil éloigné des ammes nues, des bougies par exemple.
· Débrancher le câble de chargement USB en cas d‘orages.
· Coner l’entretien de l’appareil à un technicien agréé. Faire réparer
l’appareil s’il a été endommagé de quelque manière que ce soit, par
exemple si le cordon d’alimentation, ou la che, est endommagé(e), si
du liquide a été renversé sur l’appareil ou si des objets sont tombés sur
l’appareil, s’il a été exposé à la pluie ou à l’humidité, s’il ne fonctionne
pas normalement ou s’il est tombé.
· Ne plus utiliser le câble USB en cas de détérioration visible. Tout câble
détérioré doit être remplacé.
· Il existe un danger d’explosion si la batterie est remplacée de manière
incorrecte. Ne la remplacez que par un type de batterie équivalent
ou identique recommandé par le fabricant. Jetez les batteries usées
conformément aux instructions du fabricant.
· Ce produit contient une batterie rechargeable lithium-ion non
démontable.
· Les batteries et les piles ne doivent pas être exposées à des chaleurs
importantes, comme celle générées par le soleil ou le feu.
· L’appareil ne doit être exposé ni à un égouttement ni à des
éclaboussures. Aucun objet rempli de liquide, par exemple un vase, ne
doit être près de l’appareil.
ENTRETIEN ET MAINTENANCE
• Veuillez employer un chion sec et doux et évitez d’appliquer tout
produit de nettoyage, spray ou solvant chimique an de ne pas
endommager la surface de l’appareil.
• Si les haut-parleurs sont utilisé à l’extérieur, sur une terrasse ou sur un
patio, veiller à les rentrer à l’intérieur en cas d’orage pour éviter de les
endommager.
• Ne pas utiliser ou entreposer le système à des températures extrêmes
(inférieures à 32 °F/0 °C et supérieures à 122°F/40°C).
Attention : an de réduire les risques de
choc électrique, ne pas enlever le couvercle
(ou l’arrière). Aucune pièce réparable par
l’utilisateur ne se trouve à l’intérieur. Pour
toute réparation, consulter un technicien
agréé.
DÉCLARATION DE CONFORMITÉ
Magnat Audio-Produkte GmbH déclarons que le produit BTTEC3000
est conforme aux exigences essentielles et aux autres dispositions
pertinentes de la Directive 2014/53/EU. Une copie de la Déclaration de
conformité est disponible à l‘adresse http://www.magnat.de (espace de
téléchargement du produit).
Fréquence de service: 2402-2480 MHz
Puissance maximale rayonnée selon EN62479: 1,77 dBm
INSTRUCTIONS FOR DISPOSAL
In accordance with European Directive 2012/19/EU all electrical and
electronic appliances must be disposed of separately via local collection
points. Please observe the local regulations and do not dispose of your
old appliances with normal household waste.
MISE AU REBUT DE LA PILE
Les piles usagées sont des déchets dangereux et doivent être mises au
rebut conformément aux réglementations en vigueur.
Bluetooth® is a trademark of Bluetooth Special
Interest Group (SIG) Inc.
CONTENU
· Le haut-parleur BTTEC3000
· Câble de charge USB
· 3.5 mm câble audio
LE HAUT-PARLEUR
1 2 3 4 5
ON OFF
6 10 11
12
7 8 9
OPEN
1. Interrupteur On/Off
2. Lecteur de carte Micro SD (jusqu‘à 32GO)
3. Entrée AUX IN
4. Voyant charge
5. Entrée de chargement USB (DC IN)
6. Bouton On/Off (Bluetooth/FM/Alarme)
7./9. Volume -/+ / Titre précédent / suivant
8. Play/Pause / Répondre aux appels
10. Sélection de la source d’entrée
11. Heure/Alarme
12. Voyant LED
• Vérier que rien n’est branché sur la prise AUX IN du haut-parleur lors de la tentative
d’utilisation de Bluetooth.
• La connexion sans l Bluetooth dispose d’une portée d’environ 10 m
(33 pi). Cependant, cette portée peut varier en fonction d’autres facteurs, tels que
l’agencement de la pièce, le matériau des murs, les obstacles, la performance Blue-
tooth de votre appareil, etc. En cas de problème de connexion avec ce haut-parleur,
s’en rapprocher.
• Si l’appareil demande un mot de passe pour se connecter, utiliser «0000».
ÉCOUTER DE LA MUSIQUE
Réduire le volume sonore de l’appareil à 50% pour écouter de la musique.
Remarque : Cela permet de s’assurer que le son émis par le haut-parleur n’est
pas trop fort lorsque démarre la diusion en ux.
touche
Cette touche permet de démarrer ou de mettre en pause la lecture
musique.
+ et - touches
· Une légère pression augmente ou baisse le volume du son.
· Maintenez les touches enfoncées pendant 2 à 3 secondes pour sélec-
tionner le titre suivant ou précédent. (Conseil : Si vous utilisez l‘entrée
auxiliaire (AUX IN), sélectionnez le titre suivant/précédent via votre
Smartphone.)
L‘HEURE / ALARME
Réglage de l‘heure:
Appuyer sur le bouton TIME et le maintenir enfoncé.
Les heures clignotent; régler les heures à l‘aide des touches + et -, puis
valider en appuyant sur la touche .
Les minutes clignotent; régler les minutes à l‘aide des touches + et -, puis
valider en appuyant sur la touche .
Pour enregistrer l’heure, appuyez sur le bouton TIME.
Réglage de l‘alarme:
• Appuyer brièvement sur le bouton TIME. Les heures clignotent; régler
les heures à l‘aide des touches + et -, puis valider en appuyant sur
la touche . Les minutes clignotent; régler les minutes à l‘aide des
touches + et -, puis valider en appuyant sur la touche .
• Pour enregistrer l’heure d’alarme, appuyez sur le bouton TIME.
• L’écran affiche alors ON ou OFF. Appuyez sur le bouton + ou - pour
activer ou désactiver l’alarme.
• Appuyer sur le bouton . Vous pouvez maintenant sélectionner la
tonalité d’alarme à l’aide des boutons + et -:
S-1: Alarme 1
S-2: Alarme 2
S-3: Alarme 3
S-P3: MP3 (Carte SD)
S-FM: dernière station radio réglée.
Appuyer sur TIME pour valider votre sélection.
• Pour désactiver l’alarme active, appuyez sur le bouton TIME.
MODE RADIO
• Appuyez sur le bouton M pour passer en mode radio.
• Une longue pression sur le bouton permet de démarrer la recherche
automatique des stations de radio. Jusqu’à 60 stations trouvées
sont enregistrées. Pour basculer parmi les stations enregistrées,
appuyez et maintenez les boutons + ou - enfoncés pendant environ
3 secondes.
UTILISATION DE L‘ENTRÉE AUX IN
Utiliser le câble audio de 3,5 mm pour relier la sortie audio de votre
appareil à l‘entrée audio AUX IN située sur le panneau arrière du haut-
parleur.
Le haut-parleur passe automatiquement en mode audio AUX IN.
Conseil : Si vous utilisez l‘entrée auxiliaire (AUX IN), sélectionnez le
titre suivant/précédent via votre Smartphone.
Pour revenir en mode Bluetooth, appuyez sur le bouton M.
CARTE TF/MICRO SD
Insérer une carte Micro SD (jusqu’à 32 GO) dans l’entrée située sur le
panneau arrière du haut-parleur pour écouter de la musique MP3.
SÉLECTION DE LA SOURCE D’ENTRÉE
Appuyez sur le bouton M pour sélectionner la source d’entrée (Bluetooth,
TF, AUX, FM).
DISPOSITIF MAINS-LIBRES
• Appuyer sur le bouton pour prendre un appel. La lecture de la
musique sera automatiquement interrompue.
• Appuyer à nouveau sur le bouton pour terminer l‘appel. La lecture sera
poursuivie.
• Appuyer sur le bouton et le maintenir enfoncé pour rejeter un appel.
IMPORTANT : La commande de lecture et la commande de réponse/fin d‘un appel
ne sont pas pris en charge par tous les téléphones. Veuillez lire le mode d‘emploi de
votre téléphone pour obtenir plus d‘informations si vous rencontrez des problèmes
avec ces fonctions.
LUMINOSITÉ DE L‘ÉCRAN
Appuyez plusieurs fois sur la touche M pendant 3 secondes pour
sélectionner le niveau de luminosité (sombre, moyen, brillant, Off).
SPÉCIFICATIONS TECHNIQUES
Configuration: totalement opérationnelle
Dimensions (lxhxp): 190 x 77 x 61 mm
Poids: 0,46 kg
SOUS TOUTES RÉSERVES DE MODIFICATIONS TECHNIQUES
WARRANTY INFORMATION
We grant a 2-years warranty for this product.
The equipments are checked and tested continuously during the entire production
process. In case you have problems with your equipment, kindly observe the following:
1. The warranty period commences with the purchase of the component and is
applicable only to the original owner.
2. During the warranty period we will rectify any defects due to faulty material or
workmanship by replacing or repairing the defective part at our discretion. Further
claims, and in particular those for price reduction, cancellation of sale, compensation
for damages or subsequential damages, are excluded.
3. Unauthorized tampering with the equipment will invalidate this warranty.
4. Consult your authorized dealer first, if warranty service is needed. Should it prove
necessary to return the component to the factory, please insure that • the component
is packed in original factory packing in good condition • your enclose your receipt as
proof of purchase.
5. Excluded from the warranty are: • Illuminates • Wear parts • Shipping damages, either
readily apparent or concealed (claims for such damages must be lodged immediately
with forwarding agent, the railway express office or post office). • Scratches in cases,
metal components, front panels, etc. (You must notify your dealer directly of such defects
within three days of purchase.) • Defects caused by incorrect installation or connection,
by operation errors (see operating instructions), by overloading or by external force. •
Equipments which have been repaired incorrectly or modified or where the case has
been opened by persons other than us. • Consequential damages to other equipments.
• Reimbursement of cools, without our prior consent, when repairing damages by third
parties • Batteries and battery packs.
CHARGER LE BTTEC3000
Avant de commencer à utiliser le haut-parleur BTTEC3000 pour la
première fois, il est conseillé de le charger complètement.
Pour charger le haut-parleur : Brancher le câble de chargement USB
fourni dans la prise DC IN (2).
Brancher l‘autre extrémité du câble de chargement USB dans une source
d‘alimentation telle qu‘un ordinateur ou un adaptateur de charge USB.
Lorsque le haut-parleur est en charge, le voyant charge est rouge. Il
s‘éteint dès que le haut-parleur est chargé.
Si la batterie est faible, le haut-parleur émet un signal.
Remarque : Il est possible d’utiliser le haut-parleur pendant qu’il se
charge.
METTRE EN MARCHE
Placer l‘interrupteur On/Off (1) sur On.
L’affichage de l’heure est maintenant activé. Pour activer les fonctions
Bluetooth / radio / alarme, maintenez le bouton enfoncé.
Le signal de mise sous tension retentit et le voyant LED se met à clignoter
rapidement.
Au bout de quelques secondes, le haut-parleur passe en mode de
jumelage Bluetooth pour le configurer avec votre Smartphone.
JUMELER ET CONNECTER
Activer le Bluetooth sur votre Smartphone ou sur un autre appareil.
Vérifier que le voyant LED clignote. (Si ce n‘est pas le cas, éteindre puis
remettre le haut-parleur en marche.)
Sélectionner BTTEC3000 dans les options de jumelage de votre
Smartphone. (S‘il n‘apparaît pas dans la liste, sélectionner „Scan“ dans le
menu Bluetooth de votre téléphone.)
Le haut-parleur émet un signal audio lorsque le jumelage est terminé et
connecté à votre Smartphone. Le voyant LED s‘allume en permanence.
Remarque : Le processus d’activation Bluetooth et de connexion varie d’un appareil
à l’autre. Se reporter au manuel du propriétaire de l’appareil pour obtenir des
informations supplémentaires et des instructions spéciques.
Appuyer sur le bouton et le maintenir enfoncé pendant env. 3
secondes pour désactiver la connexion Bluetooth.
Conseils pour la connexion sans l Bluetooth
• Vérier que la fonction Bluetooth de l’appareil est activée. Mac Audio · Lise-Meitner-Str. 9 · 50259 Pulheim/Germany · www.mac-audio.de
manual_v1.0
F-4 F-5 F-6 F-7
F-1 F-2 F-3
BTTEC3000
MODE D’EMPLOI

Egregio cliente MAC AUDIO,
innanzi tutto La ringraziamo per aver scelto un prodotto MAC AUDIO.
Prima della messa in esercizio si prega di leggere attentamente le
istruzioni per l’uso. Le presenti istruzioni per l’uso comprendono
avvisi importanti relativi al funzionamento e la sicurezza. Si prega di
rispettare tutte le avvertenze. Si prega inoltre di conservare con cura le
presenti istruzioni per l’uso.
INDICAZIONE IMPORTANTE AI FINI DELLA SICUREZZA
· Si prega di utilizzare un panno asciutto e morbido.
· Non ostruire le aperture di aerazione. Eseguire l‘installazione secondo le
istruzioni del produttore.
· Posizionare lontano da fonti di calore quali radiatori, diffusori di aria
calda, stufe o altri apparecchi (tra cui gli amplificatori) che producono
calore.
· Non avvicinare a amme libere, come ad es. candele.
· Scollegare il cavo di ricarica USB durante i temporali.
· Rivolgersi a personale qualificato per eventuali interventi di
manutenzione che si rendono necessari se l’apparecchio ha subito
danni, ad es. se all’interno è stato rovesciato del liquido o sono caduti
degli oggetti oppure se l’apparecchio è stato esposto a pioggia o
umidità, non funziona correttamente o è caduto.
· Non utilizzare il cavo USB se visibilmente danneggiato. I cavi danneggiati
devono essere sostituiti.
· Vi è il rischio di esplosione se la batteria non viene inserita nel modo
corretto. Sostituire la batteria solo con una batteria equivalente o
dello stesso tipo. Smaltire le batterie utilizzate conformemente alle
istruzioni del produttore.
· BATTERIE: Non esporre le batterie (accumulatore o batterie installate) a
fonti di calore elevate, come ad es. luce del sole, fuoco o simili.
· Il dispositivo non deve essere esposto a gocce o spruzzi d’acqua.
PULIZIA E MANUTENZIONE
· Si prega di utilizzare un panno asciutto e morbido e non utilizzare
detergenti, spray o solventi chimici per non danneggiare la superficie.
· Se gli altoparlanti vengono utilizzati all’aperto (ad es. su una terrazza),
non dimenticarsi di riportarli all’interno in caso di temporale per evitare
che si danneggino.
· Non utilizzare o conservare l’impianto a temperature estreme (inferiori
a 32ºF/0ºC e superiori a 112ºF/40ºC).
Attenzione! Non aprire!
Attenzione: Per evitare scosse elettriche
non è consentito aprire l’alloggiamento degli
altoparlanti ne rimuovere le coperture.
All’utente non è consentito eettuare alcun
intervento di riparazione. Gli interventi di
riparazione possono essere eseguiti solo da
tecnici qualicati!
DICHIARAZIONE DI CONFORMITÀ
Con la presente la ditta Magnat Audio-Produkte GmbH dichiara che
l’apparecchio BTTEC3000 è conforme ai requisiti di base e alle altre
prescrizioni rilevanti della Direttiva 2014/53/UE. La dichiarazione di
conformità è disponibile al sito www.magnat.de nell’area download
dell’apparecchio.
Frequenza di funzionamento: 2402-2480 MHz
Potenza massima emessa secondo EN62479: 1,77 dBm
AVVERTENZE PER LO SMALTIMENTO
Secondo quanto prescritto dalla direttiva europea 2012/19/EU è
necessario che tutti i dispositivi elettrici ed elettronici vengano smaltiti
separatamente dai centri di raccolta preposti. Si prega di rispettare
le regolamentazioni locali e smaltire i dispositivi usati non insieme ai
normali riuti domestici.
SMALTIMENTO DELLA BATTERIA
Le batterie esauste sono da considerarsi riuti speciali e devono essere
smaltite secondo le regolamentazioni attuali.
Bluetooth® is a trademark of Bluetooth Special
Interest Group
(SIG) Inc.
CONTENUTO
· Altoparlante BTTEC3000
· Cavo di ricarica USB
· 3.5 mm cavo audio
IL ALTOPARLANTE
1 2 3 4 5
ON OFF
6 10 11
12
7 8 9
OPEN
1. Interruttore ON/OFF
2. Slot per TF/Micro-SD (fino a 32 GB)
3. Ingresso AUX IN
4. L‘indicatore di carica
5. Ingresso di ricarica USB (DC IN)
6. Pulsante ON/OFF (Bluetooth/FM/Sveglia)
7./9. Volume -/+ / Brano precedente/successivo
8. Play/Pausa / accettazione chiamate
10. Selezione della sorgente d’ingresso
11. Ora/Sveglia
12. Spia LED
• La connessione wireless Bluetooth funziona fino a una distanza approssimativa
di 10 metri (33 piedi). Tale distanza può variare in funzione di altri fattori, come la
disposizione dello spazio, la struttura delle pareti, ostacoli, prestazioni Bluetooth
del dispositivo, ecc. In caso di problemi di connessione, è consigliabile avvicinarsi
all’altoparlante.
• Se il dispositivo richiede una password inserire “0000”.
RIPRODUZIONE DELLA MUSICA
Regolare il volume del dispositivo al 50%.
Attenzione: quest’operazione serve ad assicurarsi che il suono proveniente
dall’altoparlante non sia troppo alto quando la riproduzione ha inizio.
Avviare la riproduzione di musica o audio da un dispositivo. Entro alcuni
secondi, l’altoparlante avvierà lo streaming dell’audio tramite Bluetooth.
Pulsante
Avvia o mette in pausa la riproduzione di musica.
Tasti + e -
· Cliccare brevemente per aumentare/ridurre il volume.
· Tenere premuti i tasti per ca. 2-3 secondi per selezionare il brano succes-
sivo/precedente. (Nota: quando si utilizza l’ingresso AUX IN selezionare il
brano successivo/precedente dallo smartphone).
ORA / FUNZIONE SVEGLIA
Impostazione dell’orologio:
Tenere premuto il pulsante TIME. L’indicazione delle ore lampeggia;
impostare l’ora con i pulsanti + e -, e confermare con il pulsante . Ora è
l’indicazione dei minuti a lampeggiare; impostare i minuti con i pulsanti +
e -, e confermare con il pulsante .
Per salvare l’ora premere il tasto TIME.
Impostazione della sveglia:
• Premere brevemente il tasto TIME. L’indicazione delle ore lampeggia;
impostare l’ora con i pulsanti + e -, e confermare con il pulsante
. Ora è l’indicazione dei minuti a lampeggiare; impostare i minuti con
i pulsanti + e -, e confermare con il pulsante . Per salvare la sveglia
premere il tasto TIME.
• Sul display viene visualizzato ON o OFF. Premere il tasto + o - per atti-
vare o disattivare la sveglia.
• Premere il pulsante . Selezionare quindi la suoneria della sveglia
mediante i tasti + e -:
S-1: Sveglia 1
S-2: Sveglia 2
S-3: Sveglia 3
S-P3: MP3 (scheda SD)
S-FM: Ultima stazione radio impostata.
Premere TIME per confermare la selezione.
• Per interrompere la sveglia attiva premere il tasto TIME.
FUNZIONAMENTO RADIO
• Premere il pulsante M per passare alla modalità radio.
• Una pressione prolungata sul tasto avvia la ricerca automatica
della stazione. Vengono memorizzate fino a 60 stazioni trovate. Per
selezionare le stazioni radio memorizzate, tenere premuto il tasto +
o - ogni volta per 3 secondi.
UTILIZZO DELL’INGRESSO AUX IN
Utilizzare il cavo audio da 3,5 mm per collegare l’uscita audio del
dispositivo all’ingresso audio AUX IN posto sul retro dell’altoparlante.
L’altoparlante passerà automaticamente all’audio AUX IN.
Nota: quando si utilizza l’ingresso AUX IN selezionare il brano succes-
sivo/precedente dallo smartphone.
Per passare nuovamente all’audio Bluetooth, premere il tasto M.
SCHEDA TF/MICRO-SD
Per riprodurre musica MP3 inserire una scheda Micro-SD (no a 32 GB)
nell’apposito slot posto sul retro dell’altoparlante.
SELEZIONE DELLA SORGENTE D’INGRESSO
Premere il tasto M per selezionare la sorgente d’ingresso (Bluetooth, TF,
AUX, FM).
VIVAVOCE
• Premere il pulsante di accettazione chiamata per rispondere
al telefono. La riproduzione della musica viene interrotta
automaticamente.
• Premere di nuovo questo pulsante per terminare la chiamata. La
riproduzione dell’audio riprenderà.
• Premere e tenere premuto il pulsante per rifiutare la chiamata.
IMPORTANTE: non tutti i telefoni supportano il comando della riproduzione e
l’accettazione/il rifiuto di chiamate. Consultare il manuale del proprio smartphone per
maggiori informazioni in caso di problemi con queste funzioni.
UMINOSITÀ DEL DISPLAY
Tenere premuto il pulsante M più volte per 3 secondi per selezionare la
luminosità preferita (scuro, medio, luminoso, Off)
.
SPECIFICHE TECNICHE
Configurazione: completamente attivo
Dimensioni (LxAxP): 190 x 77 x 61 mm
Peso 0,46 kg
Possono subire modiche tecniche.
WARRANTY INFORMATION
We grant a 2-years warranty for this product.
The equipments are checked and tested continuously during the entire production
process. In case you have problems with your equipment, kindly observe the following:
1. The warranty period commences with the purchase of the component and is
applicable only to the original owner.
2. During the warranty period we will rectify any defects due to faulty material or
workmanship by replacing or repairing the defective part at our discretion. Further
claims, and in particular those for price reduction, cancellation of sale, compensation
for damages or subsequential damages, are excluded.
3. Unauthorized tampering with the equipment will invalidate this warranty.
4. Consult your authorized dealer first, if warranty service is needed. Should it prove
necessary to return the component to the factory, please insure that • the component
is packed in original factory packing in good condition • your enclose your receipt as
proof of purchase.
5. Excluded from the warranty are: • Illuminates • Wear parts • Shipping damages, either
readily apparent or concealed (claims for such damages must be lodged immediately
with forwarding agent, the railway express office or post office). • Scratches in cases,
metal components, front panels, etc. (You must notify your dealer directly of such defects
within three days of purchase.) • Defects caused by incorrect installation or connection,
by operation errors (see operating instructions), by overloading or by external force. •
Equipments which have been repaired incorrectly or modified or where the case has
been opened by persons other than us. • Consequential damages to other equipments.
• Reimbursement of cools, without our prior consent, when repairing damages by third
parties • Batteries and battery packs.
RICARICARE L’ALTOPARLANTE
Prima di iniziare a utilizzare l’altoparlante per la prima volta, è buona
norma caricarlo completamente.
Per ricaricare l’altoparlante: inserire il cavo di ricarica USB fornito in
dotazione nella presa jack DC IN (2).
Collegare l’altro capo del cavo di ricarica USB a un alimentatore, come ad
es. un computer o un adattatore di ricarica USB.
L‘indicatore di carica rosso resta acceso durante il processo di ricarica.
L‘indicatore si spegna a ricarica completata.
In caso di poca autonomia della batteria viene emesso un segnale
acustico.
Nota: durante il processo di ricarica è possibile utilizzare l’altoparlante.
ACCENSIONE
Posizionare l’interruttore ON/OFF (1) su ON.
L’indicazione dell’orario è ora attiva. Per attivare le funzioni Bluetooth/
radio/sveglia tenere premuto il tasto .
Viene emesso il segnale acustico di accensione e la spia LED inizia a
lampeggiare velocemente.
Dopo qualche istante, viene attivata la modalità di abbinamento
Bluetooth per il collegamento allo smartphone.
ABBINAMENTO E CONNESSIONE
Attivare il Bluetooth sullo smartphone o un altro dispositivo.
Assicurarsi che la spia LED stia lampeggiando (in caso contrario spegnere
e riaccendere l’altoparlante).
Selezionare BTTEC3000 dalle opzioni di abbinamento sul proprio
smartphone (se non elencato, eseguire la scansione dal menu Bluetooth
del telefono).
Una volta eseguito l’abbinamento, l’altoparlante emetterà un segnale
audio e sarà connesso allo smartphone. La spia LED si accende.
Nota: la procedura di attivazione e connessione Bluetooth varia da dispositivo a
dispositivo. Consultare il manuale del proprio dispositivo per maggiori informazioni e
istruzioni specifiche.
Premere e tenere premuto il pulsante per ca. 3 secondi per
disattivare l’abbinamento Bluetooth.
Consigli sulla connessione wireless Bluetooth
• Assicurarsi che la funzione Bluetooth del dispositivo sia attiva.
• Assicurarsi che non vi sia un altro apparecchio collegato alla presa AUX IN
dell’altoparlante nel momento in cui si cerca di usare il Bluetooth. Mac Audio · Lise-Meitner-Str. 9 · 50259 Pulheim/Germany · www.mac-audio.de
manual_v1.0
I-4 I-5 I-6 I-7
I-1 I-2 I-3
BTTEC3000
AVVERTENZE IMPORTANTI PER L’INSTALLAZIONE

Muy estimado cliente de MAC AUDIO:
En primer lugar, quisiéramos agradecerle por haber optado por un
producto de MAC AUDIO.
Por favor lea atentamente el manual de instrucciones antes de
utilizar el producto. El manual de instrucciones contiene indicaciones
importantes para el funcionamiento y la seguridad del producto. Siga
absolutamente todas las indicaciones. Guarde en un lugar seguro este
manual de instrucciones.
INDICACIÓN DE SEGURIDAD IMPORTANTE
· LIMPIEZA: Utilice un paño seco y suave.
· No bloquee las aberturas de ventilación. Realice la instalación de
conformidad con las instrucciones del fabricante.
· No lo instale cerca de fuentes de calor como radiadores, rejillas de
aire caliente, hornos u otros aparatos (incluyendo amplificadores) que
produzcan calor.
· No exponga el dispositivo a llamas directas como p. ej., velas.
· Desconecte el cable de carga USB durante las tormentas eléctricas.
· Consulte toda tarea de revisión al personal cualificado. Se requerirá
servicio de revisión cuando el aparato resulte dañado de alguna
manera, por ejemplo, en caso de derramamiento de líquido o de caída
de objetos en el aparato, cuando el aparato haya estado expuesto a la
lluvia o la humedad, no funcione de modo normal o haya sufrido una
caída.
· El cable USB no debe seguir funcionando si presenta daños visibles. Un
cable dañado debe sustituirse.
· Si la pila no se instala correctamente, existe riesgo de explosión.
Sustituya la pila solo por una del mismo tipo o de un tipo equivalente.
Deseche las pilas usadas de acuerdo con las instrucciones del
fabricante.
· Este producto contiene una batería recargable de iones de litio no
extraíble.
· Las pilas y baterías no deben exponerse a temperaturas elevadas
como p. ej., las emitidas por los rayos solares, el fuego, etc.
· El dispositivo no debe exponerse a gotas o salpicaduras ni colocarse
cerca de objetos llenos de líquido.
CUIDADO Y MANTENIMIENTO
· Utilice un paño seco y suave y no emplee productos de limpieza,
esprays o disolventes químicos, ya que estos pueden dañar la
superficie.
· Si el altavoz se utiliza fuera de una terraza o un patio, asegúrese de
llevarlo al interior en caso de tormenta a fin de evitar posibles daños.
· No utilice ni guarde el sistema a temperaturas extremas (por debajo de
32ºF / 0ºC y por encima de 112ºF / 40ºC).
Peligro de descarga electrica. No abrir!
ATENCIÓN: Para evitar descargas eléctricas
no abrir la carcasa de los altavoces ni retirar
las cubiertas. Ninguna reparación debe ser
hecha por el usuario. ¡Las reparaciones deben
realizarlas sólo técnicos especializados!
DECLARACIÓN DE CONFORMIDAD
Por la presente, la empresa Magnat Audio-Produkte GmbH declara que
el aparato BTTEC3000 cumple los requisitos básicos y demás normas
relevantes de la Directiva 2014/53/UE. Esta declaración de conformidad
está disponible en el área de descargas del aparato dentro de nuestra
web www.magnat.de.
Frecuencia de funcionamiento: 2402-2480 MHz
Potencia máxima emitida según la norma UNE-EN 62479: 1,77 dBm
INSTRUCCIONES DE ELIMINACIÓN
De acuerdo con la Directiva Europea 2012/19/EU, todos los aparatos
eléctricos y electrónicos deben ser eliminados por medio de puntos
de recogida locales e independientes. Respete la normativa local y no
elimine los aparatos usados junto a los residuos domésticos.
ELIMINACIÓN DE LA BATERÍA
Las baterías usadas son un residuo peligroso y deben ser eliminadas de
acuerdo con las normativas actuales.
Bluetooth® is a trademark of Bluetooth Special
Interest Group (SIG) Inc.
CONTENIDO
· El altavoz BTTEC3000
· Cable de carga USB
· 3.5 mm cable de audio
EL ALTAVOZ
1 2 3 4 5
ON OFF
6 10 11
12
7 8 9
OPEN
1. Interruptor de ENCENDIDO/APAGADO
2. Ranura de tarjeta TF/micro SD (hasta 32 GB)
3. Entrada AUX IN
4. Indicación de carga
5. Entrada de carga USB (DC IN)
6. EIn/Aus-Taste (Bluetooth/FM/Alarma)
7./9. Volume -/+ / Pista anterior/siguiente
8. Reproducir/Pausa / Contestar llamadas
10. Selección de fuente de entrada
11. Hora/Alarma
12. Indicador LED
factores, como la disposición de la sala, el material de las paredes, los obstáculos, el
rendimiento Bluetooth de su dispositivo, etc. Si tiene problemas para conectarse a
este altavoz, acérquese a él.
• Si su dispositivo le solicita una contraseña para conectarse, use «0000».
REPRODUCIR MÚSICA
Ajuste el volumen de su dispositivo al 50% para reproducir música.
Nota: esto es para asegurarse de que el sonido del altavoz no sea demasiado
alto cuando se inicie la transmisión.
Inicie la reproducción de música u otro audio en su dispositivo.
En cuestión de segundos, el altavoz inicia la transmisión de audio
inalámbrica a través de Bluetooth.
Tecla
Inicia o pone en pausa la reproducción de música.
+ y - Teclas
· Una pulsación breve incrementa o reduce el volumen.
· Mantenga las teclas pulsadas durante aprox. 2 ó 3 segundos para se-
leccionar la pista siguiente o la anterior. (Indicación: si utiliza la entrada
AUX IN, use su teléfono inteligente para seleccionar la pista siguiente/
anterior).
HORA / FUNZIONE ALARMA
Configuración del reloj:
Pulse y mantenga pulsado el botón TIME.
La indicación de la hora parpadea, establezca las horas con los botones +
y -, y confirme pulsando el botón . Cuando la indicación de los minutos
parpadee, establezca los minutos con los botones + y -, y confirme
pulsando el botón .
Para guardar la hora, pulse el botón TIME.
Configuración de la alarma:
• Pulse brevemente el botón TIME. La indicación de la hora parpadea,
establezca las horas con los botones + y -, y conrme pulsando el
botón . Cuando la indicación de los minutos parpadee, establezca los
minutos con los botones + y -, y conrme pulsando el botón . Para
guardar la hora de alarma, pulse el botón TIME.
• En el display aparece ahora ON u OFF. Pulse el botón + o - para
conectar o desconectar la alarma.
• Pulse el botón . Ahora puede seleccionar el tono de alarma con los
botones + y -:
S-1: Alarma 1
S-2: Alarma 2
S-3: Alarma 3
S-P3: MP3 (tarjeta SD)
S-FM: última emisora de radio sintonizada.
Pulse el botón TIME para confirmar la selección.
• Para desconectar la alarma activa, pulse el botón TIME.
MODO DE RADIO
• Pulse el botón M para cambiar al modo de radio.
• Si mantiene pulsado el botón , se iniciará la búsqueda automática de
emisoras. Se guardan hasta 60 emisoras encontradas. Para cambiar
entre las emisoras memorizadas, mantenga pulsada la tecla + o -
durante unos 3 segundos.
UTILIZACIÓN DE LA ENTRADA AUX IN
Utilice el cable de audio de 3,5 mm para conectar la salida de audio de su
dispositivo a la entrada de audio AUX IN en el panel trasero del altavoz.
El altavoz cambia automáticamente al audio AUX IN.
Indicación: si utiliza la entrada AUX IN, use su teléfono inteligente
para seleccionar la pista siguiente/anterior.
Para escuchar de nuevo el audio del Bluetooth, pulse la tecla M.
TARJETA TF/MICRO SD
Inserte una tarjeta Micro SD (hasta 32 GB) en la entrada de la parte
posterior del altavoz con el n de reproducir música MP3.
SELECCIÓN DE FUENTE DE ENTRADA
Pulse la tecla M para seleccionar la fuente de entrada (Bluetooth, TF, AUX,
FM).
USO DEL MANOS LIBRES
• Pulse el botón de aceptación de llamada para responder a una
llamada. La reproducción musical se interrumpirá automáticamente.
• Pulse el botón de nuevo para finalizar la llamada. La reproducción
musical se reanudará.
• Pulse y mantenga pulsado el botón para rechazar una llamada.
IMPORTANTE: no todos los teléfonos admiten el control de reproducción y la res-
puesta telefónica / control final. Si tiene problemas con estas funciones, consulte el
manual de usuario de su teléfono para obtener más información.
BRILLO DE LA PANTALLA
Pulse y mantenga pulsado el botón M durante 3 segundos para
seleccionar el brillo de la pantalla (oscuro, mediano, claro, Off) .
DADOS TÉCNICOS
Configuración: totalmente activo
Dimensiones (AnxAlxPr): 190 x 77 x 61 mm
Peso 0,46 kg
RESERVADO EL DERECHO A REALIZAR MODIFICACIONES TÉCNICAS
WARRANTY INFORMATION
We grant a 2-years warranty for this product.
The equipments are checked and tested continuously during the entire production
process. In case you have problems with your equipment, kindly observe the following:
1. The warranty period commences with the purchase of the component and is
applicable only to the original owner.
2. During the warranty period we will rectify any defects due to faulty material or
workmanship by replacing or repairing the defective part at our discretion. Further
claims, and in particular those for price reduction, cancellation of sale, compensation
for damages or subsequential damages, are excluded.
3. Unauthorized tampering with the equipment will invalidate this warranty.
4. Consult your authorized dealer first, if warranty service is needed. Should it prove
necessary to return the component to the factory, please insure that • the component
is packed in original factory packing in good condition • your enclose your receipt as
proof of purchase.
5. Excluded from the warranty are: • Illuminates • Wear parts • Shipping damages, either
readily apparent or concealed (claims for such damages must be lodged immediately
with forwarding agent, the railway express office or post office). • Scratches in cases,
metal components, front panels, etc. (You must notify your dealer directly of such defects
within three days of purchase.) • Defects caused by incorrect installation or connection,
by operation errors (see operating instructions), by overloading or by external force. •
Equipments which have been repaired incorrectly or modified or where the case has
been opened by persons other than us. • Consequential damages to other equipments.
• Reimbursement of cools, without our prior consent, when repairing damages by third
parties • Batteries and battery packs.
CARGA DE SU ALTAVOZ
Antes de empezar a usar el altavoz por primera vez, es recomendable
cargarlo por completo.
Para cargar el altavoz: conecte el cable de carga USB incluido en el cable
en la toma DC IN (2).
Conecte el otro extremo del cable de carga USB en la fuente de
alimentación, por ejemplo, el ordenador o un adaptador de carga USB.
El indicador de carga permanecerá rojo mientras el altavoz se esté
cargando. Se apagará cuando el altavoz esté completamente cargado.
En caso de nivel bajo de la batería, se emitirá un pitido señalizador.
Nota: puede usar el altavoz mientras se esté cargando.
ENCENDIDO
Coloque el interruptor de ENCENDIDO/APAGADO (1) en ON.
La indicación de la hora está encendida. Para activar las funciones
Bluetooth / Radio / Alarma, mantenga pulsado el botón .
Se emite el tono de encendido y el indicador LED comienza a parpadear
rápidamente.
Después de unos segundos, el altavoz pasa al modo de enlace de
Bluetooth para configurarlo con su teléfono inteligente.
ENLACE Y CONEXIÓN
Active el Bluetooth en su teléfono inteligente u otro dispositivo.
Asegúrese de que el indicador LED esté parpadeando. (Si no lo está,
apague el altavoz y enciéndalo de nuevo).
Elija BTTEC3000 en las opciones de enlace de su teléfono inteligente. (Si
no está en la lista, elija «Escanear» en el menú Bluetooth de su teléfono).
El altavoz emite una señal acústica cuando se realiza el enlace y la
conexión con su teléfono móvil. El indicador LED se iluminará de modo
permanente.
Nota: El proceso de activación del Bluetooth y de conexión varía de un dispositivo a
otro. Vea el manual de instrucciones de su dispositivo para obtener más información
e instrucciones específicas.
Pulse y mantenga pulsado este botón durante aprox. 3 segundos
para desactivar el conxión Bluetooth.
Consejos de conexión inalámbrica por Bluetooth
• Asegúrese de que la función Bluetooth de su dispositivo esté encendida.
• Asegúrese de que no haya ningún dispositivo conectado en la toma AUX IN del
altavoz cuando esté intentando utilizar el Bluetooth.
• La conexión inalámbrica Bluetooth funciona hasta un alcance de aproximadamente
10 metros (33 pies). Sin embargo, este alcance puede variar en función de otros
Mac Audio · Lise-Meitner-Str. 9 · 50259 Pulheim/Germany · www.mac-audio.de
manual_v1.0
E-4 E-5 E-6 E-7
E-1 E-2 E-3
BTTEC3000
NOTAS IMPORTANTES SOBRE LA INSTALACIÓN
Table of contents
Languages:
Other MAC Audio Speakers manuals

MAC Audio
MAC Audio LiL'BiG User manual

MAC Audio
MAC Audio MMC 910 Technical manual

MAC Audio
MAC Audio BT ELITE 2000 User manual

MAC Audio
MAC Audio MMC 900 Planning guide

MAC Audio
MAC Audio BT STYLE 3000 User manual

MAC Audio
MAC Audio BT FORCE 116 Planning guide

MAC Audio
MAC Audio BT ELITE 5000 User manual

MAC Audio
MAC Audio SX 112 REFLEX Planning guide

MAC Audio
MAC Audio BT ELITE 3000 User manual

MAC Audio
MAC Audio BT WILD 801 User manual