manuals.online logo
Brands
  1. Home
  2. •
  3. Brands
  4. •
  5. Mackie
  6. •
  7. Recording Equipment
  8. •
  9. Mackie C4 Commander User manual

Mackie C4 Commander User manual

Quick-Start Guide
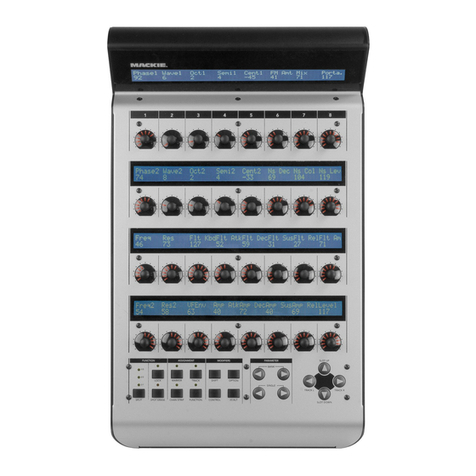
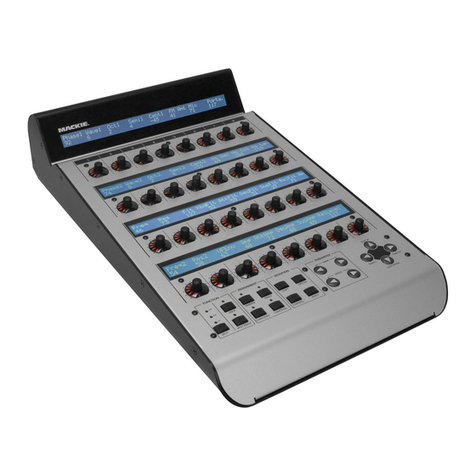
Mackie Control C
4
DSP Plug-in and Virtual Instrument Controller
FUNCTION PARAMETER
TRACK SHIFT OPTION
MARKER
SPLIT CONTROL
LOCK
SPOT ERASE
MODIFIERS
FUNCTION
CHAN STRIP
2/2
TRACK L
SLOT UP
SLOT DOWN
TRACK R
BANK
SINGLE
ASSIGNMENT
3/1
1/3
/ALT
MACKIE CONTROL C4
CONTROL C4
DSP PLUG-IN CONTROLLER
VIRUTAL INSTRUMENT CONTROLLER
MACKIE CONTROL PHATT CHANNEL
THE FOLLOWING ARE TRADEMARKS OR REGISTERED TRADEMARKS OF MACKIE DESIGNS INC "MACKIE" AND THE "RUNNING MAN" FIGURE
SERIAL NUMBER MANUFACTURING DATE
EXTERNAL
POWER
POWER
+
–
CONCEIVED, DESIGNED, AND MANUFACTURED BY MACKIE DESIGNS INC • WOODINVILLE • WA • USA • MADE IN USA • FABRIQUE AU USA • COPYRIGHT ©2002
IN MIDI OUT
CONTROL C
4
2
Mackie Control C4
Mackie Control C4
Part No. 0005708 Rev. A 01/03
© 2003 Mackie Designs Inc. All rights reserved.
Printed in the U.S.A.
1. Read instuctions — Read, understand and follow all safety and
operating instructions before using this Mackie product.
2. Retain Instructions — Keep these safety and operating
instructions for future reference.
3. Heed Warnings — Follow all warnings on this Mackie product
and in these operating instructions.
4. Water and Moisture — Do not use this Mackie product near
water – for example, near a bathtub, kitchen sink, garden hose,
incontinent poodle, sweaty drummer, etc. – or when condensa-
tion has formed on the unit.
5. Cleaning — Clean only with a dry cloth.
6. Heat and Ventilation — Locate this Mackie product away from
heat sources such as radiators, campfires, compost pits, heliarc
welders, magma flows, etc. Do not block the ventilation
openings or install in spaces that prevent adequate air circulation
to the unit.
7. Power Sources — Connect this Mackie product only to a power
source of the type described in these operating instructions or as
marked on the product.
8. Power Cord Protection — Route power supply cords so that they
are not likely to be walked upon, tripped over, or abraded by
items placed upon or against them. Pay particular attention to
cords at plugs, convenience receptacles, and the point where
they exit the product.
9. Object and Liquid Entry — Do not drop objects or spill liquids
into this Mackie product. Clean only with a damp cloth; do not
clean with liquid or aerosol cleaners.
10. Attachments — Use this Mackie product with only the
accessories specified in this manual.
11. Damage Requiring Service — This Mackie product should be
serviced only by qualified service personnel when:
A. The power supply cord or the plug has been damaged; or
B. Objects have fallen onto, or liquid has spilled into the unit; or
C. The unit has been exposed to rain or water; or
D. The unit does not appear to operate normally or exhibits a
marked change in performance; or
E. The unit has been dropped, or its chassis damaged.
12. Servicing — Do not attempt to service this Mackie product. All
servicing should be referred to the Mackie Service Department.
13. Lightning — Unplug the product during lightning storms or
when unused for long periods of time. Note that this Mackie
product is not completely disconnected from the AC mains
service when the power switch is in the OFF position.
14. Grounding and Polarization — To prevent electric shock, do not
use the polarized plug with an extension cord, receptacle or
other outlet unless the blades can be fully inserted to prevent
blade exposure. Do not defeat the grounding by plugging into an
ungrounded receptacle or ground lift adapter.
This apparatus does not exceed the Class A/Class B (whichever is
applicable) limits for radio noise emissions from digital apparatus as
set out in the radio interference regulations of the Canadian
Department of Communications.
ATTENTION — Le présent appareil numérique n’émet pas de bruits
radioélectriques dépassant las limites applicables aux appareils
numériques de class A/de class B (selon le cas) prescrites dans le
réglement sur le brouillage radioélectrique édicté par les ministere
des communications du Canada.
This product has been tested and complies
with the following standards and directives
as set forth by the European Union:
* EN 55022 Radiated and Conducted Emissions
* EN 55024 Electromagnetic Immunity
* EN 61000-4-2 Electrostatic Discharge Immunity
* EN 61000-4-3 RF Electromagnetic Fields Immunity
* EN 61000-4-4 Electrical Fast Transient/Burst Immunity
* EN 60950/IEC 950 Electrical Safety Requirements
CAUTION AVIS
RISK OF ELECTRIC
SHOCK
DO NOT OPEN
RISQUE DE
CHOC
ELECTRIQUE
NE PAS OUVRIR
CAUTION: TO REDUCE THE RISK OF ELECTRIC SHOCK
DO NOT REMOVE COVER (OR BACK)
NO USER-SERVICEABLE PARTS INSIDE
REFER SERVICING TO QUALIFIED PERSONNEL
ATTENTION: POUR EVITER LES RISQUES DE CHOC
ELECTRIQUE, NE PAS ENLEVER LE COUVERCLE. AUCUN
ENTRETIEN DE PIECES INTERIEURES PAR L’USAGER. CONFIER
L’ENTRETIEN AU PERSONNEL QUALIFIE.
AVIS: POUR EVITER LES RISQUES D’INCENDIE OU
D’ELECTROCUTION, N’EXPOSEZ PAS CET ARTICLE
A LA PLUIE OU A L’HUMIDITE
The ligh ning flash wi h arrowhead symbol wi hin an equila eral
riangle is in ended o aler he user o he presence of uninsula ed
"dangerous vol age" wi hin he produc ’s enclosure, ha may be
of sufficien magni ude o cons i u e a risk of elec ric shock o persons.
Le symb le clair avec p int de fl che l’int rieur d’un triangle
quilat ral est utilis p ur alerter l’utilisateur de la pr sence
l’int rieur du c ffret de "v ltage dangereux" n n is l d’ampleur
suffisante p ur c nstituer un risque d’ l ctr cuti n.
The exclama ion poin wi hin an equila eral riangle is in ended o
aler he user of he presence of impor an opera ing and main enance
(servicing) ins ruc ions in he li era ure accompanying he appliance.
Le p int d’exclamati n l’int rieur d’un triangle quilat ral est
empl y p ur alerter les utilisateurs de la pr sence d’instructi ns
imp rtantes p ur le f ncti nnement et l’entretien (service) dans le
livret d’instructi n acc mpagnant l’appareil.
Important Safety Instructions
WARNING — To reduce the risk of fire or electric shock, do
not expose this appliance to rain or moisture.
FCC Information
NOTE: This equipment has been tested and found to comply
with the limits for Class B digital devices, pursuant to Part 15 of
the FCC ules. These limits are designed to provide reasonable
protection against harmful interference when the equipment is
operated in a commercial installation. This equipment generates,
uses, and can radiate radio frequency energy and, if not installed
and used in accordance with the instruction manual, may cause
harmful interference to radio communications. Operation of this
equipment in a residential area is likely to cause harmful
interference in which case the user will be required to correct
the interference at his own expense.
Quick-Start Guide
Quick-Start Guide
Introduction
Thank you for choosing Mackie Designs for your
Digital Audio Workstation (DAW) control solution.
Mackie Control C4provides easy editing of DSP and
virtual instrument plug-in parameters. Its flexibility
allows you to make simple or complex edits across
multiple parameters quickly and precisely.
The Mackie Control C4can be used by itself, but
when used with the Mackie Control and Mackie
Control Extender, you have complete analog-style
control over tracks and plug-ins with your Mackie
Control-supported DAW.
Installation
• Connect the Mackie Control C4to your MIDI
interface via two MIDI cables (IN and OUT).
• Connect one end of the external power supply
to the Mackie Control C4, and the other end to
an AC power source between 90 V and 264 V
AC (50–60 Hz).
• Turn on the Mackie Control C4POWER switch.
• Launch your software program of choice
• Select your software’s console or surface
manager set up window.
• Select the Mackie Control MIDI Mapping. If it
is not included in the version of software you
are using, go to the software company’s
website or to www.mackie.com/mackiecontrol
and download the MIDI map for your
particular application.
• Once the appropriate MIDI map is selected
within your software’s preferences, the unit(s)
will be recognized automatically.
To connect one or more Mackie Control, Mackie
Control Extenders, and Mackie Control C4s:
1. Connect the MIDI OUT jack on your computer’s
MIDI interface to the MIDI IN jack of the
Mackie Control, Mackie Control Extender, or
Mackie Control C4.
2. Connect the MIDI IN jack on your computer’s
MIDI interface to the MIDI OUT jack of the
Mackie Control, Mackie Control Extender, or
Mackie Control C4.
3. You need to have separate MIDI IN and OUT
jacks on the MIDI interface for each Mackie
Control, Mackie Control Extender, and Mackie
Control C4(see illustration below).
Operation
• Please refer to your particular DAW’s
documentation for specific instructions on
establishing communication with Mackie
Control C4, and for operating instructions
when using Mackie Control C4with the DAW.
LISTED INFORMATION
TECHNOLOGY EQUIPMENT
59BJ
THE FOLLOWING ARE TRADEMARKS OR REGISTERED TRADEMARKS OF MACKIE DESIGNS INC "MACKIE" AND THE "RUNNING MAN" FIGURE
SERIAL NUMBER MANUFACTURING DATE
EXTERNAL
POWER
POWER
+
–
CONCEIVED, DESIGNED, AND MANUFACTURED BY MACKIE DESIGNS INC • WOODINVILLE • WA • USA • MADE IN USA • FABRIQUE AU USA • COPYRIGHT ©2001
IN MIDI OUT
CONTROL EXTENDER
LISTED INFORMATION
TECHNOLOGY EQUIPMENT
59BJ
IN MIDI OUT
USER SWITCH EXTERNAL
CONTROL
SERIAL NUMBER
RISK OF ELECTRIC SHOCK
DO NOT OPEN
REPLACEWITH THE SAME TYPE FUSE AND RATING.
DISCONNECTSUPPLY CORD BEFORE CHANGING FUSE
UTILISEUN FUSIBLE DE RECHANGE DE MÊME TYPE.
DEBRANCHERAVANT DE REMPLACER LE FUSIBLE
WARNING:
TOREDUCE THE RISK OF FIRE OR ELECTRIC SHOCK, DO NOT
EXPOSETHIS EQUIPMENT TO RAIN OR MOISTURE. DO NOT REMOVE COVER.
NOUSER SERVICEABLE PARTS INSIDE. REFER SERVICING TO QUALIFIED PERSONNEL.
AVIS :
RISQUE DE CHOC ELECTRIQUE — NE PAS OUVRIR
MANUFACTURING DATE
EXTERNA L
POWER
POWER
THE FOLLOWING ARE TRADEMARKS OR REGISTERED TRADEMARKS OF MACKIE DESIGNS INC "MACKIE" AND THE "RUNNING MAN" FIGURE
CONCEIVED, DESIGNED, AND MANUFACTURED BY MACKIE DESIGNS INC • WOODINVILLE • WA • USA • MADE IN USA • FABRIQUE AU USA • COPYRIGHT ©2001
+
–
EIGHT CHANNEL MASTER CONTROL
THE FOLLOWING ARE TRADEMARKS OR REGISTERED TRADEMARKS OF MACKIE DESIGNS INC "MACKIE" AND THE "RUNNING MAN" FIGURE
SERIAL NUMBER MANUFACTURING DATE
EXTERNAL
POWER
POWER
+
–
CONCEIVED, DESIGNED, AND MANUFACTURED BY MACKIE DESIGNS INC • WOODINVILLE • WA • USA • MADE IN USA • FABRIQUE AU USA • COPYRIGHT ©2002
IN MIDI OUT
CONTROL C
4
Multiport
MIDI Interface
MIDI
OUT
MIDI
IN
Computer Serial or
USB Connection
Digital Audio Workstation
Mackie Control C
4
MIDI
OUT
MIDI
IN
Mackie Control Extender
MIDI
OUT
MIDI
IN
Mackie Control
4
Mackie Control C4
Mackie Control C4
Service
If you think your Mackie Control C4has a problem,
please do everything you can to confirm it before
calling for service. If the problem is related to setting
up and using Mackie Control C4with your DAW
software, contact your software manufacturer’s
technical support.
If you are absolutely, positively sure it is a
hardware related problem, then go to the repair
section next for further instructions.
Repair
Service for Mackie Control C4units purchased in
the USA is available only from one of our authorized
domestic service stations. It is also available at the
factory, located in sunny Woodinville, Washington.
(Service for Mackie products living outside the
United States can be obtained through local dealers
or distributors.) If your Mackie Control C4 needs
service, and it lives in the United States, follow these
instructions:
1. Call Tech Support at 1-800-258-6883, 8 am to
5 pm PST, to explain the problem and request
an RA (Return Authorization) number. Have
your Mackie Control C4serial number ready.
You must have an RA number before you can
obtain service at the factory or an authorized
service center.
2. Keep this quick-start guide. We don’t need it
to repair the controller.
3. Pack the controller in its original package,
including endcaps and box. This is very
important. When you call for the RA number,
please let Tech Support know if you need new
packaging. Mackie is not responsible for any
damage that occurs due to non-factory
packaging.
4. Include a legible note stating your name,
shipping address (no P.O. boxes), daytime
phone number, RA number, and a detailed
description of the problem, including how we
can duplicate it.
5. Write the RA number in BIG PRINT on top of
the box.
6. Ship the controller to us. We suggest insurance
for all forms of cartage. Ship to this address:
Mackie Designs
SERVICE DEPARTMENT
16140 Wood-Red Rd. NE Ste. 5
Woodinville, WA 98072
7. We’ll try to fix the controller within five
business days. Ask Tech Support for current
turn-around times when you call for your RA
number. We normally send everything back
prepaid using UPS ORANGE (three-day air).
However, if you rush your recorder to us by
Next Day Air, we’ll ship it back to you UPS
RED (Next Day Air). This paragraph does not
necessarily apply to non-warranty service.
16220 Wood-Red Rd. NE • Woodinville, WA 98072 • USA
US & Canada: 800/898-3211
Europe, Asia, Central & South America: 425/487-4333
Middle East & Africa: 31-20-654-4000
Fax: 425/487-4337 • www.mackie.com
E-mail: [email protected]
Please read the included warranty information,
then complete and return the Warranty Registration
card, or it’s straight to bed for you with no dinner.
“Mackie,” the “Running Man” figure, “Mackie
Control,” “Mackie Control Extender,” and “Mackie
Control C4” are trademarks or registered trademarks
of Mackie Designs Inc. All other brand names
mentioned are trademarks or registered trademarks of
their respective holders, and are hereby acknowledged.
© 2003 Mackie Designs Inc.
All Rights Reserved.
Printed in the U.S.A.

Other manuals for C4 Commander

6

Other Mackie Recording Equipment manuals

Mackie C4 Commander User guide

Mackie

Mackie C4 Commander User guide

Mackie MDR 24/96 User manual

Mackie

Mackie MDR 24/96 User manual

Mackie ProDX8 User manual

Mackie

Mackie ProDX8 User manual

Mackie C4 Commander Quick start guide

Mackie

Mackie C4 Commander Quick start guide

Mackie SDR24 User manual

Mackie

Mackie SDR24 User manual

Mackie C4 Commander Quick start guide

Mackie

Mackie C4 Commander Quick start guide

Mackie BIGK NOB User manual

Mackie

Mackie BIGK NOB User manual

Mackie Spike User manual

Mackie

Mackie Spike User manual

Mackie HDR 24 User manual

Mackie

Mackie HDR 24 User manual

Mackie Onyx Blackbird User manual

Mackie

Mackie Onyx Blackbird User manual

Mackie DXB 200 - CONNECTIONS User manual

Mackie

Mackie DXB 200 - CONNECTIONS User manual

Mackie HDR 24 User manual

Mackie

Mackie HDR 24 User manual

Mackie HDR 24 User manual

Mackie

Mackie HDR 24 User manual

Mackie MDR 24 User manual

Mackie

Mackie MDR 24 User manual

Mackie HDR 24 User manual

Mackie

Mackie HDR 24 User manual

Mackie MDR 24/96 User manual

Mackie

Mackie MDR 24/96 User manual

Mackie SDR24/96 User manual

Mackie

Mackie SDR24/96 User manual

Mackie hotwire PB-1 User manual

Mackie

Mackie hotwire PB-1 User manual

Mackie Onyx Blackbird User manual

Mackie

Mackie Onyx Blackbird User manual

Mackie HDR 24 User manual

Mackie

Mackie HDR 24 User manual

Mackie ProFX8v2 User manual

Mackie

Mackie ProFX8v2 User manual

Mackie Quad Gate User manual

Mackie

Mackie Quad Gate User manual

Mackie Onyx 1200F User manual

Mackie

Mackie Onyx 1200F User manual

Mackie Onyx Blackjack User manual

Mackie

Mackie Onyx Blackjack User manual

Popular Recording Equipment manuals by other brands

Data Video AD-100M quick start guide

Data Video

Data Video AD-100M quick start guide

NAV TOOL GMC Acadia 2013 installation manual

NAV TOOL

NAV TOOL GMC Acadia 2013 installation manual

ICON QconProX Firmware upgrade

ICON

ICON QconProX Firmware upgrade

USASPEC BT45-ACU manual

USASPEC

USASPEC BT45-ACU manual

digi-tech S100 user guide

digi-tech

digi-tech S100 user guide

FOR-A IVS-200 Operation manual

FOR-A

FOR-A IVS-200 Operation manual

TV One 1T-VS-558 instruction manual

TV One

TV One 1T-VS-558 instruction manual

WhisperPower 40290316 installation manual

WhisperPower

WhisperPower 40290316 installation manual

FRO­NIUS DRM Installation

FRO­NIUS

FRO­NIUS DRM Installation

digi-tech HARDWIRE DL-8 owner's manual

digi-tech

digi-tech HARDWIRE DL-8 owner's manual

Data Video TC-100 instruction manual

Data Video

Data Video TC-100 instruction manual

iCON Pro Audio Uports4 Live user manual

iCON Pro Audio

iCON Pro Audio Uports4 Live user manual

Xylem ebro EBI 20-IF Series manual

Xylem

Xylem ebro EBI 20-IF Series manual

stellar labs DI-50 instructions

stellar labs

stellar labs DI-50 instructions

SolarEdge BI-EU3P Quick installation guide

SolarEdge

SolarEdge BI-EU3P Quick installation guide

Dahua Villa VTO user manual

Dahua

Dahua Villa VTO user manual

Eventide 1745M instruction manual

Eventide

Eventide 1745M instruction manual

Overstayer 3706 manual

Overstayer

Overstayer 3706 manual

manuals.online logo
manuals.online logoBrands
  • About & Mission
  • Contact us
  • Privacy Policy
  • Terms and Conditions

Copyright 2025 Manuals.Online. All Rights Reserved.