MixerConnect
2
MixerConnect
Like us
Follow us
Watch our dang videos
Need help with MixerConnect?
• Visit www.mackie.com/support to fi nd: FAQs, manuals, addendums, and other documents.
• Telephone 1-800-898-3211 to speak with one of our splendid technical support chaps
(Monday through Friday, normal business hours, Pacifi c Time).
Contents
Contents................................................................. 2
Introduction............................................................ 3
MixerConnect V1.0........................................... 3
About This Guide............................................... 3
Things To Remember ......................................... 3
Getting Started....................................................... 3
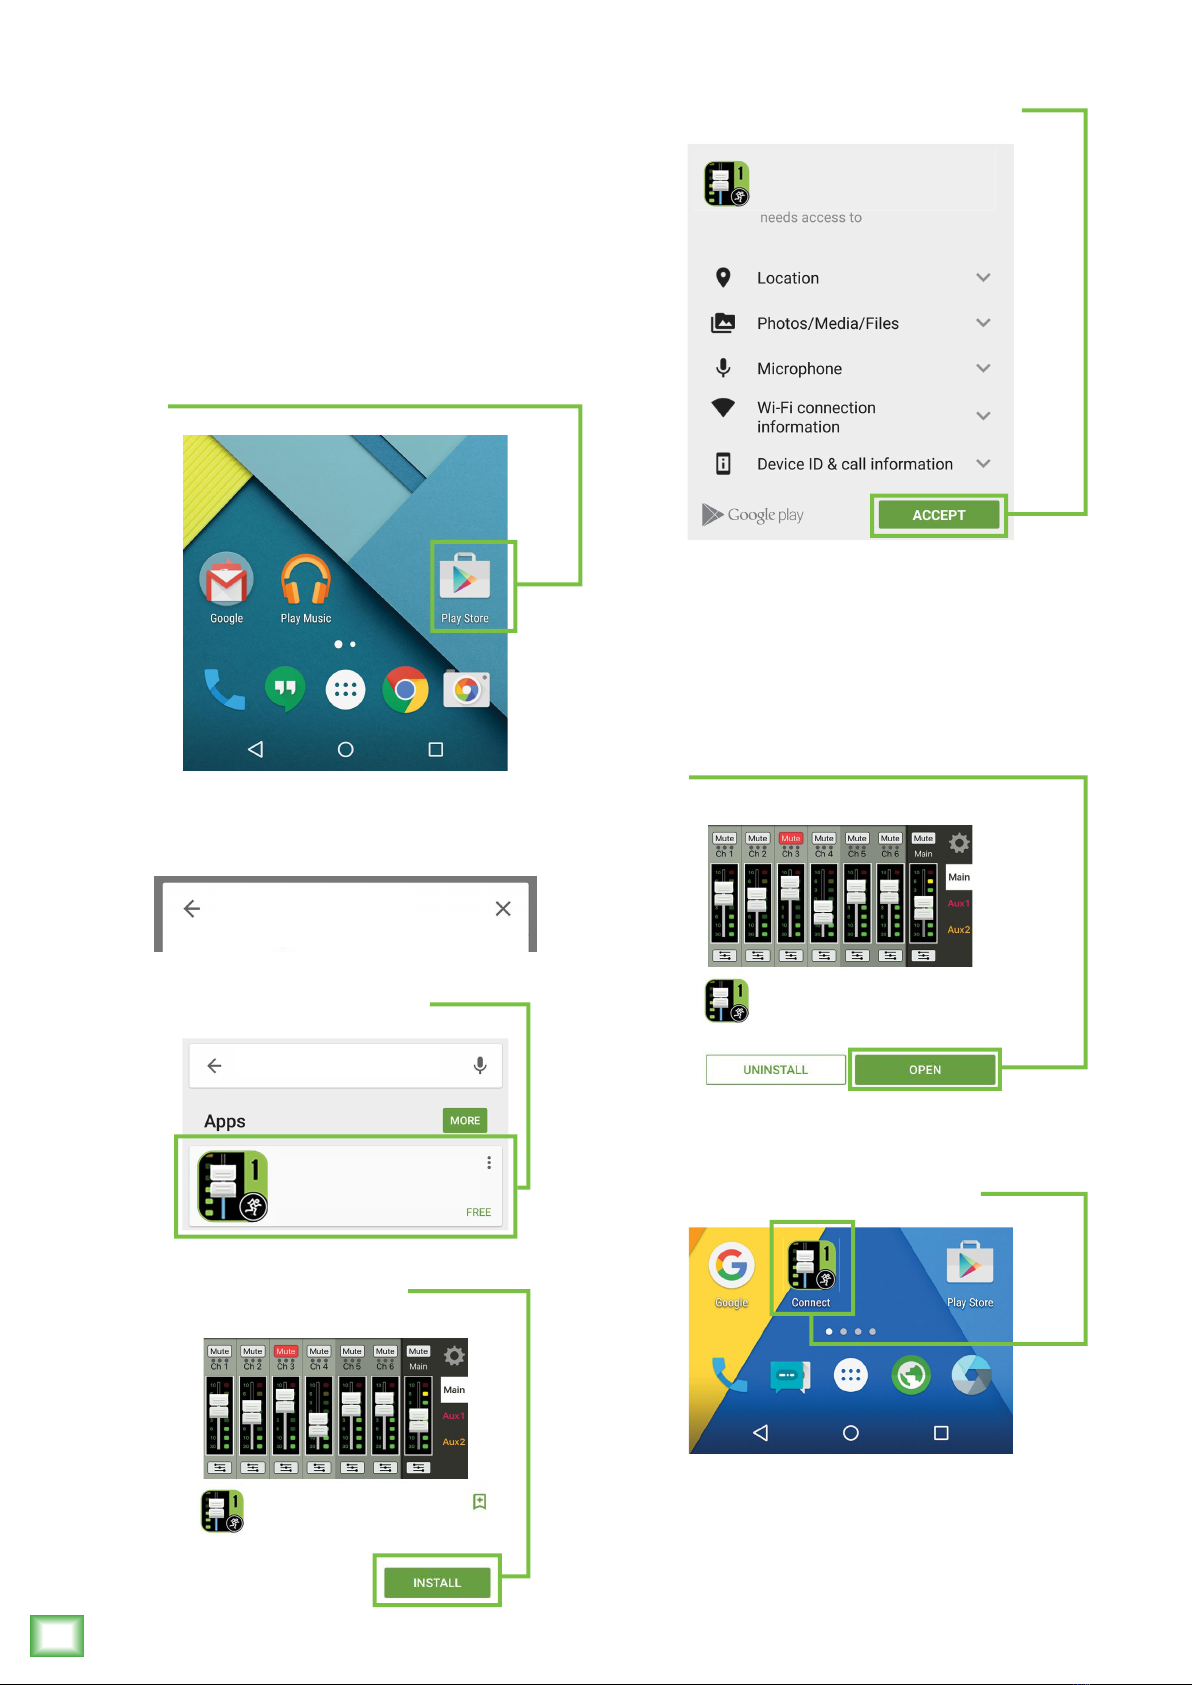
Part I: Downloading, Installing
the MixerConnect App for Android ..................... 4
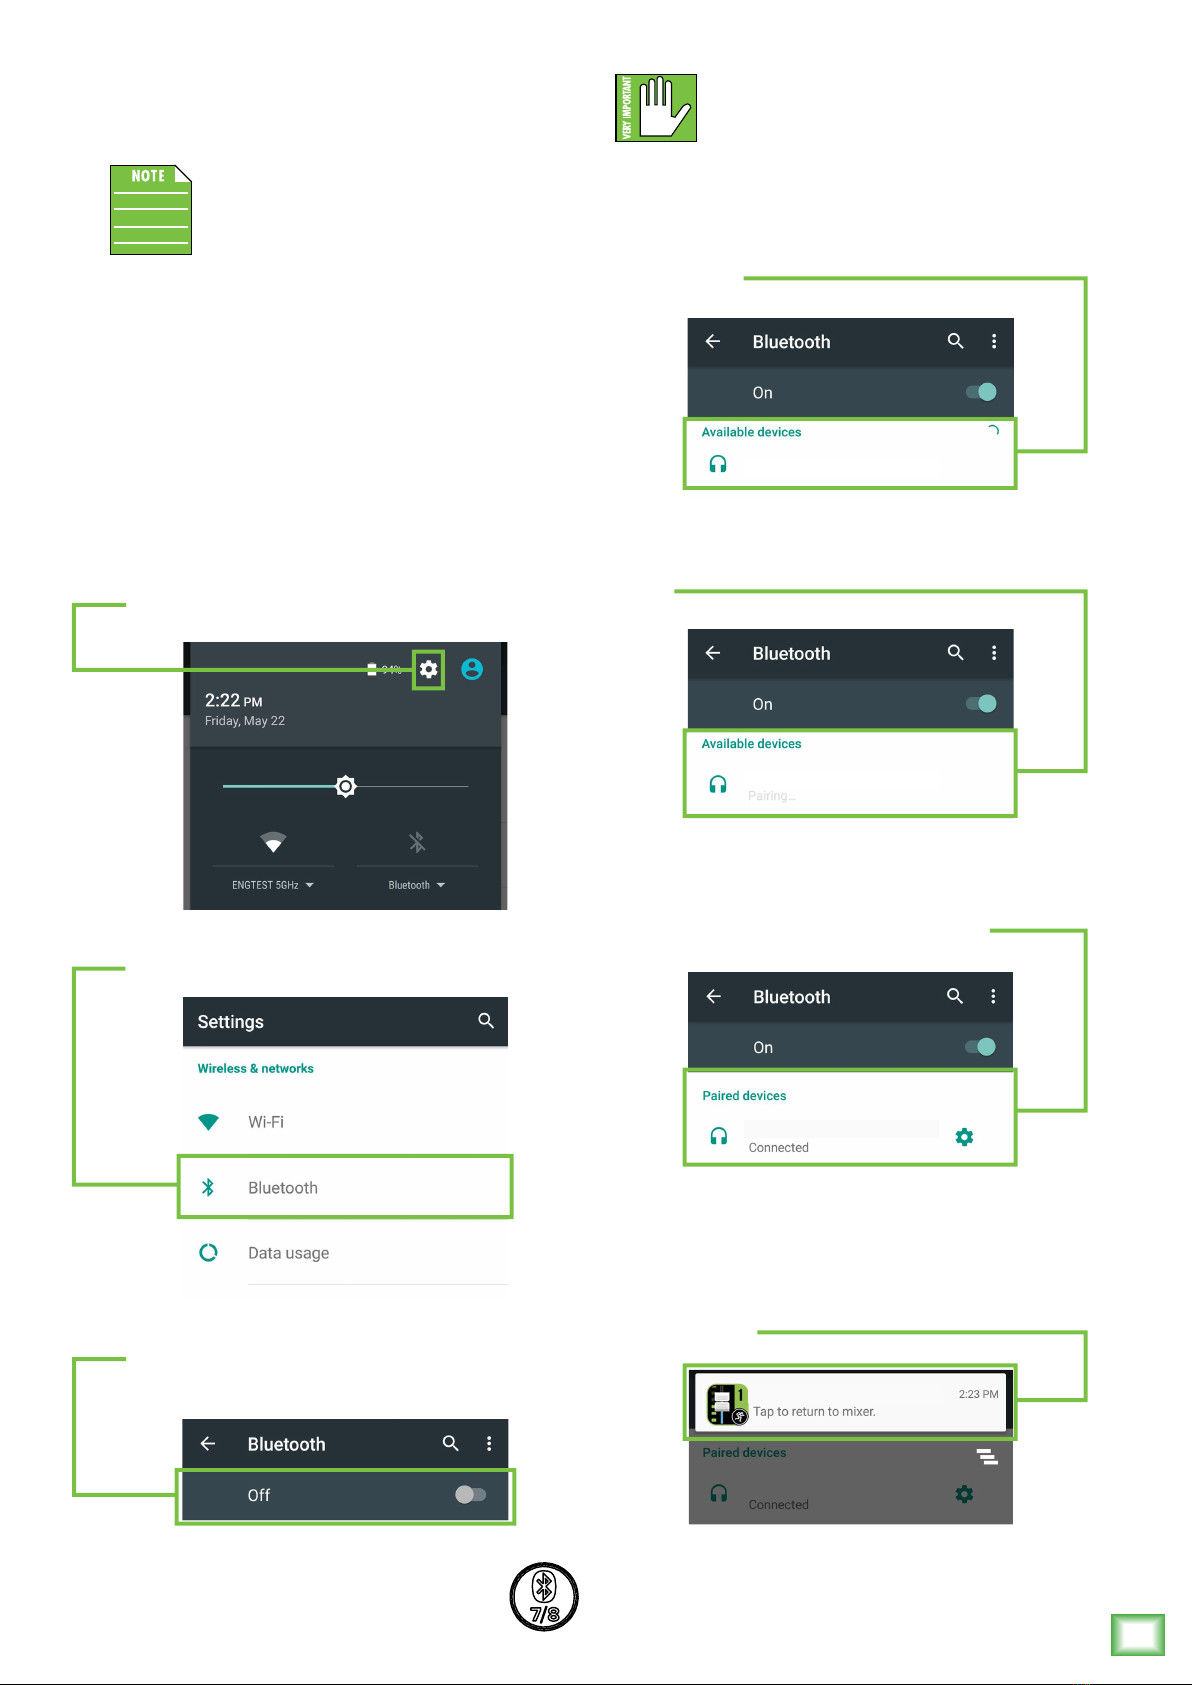
Part II: Pairing and Connecting the Android
Device via Bluetooth ......................................... 5
Part I: Downloading, Installing and Updating
the MixerConnect App for iOS Devices................ 6
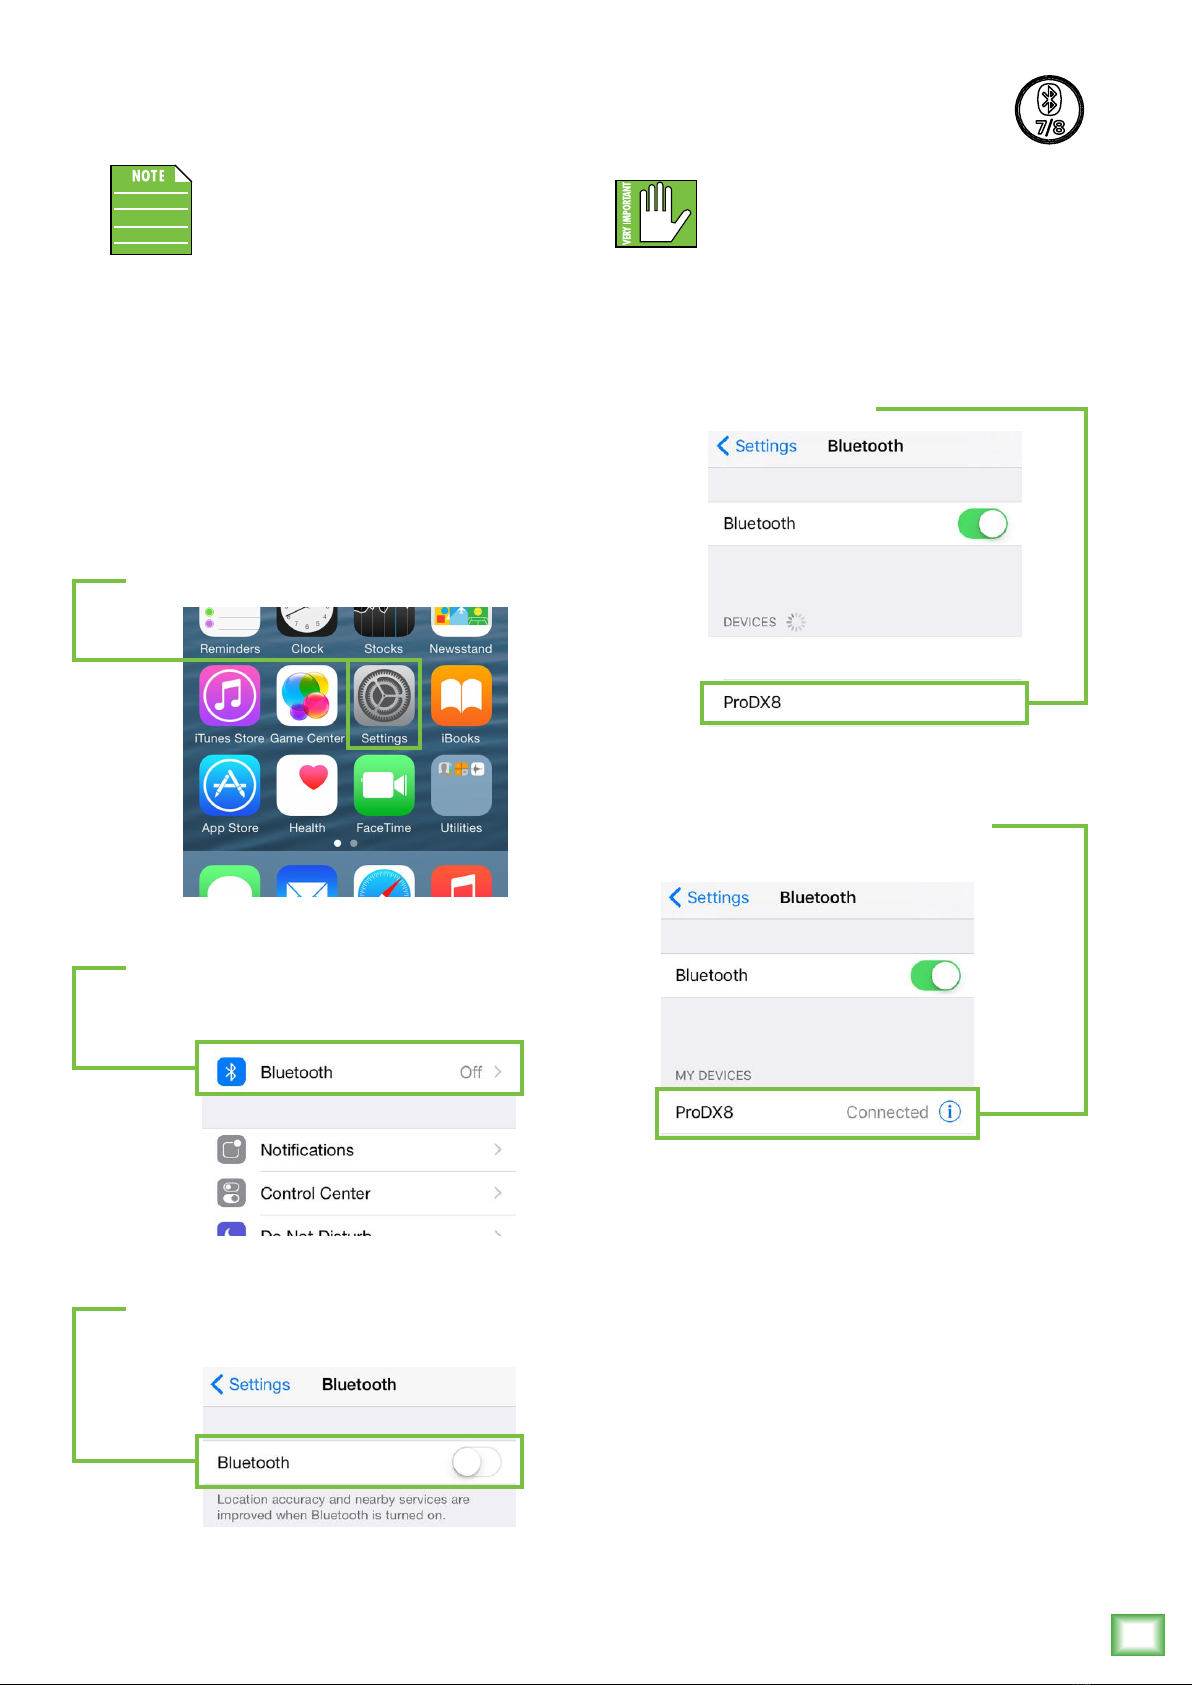
Part II: Pairing and Connecting the iOS Device
via Bluetooth.................................................... 7
Additional Bluetooth Notes [Android and iOS]..... 8
Part III: Level Setting Procedure......................... 8
Welcome................................................................. 9
Android............................................................ 9
iOS ................................................................. 9
MixerConnect – Three Main Views......................... 10
Mixer View.................................................... 10
Channel View ................................................. 10
System View.................................................. 10
Mixer View .......................................................... 11
Introduction.................................................... 11
1. Mute.......................................................... 11
2. Gain Reduction Meter.................................. 11
3. Channel Name............................................. 11
4. Channel Faders and Input Meters ................. 11
5. EQ / FX Channel View ................................ 12
6. FX Return................................................... 12
7. FX Channel Button....................................... 12
8. Main / Aux Mix ......................................... 12
9. Mix Selector............................................... 12
10. GEQ Button .............................................. 13
11. System View Button ................................. 13
Channel View........................................................ 14
Introduction.................................................... 14
12. < / > ....................................................... 14
13. Link.......................................................... 14
3-Band Mid Sweep EQ..................................... 15
14. Low EQ .............................................. 16
15. Low Cut ............................................. 16
16. Mid and Mid Freq EQ........................... 16
17. High EQ.............................................. 16
18. Compressor .............................................. 17
19. FX Send.................................................... 17
20. FX............................................................ 17
21. GEQ View ................................................ 18
System View ........................................................ 19
Introduction.................................................... 19
22. Memory ................................................... 19
23. Phones..................................................... 20
24. About....................................................... 20
Appendix A: Service Information ............................ 21
Appendix B: Technical Information .......................... 23
Appendix C: Table of Effects Presets....................... 24
Appendix D: Android and iOS Optimizations............ 25