Mackie C4 Commander User manual

USER’S GUIDE
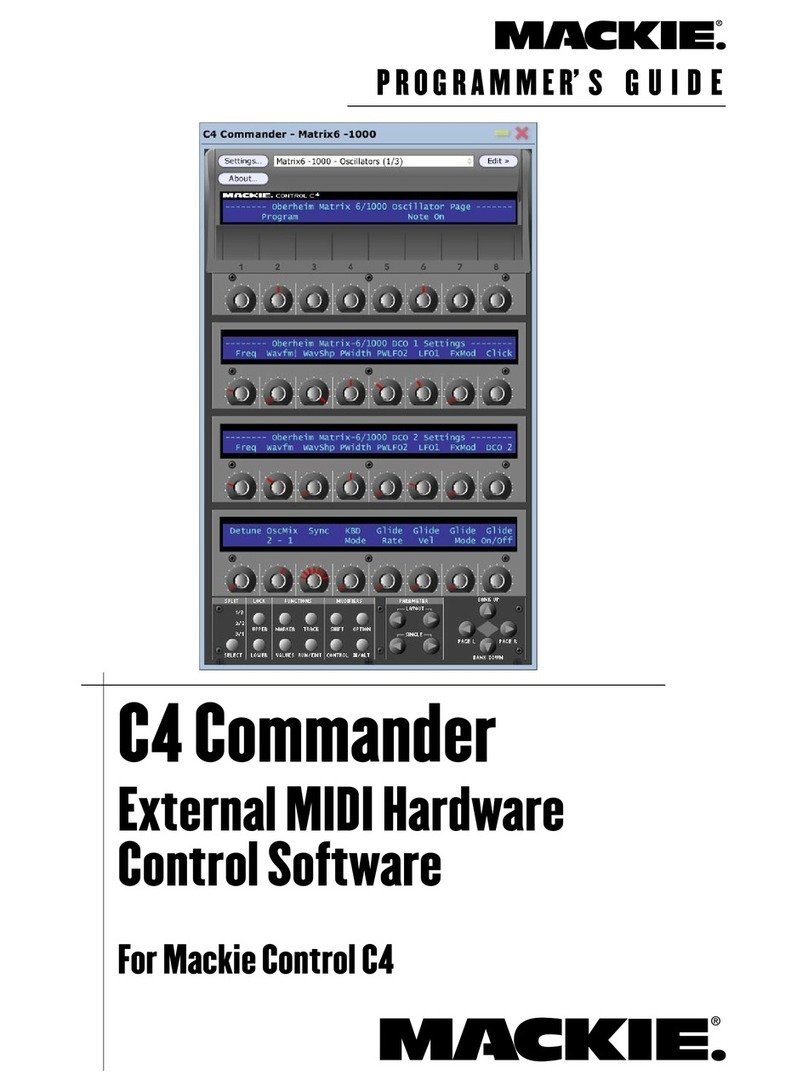
C4 Commander
External MIDI Hardware
Control Software
For Mackie Control C4

User’s Guide
C4 Commander
Mackie Software License
Please read this license carefully before using
the accompanying Software. By downloading and
using the Software, you are agreeing to be bound
by the terms of this license. Software as used
herein means all computer code (both source and
object) including, but not limited to, all interfaces,
navigational devices, search engines, databases,
menus, menu structures or arrangements, drivers,
development tools, icons, operational instructions,
scripts, commands, and syntax, whether created,
or licensed from third parties by LOUD Technolo-
gies Inc., including all associated documentation.
1. Software License. Any Software whether on
disk, in read-only memory, or on any other media,
and related documents are licensed to you by
LOUD Technologies Inc. You own the disk(s) on
which the Software is recorded but LOUD Tech-
nologies and/or LOUD Technologies’ Licensor(s)
retain all rights, title, and interest to the Software
and related documentation. This License allows
you to use the Software on a single computer and
make one copy of the Software in machine-read-
able form for backup purposes only. You must
reproduce on such copy LOUD Technologies’ copy-
right notice and any other proprietary legend on
the original copy of the Software.
2. Restrictions on Software Use. The Software
contains copyrighted material, trade secrets and
other proprietary material and in order to protect
them you may not decompile, reverse engineer,
disassemble or otherwise reduce the Software to
human-perceivable form, or in any way analyze or
utilize in a manner inconsistent with this license,
or allow a third party to do so. You may not modify,
network, rent, lease, loan, distribute, create de-
rivative works, or use the Software to create a
compilation based upon the Software in whole or
in part. You may not electronically transmit the
Software from one computer to another over a net-
work or other means of transmission.
3. Support. You acknowledge and agree that LOUD
Technologies may not offer any technical support
in the use of the Software.
4. Termination. This License is effective until ter-
minated. You may terminate this License at any
time by destroying the Software and related docu-
mentation and all copies thereof. This License will
terminate immediately without notice from LOUD
Technologies if you fail to comply with any provi-
sions of this License. Upon termination you must
destroy the Software and related documentation
and all copies thereof.
5. Export Law Assurances. You agree and certify
that neither the Software nor any other technical
data received from LOUD Technologies, nor the
direct product thereof, will be exported outside
the United States except as authorized and as per-
mitted by the laws and regulations of the United
States and with LOUD Technologies’ express per-
mission.
6. Government End Users. If you are acquiring
the Software on behalf of any unit or agency of the
United States Government, the following provi-
sions apply. The Government agrees:
(i) if the Software is supplied to the Department of
Defense (DOD), the Software is classified as “Com-
mercial Computer Software” and the Government
is acquiring only “restricted rights” in the Soft-
ware and its documentation as that term is defined
in Clause 252.227-701(c)(1) of the DFARS; and
(ii) if the Software is supplied to any unit or
agency of the United States Government other
than DOD, the Government’s rights in the Soft-
ware and its documentation will be defined in
Clause 52.227-19(c)(2) of the FAR or, in the case
of NASA, in clause 18-52.227-86(d) of the NASA
supplement to the FAR.
7. Limited Warranty on Software Media (if
provided on disks). LOUD Technologies Inc.
warrants the disks on which the Software is re-
corded to be free from defects in materials and
workmanship under normal use for a period of
ninety (90) days from the date of purchase as evi-
denced by a copy of the purchase receipt. LOUD
Technologies’ entire liability and your exclusive
remedy will be the replacement of the defective
disk when it is returned postage prepaid to LOUD
Technologies at the address below or a Mackie
authorized representative with a copy of the
purchase receipt. LOUD Technologies will have
no responsibility to replace a disk damaged by
accident, abuse or misapplication. THIS WAR-
RANTY SPECIFICALLY EXCLUDES ANY OTHER
WARRANTY RELATED TO SOFTWARE MEDIA,
INCLUDING, BUT NOT LIMITED TO, ANY IM-
PLIED WARRANTIES ON THE DISKS, SUCH AS
THE IMPLIED WARRANTIES OF MERCHANT-
ABILITY OR FITNESS FOR A PARTICULAR
PURPOSE OR USE. THIS WARRANTY GIVES

User’s Guide
C4 Commander
YOU SPECIFIC LEGAL RIGHTS, AND YOU MAY
ALSO HAVE OTHER RIGHTS, WHICH VARY
FROM STATE TO STATE AND FROM COUNTRY
TO COUNTRY.
8. Disclaimer of Warranty on Software. You
expressly acknowledge and agree that use of
the Software is at your sole risk. The Software
and related documentation are provided “AS
IS” and without warranty of any kind. LOUD
TECHNOLOGIES EXPRESSLY DISCLAIMS ALL
WARRANTIES, EXPRESS OR IMPLIED, INCLUD-
ING, BUT NOT LIMITED TO, THE IMPLIED
WARRANTIES OF MERCHANTABILITY AND
FITNESS FOR A PARTICULAR PURPOSE OR
USE. LOUD TECHNOLOGIES DOES NOT WAR-
RANT THAT THE FUNCTIONS CONTAINED IN
THE SOFTWARE WILL MEET YOUR REQUIRE-
MENTS, OR THAT THE OPERATION OF THE
SOFTWARE WILL BE UNINTERRUPTED OR
ERROR-FREE, OR THAT DEFECTS IN THE
SOFTWARE WILL BE CORRECTED. FURTHER-
MORE, LOUD TECHNOLOGIES DOES NOT
WARRANT OR MAKE ANY REPRESENTATIONS
REGARDING THE USE OR THE RESULTS OF
THE USE OF THE SOFTWARE OR RELATED
DOCUMENTATION IN TERMS OF THEIR COR-
RECTNESS, ACCURACY, RELIABILITY, OR
OTHERWISE. NO ORAL OR WRITTEN IN-
FORMATION OR ADVICE GIVEN BY LOUD
TECHNOLOGIES OR A MACKIE AUTHORIZED
REPRESENTATIVE SHALL CREATE A WAR-
RANTY OR IN ANY WAY INCREASE THE SCOPE
OF THIS WARRANTY. SHOULD THE SOFTWARE
PROVE DEFECTIVE, YOU (AND NOT LOUD
TECHNOLOGIES OR ANY MACKIE AUTHORIZED
REPRESENTATIVE) ASSUME THE ENTIRE
COST OF ALL NECESSARY SERVICING, RE-
PAIR OR CORRECTION. SOME STATES DO NOT
ALLOW THE EXCLUSION OF IMPLIED WAR-
RANTIES, SO THE ABOVE EXCLUSION MAY
NOT APPLY TO YOU.
9. Limitation of Liability. UNDER NO CIRCUM-
STANCES INCLUDING NEGLIGENCE, SHALL
LOUD TECHNOLOGIES BE LIABLE FOR ANY
INCIDENTAL, SPECIAL OR CONSEQUENTIAL
DAMAGES INCLUDING, BUT NOT LIMITED TO,
LOST PROFITS OR EARNINGS, DAMAGE TO
PROPERTY OR PERSON, OR ATTORNEYS’ FEES
THAT RESULT FROM THE USE OR INABILITY
TO USE THE SOFTWARE OR RELATED DOCU-
MENTATION, EVEN IF LOUD TECHNOLOGIES
OR A MACKIE AUTHORIZED REPRESENTATIVE
HAS BEEN ADVISED OF THE POSSIBILITY
OF SUCH DAMAGES. SOME STATES DO NOT
ALLOW THE LIMITATION OR EXCLUSION OF
LIABILITY FOR INCIDENTAL OR CONSEQUEN-
TIAL DAMAGES SO THE ABOVE LIMITATION
OR EXCLUSION MAY NOT APPLY TO YOU. IN
NO EVENT SHALL LOUD TECHNOLOGIES’ TO-
TAL LIABILITY TO YOU FOR ALL DAMAGES,
LOSSES, AND CAUSES OF ACTION (WHETHER
IN CONTACT, TORT (INCLUDING NEGLIGENCE)
OR OTHERWISE) EXCEED THE AMOUNT PAID
BY YOU FOR THE SOFTWARE.
10. Controlling Law and Severability. This
License shall be governed by and construed in ac-
cordance with the laws of the United States and
the State of Washington, as applied to agreements
entered into and to be performed entirely within
Washington between Washington residents. If for
any reason a court of competent jurisdiction finds
any provision of this License, or portion thereof,
to be unenforceable, that provision of the License
shall be enforced to the maximum extent permis-
sible so as to effect the intent of the parties, and
the remainder of the License shall continue in full
force and effect.
11. Complete Agreement. This License constitutes
the entire agreement between the parties with
respect to the use of the Software and related
documentation, and supersedes all prior or con-
temporaneous understandings or agreements,
written or oral, regarding such subject matter. No
amendment to or modification of this License will
be binding unless in writing and signed by a duly
authorized representative of LOUD Technologies
Inc.
LOUD Technologies Inc. • 16220 Wood-Red Road NE • Woodinville, WA 98072 • USA
©2006 LOUD Technologies Inc.
All Rights Reserved.

User’s Guide
C Commander
Iconography
“Mackie” and the “Running Man” figure are trademarks or registered trademarks of LOUD Tech-
nologies Inc. All other brand names mentioned are trademarks or registered trademarks of their
respective holders, and are hereby acknowledged.
Part No. SW0297 Rev. A 06/06
© 2006 LOUD Technologies Inc. All Rights Reserved.
This icon will lead you to some further explanations of features and practical tips.
This icon marks information that is very important, so please make sure you have a
read.
This icon does not appear in this guide. Well, except here, of course.
Note: Visit our website at www.mackie.com to obtain the latest manuals and downloads
for all your Mackie products.

User’s Guide
C4 Commander
Contents
Mackie Software License -------------------------
Iconography ----------------------------------------4
Introduction ----------------------------------------6
Main Features -------------------------------------- 6
A brief word about MIDI Controllers ---------- 6
Installing the Software ---------------------------7
Connecting the Hardware ------------------------8
C4 Commander Features -------------------------8
The Settings Window ----------------------------- 9
Control C4 ------------------------------------------- 9
Instruments ----------------------------------------- 9
The Edit Window --------------------------------- 10
Layouts ---------------------------------------------- 10
Assignments ----------------------------------------- 11
Display -----------------------------------------------1
C4 Commander Graphic Interface ------------ 1
V-Pots -------------------------------------------------1
Scribble Strips ------------------------------------- 14
SPLIT ------------------------------------------------- 14
LOCK ------------------------------------------------- 14
FUNCTIONS ---------------------------------------- 14
MODIFIERS ----------------------------------------- 14
PARAMETER ---------------------------------------- 14
BANK/PAGE Navigation Buttons ---------------1
Navigating the C4 Commander ----------------1
Creating a Layout ---------------------------------16
Customizing a Layout ----------------------------18

User’s Guide
6
C4 Commander
Introduction
Thank you for choosing Mackie software products
for your computer-based audio recording system.
The C4 Commander software package is designed to
be used with the Mackie C4 virtual instrument con-
troller. It serves as "middleware" between the C4
and an external MIDI synth, effects device, or other
MIDI hardware device and translates the controls
on the C4 into the correct MIDI commands to con-
trol the external device.
It comes with an extensive library of the most com-
monly used MIDI synths and instruments. You
simply drag-and-drop the instrument assignment
onto the C4 Commander software control panel and
all the controls are automatically assigned to the
selected instrument. You can create different lay-
outs to control different instruments, and customize
your layouts to suit your own style of working with
the C4.
And if you want to exercise your programming
chops, you can even create your own instrument
definition file to control an instrument not included
in the C4 Commander Instrument Library (please
refer to the C4 Commander Programmer's Guide).
The C4 Commander software package is easy to
use and provides you the flexibility to customize the
C4 controller to whatever application you require.
You're only limit is your imagination, so experiment
and have fun!
Main Features
• Middleware control for C4
• Easy drag-and-drop instrument assignments
• Vast library of MIDI instrument definition files
• User-configurable layouts
• Interactive graphic display of C4 controller
• Easy switching between open layouts
• MIDI Common (e.g. Note On/Off) and MIDI
Controller (Continuous Controller) assignments
available to drag-and-drop
A brief word about MIDI Controllers
Many MIDI-controlled devices come with a
software package that allows you to control
them from your
computer. Using a keyboard
and mouse (or worse, a touchpad) to control an audio
device can be frustrating and time-consuming.
The C4 and C4 Commander software offer an el-
egant solution to controlling MIDI devices. The
C4 provides real hardware knobs for tweaking the
parameters of a MIDI instrument (hardware) or
a virtual instrument (software), and the C4 Com-
mander provides a library of MIDI command presets
for many popular MIDI devices.
Once you have learned how to use the C4 Com-
mander software (just continue reading this user's
guide and you will have it in no time!), you will be-
gin to see how the flexibility of the C4 Commander
will help you work faster and more efficiently, and
allow you to perform tasks you never dreamed were
possible.

User’s Guide
7
C4 Commander
Installing the Software
You probably have acquired the C4 Commander soft-
ware package by downloading it from the Mackie
website. There are two versions, one for Windows
XP and one for Mac OS X. Installation instruc-
tions are included when you download the software
package. Visit the Mackie website if you need the
installation instructions (http://www.mackie.com/
products/C4Commander).
When you install the software, a folder called “C4
Commander” is created on your hard drive that
contains the C4 Commander application (C4 Com-
mander.exe on the PC, and C4 Commander.app on
the Mac), a folder called “Instruments” that con-
tains all the instrument definition files, and a file
called “local.c4s.” This is where your layout files
(.c4l) are stored by default. You should keep all your
layout files together to make them easy to find, and
easy to back up.
C4 Commander File Structure — Windows XP
C4 Commander File Structure — Macintosh OS X

User’s Guide
8
C4 Commander
Connecting the Hardware
We refer to the C4 Commander software as
"middleware" because it sits between the C4
and the MIDI instruments that it is controlling.
Connecting the equipment is fairly straightfor-
ward. It is best done with a USB MIDI interface
to make it easy to connect multiple MIDI devices.
The hookup diagram below shows a typical
method of connecting the C4 to the computer
and the MIDI instruments.
C4 Commander Features
The C4 Commander is made up of three main sec-
tions:
• Settings Window
• Edit Window
• C4 Graphic Interface
The C4 graphic interface is a virtual representa-
tion of the controls, buttons, and displays on
the actual C4. Any changes made on the C4 are
reflected in the C4 graphic interface, and any
changes made in the graphic interface are re-
flected on the C4.
The Settings window allows you to assign the
MIDI ports used to connect to the C4, adjust the
shift increment value, and select the individual
instruments you want to have the C4 control.
The Edit window allows you to create new
layouts, assign the instrument contols to the
C4 (as well as MIDI common and MIDI control-
ler commands), view the MIDI parameters for
each control, and view and modify the names
that appear in the display for each page, bank,
group, and control.
These sections are described in the next few
pages. But first, we should define some terms
that will help you understand the operation of
the C4 Commander.
Controls:
Each V-Pot is a control that can be as-
signed to an individual parameter on the MIDI
instrument. The C4 Commander comes with an
extensive library of Instrument Definition Files,
which can be accessed in the Settings window.
The easiest way to assign parameters to the V-
Pots is to simply drag-and-drop the Instrument
from the Assignment list in the Edit window to
the first V-pot on the C4. All of the parameters
for the instrument are automatically assigned to
the V-pots sequentially. However, you can remove
and rearrange the parameters to your liking.
Connecting the C4
LISTEDINFORMATION
TECHNOLOGYEQUIPMENT
59BJ
SERIAL NUMBER MANUFACTURINGDATE
EXTERNAL
POWER
POWER
+
–
IN MIDI OUT
CONTROL C4
DESIGNEDBY MACKOIDSIN WOODINVILLE, WA, USA • MANUFACTUREDIN CHINA• FABRIQUE ENCHINE • COPYRIGHT©2005
"MACKIE"AND THERUNNING MAN FIGUREARE TRADEMARKSOF LOUDTECHNOLOGIES,INC. • PATENTPENDING
Multiport
USB MIDI Interface
MIDI
OUT
MIDI
IN
Computer
USB Connection
Laptop Computer
with C4 Commander Software
Mackie Control C4
MIDI
IN
MIDI Keyboard/Synth
MIDI Effects Processor
MIDI
IN
Note: The MIDI hardware devices only require
a MIDI IN connection (no MIDI OUT) because
the C4 Commander software is only bidirectional
with the Mackie Control C4, not with the MIDI
hardware devices.

User’s Guide
9
C4 Commander
Banks: There are eight V-pots in a bank (hori-
zontal row). There are four banks of V-Pots on
the control surface of the C4.
Pages:
A page is comprised of four banks, 32 V-
Pots (8 x 4 = 32). When there are more than 32
parameters to control on an instrument, you can
create a second page, which gives you 32 more
controls to assign to instrument parameters. You
can create as many pages as you need to control
all the parameters for an instrument. Use the
PAGE L/R buttons at the bottom of the C4 to
scroll among the pages.
Layouts:
A layout is comprised of all the pages
for a particular instrument, or group of instru-
ments. You can create a layout to control some
of the parameters for an instrument, all of the
parameters for an instrument, or parameters for
two (or more) instruments.
Once you've assigned all the desired parameters
to the V-Pots, you can save the layout to your
hard drive so it is permanently stored and avail-
able whenever you need it.
The Settings Window
Click the Settings button in the upper-left cor-
ner of the C4 graphic interface window to open
the Settings window. There are two tabs in the
Settings window: Control C4 and Instruments.
Control C4
There are three settings under the Control C4
tab.
Midi Ports: This is where you let your computer
know which MIDI ports you are using to con-
nect the C4.
You must have a MIDI IN and a MIDI
OUT connected between the C4 and your
MIDI interface to the computer so that
MIDI data can travel in both directions.
Controls: Many times, a parameter's control can
be modified by pressing the SHIFT button on
the C4 to change the speed at which the control
increases or descreases the value of the param-
eter. The default shift increment value is 10, but
you can change the value in the Controls box.
Note: MIDI provides up to 128 increments for
a control, but a control may not necessarily use
128 increments.
Instruments
This is where you select the instruments you
want to control with the C4. A list of available
instruments appears in the left side of the win-
dow. Select one that you want to control and
click the right-pointing arrow to move it to the
list of instruments to be controlled in the right
side of the window.

User’s Guide
10
C4 Commander
Likewise, you can remove an instrument from
the "Controlled" list by selecting it and clicking
the left-pointing arrow.
Note: If no instruments appear in the list of
available instruments, make sure the Instru-
ments folder is in the same folder as the C4
Commander application, or click on the navi-
gation button at the bottom of the window to
navigate to the location of the Instruments Defi-
nitions Folder on your computer.
Once you have completed your settings for the
C4, click the OK button at the bottom of the Set-
tings window to save your settings and close
the window.
There is a link at the bottom of the Instruments
tab that will launch your internet browser and
take you to Mackie’s website where you may
find new or updated instrument definition files.
The Edit Window
Click the Edit button in the upper-right corner
of the C4 graphic interface window to open the
Edit window.
Layouts
This is where you create, open, or remove the
layouts that are available to the C4. You can
have multiple layouts open at any one time.
New: Click the New button to create a new
layout, beginning with a "clean slate." All the
V-Pot controls and displays are blank, and an
"Untitled" layout appears in the Layouts list.
You may proceed to assign parameters to the
V-pot controls, and then save the layout with a
unique name using the Save As button.
Open: Click this button to open a saved layout
and make it available to the C4. The "Select a

User’s Guide
11
C4 Commander
layout file" window opens and you may select
any layout (.c4l) file that you have created.
Click Open and the selected layout appears in
the Layouts list.
Save: If you make any changes to an open lay-
out, click the Save button to save the changes
to the layout file on the hard drive.
Save As: If you make changes to an existing lay-
out file, but want to keep the original, click the
Save As button to save the modified layout file
under a different name. Or you can use Save As
to simply rename a layout file.
Remove: Use the Remove button to remove a
selected layout from the Layouts list. This does
not delete the layout from the hard drive, but
simply makes it inaccessible to the C4. You can
always add the layout back to the Layouts list
using the Open button.
Assignments
Each instrument that you have selected in the
Settings window appears in the Instrument list
under the Assignments tab.
Click on the "+" sign in front of the instrument
to see an indented list of all the parameters
available for that instrument. Click on an in-
dividual parameter to see the details for that
parameter, including the manufacturer, model,
MIDI Out device, MIDI channel, parameter
name, MIDI message, minimum and maximum
values, and the default value.
Typically, you would assign an instrument to a
MIDI Out device and MIDI channel by clicking
on the instrument name and selecting the MIDI
Out device and MIDI channel in their respective
drop down boxes. All the parameters for that
instrument are automatically assigned to the
same MIDI Out device and MIDI channel.
There is also an entry called "Globals." This
contains standard MIDI common and MIDI con-
troller commands, which you can assign to any
of the C4 controls as well.

User’s Guide
1
C4 Commander
Display
Click on the Display tab to open the Display
window. This allows you to modify how things
appear in the scribble strip displays.
Page: You can give each page in a layout an
individual name, perhaps suited to the type of
controls that are located on each page. This ap-
pears in the top line of the C4 graphic interface,
but does not appear on the C4 itself.
You can also add, delete, and clear a page in the
Display window.
Add: Click the Add button to add a new page
after the current page.
Insert: Click this button to insert a new page
before the current page.
Delete: Click the Delete button to remove
the current page, and all the controls con-
tained on the current page.
Clear: Click this button to clear all the con-
trols on the current page.
Bank:
You can give each bank a unique name.
This name appears in the top line of the scribble
strip display of the selected bank. Click the Bars
checkbox to display a dashed line across the
scribble strip, on either side of the bank name.
Group: You can group two or more adjacent
controls under a common name, to assist in rec-
ognizing several controls that adjust different
parameters of a common function. For example,
you could group the Cutoff, Freq, and Q controls
for a filter and name the group “Filter.”
To create a group, select two or more adjacent
controls (Shift+click). Enter a name for the
group to create it. The name appears above the
selected controls in the first line of the scribble
strip display. Click the Bars checkbox to add a
dashed line on either side of the name, and click
the Pickets checkbox to add a vertical dashed
line on the right end of the group.
If you select one control in a group, click the
Select button to select all the controls in the
group. If you want to add or remove one or
more controls from an existing group, select the
control(s) you want to include in the group and
click the Regroup button.
Control: This section displays the name of the
control, the text that appears in line 1 and line
2 of the scribble strip display, and the rotary
mode of the V-Pot.
Name: The name of the control is provided
by the manufacturer and is not editable.
Line 1: You can replace the default text that
appears in line 1 of the scribble strip.
Line 2: You can replace the default text that
appears in line 2 of the scribble strip.
Note: The scribble strip can only display 7-8
characters for each line in the space provided
above each control.
Rotary Mode: You can select the mode that
the V-Pot indicates its position. This is usu-
ally dicatated by the function of the control.

User’s Guide
1
C4 Commander
Single Dot mode lights one LED at a time
around the V-Pot to indicate the relative po-
sition of the V-Pot control.
Boost/Cut mode lights a single LED at the
12 o'clock position, and lights LEDs to the
left or the right of the center position as the
V-Pot is rotated. This is typically used for an
EQ boost/cut control.
Wrap mode lights the LEDs continuously
around the V-Pot as it is rotated to the right.
Spread mode lights a single LED at the 12
o'clock position, and lights LEDs to the left
and right of the center position as the V-Pot
is rotated.
On/Off mode simply toggles between fully lit
and fully off. This is typically used for on/off
functions.
Click the Pickets checkbox to add a vertical
dashed line on the right side of the scribble
strip for the selected
control.
When you have com-
pleted making your
edits to the layout, click
the Run button in the
upper right corner of
the C4 graphic inter-
face. The Save Layout
popup window asks
you if you want to save
your changes. Click Yes
to save the changes to
the layout and close the
Edit window.
Now you are in Run mode, and the C4 V-Pots
and buttons should now control your MIDI de-
vice. Try it out and see how the device responds
when you make adjustments on the C4.
Note: The C4 controls are inactive while
you are in Edit mode. If the controls on
the C4 are not doing anything, make
sure the C4 Commander is in Run mode.
C4 Commander Graphic Interface
The C4 Commander graphic interface is the
main window that opens when you first launch
the C4 Commander software. It displays a rep-
lica of the front panel of the C4, with its four
banks of V-Pots and associated scribble strip
displays, and a number of push buttons at the
bottom of the window. Some of the button labels
at the bottom of the C4 Commander graphic
interface differ from those on the actual C4.
A C4 Commander overlay should be available
soon that you can place
over the C4 buttons so
they match the C4 Com-
mander graphic interface.
Check our website for
availability and ordering
information (www.mackie.
com).
V-Pots
Each V-Pot can control
any parameter in the
MIDI instrument. The
V-Pots serve double-duty
as rotary encoders and
push-button switches, de-
pending on the parameter
assigned to it.
V-Pots
Scribble Strip
SPLIT, LOCK,
FUNCTIONS, MODIFIERS PARAMETER,
BANK/PAGE
Single
Boost/Cut
Wrap
Spread
On/Off

User’s Guide
14
C4 Commander
Scribble Strips
The scribble strip displays a name describing
the parameter. The name can be modified in the
Edit window.
SPLIT
The SPLIT button toggles the controls on the
C4 such that two open setups can be displayed
on a single C4 page. Use the arrow keys to
scroll through the currently selected bank's
parameters (as shown by the C4C on-screen
highlighted controls).
Press the SPLIT button once and the 1/3 mode
is activated. Bank 1 controls the current layout,
and banks 2-4 control the next consecutive open
layout (as displayed in the Edit window).
Press the SPLIT button again, and the 2/2
mode is activated, where banks 1 and 2 control
the current layout, and banks 3 and 4 control
the next open layout.
Press the SPLIT button again to activate the
3/1 mode, where banks 1-3 control the current
layout, and bank 4 controls the next open layout.
Press the SPLIT button again to turn off the
SPLIT mode, and all four banks control the cur-
rently selected layout.
LOCK
When the SPLIT mode is enabled, you can lock
the upper or lower layout so that it is not af-
fected by the PARAMETER or BANK/PAGE
buttons. This allows you to retain frequently
used controls in one layout while scrolling
through another layout's controls.
FUNCTIONS
There are four buttons in the FUNCTIONS sec-
tion: VALUES and RUN/EDIT, and two buttons
that are not used.
VALUES: Press this button to display the cur-
rent values of all the controls in the scribble
strip. The LED above the button lights to indi-
cate that the VALUES button is active. Press
again to return to displaying the parameters.
RUN/EDIT: Press this button to open the Edit
window. It performs the same function as the
Run/Edit button in the upper-right corner of the
GUI. The LED above the button lights while in
Edit mode.
MODIFIERS
There are four modifier buttons: SHIFT, LAY-
OUT, VALUES, and one button that isn’t used.
SHIFT: When this momentary button is pressed,
turning a V-Pot will increment/decrement the val-
ue by the amount defined in the Settings window.
LAYOUT: Press this momentary button to dis-
play the current layout in the top line of the top
scribble strip.
VALUES: Press this momentary button to dis-
play the current values of all the controls in the
scribble strip. This works just like the VALUES
button in the FUNCTIONS section, except it is
momentary (the values appear only while the
button is pressed).
PARAMETER
LAYOUT Left and Right: Use these buttons to
scroll back and forth among the open layouts,
as they appear in the Edit window. If there is an
active split layout, these buttons scroll the ac-
tive bank of the split.
SPLIT, LOCK,
FUNCTIONS, MODIFIERS PARAMETER,
BANK/PAGE
Scribble Strip

User’s Guide
1
C4 Commander
SINGLE Left and Right: These buttons scroll
individual parameters left and right. If there are
multiple pages in a layout, the adjacent page
scrolls across the banks. A vertical dotted line
indicates the division between pages.
BANK/PAGE Navigation Buttons
BANK UP/DOWN: Use these buttons to scroll
banks of parameters up and down. If there are
multiple pages in a layout, the adjacent page
scrolls up from the bottom or down from the
top. A horizontal dotted line indicates the divi-
sion between pages.
PAGE L/R: These buttons scroll through the
pages in a layout. The right button scrolls in as-
cending order (1, 2, 3, etc.) and the left button
scrolls in descending order (3, 2, 1).
Navigating the C4 Commander
The C4 has four rows of eight V-Pots, for a to-
tal of 32 controls. For many MIDI controlled
instruments, that is enough to handle all the
parameters for the C4 to control. But some
instruments have more than 32 parameters to
control. The Emu Planet Phatt, for example,
has 224 parameters to control. This would re-
quire seven C4's (224/32=7) to control all the
parameters required.
The beauty of a digital MIDI controller is that
you can assign any parameter to any V-Pot, and
change it on the fly. With the push of a button,
you can reassign all of the V-Pots to another
set of parameters. This is where the concept
of "pages" comes in. The obvious analogy to
changing pages in the C4 Commander is turning
the pages of a book. We can create seven pages
in the C4 Commander to control all 224 param-
PARAMETER,
BANK/PAGE
eters on the Emu Planet Phatt. You simply push
the PAGE L and PAGE R buttons at the bottom
of the C4 to scroll among the pages and gain ac-
cess to the various controls.
In addition, you can use the BANK UP and
BANK DOWN buttons to scroll up and down,
bank by bank, as if the pages were aligned ver-
tically. A horizontal dotted line indicates the
division between the pages.
The SINGLE left and right buttons scroll the
parameters across the banks, one by one, as
if the pages were aligned horizontally, side by
side. A vertical dotted line indicates the division
between the pages.
You can also use the LAYOUT left and right
buttons to scroll between open layouts in the
Layout list. If you have two or more instruments
you want to control with the C4, this makes it
easy to quickly change the V-Pot assignments
to control different instruments.
But wait...there's more! What if you want to
have access to a few (or many) frequently-used
controls on two different instruments at the
same time? Use the SPLIT function to divide
the C4 so that some of the banks control one
instrument (Layout 1) and the other banks
controls another instrument (Layout 2). You
can still use the PAGE L/R, BANK UP/DOWN,
SINGLE L/R, and LAYOUT L/R buttons while in
split mode.
The best way to understand and get used to
these navigation controls is to just start using
them and see what happens on your own. So go
ahead and create a few sample layouts and start
experimenting with the navigation buttons.
You'll have it figured out in no time!

User’s Guide
16
C4 Commander
Creating a Layout
Let's go through the process of creating a sam-
ple layout, just so you get the idea.
1.
Open the C4 Commander software application.
2. Click the Edit button in the upper-right cor-
ner of the C4 graphic interface to open the
Edit window.
3. Click the Settings button in the upper-left
corner of the C4 graphic interface to open
the Settings window. Click the Instruments
tab. Select an instrument to control; the
Oberheim-Matrix 6/1000, for example. Click
the right button to add it to the list of Con-
trolled instruments.
4. Click OK to close the Settings window. The
Oberheim-Matrix 6/1000 should now appear
in the Instrument list under the Assign-
ments tab in the Edit window.
5. Click the New button next to the Layouts list
to create a new layout. It is given the default
name "Untitled."
6. Click and drag the Oberheim-Matrix 6/1000
from the Instrument list over to the first V-
Pot in the upper-left corner of the C4 graphic
interface, and release the mouse button
when the V-Pot is highlighted.

User’s Guide
17
C4 Commander
All the parameters for the Oberheim-Matrix
6/1000 are automatically assigned to the V-
Pots on the C4 sequentially.
7. Click the Save As button next to the Lay-
outs list and name the layout an appropriate
name, such as Oberheim. Click Save to save
it to the C4 Commander folder on your hard
drive.
8. Click the Run button in the upper-right cor-
ner of the C4 graphic interface to close the
Edit window.
9. You have now successfully created a layout.
Go ahead and experiment with the naviga-
tion buttons to see how the controls scroll
up and down and side to side.

User’s Guide
18
C4 Commander
• Click the Assignments tab and click-and-
drag the Novation-BassStation to the first
V-Pot in Bank 4. Since there are only seven
parameters to control on the Bass Station,
they will all fit on one bank.
• Again, we can modify how the parameter
names appear in the display in the Display
tab (see graphic below).
• Click the Run button and save the modified
layout. We now have all the controls as-
signed to the C4 that we want for the DR16
and Bass Station.
This is a simple example, but it gives you an
idea of the flexibility that you have with C4
Commander in assigning and control virtually
any MIDI parameter that you want with the C4.
Customizing a Layout
You may find that there are certain parameters
that you never use, and want to assign only
those parameters to the C4 that you use fre-
quently. You can customize a layout to suit your
needs.
Let's say you have an Akai DR16 Hard Disk
Recorder and a Novation Bass Station keyboard
that you want to control with the C4.
After you select the Akai-DR16 and the No-
vation-BassStation from the Instrument list,
create a new layout (let's call it DR16_BassSta-
tion.c4l).
• On the DR16, you want to use the C4 to ad-
just the levels for tracks 1-8 on the DR16.
• Click the Edit button in the upper-right cor-
ner of the C4 graphic interface and click the
Display tab.
• Click a V-Pot in the first bank to select it,
and enter "Akai DR16" in the Bank Name
box. Click the Bars checkbox to add dotted
lines on either side of the name.
• Click the Assignments tab and click the "+"
in front of Akai-DR16 to see the parameters.
• Shift+click to select Track 1-8 Levels and
drag them over to the first V-Pot in Bank 2.
This assigns the eight V-Pots to Track Level
1-8 on the Akai DR16.
• Click the Display tab and click the first V-Pot
in Bank 2. Change the text in Line 1 (under
Control) to "Track1" and the text in Line 2 to
"Level." This makes it more readable in the
display. Do the same for V-Pots 2-8.
• Now click a V-Pot in Bank 3 and enter "No-
vation Bass Station" for the Bank Name.
Click the Bars checkbox.

User’s Guide
19
C4 Commander
Need Help?
Contact our Technical Support staff at 1-800-898-3211, Monday to Friday,
from 7 am to 5 pm PST. After hours, please visit www.mackie.com and look
under Support, or email us at [email protected].
FUNCTION PARAMETER
TRACK SHIFT OPTION
MARKER
SPLIT CONTROL
LOCK
SPOT ERASE
MODIFIERS
FUNCTION
CHAN STRIP
2/2
TRACK L
SLOT UP
SLOT DOWN
TRACK R
BANK
SINGLE
ASSIGNMENT
3/1
1/3
/ALT
MACKIE CONTROL C4
CONTROL C4
DSP PLUG-IN CONTROLLER
VIRTUAL INSTRUMENT CONTROLLER
MACKIE CONTROL PHATT CHANNEL

16220 Wood-Red Road NE • Woodinville, WA 98072 • USA
United States and Canada: 800.898.3211
Europe, Asia, Central and South America: 425.487.4333
Middle East and Africa: 31.20.654.4000
Fax: 425.487.4337 • www.mackie.com
E-mail: [email protected]
Other manuals for C4 Commander
6
Table of contents
Other Mackie Software manuals