Manual del usuario
4Manual del usuario V 03/16
E Teclas e indicadores (fig. 3)
Fig. 3
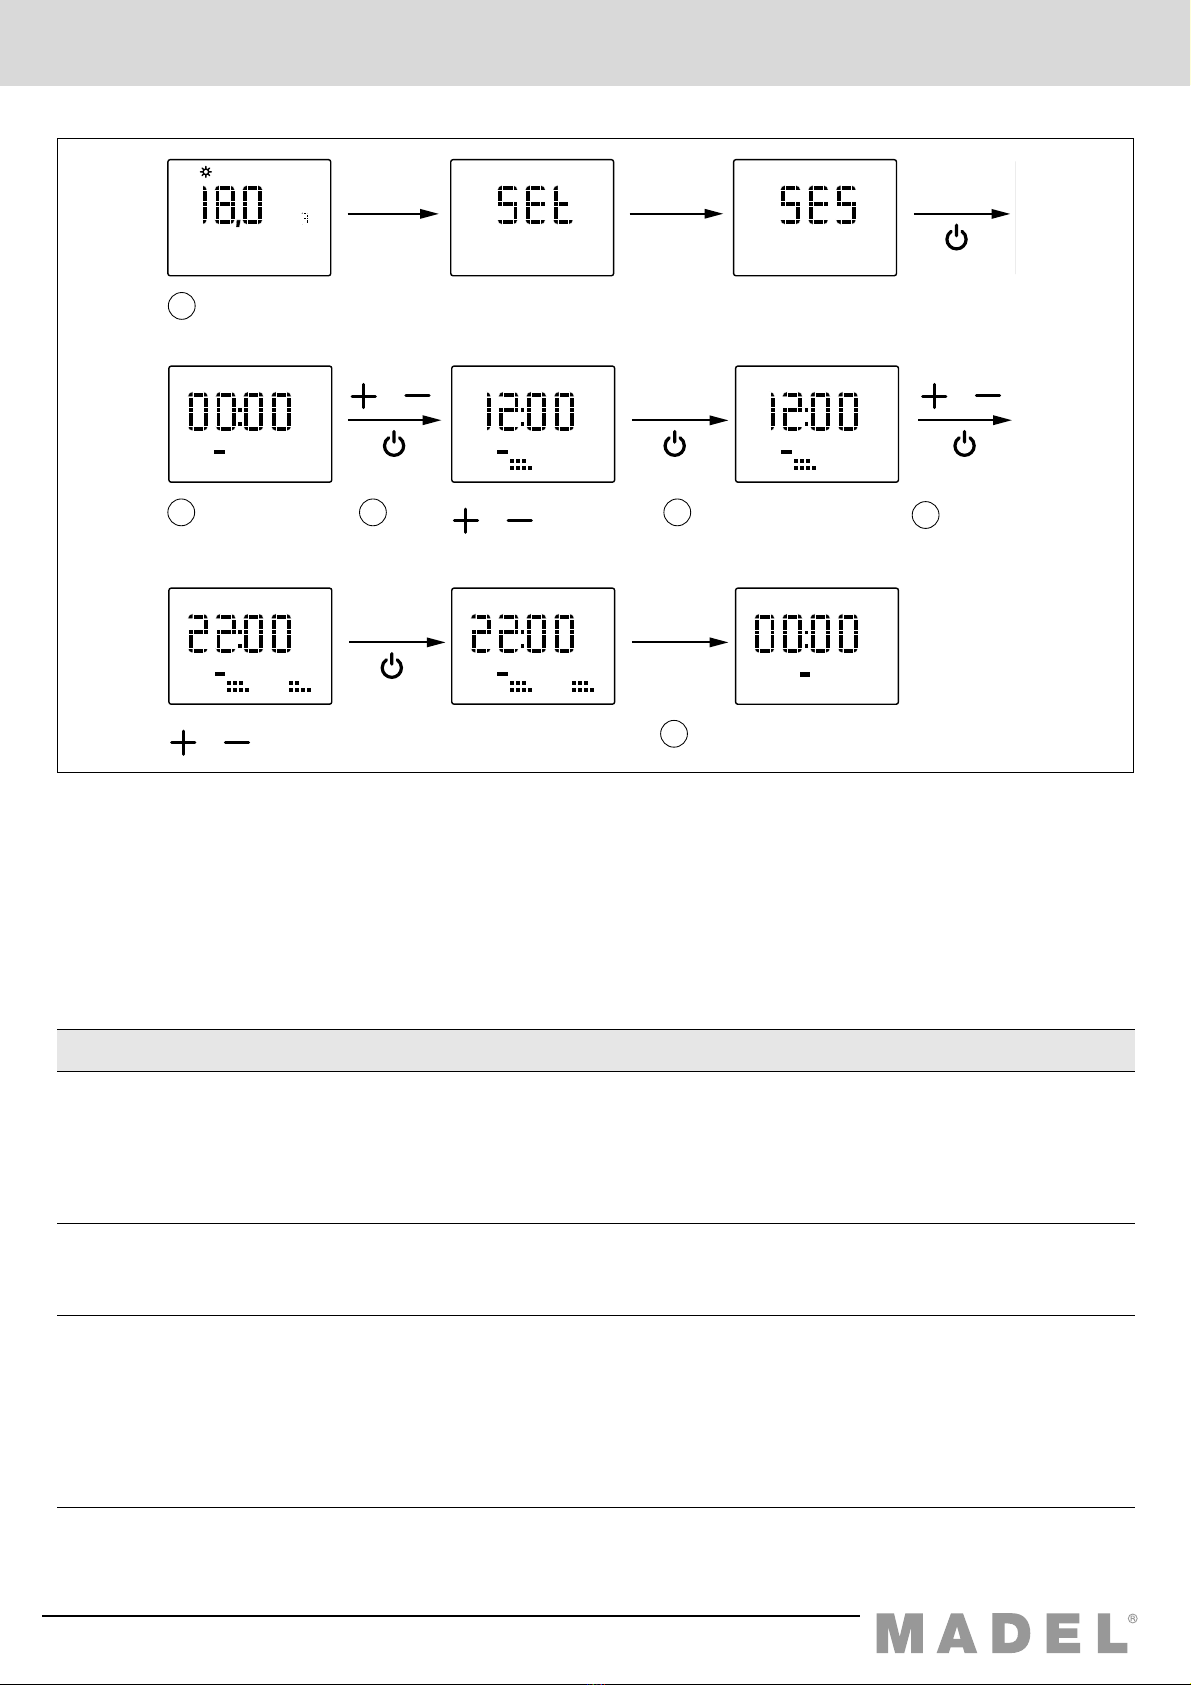
F Utilización
Configuración
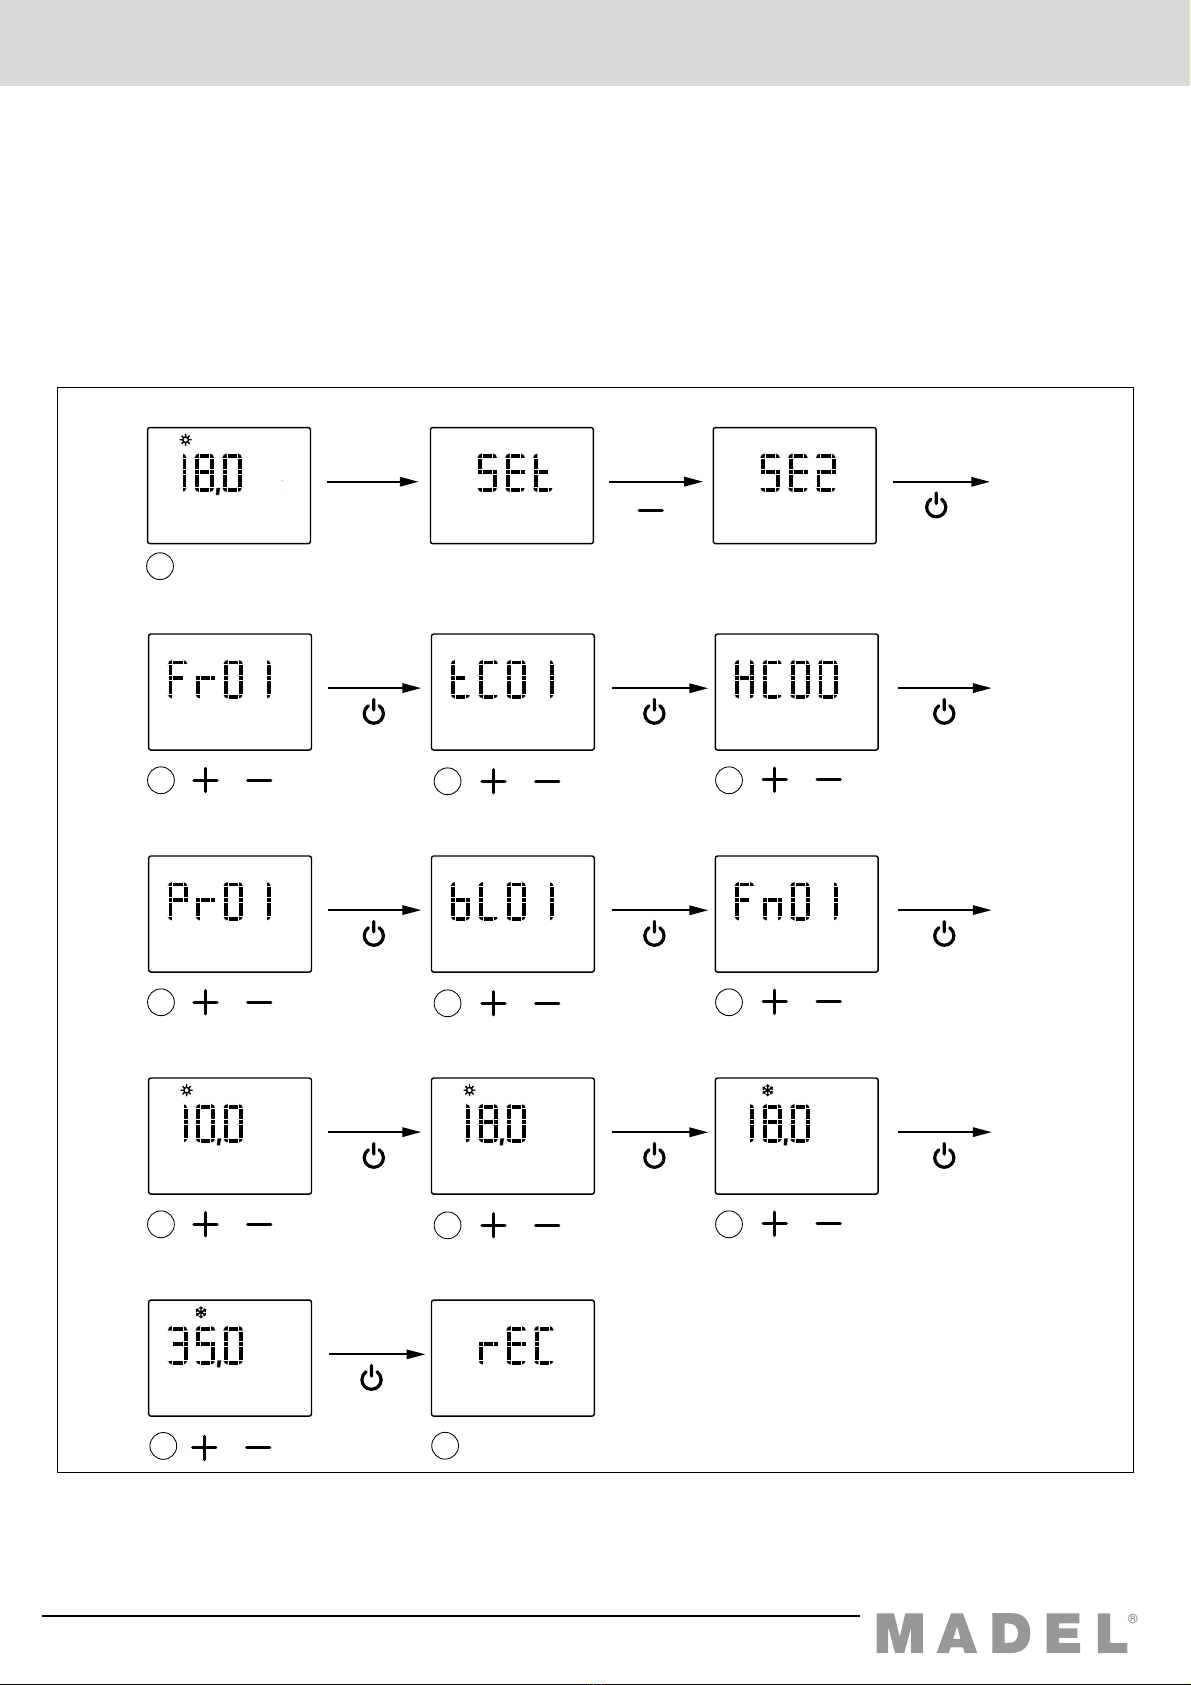
Antes de utilizar el termostato ZOE, debe haber sido
configurado por un instalador acreditado, tal como se
explica al final de este manual.
Encender el sistema
El encendido del sistema de zonificación sólo puede
hacerse mediante el termostato MASTER, que
normalmente está instalado en el recinto más concurrido:
1Pulse la tecla “ON/OFF” (16).
2Seleccione el modo de funcionamiento FRÍO / CALOR
/ CALDERA (14).
3Seleccione la temperatura de consigna mediante las
teclas “+” “-” (15/8).
Climatizar las zonas
Realice los siguientes pasos para cada uno de los
termostatos:
1Pulse la tecla “ON/OFF”.
2Seleccione la temperatura de consigna (teclas “+” / “-”).
Apagar las zonas
El apagado de una zona concreta se realiza desde su
termostato correspondiente:
1Pulse la tecla “ON/OFF” para cada zona que desee
desactivar.
Apagar todo el sistema
El apagado del sistema completo sólo puede hacerse
mediante el termostato MASTER:
1Pulse la tecla “ON/OFF” 2 veces, hasta que en el
display aparezca la palabra OFF y debajo del indicador
de zona aparezca MASTER. Indica el paro de toda la
instalación.
Modo Económico
El modo ECO modifica la temperatura de consigna en
±3ºC. Se activa en zonas desocupadas temporalmente
para mantener un cierto grado de confort, sin producir un
consumo excesivo de energía.
1Pulse la tecla “ECO” (11) para activar y desactivar esta
función.
Modo de funcionamiento (invierno/verano)
Sólo se puede cambiar mediante el termostato MASTER.
1Pulse la tecla (14) para cambiar de frío a calor o
viceversa.
2En el caso de comandar una caldera, posicionar en la
llama. El termostato MASTER actuará como termostato
de calefacción (sólo si la central lo permite).
3Para equipos que no permitan sustituir el termostato
máquina, el cambio de ciclo de frío-calor se debe
realizar tanto en el termostato máquina como en el
termostato maestro. Para evitar el paro del equipo de
climatización, el termostato de la máquina debe estar
siempre en demanda, siendo los termostatos de zona
los que asumen el control de temperatura.
Z
MASTER
OFF
ON
SYST
ECO
PROG
1234567
246810 12 14 16 18 20 22 24
ºC
TIMER
INFO
CLEAR
SET
DAY
PROG
COPY
ECO
FRESH
1 2 3
4
5
6
8
9
10
11
12
13
14
15
16
17
18
19
7
1 Temperatura de consigna / ambiente
2 Indicador velocidad ventilador
3 Indicador reloj
4 Indicador desgaste pilas
5 Indicadores Zona y Master
6 Indicador día de la semana
7 Indicador tramos horarios
8 Tecla bajar temperatura
9 Tecla “FAN” velocidad ventilador
10 Tecla “PROG” activar/desactivar programación semanal
11 Tecla “ECO”(modo económico ±3ºC)
12 Tecla “INFO” información sobre la configuración
13 Tecla “SET” acceso a la programación
14 Tecla “MODO” de funcionamiento (frío/calor/caldera)
15 Tecla subir temperatura
16 Tecla marcha/paro “ON/OFF”
17 Indicadores menú programación
18 Indicador termostato OFF
19 Indicadores modo de funcionamiento (frío/calor/caldera)