Magewell XI100XUSB-PRO User manual

http://www.magewell.com
Copyright © 2009-2010 All Rights Reserved. Nanjing Universal Networks Co. i
XI100XUSB-PRO
All in One HD USB3.0 Capture Box
User’s Guide
Rev 1.0
2013/3/20

http://www.magewell.com
ii Copyright © 2009-2010 All Rights Reserved. Nanjing Universal Networks Co.
Content
1Preface....................................................................................................................................................... 1
2Minimum Hardware Configuration ........................................................................................................... 1
3Recommended Hardware Configuration................................................................................................... 1
4System Requirements................................................................................................................................ 1
5Hardware and Driver Installation .............................................................................................................. 2
6Connection of Video Input......................................................................................................................... 2
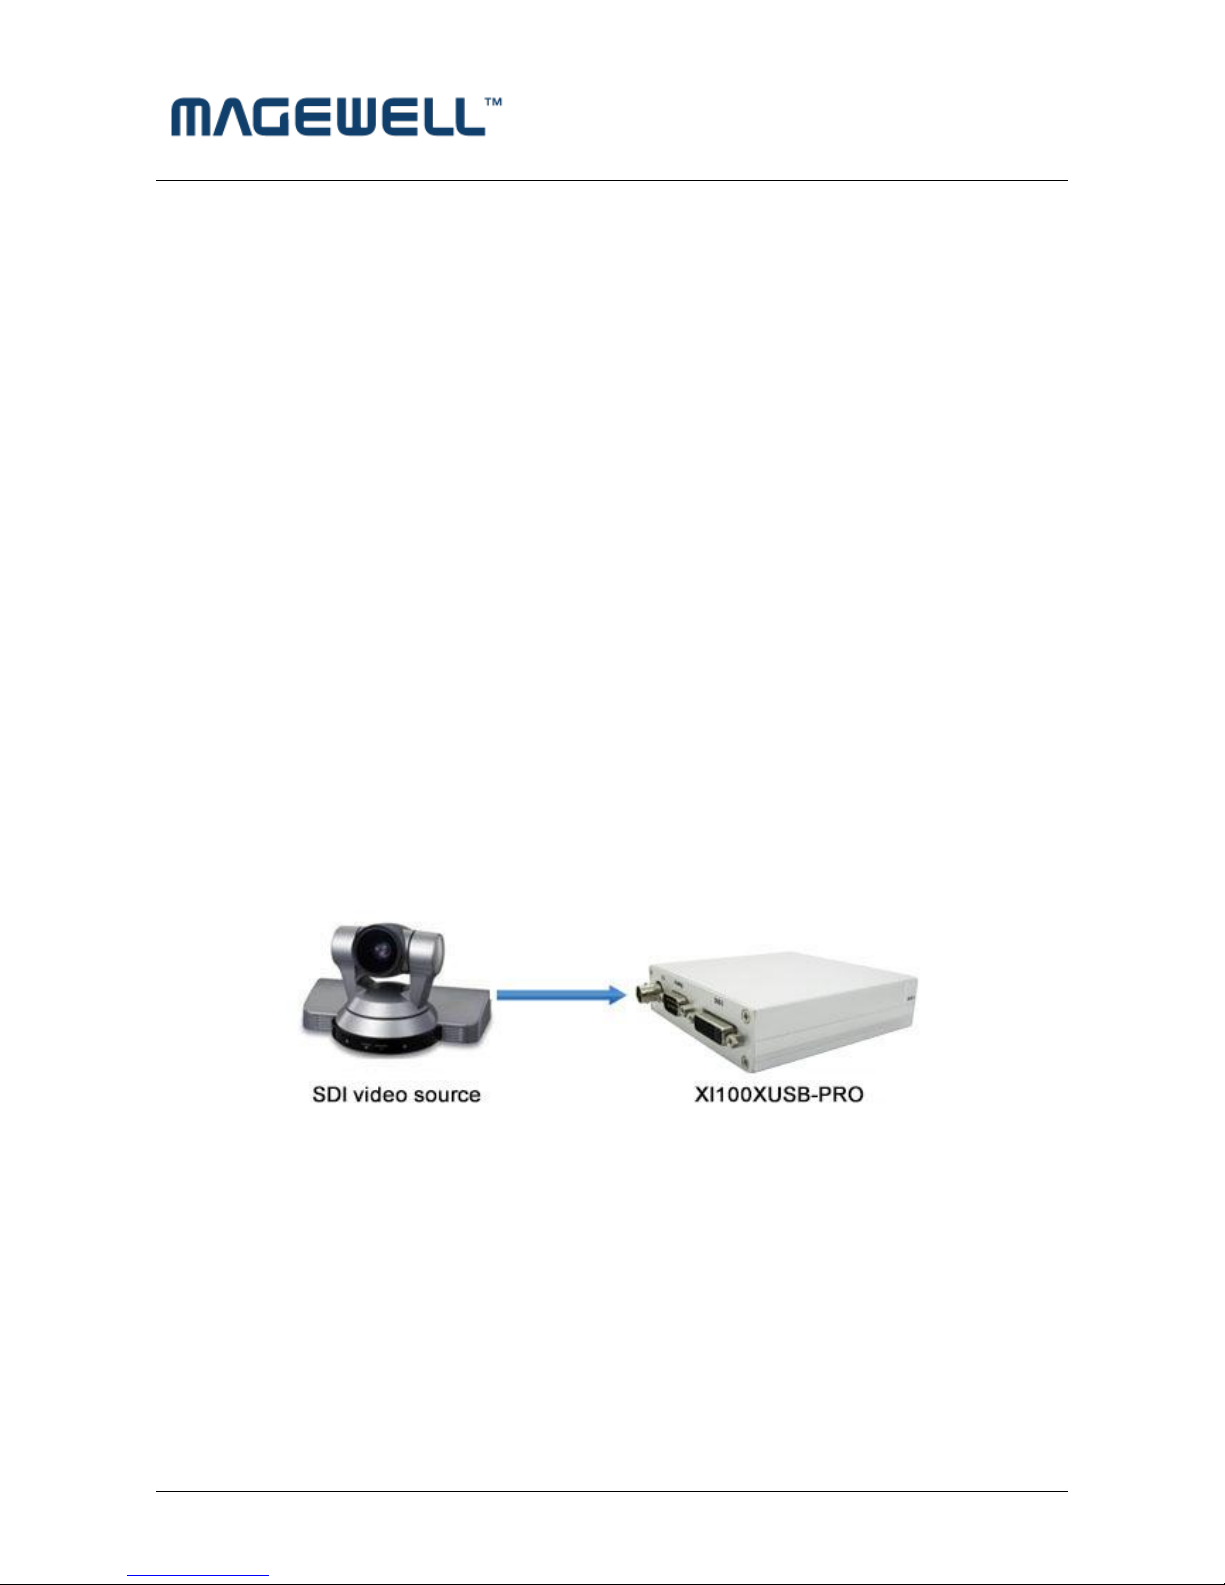
6.1 SDI Signal ............................................................................................................................................ 2
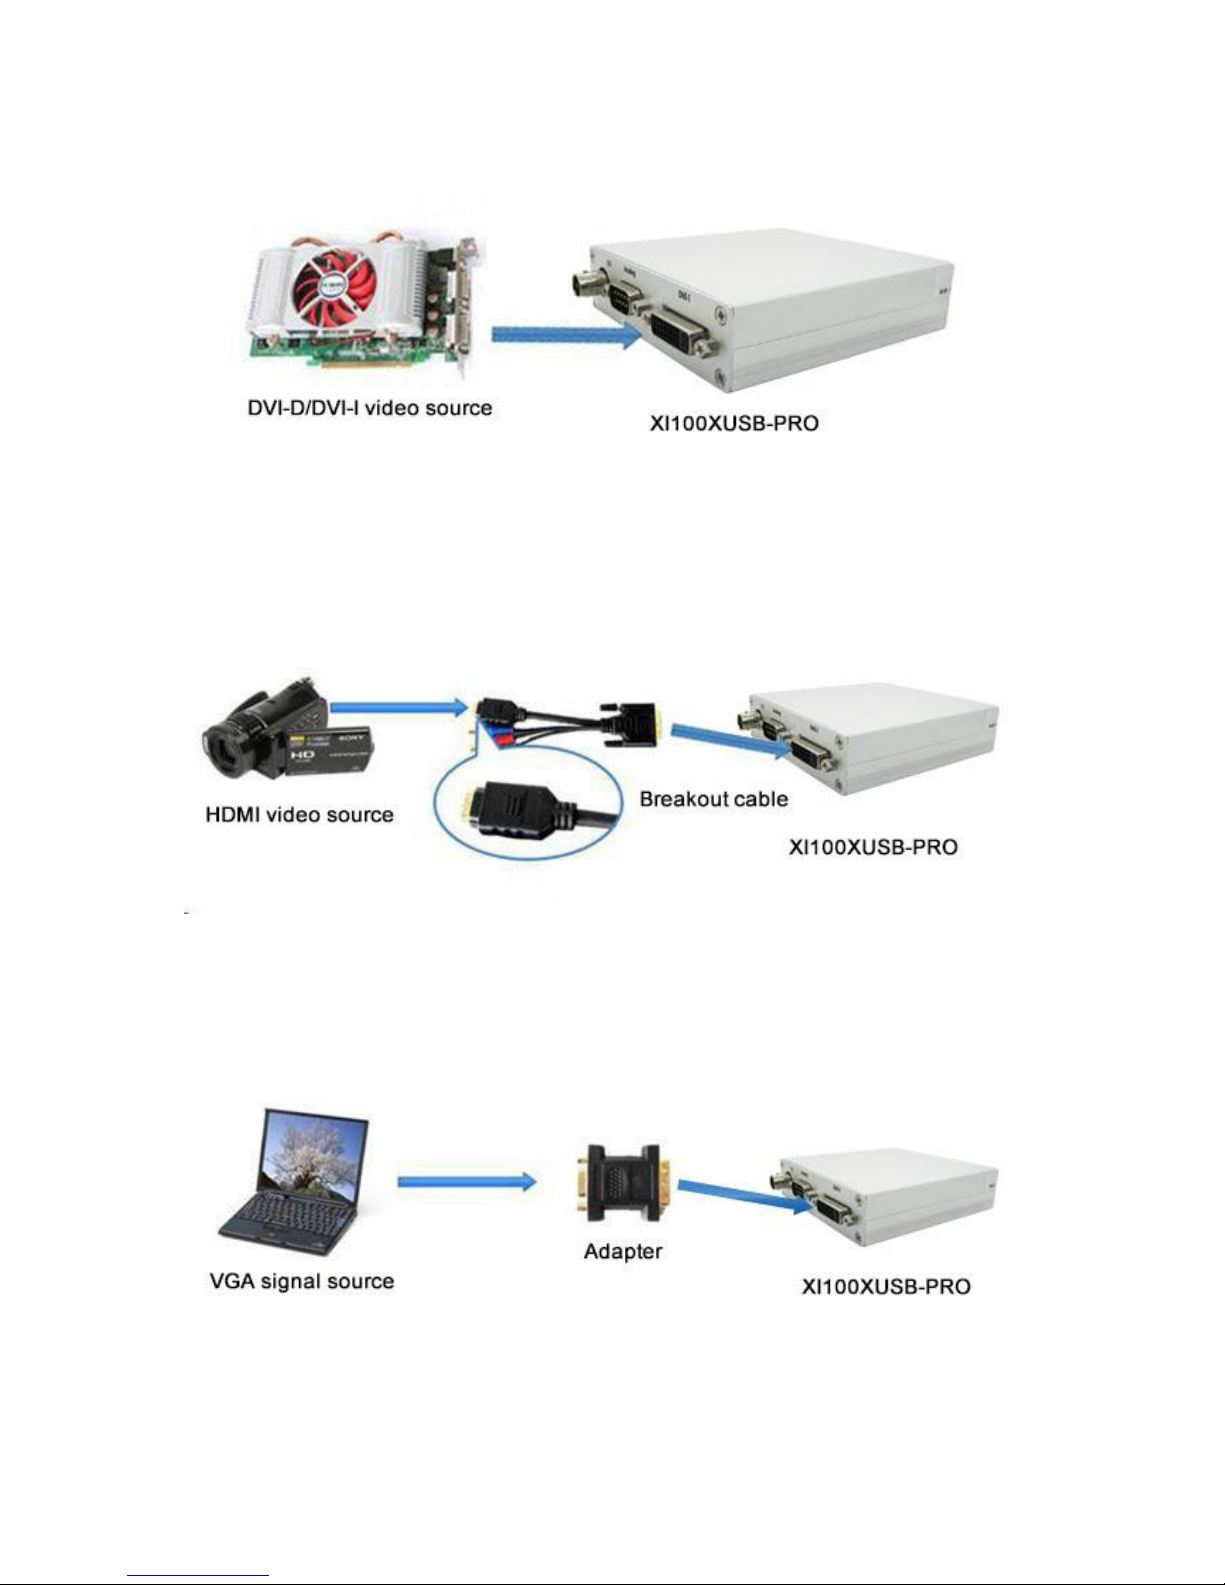
6.2 DVI-D/DVI-I Signal .............................................................................................................................. 3
6.3 HDMI Signal........................................................................................................................................ 3
6.4 VGA Signal .......................................................................................................................................... 3
6.5 YpbPr Signal........................................................................................................................................ 4
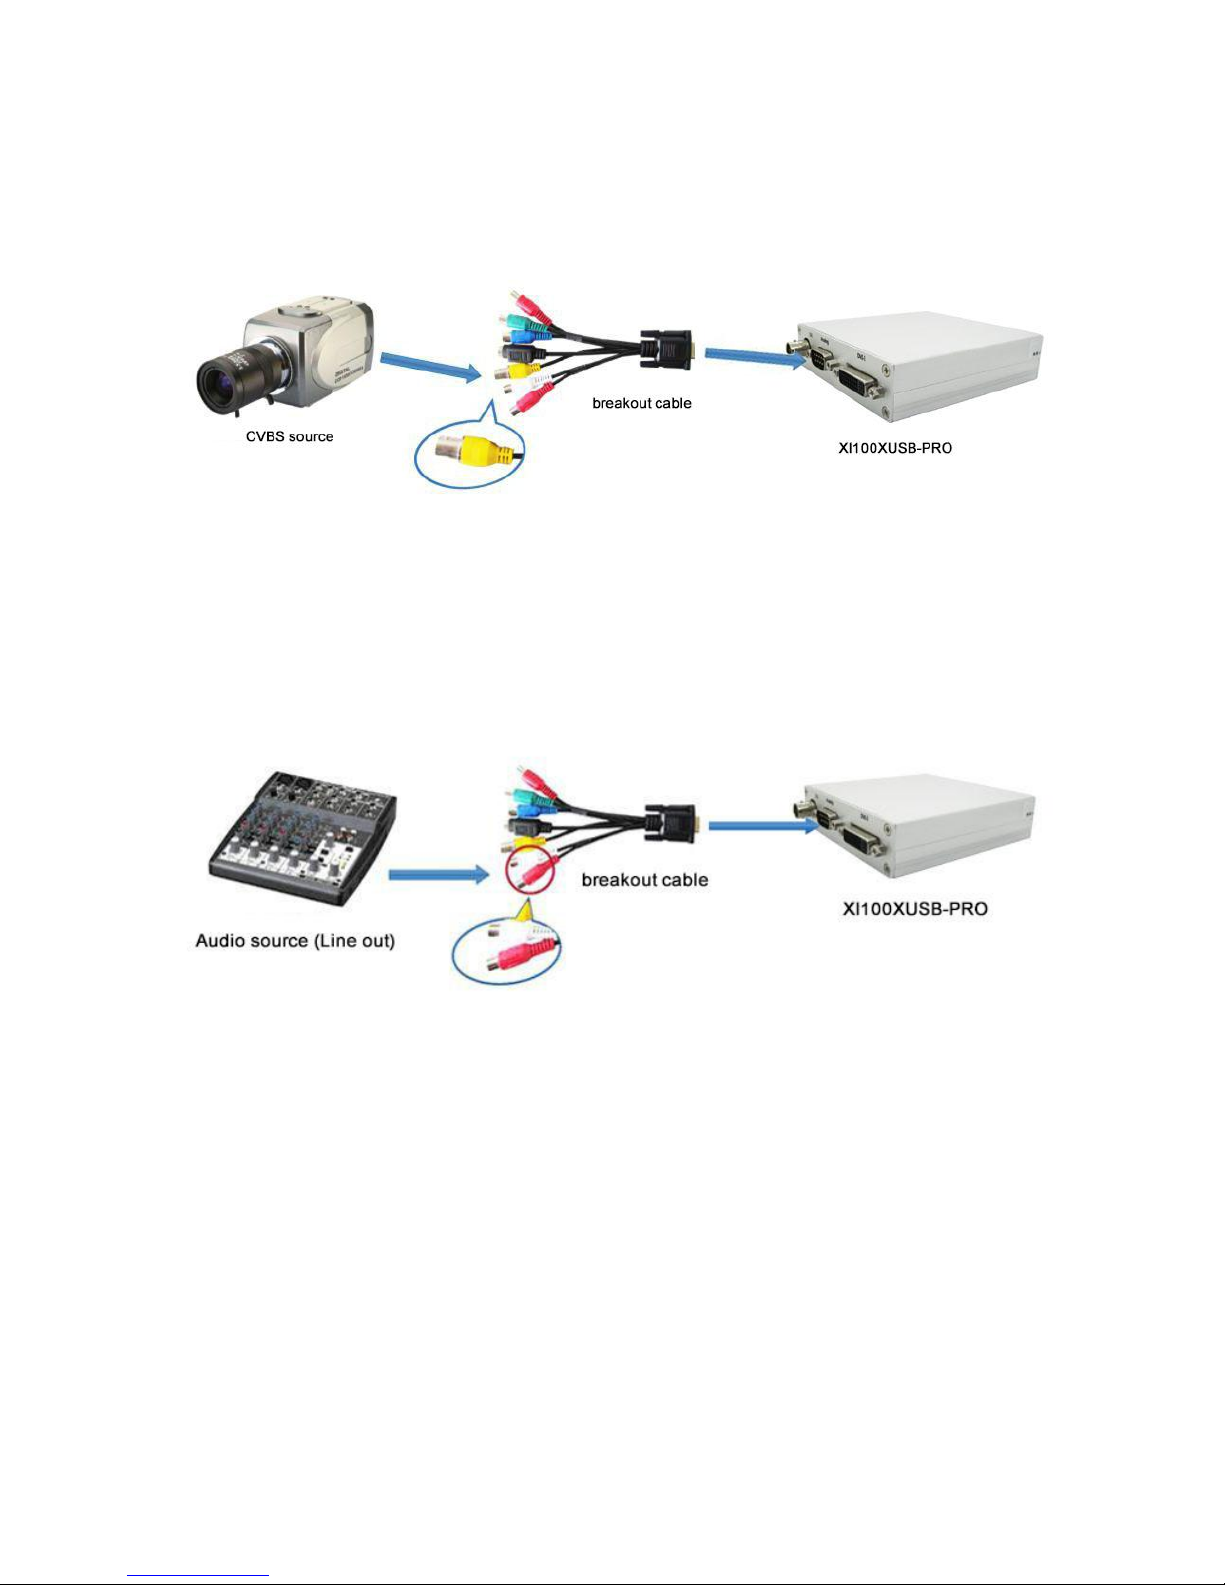
6.6 CVBS signal ......................................................................................................................................... 4
6.7 S-Video signal ..................................................................................................................................... 5
7. Connection of Audio Signal ....................................................................................................................... 5
8Video Capture Device Instruction.............................................................................................................. 6
8.1 Display "Filter Properties Dialog Window" In Common Software ..................................................... 6
8.2 “Device” Instruction ........................................................................................................................... 6
8.3 "Advanced Settings" Instruction ........................................................................................................ 8
8.3.1 Input Signal..................................................................................................................................... 9
8.3.1.1 Input Interface................................................................................................................................ 9
8.3.1.2 Signal Status ................................................................................................................................... 9
8.3.2 Image Adjustment .......................................................................................................................... 9
8.3.3 Image Output................................................................................................................................ 10
8.4 "Color Adjustment" Instruction........................................................................................................ 11
9Video Formats Setting ............................................................................................................................. 12
9.1 Display "Filter Output Pin" In Common Software............................................................................ 12
9.2 “Out Format” Instruction ................................................................................................................. 12
10 Audio Capture Device Instruction ........................................................................................................... 13
10.1 Windows XP, Windows 2003............................................................................................................ 13

10.2 Windows Vista, Windows 7, Windows 2008, Windows 2008 R2........................................................ 14
11 Compatible Software Instruction ............................................................................................................ 15


http://www.magewell.com
Copyright © 2009-2010 All Rights Reserved. Nanjing Universal Networks Co. 1/16
1Preface
Thank you for purchasing XI100XUSB-PRO USB3.0 capture box!
The XI100XUSB-PRO capture box has a small size and is easy to carry, superior
performance and flexible characteristics. The XI100XUSB can capture one High-
Definition video signal or one Standard Definition video signal and one stereo analog
audio signal. Video input can connect with SDI, HDMI, DVI, Component (YPbPr),
VGA, CVBS, S-VIDEO.
The user‟s guide will provide with necessary instruction for proper use of
XI100XUSB-PRO capture adapter.
2Minimum Hardware Configuration
Intel Core Solo
1G of RAM
Available USB 3.0 interface
3Recommended Hardware Configuration
Intel Core i5
2G of RAM
Available USB 3.0 interface
4System Requirements
System should be one of the following systems (x 86 version or x64 version):
Microsoft Windows XP

http://www.magewell.com
2/14Copyright © 2009-2010 All Rights Reserved. Nanjing Universal Networks Co.
Microsoft Windows Server 2003
Microsoft Windows Vista
Microsoft Windows Server 2008
Microsoft Windows 7
Microsoft Windows Server 2008 R2
5Hardware and Driver Installation
Please refer to "XI100XUSB-PRO Installation Guide" to install the hardware and
the driver.
6Connection of Video Input
6.1 SDI Signal
Figure 1, SDI signal connection sketch map

6.2 DVI-D/DVI-I Signal
Figure 2, 6.2 DVI-D/DVI-I signal connection sketch map
6.3 HDMI Signal
Figure 3, HDMI signal connection sketch map
6.4 VGA Signal
Figure 4, VGA signal connection sketch map

http://www.magewell.com
4/14Copyright © 2009-2010 All Rights Reserved. Nanjing Universal Networks Co.
6.5 YpbPr Signal
Figure5, first YpbPr signal connection sketch map
Figure6, second YpbPr signal connection sketch map
Note: Second YpbPr signal should be chosen manually.
6.6 CVBS signal

Figure7, CVBS signal connection sketch map
6.7 S-Video signal
Figure8, S-video signal connection sketch map
7.Connection of Audio Signal
Figure 9, audio line in signal connection sketch map
Notes: The audio signal input is up to" Line in" level standard, if you need to connect
microphone , must connect microphone with microphone input of "microphone
amplifier" or "mixer" , and then "microphone amplifier" or " mixer "output is
connected to the interface.

http://www.magewell.com
6/14Copyright © 2009-2010 All Rights Reserved. Nanjing Universal Networks Co.
8Video Capture Device Instruction
XI100XUSB-PRO is based on Microsoft DirectShow interface, one HD video
capture device will be increased in operating system after installation:
HD Video (XI100XUSB-Pro Box 1)
XI100XUSB-PRO not only offers basic options, such as image brightness, contrast,
hue, saturation, Gamma and so on, but also provides additional options for setting
function. You can use "Filter Properties dialog window" in DirectShow to set these
options.
8.1 Display "Filter Properties Dialog Window" In Common
Software
AMCAP: Double click "AmCap.exe", choose HD video device "HD Video
(XI100XUSB-PRO Box 1)" in "Devices" menu, then click "Video Capture
Filter ..." in "Settings" menu, pop-up " Filter Properties dialog window".
8.2 “Device” Instruction

Figure 10, Device Properties tab
Device Number: display serial of card, the number should be accorded with the
barcode on the card.
Version: display related version number; versions include hardware version,
firmware version, driver version, and device serial. You may request user to provide
relevant version number when you solve problems.
Firmware: if new features need to upgrade the firmware, we should first backup it
and then upgrade the firmware.
Notes: The different versions of the firmware and hardware cannot be mixed together,
or else it will get error when upgrade. Additionally, do not power outage in the
process of firmware upgrade, otherwise it will lead to upgrade firmware fail, then

http://www.magewell.com
8/14Copyright © 2009-2010 All Rights Reserved. Nanjing Universal Networks Co.
XI100XUSB will not work. You have to return back to factory for being repaired.
8.3 "Advanced Settings" Instruction
Figure 11, "Advanced Settings" page

8.3.1 Input Signal
8.3.1.1 Input Interface
By default, check “Auto Select Input Interface”, supporting input interface includes:
DVI / HDMI input, YPbPr input, CVBS input, S-Video input.
Notes: when “Auto Select Input Interface”is selected, if SDI, HDMI and YPbPr
input interfaces all have signal access, then SDI input is preferred. You must select
CVBS and S-Video input manually, otherwise it will be identified with YPbPr input.
8.3.1.2 Signal Status
The relevant parameters of signal are shown, such as total number of rows, frame rate
(p is progressive scan, i is interlaced), mode, audio frequency.
8.3.2 Image Adjustment
By default, image is auto, but auto cannot achieve desired effect, such as black border,
unclear image, picture which needs clipping, it must be adjusted manually. After
adjustment, you can save the preset. Then you can apply preset values without
adjustment when the same signal accesses.
For example as VGA signal adjustment:
Black border adjustment: Through adjust left margin and top margin to
eliminate black border. Every time you can adjust 1 pixel.
Image clipping: Through adjust image width, height, left margin and top margin
to achieve desired requirement. Increasing/reducing width of image starts from
right, increasing/reducing height of image starts from below.
Select the correct resolution: For the resolution with same number of row, the
capture boxes may not recognize the correct resolution, like
1024x768、1280x768、1360x768, 1368x768, the number of rows are all
768,automatic adjustment may all recognition into 1024x768, then click
automatic adjustment will pop up as shown in the following figure list, the user

http://www.magewell.com
10/14Copyright © 2009-2010 All Rights Reserved. Nanjing Universal Networks Co.
can select the correct resolution.
Image clipping: Through adjust image width, height, left margin and top margin
to achieve desired requirement. Increasing/reducing width of image starts from
right; increasing/reducing height of image starts from below.
Skills of image clipping as follows:
1. Set scale full output image to confirm whether clipping adjustment is
appropriate.
2. Cut off left margin of image: firstly increase left margin, then reduce image
width.
3. Cut off right margin of image: reduce image width.
4. Cut off top margin of image: firstly reduce image height, and then increase
top margin.
5. Cut off lower margin of image: reduce image height.
After image adjustment completes, click "Save Preset" to save current adjustment;
click "Del preset" to delete preset you saved; click "Apply Preset" to apply the saved
preset to current settings.
8.3.3 Image Output
Display output format of current image, set image zoom scale, deinterlace and
image flipping.
Format: display output image size, frame rate, color format.

Scale: if image size is not unified with user setting, we provide three ways,
full output image and keep aspect ratio, fill border to black and keep aspect
ratio, clip border. Full output image and keep aspect ratio is default.
De-interlace: vertical blend, motion adaptive. Motion adaptive is better, but it
takes up high CPU usage, also you can choose “disabled”.
Image: offer two ways, vertical flip and mirror.
8.4 "Color Adjustment" Instruction
Figure13
,
“Color Adjustment”properties page
Here can be adjusted R, G, B brightness and contrast separately, click "Default" to

http://www.magewell.com
12/14Copyright © 2009-2010 All Rights Reserved. Nanjing Universal Networks Co.
restore default values.
9Video Formats Setting
Driver is redefined "Filter Output Pin" interface and unified standard for SD and
HD. Output resolution can be any size, even special resolution which is cut.
9.1 Display "Filter Output Pin" In Common Software
AMCAP: Double click "AmCap.exe", choose HD video device " HD Video
(XI100XUSB-PRO Box 1)" in "Devices" menu, then click “Video Capture
Pin ...”in "Settings" menu, pop-up " Filter Output Pin ".
9.2 “Out Format”Instruction
Figure 14,”properties page”
Color Space: offer five color formats, YUYV, UYVY, I420, RGB 24 Bits, and RGB
32 Bits.
Image Size: set image size of output, it can be written manually, or select output
resolution from “Presets”, the bold font resolution at the top is the same as capture

image, it is the best resolution.
Frame Rate: set output frame rate, it can be written manually, or select from
“Presets”. If application software is set output frame rate, now setting is no effect,
when you open again, it will return frame rate in application software.
10 Audio Capture Device Instruction
XI100XUSB-PRO support embedded HDMI and SDI in LPCM audio, based on the
Microsoft DirectShow interface. After installation in operating system, the relevant
audio devices will be added on. Any software which is compatible with DirectSound,
DirectShow can use the recording device for capturing sound.
10.1 Windows XP, Windows 2003
The name of audio capture device under Windows XP, Windows 2003:
HDMI In (XI100XUSB-PRO Box 1) , digital audio devices, embedded SDI or HDMI
audio signal.
Line In (XI100XUSB-PRO Box 1 , analog audio equipment
Through system "Volume Control" to adjust the recording volume, specific steps as
follows:
1. In system notification icon area on right corner double-click " " button to pop-up
"Open Volume Control" window.
2. Open "Options" menu, select "Properties" menu item.
3. In "Mixer", select "Digital In (XI100XE-PRO Box 1)" or „Line In
(XI100XUSB-PRO Box 1)‟, click "OK" button.
4. Corresponding volume control project will be displayed, this time you can operate
volume and "quiet" according to your requirement.

http://www.magewell.com
14/14Copyright © 2009-2010 All Rights Reserved. Nanjing Universal Networks Co.
Figure 15, Windows XP/2003“VolumeControl”-“Properties”dialogue
10.2 Windows Vista, Windows 7, Windows 2008, Windows 2008
R2
HDMI In (XI100XUSB-PRO Box 1) , digital audio devices, embedded SDI or HDMI
audio signal.
Line In (XI100XUSB-PRO Box 1 , analog audio equipment
Through system "Volume Control" to adjust recording volume, specific steps as
follows:
1. In system notification icon area on right corner right-click " "button, select
"Recording devices" in pop-up menu.
2. In pop-up list which displays recording device, select "HDMI In" or "Line In",

click "Properties" button, system will pop up device properties dialog window.
3. In Properties dialog box, select "Levels" property page, then you can operate
volume control and "Quiet" according to your requirement.
Figure16
,
Windows Vista/7 dialogue
11 Compatible Software Instruction
XI100XUSB-PRO can be compatible with variety of audio and video capture
software which is based DirectShow interface, and audio capture software which is
based DirectSound interface, such as:
Windows Media Encoder
Adobe Flash Media Live Encoder
Real Producer Plus

http://www.magewell.com
16/14Copyright © 2009-2010 All Rights Reserved. Nanjing Universal Networks Co.
VideoLAN for Windows
Table of contents
Popular Recording Equipment manuals by other brands

Panasonic
Panasonic SLPR300 - CD RECORDER operating instructions

Gantner
Gantner Q Series manual

Rupert Neve Designs
Rupert Neve Designs Portico 500 Series Operation manual

Gemtech
Gemtech OASIS Operation and maintenance instruction

Belden
Belden GRASS VALLEY DENSITE Series Guide to installation and operation

Cochlear
Cochlear Baha 4 user manual

IK Multimedia
IK Multimedia iRig Keys 25 user manual

Hameg
Hameg IEEE-488 FITTING INSTRUCTION

VADDIO
VADDIO Quick-Connect USB Mini Release Notes & Update Instructions

TC-Helicon
TC-Helicon SINGTHING quick start guide

DURASTAR
DURASTAR DRA1U09S1A installation manual

Audient
Audient ASP500 Series Operation manual