Magner 30 User manual

OPERATION MANUAL
Banknote Counting Machine

1. Overview
1-1. General Overview
○
1 CONTROL PANEL
○
2 HOPPER
○
3 HOPPER GUIDE
○
4 STACKER
○
5 THICKNESS ADJUSTMENT SCREW
1
2 3
4
5

1-2. Control Panel
[ Control Panel for Simple Counter ]
[ Control Panel for Counter with MG & UV ]
○
1 RESET/START : RESET & START BUTTON
○
2 BATCH : PRESET NUMBER OF NOTES
○
3 SPD : MACHINE SPEED
○
4 ADD : ACCUMULATED NUMBER COUNT
○
5 UV : ULTRA VIOLET DETECTION
○
6 MG : MAGNETIC DETECTION
○
7 DD : DIFFERENT SIZE DETECTION BY HEIGHT & LENGTH
(30SUMI ONLY FOR LENGTH)
○
8 DEN : DIFFERENT SIZE DETECTION BY HEIGHT (For Simple Counter)
○
9 A/M : AUTOMATIC & MANUAL COUNT
○
10 MODE : MACHINE SET-UP

2. Function of Control Panel
2-○
1. RESET / START
This button can be used to reset number of counting result shown on the
display or error messages or to start the machine operation.
2-○
2 BATCH
Expected the BATCH size of note numbers will be selected. When
reaching the BATCH number the machine stops operation.
2-○
3 SPD ( For Simple Counter Only )
It is the SPEED button which has 4 different speeds as shown under..
L-1 : 1,000 notes per minute
L-2 : 1,200 notes per minute
L-3 : 1,300 notes per minute
L-4 : 1,500 notes per minute
2-○
4 ADD
When pressing ADD button the accumulated total of notes will be shown
on the display when they have been counted.
2-○
5 UV ( Counter with UV Only )
The Ultra-violet detection function is capable of checking the authenticity
of the banknote paper by UV light.

2-○
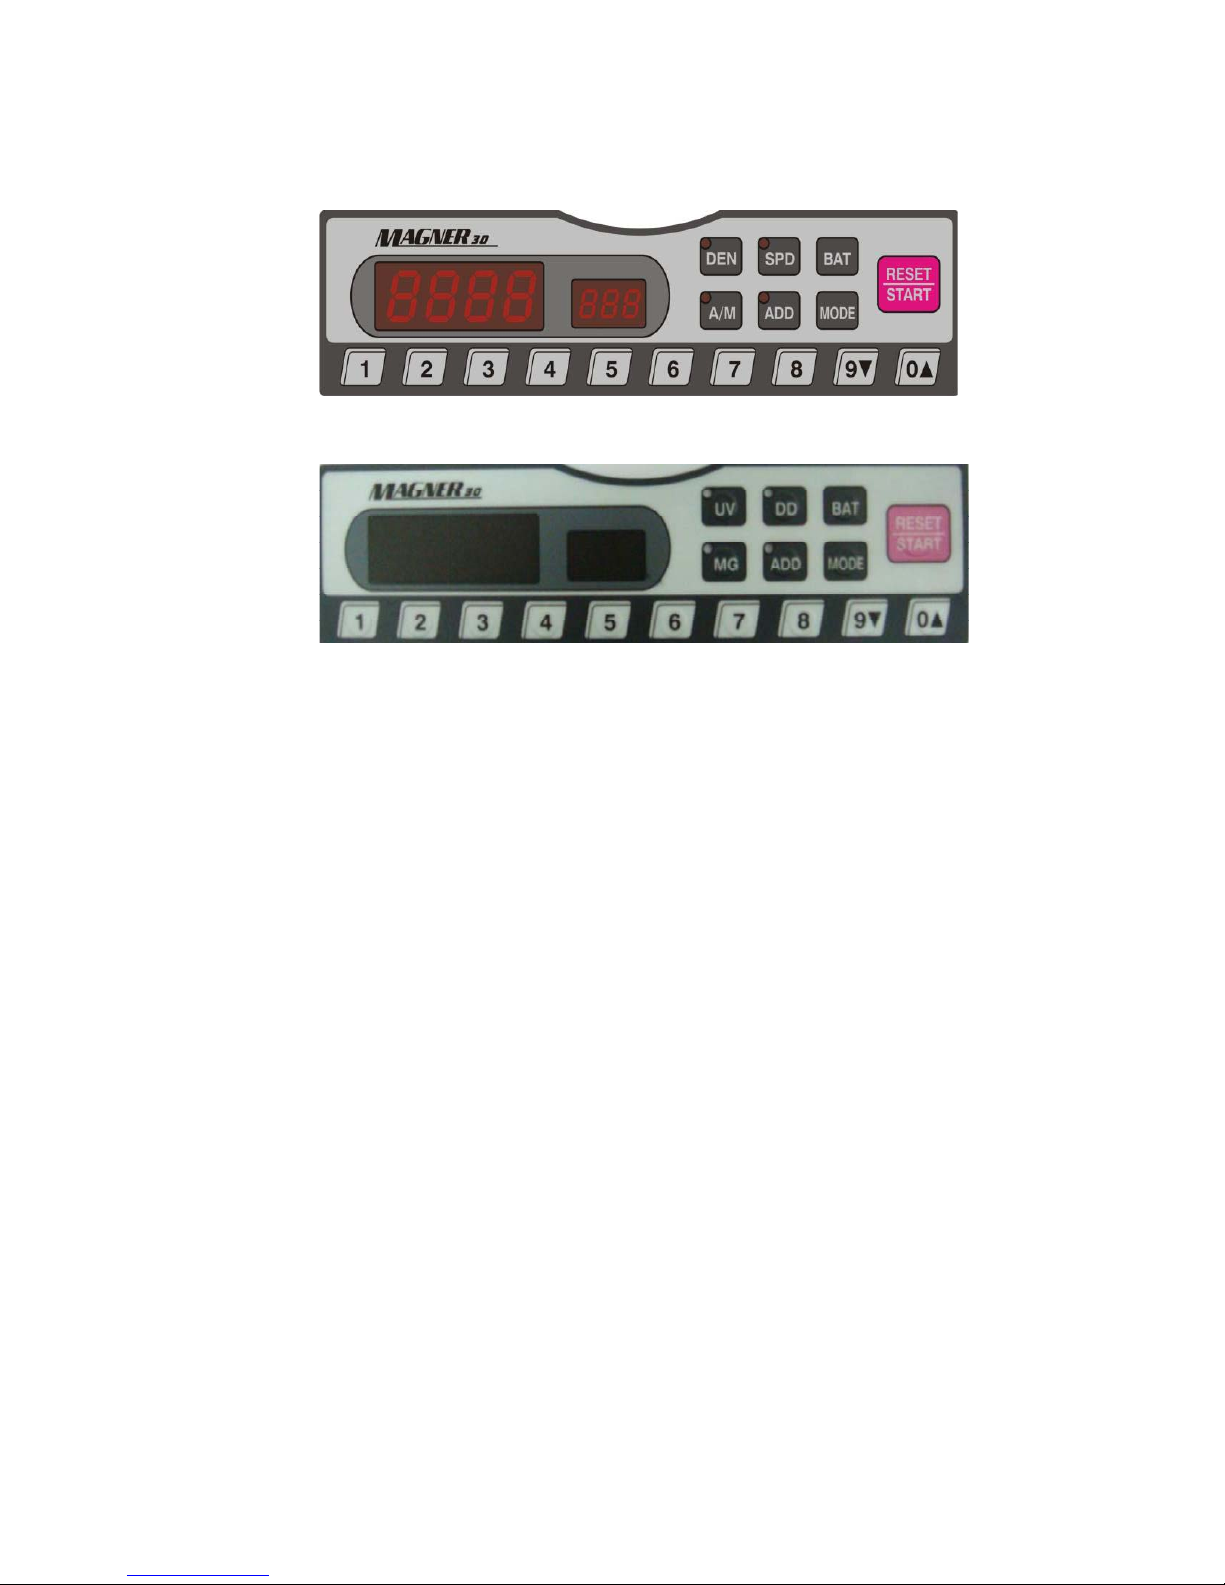
6 MG ( Counter with MG Only )
Magnetic sensor function is to examine the presence of the magnetic
composition on the surface of the banknotes.
When Counting DZD (Algerian Dinars) – MG OFF
When Counting USD (US Dollars) – MG ON
2-○
7 DD ( For Counter with UV & MG Only )
When switching on DD it automatically detects the different size of note
by height detection based on the firstly scanned note size.
However, each of denominations should have more than 6mm difference in
height and length. (30SUMI ONLY FOR LENGTH)
1) Press DD button once (dd-A Ht_) : 3mm Height
2) Press DD button twice (d2-A br_) : 6mm Length
3) Press DD button 3 times (dd-A ALL) : 3mm Height & 6mm Length
4) Press DD button 4 times (OFF) : Function Off
2-○
8 DEN ( For Simple Counter Only )
2-○
9 A/M ( For Simple Counter Only )
When A/M button is on machine will be starting automatically in case the
hopper sensor detects any notes placed. In case of A/M button is off the
machine is running manually whenever RESET/START button is pressed.

2-○
10 MODE
When pressing “MODE” button 5 times you may move to “ dAtA Set”
showing on the display. Then press MODE button again in order to move
to the following mode set-up. You can select each of levels like
speed/density/batch/beep on&off/stacker alarm by 9 and 0 button.
-. Ed-A : Density Levels
-. SS-A : Short & Chain note detection
-. bt-A : Batch number preset
-. bu-A : Beep on/off
-. St-A : Stacker Alarm
-. SPd : Speed Change
(30UD, 30UMD, 30SUMI & 30SU Only)
L-1 : 1,200 notes per minute
L-2 : 1,300 notes per minute
L-3 : 1,500 notes per minute
L-4 : 1,800 notes per minute
-. At-n : Auto / Manual Start(For 30UMD & 30SUMIOnly )
- HP-t : Hopper Alarm
- bL-A : Length & Chain note detection
(For 310S & 310SU Only)
In order to exit the MODE function press RESET/START button.
For the details of the MODE functions you may refer to the SERVICE
MANUAL- SERVICE MODE . It shows the way as to how to change each
of set-up.

3. Recovery of factory set-up
In case you need to reset all the set-ups you changed or you would like
to recover the factory default configuration you may take the following
steps.
3-○
1 press 9 1 1 1 button
3-○
2 press MODE button 10 times
3-○
3 press RESET/START button

4. Error Codes
Error Codes Reason Solution
E-db Two notes have passed Check the Note
E-CH 2 or more notes have passed Check the Note
E-HF Half size note has passed Check the Note
E-JA Notes are jammed in the M/C Remove the Note
E-FE Machine runs but no Notes Check the Hopper
E-HP Dirt on Hopper Sensor Clean the Sensor
E-St Dirt on Stacker Sensor Clean the Sensor
E-C1 Dirt on Left Count Sensor
Clean the Sensor
Check the Cable
E-C2 Dirt on Right Count Sensor
E-C3 Dirt on both Count Sensors
E-En Encoder Sensor Problem Check the Sensor
E-Pr Note Skew (right side) Count Again
E-PL Note Skew (Left side) Count Again
E-CF UV Error Fake Note
E-FC MG Error Fake Note
E-dd Different Size Note by Height Remove the Note
E-tE Short size note has passed Check the Note

5. Specification
Main Voltage AC 100-240V, 50/60Hz, 1.5A
Power Consumption 40 W
Dimension 255(H) X 270(W) X 260(D) mm
Weight 6 Kg
Document Size 100~185 (D), 60~100mm (H)
Speed 1000/1200/1300/1500 per min
(for Simple Counter)
1200/1300/1500/1800 per min
(for 30UD, 30UMD & 30SUMI
Only)
Hopper Capacity 300 notes ( up to 500 notes )
Stacker Capacity 300 notes
6. Maintenance
6-○
1 When cleaning the Sensors please do not use any Chemicals
6-○
2 Clean the Sensors by soft brush provided periodically

“ CAUTION : Any Changes of modifications in construction of this device
which are not expressly approved by the party responsible
for compliance could void the user’s authority to operate the
equipment.”
“ NOTE : This equipment has been tested and found to comply with
the limits for a Class A digital device, pursuant to part 15 of
the FCC Rules. These limits are designed to provide reasonable
protection against harmful interference when the equipment is
operated in a commercial environment.
This equipment generates, uses and can radiate requency
energy and if not installed and used in accordance with the
instruction manual, may cause harmful interference to radio
communications.
Operation of this equipment in a residential area is likely to cause
harmful interference in which case the use will be required to
correct the interference at his own expense.”
Table of contents
Other Magner Banknote Counter manuals