INSTRUCCIONES DE MONTAJE
MUCHO# FECHA DE COMPRA / /
UPC#849392013102/849392013096
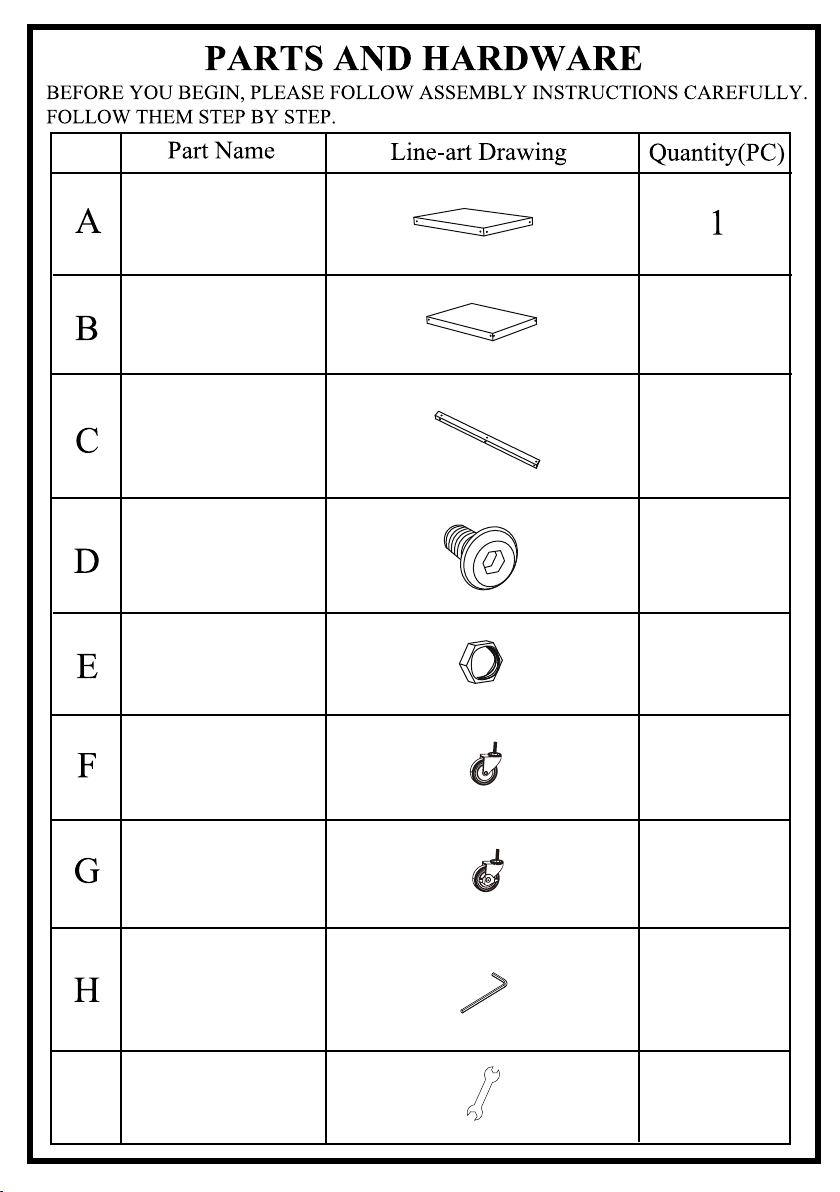
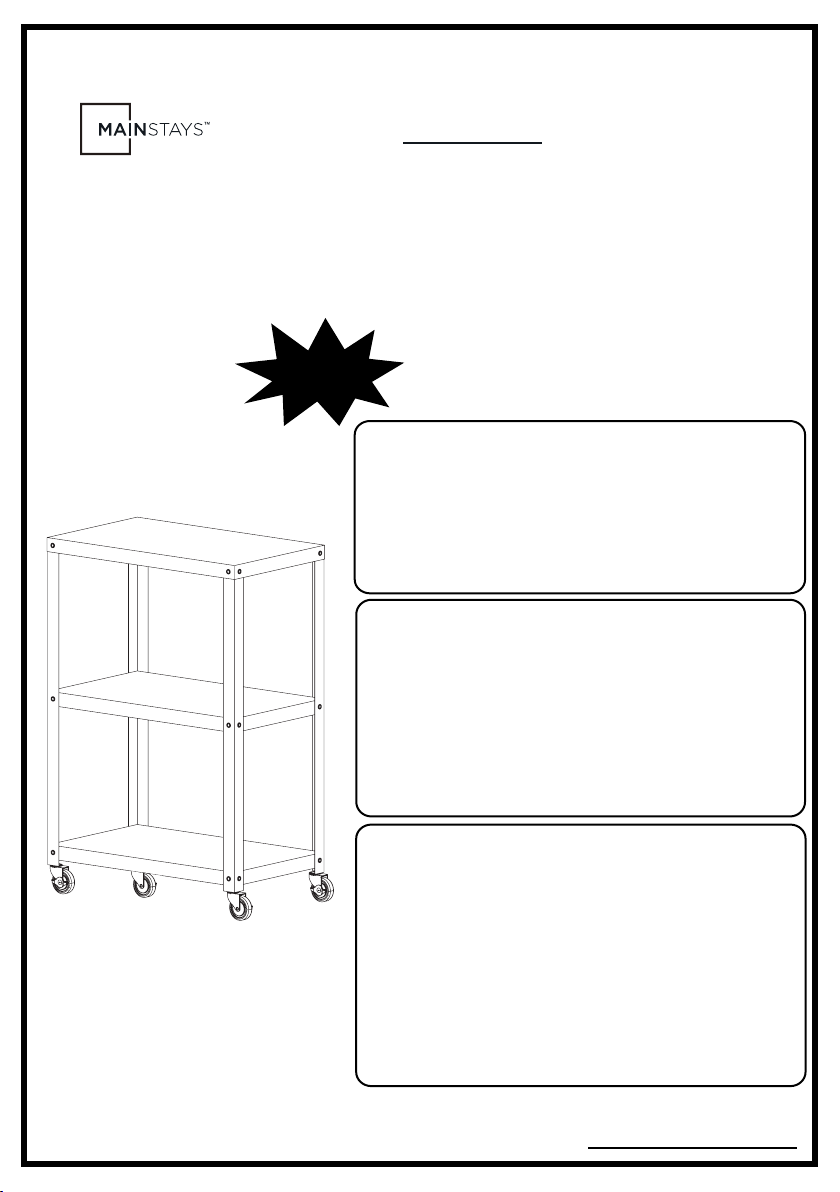
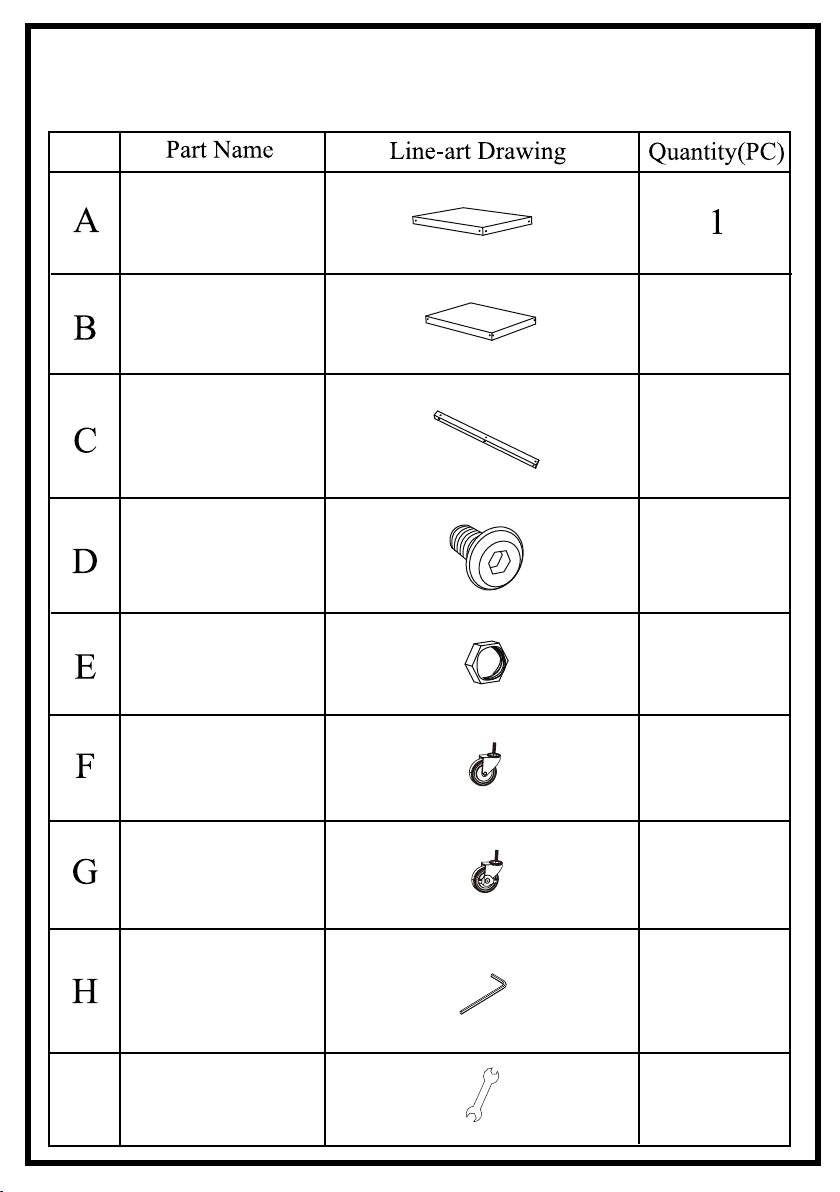
Carro de metal de 3 niveles
MS59-020-098-01/MS59-020-098-02
Easy Home Organization Manufacturing Co., Ltd
¡¡¡ADVERTENCIA!!!
Esta unidad está diseñada para usarse solo con los
productos y los pesos máximos indicados.
MAXIMUM SAFE CARGA: 120 libras (54.4kgs)
El uso con otros productos o productos con un peso
mayor que el peso máximo indicado puede resultar en
inestabilidad y causar lesiones. Los muebles pueden
volcarse o romperse si se mueven incorrectamente.
Pida ayuda a un amigo para levantar y llevar la
unidad a su nueva ubicación.
Por favor, informe al servicio al cliente:
2. La descripción del artículo es:
1. Has comprado este artículo de Wal-Mart
Carro de metal de 3 niveles
MS59-020-098-01/MS59-020-098-02
3. El número de stock del vendedor es
4. El número de parte / letra y la cantidad necesaria
Si tiene esta información lista, podremos
procesar su solicitud de inmediato. Gracias
¿NECESITAS AYUDA? Para obtener ayuda con
el montaje o el pedido de piezas faltantes, llame
gratis a nuestro servicio de asistencia:
1-855-968-6917 entre las 9 a.m. y las 4 p.m. (Hora
central) de lunes a viernes.
O envíenos un correo electrónico:
ESTE FOLLETO DE INSTRUCCIONES CONTIENE
INFORMACIÓN IMPORTANTE DE SEGURIDA.POR
FAVOR LEA Y MANTENGA EL FOPLEASE LEER Y
MANTENGA LA REFERENCIA FUTURA.
Impreso en China
No vuelvas a la tienda!
DETENER