MAJORITY Neptune Manual

NEP-FM-WHT
NEPTUNE
Docking Station & Radio Alarm
Instrucons Guide

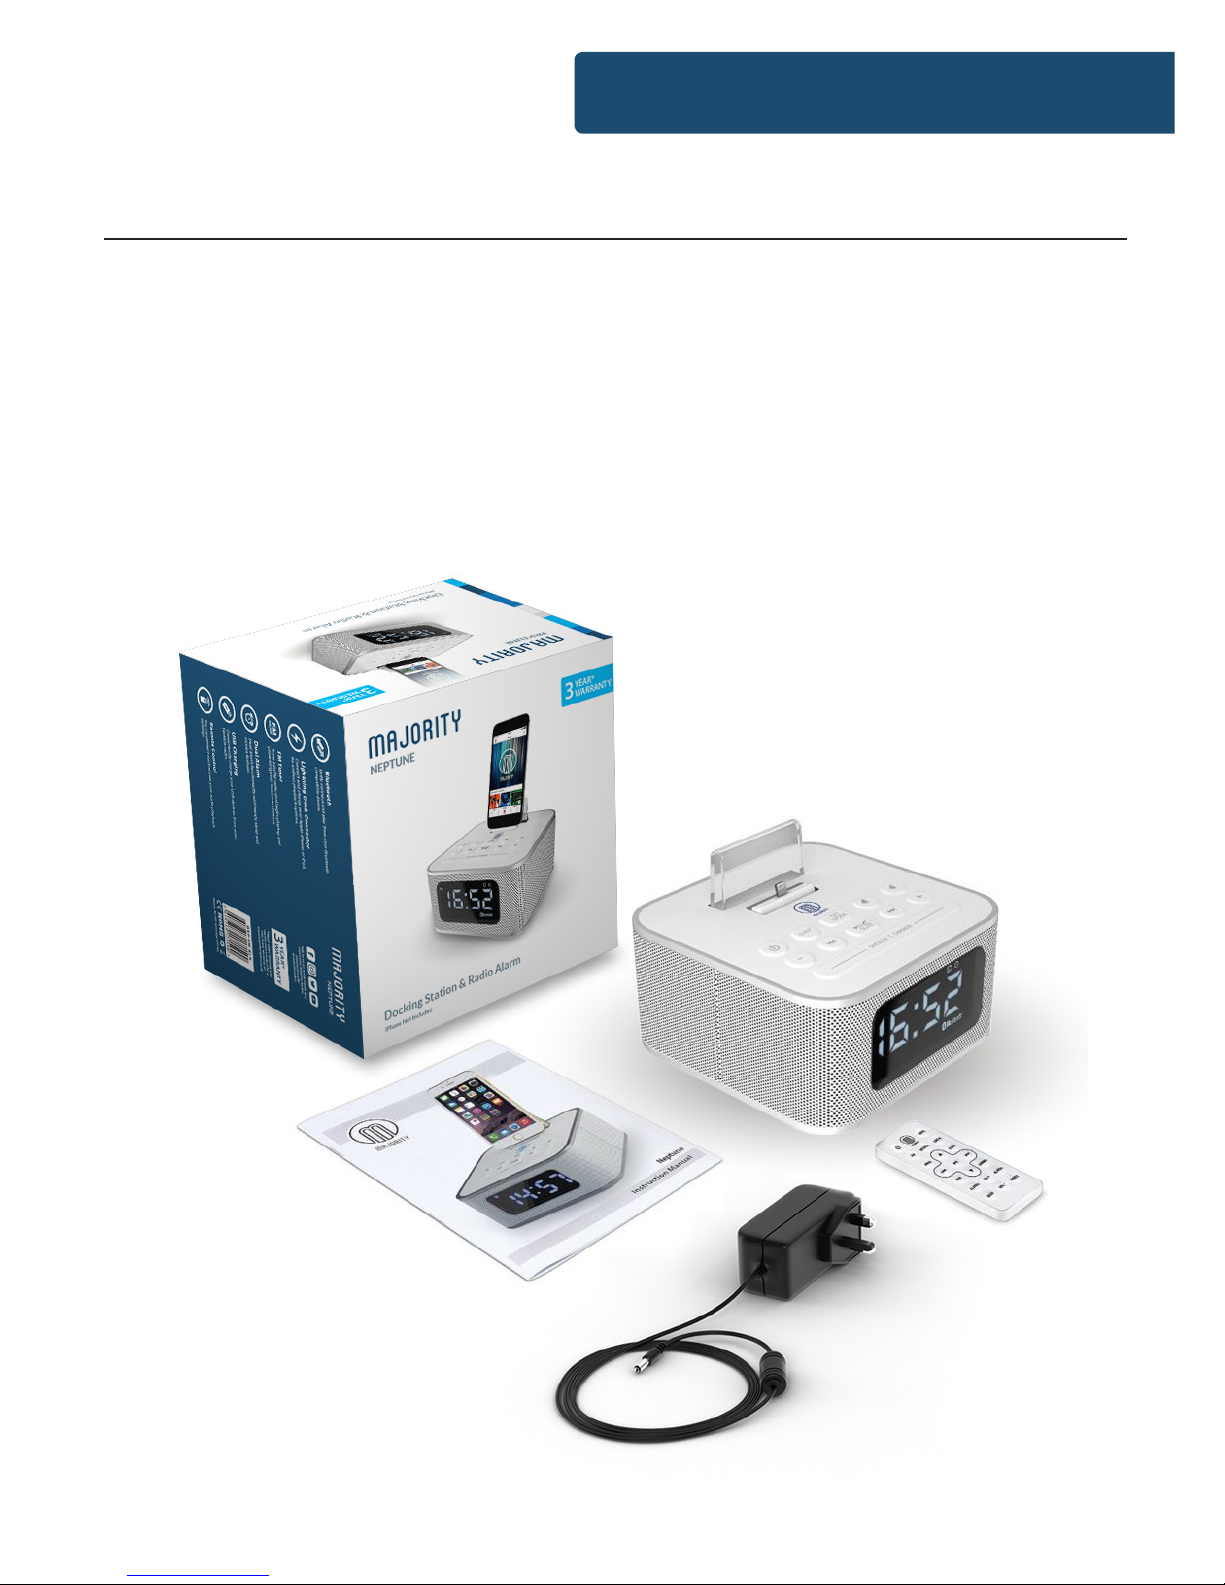
Box Contents ������������������������������������������������������������� 1
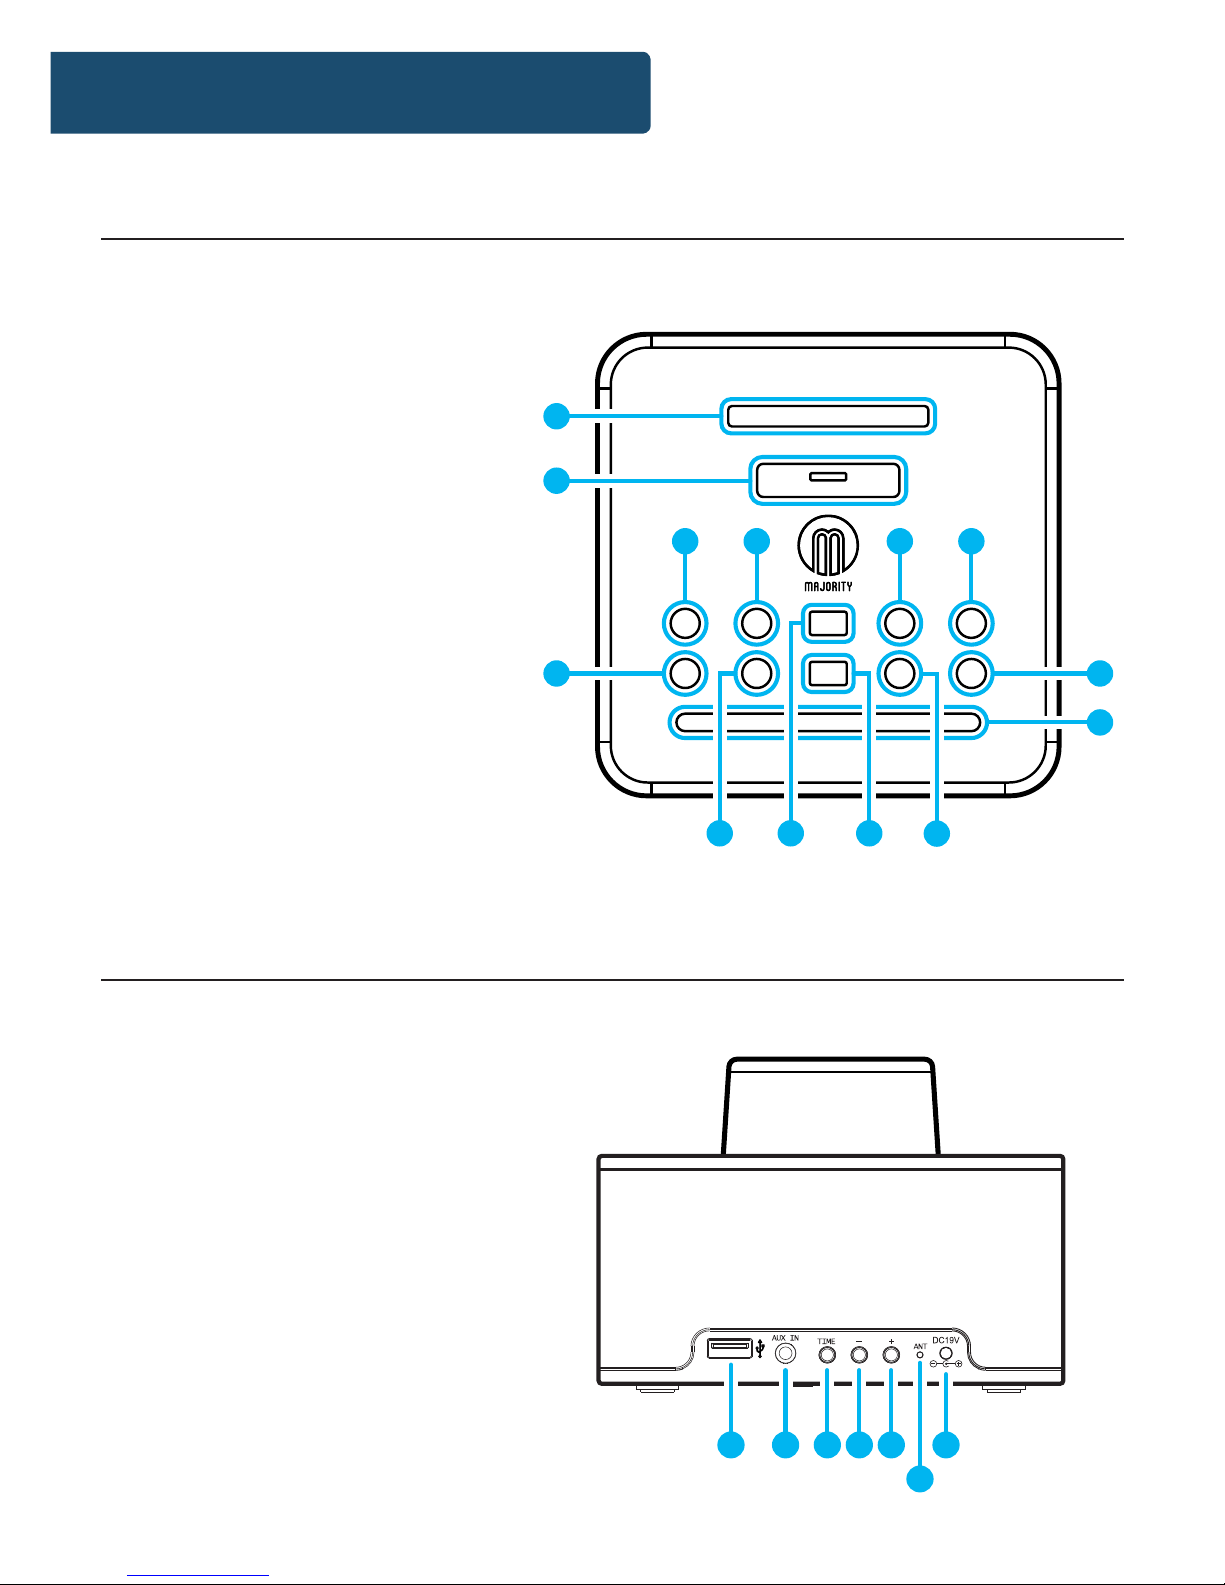
Controls And Funcons ����������������������������������������������2
Support ���������������������������������������������������������������������5
Instrucons Guide ���������������������������������������������������� 6
Basic Operaon �������������������������������������������������������� 6
iPhone/iPod Connecon������������������������������������������� 7
USB Funcons����������������������������������������������������������� 8
AUX-In Playing Mode ����������������������������������������������� 10
FM Radio Mode ��������������������������������������������������������11
Alarm Funcons������������������������������������������������������� 13
Seng the Clock������������������������������������������������������ 14
Sleep Seng ������������������������������������������������������������ 15
Brightness Seng���������������������������������������������������� 16
Specicaons �����������������������������������������������������������17
Warranty ������������������������������������������������������������������17
Safety Informaon��������������������������������������������������� 18
Watch video tutorials and register
your product for a FREE 3-year warranty
at www.majorityradios.co.uk
Contents
3YEAR
WARRANTY

1
Box Contents
What’s in the Box?
1. Majority Neptune Docking Station
2. Remote Control
3. AUX-In Jack Cable
4. UK Standard Plug Power Supply
5. User Guide

2
Controls And Funcons
Top View
54 6 7
3
10 11 12
8
13
9
1
2
Back View
14. USB Out 1 Jack
15. Aux-In-Jack
16. Time
17. Volume (-)
18. Volume (+)
19. Antenna
20. DC 5V In
14 15 16 17 18
19
20
1. Stand
2. Dock
3. Volume (-)
4. Power Button
5. Sleep
6. Alarm 1
7. Alarm 2
8. Volume (+)
9. Snooze/Dimmer
10. Skip Back
11. Set Mode
12. Play/Pause/Scan/Call
13. Skip Forward

3
Controls And Funcons
Display Screen
2
3
4
5
6 7 8
9
10 11
1
12
1. Display Screen
2. iPhone/iPod Docking
Mode
3. USB Mode
4. Bluetooth Mode
5. Aux-In Mode
6. FM Radio Mode
7. Radio Station
8. Alarm 1 On
9. Alarm 2 On
10. Alarm Time
11. Sleep Timer
12. Time Display

4
Remote Control
Controls and Funcons
1
2
3
4
5
11
6
7
14
8
9
10
12
13
1. Power On/O
2. Time Setting
3. Sleep Time Setting
4. Skip Back
5. Alarm 1 & 2
6. Tune Up & Down (hold
and press to auto-scan)
7. Snooze
8. Mode Selection/Alarm
Ring Source Selection
9. Dimmer
10. Skip Forward
11. Play/Pause
12. Volume Up & Down
13. Mute
14. Auto-Scan

5
Support
Thank you for your purchase of the Majority Neptune.
Please follow the guidance of the manual to set up your docking
station and enjoy its fantastic variety of stations and features.
If you require further assistance with your new purchase,
please contact our support team on the Majority website:
https://www.majorityradios.co.uk/support/
Support

6
Instrucons Guide
Basic Operation
Please note all (Ref.) refer to Page 2-3 Controls and Functions mapping guide.
Starting up your radio
Plug the adaptor connector into the back of the system labelled
‘DC 5v’ and turn the power on from the mains (Ref.).
Press the ‘Power’ button to turn on the unit (Ref.) and “ON” will
be displayed on the screen.
To select a mode, press the ‘Set Mode’ button (Ref.) multiple
times until your required option displayed on the screen (pg.2).
There are ve modes to select from:
• iPod/iPhone Connection
• USB Playing Mode
• Bluetooth
• AUX-In Playing Mode
• FM Radio
Standby
To place the music system back to standby, press the‘Power’
button (Ref.). The front display will show “O” and then switch
to the standby screen with a clock display.
To turn the unit o fully, switch it o at the mains.
Please ensure that the cord is out of reach of children.

7
Instrucons Guide
iPhone/iPod Connection
iPhone/iPod Docking
Press the ‘Set Mode’ button (Ref.) repeatedly until “iPod”
displays on the front display screen (Ref.) to indicate iPhone/
iPod mode.
Insert your iPhone/iPod onto the dock (Ref.) and ensure that it
is supported by the stand. You may have to remove your phone
case to ensure that it is connecting properly to the port.
Once your iPhone/iPod is connected to the dock, your device
will begin to charge.
Go to your iPhone/iPod and begin to play your favourite albums,
playlists or music app - this should now begin to be heard out of
the Neptune speakers.
Once the music is playing from your device, you can use the ‘Skip
Back’ (Ref.) or ‘Skip Forward’ (Ref.) buttons to select previous
or next tracks. The remote control can also be used for various
functions, see page 3.
Please ensure that your iPhone/iPod is not on low volume.

8
Instrucons Guide
USB Functions
USB Playing Mode
Select the ‘Set Mode’ button (Ref.) repeatedly to scroll to USB
mode. When the icon appears, USB mode will be selected for
USB playing mode.
Connect a USB stick into the USB port at the back of the
docking station. Audio from the USB stick should begin playing
automatically when in USB mode.
Use the ‘<<’ and ‘>>’ buttons (Ref. 5/7) to select previous or next
tracks. You can also use the ‘Play/Pause’button (Ref.) to play or
pause a track.
USB Charging
Connect a USB charging cable into the USB charging port at the
back of the unit (Ref.).
Connect the USB cable to your device to begin charging your
device.
Please note that you cannot play music from your phone, tablet
or other device by connecting it via USB cable.

9
Instrucons Guide
Bluetooth
Connect to Bluetooth
Select the ‘Set Mode’ button (Ref.) repeatedly to scroll to
Bluetooth mode. When the icon appears, Bluetooth mode
will be selected.
Go to Bluetooth settings on your phone/tablet and ensure that
it is switched on. “Majority Neptune” should then display in
available devices to connect to. Select this option to connect to
it and your device should display “Connected”.
To choose the music you wish to play, you will need to choose
the album, playlist or streaming service from your device.
Use the ‘<<’ and ‘>>’ buttons (Ref. 5/7) to select previous or next
tracks. You can also use the ‘Play/Pause’button (Ref.) to play or
pause a track.
Tip: Ensure the volume is switched up on your device to ensure you
have sound. Ensure any other users have disconnected from the device
before trying to connect.
Bluetooth Call Connection
Once your phone is connected via Bluetooth to the Neptune and
you have approved access to your phone book, you can accept
and cancel calls from the dock.
To answer a call, press the ‘Play/Pause/Scan/Call’ button (Ref.).
Press this button again to end the call.
To resume music after the call has ended, press the ‘Play/Pause/
Scan/Call’ button (Ref.) again.

10
Instrucons Guide
AUX-In Playing Mode
Scroll through to AUX mode by pressing the ‘Set Mode’button
(Ref.) repeatedly until the icon displays on the screen.
You can connect your phone or tablet with an Aux 3.5mm cable
that connects to the Aux-in jack (Ref.).
Begin playing music from your device and it will begin to sound
through the Neptune speakers.
Please ensure that the volume on your device is switched up so
that it sounds through the Neptune.

11
Instrucons Guide
FM Radio Mode
Scroll through to FM Radio mode by pressing the ‘Set Mode’
button (Ref.) repeatedly until the icon displays on the
screen.
Move the antenna so that you get the best signal you can
(Ref.).
Press and hold the ‘Scan’ button (Ref.) and the music system
will automatically save all stations that have a good signal.
To scroll through the saved stations, use the‘Skip Bk’ (Ref.) or
‘Skip Fwd’ (Ref.) buttons.
To ne tune, use the ‘Tun+’ (Ref.) and ‘Tun-’ (Ref.) buttons to
tune a frequency, hold the button to scan quickly.

12
Instrucons Guide
Settings: Dual Alarm Function
Setting your alarm
Please note that the ‘Alarm 1’option is a Sound Once alarm, and
‘Alarm 2’ is an Everyday alarm.
Press the ‘Alarm 1’ button (Ref.) or the ‘Alarm 2’ button on the
radio (Ref.). The alarm icon 1 or 2 will appear on the display
screen.
When setting the alarms using the remote control, press the ‘Set’
button (Ref.) and use the ‘Skip Back’ (Ref.) or ‘Skip Fwd’ (Ref.)
buttons to choose your hour and minutes. Press the ‘Set’ button
(Ref.) when conrming your options.
Firstly, you will need to select your alarm sound. There are
4 sound options to select from. Press the ‘Alarm1/2’ button
multiple times to choose between the following options: iPod,
Radio, Buzzer or O. Press the ‘Set Mode’ button (Ref.) to select
your option.
Next, you can set the hour of the alarm by using the ‘-’ (Ref.)
and ‘+’(Ref.) buttons. Once your alarm hour displays, press the
‘Set Mode’button (Ref.) to conrm.
Next, you can set the minutes of the alarm by using the‘-’ (Ref.)
and ‘+’(Ref.) buttons. Once your alarm minutes display, press
the ‘Set Mode’button (Ref.) to conrm.
When the alarm is set, an icon will display on the main display
screen.

13
Alarm Functions
Instrucons Guide
The alarm will sound from low to high volume.
To snooze your alarm for another 9 minutes, press the ‘Snooze/
Dimmer’ button (Ref.). You can keep snoozing for up to 30
minutes.
To turn alarm o, press the ‘Power’ button (Ref.) or ‘Alarm 1/2’
button (Ref./13). Alarm 1 will need to be reset on every use but
Alarm 2 will sound daily once set unless the setting is changed
t o ‘ O ’.

14
Instrucons Guide
Setting the Clock
The time will automatically set once you have docked your
iPhone into the unit and will show when system is in Standby. To
manually set, follow the below instructions:
Manually Setting the Time
Press and hold the ‘Time’ button (Ref.) for 1 second to display
clock options. Select your option using the ‘-’ (Ref.) and ‘+’
buttons (Ref.).
Firstly, you will need to select a 12 or 24 hour clock for the
display screen. Using the ‘-’ (Ref.) and ‘+’ (Ref.) buttons, select
12 HOUR or 24 HOUR. When your option displays, press the
‘Time’ button to conrm your option.
Next you can set the clock hour. The clock hour will ash and you
can change it using the ‘-’ (Ref.) and ‘+’(Ref.) buttons. When
the correct hour displays, press the ‘Time’ button to conrm your
option.
Next you can set the clock minutes. The clock minutes will ash
and you can change it using the ‘-’ (Ref.) and ‘+’(Ref.) buttons.
When the correct minutes display, press the ‘Time’ button to
conrm your option.

15
Instrucons Guide
Sleep Setting
Sleep Setting enables you to programme the music system to
switch o at a set time – up to 90 minutes.
Press the ‘Sleep’ button (Ref.).
Browse through the sleep timer options by pressing the
‘Sleep’ button (Ref.) multiple times. The options are
‘90/80/70/60/50/40/30/20/10 or O’.
The sleep icon will appear in the top right of the display
screen. To see how many minutes you have left before the unit
automatically switches o press the ‘Sleep’ button (Ref.).
To turn the function o, follow the above instructions and
choose “OFF”.

16
Instrucons Guide
Brightness Setting
To change the display screen brightness, use the remote control
‘Dimmer’ button (Ref.) or the ‘Dimmer’ button (Ref.) on the
unit.
Press the button repeatedly to choose between 4 dierent
brightness levels. You can also choose to turn the brightness o
completely.

17
Specicaons
Power Supply DC 5V 3A (100-240V /Hz)
Modes
FM (.MHz - MHz)
Bluetooth
USB
AUX In
Dock Play
Dimension (WxHxD) . x . x . cm
Net Weight g
All products come with a standard 12 month warranty. All items
must be registered on www.majorityradios.co.uk for the
warranty to be valid. Once on the web page, use the menu to
nd “Register Your Product”. You will also be given the chance
to extend your warranty for an additional 24 months, free of
charge.
Specications
Warranty

18
1. Read these instructions.
2. Keep these instructions. Instructions are also
available for download at www.majorityradios.co.uk
3. Heed all Warnings
4. Follow all instructions
5. Do no clean the apparatus near or with water
6. Do not block any ventilation openings. Install in
accordance with the manufacturer’s instructions
7. Do not install near any heat sources such as
radiators, heat registers, stoves, or other apparatus
(including ampliers) that produce heat.
8. Protect the power from being walked on or pinched
particularly at plugs, convenience receptacles, and
the point where they exit from the apparatus.
9. Only use attachments/accessories specied by the
manufacturer.
10. Unplug this apparatus during light storms or when
unused for long periods of time.
11. Refer all servicing to qualied service personnel.
Servicing is required when the apparatus has been
damaged in a way, such as power-supply cord or
plug is damaged, liquid has been spilled or objects
have fallen into the apparatus, the apparatus has
been exposed to the rain or moisture, does not
operate normally or has been dropped.
12. No naked ame sources, such as lit candles, should
be placed on the apparatus.
13. Dispose of used electrical products and batteries
safely according to your local authority and
regulations.
ADDITIONAL WARNINGS
The apparatus shall not be exposed to dripping or
splashing and no objects lled with liquid, such as
vases, shall be places on the apparatus.
Main plug is used to disconnect device and it should
remain readily operable during intended use. In order
to disconnect the apparatus from the main mains
completely, the mains plug should be disconnected
from the main socket outlet completely.
Battery shall not be exposed to excessive heat such as
sunshine, re or the like.
RECYCLING ELECTRICAL PRODUCTS
You should now recycle your waste electrical goods and
in doing so help the environment.
This symbol means an electrical product should
not be disposed of with normal household waste.
Please ensure it is taken to a suitable facility for
disposal when nished with.
IMPORTANT: Please read all instructions carefully
before use and keep for future reference.
Risk of electric shock.
Do not open
Read all instructions carefully before use
and keep for future reference
When servicing, use only identical
replacement parts
ATTENTION
RISQUE D’ELECTROCUTION
NE PAS OUVRIR !
CAUTION
RISK OF ELECTRIC SHOCK
DO NOT OPEN !
CAUTION
RISK OF ELECTRIC SHOCK
DO NOT OPEN !
CAUTION
RISK OF ELECTRIC SHOCK
DO NOT OPEN
!
!
!
Safety Informaon
IMPORTANT: Please read all instrucons carefully
before use and keep for future reference
!
Other manuals for Neptune
1
This manual suits for next models
1
Table of contents
Other MAJORITY Docking Station manuals
Popular Docking Station manuals by other brands

Philips
Philips DC1000 Specifications

Sony
Sony CPF-iP001 - Cradle Audio System operating instructions

Dictaphone
Dictaphone Walkabout operating instructions

Listen Technologies
Listen Technologies ListenTALK LA-480 quick start guide

Centrios
Centrios 1219820 owner's manual

Logic3
Logic3 MIP011 instruction manual