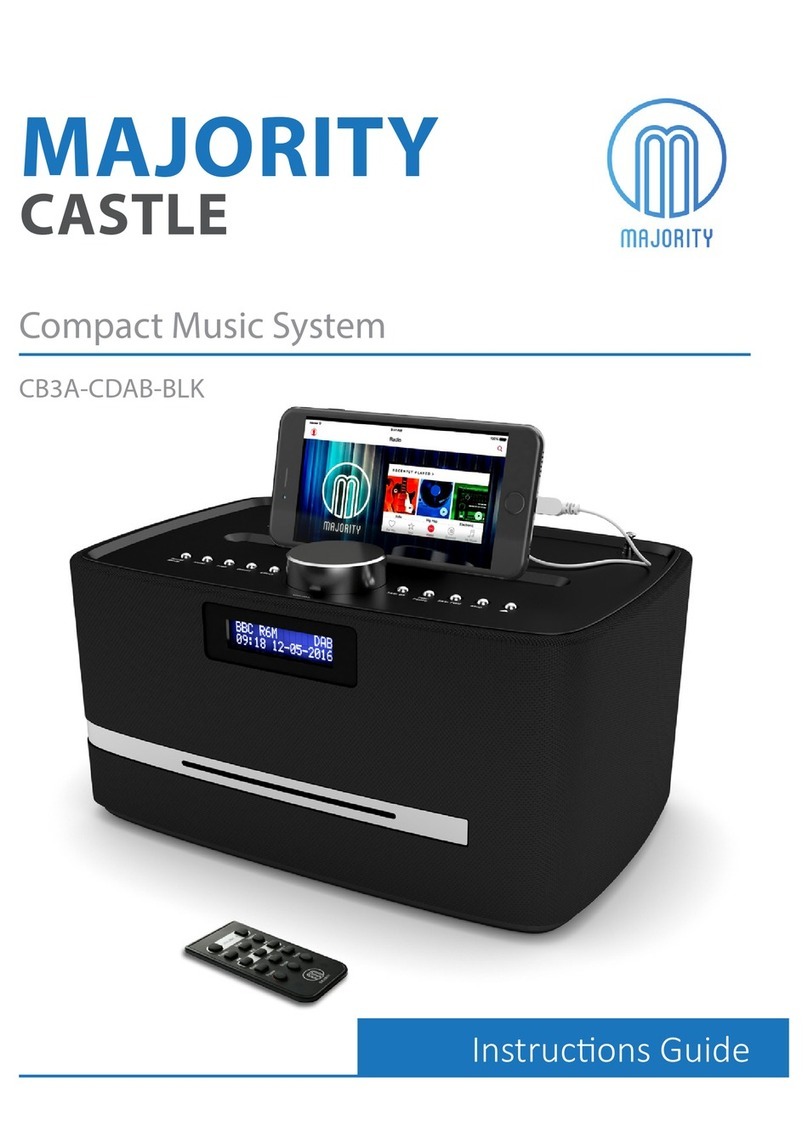
MAJORITY Castle User manual

Majority Castle
Music System
CB3A-CDAB-BLK
User Guide

Contents
Controls and Functions.............................. 1
Remote Controller .................................. 3
What’s in the box? .................................. 4
Instruction Guide . . . . . . . . . . . . . . . . . . . . . . . . . . . . . . . . . . . 5
Basic Operation...........................................5
DAB Radio and Set up Preset for DAB Radio................6
FM Radio and Set up Preset for FM Radio ..................8
CD Player ................................................10
Bluetooth & Phone Connection ..........................11
Clock and Date Setting...................................13
Sleep Setting ............................................14
System Reset and Software Version Display ...............15
Brightness and Alarm Setting ............................16
Other Functions .........................................18
Technical Specification .............................19
Warranty ..........................................19
Troubleshooting Guide ............................20
Important Safety Information ......................21
Watch video tutorials and register
your product for a FREE 3-year
warranty at
3
Y
E
A
R
F
R
E
E
E
X
T
E
N
D
E
D
W
A
R
R
A
N
T
Y

Instructions GuideControls and Functions
1
1. USB Out 1
2. USB Out 2
3. Antenna
4. Power/Mode
5. Menu
6. Scan
7. Preset
8. Effect
9. Volume/Select
Snooze
10. Display
(on front of
music system)
11. Skip Back
12. Play/Pause
13. Skip Forward
14. Stop
15. Eject CD
1. Volume Control
2. Reduce Treble Effect
3. Mute
4. Increase Treble Effect
5. Previous Track
6. Play/Pause
7. Next Track
8. Reduce Bass Effect
9. Bass+Loudness Compensation
10. Increase Bass Effect
11. Power/Standby
12. Switch Mode
13. Reset Treble and Bass Effects
21 3
4 6
5 7 9 10
811 13
12 14 15
Top View
Rear View
20
16 17 18 19
13
4
10
7
12
9
6
3
11
8
5
2
11

Instructions Guide
Controls and Functions
2
1. Volume Control
2. Reduce Treble Effect
3. Mute
4. Increase Treble Effect
5. Previous Track
6. Play/Pause
7. Next Track
8. Reduce Bass Effect
9. Bass+Loudness Compensation
10. Increase Bass Effect
11. Power/Standby
12. Switch Mode
13. Reset Treble and Bass Effects
21 3
4 6
5 7 9 10
811 13
12 14 15
Top View
Rear View
20
16 17 18 19
13
4
10
7
12
9
6
3
11
8
5
2
11
16. Aux-In jack
17. Headphone jack
18. DC 9v In jack – wall plug
19. On/Off switch
20. Phone stand

Instructions Guide
Remote Controller
3
1. Volume Control
2. Reduce Treble Effect
3. Mute
4. Increase Treble Effect
5. Previous Track
6. Play/Pause
7. Next Track
8. Reduce Bass Effect
9. Bass+Loudness Compensation
10. Increase Bass Effect
11. Power/Standby
12. Switch Mode
13. Reset Treble and Bass Effects
21 3
4 6
5 7 9 10
811 13
12 14 15
Top View
Rear View
20
16 17 18 19
13
4
10
7
12
9
6
3
11
8
5
2
11
1. Volume Control
2. Reduce Treble
3. Mute
4. Increase Treble
5. Previous Track
6. Play/Pause
7. Next Track
8. Reduce Bass
9. Bass+ Loudness
Compensation*
10. Increase Bass
11. Power/
Standby
12. Switch Mode
13. Reset Treble
and Bass
Levels
*Bass Loud Compensation increases the level of low
frequencies. Audio at low frequencies can lose bass and treble.
The Loud button helps to rectify this.

Instructions Guide
What’s in the box?
4
●Majority Castle Music System
●Remote Control
●UK Standard Plug DC 9v Power Supply
●Phone Stand
●User Guide

Instructions Guide
Instructions Guide
5
Please note all (Ref.) refer to the Controls and Functions
mapping guide on Pages 1-2.
Basic Operation
Plug the 9v adapter connector into the back of the system
labelled DC 9v (Ref.18) and the power supply into the mains.
Power Supply ON/OFF at the back of the system (Ref.19).
Press the ‘Power/Mode’button to turn the unit on (Ref.4).
The unit will automatically start up in DAB radio mode or the
previous mode you were using.
To select a mode press the ‘Power/Mode’button (Ref.4) until
your required option is selected. The currently selected mode
will be displayed on the front screen (Ref.10).
There are four options:
●DAB - DAB Radio
●FM - FM Radio
●CD - CD Player
●BT-AUX – Phone connection
Watch video tutorials and register
your product for a FREE 3-year
warranty atwww.majorityradios.co.uk
3
Y
E
A
R
F
R
E
E
E
X
T
E
N
D
E
D
W
A
R
R
A
N
T
Y

6
Instructions Guide
Standby
To place the music system back on standby, press and hold the
‘Power’ Button (Ref.4). The front display will show “Goodbye”
and then go into standby, showing the time and date. To turn
off fully press the button on rear of the unit (Ref.19) and switch
off at the mains. The cord must be kept out of reach of children.
DAB Radio
Press ‘Power/Mode’ button (Ref.4) and the unit will display
“Welcome to DAB” on the front display (Ref.10).
Pull up the antenna (Ref.3).
The music system will display “Searching” on the display or
“Tuning”if you have tuned previously (scanning may take a
few minutes).
Press ‘Scan’ (Ref.6) to search for stations and use the ‘Skip Bk’
(Ref.11) or ‘Skip Fwd’ (Ref.13) button to fine tune the station.
IMPORTANT: Please make sure you have
extended the antenna to its full length
(Ref.3). This will then enable you to rotate it
to get the best signal.

7
Instructions Guide
How to store a preset radio station
You can store a station using the preset button (Ref.7) and save
up to 10 stations.
First, tune to the station you want to store. Then press and hold
the ‘Preset’ button. The number “1” will flash on the front
display screen.
Use the ‘Skip Bk’ or‘Skip Fwd’ button to select which preset
number you want to assign to that station.
Then press the large ‘Volume/Select/Snooze’ button on top of
the system button (No.9) once to select and store this.
The display screen will show “Preset [1] stored”. [1] will be the
preset number to which the station has been saved.
How to play a preset radio station
Once you have stored all your selected stations you can then
just press (do not hold) the preset button (Ref.7) and scroll
through your choices using the ‘Skip Bk’ or ‘Skip Fwd’ button to
select the preset number you want.
Then press the large ‘Volume/Select/Snooze’ button on top of
the system (Ref.9) once to select.
To view information about the station such as ‘what’s now
playing’ press the menu button (Ref.5) once and it will show
any data on the front display.

8
Instructions Guide
FM Radio
To select FM Radio mode press the ‘Power Mode’ button (Ref.4)
until “FM Mode”is displayed on the front screen (Ref.10).
Pull up the antenna (Ref.3).
Press and hold ‘Scan’ (Ref.6) and the music system will
automatically preset the first 10 stations that have a good signal.
To fine tune or search for stations use the ‘Skip Bk’ (Ref.11) or
‘Skip Fwd’ (Ref.13) button. Press the ‘Skip Bk’ or ‘Skip Fwd’
button multiple times to search slowly or press and hold to
search quickly.
IMPORTANT: Please make sure you have
extended the antenna to its full length
(Ref.3). This will then enable you to rotate it
to get the best signal.

9
Instructions Guide
How to store a preset radio station
You can store the station using the preset button (Ref.7) with
up to 10 saved stations.
First, tune to the station you want to store. Then press and hold
the ‘Preset’ button. The number “1” will flash on the front
display screen.
Use the ‘Skip Bk’ or‘Skip Fwd’ button to select which preset
number you want to assign to that station.
Then press the large ‘Volume/Select/Snooze’ button on top of
the system button (Ref.9) once to select and store this.
The display screen will show “Preset [1] stored”. [1] will be the
preset number to which the station has been saved.
How to play a preset radio station
Once you have stored all your selected stations you can then
just press the preset button (Ref.7) (do not hold) and scroll
through your choices using the ‘Skip Bk’ or ‘Skip Fwd’ button to
select which preset number you want.
Then press the large ‘Volume/Select/Snooze’ button on top of
the system (Ref.9) once to select.

10
Instructions Guide
CD Mode
To select CD mode press the ‘Power Mode’button (Ref.4) until
“CD MODE” is displayed on the front screen (Ref.10).
Insert the CD into the CD port at the front of the unit.
The CD will read automatically and start playing.
Press and release the‘Play/Pause’ button (Ref.12) to play/pause.
Press and release the‘Skip Bk’ (Ref.11) or ‘Skip Fwd’ (Ref.13)
button to select previous or upcoming tracks.
Press and hold the ‘Skip Bk’ or ‘Skip Fwd’ button to rewind or
fast forward.
Press and release the‘Stop’ button to stop (Ref.14).
Press and release the‘Eject’ button (Ref.15) to eject the CD.
Watch video tutorials and register
your product for a FREE 3-year
warranty atwww.majorityradios.co.uk
3
Y
E
A
R
F
R
E
E
E
X
T
E
N
D
E
D
W
A
R
R
A
N
T
Y

11
Instructions Guide
Bluetooth & Phone Connection
To select Bluetooth and Phone mode press the ‘Power Mode’
button (Ref.4) until “BT-AUX” is displayed on the front screen
(Ref.10).
Turn on Bluetooth on your phone and“Majority Castle” will
appear. Click on this to connect.
If the unit displays “BT Mode CONNECT” on the front display
screen, it has successfully connected.
To select music you will need to select the album or playlist
from your phone, but once selected you can then use the
‘Skip Bk’ (Ref.11) or ‘Skip Fwd’ (Ref.13) button to select previous
or next tracks.
* Tip: if when you first connect your Bluetooth device it isn’t picking
up straight away, place it nearer to the music system.
Aux-In Port
You can connect your phone or tablet with an Aux 3.5mm cable
that connects to the Aux-In jack (Ref.16).
Insert the audio cable. To select your mode press the ‘Power/
Mode’ button (Ref.4). To scroll through your choices, which will
be displayed on the front screen (Ref.10) – press the ‘Power/
Mode’ button until you are on the required option “AUX”.

12
Instructions Guide
Dual USB Ports – Charging your phone
Both USB Ports output 5V/2A (Ref.1&2). When connected via a
USB lead into the USB port (Ref.1) the system will charge your
phone but you can not play your music via the USB connection
- it is purely a charging facility. You can play your phone music
either using Bluetooth or an Aux 3.5mm cable as instructed
on page 11.
Phone Stand Set Up
To set up phone stand (Ref.20) – remove the rubber strip from
the top of the unit (Ref.20) and insert the phone stand.
(If the rubber strip is hard to remove, use a small pin to extract
it from the top of the music system). The soft protector strip
faces the same way as the display screen so that the phone is
protected when resting horizontally on top of the speaker.
Watch video tutorials and register
your product for a FREE 3-year
warranty atwww.majorityradios.co.uk
3
Y
E
A
R
F
R
E
E
E
X
T
E
N
D
E
D
W
A
R
R
A
N
T
Y

13
Instructions Guide
Clock and Date Setting
The date and time will automatically set after using DAB radio
and will show when system is in Standby. The time will also
automatically update when the time changes from BST to GMT
and vice versa.
Manually Setting the Time
Press and hold the ‘Menu’ button (Ref. 5) for 1 second to display
options.
Select your option using the ‘Skip Bk’ (Ref.11) and ‘Skip Fwd’
(Ref.13) buttons.
Select “Clock Setting” by pressing the ‘Volume/Select/Snooze’
button (Ref.9) on top of the system once.
Using the ‘Skip Bk’ and‘Skip Fwd’ buttons, select “12 HOUR/
24 HOUR” by pressing the large ‘Volume/Select/Snooze’ button
on top of the system (Ref.9).
The hour will then flash and you can change it using the
‘Skip Bk’ and ‘Skip Fwd’ buttons. Then press the large volume
button once on the time you require. The display will
automatically move on to the minutes. Change the minutes
using the ‘Skip Bk’ and ‘Skip Fwd’ buttons, then press the large
‘Volume/Select/Snooze’ button once on the time you require.

14
Instructions Guide
Manually Setting the Date
Press and hold the ‘Menu’ button (Ref.5) for 1 second to display
options.
Select your option using the ‘Skip Bk’ (Ref.11) and ‘Skip Fwd’
buttons (Ref.13).
Select “Date Setting” by pressing the ‘Volume/Select/Snooze’
button (Ref.9) on top of the system once.
The year will flash and can be changed using the ‘Skip Bk’ and
‘Skip Fwd’ buttons. Then press the large ‘Volume/Select/Snooze’
button once to confirm.
The month will then flash automatically. You can change the
month using the ‘Skip Bk’ and ‘Skip Fwd’ buttons. Press the large
‘Volume/Select/Snooze’ button once on the month you require.
The day will then flash automatically and you can change it the
same way by using the ‘Skip Bk’ and ‘Skip Fwd’ buttons. Press
the large ‘Volume/Select/Snooze’ button once on the day you
require.
Sleep Setting
Sleep Setting enables you to programme the music system to
switch off at a set time - up to 120 minutes.
Press and hold the ‘Menu’ button (Ref.5) for 1 second to display
options, then select your option using the ‘Skip Bk’ and ‘Skip
Fwd’ buttons.

15
Instructions Guide
Select “Sleep Setting” by pressing the ‘Volume/Select/Snooze’
button (Ref.9) on top of the system once.
Using the ‘Skip Bk’ and‘Skip Fwd’ buttons select the number of
minutes you would like the system to play before turning off,
then press the large ‘Volume/Select/Snooze’ button to confirm.
System Reset and Software Version Display
System Reset
Press and hold the ‘Menu’ button (Ref.5) for 1 second to display
options, then select your option using the ‘Skip Bk’ and ‘Skip
Fwd’ buttons.
Select “System Reset” by pressing the‘Volume/Select/Snooze’
button (Ref.9) on top of the system once. The machine resets
and will go into standby.
SW Version – Software version display
Press and hold the ‘Menu’ button (Ref.5) for 1 second to display
options. Select your option using the ‘Skip Bk’ and ‘Skip Fwd’
buttons.
Select “SW Version” by pressing the ‘Volume/Select/Snooze’
button (Ref.9) on top of the system once. It will the display the
software version.

16
Instructions Guide
Brightness & Alarm Setting
Brightness Setting
Press and hold the ‘Menu’ button (Ref.5) for 1 second to display
options, then select your option using the ‘Skip Bk’ (Ref.11) and
‘Skip Fwd’ buttons (Ref.13).
Select “Brightness” by pressing the ‘Volume/Select/Snooze’
button (Ref.9) on top of the system once.
There are four choices: OFF, Level 1, 2 and 3. Level 3 is the
brightest. Select using the ‘Skip Bk’ and ‘Skip Fwd’ buttons.
Confirm your selection by pressing the‘Volume/Select/Snooze’
button (Ref.9) on top of the system once.
Watch video tutorials and register
your product for a FREE 3-year
warranty atwww.majorityradios.co.uk
3
Y
E
A
R
F
R
E
E
E
X
T
E
N
D
E
D
W
A
R
R
A
N
T
Y

17
Instructions Guide
Alarm1/Alarm2 Setting
Both alarms are set up in the same way:
Press and hold the ‘Menu’ button (Ref.5) for 1 second to display
options, then select your option using the ‘Skip Bk’ (Ref.11) and
‘Skip Fwd’ (Ref.13) buttons.
Select “Alarm1 Setting/Alarm2 Setting” by pressing the ‘Volume/
Select/Snooze’ button (Ref.9) on top of the system once.
There are three choices: Alarm On/Off - Alarm Del (Delete) -
Alarm Set.
Using the ‘Skip Bk’ and ‘Skip Fwd’ buttons, confirm by pressing
the ‘Volume/Select/Snooze’ button (Ref.9) on top of the system.
If you have chosen “Alarm Set” you can select the sound of the
alarm using the ‘Skip Bk’ and ‘Skip Fwd’ buttons. It can be set to
BUZZER/DAB Mode/FM Mode. Select your choice by pressing the
‘Volume/Select/Snooze’button (Ref.9) on top of the system once.
Then choose the hour of the alarm using the ‘Skip Bk’ and ‘Skip
Fwd’buttons and press the ‘Volume/Select/Snooze’button (Ref.9)
on top of the system once and repeat this for the minutes.
The alarm volume can then be changed using the‘Skip Bk’ and
‘Skip Fwd’ buttons and press the‘Volume/Select/Snooze’
button (Ref.9) on top of the system to confirm.
To snooze, press the ‘Volume/Select/Snooze’ button (Ref.9) on
top of the system once. The alarm will sound again 10 minutes
after snooze has been pressed.

18
Instructions Guide
Other Functions
Erp Power Saving Feature
If the unit can not receive signal after 10 minutes it will enter
into Erp management mode and the unit will go into standby.
NOTE: The unit won’t go into the Erp power saving mode
if in FM.
Headphones Function
When the headphones are connected into port (Ref.17) you
will not be able to hear sound from the speakers only via the
headphones.
Effect Button
This button is for increasing or decreasing the Bass and Treble.
Press and release the‘Effect’ button (Ref.8) to show “BASS/
TREBLE” on the front display then turn the large volume button
on the top of the system to select the range between +5 - 5 db.
Volume Button
This button is the volume control and select button. Press this
button to switch the Mono (Plays the same through both
speakers) and Auto (Auto offers a better stereo sound) when in
FM Mode. Each press on the volume button will switch it from
Mono to Auto and you will see this displayed on the front display.
Other manuals for Castle
1
This manual suits for next models
1
Table of contents
Other MAJORITY Media Converter manuals