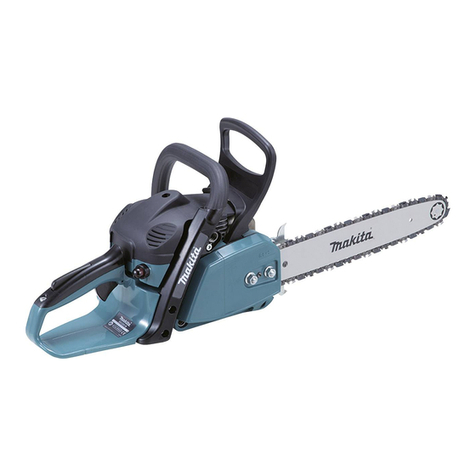
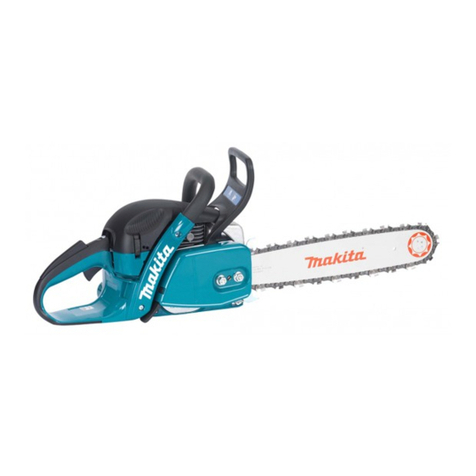
Makita DCS540 Instruction Manual

Owner’s
and
Safety Manual
for
Gasoline Chain Saws
(page
2
-
31)
Manuel
d’emploi
et
de
securite
de
tronGonneuses
thermiques
(page
32
-
61)
DCS
430,431
DCS 520,520i
DCS 540
DCS 5200i
WARNING!
Read and understandthis Manual. Alwaysfollow safety precautions
in
the Owner’s and SafetyManual.
Improperusecancauseserious injury!
Theengineexhaustfromthis productcontainschemicalsknownto the State
of
Californiato cause
cancer, birthdefectsor other reproductiveharm. Presepethis Manualcarefully!
AlTENTlONl
Suiveztoujours lesconseilsde skuritedu presentmanueld’emploi et de securite. Une utilisation
incorrectede latronqonneusepeutentrainerdes blessuresgraves! Conservez avec soin ce manuel!
Les
gaz
d’echappement emis par ce produit contiennentdes produits chimiquesconnus par I’Etat de
Californiepour provoquer lecancer, des defautsde naissanceou autres dommages de reproduction.
Lisezet comprenez ce manuel.

WARNING
I
Careless or improper use of this product can cause seriousor even fatalinjury.
Before operatinga chain
saw
or other MAKITA products
it
is important that you read, fully understandand
carefully follow theinstructionsoutlinedinthis owners manual. Kickbackmaycausesevere or fatalinjury and.
isone
of
many potentialdangersinoperatinga chain saw. Kickbackandother safety relatedprecautionsare
described indetailwithinthis owners manual. Additional owners manualsare available from MAKITA U.S.A.,
INC., 149304NorthamStreet,
La
Mirada, CA 90638-5753, USA, Telephone: (714) 522 80 88 and MAKITA
CANADA INC.,1950 ForbesStreet, Whitby, Ontario,
L1
N787, Canada, Telephone: (905) 571 22
00.
4'1
.
This productcomplies
with:
American NationalStandard Institute
B
175.1-1991chain saw safety standard.
CanadianStandardsAssociation
Society of Automotive Engineers
262.1-95 chain saw safety standard.
262.3-96 chain saw kickbackstandard.
SAEJ 335-Jun 95 ,Multiposition small
engine exhaust system fire ignition
suppression"
1,
.
With the purchase of this chain saw you have chosen a German quality product. Important instructions for the
assemblyandoperationof this saw aregiven inthis manual. Foryour own safety,we askyouto readthe accident
prevention instructionsvery carefully before putting your chain saw into operation, as incorrect handling can,
despite all precautions, lead
to
accidents. With a littlecare and attention youwill have good service and lasting
satisfaction from this first-rateproduct.The following industrialproperty rightsapply:
US
4465440,
US
5411382,
EP 0236858, EP 0560201, GBM 8710075, GBM 8809928,GBM 9203378, GEM 29616652.
DCS
430,
DCS
431,
DCS
520,
DCS
5201,
DCS
540,
DCS
5200i
Contents
Delivery inventory
Symbols
Safety precautions
Denominationof components
Technical data
Approvedbar and chain combinations
Mountingthe guide bar and saw chain
Chain brake
Fuel
I
Refuelling
Adjusting the chain lubrication
Starting the engine
Stoppingthe engine
Checkingthe chain brake
Checkingthe chain lubrication
Adjusting the carburetor
Working inwinter
Page
3
3
4-1
5
16
17
17
18-1
9
19
20-21
21
22
22
23
23
23
24
Contents
Page
-
.
Sharpeningthe saw chain 24-25
c
Cleaningthe guide bar 25
Cleaningthe brake bandand sprocket interior 26
Replacingthe saw chain 26
Replacingthe suction head 26
Replacing
I
cleaning the spark arrester screen 26
Cleaningthe air filter 27
Replacingthe spark plug 27
Replacingthe starter cable 28
Replacingthe returnspring 28
Mountingthe fan housing 28
Instructionsfor daily and periodic maintenance 29
Troubleshooting 30
Extractfrom the spare parts !ist 31
Adress list 62
Service, spare parts andguarantee 29-30
The MAKITA DCS
430,
DCS 431, DCS 520, DCS 520i, DCS 540, DCS
5200i
will be delivered in a protective
cardboardbox
to
prevent transportdamage. Cardboardisabasic raw materialand isconsequentlyreuseable
or
suitable for recycling(waste paper recycling).
.
,'
1
2

Delivery inventory
4
I
2-
I
6
I
-
’I
1
Chainsaw
2
Sawchain
3
Guidebar
4
Chainprotection cover
5
Universalwrench
6
&Wrench
7
Screwdriver for carburetoradjustment
(only in delivery
for
model
5200i)
8
Owner’s andSafety Manual(not shown)
57
Incase one of the parts listedshould not be includedin the
deliveryinventory, pleaseconsultyour salesagent.
Symbols
You
will noticethe following symbolson the chain saw and inthe Owner’s and Safety Manual:-
~
Readinstructionmanual
andfollow thewarning- and
safety precautions!
Particular care and caution!
Forbidden!
Wear protective helmet, eye
and ear protection!
No
smoking!
No
openfire!
OnlOff
(UO) switch
Pressstarting valve
Engine
-
manualstart
Chokelever
Stop engine!
Wear protective gloves!
Chainbrake
Caution, kickback!
Fueland oil mixture
Carburetor adjustment
Chain oilfilUoil pump
Working
in
winter
First aid
(Further
symbols
see
page
5.
@
Recycling
3

Safety precautionsfor chain saw operators
While operatingthe chain saw please observe the
followingrules:
a) Contact of the guide bar nose with any object
should be avoided.
b) Tip contact may cause the guide bar
to
move
suddenly upwardand backward, which may
causeserious or fatal injury.
Always operate the chain saw with bothhands.
c)
manual. Failure
to
follow instructionscouldresult
in
serious injury.
It
is recommended
to
lend the
chainsaw only
to
peoplewho are experlencedin
workingwith chain saws. Always handover the
Owner‘s andSafety Manual.
WARNING!
Tbischainsaw
k
capable
of
severekickbackthat
couldresultinseriousinjury
to
theoperator.
Do
not
operate this chain saw unless you have
extraordinarycuttingneedsandexperience
in
and
specialtrainingfor dealing with kickback Chain
sawswithsignificantlvreducedkickbackwtential
areavailable.
Kickback may
occur
whenthe no
guide bar touches an object,
or
w
closesinandpinchesthesaw
chain
ntact
may
abruptly
stop
th
me
cases
may
cause a
lii
ction,WkingtheguIdebar
user,
or
pushthe guide b
reducethe risk
of
a kckbadcandpotentialinjury.
With
a-basicunderstandina
of
kickback. vou
C.
D.
E.
F.
canreduceoreliminatethe
e7ementot
surpise.
It
is
a sudden surprise that contributes
to
acciden
Keep
a
hands, your right hand on the rear grip and
yourlefthandonthetubularhandle,whenthe
engineisrunning.Usea
firm
grip
with
thumbs
andfingersencirclingthechainsaw handles.
A
firm
grip
can
neutralize kickbackand help
you maintaincontrolof the saw. Don’t letgo!
Make sure that the area in which you are
cuttingisfreefromobstructions. Donotletthe
noseof theguidebar contactthe log, branch,
or any other obstructionswhich could be hit
whileyouare operatingthe saw.
Donotoverreachorcutaboveshoulderheight.
Follow manufacturer‘ssharpeningand main-
tenanceinstructionsforthesawchain.
Only usereplacementbarsandchainsspeci-
fiedbythemanufacturerortheequivalent.
Additional safety precautions
Thefollowingadditionalsafetyprecautionsshouldbe
.
observedby allusersof chainsaws:
1.
2.
3.
4.
5.
6.
7.
8.
Do
notoperateachainsawwhenyouarefatigued.
Use safety footwear; snug-fitting clothing;
protective gloves: and eye, hearing, and head
protectiondevices.
Usecautionwhen handlingfuel. Movethe chain
saw at least 10feet
(3
m) from the fueling point
beforestartingthe engine.
Do
not allow other persons
to
be near the chain
saw when startingor cutting with the chain saw.
Keep bystanders and animals out of the work
area.
*
Do
not start cutting until you have a clear work
area, secure footing, and a planned retreat path
from the fallingtree.
Keep all parts of your body away from the saw
chainwhen the engine is running.
Before you start the engine, make sure that the
saw chain is not contacting anything.
Carry the chain’sawwith the engine stopped, the
guide bar and saw chain
to
the rear, and the
muffler away from your body.
-
-
-
.
9.
Do
not operate a chain saw that is damaged, is
improperly adjusted, or is not completely and
securely assembled. Be sure that the saw chain
stops moving when the throttlecontroltrigger is
released.
10.
Shut
off
the engine before setting it down.
11. Use extreme caution when cutting small sizec
brushandsaplingsbecauseslendermaterial may
catchthe saw chain and be whippedtowardyou
or pullyou off balance.
12. When cuttinga limb that
is
undertensionbealert
for
springback
so
that youwillnotbestruckwhen
the tension onthe woodfibers is released.
13.
14.
15.
16.
17
18.
Keepthe handlesdry, clean, andfreeof oil
or
fuel
mixture.
Operate the chain saw only in well-ventilated
areas.
Do
not operate a chain saw in a tree unlessyou
have been specifically trained
to
do
so,
All
chainsawservice,otherthantheitemslistedin
the owner’s manual maintenance instructions,
shouldbe performedby MAKlTA
.
(Forexample,
if
improper
tools
are used
to
removethe flywheel
or
if
an impropertool is usedto holdthe flywheel
inordertoremovetheclutchstructuraldamage
to
the flywheel could occur andcouldsubsequently
cause the flywheel
to
burst.)
When transportingyour chain saw, use the chain
protectioncover.
Low kickback bars and low kickback chains are
designed
to
reducethe riskof kickbackinjury.Ask
your MAKITAdealer about these devices.
’
’
4


General
Safety
Precautions
The use
of
any chain saw may be hazardous.
At
full
throttlechainspeedcan reach
45
mph
(20
m/s).
Itis
importantthat youread; fully understandandobserve
the followingsafety precautions andwarnings. Read
the owner's manual and the safety instructions
periodically.
gerous. Carelessorimproperuseof anychainsaw
may causeseriousor
f
Haveyour MAKlTAdealer
show
you
how
tooperate
your chainsaw. Observe
all
applicable
local
safety
regulations,
standards
andordinances.
Maximum Computed Kickback Angle
(CKA)' without usingthe chain brake when
using the recommended bar and chain
combinations(Inthis example the
CKA
is
45").
Maximumcomputed Kickback Angle
(CKA)' with using the chain brake when
using the recommended bar and chain
combinations(In
this
example
me
CKA
is
40").
Contactof the guide bar tip with
any object shouldbe avoided!
Tipcontactmaycausetheguide
bar
to
move suddenly upward
andbackward,whichmaycause
serious injury!
Always use two hands when
operating thechain saw!
Reduced Kickback Bar and
fueltankto
7/8
th
full
(see
storingthe
saw).
not lendyour chain
saw
without
this owner's
nual. Besurethat
anyone
usinnyour
saw
un-
Properuseof a chain
1.
the operator
2
the saw
3.
the useof the
Discription
of
symbols
used onchain
saws:
Z
62.1
-95
and Compliancewith
Z
62.3-96 CSA -Standards
Class 1A
ANSI
B175.1-1991
Compliance with
ANSI -Standards
ChainSaw list.edinaccordance with
45M6
Amencan,NationalStandardSafety
S
ecificationsfor Gasoline Powered
rain
saws(ANSI
B
175.1-1991).
@
Chaincombinationthathasbeen
c-2
evaluated with the power head
to achieve kickback Drotection
@X.~~-~
(according to ANSI 'and CSA
standards).
TheComputedKickbackAngle isacalculatedvalue
from eneraiesmeasuredon a test bench.lt is
mt
the
angle of tbe guide bar moved upward in caseof a
KICKBACK.
The operator
Physical Condition
You must be ingood physicalcondition and mental
healthand not underthe influenceof any substance
(drugs, alcohol), which might impair vision, dexterity
or judgment.
Prolongeduse
of
chain
saws
exposingtheoperator
to vibrations
may
produce Whitefinger disease
(Raynaud's phenomenon). This phenomenon
reduces the hand's ability
to
feel and regulate
temperature, produces numbness and buming
sensationsand may cause nerve and circulation
damage
and
tissue necrosis.
Alt MANTA
saws
are
therefore provided
with
an
antivibration system which is essential for those
using chain
saws
on a regular
or
sustained
basis.
Antivibrationsystemsdo
not
guarantee
that
you
will
not sustain Whiefinger disesase, however, they
reduce this danger considerably. Nevertheless,
continual and regular
users
should observe their
hands
and fingers
and
in
case
af
any abnormal
symptoms,
seek
medii
adviceimmediately.
5

Proper
clothing
The
saw
Clothing must be sturdy and snug-fitting, but allow
complete freedom of movement. Avoid loose-fitting
jackets,scarfs,neckties,jewelry,flaredorcuffedpants,
or anythingthat couldbecomeentangledwiththesaw
or brush. Wear overalls or jeans with a reinforced
cuttingresistant insert (fig.
3).
Protect your hands with gloves when handling saw
and saw chain. Heavy-duty, nonslip gloves improve
your grip and protect your hands.
0
Good footing is most important in chain saw worl
Wearsturdybootswithnonslipsoles.Steel-toedsafety
boots are recommended.
Propereye protection isa must. Non-fogging.vented
goggles and a face screen is recommended. Their
use reducesthe risk of eye andfacial injury.
Wear an approved safety hard hat to protect your
head. Chain saw noise may damage your hearing.
Always wear noise protection equipment (ear plugs
or ear muffs)
to
protectyour hearing.
Continual and regular users should have their
hearingchecked regularly.
Wear protective helmet,
eyeandear protection
Partsof the chain saw: illustrationsanddescription
of
partssee page
16.
WARNING
!
Never modify a chain saw in any way. Only
attachments supplied by MAKITA or expressly
approvedbyMAKITAforusewiththespecificsaw
areauthorized.
WARNING
!
Bowguidebarssubstantiallyincreasethepotential
for kickback and severe or fatal injurydue
to
the
greater kickback zone
of
the bow design. Bow
guide bars are not
recommended
for use on
MAKITAchain
saws
norarethey approvedbythe
ANSI B
175.1-1991
chain saw safety standard.
-'
The
use
of
the
saw
Transporting the chain saw
own
or
carrying
it.
Carrying
a
chainsawwiththeown
or
carrying
it.
Carrying
a
chainsawwiththe
en-gine
Nnningisextremelydangerws.Accidental
By
hand: When carryingyour saw by hand, the
enginemustbestoppedandthesawmustbeinthe
properposition.
The chain protection cover should be over the
chain and the guide bar must point backwards.
Whencarryingyour sawthebarshouldbebehind
,
you(fig.
4).
By
vehicle: When transportinginavehicle, keep
chainandbarcoveredwiththechainguard.Properly
secureyour saw to prevent turnover, fuel spillage
anddamage
to
thesaw. Makesurethesaw innot
exposedto heator sparks.
6

Chain
saw
operating instructions
For assemblyfollow the procedureinthe appropriate
section"MountingGuideBarandChain"
of
thismanual.
MAKITA chain, guide bar and sprocket must match
eachother(seetheappropriatesectioninthismanual).
WARNING!
Propertension
of
thechainisextremelyimportant.
In
order
to
avoid false setting the tensioning
pr0CedUre
must
be followed
as
described
in
this
manual. Always make sure
the
hexagonal nut@)
for the sprocket guardis (are) tightenedsecurely
after tensioningthe chain. Check chain tension
once more after having tightened the nuts and
thereafteratregularintervals(alwaysbeforestarting
towork).
If
thechainbecomesloosewhile cutting,
shut
off
the engine
and
thentighten. Never try to
tightenthe chainwhile the engine
is
running!
Fueling
YourMAKITAsaw usesonoil-gasolinemixtureforfuel
(seechapter "Fuel" of this manual).
5
extreme
caution
when handlinggasoline
or
fuel
mix. Do-notsmoke or
bring
any sparks or flame
Fueling instructions
630
Fuelyour chain saw in well ventilatedareas or out-
doors. Always shut
off
the engine and allow itto cool
before refueling. Select bare ground for fueling and
movethechainsaw at least
10
feet
(3
m) from fueling
spot beforestartingthe engine (fig. 5a).
I I
5a
a
Wipe off any spilledfuelbeforestartingyour saw and
check for leakage.
Check for fuel leakage while refueling and during
operation.
If
fuelor oilleakage
is
found, do not startor
run the engine until leak is fixedand spilledfuel has
been wiped away. Clothingwith fuel on it has to be
changedimmediately (thisis a danger to your life!).
Avoidskincontactwithfuel. Never loosenor remove
the capof the fuel tankwhile the engine is running.
Starting
Do
notdrop start.
This
methodis very dangerous be-
causeyoumay losecontrol
of
the saw (fig. 6).
L
6a
Place the chain saw on firm ground or other solid
surfaceinanopenarea. Maintainagoodbalanceand
securefooting. Placeyour rightfoot throughthe rear
handleopeningandfirmly graspthe front handlewith
your left hand (fig.sa).
Be absolutely sure that guide bar and chain are clear
of youor allother obstructionsand objects, including
the ground, because when the engine starts in semi-
throttleposition, engine speedwill be fast enoughfor
the clutchto engage the sprocket and turn the chain
which may cause a kickback.
Neverattempttostartthe saw whentheguidebarisin
acut or kerf.
When you pullthe starter grip, don't wrap the starter
ropearoundyour hands.
Do
notallowthe grip to snap
back, but guidethe starterrope slowly backto permit
the rope to rewind properly. Failure to follow this
procedure may result ininjury
to
handor fingers and
may damagethe starter mechanism.
7

Importantadjustments
WARNING1
At correctidlespeed, chainshouldnottum. Fordi-
rectionsto adjust idlespeed, see the appropriate
section
of
this
instructionmanual.
Do
notuse asaw withincorrect idle speedadjust-
ment. Adjust the idlespeedyourself according to
theappropriate section of this manual.
Have your MAKITA dealer check your saw and
makeproperadjustmentsorrepairs.
Checkthesawchaintensionfrequently,especially
just afterinstallinga new chain. New chains may
stretchmoreduringtheir initialuse. Aproperlyad-
justedsaw chaincan bepulledfreely aroundthe
guide bar by handwithout sagging. Always stop
the engine and wear gloves when checking or
adjustingthe chaintension.
Working conditions
Operate your chain saw only outdoors. Operate the
saw undergoodvisibilityanddaylightconditionsonly.
(rain,snow,
ice).
Put
off
theworkwhentheweather
is
windy, stormyor rainfall
is
heavy. Clearthearea
ks
&d
watch
out
for holesor ditches.
Cuttinginstructions
Always holdthe saw firmly with both handswhen the
engine is running. Placeyour left handonthe tubular
handleand your right handon grip andthrottlelever.
Left-handersshould follow these instructionstoo.
Wrap your fingerstightly aroundthe handles, keeping
thehandlescradledbetweenyour thumbandforefinger
(fig.
7).
With your handsinthis position, you can best
opposeandabsorb the push,pullandkickbackforces
of
your sawwithout havingit slip out of your grip (see
sectionof reactiveforces). Makesureyour chainsaw
handle and grip are in good condition and free
of
moisture,pitch,oilorgrease.
Always
start
acut with the chain running at fullspeed
and the spike bar incontactwith the wood.
p
,
’
WARNING!
Never use the saw with one hand. You cannot
control reactive forces (see pages
9
to
11)
and
maylosecontrolof the saw.
,
.
designedforpryingorshovelingaway limbs,roots
or other objects.
Whensawing, makesurethatthesaw chaindoes
not touch any foreign materials such as rocks,
nailsandthelike(fig.
8).
Suchobjectsmaybeflung
off,
damage the saw chain or cause the saw to
kickback.
J
I

Inordertokeepcontrolof your saw, alwaysmaintaina
firmfoothold.Neverworkonaladder,inatreeoronany
other insecure support. Never use the saw above
shoulderheight(fig.
9).
Positionthechainsawinsuchaway that your bodyis
clearof thecuttingattachmentwhenevertheengineis
running(fig.10).
Don't putpressureonthesawwhen reachingtheend
of
acut. Thepressuremaycausethe barandrota!ing
chainto popout of thecutorkerf,gooutof controland
striketheoperatororsomeotherobject.
If
therotating
chain strikes some other object a reactiveforce (see
pages 10
to
12
)
may cause the chain to strike the
operator.
Reactiveforcesduring
the
cut, includingkickback
kickback, pushback and pull-in. Reactive
forces
can
bedangerous1Inany chainsaw,
the
powerful
force used
to
cut
wood
can
be
reve
againstthe operator).
If
the
rotatingchain
is
suddenlystoppedbycontact
with any solid object like
a
log
or
branch or
is
pinched,thereactiveforcesinstantlyoccur.These
reactiveforcesmay result
in
loss
of
controlwhich
may, in turn, cause serious or fatal
injury.
An
understanding of the causes
of
these reactive
forces may helpyou avoid
loss
of
control.
The most common reactiveforces are
-
kickback,
-
pushback,
-
pull-in.
Kickback
Kickback occurs when the upper quadrant
of
the bar
nosecontacts asolidobject inthe woodor ispinched
(fig. 11).The reactionof the cutting force of the chain
causesarotationalforceofthechainsawinthedirection
oppositetothechainmovement,mainlyintheplane
of
the bar. This may flingthe bar inan uncontrolledarc
towardsthe operator.
12
\-Y-w--
This reactioncan occur in a fraction of a second and
undersome circumstances, cause the guide bar and
chaintostriketheoperatorwithenoughforcetocause
severeorfatalinjury.
It
mayalso occur duringlimbing.
Italsooccurswhenthenoseof theguidebarispinched
unexpectedly, unintentionallycontacts solid material
inthe wood (fig.12) or is incorrectly used
to
begin a
plungeor boringcut.
Thegreatertheforceofthekickbackreaction,themore
difficultitbecomesfortheoperatorto controlthesaw.
9

Many factors influence the occurence and
force
of
the kickback reaction.The type of bar and saw chain
youuseisafactorintheforceofthe kickbackreaction.
Thespeedof contact atwhich the cutter contacts
theobject.
Kickbackforce increasewith the rate of impact..
The contact angle between the nose
of
the bar
andthe foreign object (fig.
11).
Kickback is most pronouncedin the upper quadrant
of the bar nose.
MAKITAchaintypes aredesignedto reducekickback
forces.
The depth gauges:
Improperloweringof thedepthgaugesalsoincreases
the risk of a kickback.
Saw chaincutter sharpness:
WARNING!
A dullimproperly sharpenedchain may increase
the
risk
of
kickback Always cut with
a
properfy
sharpenedchain.
-1
-
*
Devicesfor reducingthe risk
of
kickback injury
MAKITA have developed a special chain brake to
reducethe risk of kickbacks.
This chain brake increases the safety factor on the
job, e.g. when the saw suddenly bucks upwards the
chain stops rotating within a fraction of a second. A
deflectionguardonthedisengagingleverof the chain
brakeandascooprearhandleensurethat the opera-
tor's handsare fully protectedat alltimes.
Kickbacktendency increasesas the radius or size of
the guide bar nose increases. MAKITA have devel-
opedguidebarswith smallnoseradius,to reducethe
kickbacktendency.
No
chain brake prevents
ki
Thesebrakesaredesignedonlytostopthechain,
if
activated.
To
ensureaproperoperationof thechainbrake,
it
must be properly maintained. Furthermore, there
must
be
asufficientdistancebetweentheoperator
and the bar to ensure that the chain brake has
sufficienttimetoactivateandstopthechainbefore
potentialcontactwith the operator.
I
13
To
avoid kickback
The best protection from personal-injury that may
result from kickback isto avoid kickback situations:
1.
Hold the chain saw firmly with both hands and
maintain a secure grip.
2.
Beawareof the location of the guide bar nose at
alltimes.
c"
_.
.
3.
Never bring the nose of the guide bar in contact
withany object.
Do
notcut limbswith the nose
of
the guide bar. Be especially careful with small,
toughlimbs, smallsize brushandsaplingswhich
may easily catch the chain.
4.
Don'toverreach.
5.
Don't cut above shoulder height.
6.
Begincutting and continue at full throttle.
7.
Cut ontione
tog
at atime.
8.
Useextremecautionwhen re-enteringaprevious
cut.
9.
Do
not attempt plunge cuts (see page
13)
if
you
arenotexperiencedwiththesecuttingtechniques.
10.
Be alert for shiftingof the logor other forces that
may causethe cut to close and pinchthe chain.
11.
Maintainsaw chain properly.Cut witha correctly
sharpened, properlytensionedchain at alltimes.
12.
Standto the side of the cutting path of the chain
saw.
10

Pushback:
Pushbackoccurswhenthe chain on thetop
of
the bar
is suddenly stopped when
it
is pinched, caught or
encounters
a
foreign object inthewood. Thereaction
of the chain drives the saw straight back toward the
operatorcausing
loss
of saw control. Pushback fre-
quently occurs when the top of the bar is used
for
cutting(fig.
14).
14
To
avoid
pushback
1.
Be alert to forces or situations that may cauE
material
to
pinchthe top of the chain.
2.
Do
not cut more than one logat a time.
3.
Do
not twist the saw when withdrawing the bar
froma plungecut or underbuck cut (figures
25
to
27
and
33,
pages 13 and
15),
becausethe chain
can pinch.
Pull-in:
Pull-inoccurswhenthechainonthebottomof the bar
is suddenly stopped. The chain on the bottom
of
the
bar stops when it is pinched, caught or encounters a
foreignobject inthewood(seefig.
15).
The reactionof
the chain pullsthe saw forward, causingthe operator
to losecontrol.
Pull-in frequently occurs when the spike bar of the
saw is not heldsecurely against the tree or limb and
when the chain is not rotatingat full speed before it
contactsthe wood.
15
To
avoid
pull-in
1.
Always start a cut with the chain rotating at full
speedandthe spike bar incontact with the wood.
2.
Pull-in may also be prevented by using plastic
wedges
to
open the kerf or cut.
Cutting
techniques
Felling
Fellingiscuttingdown a tree.
Before fellingatree, consider carefully all conditions
which may affect the directionof fall, including:
The intended directionof the fall.
The neutrallean
of
the tree.
Any unusually heavy limb structure.
Surroundingtreesand obstacles.
Thewind directionand speed.
'
WARNING!
Always observe the generalcondition
of
the tree.
Look
for
decay
and
rot
in
the trunk.
If
it
U
rotfed
vibrate loose
and
fall
on
the
operator.When
fellina
._
on
aslope,theoperatorshould
stand
ontheup-hi
When fellinginthe vicinity of roads, railways
and
powerlines, etc., take
extra
precautions(see fig.
16).
Informthe police,
utili
company or railway
authority beforebeginningto cut.
WARNING!
Useextremecautionwhencuttingsmallsizebrush
andsaplingswhichmayeasilycatchthechainand
pullyou
off
balance.
11

,
'I
.
-.
-
I
-
-____---
-
--
----
11
I'I
=
cuttingdownarea
Whenfelling, maintainadistanceof at least
2
1/2
tree
lengthsfrom the nearest person(see fig.
17).
Note:
Thenoiseof your enginemay drownany wamingcall.
Felling instructions:
18
First clear the tree base and work area from inter-
feringlimbs and brushand clean its lower portion an
axe (seefig.
18).
\I/r
19
I
I
w
J
Then, establish a path of escape and remove all
obstacles.Thispathshouldbeoppositetotheplanned
directionof the fall of the tree and at a
45"
angle (fig.
19).
An alternatepathmustalso beselected. Placeall
tools and equipment a safe distance away from the
tree, but not on the escape path.
If
thetreehaslargebuttressroots, cut intothe largest
buttressesvertically first (horizontally next) and re-
move (fig.
20).
.
Direction
of
fall
'Ip
lis
$1
+
I
Fellingnotch
I
I
Hinge
I
23
Then, determine the placement of the felling notch
(fig.
21).
The felling notch when properly placed de-
termines the direction in which the tree will fall. It
is
madeperpendiculartothelineof fallandshouldbeas
close to the ground as possible. Cut the fellingnotch
to adepthof about one-fifthto one-fourthof the trunk
diameter (fig.
22).
Itshould be inno case higher than
it isdeep. Make the felling notchvery carefully.
'
12

Begin the felling cut slighty higher than the felling
notch and on the opposite side
of
the tree (fig.
22).
Thencuthorizontallythroughtowardsthefellingnotch.
Applythechainsawwithitsspikesdirectlybehindthe
uncut portionof wood and cut toward the notch (fig.
23).
Leave approximately
1/10
of the tree diameter
uncut!Thisisthehinge
(fig.
23).
Do
notcutthroughthe
hinge becauseyoucouldlosecontrolof the direction
of the fall. Drive wedges into the felling cut where
necessary to controlthe direction
of
the fall. Wedges
shouldbe
of
wood, lightalloyor plastic
-
neverof steel,
which cancause kickbackand damageto the chain.
Always keep to the side of the fallingtree. When the
treestartsto fall, shut
off
the engine,withdraw the bar
and walk away on the pre-planned escape path.
Watch out for falling limbs.
WARNING!
Beememelycarefulwithpartiallyfallentreeswhich
are poorlysupported.
Whenthetreehangsorforsomeotherreasondoes
not
fall
completely, set the
saw
aside and pullthe
tree downwith a cable winch,
block
andtackle or
Sectioning Method
length
of
the guidebar requires use of either the
sectioning
or plunge-cut method. Thesemethods
areextremelydangerousbecausethey involvethe
use
of
the
nose
of
theguidebar
and
can
result
in
kickback. Only property traine
24
~
For the sectioning method (fig.
24)
make the first cut
with the guidebarfanning intowardthe hinge. Then,
usingthe bumperspike as a pivot, repositionthe saw
forthenextcut. Avoidrepositioningthesaw morethan
necessary.When repositioningfor the next cut, keep
the guide bar fully engaged in the kerf to keep the
fellingcut straight. If the saw begins
to
pinch, insert a
wedge
to
open the cut. On the last cut, do not cut
the hinge.
Plunge-Cut Method
Timberhaving
a
diameter more than twice the length
of
the guide bar reauires the use of the plunge-cut
methodbefore makingthe fellingcut.
First, cutalarge,wide notch. Makea plungecut inthe
center of the notch.
Theplungecutismadewiththeguidebar nose. Begin
the plunge cut by applying the lower portion of the
guidebarnose
to
thetree at anangle (fig.
25).
Cutuntil
depthof the kerf isaboutthe sameasthewidth of the
guidebar (fig.
26).
Next, alignthe saw inthe direction
~~
inwhich the recess is to be cut. With the saw at full
throttle, insertthe guide bar inthe trunk (fig.
27).
Enlargetheplungecutas showninillustration(fig.
28)
28
13

29
WARNING!
There is an extreme danger of kickback at this
point. Extra caution must be taken to maintain
controlof thesaw.
To
makethefellingcut, follow
the sectioningmethod described previously (fig.
29).
If you are inexperienced with a chain saw
plunge-cutting shouldnot be attempted. Seek the
help of a professional.
Limbing
Limbing
is
removingthe branchesfrom afallen tree.
ARNING!
There
is
an
extremedangerof kickbackduringthe
limbingoperation.
Do
notworkwiththenoseofthe
bar. Be extremely cautious and avoid contacting
the
log
or
otherlimbswiththenose
of
theguidebar.
or
the
log
mayroll.
I
1
Startlimbingbyleavingthelowerlimbstosupport
the
log
offtheground(fig.
30).
Alwayscutfromthe
top of thelimb.
Do
not underbuckfreelyhanging
limbs.
A
pinch may result or the limb may fall,
causinglossof control. Ifapinchoccurs,stopthe
engine andremovethe saw, by liftingthe limb.
Bucking
Bucking iscutting a logintosections.
WARNING!
1.
When bucking, do not standon the log. Make
surethe log
will
notrolldown-hill.
If
on aslope,
stand
on
theuphillsideof the
log
(see
fig. 31).
Watchout for rollinglogs.
WARNING!
4.
Whencuttingsmalllogs,useasawhorse(fig.32).
Never permit another perkon to holdthe
log.
Neverholdthe
log
withyour leg
or
foot.
WARNING!
Be extremely cautious when cutting limbs under
tension. The limbs couldspring backtoward the
operator andcause loss
of
control
of
the saw or
injury to the operator.
14

3:
li
1
I
2.
Cross cut
I-
ire specialattentionto
stresson
the
log
(see
fig.
33,34).
Thebucking
WARNING!
6.
Onlyproperlytrainedprofession
inanareawherethelogs, limbsand
roots
are
tangled
(i.
e. ablowdownarea, fig.
35).
Work-
ing inblowdown areas is
e
ous.
NING!
7.
Dragthe
logs
intoa clearareabefore cutting.
Pullout exposed andcleared
logs
first.
Maintenance and Repair
Neveroperate a chain saw that isdamaged, improp-
erlyadjusted
or
not
completelyorsecurelyassembled.
Followthe maintenanceand repair instructionsin the
appropriate section
of
this manual.
WARNING
!
Always stop the engine and make sure that the
chain
is
stopped
beforecommencingany mainte-
nanceor repairwork
or
cleaning thesaw.
Do
not
attempt any maintenance
or
repair work not de-
scribedinthismanual. Havesuchwork performed
byyour MAKITAserviceshop only.
Maintaining and storing the saw
Keepthechain,barandsprocketcleanandlubricated;
replaceworn sprockets or chains.
Keepthechain sharp. You canspot adullchainwhen
easy-to-cutwoodbecomeshardtocutandburnmarks
appear on the wood.
Keep the chain at proper tension. Tighten all nuts,
bolts and screws except the carburetor adjustment
screws after each use.
Keepspark plugandwire connectiontightand clean.
Store saws in a high or locked place, away from
children.

Denomination
of
components
12 10
9
8
Identificationplate
(example model
DCS
5200i)
Indicatewhen orderingspareparts!
1
Handle
2
Choke
3
Filtercover
4
Tubular handle
5
Muffler
6
Retainingnuts
7
Spikebar
24 23 22 18 21
13
Guide bar
14
Chain
15
16
17
18
19
20
21
22
23
24
25
(toothedstop
for
holding
saw
steady against wood)
8
Chaincatcher
9
Adjustingscrew for oil pump(bottomside)
10
Sprocket guard
11
Identificationplate
12
Handguard
Handguard(releasefor chainbrake)
Starter grip
Adjustingscrews
"S-L-H"
for carburetor
VSTOP-switch
Stop knobfor halfway throttle
Safety lockingbutton
Throttle lever
Fueltank cap
Fanhousingwith startingassembly
Oil tank cap
Startingvalve (only DCS
431)
16

Technical data
DCS
430
I
431
I
DCS
520
I5201
DCS540
I
DCS
52001
Approvedbar and chain combinations
"Low-kickback saw chain is a chain which has met the kickbackperformance requirements
of
ANSI
B
175.1-1991
(AmencanNationalStandardforPowerTools-Gasoline-PoweredChainSaws-SafetyRequirements)whentestedonthe
representativesample of chain saws below
3.8
c.i.d. specifed
in
ANSI
B
175.1-1991".
The approvedbar and chain
combinations are low kickbackchains according
to
ANSI
6
175.1-1991
and also meet the kickbackrequirements
of
CSA
262.3-96
for chainssaws below
80
cm3.
designated
as
'low
kic
___~
iuidebarandsawchaincombinationsmeetingkick-
lack
requirementsof
ANSI
B175.1-1991 for the use
n
the
USA
Aodels
DCS
430,
DCS
431
XJlDE BAR SAWCHAIN
ength pitch partno. part no.
15'
(38
cm)
.325"
445
038 631 523
085
664
16" (40
cm)
.325"
445
040 631 523
085
666
18'
(45
cm)
.325"
445
045 631 523
085
672
Drivelinkgauge:
.058",
Chainsprocket:
8
teeth
UodelsDCS
520,
DCS 5201, DCS 540, DCS 5200i
GUIDE
BAR
SAW CHAIN
length pitch part no. part no.
15"
(38
cm)
.325'
445
038 631 523
085
664
16' (40
cm)
.325'
445
040 631 523
085
666
18' (45
cm)
.325'
445
045 631 523 085 672
Drivelinkgauge:
.058',
Chainsprocket:
8
teeth
18"
(45
cm)
3/8"
443
045 661 523 102 664
21
'
(53
cm)
318"
443
053 661 523 102 672
Drivelinkgauge:
.OW,
Chainsprocket:
7
teeth
hidebarandsawchaincombinationsmeetingkick-
,ack requirementsof CSA
262.3-96
for the usein
Uodels
DCS
430~431,520,5201,540and
DCS
5200i
lenath pitch part no. part no.
CANADA
GUIDE BAR SAWCHAIN
15"
(38
cm)
.325"
445
038 631 523
085
664
16"(40
cm)
.325" 445 040 631 523
085
666
18"
(45
cm)
.325"
445
045 631 523 085 672
Drivelinkgauge:
.058",
Chainsprocket:
8
teeth
15"
(38
cm)
3/8"
443
038
651 522 094 656
18"(45
cm)
3/8" 443 045 651 522 094 664
21' (53
cm)
3/8" 443 053 651 522 094 672
Drivelinkgauge:
.058',
Chainsprocket:
7
teeth
17

PUlTlNGINTOOPERATION
Mountingthe guide bar and saw chain
Usethe universalwrenchdeliveredwiththe chainsaw for the
followingwork.
Put the chain saw on a stable surface and carry out the
following steps for mountingthe guide bar andchain:
CAUTION:
Before doing any work on the guide bar or
chain. Mysswitch
off
the engine and pull
the plugcap
off
thesparkplug(see'Replacing
thesparkplug").Alwayswearprotectivegloves!
CAUTION:
Start
the chain saw only after havingassem-
bled
it
completelyand inspected!
.
-
Alwaysreleasethechainbrakebeforeremovingor replac-
ingthesprocketguard
(W4).
Todo
so.
pullthehandguard
(Nl)
towardsthetubularhandle
(N2)
untilyoufeelitcatch.
-
Unscrew retainingnuts
(813).
-
Pull
off
the sprocket guard
(814).
_.
-
-
Turn the chain adjustingscrew.(C/6)
to
the left (counter-
clockwise)untilthe pin (Cn) isat the left stop.
-
Lift the chain
(U10)
over the clutch drum and onto the
sprocket
(Vll).
Usingyourright hand,guide thechaininto
the top guide groove on the guide bar
(W8).
NOTE:
The cuttingedges alongthe top of the chain must
point in the directionof the arrow!
18
-
Positionthe guide bar
(We).
Makesurethat the pin
(D19)
of
the chaintighteneris in the hofe(circled)on the guide bar.
10
12
I
-
Leadthe chain
(F/lO)
aroundthe sprocketnose
(F/12)
of
the guidebar.
NOTE:
The chainshouldbe easy
to
pullinthe directionof the
arrow.

-
Turn the chain tightener
(W6)
to
the right (clockwise)
untilthechainengagestheguidegroove
of
the bottomside
of the bar (see circle). Press the guide bar against the
housingwith your left hand.
Tighteningthe saw chain
-
Slightly lift the end of the guide bar and turn the chain
adjustingscrew
(116)
to
the right(clockwise)untilthe chain
restsagainstthe bottomside of the guide bar.
While still holding up the tip of the guide bar, tighten the
retainingnuts
(W3)
with the universalwrench.
-
Chain
brake
4
3
El
-
-
Replacethe sprocket guard
(W4).
Manuallytightenthe retainingnuts
(W3).
Checkingthe chaintension
-
Thetensionof thechainiscorrect
if
thechainrestsagainst
the bottom side
of
the guide bar and can still be easily
turned by hand. While doing
so
the chain brake must
be
released.
Every new chain has
to
be broken in for about
2
to
3
minutes. Ample chain lubrication is essential during this
period.After breakingin, checkchaintensionandadjust,
if
necessary.
When checking the chain tension the engine must
be
NOTE:
Checkthechaintensionfrequently
-
chainstendto
getlongerduringuse!
If
thisisnotdone,thereisarisk
of
the
chainjumping
off
the bar.
It
is recommendedto use
2-3
chainsaltematively.
Inorder
to
guaranteeuniformwear of the guidebarthebar
should
be
turnedover whenever replacingthe chain.
-
-
The MAKITA models comes with an inertia chain brake as
standard equipment.
If
kickbackoccurs due
to
contact of the
guidabar tip with wood
(see
SAFETY PRECAUTIONS), the
chainbrakewillstopthe chainthroughinertia
if
the kickbackis
sufficiently strong. The chain will stop within a fraction of a
second.
The chain brake
Is
installed
to
blockthe
saw
chain before
startingitand
to
stop
itimmediatelyin
case
of
anemergency.
Engagingthe chain brake(braking)
Ifthekickbackisstrongenoughthesuddenaccelerationof the
guidebarcombinedwiththeinertiaof thehandguard
(U3)
will
automatically actuatethe chain brake.
To engage the chainbrakemanually,simply pushthe handguard
(U3)forward(towardsthetipofthesaw)withyourlefthand(arrow
1).
Releasingthe chainbrake
Pullthe handguard
(u3)
towardsyou (arrow
2)
until
you
feel
it
catch. The brakeisnow released.

@@
Fuel
I
Refuelling
1.0US-@.
(3.71)
2.5
US-~I.
(9.4
I)
5.0
US-Wl.
(18.9
I)
I
Gasoline
I
40:l
1
501
I
1OO:l
1
32nOr(94a))
25nOr@OTt'l
1.3nOr(3acm)
aonOrmcm)
wn~r(iescm)
~znozp~m
lROIbZ(473aIFI
128IbZ(nScm)
6.4fbZ(189cm)
I
+
I
omer
dl
MAKITA
a1
pJ
WKA
oil
U
Chain
oil
Useanoilwith adhesiveadditivefor lubricatingthechain and
guidebar. The adhesive additive preventsthe oil from being
flung
off
the chaintoo quickly.
We recommendthe useof chainoilwhich isbio-degradablein
ordertoprotecttheenvironment. The use
of
bio-degradableoil
mayevenbe requiredby localregulations.
The chain oil BIOTOP sold by MAKITA is made
of
special
vegetableoilsandis
100%
bio-degradable.BIOTOPhasbeen
granted the 'blue angel' (Blauer Umweltschutz-Engel)for
beingparticularlyenvironment-friendly(RAL
UZ
48).
BIOTOP chainoil is availableinthe followingsizes:
1
I
5
I
20
I
order number
980008 610
order number
980 008 61
1
ordernumber
980
008
613
Biodegradableoilisstable only for alimitedperiodof time. It
should
be
usedwithin
2
years from the date
of
manufacture
(printedon the container).
Important note onbio-degradablechain
oils:
period
of
time(longerthanthe expirationdateof thechain
oil)
If
you are not planning
to
use the saw again for an extend
empty the oiltank andputinasmallamountof regularengine
oil(SAE
30),
andthenrunthesawfor atime. Thisisn&essary
to flush out all remainingbio-degradableoilfrom the oil tank,
oil-feedsystem, chain and guide bar, as many such oilstend
to leave sticky residuesover time, which can causedamage
to the oilpumpor other parts.
Thenexttimeyouusethesaw,
fill
thetankwithBIOTOPchain
oilagain.
T7
.
NEVER
USE
WASTE
OIL
Wasteoil is very dangerousfor the environment.
Wasteoil containshighamounts
of
carcinogenicsubstances.
Residuesinwaste oil result ina highdegree of wear andtear
at the oil pump andthe sawingdevice.
Incase
of
damagecausedby usingwasteoilor unappropriate
chainoil the productguaranteewit1be null and void.
Your salesman
will
informyou about the use of chainoil.
c
This manual suits for next models
3
Table of contents
Other Makita Chainsaw manuals

Makita
Makita DUC307ZX1 User manual

Makita
Makita UC002G User manual

Makita
Makita DUC256 User manual

Makita
Makita UC250D User manual

Makita
Makita DUC121 User manual

Makita
Makita DUC204 User manual

Makita
Makita DUC357 User manual

Makita
Makita 5012B Quick start guide

Makita
Makita DCS230T User manual

Makita
Makita XCU03 User manual

Makita
Makita XCU05 User manual

Makita
Makita UC3530A User manual

Makita
Makita UC014G User manual

Makita
Makita BUC250 User manual

Makita
Makita UC3030A User manual

Makita
Makita UC3020A User manual

Makita
Makita UC004G User manual

Makita
Makita EA3500S User guide

Makita
Makita EA3600F35B User guide

Makita
Makita UC120D User manual