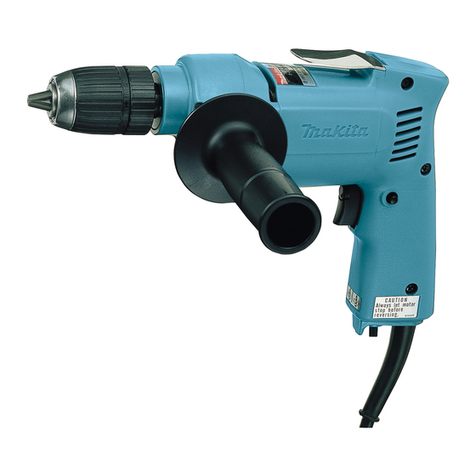
Makita 6302 User manual

Drill
Drilling capacities
Steel Wood
Model
13
mm
(1/2”)
MODEL
6302
13
mm
(1/2”)
MODEL
6303
Variable speed
/
Reversing
Variable speed
I
Reversing
Overall length Net weight
No
load speed
(RPMI
INSTRUCTION MANUAL
6302
6303
DOUBLE
INSULATION
13
mm
(1/2”) 36
mm
(1-3/8”)
0
~
550
285
mm
(11-114”)
2.0
kg
(4.4
Ibs)
13
mm
(1/2”) 36
mm
(1-3/8”)
0
~
850
285
mm
(11-114”)
2.0
kg
(4.4
Ibsl
SPECIFICATIONS

I
M
PO
RTANT
SAFETY INSTRUCTIONS
(For
All Tools)
WARNING:
WHEN USING ELECTRIC TOOLS, BASIC SAFE-
REDUCE THE RISK OF FIRE, ELECTRIC SHOCK,
AND
PER-
TY PRECAUTIONS SHOULD ALWAYS BE FOLLOWED TO
SONAL INJURY, INCLUDING THE FOLLOWING:
READ ALL INSTRUCTIONS.
1.
2.
3.
4.
5.
6.
7.
8.
9.
IO.
11.
12.
13.
2
KEEP WORK AREA CLEAN. Cluttered areas and benches invite injuries.
CONSIDER WORK AREA ENVIRONMENT. Don't use power tools in damp
or wet locations. Keepwork area well
lit.
Don't expose power tools torain.
Don't use tool
in
presence of flammable liquids or gases.
KEEP CHILDRENAWAY. All visitors should be kept away from work area.
Don't let visitors contact tool or extension cord.
STORE IDLETOOLS. When not
in
use, toolsshould be stored
in
dry, andhigh
or locked-up place
-
out of reach of children.
DON'T FORCETOOL.
It
will
dothejob better and safer at the ratefor which
it
was intended.
USE RIGHT TOOL. Don't force small tool or attachment to do the job of a
heavy-duty tool. Don't use tool for purpose not intended.
DRESS PROPERLY. Don't wear looseclothing or jewelry. They can becaught
in
moving parts. Rubber gloves and non-skid footwear are recommended
when working outdoors. Wear protective hair covering to contain long hair.
USE SAFETY GLASSES. Also use face or dust mask if cutting operation is
dusty.
DON'T ABUSE CORD. Never carry tool by cord or yank
it
todisconnect from
receptacle. Keep cord from heat, oil, and sharp edges.
SECURE WORK. Use clamps or a vise to hold work. It's safer than using
your hand and
it
frees both hands to operate tool.
DON'T OVERREACH. Keep proper footing and balance at all times.
MAINTAIN TOOLS WITH CARE. Keep tools sharp and clean for better and
safer performance. Follow instructionsfor lubricating and changing acces-
sories. Inspecttoolcordsperiodicallyandifdamaged, have repaired by autho-
rized service facility. Inspect extension cords periodically and replace if
damaged. Keep handles dry, clean, and free from oil and grease.
DISCONNECTTOOLS. When not
in
use, beforeservicing, and when chang-
ing accessories, such as blades, bits, cutters.

14.
REMOVE
ADJUSTING
KEYS
AND
WRENCHES. Form habit of checking to
see that keysandadjusting wrenches are removed from tool before turning
it
on.
15.
AVOID UNINTENTIONALSTARTING. Don't carry plugged-intool with finger
on switch. Be sure switch is
OFF
when plugging in.
16.
OUTDOOR USE EXTENSIONCORDS. Whentool is usedoutdoors, use only
extension cords intended for use outdoors and
so
marked.
17.
STAY ALERT. Watch what youare doing, use common sense. Don't operate
tool when you are tired.
18.
CHECK DAMAGED PARTS. Before further use of the tool, a guard or other
part that is damaged should be carefully checked to determine that
it
will
operate properly and performits intended function. Check for alignment of
movingparts, bindingof movingparts, breakageof parts, mounting,and any
other conditions that may affect its operation. A guard or other part that
is damaged should be properly repaired or replaced by an authorized serv-
ice center unless otherwise indicatedelsewhere inthis instruction manual.
Have defective switches replaced by authorized service center. Don't use
tool if switch does not turn
it
on and off.
19.
GUARD AGAINST ELECTRIC SHOCK. Prevent body contact with grounded
surfaces. For example; pipes, radiators, ranges, refrigerator enclosures.
20.
REPLACEMENTPARTS. When servicing, useonly identicalreplacementparts.
21.
POLARIZED PLUGS: To reducethe risk of electric shock, this equipment has a
polarizedplug (one blade is wider than the other). This plugwill fit ina polarized
outlet onlyone way. Ifthe plugdoes notfit fully inthe outlet, reversethe plug.
If
it
still
does
not fit, contact a qualifiedelectrician
to
installthe proper outlet.
Do
not
changethe pluginany way.
VOLTAGE WARNING: Before connectingthe tooltoa powersource (receptacle,
outlet, etc.) be sure the voltage supplied is the same as that specified on the
nameplate of the tool. A power source withvoltage greater than that specified
for the tool can result in SERIOUS INJURY to the user
-
as well as damage to
the tool. If in doubt,
DO
NOT PLUG IN THE TOOL. Using a power source with
voltage less than the nameplate rating is harmful to the motor.
3

ADDITIONAL SAFETY RULES
1.
Always be sure you have a firm footing.
2.
Hold the tool firmly.
3.
Keep hands away from rotating parts.
4.
When drilling into walls, floors or wherever "live" electrical wires may be
encountered,
DO
NOT TOUCH ANY METAL PARTS
OF
THE TOOL!
Holdthe tool by the insulated grasping surfaces to prevent electric shock if
you drill into a "live" wire.
Be sure no one is below when using the tool in high locations.
5.
Do
not leave the tool running. Operate the tool only when hand-held.
6.
Do
not touch the drill bit or the workpiece immediately after operation; they
may be extremely hot and could burn your skin.
SAVE THESE INSTRUCTIONS.
Installingside grip (auxiliary handle)
Screw the side grip on the tool securely.
Installingor removingdrill
bit
CAUTION
:
Always be sure that the tool
is
switched off and unpluggedbeforeinstallingor removing
the bit.
To
install the bit, place
it
in the chuck
as
far
as
it
will go.Tightenthe chuck by hand.
Place the chuck key in each
of
the three
holes and tighten clockwise.
Be
sure to
tighten
all
three chuck holes evenly.
To
remove the bit turn the chuck key
counterclockwise in just one hole, then
loosenthechuck by hand.
Chuck
kev
4

Switchaction
Tool speed
is
increased by increasing pres-
sure
on
the trigger.
To
start
the
tool, simply
pull the trigger.
Release
the trigger tostop.
For continuous operation, pull the trigger
and then push in the lock button. To stop
the tool from the locked position, pull the
trigger fully, then release it.
CAUTION
:
Before plugging in the tool, always check to
see
that the trigger switch actuates porperly
and returnsto the "OFF" positionwhen released.
Reversingswitchaction
This
tool
has
a
reversing switch to change
the direction of rotation. Move the revers-
ing switch lever tothe "FWD" position for
clockwise rotation or the
"REV"
position
for counterclockwise.
CAUTION
:
0
Always check the direction of rotationbefore drilling.
0
Use the reversing switch only when the tool comes to
a
complete stop. Changing the
direction of rotationbefore the tool stop may ruinthe tool.
5

Drillingoperation
Drilling in wood
When drilling in wood, best results are obtainedwith wood drills equipped with a guide
screw. The guide screw makes drilling easier by pulling the bit into the workpiece.
To preventthe bitfrom slippingwhen starting
a
hole, make an indentation with
a
center-
punch and hammer
at
the point to be drilled. Place the point of the bit inthe indenta-
tion and startdrilling.
Use
a
cutting lubricant when drilling metals. The exceptions are iron and brass which
should be drilled dry.
0
Drillinginmetal
CAUTION
:
*Pressing excessively on the tool will not speed up the drilling. Infact, this excessive
pressure will only serve to damage the tip of your bit, decrease the tool performance
and shortenthe service lifeof the tool.
*There
is
a
tremendous force exerted on the tool/bit
at
the time of holebreak through.
Hold the tool firmly and exert care when the bit begins to break through the workpiece.
*Always grip the smallworkpiecefirmly with
a
vise
or
a
holding means.
*A stuck bit can be removed simply by setting the reversing switch to reverse rotation
in order to back out. However, the tool will pull away easily unless you hold
it
firmly
beforestarting the tool.
MAINTENANCE
CAUTION
:
Always be sure that the tool
is
switched off and unplugged beforeattempting to perform
inspectionor maintenance.
To maintain product SAFETY and RELlABlLITY, repairs, carbon brush inspectionand
replacement, any other maintenance or adjustment should be performed by Makita
Authorized or FactoryService Centers, alwaysusing Makita replacement parts.
OPTIONAL ACCESSORIES
I
The accessories listed in this manual are available at an extra cost from your Makita distributor
or
Makita factory
I
service center Service centers are listed
on
the warranty card packed with your
tool
CAUTION
:
These accessories or attachments are recommended for use with your Makita tool specified
in
this
manual. The use of any other accessories or attachments might present a risk
of
injury topersons. The
accessories or attachmentsshould be used only inthe proper and intended manner.
Chuck
key
Part
No.
763420-6
Grip
32
Part
No.
273406-7
6

Feb
-01-'91
US
Note: The switch and other part configurations
may differ from country
to
country.
7

MODEL 6302. 6303
&
DESCRIPTION
Feb-01-’91
US
‘yc
,&
DESCRIPTION
MACHINE
~
1
2
3
4
5
6
7
8
9
10
11
12
13
14
15
16
17
lB
19
20
21
22
1
1
1
1
1
1
1
1
1
1
1
1
1
1
1
1
2
1
1
1
1
1
Drill
Chuck 513
Flat
Head
Screw
M6x22
Spindle
Bearing
Retainer
22-36
Ball
Bearing
6202LLB
Ring
15
Gear
Hou%ng
Rubber
Pin
4
Ball Bearing
606
Gear
Complete
7-46
For
Model
6302
10-46
For
Model 6303
Rubber
Pin
4
Ball
Bearing
626
Spur Gear
52
For
Model 6302
49
For
Model 6303
Retaining
Ring
S-14
Gear
Housing
Cover
Pan
Head
Screw
M4x50 IWith Washer]
Pan
Head
Screw
M4x65 IWith Warherl
Key
5
Ball
Bearing
608LB
Fan
52
Armature
ln~ulation
Washer
23
24
25
26
27
28
29
30
31
32
33
34
35
36
37
38
39
40
41
42
43
44
45
46
402
-
1
1
1
1
1
1
1
1
1
2
1
1
1
1
2
1
1
1
1
1
3
1
2
1
1
-
Note The
switch
and other part SPeCIf4Cathm may
differ
from
country
10 co~nliv
Rubber
Pin
4
Ball
Bearing
627LB
Flat
Washer 14
Baffle
Plate
Field
Hook
Name
Plate
Motor
Housing
Label
Carbon Brush
Pan
Head
Screw
M4x14 (With Washer)
Cord
Guard
Cord
Strain Relief
Pan
Head Screw
M4x18 (With Washerl
Switch
Terminal Block
Switch
Sponge Sheet
Dust
Cover
Pan
Head
Screw
M4x28 IWith Warherl
Handle
Cover
Pan
Head
Screw
M4x55 IWith Wsrherl
Rubber Pin4xlO
Grip 32
MAKmA
UMmD
ONE
YEAR
WARRANTY
warranty
Policy
Every
Makita
tool
is
thorou ly lnFtedand tested before leavingthe factory. It is warranted to
be
free of defects from work& and materinlsfor the period of ONE YEAR from the date of
original
purchase. Shouldany troubL develop during
this
oneyear period,retum the COMPLETE
tool, freight prepaid, to one of
Makita’s
Factory or Authorized
Service
Centers. If inspection
shows
the trouble
u
uuaed
by defective worlundpor mated,
Makita
will
repair (or at our option,
replace) without
chuge.
This
Warranty does not apply where:
repaira have been made or attempted by others:
repairs
on
required
because
of
normal
wear and tear:
The tool
h
been abuacd,
mirured
or improperlymaintained
;
alteratiom havebeen made to the tool.
IN NO EVENT SHALL MAKITA BE LL4BLE FOR
ANY
INDIRECT, INCIDENTAL OR CON-
SEOUENTlALDAMAGES FROM THE SALE
OR
USE OFTHE PRODUCT. THIS DISCLAIMER
APFLIES
BOTH
DURING
AND
AFTER
THE
TERM
OF
THIS
WARRANTY.
MAKITA
DISCLAIMS LIABILITY FOR ANY IMPLIED WARRANTIES, INCLUDING IMPLIED
WARRANTIES OF “MERCHANTABILITY” AND “FITNESS FOR
A
SPECIFIC
PURPOSE,”
AFTER THE ONE-YEARTERM OFTHISWARRANTY.
This
Wmty
gives
you specific legal
mts,
and you may
also
have other rights which vary from
state
to
state.
Some states do not allow the exclusion or limitationof incidentalor conseuuential
I
&ya,
so
the above limitation or cxcluaion
may
not apply to you.
Some
states do nit allow
limitation
on
how long
an
implied warranty lasts,
so
the abovelimitationmay not apply to you.
MCNRevised
8-92
Makita Corporation
of
America
2650
Gainesville
Hwy.,
Buford,
GA
30518
883680D067
PRINTED IN
USA
1994-1 1
-4D
This manual suits for next models
1
Table of contents
Other Makita Drill manuals

Makita
Makita DDF458Z User manual

Makita
Makita DHP456RMJ User manual

Makita
Makita DDA340 User manual

Makita
Makita FD02 User manual

Makita
Makita 6404 User manual

Makita
Makita DDF083 User manual

Makita
Makita DHP470RMJ User manual

Makita
Makita HP333D User manual

Makita
Makita DDA351Z User manual

Makita
Makita PH01 User manual

Makita
Makita DHP459RMJ User manual

Makita
Makita DA333 User manual

Makita
Makita BDF448 User manual

Makita
Makita DHP481RMJ User manual

Makita
Makita HP002G User manual

Makita
Makita 6207D Manual

Makita
Makita 6312DW User manual

Makita
Makita 6207D User manual

Makita
Makita 6227DW User manual

Makita
Makita 6207D-NEW Manual