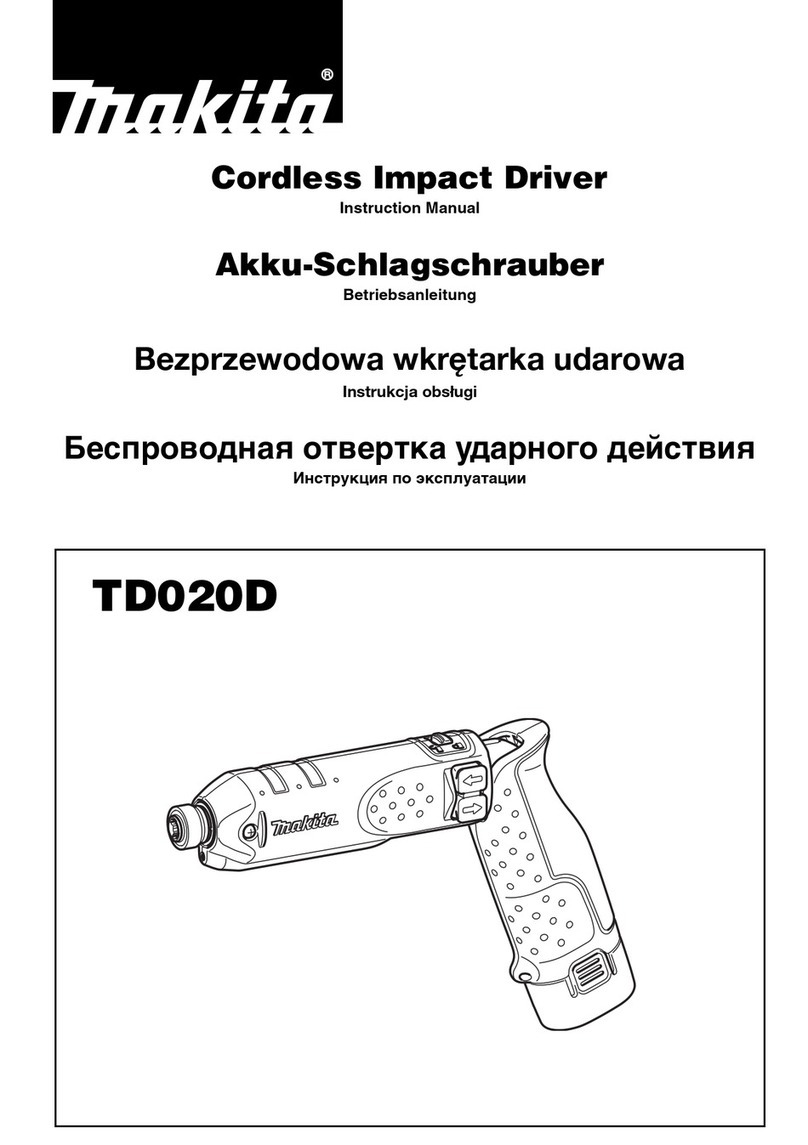
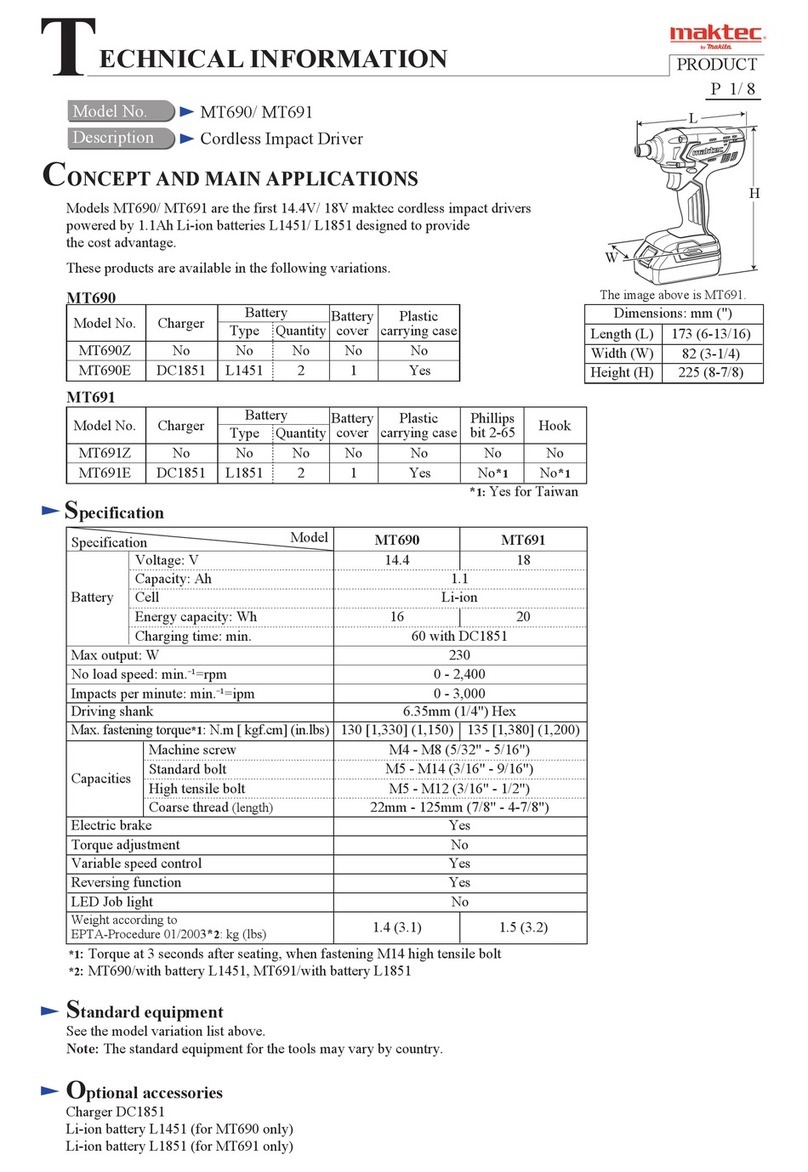
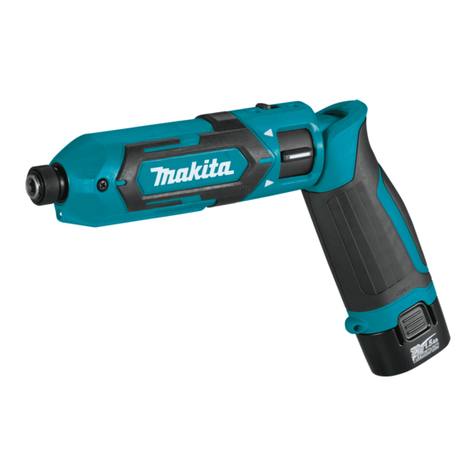
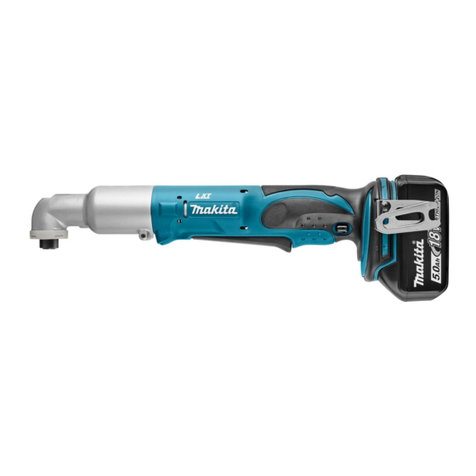
Makita DTS141 Manual

Battery...........................1 or 2*5
Plastic carrying case.....1*7
CONCEPT AND MAIN APPLICATIONS
Model DTS141 is a cordless oil-pulse driver powered by 18V Li-ion battery
and more compact and lightweight than the current model DTS130 thanks to
the newly-developed oil unit and brushless motor.
Its other main features are:
• "T" mode: Tightening mode for self-drilling screw and bolts
• Electronic 3-stage impact power selection
with variable power control in each range
• XPT (eXtreme Protection Technology) for use in outdoor
applications or harsh environments
This product is compatible with 18V-1.3Ah/ 1.5Ah/ 2.0Ah/ 3.0Ah/ 4.0Ah/ 5.0Ah
Li-ion batteries BL1815/ BL1815N/ BL1820/ BL1830/ BL1840/ BL1850.
*1 With battery BL1830/ BL1840/ BL1850
*2 With battery BL1815/ BL1815N/ BL1820
W
L
H
Belt clip............................... 1 Battery cover..................1*6
Charger................................ 1*5
*5: Battery and charger are not supplied with “Z” model.
*6: Supplied with the same quantity of extra battery.
*7: Only for model with battery and charger.
Note: The standard equipment may vary by country or model variation.
Standard equipment
Phillips bits, Square bits, Socket bits
Battery protectors
Four port multi charger DC18SF
Automotive charger DC18SE
Battery BL1820
Battery BL1850
Optional accessories
Dimensions: mm ( " )
Length (L) 136 (5-3/8)
Width (W) 79 (3-1/8)
Height (H) 240 (9-1/2)*1
223 (8-3/4)*2
Battery
Voltage: V 18
Capacity: Ah 1.3/ 1.5/ 2.0/ 3.0/ 4.0/ 5.0
Energy capacity: Wh 24/ 27/ 36/ 54/ 72/ 90
Cell Li-ion
Charging time (approx.): min. 15/ 15/ 24/ 22/ 36/ 45 with DC18RC
Max output (W) 280
Driving shank: mm (") 6.35mm (1/4") Hex
Capacities
Machine screw M4 - M8 (5/32 - 5/16")
Standard bolt M5 - M8 (3/16 - 5/16")
High tensile bolt M5 - M6 (3/16 - 1/4")*3
Coarse-thread 22 - 125mm (7/8 - 4-7/8")
Impact power selection Electronic 3 stages (Hard/ Medium/ Soft) + "T" mode*4
Impacts per min.:min.ˉ¹=ipm Hard/ Medium/ Soft 0 - 2,700/ 0 - 2,200/ 0 - 1,400
No load speed:min.ˉ¹=rpm Hard/ Medium/ Soft 0 - 3,200/ 0 - 2,000/ 0 - 1,200
Max. tightening torque: N.m [ft.lbs] (in.lbs) 40 [30] (355)
Electric brake Yes
Variable speed control by trigger Yes
Reverse switch Yes
LED job light Ye s
Weight according to
EPTA-Procedure 01/2003: kg(lbs) 1.2 (2.7)*2/ 1.5 (3.2)*1
*3 Can be used in "T" mode or soft mode. If used in medium or hard mode the tool may stop for tool body protection.
*4 Tightening mode for self-drilling screw and bolts
Belt clip
Fast charger DC18RC
Charger DC18SD
Battery BL1815
Battery BL1830
Tool catcher
Two port multi fast charger DC18RD
Charger DC24SC
Battery BL1815N
Battery BL1840
PRODUCT
P 1/ 11
Model No.
Description Cordless Oil-Pulse Driver
DTS141
TECHNICAL INFORMATION
Specication
OFFICIAL USE
for ASC & Sales Shop

P 2/ 11
Repair
[3] DISASSEMBLY/ASSEMBLY
[3] -1. Bit holder section
[1] NECESSARY REPAIRING TOOLS
[2] LUBRICATION
CAUTION: Repair the machine in accordance with “Instruction manual” or “Safety instructions”.
Code No. Description Use for
1R004 Retaining ring pliers ST-2 disassembling Bit holder section
disassembling Bit holder section
disassembling / assembling Oil seal 12 from / to Unit case complete
1R250 assembling Ball bearing 6801LLU to Unit case complete
1R286
1R291 Retaining ring S and R pliers
253804-1 Flat washer 6
Round bar for Arbor 12-50
Round bar for Arbor 26-100
removing Ball bearing 6801LLU, Oil seal 12 from Unit case complete
DISASSEMBLING
1R004 or
1R291
Ring spring 10
Disassemble Bit holder section as drawn in Fig. 2.
Note: Bit holder section can be disassembled without removing Bumper, Unit case cover.
1. While expanding the end gap of Ring spring 10 with
1R004 or 1R291, raise the spring from the opposite of
the expanded side with your finger.
Note: Press the top of Bit sleeve with thumb to prevent
Compression spring 11 from popping out and away.
2. Bit holder section can now be removed
as shown below.
Bit sleeve Compression spring 11
Flat washer 11
Apply Makita grease FA No.2 to the following portions designated with the black triangle to protect parts and product
from unusual abrasion.
Assemble Bit holder section by reversing the disassembly procedure. (Refer to Fig. 2.)
Fig. 1
Fig. 2
Item No. Description
Carrier complete
Ball bearing 6806LLU
Oil unit complete
Spur gear 22 (3 pcs.)
Internal gear 51
Teeth portion a little
Teeth portion 1g approx.
AmountPortion to lubricate
Unit case complete
Bit sleeve
Ring spring 10Steel ball 3
(2 pcs.)
ASSEMBLING
19
17
19
17
17
17

P 3/ 11
Fig. 3
Repair
[3] DISASSEMBLY/ASSEMBLY
[3] -2. Oil unit complete and Gear section
DISASSEMBLING
(1) Disassemble Bit holder section. (See Fig. 2.)
(2) Disassemble Oil unit complete as drawn in Fig. 3.
(1) Assemble Oil unit complete section by reversing the disassembly procedure. (Refer to bottom right in Fig. 3.)
Note: Do not forget to mount Flat washer 12.
(2) Assemble Oil unit complete section to Unit case complete while fitting four projections of Oil unit complete section
to four notches of Unit case complete as drawn in Fig. 4.
1. Remove Housing set R
by removing nine 3x16
Tapping screws.
2. Remove the entire of Oil unit section
and Brushless motor section from
Housing set L.
3. Pull out Oil unit section from
Brushless motor section.
4. Push Bit holder section toward a workbench
as shown below to remove Oil unit complete
section from Unit case complete.
5. Internal gear 51, Flat washer12, three Spur gears 22,
Carrier complete and Ball bearing 6806LLU can now be
removed from Oil unit complete.
Note: Do not disassemble Oil unit complete.
ASSEMBLING
Internal gear 51
Flat washer12
Spur gear 22
(3pcs.)
Carrier
complete
Ball bearing
6806LLU
Oil unit complete
Unit case complete
Oil unit complete section
Fig. 4
Oil unit
complete
section
Unit case
complete
Oil unit
section
Brushless motor
section
Oil unit
section
Brushless motor
section
3x16 Tapping
screw (9pcs.)
Housing set R
Housing set L

P 4/ 11
Fig. 5
Fig. 6
Repair
ASSEMBLING
(3) Assemble Oil unit section to Motor section. (Refer to top right illustration in Fig. 3.)
(4) Assemble the entire of Oil unit section and Motor section, Switch section to Housing set L. (Fig. 5)
(5) Assemble Switch plate complete to Housing set L as drawn in Fig. 6.
round mark of
Switch plate
Assemble Switch plate complete to Housing set L while facing
the round mark side of the plate to the housing.
Notch of
Stator
Projection of
Unit case complete
Projections
Switch
Mount Motor section to
Housing set L while fitting
its notches to the projections
of Housing set L.
Face the projection of Unit case complete
to Switch side, then, mount Oil unit section
to Housing set L while fitting the depression
of Unit case complete to the projection of
Housing set L.
Assemble F/R Change lever to Switch while fitting its prong
to the projection of Switch.
Depression of
Unit case complete
Projection
Projection
Prong Unit case
complete
Switch
Housing set L
[3] DISASSEMBLY/ASSEMBLY
[3] -2. Oil unit complete and Gear section (cont.)

P 5/ 11
Fig. 7
Repair
[3] DISASSEMBLY/ASSEMBLY
[3] -3. Unit case complete
DISASSEMBLING
Slotted screwdriver
Slotted screwdriver
Unit case cover
Unit case complete
Bumper
1. Remove Bumper with a thin
slotted screwdriver.
2. Remove Unit case cover from Unit case complete by detaching
the claw of Unit case cover from the groove of Unit case complete
with a thin slotted screwdriver.
3. Put Flat washer 6 as a jig
onto Unit case complete.
4. Apply 1R286 on Flat washer 6 and press them with Arbor press to remove
Ball bearing 6801LLB and Oil seal 12 from Unit case complete.
(1) Separate Oil unit complete section from Unit case complete. (See Fig. 3.)
(2) Disassemble Unit case complete as drawn in Fig. 7.
Unit case cover
1R286
jig of Flat washer 6
(253804-1)
Unit case complete
Oil seal 12
Ball bearing
6801LLB

P 6/ 11
Fig. 8
Repair
ASSEMBLING
1. Assemble Ball bearing 6801LLB to Unit case
complete by pressfitting the bearing with 1R250.
Note: It is normal that the assembled bearing is
a little bit protruded from the bottom
surface of Unit case complete.
1R250
Ball bearing
6801LLB
2. Facing the lip side of Oil seal 12 to the top,
pressfit the seal to Unit case complete until
it comes to the same level to the surface of
Unit case complete.
3. Put Flat washer 6 as a jig onto Oil seal 12, pressfit them until the washer comes to the same level to the surface
of Unit case complete so that Oil seal 12 is to be fixed 1mm deep from the surface of the case.
Assemble Unit case complete as drawn in Fig. 8.
Oil seal 12 Lip side
Oil seal 12
jig of Flat washer 6
(253804-1)
1mm
Oil seal 12
Flat washer 6
Unit case complete
Arbor press
Cross section
Projection
Claw
4. Facing the claw of Unit case cover
to the opposite side of the projection of
Unit case complete, mount the cover
to the case.
5. While aligning the projections of Bumper to those of
Unit case cover, mount Bumper to Unit case complete,
and fit the inside projection of Bumper to the cut portion
of Unit case cover.
Unit case cover Cut portion of
Unit case cover
Inside projection
of Bumper
Projection of
Unit case cover
Projection of
Bumper
Unit case
complete
[3] DISASSEMBLY/ASSEMBLY
[3] -3. Unit case complete (cont.)

P 7/ 11
Fig. 9
Repair
[3] DISASSEMBLY/ASSEMBLY
[3] -4. Rotor
DISASSEMBLING
ASSEMBLING
(1) After removing Housing set R, separate Motor section from Oil unit section. (See Fig. 3)
(2) Separate Rotor from Stator as drawn in Fig. 9.
Put Motor section on a workbench so that the drive end of Rotor touches the workbench.
Then separate Stator from Rotor by pressing it down towards the workbench.
Rotor
Stator
Rotor
Stator
Assemble Rotor as drawn in Fig. 10.
Note: Be careful not to pinch your finger between Rotor’s fan and Stator.
Fig. 10
1. Holding Stator on the workbench, slowly insert Rotor into
Stator until Rotor’s drive end reaches the workbench.
2. When the drive end of Rotor reaches
the workbench, lift up Stator slowly.
Rotor
Stator
Caution for Handling of Rotor
When handling or storing multiple Rotors, be sure to keep a proper distance between Rotors as shown in Fig. 11
Because Rotor is a strong magnet, failure to follow this instruction could result in:
Finger injury caused by pinching between Rotors pulling each other.
Magnetic loss of Rotors or damage on the magnet portion of Rotor. (Fig. 12)
Fig. 11 Fig. 12
* Magnetic loss of Rotors
* Damage on the magnet
portion of Rotor
The Rotors has to be put, keeping so enough distance,
that they are out of their magnetic forces each other.

P 8/ 11
Repair
Note in Repairing
Whenever you find any trouble in your machine, refer to this chapter first.
(1) Use the full charged battery that has a star mark. (Fig. T-1)
(2) When Housing is disassembled, check the conditions of the electrical parts
(Connectors, Lead wires, Switches, etc.), Rotor, Stator, Gear section, etc.
(3) Do the running test in Low speed mode (when the trigger is being pulled just a little)
to check the following functions by repeating 10 times;
• F/R change lever • every Operation work mode • Variable speed control trigger
[4] TROUBLESHOOTING
Star mark
Fig. T-1
Fig. T-2
Test for recognizing the trouble on FET (Field effect transistor) in Controller
Trouble on Controller can be checked with Tester as follows.
1. Set Digital tester (1R402) in the diode mode
( mark on the tester).
2. After removing the battery from the machine,
pull Switch trigger and hold it at “ON position”
with tape or the like.
3. Attach Black tester bar to the plus pole,
Red tester bar to minus pole of Terminal.
And, check the figure in the tester.
Note: Be careful not to attach the bars in reverse.
4. There is no fault on FET of Controller
if the tester indicates within 0.79V - 0.81V.
If it indicates 0V or 0.4V approx.,
Controller is broken. Replace it with a new one.

P 9/ 11
Repair
[4] TROUBLESHOOTING
Symptom Cause Corrective action
Check List for Troubleshooting
Check the items from top of the following list. (Description of the item is referred to Circuit diagram in Fig. D-1.)
After corrective action, return to the start of Trouble shooting and re-check again.
Does the tester indicate 0.79V ~ 0.81V ?
When a tester cannot be prepared, go to “Yes”.
Yes
Yes
Yes
Yes
Yes
No
No
LED Job light is ON.
The machine does
not have any trouble.
Speed and Rotating
direction can be
changed with Trigger
and F/R change lever.
Rotor is rubbed to
Stator.
Motor runs when the machine
is switched on.
(Check in forward rotation
mode and in reverse rotation
mode by repeating 10 times.)
In case of running inconstantly,
go to “No”.
Battery fuel gauge
lights on.
Controller is broken.
Switch is broken.
Replace Controller.
LED Light circuit is broken
Connectors are in incomplete
connection.
Lead wires are broken.
Connect it firmly.
Check Lead wires,
or replace it.
Replace LED Light
circuit.
If your problem cannot be solved although
its corrective action has been carried out.
Replace Switch.
Yes
No
Battery fuel gauge
lights on.
No
No
No
No
Switch is broken. Replace Switch.
Controller is broken. Replace Controller.
Yes Rotor is broken. Replace Rotor.
Stator is broken. Replace Stator.
Controller is broken. Replace Controller.
Replace Controller.
Terminal is broken. Check Terminal,
or replace it.
Connectors are in incomplete
connection.
Lead wires are broken.
Connect it firmly.
Check Lead wires,
or replace it.
Connect it firmly.
Yes
LED Job light is ON.
LED Light circuit is broken Replace LED Light
circuit.
No
Switch is broken. Replace Switch.
Connectors are in incomplete
connection.
Lead wires are broken. Check Lead wires,
or replace it.

P 10/ 11
Fig. D-1
Circuit diagram
Orange
Blue
Gray
Color index of lead wires' sheath
Black
White
Yellow
Red
Controller
Fuse
Tape
Tape
Tape
Switch
LED circuit Stator
Printed wiring board
Vinyl tube
Connector
Closed end
Connector
2-SD
Connector
White lead wire is used
for some countries.
Flag terminal with lock
(#250, t=0.8mm)
Flag terminal with lock
(#187, t=0.8mm)
Heat
shrink
tube
AS

P 11/ 11
Fig. D-2
Printed wiring
board
Boss A
Rib A
LED circuit
F/R Change lever
Capacitor of Controller
Stator
Wiring diagram
Unit case
complete
Rib B
Switch
Controller
Terminal
Controller
Controller
Lead wires of Terminal
must be put on the tab of
Controller.
Tab of Controller
Stator’s Lead wires (3pcs.)
have to be put on the other
lead wires in this area.
Three Controller’s lead wires they are
connected to Closed end connectors
must be fixed with this lead wire holders.
Put Closed end connectors in this space
while keeping enough distance from
Capacitor of Controller.
Pass Lead wires of LED circuit between Rib A and
Boss A, between Rib A and Unit case complete,
and between Rib B and F/R change lever.
At least Black lead wire of
Terminal has to be put with
this lead wire holder.
Put Connector of
LED circuit here.
Do not put any lead wires
on these Ribs.
Be careful not to give damage
to Printed wiring board and
its lead wires when assembling
them in the place here.
Other manuals for DTS141
2
This manual suits for next models
1
Other Makita Impact Driver manuals

Makita
Makita XDT111 User manual

Makita
Makita TD127DWE User manual

Makita
Makita BTD144 User manual

Makita
Makita BTD130F User manual

Makita
Makita TL064DSAE User manual

Makita
Makita TW007G User manual

Makita
Makita BTD200 User manual

Makita
Makita 6980FDWDE User manual

Makita
Makita DTD170 Manual

Makita
Makita TD111D User manual

Makita
Makita DTD134RTJ User manual

Makita
Makita 6914D User manual

Makita
Makita BTD129 User manual

Makita
Makita LT02R1 User manual

Makita
Makita DTW302Z User manual

Makita
Makita 6953 User manual

Makita
Makita 6932FDWDE User manual

Makita
Makita TL064D User manual

Makita
Makita TD003GZ User manual

Makita
Makita 6905B User manual