7ENGLISH
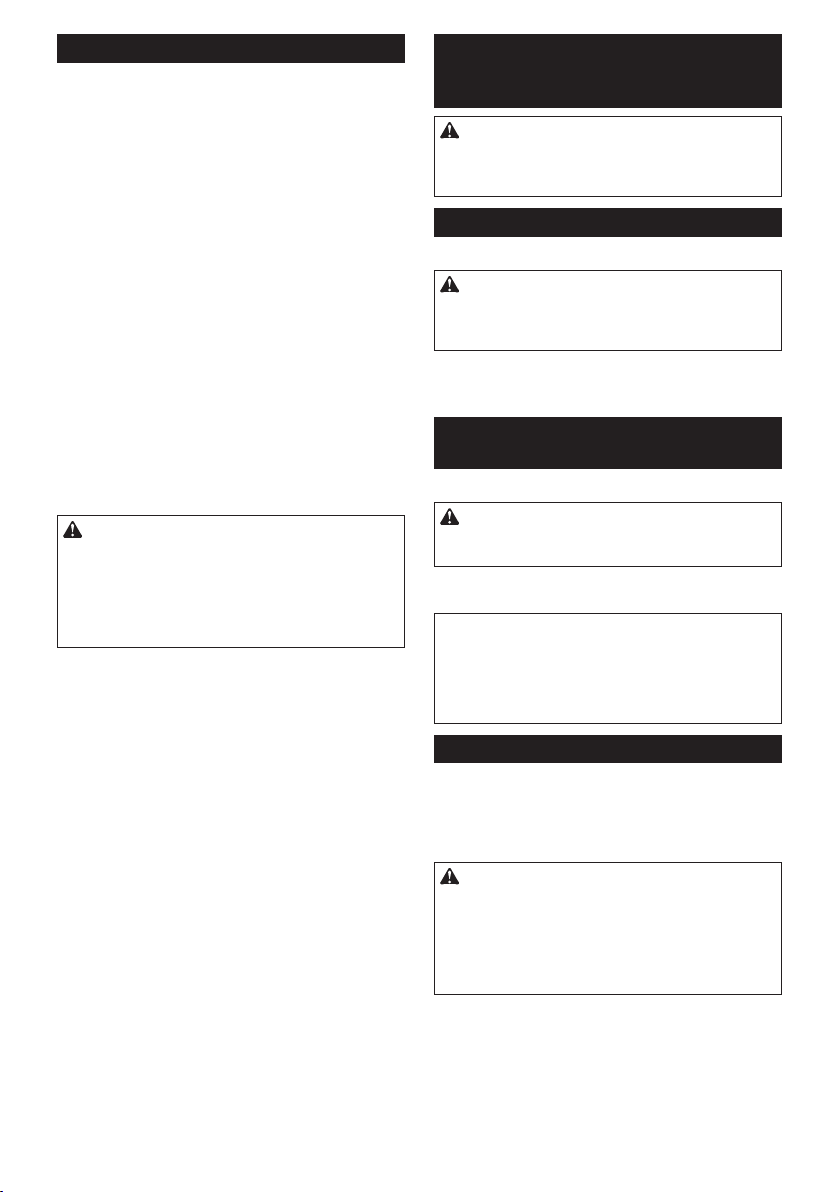
Holdthetoolrmlyandplacethepointofthedriverbit
inthescrewhead.Applyforwardpressuretothetoolto
the extent that the bit will not slip off the screw and turn
the tool on to start operation.
NOTE:
• Usetheproperbitfortheheadofthescrew/bolt
that you wish to use.
• WhenfasteningscrewM8orsmaller,carefully
adjustpressureontheswitchtriggersothatthe
screw is not damaged.
• Holdthetoolpointedstraightatthescrew.
•
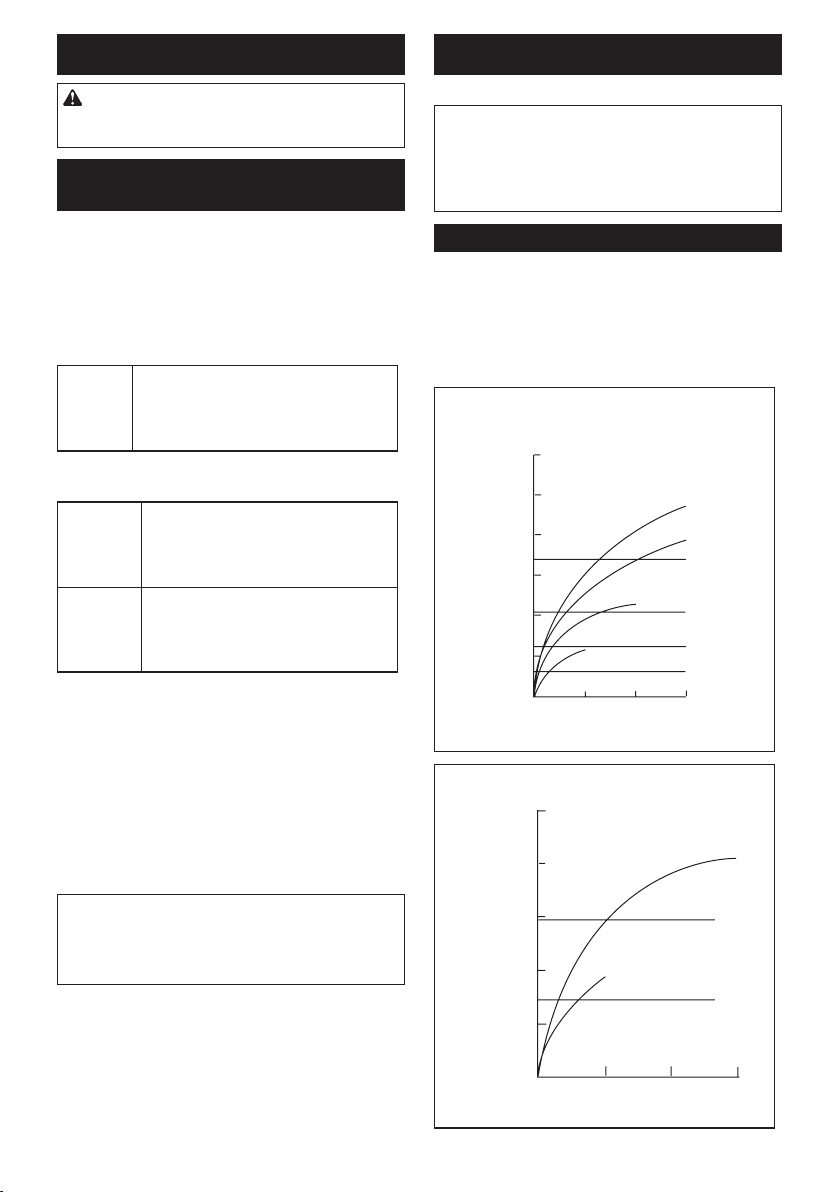
If you tighten the screw for a time longer than shown
inthegures,thescreworthepointofthedriverbit
maybeoverstressed,stripped,damaged,etc.Before
startingyourjob,alwaysperformatestoperationto
determine the proper fastening time for your screw.
Thefasteningtorqueisaffectedbyawidevarietyof
factorsincludingthefollowing.Afterfastening,always
check the torque with a torque wrench.
1. Driverbitorsocketbit
Failuretousethecorrectsizedriverbitorsocket
bit will cause a reduction in the fastening torque.
2. Bolt
•
Eventhoughthetorquecoefcientandtheclass
of bolt are the same, the proper fastening torque
will differ according to the diameter of bolt.
• Eventhoughthediametersofboltsarethe
same, the proper fastening torque will differ
accordingtothetorquecoefcient,theclass
of bolt and the bolt length.
3.
The manner of holding the tool or the material of
drivingpositiontobefastenedwillaffectthetorque.
4. Operating the tool at low speed will cause a reduc-
tion in the fastening torque.
MAINTENANCE
CAUTION:
• Alwaysbesurethatthetoolisswitchedoffand
unplugged before attempting to perform inspec-
tion or maintenance.
•
Neverusegasoline,benzine,thinner,alcoholorthe
like. Discoloration, deformation or cracks may result.
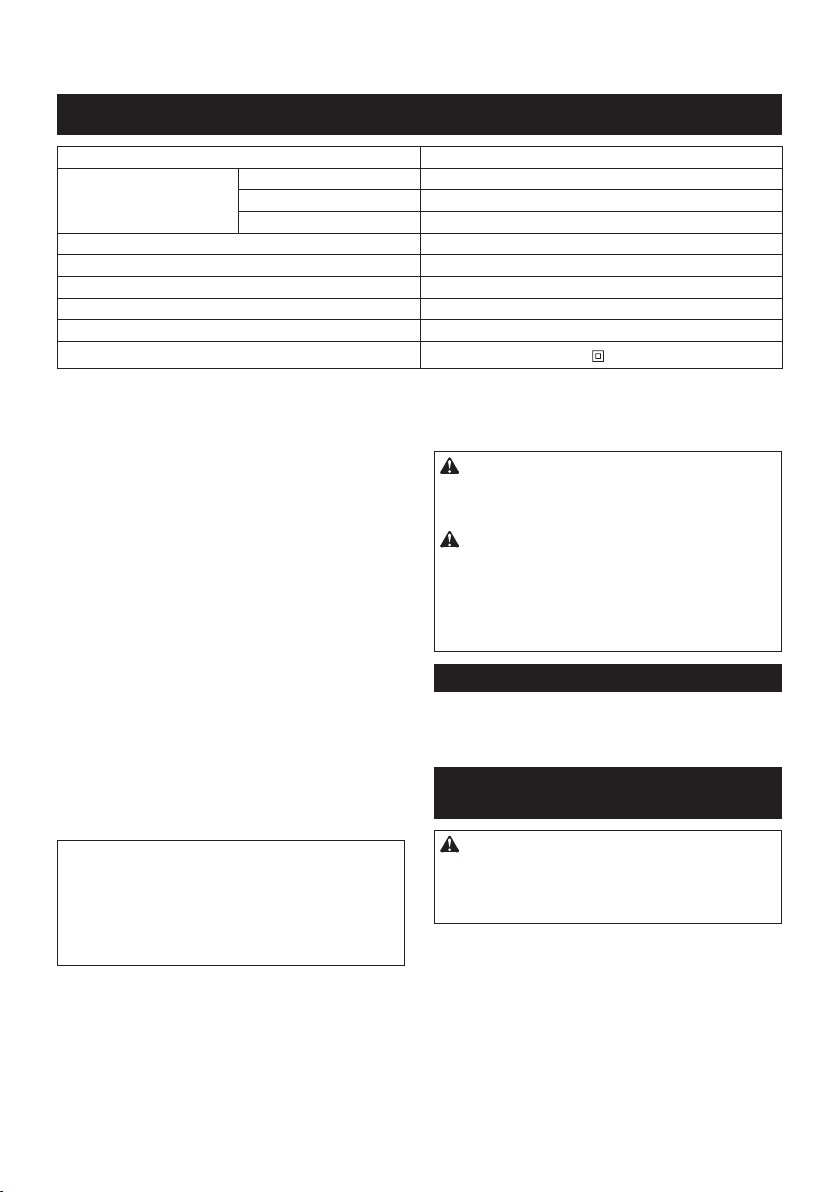
Replacing carbon brushes
►Fig.8: 1. Limit mark
Removeandcheckthecarbonbrushesregularly.
Replace when they wear down to the limit mark. Keep
the carbon brushes clean and free to slip in the holders.
Bothcarbonbrushesshouldbereplacedatthesame
time. Use only identical carbon brushes.
Useascrewdrivertoremovethebrushholdercaps.
Take out the worn carbon brushes, insert the new ones
and secure the brush holder caps.
►Fig.9: 1.Screwdriver2.Brushholdercap
TomaintainproductSAFETYandRELIABILITY,repairs,car-
bon brush inspection and replacement, any other maintenance
oradjustmentshouldbeperformedbyMakitaAuthorized
ServiceCenters,alwaysusingMakitareplacementparts.
OPTIONAL
ACCESSORIES
CAUTION:
• Theseaccessoriesorattachmentsarerecom-
mendedforusewithyourMakitatoolspecied
in this manual. The use of any other accessories
orattachmentsmightpresentariskofinjuryto
persons. Only use accessory or attachment for
its stated purpose.
If you need any assistance for more details regard-
ingtheseaccessories,askyourlocalMakitaService
Center.
• Screwbits
• Socketbits
• Bitpiece
• Adjustablelocatorwithbit
• Hook
NOTE:
• Someitemsinthelistmaybeincludedinthe
tool package as standard accessories. They
may differ from country to country.
Hook
►Fig.10: 1. Screw 2. Hook 3.Groove
Thehookisconvenientfortemporarilyhangingthetool.
This can be installed on either side of the tool.
Toinstallthehook,insertitintoagrooveinthetool
housing on either side and then secure it with a screw.
Toremove,loosenthescrewandthentakeitout.
Adjustable locator with bit
►Fig.11: 1.Bumper2.Hammercasecover
Tousetheadjustablelocatorwithbit,removethe
bumperandtheninstallit.Thebumpercanberemoved
by pulling forward.