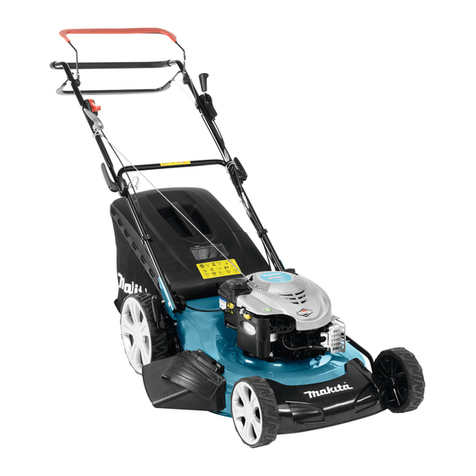
Makita ELM3311 User guide

GB Lawn Mower Original instruction manual
FTondeuse Manuel d’instructions d’origine
DElektro-Rasenmäher Original-Bedienungsanleitung
IRasaerba Manuale di istruzioni originale
NL Grasmaaier Oorspronkelijke gebruiksaanwijzing
ECortadora de Cesped Manual de instrucciones original
PCortador de Grama Elétrico Manual de instruções original
DK Plæneklipper Original brugsanvisning
GR Χλοοκοπτικό Πρωτότυπο εγχειρίδιο οδηγιών
TR Çim Biçme Makinesi Orijinal kullanım kılavuzu
SGräsklippare Originalbruksanvisning
NGressklipper Original bruksanvisning
FIN Ruohonleikkuri Alkuperäinen käyttöohje
LV Zāles pļaujmašīna Oriģinālālietošanas rokasgrāmata
LT VejapjovėOriginali naudojimo instrukcija
EE Muruniiduk Originaalne kasutusjuhend
PL Elektryczna Kosiarka do Trawy Oryginalna instrukcja obsługi
HU Fűnyíró Eredeti használati útmutató
SK Kosačka Pôvodný návod na obsluhu
CZ Sekačka na trávu Originální návod k obsluze
RO Maşinăde tuns iarba Manual de instrucţiuni original
RUS
Газонокосилка Оригинальное руководство по эксплуатации
UA Газонокосарка Оригінальні інструкції зексплуатації
ELM3311
ELM3711
Questo manuale d’istruzione è fornito da trovaprezzi.it. Scopri tutte le offerte per Makita ELM3311 o cerca
il tuo prodotto tra le migliori offerte di Macchine Giardinaggio

2
1
2
13
12
11
10
1
2
3
4
5
6
7
8
9
14
15
16
17
18
19

3
34
56
78
9

4
10 11
12 13A
13B
20
21

5
14
15
16
(1)
(2)
(3)
(1)
(2)
(3)

6
17
18 19
20 21
22
(1)
(2)

7
22 23
24 25
(1)
(2)
(3)

8
CONTENTS
ENGLISH....................................................................................................................9
FRANÇAIS ...............................................................................................................17
DEUTSCH ................................................................................................................26
ITALIANO .................................................................................................................36
NEDERLANDS .........................................................................................................45
ESPAÑOL.................................................................................................................54
PORTUGUÊS...........................................................................................................63
DANSK .....................................................................................................................71
ΕΛΛΗΝΙΚΑ ...............................................................................................................79
TÜRKÇE...................................................................................................................89
SVENSKA.................................................................................................................97
NORSK...................................................................................................................105
SUOMI....................................................................................................................113
LATVIEŠU ..............................................................................................................121
LIETUVIŲKALBA...................................................................................................129
EESTI .....................................................................................................................137
POLSKI...................................................................................................................145
MAGYAR ................................................................................................................154
SLOVENČINA ........................................................................................................162
ČESKY ...................................................................................................................170
ROMÂNĂ................................................................................................................178
РУССКИЙ ..............................................................................................................186
УКРАЇНСЬКА .........................................................................................................196

9
ENGLISH
Explanation of general view
KNOW YOUR LAWN MOWER
Read this manual carefully, observing the recommended
safety instructions before, during and after using your
lawn mower. Following these simple instructions will also
maintain your lawn mower in good working order.
Familiarize yourself with the controls on your mower
before attempting to operate it, but above all, be sure you
know how to stop your mower in an emergency. Retain
this user manual and all other literature with your mower
for future reference.
1. SYMBOLS MARKED
ON THE PRODUCT
DOUBLE INSULATED
Your mower is double
insulated.
This means that all external parts
are electrically isolated from the
power supply. This is achieved by
placing an extra insulation barrier
1. Upper handle
2. Switch box
3. Safety push-button
4. Locking lever
5. Cable clamp
6. Grass catcher
7. Rear wheel
8. Underpan
9. Front wheel
10. Motor cover
11. Lower handle
12. Cable hook
13. Switch handle
14. The rear wheel cover
15. The rear wheel
16. The rear wheel support
17. The front wheel cover
18. The front wheel
19. The front wheel support
20. Rear cover
21. Level indicator
22. Indicator light
Read this instruction book
carefully before using the
lawn mower and keep it in
a safe place for future
reference.
Keep bystanders away.
Beware of sharp blades.
Blades continue to rotate
after the motor is switched
off.
Remove the plug from the
machine before
maintenance or if cord
damaged.
Keep the supply flexible
cord away from the cutting
blades.
CE Marking
The product meets
demands and regulations
set by the European
Community.
WEEE Marking
CAUTION! Unusable
power tools do not belong
with domestic waste. They
must be taken to a
communal collecting point
for environmentally friendly
disposal in accordance
with local regulations.
Noise level marking
Your tool noise is not more
than 96 dB.
SAFETY ALERT
SYMBOL: Indicates
caution or warning may be
used in conjunction with
other symbols or pictures.

10
between the electrical and
mechanical parts.
2. GENERAL SAFETY
RULES
The purpose of the safety rules is
to attract your attention to
possible dangers. The safety
symbols and the explanations
with them, require your careful
attention and understanding. The
safety warnings do not by
themselves eliminate any danger.
The instruction or warnings they
give are not substitutes for proper
accident prevention measures.
WARNING: Failure to obey
a safety warning can result in
serious injury to yourself or to
others. Always follow the safety
precautions to reduce the risk of
fire, electric shock and personal
injury. Save owners manual and
review frequently for continuing
safe operation and instructing
others who may use this tool.
WARNING: This machine
produces an electromagnetic field
during operation. This field may
under some circumstances
interfere with active or passive
medical implants. To reduce the
risk of serious or fatal injury, we
recommend persons with medical
implants to consult their physician
and the medical implant
manufacturer before operating
this machine.
WARNING: The operation of
any tool can result in foreign
objects being thrown into your
eyes, which can result in eyes
severely damaged. Before
beginning power tool operation,
always wears safety goggles or
safety glasses with side shields
and a full face shield when
needed. We recommend Wide
Vision Safety Mask for use over
eyeglasses or standard safety
glasses with side shield.
IMPORTANT
READ CAREFULLY
BEFORE USE.
KEEP FOR FUTURE
REFERENCE.
1. Read the instructions
carefully. Be familiar with the
controls and the proper use of
the equipment.
2. Never allow children or
people unfamiliar with these
instructions to use the lawn
mower. Local regulations can
restrict the age of the
operator.
3. Never mow while people,
especially children, or pets
are nearby.
4. Keep in mind that the
operator or user is

11
responsible for accidents or
hazards occurring to other
people or their property.
5. While mowing, always wear
substantial footwear and long
trousers. Do not operate the
equipment when barefoot or
wearing open sandals; Avoid
wearing clothing that is loose
fitting or that has hanging
cords or ties.
6. Thoroughly inspect the area
where the equipment is to be
used and remove all objects
which can be thrown by the
machine.
7. Before using, always visually
inspect to see that the blades,
blade bolts and cutter
assembly are not worn or
damaged. Replace worn or
damaged blades and bolts in
sets to preserve balance.
Replace damaged or
unreadable labels.
8. Before use check the supply
and extension cord for signs
of damage or worn. If the cord
becomes damaged during
use, disconnect the cord from
the supply immediately. DO
NOT TOUCH THE CORD
BEFORE DISCONNECTING
THE SUPPLY. Do not use the
appliance if the cord is
damaged or worn.
9. Mow only in daylight or in
good artificial light.
10. Avoid operating the
equipment in wet grass,
where feasible.
11. Always be sure of your
footing on slopes.
12. Walk, never run.
13. For wheeled rotary machines;
mow across the face of
slopes, never up and down.
14. Exercise extreme caution
when changing direction on
slopes.
15. Do not mow excessively
steep slopes.
16. Use extreme caution when
reversing or pulling the lawn
mower towards you.
17. Stop the blades if the lawn
mower has to be tilted for
transportation when crossing
surfaces other than grass,
and when transporting the
lawn mower to and from the
area to be mowed.
18. Never operate the lawn
mower with defective guards,
or without safety devices, for
example deflectors and/or
grass catchers, in place.
19. Start or switch on the motor
carefully according to
instructions and with feet well
away from the blades.
20. Do not tilt the lawn mower
when starting switching on
the motor, except if the lawn
mower has to be tilted for
starting. In this case, do not
tile it more than absolutely
necessary and lift only the

12
part which is away from the
operator.
21. Do not start the motor when
standing in front of the
discharge chute.
22. Do not put hands or feet near
or under rotating parts. Keep
clear of the discharge
opening at all times.
23. Never pick up or carry a lawn
mower while the motor is
running.
24. Stop the motor and
disconnect the plug. Make
sure that all moving parts
have come to a complete
stop.
- whenever you leave the
machine:
- before clearing blockages
or unclogging chute;
- before checking, cleaning
or working on the lawn
mower;
- after striking a foreign
object. Inspect the lawn
mower for damage and
make repairs before
restarting and operating the
lawn mower.
If lawn mower starts to
vibrate abnormally (check
immediately):
- inspect for damage;
- replace or repair any
damage parts;
- check for and tighten any
loose parts.
25. Stop the mower:
- whenever you leave the
lawn mower.
26. Keep all nuts, bolts and
screws tight to be sure the
equipment is in safe working
condition.
27. Check the grass catcher
frequently for wear or
deterioration.
28. Replace worn or damaged
parts for safety.
29. Do not use the lawn mower if
the cords are damaged or
worn.
30. Do not connect a damaged
cord to the supply or touch a
damaged cord before it is
disconnected from the supply.
A damaged cord can lead to
contact with live parts.
31. Do not touch the blade before
the machine is disconnected
form the supply and the blade
have come to a complete
stop.
32. To keep extension cords
away from the blade. The
blade can cause damage to
the cords and lead to contact
with live parts.
33. To disconnect the supply (i.e.
pulling the plug from the
socket):
- whenever leaving the
machine unattended;
- before clearing a blockage;
- before checking, cleaning
or working on the machine;
- after striking a foreign
object;

13
- whenever the machine
starts vibrating abnormally.
34. Children are not allowed to
use the machine.
35. This appliance is not intended
for use by persons with
reduced physical, sensory or
mental capabilities, or lack of
experience and knowledge,
unless they have been given
supervision or instruction
concerning use of the
appliance by a person
responsible for their safety.
36. If the external flexible cable or
cord is damaged, it shall be
exclusively replaced by the
manufacturer or his service
agent or a similar qualified
person in order to avoid a
hazard (not lighter than
H05VV-F 2 x1.0 mm2or
H05RN-F 2 x1.0 mm2).
37. Instructions for the safe
operation of the appliance,
including a recommendation
that the appliance should be
supplied via a Residual
Current Device (RCD) with a
tripping current of not more
than 30 mA.
38. Be careful during adjustment
of the machine to prevent
entrapment of the fingers
between moving blades and
fixed parts of the machine.
39. Always allow the machine to
cool before storing.
40. When servicing the blades be
aware that, even though the
power source is switched off,
the blades can still be moved.
41. Replace worn or damaged
parts for safety; Use only
genuine replacement parts
and accessories.
42. Be careful during adjustment
of the appliance to prevent
entrapment of the fingers
between moving blades and
fixed parts of appliance.
43. If the supply cord is damaged,
it must be replaced by the
manufacturer, its service
agent or similarly qualified
persons in order to avoid a
hazard.
3. PARTS DESCRIPTION (Fig. 1)

14
4. TECHNICAL DATA
5. ASSEMBLY
5-1 ASSEMBLE THE WHEEL
Insert the axle of front and rear wheel cover into the wheel
and then screw into the hole of wheel support. (Fig. 2)
WARNING: All wheels must be at the same
height.
5-2 ASSEMBLE THE FOLDING HANDLE
A) Insert the lower handlebars into the fixed holes of the
underpan, and then fixed with supplied screw by a
screwdriver. (Fig. 3, Fig. 4, Fig. 5)
B) Connect the upper handle and the lower handle with
the locking lever. (Fig. 6, Fig. 7)
C) Position the cable over the handle shaft. Clamp it
around the middle of lower handle by the cable clamp
and make sure the cable is fixed on the outside of the
handle. Otherwise the cable may be pinched by
opening/closing the rear cover. (Fig. 8)
5-3 ASSEMBLE THE GRASS CATCHER
1. To fit: Raise the rear cover and hitch the grass catcher
on rear of mower. (Fig. 9, Fig. 10, Fig. 11, Fig. 12)
2. To remove: Grasp and lift the rear cover, remove grass
catcher.
There is a level indicator on the top of the grass catcher
that shows whether the catcher is empty or full (Fig. 13A,
Fig. 13B):
- The level indicator inflates if the catcher is not full during
the moving. (Fig. 13B)
- If the catcher is full, the indicator collapses. Once this
happens, stop moving immediately and empty the
catcher, make sure it is clean and ensure its meshwork
is ventilated. (Fig. 13A)
IMPORTANT
If the position of indicator opening is very dirty, the
indicator will not inflate. In this case, clean the position of
indicator opening immediately.
6. ADJUSTMENT OF CUTTING
HEIGHT
The cutting height is adjusted by attaching the wheels to
the required hole.
All wheels must be at the same height.
The height (the blade to the ground) can be adjusted from
20 mm to 55 mm (3 height positions). (Fig. 14)
The lowest adjustment: 20 mm (position (1)); the middle
adjustment: 40 mm (position (2)); the highest adjustment:
55 mm (position (3)).
WARNING: Disconnect the electric cord from the
power supply.
WARNING: Make this adjustment only when the
blade is stopped.
7. SAFETY PRECAUTIONS
a) Always operate with the deflector or grass catcher in
the correct position.
b) Always stop the motor before removing the grass
catcher or adjusting the height of cutting position.
c) Before mowing, remove all foreign objects from the
lawn which may be thrown by the machine. While
mowing, stay alert for any foreign objects which may
have been missed. (Fig. 15)
d) Never lift the rear of the mower while starting the
motor or during normal operation. (Fig. 16)
e) Never place your hands or feel underneath the
underpan or into the rear discharge chute while the
motor is running. (Fig. 17)
8. STARTING
Before connecting up the lawn mower to the electric
power supply, make sure that the mains supply voltage is
230 V ~ 50 Hz.
Before start the lawn mower, fix the extension cord into
the cable hook. (Fig. 18)
Model: ELM3311 ELM3711
Rated voltage: 230 V~ 230 V~
Rated frequency: 50 Hz 50 Hz
Rated power: 1,100 W 1,300 W
No load speed: 2,900/min 2,900/min
Cutting width: 330 mm 370 mm
Guaranteed sound power level: 96 dB (A) 96 dB (A)
LpA (SPL) at the site of the user: 75.4 dB (A), K=3 dB (A) 77.6 dB (A), K=3 dB (A)
Guaranteed vibration: 0.672 m/s2, K=1.5 m/s20.917 m/s2, K=1.5 m/s2
Grass catcher capacity: 27 L 35 L
Net weight: 13.1 kg 14.9 kg
Degree of protection against liquid: IPX4 IPX4
Height adjustment : 20/40/55 mm, 3 adjustment 20/40/55 mm, 3 adjustment

15
When the lawn mower power on, the indicator light will
turn on. (Fig. 19)
Start the motor as follows. (Fig. 20)
a) Press the safety push-button (1).
b) And meanwhile, pull the the switch handle (2), and
keep it in grasp.
Push the lawn mower manually when the motor is
running.
If you release the switch handle, the motor will stop.
CAUTION: The blade starts turning as soon as
the motor is started.
WARNING: Cutting elements continue to rotate
after the motor is switched off.
9. BLADE
The blade is made of pressed steel. It will be necessary to
reshape it frequently (with a grind wheel).
Ensure that it is always balanced (an unbalanced blade
will cause dangerous vibrations). To check for balance,
insert a round rod through the central hole and support
the blade horizontally. (Fig. 21) A balance blade will
remain horizontal. If the blade is not balanced the heavy
end will rotate downwards. Reshape the heavy end until
the blade is currently balanced. (Fig. 22) To remove th e
blade (2), unscrew the blade screw (3). (Fig. 23, Fig. 24,
Fig. 25)
Check the conditions of the fan (1), and replace any parts,
which are damaged. (Fig. 23)
When reassembling, make sure that the cutting edges
face in the direction of the motor rotation. The blade screw
(3) must be tightened to torque 20-25 Nm.
WARNING: For service,
replace the blade with: MAKITA
263001422 (for ELM3311) and
MAKITA 263001414 (for
ELM3711) only.
10. EXTENSION CORDS
You should only use extension cords for outdoor use, PVC
or rubber cord ordinary duty with a cross sectional area
not less than 1.0 mm2.
Before using, check the supply and extension cords for
signs of damage during use, disconnect the cord for signs
of damage or aging. If the cord becomes damaged during
use, disconnect the cord from the supply immediately. DO
NOT TOUCH THE CORD BEFORE DISCONNECTING
THE SUPPLY. Do not use the appliance if the cord is
damaged or worn. Keep extension cord away from cutting
elements.
WARNING: Always ensure that the ventilation
openings are kept clear of debris.
11. MAINTENANCE AND CARE
WARNING: Before performing any maintenance
or cleaning work, always pull out the mains plug!
Do not spray the unit with water. Ingress of water may
destroy the switch-plug combination unit and the electric
motor. Clean the unit with a cloth, hand brush, etc.
Never use gasoline, benzine, thinner, alcohol or the like.
Discoloration, deformation or cracks may result.
Expert inspection is required, do not make any
adjustment by yourself, must contact Makita
authorized service centre:
a) if the lawn mower strikes an object.
b) if the motor stops suddenly.
c) if the blade is bent (do not align!).
d) if the motor shaft is bent (do not align!).
e) if a short-circuit occurs when the cable is connected.
f) if the gears are damaged.
g) if the V-belt is defective.
12. TROUBLESHOOTING
WARNING: Before performing any maintenance
or cleaning work, always pull out the mains plug and wait
until the cutter has come to a standstill.
CAUTION: Faults which cannot be rectified with
the aid of this table may be rectified by Makita authorized
service centre only.
Fault Remedial action
Motor does not
run
Check mains connection cable.
Start on short grass or on an area which
has already been mown.
Clean discharge channel/housing-the
mowing blade must rotate freely.
Correct the cutting height.
Motor power
drops
Correct the cutting height.
Clean discharge channel/housing.
Have mowing blade resharpened/
replacedauthorized service centre.
Grass catcher
is not filled
Correct the cutting height.
Allow the lawn to dry.
Have mowing blade resharpened/
replacedauthorized service centre.
Clean the grille on the grass catcher.
Clean the discharge channel/housing.
Wheel drive
does not
function
Adjust the flexible cable.
Check the V-belt/gearsauthorized
service centre.
Check the drive wheels for damage.

16
13. ENVIRONMENTALLY
FRIENDLY DISPOSAL
According to EU directive 2002/96/EC on
electric and electronic equipment and its
implementation into national law, all electric
tools must be separately collected and
environmentally friendly recycled. Alternative
disposal: If the owner of the power tool does
not return the tool to the manufacturer, he is responsible
for proper disposal at a designated collection point that
prepares the device for recycling according to national
recycling laws and regulations.
This does not include accessories and tools without
electric or electronic components.
14. EC DECLARATION OF
CONFORMITY
For European countries only
The EC declaration of conformity is included as Annex A
to this instruction manual.

17
FRANÇAIS
Descriptif
PRÉSENTATION DE VOTRE
TONDEUSE
Lisez ce manuel attentivement, en respectant les
instructions de sécurité précédemment citées, pendant et
après l’utilisation de votre tondeuse. Le respect de ces
instructions simples permet également de conserver votre
tondeuse en bon état de fonctionnement. Familiarisez-
vous avec les commandes de votre tondeuse avant
d’essayer de la faire fonctionner, mais surtout, assurez-
vous de savoir comment arrêter votre tondeuse en cas
d’urgence. Conservez ce manuel utilisateur et les autres
documents fournis avec votre tondeuse pour vous y
reporter ultérieurement.
1. SYMBOLES
INDIQUÉS SUR LE
PRODUIT
1. Guidon supérieur
2. Coffret d’interrupteur
3. Bouton de blocage
4. Levier de verrouillage
5. Clip de maintien
6. Sac de ramassage
7. Roue arrière
8. Sous-bac
9. Roue avant
10. Capot du moteur
11. Guidon inférieur
12. Clip de maintien du câble
13. Guidon d’interrupteur
14. Carter de la roue arrière
15. Roue arrière
16. Support de la roue arrière
17. Carter de la roue avant
18. Roue avant
19. Support de la roue avant
20. Carter arrière
21. Indicateur de niveau
22. Témoin
Lisez ce manuel
d’instructions
attentivement avant
d’utiliser la tondeuse et
conservez-le dans un
endroit sûr pour vous y
reporter ultérieurement.
Ménagez un périmètre de
sécurité.
Attention aux lames
coupantes. Les lames
continuent à tourner après
l’arrêt du moteur.
Débranchez la fiche de
l’appareil avant de
procéder à la maintenance
ou si le cordon est
endommagé.
Éloignez le cordon flexible
d’alimentation des lames
de coupe.
Signe CE
Ce produit répond aux
exigences et
réglementations définies
par la Communauté
européenne.

18
DOUBLE ISOLATION
Votre tondeuse est
doublement isolée.
Cela signifie que toutes les
parties externes sont isolées
électriquement de l’alimentation.
Pour cela, une barrière d’isolation
supplémentaire est placée entre
les parties électriques et
mécaniques.
2. CONSIGNES DE
SÉCURITÉ
GÉNÉRALES
Les règles de sécurité visent à
attirer votre attention sur les
dangers possibles. Les symboles
de sécurité et les explications s’y
rattachant méritent votre attention
et votre compréhension. Les
mises en garde de sécurité
n’éliminent pas le danger en lui-
même. Les instructions ou mises
en garde qu’elles prodiguent ne
remplacent pas les mesures
adéquates de prévention
d’accidents.
AVERTISSEMENT : Tout
manquement au respect des
mises en garde de sécurité peut
entraîner des blessures graves à
vous-même ou à d’autres
personnes. Prenez toujours les
précautions de sécurité afin de
réduire les risques d’incendie, de
choc électrique et de blessure.
Gardez ce manuel d’utilisation et
révisez-le fréquemment pour une
utilisation continue en toute
sécurité et pour former d’autres
personnes à utiliser cet outil.
AVERTISSEMENT : Cet
appareil produit un champ
électromagnétique pendant son
fonctionnement. Dans certaines
circonstances, ce champ peut
perturber le fonctionnement
d’implants médicaux actifs ou
Marquage WEEE
ATTENTION ! Les outils
électriques en fin de vie ne
peuvent pas être jetés
avec les ordures
ménagères. Ils doivent
être déposés dans un
point de collecte
communal afin d’être
détruits de manière
écologique, conformément
aux réglementations
locales.
Marquage du niveau de
bruit
Le niveau sonore de votre
outil ne dépasse pas
96 dB.
SYMBOLE D’ALERTE
DE SÉCURITÉ : Indique
qu’une précaution ou une
mise en garde peut être
utilisée avec d’autres
symboles ou images.

19
passifs. Pour réduire les risques
de blessure grave ou mortelle, il
est recommandé aux personnes
porteuses d’un implant médical
de consulter leur médecin et le
fabricant de l’implant médical en
question avant d’utiliser cette
machine.
AVERTISSEMENT :
L’utilisation de tout outil peut
entraîner la projection de corps
étrangers dans vos yeux,
provoquant de graves blessures
oculaires. Avant d’utiliser l’outil
électrique, portez toujours un
masque de protection ou des
lunettes de sécurité avec des
écrans latéraux, ainsi qu’une
visière de protection intégrale si
nécessaire. Nous vous
conseillons de porter un masque
de sécurité panoramique par-
dessus des lunettes ou des
lunettes de sécurité standard
avec des écrans latéraux.
IMPORTANT
LIRE ATTENTIVEMENT
AVANT UTILISATION.
CONSERVER POUR
RÉFÉRENCE
ULTÉRIEURE.
1. Lisez les instructions
attentivement. Familiarisez-
vous avec les commandes et
l’utilisation correcte du
matériel.
2. Ne laissez pas des enfants ou
des personnes ne
connaissant pas ces
instructions utiliser la
tondeuse. Les
réglementations locales
peuvent limiter l’âge de
l’opérateur.
3. N’utilisez jamais la tondeuse
lorsque des personnes, en
particulier des enfants, ou des
animaux se trouvent à
proximité.
4. Gardez à l’esprit que
l’opérateur ou l’utilisateur est
responsable des accidents ou
blessures survenant à
d’autres personnes ou à leurs
biens.
5. Pendant la tonte, portez
toujours des chaussures
résistantes et des pantalons
longs. N’utilisez pas l’appareil
pieds nus ou si vous portez
des sandales ouvertes. Évitez
de porter des vêtements
amples ou qui possèdent des
cordons ou des liens.
6. Inspectez minutieusement
toute la zone à tondre et
éliminez tout objet qui pourrait
être projeté par la machine.
7. Avant utilisation, procédez
toujours à une vérification
générale pour vous assurer
que les lames, les boulons de
lame et l’ensemble de coupe
ne sont ni usés ni

20
endommagés. Remplacez les
lames et boulons
endommagés ou usés par
lots complets pour préserver
le bon équilibrage.
Remplacez les étiquettes
endommagées ou illisibles.
8. Avant utilisation, vérifiez que
le cordon d’alimentation et la
rallonge ne sont pas
endommagés ou usés. Si le
cordon est endommagé au
cours de l’utilisation,
débranchez-le
immédiatement de
l’alimentation. NE TOUCHEZ
PAS LE CÂBLE AVANT DE
DÉBRANCHER
L’ALIMENTATION. N’utilisez
pas l’appareil si le cordon est
endommagé ou usé.
9. Tondez uniquement à la
lumière du jour ou dans une
lumière artificielle de bonne
qualité.
10. Évitez de tondre de l’herbe
mouillée, si possible.
11. Assurez vos pas dans les
pentes.
12. Marchez, ne courez jamais.
13. Pour les machines rotatives à
roues ; tondez les pentes
dans le sens transversal,
jamais en montant ou en
descendant.
14. Soyez particulièrement
prudent lors des
changements de direction sur
les terrains en pente.
15. Ne coupez pas l’herbe sur
des pentes excessivement
raides.
16. Soyez extrêmement vigilant
lorsque vous reculez ou tirez
la tondeuse vers vous.
17. Arrêtez les lames si la
tondeuse doit être inclinée
pour être transportée, lorsque
vous traversez des zones
sans herbe et lors des
déplacements entre les
surfaces à tondre.
18. N’utilisez jamais la tondeuse
si ses carters sont
endommagés, ou en
l’absence de dispositifs de
sécurité, par exemple les
déflecteurs et/ou le sac de
ramassage.
19. Démarrez le moteur avec
précaution, en respectant les
consignes d’utilisation et en
tenant vos pieds éloignés des
lames.
20. N’inclinez pas la tondeuse
lorsque vous allumez le
moteur, à moins que ce soit
nécessaire pour la mise en
marche. Dans ce cas, ne
l’inclinez pas plus que
nécessaire, et ne soulevez
que la partie qui est la plus
éloignée de l’opérateur.
21. Ne démarrez pas le moteur
lorsque vous êtes devant la
goulotte d’éjection.
22. Ne placez pas vos mains ou
vos pieds à proximité ou sous
des pièces qui tournent.
Other manuals for ELM3311
2
This manual suits for next models
1
Table of contents
Languages:
Other Makita Lawn Mower manuals

Makita
Makita ELM3311 User guide

Makita
Makita DLM480 User manual

Makita
Makita PLM4626 User manual

Makita
Makita DLM460 User manual

Makita
Makita PLM5600 User guide

Makita
Makita LM2350 User manual

Makita
Makita DLM461 User manual

Makita
Makita DLM382 User manual

Makita
Makita LM2300 User manual

Makita
Makita LM001G User manual

Makita
Makita DLM380 User manual

Makita
Makita XML12 User manual
Makita
Makita DLM460PG2 User manual

Makita
Makita DLM382 User manual

Makita
Makita ELM3711 User guide

Makita
Makita BLM430 User manual

Makita
Makita PLM5113N2 User guide

Makita
Makita DLM460 User manual

Makita
Makita DLM533 User manual

Makita
Makita PTM0900 User manual