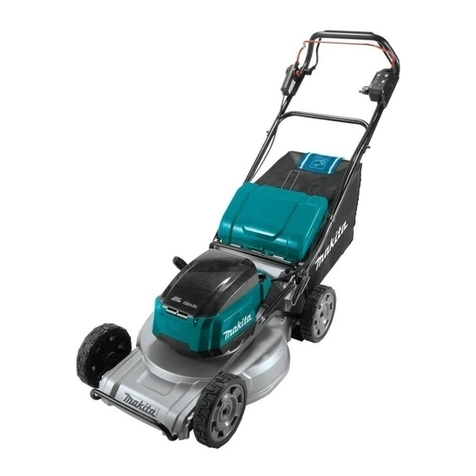
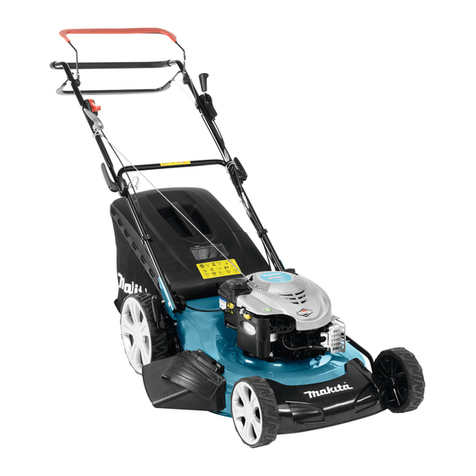
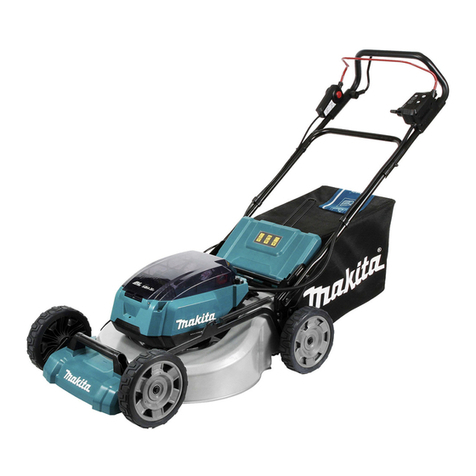
Makita DLM533 User manual

DLM533
EN Cordless Lawn Mower INSTRUCTION MANUAL 8
SL Akumulatorska kosilnica NAVODILA ZA UPORABO 19
SQ Kositëse bari me bateri MANUALI I PËRDORIMIT 31
BG Безжична косачка за трева РЪКОВОДСТВО ЗА
ЕКСПЛОАТАЦИЯ 43
HR Bežična kosilica za travu PRIRUČNIK S UPUTAMA 57
МК Безжична косилка УПАТСТВО ЗА УПОТРЕБА 68
SR Бежична косилица за траву УПУТСТВО ЗА УПОТРЕБУ 82
RO Maşină de tuns iarba fără
cablu MANUAL DE INSTRUCŢIUNI 95
UK Бездротова газонокосарка ІНСТРУКЦІЯ З
ЕКСПЛУАТАЦІЇ 108
RU Аккумуляторная
Газонокосилка РУКОВОДСТВО ПО
ЭКСПЛУАТАЦИИ 122

2
1
Fig.1
3
4
5
2
1
Fig.2
12
Fig.3
1
Fig.4
1
2
Fig.5
1
Fig.6
1
2
3
Fig.7
2

1
2
Fig.8
1
2
Fig.9
1
2
Fig.10
1
2
3
Fig.11
1
Fig.12
1
Fig.13
1
2
Fig.14
3

13
4
56
2
Fig.15
1 2
Fig.16
1
Fig.17
1
Fig.18
1
2
3
Fig.19
1
Fig.20
1
Fig.21
4

1
2
Fig.22
1
Fig.23
1
2
Fig.24
Fig.25
Fig.26
12 3
Fig.27
Fig.28
5

Fig.29
1
23
Fig.30
1
Fig.31
12
Fig.32
2
1
3
Fig.33
3
2
4
1
Fig.34
6

1
2
3
Fig.35
3
2
1
4
Fig.36
3
2
1
2
1
Fig.37
3
2
5
6
4
1
1
1
Fig.38
7

8ENGLISH
ENGLISH (Original instructions)
SPECIFICATIONS
Model: DLM533
Mowing width (blade diameter) 534 mm
No load speed 2,300 min-1
Maximum speed 2,800 min-1
Part number of replacement
mower blade
Straight mower blade 191D52-7
Swing back mower blades *1 191D50-1
Swing back mower blades *2 191D48-8
Dimensions
(L x W x H)
L: 1,655 mm to 1,740 mm
W: 590 mm
H: 990 mm to 1,100 mm
Traveling speed 2.5 - 5.0 km/h
Rated voltage D.C. 36 V
Net weight
When straight mower blade is installed
42.8 - 46.7 kg
When swing back mower
blades are installed
43.5 - 47.3 kg
Protection degree IPX4
*1. Base plate and individual mower blades. *2. Individual mower blades only.
•
Due to our continuing program of research and development, the specications herein are subject to change without notice.
• Specications may dier from country to country.
• The weight may dier depending on the attachment(s), including the battery cartridge. The lightest and heavi-
est combination, according to EPTA-Procedure 01/2014, are shown in the table.
Applicable battery cartridge
BL1815N / BL1820 / BL1820B / BL1830 / BL1830B / BL1840 / BL1840B / BL1850 / BL1850B / BL1860B
• Some of the battery cartridges listed above may not be available depending on your region of residence.
WARNING:
Only use the battery cartridges listed above. Use of any other battery cartridges may cause injury and/or re.
WARNING: Do not use a corded power supply such as battery adapter or portable power pack with
this machine. The cable of such power supply may hinder the operation and result in personal injury.
Symbols
The followings show the symbols which may be used for the equip-
ment. Be sure that you understand their meaning before use.
Take particular care and attention.
Read instruction manual.
Danger; be aware of thrown objects.
The distance between the tool and
bystanders must be at least 15 m.
Never put your hands and feet near the
blade under the mower. Blades continue to
rotate after the motor is switched o.
Remove the lock key before inspecting,
adjusting, cleaning, servicing, leaving and
storing the mower.
Electrical hazard. Contact with water can
cause electric shock.
Do not pour water.
Ni-MH
Li-ion
Only for EU countries
Due to the presence of hazardous components in the
equipment, waste electrical and electronic equip-
ment, accumulators and batteries may have a nega-
tive impact on the environment and human health.
Do not dispose of electrical and electronic
appliances or batteries with household waste!
In accordance with the European Directive on
waste electrical and electronic equipment and on
accumulators and batteries and waste accumu-
lators and batteries, as well as their adaptation to
national law, waste electrical equipment, batter-
ies and accumulators should be stored sepa-
rately and delivered to a separate collection point
for municipal waste, operating in accordance with
the regulations on environmental protection.
This is indicated by the symbol of the crossed-
out wheeled bin placed on the equipment.
Guaranteed sound power level according
to EU Outdoor Noise Directive.
Sound power level according to Australia
NSW Noise Control Regulation

9ENGLISH
Intended use
The machine is intended for lawn mowing.
Noise
The typical A-weighted noise level determined accord-
ing to EN60335-2-77:
NOTE: The values have been measured with the
mower equipped with the straight mower blade.
Sound pressure level (LpA) : 78.8 dB(A)
Sound power level (LWA) : 87.7 dB (A)
Uncertainty (K) : 3 dB(A)
The noise level under working may exceed 80 dB (A).
NOTE:
The declared noise emission value(s) has been
measured in accordance with a standard test method
and may be used for comparing one tool with another.
NOTE:
The declared noise emission value(s) may
also be used in a preliminary assessment of exposure.
WARNING: Wear ear protection.
WARNING: The noise emission during actual
use of the power tool can dier from the declared
value(s) depending on the ways in which the
tool is used especially what kind of workpiece is
processed.
WARNING: Be sure to identify safety mea-
sures to protect the operator that are based on an
estimation of exposure in the actual conditions of
use (taking account of all parts of the operating
cycle such as the times when the tool is switched
o and when it is running idle in addition to the
trigger time).
Vibration
The vibration total value (tri-axial vector sum) deter-
mined according to EN60335-2-77:
NOTE: The values have been measured with the
mower equipped with the straight mower blade.
Vibration emission (ah) : 2.5 m/s2or less
Uncertainty (K) : 1.5 m/s2
NOTE: The declared vibration total value(s) has been
measured in accordance with a standard test method
and may be used for comparing one tool with another.
NOTE: The declared vibration total value(s) may also
be used in a preliminary assessment of exposure.
WARNING: The vibration emission during
actual use of the power tool can dier from the
declared value(s) depending on the ways in which
the tool is used especially what kind of workpiece
is processed.
WARNING: Be sure to identify safety mea-
sures to protect the operator that are based on an
estimation of exposure in the actual conditions of
use (taking account of all parts of the operating
cycle such as the times when the tool is switched
o and when it is running idle in addition to the
trigger time).
EC Declaration of Conformity
For European countries only
The EC declaration of conformity is included as Annex A
to this instruction manual.
SAFETY WARNINGS
IMPORTANT SAFETY
INSTRUCTIONS
WARNING: Read all safety warnings and
all instructions. Failure to follow the warnings and
instructions may result in electric shock, re and/or
serious injury.
Save all warnings and instruc-
tions for future reference.
Training
1. Read the instructions carefully. Be familiar
with the controls and the proper use of the
mower.
2. Never allow children or people unfamiliar with
these instructions to use the mower. Local
regulations can restrict the age of the operator.
3. Never operate the mower while people, espe-
cially children, or pets are nearby.
4. Keep in mind that the operator or user is
responsible for accidents or hazards occurring
to other people or their property.
5. Children should be supervised to ensure that
they do not play with the mower.
6. Physical condition - Do not operate mower
while under the inuence of drugs, alcohol, or
any medication.
Preparation
1. While operating the mower, always wear sub-
stantial footwear and long trousers. Do not
operate the mower when barefoot or wearing
open sandals. Avoid wearing clothing or jew-
elry that is loose tting or that has hanging
cords or ties. They can be caught in moving
parts.
2. Before use, always visually inspect the mower
for damaged, missing or misplaced guards or
shields.
3. Be sure the area is clear of other people before
mowing. Stop mower if anyone enters the area.
4. Do not insert the lock key into mower until it is
ready to be used.
5. Always wear protective goggles to protect
your eyes from injury when using power tools.
The goggles must comply with ANSI Z87.1 in
the USA, EN 166 in Europe, or AS/NZS 1336
in Australia/New Zealand. In Australia/New
Zealand, it is legally required to wear a face
shield to protect your face, too.

10 ENGLISH
It is an employer's responsibility to enforce
the use of appropriate safety protective equip-
ments by the tool operators and by other per-
sons in the immediate working area.
6. Check the blades or blade bolts carefully for
cracks or damage before operation. Replace
cracked or damaged blades or blade bolts
immediately.
7. Remove foreign matters such as rocks, wire,
bottles, bones and large sticks from the work
area before mowing to prevent personal injury
or damage to the mower.
8. Objects struck by the mower blade can cause
severe injuries to persons. The lawn should
always be carefully examined and cleared of
all objects prior to each mowing.
9. Watch for holes, ruts, bumps, rocks, or other
hidden objects. Uneven terrain could cause a slip
and fall accident. Tall grass can hide obstacles.
10.
Do not insert or remove the lock key in the rain.
11. Use personal protective equipment. Always
wear eye protection. Protective equipment such
as a dust mask, non-skid safety shoes, hard hat or
hearing protection used for appropriate conditions
will reduce personal injuries.
Operation
1. Do not overreach. Keep the balance at all
times. Always be sure of the footing on slopes.
Walk, never run.
2. Stop the mower and remove the lock key, and
make sure that all moving parts have come to
a complete stop:
- whenever you leave the mower,
- before clearing blockages or unclogging chute,
- before checking, cleaning or working on the mower,
- after striking a foreign object. Inspect the
mower for damage and make repairs before
restarting and operating the mower,
- whenever the mower starts vibrating abnormally.
3. Never operate the mower with defective
guards or shields, or without safety devices,
for example deectors and/or grass basket, in
place.
4. Avoid using the mower in bad weather con-
ditions especially when there is a risk of
lightning.
5. Wear eye protection and stout shoes at all
times while operating the mower.
6. Operate the mower only in daylight or in good
articial light.
7. Switch on the mower carefully according to
instructions and with feet well away from the
blade(s).
8. Take care against injury to feet and hands from
the mower blades.
9. Always ensure that the ventilation openings
are kept clear of debris.
10. Mow across the face of slopes, never up and
down. Exercise extreme caution when chang-
ing direction on slopes. Do not mow exces-
sively steep slopes.
11. Use extreme caution when reversing or pulling
the mower towards you.
12. Stop the blade(s) if the mower has to be tilted
for transportation when crossing surfaces
other than grass, and when transporting the
mower to and from the area to be used.
13. Do not tilt the mower when switching on the
motor, except if the mower has to be tilted
for starting. In this case, do not tilt it more
than absolutely necessary and lift only the
part, which is away from the operator. Always
ensure that both hands are in the operating
position before returning the mower to the
ground.
14. Do not put hands or feet near or under rotating
parts. Keep clear of the discharge opening at
all times.
15. Do not transport the mower while the mower is
turned on.
16. Avoid operating the mower in wet grass.
17. Always keep a rm hold on the handle.
18. Don't grasp the exposed cutting blades or
cutting edges when picking up or holding the
mower.
19. Keep hands and feet away from rotating
blades. Caution - Blades coast after the mower
is switched o.
20. Stop operation immediately if you notice
anything unusual. Switch o the mower and
remove the lock key. Then inspect the mower.
21. Never attempt to make cutting height adjust-
ments while mower is running if the mower
has cutting height adjustment feature.
22. Release switch lever and wait for blade rota-
tion to stop before crossing driveways, walks,
roads, and any gravel-covered areas. Also
remove the lock key if you leave the mower,
reach to pick up or remove something out of
your way, or for any other reason that may
distract you from what you are doing.
23. If the mower strikes a foreign object, follow
these steps:
- Stop the mower, release the switch lever and
wait until the blade comes to a complete stop.
- Remove the lock key and the battery
cartridge.
- Thoroughly inspect the mower for any
damage.
- Replace the blade if it is damaged in any way.
Repair any damage before restarting and con-
tinuing to operate the mower.
24. Do not start the mower when standing in front
of the discharge opening.
11 ENGLISH
25. If the mower starts to vibrate abnormally
(check immediately)
- inspect for damage,
- replace or repair any damaged parts,
- check for and tighten any loose parts.
26. Never direct discharged material toward
anyone. Avoid discharging material against a
wall or obstruction. Material may ricochet back
toward the operator. Stop the blade when crossing
gravel surfaces.
27. Do not pull the mower backwards unless
absolutely necessary. When you are compelled
to back the mower from a fence or other similar
obstruction, look down and behind before and
while moving backwards.
28.
Shut the motor o and wait until the blade comes
to a complete stop before removing the grass
catcher. Beware that the blades coast after turn o.
29. When you use the machine on muddy ground,
wet slope, or slippery place, pay attention to
your footing.
30. Avoid working in poor environment where
increased user fatigue is expected.
31. Do not use the machine in bad weather where
visibility is limited. Failure to do so may cause
fall or incorrect operation due to low visibility.
32. Do not submerge the machine into a puddle.
33. When wet leaves or dirt adhere to the suc-
tion mouth (ventilation window) due to rain,
remove them.
34. Do not use the machine in the snow.
35. If the cut-o grass is wet, it is likely to be
clogged inside of the machine. Check the con-
dition of the machine regularly, and remove the
adhered grass as necessary.
36. When operating the machine, pay attention to
piping and wiring.
37. Do not use a corded power supply such as bat-
tery adapter or portable power pack with this
machine. The cable of such power supply may
hinder the operation and result in personal injury.
Maintenance and storage
1. Replace worn or damaged parts for safety.
Use only genuine replacement parts and
accessories.
2. Inspect and maintain the mower regularly.
3. When not in use, store the mower out of the
reach of children.
4. Keep all nuts, bolts, and screws tight to
be sure the equipment is in safe working
condition.
5. Check the grass basket frequently for wear or
deterioration. For storage, always make sure
the grass basket is empty. Replace a worn
grass basket with a new factory replacement
for safety.
6. Use only the manufacturer genuine blades
specied in this manual.
7. Be careful during adjustment of the mower
to prevent entrapment of the ngers between
moving blades and xed parts of the mower.
8. Check the blade mounting bolt at frequent
intervals for proper tightness.
9. Always allow the mower to cool down before
storing.
10. When servicing the blades be aware that, even
though the power source is switched o, the
blades can still be moved.
11. Never remove or tamper with safety devices.
Check their proper operation regularly. Never
do anything to interfere with the intended
function of a safety device or to reduce the
protection provided by a safety device.
12. Do not leave the machine unattended outdoors
in the rain.
13. Do not wash the machine with high pressure
water.
14. When washing the machine, be sure to remove
the battery and lock key and close the battery
cover, and pour water toward the bottom of the
machine to which the blade is attached.
15. When storing the machine, avoid direct sun-
light and rain, and store it in a place where it
does not get hot or humid.
16. Perform inspection or maintenance in a place
where rain can be avoided.
17. After using the machine, remove the adhered
dirt and dry the machine completely before
storing. Depending on the season or the area,
there is a risk of malfunction due to freezing.
Battery tool use and care
1. Recharge only with the charger specied by
the manufacturer. A charger that is suitable for
one type of battery pack may create a risk of re
when used with another battery pack.
2. Use power tools only with specically desig-
nated battery packs. Use of any other battery
packs may create a risk of injury and re.
3. When battery pack is not in use, keep it away
from other metal objects, like paper clips,
coins, keys, nails, screws or other small metal
objects, that can make a connection from one
terminal to another. Shorting the battery termi-
nals together may cause burns or a re.
4. Under abusive conditions, liquid may be
ejected from the battery; avoid contact. If con-
tact accidentally occurs, ush with water. If
liquid contacts eyes, additionally seek medical
help. Liquid ejected from the battery may cause
irritation or burns.
5. Do not use a battery pack or tool that is dam-
aged or modied. Damaged or modied batteries
may exhibit unpredictable behaviour resulting in
re, explosion or risk of injury.
6. Do not expose a battery pack or tool to re or
excessive temperature. Exposure to re or tem-
perature above 130 °C may cause explosion.
7. Follow all charging instructions and do not
charge the battery pack or tool outside the
temperature range specied in the instruc-
tions. Charging improperly or at temperatures
outside the specied range may damage the
battery and increase the risk of re.
Electrical and battery safety
1. Do not dispose of the battery(ies) in a re.
The cell may explode. Check with local codes for
possible special disposal instructions.

12 ENGLISH
2.
Do not open or mutilate the battery(ies). Released
electrolyte is corrosive and may cause damage to the
eyes or skin. It may be toxic if swallowed.
3.
Do not charge battery in rain, or in wet locations.
4. Do not charge the battery outdoors.
5. Do not handle charger, including charger plug,
and charger terminals with wet hands.
6. Do not replace the battery in the rain.
7. Do not wet the terminal of battery with liquid
such as water, or submerge the battery. Do not
leave the battery in the rain, nor charge, use,
or store the battery in a damp or wet place. If
the terminal gets wet or liquid enters inside of bat-
tery, the battery may be short circuited and there is
a risk of overheat, re, or explosion.
8. After removing the battery from the machine or
charger, be sure to attach the battery cover to
the battery and store it in a dry place.
9. Do not replace the battery with wet hands.
Service
1. Have your power tool serviced by a qualied
repair person using only identical replacement
parts. This will ensure that the safety of the power
tool is maintained.
2. Never service damaged battery packs. Service
of battery packs should only be performed by the
manufacturer or authorized service providers.
SAVE THESE INSTRUCTIONS.
WARNING: DO NOT let comfort or familiarity
with product (gained from repeated use) replace
strict adherence to safety rules for the subject
product.
MISUSE or failure to follow the safety rules stated
in this instruction manual may cause serious
personal injury.
Important safety instructions for
battery cartridge
1.
Before using battery cartridge, read all instruc-
tions and cautionary markings on (1) battery
charger, (2) battery, and (3) product using battery.
2. Do not disassemble or tamper with the battery
cartridge. It may result in a re, excessive heat,
or explosion.
3. If operating time has become excessively
shorter, stop operating immediately. It may
result in a risk of overheating, possible burns
and even an explosion.
4. If electrolyte gets into your eyes, rinse them
out with clear water and seek medical atten-
tion right away. It may result in loss of your
eyesight.
5. Do not short the battery cartridge:
(1) Do not touch the terminals with any con-
ductive material.
(2) Avoid storing battery cartridge in a con-
tainer with other metal objects such as
nails, coins, etc.
(3) Do not expose battery cartridge to water
or rain.
A battery short can cause a large current
ow, overheating, possible burns and even a
breakdown.
6. Do not store and use the tool and battery car-
tridge in locations where the temperature may
reach or exceed 50 °C (122 °F).
7. Do not incinerate the battery cartridge even if
it is severely damaged or is completely worn
out. The battery cartridge can explode in a re.
8. Do not nail, cut, crush, throw, drop the battery
cartridge, or hit against a hard object to the
battery cartridge. Such conduct may result in a
re, excessive heat, or explosion.
9. Do not use a damaged battery.
10. The contained lithium-ion batteries are subject
to the Dangerous Goods Legislation require-
ments.
For commercial transports e.g. by third parties,
forwarding agents, special requirement on pack-
aging and labeling must be observed.
For preparation of the item being shipped, consult-
ing an expert for hazardous material is required.
Please also observe possibly more detailed
national regulations.
Tape or mask o open contacts and pack up the
battery in such a manner that it cannot move
around in the packaging.
11. When disposing the battery cartridge, remove
it from the tool and dispose of it in a safe
place. Follow your local regulations relating to
disposal of battery.
12. Use the batteries only with the products
specied by Makita. Installing the batteries to
non-compliant products may result in a re, exces-
sive heat, explosion, or leak of electrolyte.
13. If the tool is not used for a long period of time,
the battery must be removed from the tool.
14. During and after use, the battery cartridge may
take on heat which can cause burns or low
temperature burns. Pay attention to the han-
dling of hot battery cartridges.
15. Do not touch the terminal of the tool imme-
diately after use as it may get hot enough to
cause burns.
16. Do not allow chips, dust, or soil stuck into the
terminals, holes, and grooves of the battery
cartridge. It may result in poor performance or
breakdown of the tool or battery cartridge.
17. Unless the tool supports the use near
high-voltage electrical power lines, do not use
the battery cartridge near high-voltage electri-
cal power lines. It may result in a malfunction or
breakdown of the tool or battery cartridge.
18. Keep the battery away from children.
SAVE THESE INSTRUCTIONS.
CAUTION: Only use genuine Makita batteries.
Use of non-genuine Makita batteries, or batteries that
have been altered, may result in the battery bursting
causing res, personal injury and damage. It will
also void the Makita warranty for the Makita tool and
charger.

13 ENGLISH
Tips for maintaining maximum
battery life
1.
Charge the battery cartridge before completely dis-
charged. Always stop tool operation and charge the
battery cartridge when you notice less tool power.
2.
Never recharge a fully charged battery cartridge.
Overcharging shortens the battery service life.
3.
Charge the battery cartridge with room tempera-
ture at 10 °C - 40 °C (50 °F - 104 °F). Let a hot
battery cartridge cool down before charging it.
4. When not using the battery cartridge, remove
it from the tool or the charger.
5. Charge the battery cartridge if you do not use
it for a long period (more than six months).
ASSEMBLY
WARNING:
Always be sure that the lock key and bat-
tery cartridge are removed before carrying out any work on the
mower. Failure to remove the lock key and the battery cartridge
may result in serious personal injury from accidental start-up.
WARNING: Never start the mower unless it is
completely assembled. Operation of the machine
in a partially assembled state may result in serious
personal injury from accidental start-up.
Installing the handle
NOTICE:
When installing handles, position the cords so
that they are not caught by anything between the handles.
If the cord is damaged, the mower switch may not work.
1. Align the holes in the lower handle with the holes
in the mower body, and then tighten 4 bolts temporarily.
► Fig.1: 1. Lower handle 2. Bolt
2. Firmly tighten 4 bolts which were temporarily
tightened in step 1 using box wrench 13.
3. Align the hole in the lower handle with the hole in
the upper handle, then insert the bolt from inside, and
then tighten the nut from outside with box wrench 13.
Perform the same procedure on the other side.
► Fig.2:
1. Bolt 2. Lower handle 3. Nut 4. Hole 5. Upper handle
CAUTION: Hold the upper handle rmly so
that it does not drop o your hand. Otherwise, the
handle may fall and cause an injury.
4. Attach the holders to the handle.
Align the protrusions on the holder with the holes on the
handle so that the protrusions t in the holes. Position
the cords as shown in the gure.
► Fig.3: 1. Cord 2. Holder
Removing the mulching plug
1. Open the rear cover.
► Fig.4: 1. Rear cover
2.
Remove the mulching plug while holding down the lever.
► Fig.5: 1. Lever 2. Mulching plug
Installing or removing the grass basket
To install the grass basket, follow the steps below.
1. Open the rear cover.
► Fig.6: 1. Rear cover
2. Hold the handle of the grass basket, and then
hook the grass basket on the rod of the mower body as
shown in the gure.
► Fig.7: 1. Rod 2. Handle 3. Grass basket
To remove the grass basket, open the rear cover, and
then remove the grass basket by holding the handle.
Attaching the mulching plug
1.
Open the rear cover, and then remove the grass basket.
► Fig.8: 1. Rear cover 2. Grass basket
2.
Attach the mulching plug while holding down the
lever, and then release the lever to lock the mulching plug.
► Fig.9: 1. Lever 2. Mulching plug
FUNCTIONAL
DESCRIPTION
Installing or removing battery
cartridge
CAUTION: Always switch o the machine
before installing or removing of the battery
cartridge.
CAUTION: Hold the machine and the battery
cartridge rmly when installing or removing bat-
tery cartridge. Failure to hold the machine and the
battery cartridge rmly may cause them to slip o
your hands and result in damage to the machine and
battery cartridge and a personal injury.
CAUTION: Make sure that you lock the battery
cover before use. Otherwise, mud, dirt, or water may
cause damage to the product or the battery cartridge.
CAUTION: Always install the battery cartridge
fully until the red indicator cannot be seen. If not,
it may accidentally fall out of the machine, causing
injury to you or someone around you.
CAUTION: Do not install the battery cartridge
forcibly. If the cartridge does not slide in easily, it is
not being inserted correctly.
NOTE: The machine does not work with only one
battery cartridge.
To install the battery cartridge;
1.
Pull up the locking lever, and then open the battery cover.
► Fig.10: 1. Battery cover 2. Locking lever
2. Align the tongue on the battery cartridge with the
slot on the machine, and then slide the cartridge until it
locks in place with a little click.
► Fig.11: (1) Battery port 1 (2) Battery port 2
(3) Battery cartridge

14 ENGLISH
NOTE: Install at least 2 battery cartridges to battery
port 1 or battery port 2.
3. Insert the lock key in the place shown in the gure
as far as it will go.
► Fig.12: 1. Lock key
4. Close the battery cover and push it until it is
latched with the locking lever.
To remove the battery cartridge;
1. Pull up the locking lever and open the battery
cover.
2. Pull out the battery cartridge from the machine
while sliding the button on the front of the cartridge.
3. Pull out the lock key.
4. Close the battery cover.
Switching the battery cartridges
► Fig.13: 1. Battery selection switch
The machine uses 2 battery cartridges for operation
at a time. Up to 4 battery cartridges can be installed to
the machine. Before operating the machine, select the
battery port 1 or battery port 2 by turning the battery
selection switch.
NOTE: If only 2 battery cartridges are installed to the
machine, be sure to select the battery port to which
the battery cartridges are installed using the battery
selection switch.
Machine / battery protection system
The machine is equipped with a machine/battery
protection system. This system automatically cuts o
power to the motor to extend machine and battery life.
The machine will automatically stop during operation if
the machine or battery is placed under one of the fol-
lowing conditions:
Overload protection
When the battery is operated in a manner that causes
it to draw an abnormally high current, the machine
automatically stops and the main power lamp blinks in
green. In this situation, turn the machine o and stop
the application that caused the machine to become
overloaded. Then turn the machine on to restart.
Overheat protection
When the machine or battery is overheated, the
machine stops automatically and the main power lamp
lights up in red. In this case, let the machine and battery
cool before turning the machine on again.
Overdischarge protection
When the battery capacity is not enough, the machine
stops automatically and the main power lamp blinks in
red. In this case, remove the battery from the machine
and charge the battery cartridges or change the battery
cartridges to fully charged ones.
Indicating the remaining battery
capacity
Only for battery cartridges with the indicator
► Fig.14: 1. Indicator lamps 2. Check button
Press the check button on the battery cartridge to indi-
cate the remaining battery capacity. The indicator lamps
light up for a few seconds.
Indicator lamps Remaining
capacity
Lighted O Blinking
75% to 100%
50% to 75%
25% to 50%
0% to 25%
Charge the
battery.
The battery
may have
malfunctioned.
NOTE: Depending on the conditions of use and the
ambient temperature, the indication may dier slightly
from the actual capacity.
NOTE: The rst (far left) indicator lamp will blink when
the battery protection system works.
Control panel
The control panel has the main power switch, the mode
switching button, and the indicator of remaining battery
capacity.
► Fig.15: 1. Battery indicator 2. Mode switching
lamp 3. Main power lamp 4. Check button
5. Mode switching button 6. Main power
switch
Main power switch
WARNING: Always turn o the main power
switch when not in use.
To turn on the machine, press the main power switch.
The main power lamp lights up in green. To turn o the
machine, press the main power switch again.
NOTE: If the main power lamp lights up in red or
blinks in red or green, refer to the instructions for
machine/battery protection system.
NOTE: This machine employs the auto power-o
function. To avoid unintentional start up, the main
power switch will automatically shut down when the
switch lever and drive lever (if equipped) are not
pulled for a certain period after the main power switch
is turned on.

15 ENGLISH
Mode switching button
You can switch the operating mode by pressing the mode
switching button. When the machine is turned on, the
machine starts up in the normal mode. When you press
the mode switching button, the machine shifts to the noise
reduction mode and the mode switching lamp lights up
in green. In the noise reduction mode, you can decrease
the noise at mowing. When you press the mode switching
button again, the machine returns to the normal mode.
Indicating the remaining battery capacity
Press the check button to indicate the remaining battery
capacities. The battery indicators correspond to each battery.
Battery indicator status
Remaining battery
capacity
On O
50% - 100%
20% - 50%
0% - 20%
NOTE: The indicator lamps for remaining battery
capacity is just for a reference. The actual bat-
tery capacity may dier depending on the usage
conditions.
NOTE: Before you press the check button to indicate
the remaining battery capacities, stop the machine.
Switch action
WARNING: Before installing the battery car-
tridge, always check to see that the switch lever
actuates properly and returns to the original posi-
tion when released. Operating the machine with a
switch that does not actuate properly can lead to loss
of control and serious personal injury.
NOTE: The mower does not start without pressing the
switch button even the switch lever is pulled.
NOTE: Mower may not start due to the overload
when you try to mow long or dense grass at a time.
Increase the mowing height in this case.
This mower is equipped with the lock key and handle switch.
If you notice anything unusual with either of the lock key
or switch, stop the operation immediately and have them
checked by your nearest Makita Authorized Service Center.
1. Install the battery cartridges. Insert the lock key,
and then close the battery cover.
2. Select the battery cartridges used for operation by
turning the battery selection switch.
3. Press the main power switch.
4. Pull the switch lever toward you while holding
down the switch button. Release the switch button as
soon as the motor starts running.
► Fig.16: 1. Switch button 2. Switch lever
NOTE: If the lock key is not inserted, the power lamp
blinks in green when you pull the switch lever.
5. While holding the switch lever, push the drive lever
forward and hold it to drive the rear wheels.
► Fig.17: 1. Drive lever
NOTE: You can drive the rear wheels by pushing
the drive lever forward and hold it without pulling the
switch lever.
6. Release the drive lever and the switch lever to
stop the machine.
Adjusting the mowing height
WARNING: Never put your hand or leg under
the mower body when adjusting the mowing
height.
WARNING: Always make sure that the lever
ts in the groove properly before operation.
The mowing height can be adjusted in the range of
between 20 mm and 100 mm.
Remove the lock key, and then pull the mowing height
adjusting lever outward of the mower body and move it
to your desired mowing height.
► Fig.18: 1. Mowing height adjusting lever
The table below shows the relationship between the
number on the mower body and the approximate mow-
ing height.
Number Mowing height
120 mm
226 mm
332 mm
439 mm
547 mm
655 mm
763 mm
874 mm
986 mm
10 100 mm
Hold the front grip or the lower handle with one hand,
and then move the mowing height adjusting lever with
the other hand.
► Fig.19: 1. Mowing height adjusting lever 2. Lower
handle 3. Front grip
NOTE: The mowing height gures should be used
just as a guideline. Depending on the conditions of
the lawn or the ground, the actual lawn height may
become slightly dierent from the set height.
NOTE: Try a test mowing of grass in a less conspicu-
ous place to get your desired height.

16 ENGLISH
Grass level indicator
Grass level indicator shows the volume of mowed
grass. When the grass basket is not full, the indicator
oats while the blades are running.
► Fig.20: 1. Grass level indicator
When the grass basket is almost full, the indicator does
not oat while the blades are running. In this case, stop
the operation immediately and empty the basket.
► Fig.21: 1. Grass level indicator
NOTE: This indicator is a rough guide. Depending on
the conditions of inside of the basket, this indicator
may not work properly.
Adjusting the handle height
CAUTION: Before removing the bolts, hold
the upper handle rmly. Otherwise, the handle may
fall and cause an injury.
The handle height can be adjusted in two levels.
1. Remove the upper bolts of the lower handle using
box wrench 13, and then loosen the lower bolts.
► Fig.22: 1. Upper bolt 2. Lower bolt
2. Adjust the handle height, and then tighten the
upper and lower bolts rmly.
Adjusting the traveling speed
► Fig.23: 1. Speed lever
The traveling speed can be adjusted with the speed
lever. To decrease the speed, pull the lever toward you,
and to increase the speed, turn the lever forward.
Using mulching plug
The mulching plug allows you to return the cut grass to
the ground without gathering the cut grass in the grass
basket. When you operate the machine with the mulch-
ing plug, be sure to remove the grass basket.
NOTICE:
When using the machine with the mulch-
ing plug, make sure that the total length of grass is
30 mm or more, or the cut length is 15 mm or less.
► Fig.24: (1) 30 mm or more (2) 15 mm or less
Using the rear discharge
Using the rear discharge allows you to discharge the cut
grass to the ground from the rear side of the machine
without gathering the cut grass in the grass basket.
When you operate the machine using the rear dis-
charge, be sure to remove the grass basket and mulch-
ing plug, and close the rear cover.
Electronic function
The machine is equipped with the electronic functions
for easy operation.
• Constant speed control of blade rotation
Electronic speed control for obtaining constant speed.
Possible to get ne nish, because the rotating speed
is kept constant even under load condition.
• Soft start at driving
The soft-start function minimizes start-up shock,
and makes the machine start smoothly.
• Electric brake
This machine is equipped with an electric brake. If the
machine consistently fails to quickly stop the mower
blades after releasing the switch lever, have the
machine serviced at Makita Authorized Service Center.
OPERATION
Mowing
WARNING: Before mowing, clear away sticks
and stones from mowing area. Furthermore, clear
away any weeds from mowing area in advance.
WARNING:
Always wear the safety goggles or safety
glasses with side shields when operating the mower.
CAUTION:
If the cut grass or foreign object
blocks up inside of the mower body, be sure to
remove the lock key and battery cartridge and wear
gloves before removing the grass or foreign object.
NOTICE: Use this machine for mowing lawn only.
Do not mow weeds with this machine.
► Fig.25
Firmly hold the handle with both hands when mowing.
The mowing speed guideline is approximately 7 to 14
meters per 10 seconds.
► Fig.26
The center lines of the front wheels are guidelines to
mowing width. Using the center lines as guidelines,
mow in strips. Overlap by one half to one third the previ-
ous strip to mow the lawn evenly.
► Fig.27: 1. Mowing width 2. Overlapping area
3. Center line
Change the mowing direction each time to prevent the
grass grain pattern from forming in just one direction.
► Fig.28
Periodically check the grass basket for mowed grass.
Empty the grass before it becomes full. Before every
periodical check, be sure to stop the mower then
remove the lock key and the battery cartridge.
NOTICE: Using the mower with the grass basket
full prevents smooth blade rotation and places
an extra load on the motor, which may cause
breakdown.
Mowing a long-grass lawn
Do not try to cut long grass all at once. Instead, mow
the lawn in steps. Leave a day or two between mowings
until the lawn becomes evenly short.
► Fig.29
NOTE: Mowing long grass to a short length all at
once may cause the grass to die. The cut grass may
also block up inside of the mower body.

17 ENGLISH
Emptying the grass basket
WARNING: To reduce a risk of accident, reg-
ularly check the grass basket for any damage or
weakened strength. Replace the grass basket if
necessary.
1. Release the switch lever and drive lever.
2. Remove the lock key.
3. Open the rear cover and take out the grass basket
by holding the handle.
► Fig.30: 1. Rear cover 2. Handle 3. Grass basket
4. Empty the grass basket.
MAINTENANCE
WARNING: Always be sure that the lock
key and battery cartridge are removed from the
mower before storing or carrying the mower or
attempting to perform inspection or maintenance.
WARNING: Always remove the lock key when
the mower is not in use. Store the lock key in a
safe place out of reach of children.
WARNING: Wear gloves when performing
inspection or maintenance.
WARNING: Always wear the safety goggles or
safety glasses with side shields when performing
inspection or maintenance.
NOTICE: Never use gasoline, benzine, thinner,
alcohol or the like. Discoloration, deformation or
cracks may result.
To maintain product SAFETY and RELIABILITY,
repairs, any other maintenance or adjustment should
be performed by Makita Authorized or Factory Service
Centers, always using Makita replacement parts.
Maintenance
1. Remove the lock key and battery cartridges, and
then close the battery cover.
2. Put the mower on its side and clean grass clip-
pings accumulated on the underside of mower deck.
3. Pour water toward the bottom of the machine to
which the blade is attached.
NOTICE: Do not wash the machine with high
pressure water.
4. Check all nuts, bolts, knobs, screws, fasteners etc.
for tightness.
5.
Inspect moving parts for damage, breakage, and wear.
Damaged or missing parts should be repaired or replaced.
6.
Store the mower in a safe place out of the reach of children.
NOTICE: Do not pour water to the area shown in
the gure. Pouring water to the motor unit may cause
a malfunction of the machine.
► Fig.31: 1. Area where water should not be poured
Carrying the mower
When carrying the mower, hold the front grip and rear
grip with two people as shown in the gure.
► Fig.32: 1. Front grip 2. Rear grip
Storing
Store mower indoors in a cool, dry and locked place.
Don't store the mower and charger in locations where
the temperature may reach or exceed 40 °C.
Removing or installing the mower
blade
WARNING: The blade coasts for a few sec-
onds after releasing the switch. Do not start any
operation until the blade comes to a complete
stop.
WARNING: Always remove the lock key and
battery cartridge when removing or installing the
blade. Failure to remove the lock key and battery
cartridge may cause a serious injury.
WARNING: Always wear gloves when han-
dling the blade.
Removing the mower blade
For models equipped with straight mower
blade
1. Put the mower on its side so that the mowing
height adjusting lever comes to the upper side.
2. To lock the blade, insert the pin into a hole on the
mower body.
3. Turn the bolt counterclockwise with box wrench
17.
► Fig.33: 1. Mower blade 2. Pin 3. Box wrench
4. Remove the bolt, and then mower blade.
► Fig.34: 1. Blade support 2. Mower blade 3. Bolt
4. Protrusion
NOTICE: When installing the mower blade, make
sure that the protrusions on the blade support t
in the holes in the mower blade.
For models equipped with swing back
mower blades
1. Put the mower on its side so that the mowing
height adjusting lever comes to the upper side.
2. To lock the base plate, insert the pin into a hole on
the mower body through a hole on the base plate.
3.
Turn the bolt counterclockwise with box wrench 17.
► Fig.35: 1. Pin 2. Base plate 3. Box wrench
4. Remove the bolt, and then base plate.
► Fig.36: 1. Blade support 2. Base plate 3. Bolt
4. Protrusion
NOTICE: When installing the mower blades,
make sure that the protrusions on the blade sup-
port t in the holes in the base plate.

18 ENGLISH
5.
To remove the individual mower blade, turn the bolt coun-
terclockwise with box wrench 17 while holding the base plate.
► Fig.37: 1. Base plate 2. Mower blade 3. Box wrench
6. Remove the nut, washer, spring washer, mower
blade, and bolt in order.
► Fig.38: 1. Bolt hole 2. Bolt 3. Mower blade 4. Spring
washer 5. Washer 6. Nut
NOTICE: When tightening the nuts to install the
individual mower blades, apply 30 N•m as tighten-
ing torque.
NOTICE: When installing the individual mower
blade, be sure to attach the spring washer in the
direction as shown in the gure.
NOTICE: When installing the individual mower
blade, be sure to insert the bolts into the bolt
holes shown in the gure.
Installing the mower blade
WARNING: Install the mower blade carefully.
It has a top/bottom facing.
WARNING: Tighten the bolt clockwise rmly
to secure the blade.
WARNING: Make sure that the mower blade
and all the xing parts are installed correctly and
tightened securely.
WARNING: When you replace the blades,
always follow the instructions provided in this
manual.
NOTICE: After installing the mower blades,
remove the pin from the mower body.
To install the mower blades, perform the removal proce-
dure in reverse.
TROUBLESHOOTING
Before asking for repairs, conduct your own inspection rst. If you nd a problem that is not explained in the manual,
do not attempt to disassemble the machine. Instead, ask Makita Authorized Service Centers, always using Makita
replacement parts for repairs.
State of abnormality Probable cause (malfunction) Remedy
Mower does not start. Two battery cartridges are not installed. Install two charged battery cartridges.
Battery problem (under voltage) Recharge the battery cartridge. If recharging is not
eective, replace battery cartridge.
The lock key is not inserted. Insert the lock key.
Battery selection switch is not in the
correct position.
Select the battery port to which the battery car-
tridges are installed using the battery selection
switch.
Motor stops running after a little use. Battery's charge level is low. Recharge the battery cartridge. If recharging is not
eective, replace battery cartridge.
Cutting height is too low. Increase the cutting height.
Cut grass is clogged in the mower. Remove the clogged grass from the mower.
Motor does not reach maximum
RPM.
Battery cartridge is installed improperly. Install the battery cartridge as described in this
manual.
Battery power is dropping. Recharge the battery cartridge. If recharging is not
eective, replace battery cartridge.
The drive system does not work correctly.
Ask your local authorized service center for repair.
Mower blade does not rotate:
stop the mower immediately!
Foreign object such as a branch is
jammed near the blade.
Remove the foreign object.
The drive system does not work
correctly.
Ask your local authorized service center for repair.
Abnormal vibration:
stop the mower immediately!
Blade is imbalanced, excessively or
unevenly worn.
Replace the blade.
OPTIONAL ACCESSORIES
CAUTION: These accessories or attachments
are recommended for use with your Makita
machine specied in this manual. The use of any
other accessories or attachments might present a risk
of injury to persons. Only use accessory or attach-
ment for its stated purpose.
If you need any assistance for more details regard-
ing these accessories, ask your local Makita Service
Center.
• Mower blade
• Makita genuine battery and charger
NOTE: Some items in the list may be included in the
product package as standard accessories. They may
dier from country to country.

19 SLOVENŠČINA
SLOVENŠČINA (Originalna navodila)
TEHNIČNI PODATKI
Model: DLM533
Širina košnje (premer rezila) 534 mm
Hitrost brez obremenitve 2.300 min-1
Najvišja hitrost 2.800 min-1
Številka dela nadomestnega
rezila kosilnice
Ravno rezilo kosilnice 191D52-7
Povratno rezilo kosilnice *1 191D50-1
Povratno rezilo kosilnice *2 191D48-8
Mere
(D x Š x V)
D: 1.655 mm do 1.740 mm
Š: 590 mm
V: 990 mm do 1.100 mm
Hitrost 2,5 - 5,0 km/h
Nazivna napetost D.C. 36 V
Neto teža
Ko je nameščeno ravno rezilo kosilnice
42,8 – 46,7 kg
Ko so nameščena povratna
rezila kosilnice
43,5 - 47,3 kg
Stopnja zaščite IPX4
*1. Osnovna plošča in posamezna rezila kosilnice. *2. Samo posamezna rezila kosilnice.
•
Ker nenehno opravljamo raziskave in razvijamo svoje izdelke, se lahko tehnični podatki v tem dokumentu spremenijo brez obvestila.
• Tehnični podatki se lahko razlikujejo od države do države.
• Teža se lahko razlikuje glede na priključke, vključno z akumulatorsko baterijo. Najlažja in najtežja kombinacija v
skladu s postopkom EPTA 01/2014 sta prikazani v preglednici.
Uporabna akumulatorska baterija
BL1815N / BL1820 / BL1820B / BL1830 / BL1830B / BL1840 / BL1840B / BL1850 / BL1850B / BL1860B
• Nekatere zgoraj navedene akumulatorske baterije morda v vaši državi prebivališča niso na voljo.
OPOZORILO: Uporabljajte le zgoraj navedene akumulatorske baterije. Uporaba drugih akumulatorskih
baterij lahko povzroči telesne poškodbe in/ali požar.
OPOZORILO: S tem strojem ne uporabljajte električnega napajalnika s kablom, kot je adapter aku-
mulatorja ali prenosna polnilna enota. Kabel tovrstnega električnega napajalnika lahko ovira delo in povzroči
telesne poškodbe.
Simboli
Naslednji simboli se lahko uporabljajo v povezavi s strojem. Pred
uporabo izdelka se obvezno seznanite z njihovim pomenom.
Potrebna je posebna pozornost in
previdnost.
Preberite navodila za uporabo.
Nevarnost; pazite se letečih predmetov.
Razdalja med orodjem in osebami v bližini
mora biti najmanj 15 m.
Nikoli ne približujte rok in nog rezilu pod
kosilnico. Ko izključite motor, se rezila še
vedno vrtijo.
Pred pregledovanjem, prilagajanjem,
čiščenjem, servisiranjem, puščanjem in
shranjevanjem kosilnice vedno odstranite
ključ za zaklep.
Nevarnost električnega toka. Stik z vodo
lahko povzroči električni šok.
Ne polivajte z vodo.
Ni-MH
Li-ion
Samo za države EU
Zaradi prisotnosti nevarnih komponent v
opremi imajo lahko uporabljena električna
in elektronska oprema, akumulatorji in
baterije negativen vpliv na okolje in zdravje
ljudi.
Električnih in elektronskih naprav ali baterij
ne odlagajte med gospodinjske odpadke!
Skladno z evropsko Direktivo o odpadni
električni in elektronski opremi, o akumula-
torjih in baterijah ter odpadnih akumulator-
jih in baterijah ter njeno uporabo v državnih
zakonih morate rabljeno električno in
elektronsko opremo, baterije in akumula-
torje zbirati ločeno ter dostaviti na posebno
zbiralno mesto za komunalne odpadke, ki
deluje skladno s predpisi za zaščito okolja.
To nakazuje simbol prečrtanega smetnjaka
s kolesi, ki je natisnjen na opremi.

20 SLOVENŠČINA
Zajamčena raven zvočne moči v skladu z
direktivo EU o hrupu na prostem.
Raven zvočne moči v skladu z avstralskim
predpisom o nadzoru hrupa NSW
Predvidena uporaba
Stroj je namenjen košnji trave.
Hrup
Običajna A-ovrednotena raven hrupa v skladu z
EN60335-2-77:
OPOMBA: Vrednosti so bile izmerjene z ravnim
rezilom kosilnice.
Raven zvočnega tlaka (LpA): 78,8 dB (A)
Raven zvočne moči (LWA): 87,7 dB (A)
Odstopanje (K): 3 dB (A)
Nivo hrupa med delom lahko preseže 80 dB (A).
OPOMBA: Navedene vrednosti oddajanja hrupa so
bile izmerjene v skladu s standardnimi metodami
testiranja in se lahko uporabljajo za primerjavo orodij.
OPOMBA: Navedene vrednosti oddajanja hrupa
se lahko uporabljajo tudi pri predhodni oceni
izpostavljenosti.
OPOZORILO: Uporabljajte zaščito za sluh.
OPOZORILO: Oddajanje hrupa med dejansko
uporabo električnega orodja se lahko razlikuje od
navedenih vrednosti, odvisno od načina uporabe
orodja in predvsem vrste obdelovanca.
OPOZORILO: Upravljavec mora za lastno
zaščito poznati varnostne ukrepe, ki temeljijo
na oceni izpostavljenosti v dejanskih pogojih
uporabe (poleg časa proženja je treba upoštevati
celoten delovni cikel, vključno s časom, ko je
orodje izklopljeno, in časom, ko deluje v prostem
teku).
Vibracije
Skupne vrednosti vibracij (vektorska vsota treh osi) v
skladu z EN60335-2-77:
OPOMBA: Vrednosti so bile izmerjene z ravnim
rezilom kosilnice.
Emisije vibracij (ah): 2,5 m/s2 ali manj
Odstopanje (K): 1,5 m/s2
OPOMBA: Navedene skupne vrednosti oddajanja
vibracij so bile izmerjene v skladu s standardnimi
metodami testiranja in se lahko uporabljajo za primer-
javo orodij.
OPOMBA: Navedene skupne vrednosti oddajanja
vibracij se lahko uporabljajo tudi pri predhodni oceni
izpostavljenosti.
OPOZORILO: Oddajanje vibracij med
dejansko uporabo električnega orodja se lahko
razlikuje od navedenih vrednosti, odvisno
od načina uporabe orodja in predvsem vrste
obdelovanca.
OPOZORILO: Upravljavec mora za lastno
zaščito poznati varnostne ukrepe, ki temeljijo
na oceni izpostavljenosti v dejanskih pogojih
uporabe (poleg časa proženja je treba upoštevati
celoten delovni cikel, vključno s časom, ko je
orodje izklopljeno, in časom, ko deluje v prostem
teku).
Izjava o skladnosti ES
Samo za evropske države
Izjava ES o skladnosti je vključena v dodatku A, ki je
priložen tem navodilom za uporabo.
VARNOSTNA OPOZORILA
POMEMBNA VARNOSTNA NAVODILA
OPOZORILO: Preberite vsa varnostna opo-
zorila in navodila. Neupoštevanje opozoril in navodil
lahko privede do električnega udara, požara in/ali
resnih telesnih poškodb.
Shranite vsa opozorila in navo-
dila za poznejšo uporabo.
Usposabljanje
1. Pozorno preberite navodila. Seznanite se s
funkcijami za upravljanje in pravilno uporabo
kosilnice.
2. Nikoli ne dovolite uporabe kosilnice otrokom
ali osebam, ki niso seznanjene z navodili.
Lokalni predpisi lahko omejijo starost uporab-
nika naprave.
3. Nikoli ne uporabljajte kosilnice v bližini ljudi,
zlasti otrok ali hišnih ljubljenčkov.
4. Upoštevajte, da je upravljavec ali uporabnik
odgovoren za nesreče ali nevarnosti, ki se
zgodijo drugim ljudem ali njihovi lastnini.
5. Zagotovite ustrezen nadzor otrok in preprečite
igranje s kosilnico.
6. Fizično stanje – ne uporabljajte kosilnice,
kadar ste pod vplivom drog, alkohola ali
kakršnih koli zdravil.
Priprava
1. Med delom s kosilnico vedno nosite ustrezno
obutev in dolge hlače. Kosilnice ne upo-
rabljajte, ko ste bosi ali nosite odprte sandale.
Ne nosite oblačil ali nakita, ki so ohlapna ali
imajo viseče vrvice ali pentlje. Lahko se zatak-
nejo v gibljive dele.
2.
Preden začnete uporabljati kosilnico, preverite,
da ni poškodovana in ji ne manjkajo nobena
varovala in ščitniki oz. so ti ustrezno nameščeni.
Other manuals for DLM533
8
This manual suits for next models
1
Table of contents
Languages:
Other Makita Lawn Mower manuals

Makita
Makita XML10 User manual

Makita
Makita PLM4611 User guide

Makita
Makita DOLMAR EM411 User manual

Makita
Makita PLM4100 User manual

Makita
Makita DLM431 User manual

Makita
Makita LM001J User manual

Makita
Makita DLM380 User manual

Makita
Makita DLM330 User manual

Makita
Makita DLM380 User manual

Makita
Makita DLM462 User manual

Makita
Makita DLM465 User manual

Makita
Makita LM001CX3 User manual

Makita
Makita DLM431 User manual

Makita
Makita BLM430 User manual

Makita
Makita LM001J User manual

Makita
Makita LM003J User manual

Makita
Makita LM001C User manual

Makita
Makita LM2300 User manual

Makita
Makita CML01 User manual

Makita
Makita DLM463 User manual