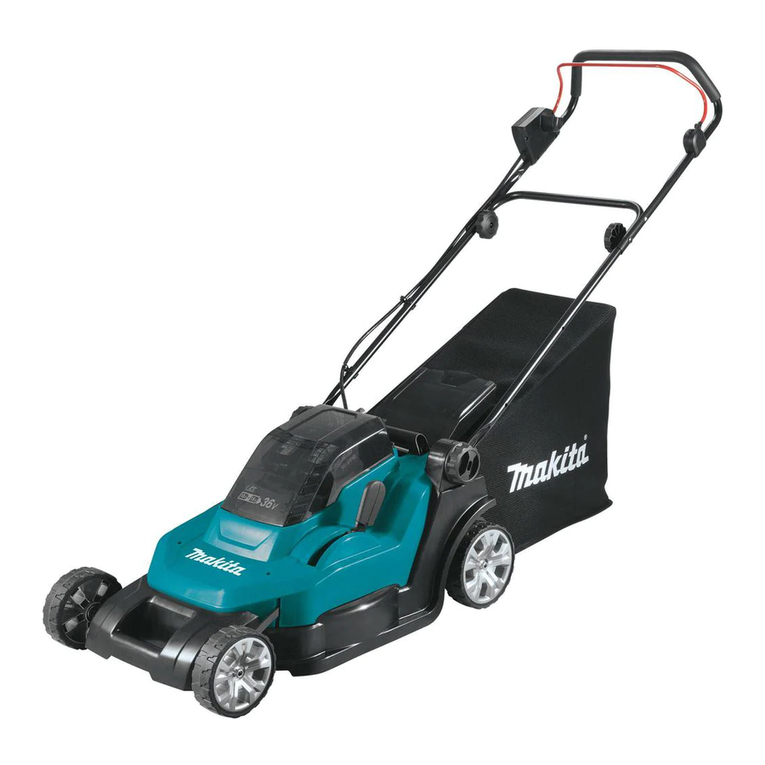
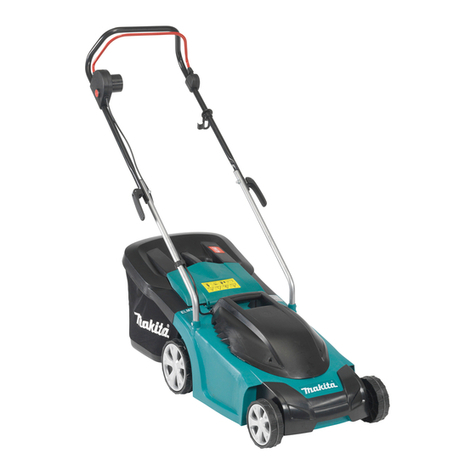
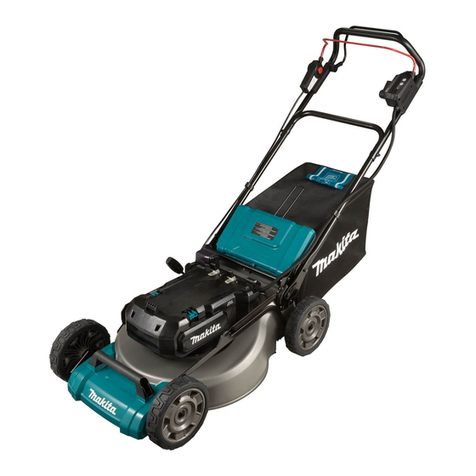
Makita BLM430 User manual

1
GB Cordless Lawn Mower INSTRUCTION MANUAL
SBatteridriven gräsklippare BRUKSANVISNING
NTrådløs Gressklipper BRUKSANVISNING
FIN Akkukäyttöinen ruohonleikkuri KÄYTTÖOHJE
LV Bezvada zāles pļaujmašīna LIETOŠANAS INSTRUKCIJA
LT BelaidėvejapjovėNAUDOJIMO INSTRUKCIJA
EE Akutoitega elektriline muruniiduk KASUTUSJUHEND
RUS Аккумуляторная Газонокосилка
РУКОВОДСТВО ПО ЭКСПЛУАТАЦИИ
BLM430
LM430D

2
1
1 012297
1
2
3
2 012379
1
2
3 012380
1
2
3
4 012381
1
5 014472
1
6 012297
1
7 012303
1
2
3
4
8 012386
1
2
3
4
5
9 012606
1
2
10 012421
1
2
11 012605
1
23
4
12 012389

3
13 012382
14 012604
15 012309
1
16 012600 17 012420

4
ENGLISH (Original instructions)
Explanation of general view
1-1. Lock key
2-1. Battery converter (BCV01)
2-2. Installation hole
2-3. Hook
3-1. Battery cover
3-2. Product mounting adapter of the
BCV01
4-1. Cord
4-2. Slit
4-3. Upper holders
5-1. Battery converter (BCV03)
6-1. Lock key
7-1. Mowing height adjusting lever
8-1. Upper handle
8-2. Lower handle
8-3. Screw holes
8-4. Screw holes
9-1. Clamping nut
9-2. Lower handle
9-3. Upper handle
9-4. Screw holes
9-5. Screw
10-1. Holders
10-2. Cord
11-1. Holders
11-2. Cord
12-1. Screw
12-2. Clamping nut
12-3. Upper handle
12-4. Lower handle
16-1. Front grip
SPECIFICATIONS
Model BLM430 / LM430D
Mowing width 430 mm
No load speed 3,600 min-1
during operation 1,450 mm -1,490 mm x 460 mm x 950 mm -1,020 mm
Dimensions (L x W x H) when stored 490 mm - 500 mm x 460 mm x 810 mm
Net weight 17.9 kg
Rated voltage D.C. 36 V
Standard battery cartridge(s)
Warning: Use only the battery cartridge(s) described. BL3626 / BL3622A
• Due to our continuing program of research and development, the specifications herein are subject to change without notice.
• Specifications and battery cartridge may differ from country to country.
• Weight, with battery cartridge, according to EPTA-Procedure 01/2003
END016-2
Symbols
The following show the symbols used for the equipment.
Be sure that you understand their meaning before use.
・Take particular care and attention.
・Read instruction manual.
・Danger; be aware of thrown objects.
・The distance between the tool and
bystanders must be at least 15 m.
・Never put your hands and feet near the
blade under the mower.
・Remove the lock key before inspecting,
adjusting, cleaning, servicing, leaving
and storing the mower.
・Only for EU countries
Do not dispose of electric equipment or
battery pack together with household
waste material!
In observance of European Directive
2002/96/EC on waste electric and
electronic equipment, 2006/66/EC on
batteries and accumulators and waste
batteries and accumulators and their
implementation in accordance with
national laws, electric equipment and
battery pack that have reached the end
of their life must be collected separately
and returned to an environmentally
compatible recycling facility.
ENG905-1
Noise
The typical A-weighted noise level determined according
to EN60335:
Sound pressure level (LpA) : 80 dB (A)
Sound power level (LWA) : 93 dB (A)
Uncertainty (K) : 3 dB (A)
Wear ear protection
ENG900-1
Vibration
The vibration total value (tri-axial vector sum)
determined according to EN60335:
Vibration emission (ah) : 2.5 m/s2or less
Uncertainty (K) : 1.5 m/s2
ENG901-1
• The declared vibration emission value has been
measured in accordance with the standard test
method and may be used for comparing one tool
with another.
Cd
Ni-MH
Li-ion

5
• The declared vibration emission value may also be
used in a preliminary assessment of exposure.
WARNING:
• The vibration emission during actual use of the
power tool can differ from the declared emission
value depending on the ways in which the tool is
used.
• Be sure to identify safety measures to protect the
operator that are based on an estimation of
exposure in the actual conditions of use (taking
account of all parts of the operating cycle such as
the times when the tool is switched off and when it
is running idle in addition to the trigger time).
ENH217-1
For European countries only
EC Declaration of Conformity
We Makita Corporation as the responsible
manufacturer declare that the following Makita
machine(s):
Designation of Machine:
Cordless Lawn Mower
Model No./ Type: BLM430, LM430D
Specifications: see "SPECIFICATIONS" table.
are of series production and
Conforms to the following European Directives:
2000/14/EC, 2006/42/EC
And are manufactured in accordance with the following
standards or standardised documents:
EN60745, EN60335
The technical documentation is kept by our authorised
representative in Europe who is:
Makita International Europe Ltd.
Michigan Drive, Tongwell,
Milton Keynes, Bucks MK15 8JD, England
The conformity assessment procedure required by
Directive 2000/14/EC was in Accordance with annex VI.
Notified Body:
TÜV Rheinland LGA Products GmbH
Am Grauen Stein 29
51105 Köln Germany
Identification number 0197
Measured Sound Power Level: 93 dB (A)
Guaranteed Sound Power Level: 94 dB (A)
7.9.2011
000230
Tomoyasu Kato
Director
Makita Corporation
3-11-8, Sumiyoshi-cho,
Anjo, Aichi, 446-8502, JAPAN
GEB091-5
IMPORTANT SAFETY
INSTRUCTIONS
WARNING! Read all safety warnings and all
instructions. Failure to follow the warnings and
instructions may result in electric shock, fire and/or
serious injury.
Save all warnings and
instructions for future reference.
1. Do not insert key into mower until it is ready to
be used.
2. This appliance is not intended for use by
persons (including children) with reduced
physical, sensory or mental capabilities, or
lack of experience and knowledge, unless they
have been given supervision or instruction
concerning use of the appliance by a person
responsible for their safety.
3. Children should be supervised to ensure that
they do not play with the appliance.
4.
Never allow children or people unfamiliar with
these instructions to use the machine. Local
regulations can restrict the age of the operator.
5. Never operate the machine while people,
especially children, or pets are nearby.
6. Keep in mind that the operator or user is
responsible for accidents or hazards
occurring to other people or their property.
7. While operating the machine always wear
substantial footwear and long trousers. Do not
operate the machine when barefoot or wearing
open sandals. Avoid wearing clothing or
jewelry that is loose fitting or that has hanging
cords or ties. They can be caught in moving
parts.
8. Operate the machine only in daylight or in
good artificial light.
9. Avoid operating the machine in wet grass.
10. Never operate the mower in the rain.
11. Battery tool use
- Recharge only with the charger specified by
the manufacturer. A charger that is suitable for
one type of battery pack may create a risk of fire
when used with another battery pack.
- Use power tools only with specifically
designated battery packs. Use of any other
battery packs may create a risk of injury and fire.
12. Always keep a firm hold on the handle.
13. Always be sure of your footing on slopes.
14. Walk, never run.
15. Don't grasp the exposed cutting blades or
cutting edges when picking up or holding the
appliance.
16. Physical condition - Do not operate mower
while under the influence of drugs, alcohol, or

6
any medication.
17. KEEP GUARDS IN PLACE and in working
order.
18. Keep hands and feet away from rotating
blades. Caution - Blades coast after turn off.
19. Remove key before servicing, cleaning or
removing material from the gardening
appliance.
20. Use only the manufacturer genuine blades
specified in this manual.
21. Check the blades carefully for cracks or
damage before operation. Replace cracked or
damaged blades immediately.
22.
Be sure the area is clear of other people before
mowing. Stop mower if anyone enters the area.
23. Remove foreign matters such as rocks, wire,
bottles, bones and large sticks from the work
area before mowing to prevent personal injury
or damage to the mower.
24. Stop operation immediately if you notice
anything unusual. Switch off the mower and
remove the key from the appliance. Then
inspect the mower.
25. Never attempt to make wheel height
adjustments while mower is running.
26. Release switch lever and wait for blade
rotation to stop before crossing driveways,
walks, roads, and any gravel-covered areas.
Also remove key if you leave it, reach to pick
up or remove something out of your way, or
for any other reason that may distract you
from what you are doing.
27. Objects struck by the lawn mower blade can
cause severe injuries to persons. The lawn
should always be carefully examined and
cleared of all objects prior to each mowing.
28. If lawn mower strikes a foreign object, follow
these steps:
-
Stop the mower, release the switch lever and
wait until the blade comes to a complete stop.
-
Remove the lock key and the battery cartridge.
- Thoroughly inspect the mower for any
damage.
- Replace the blade if it is damaged in any way.
Repair any damage before restarting and
continuing to operate the mower.
29. Check the rear bag frequently for wear or
deterioration. For storage, always make sure
the rear bag is empty. Replace a worn bag with
a new factory replacement bag for safety.
30. Stop the motor and remove key whenever you
leave the equipment, before cleaning the
mower housing, and before making any
repairs or inspections.
31. Use extreme caution when reversing or pulling
the machine towards you.
32.
Stop the blade(s) if the machine has to be tilted
for transportation when crossing surfaces
other than grass, and when transporting the
machine to and from the area to be used.
33. Never operate the machine with defective
guards or shields, or without safety devices,
for example deflectors and/or grass collector,
in place.
34. Switch on the motor carefully according to
instructions and with feet well away from the
blade(s).
35. Do not tilt the machine when switching on the
motor, except if the machine has to be tilted
for starting. In this case, do not tilt it more
than absolutely necessary and lift only the
part, which is away from the operator.
36. Do not start the machine when standing in
front of the discharge opening.
37. Do not put hands or feet near or under rotating
parts. Keep clear of the discharge opening at
all times.
38. Do not transport the machine while the mower
is turned on.
39. Stop the machine, and remove the disabling
device. Make sure that all moving parts have
come to a complete stop
- whenever you leave the machine,
- before clearing blockages or unclogging
chute,
- before checking, cleaning or working on the
machine,
- after striking a foreign object. Inspect the
machine for damage and make repairs before
restarting and operating the machine;
40. If the machine starts to vibrate abnormally
(check immediately)
- inspect for damage,
- replace or repair any damaged parts,
- check for and tighten any loose parts.
41. Be careful during adjustment of the machine
to prevent entrapment of the fingers between
moving blades and fixed parts of the machine.
42. Mow across the face of slopes, never up and
down. Exercise extreme caution when
changing direction on slopes. Do not mow
excessively steep slopes.
43. Do not wash with a hose; avoid getting water
in motor and electrical connections.
44. Check the blade mounting bolt at frequent
intervals for proper tightness.
45.
Keep all nuts, bolts, and screws tight to be sure
the equipment is in safe working condition.
46. Always allow the machine to cool down before
storing.
47. When servicing the blades be aware that, even
though the power source is switched off, the
blades can still be moved.
48. Replace worn or damaged parts for safety. Use
only genuine replacement parts and
accessories.
7
SAVE THESE INSTRUCTIONS.
WARNING:
DO NOT let comfort or familiarity with product
(gained from repeated use) replace strict adherence
to safety rules for the subject product. MISUSE or
failure to follow the safety rules stated in this
instruction manual may cause serious personal
injury.
ENC007-7
IMPORTANT SAFETY
INSTRUCTIONS
FOR BATTERY CARTRIDGE
1. Before using battery cartridge, read all
instructions and cautionary markings on (1)
battery charger, (2) battery, and (3) product
using battery.
2. Do not disassemble battery cartridge.
3. If operating time has become excessively
shorter, stop operating immediately. It may
result in a risk of overheating, possible burns
and even an explosion.
4. If electrolyte gets into your eyes, rinse them
out with clear water and seek medical
attention right away. It may result in loss of
your eyesight.
5. Do not short the battery cartridge:
(1) Do not touch the terminals with any
conductive material.
(2) Avoid storing battery cartridge in a
container with other metal objects such as
nails, coins, etc.
(3) Do not expose battery cartridge to water
or rain.
A battery short can cause a large current flow,
overheating, possible burns and even a
breakdown.
6. Do not store the tool and battery cartridge in
locations where the temperature may reach or
exceed 50 ゚C (122 ゚F).
7.
Do not incinerate the battery cartridge even if it
is severely damaged or is completely worn out.
The battery cartridge can explode in a fire.
8. Be careful not to drop or strike battery.
9. Do not use a damaged battery.
SAVE THESE INSTRUCTIONS.
Tips for maintaining maximum battery life
1. Charge the battery cartridge before
completely discharged.
Always stop tool operation and charge the
battery cartridge when you notice less tool
power.
2.
Never recharge a fully charged battery
cartridge.
Overcharging shortens the battery service life.
3. Charge the battery cartridge with room
temperature at 10 ゚C - 40 ゚C (50 ゚F - 104 ゚F).
Let a hot battery cartridge cool down before
charging it.
4. Charge the battery cartridge once in every six
months if you do not use it for a long period of
time.
FUNCTIONAL DESCRIPTION
Installing or removing battery cartridge
CAUTION:
• Always switch off the tool before installing or
removing the battery cartridge.
• Make sure that you lock the battery cover before
use. Otherwise, mud, dirt, or water may cause
damage to the product or the battery cartridge.
32
1
012296
To install the battery cartridge;
1. Pull the battery cover locking lever toward
yourself and open the battery cover.
2. Insert the battery cartridge in the direction shown
in the figure until a click is heard.
Fig.1
3. Insert the lock key in the place shown in the figure
as far as it will go.
4. Close the battery cover and push it on until it is
latched with the locking lever.
To remove the battery cartridge from the mower;
1. Pull the battery cover locking lever toward
yourself and open the battery cover.
2. Pull out the lock key.
3. Withdraw it from the tool while sliding the button
on the front of the cartridge.
4. Close the battery cover.
1. Battery cover locking lever
2. Battery cartridge
3. Battery cove
r

8
Battery converters (optional accessory)
WARNING:
• Before installing or removing the battery converters
BCV01/BCV03, remove the lock key.
BCV01 (optional accessory)
WARNING:
• When using the BCV01, never attach it to any part
of your body. Attaching the BCV01 to any part of
your body may cause a serious injury.
Fig.2
Slide the battery converter BCV01 into the installation
hole until it stops.
Fig.3
Open out the battery cover on the mower and then slide
all the way and click the product mounting adapter of the
BCV01 into the battery port on the mower.
Run the cord of the BCV01 through the slit in the battery
cover and close the battery cover.
Fig.4
Fit the cord of the BCV01 into the upper holders on the handle.
NOTE:
• When using the battery converter BCV01 (optional
accessory), hook the power cord to the designated
holder on the mower. Failure to do so may cause
the cord to be cut off.
To remove the BCV01 from the mower, open out the
battery cover and then press the hook on the battery
mounting side of the BCV01.
BCV03 (optional accessory)
Fig.5
Open the battery cover and click in the BCV03 into the
battery port on the mower.
Close the battery cover.
1
014473
To remove the BCV03, press on the hook of the BCV03
and withdraw it with both hands.
Power switch action
WARNING:
• Before inserting the battery cartridge in the
tool, always check to see that the switch lever
actuates properly and returns to the original
position when released. Operating a tool with a
switch that does not actuate properly can lead to
loss of control and serious personal injury.
NOTE:
• Trying to mow much grass at a time may not allow
the motor to start due to the overload. At this time,
change the mowing height to higher level to restart.
• The mower does not start without pressing the
switch button even if the switch lever is squeezed.
This mower is equipped with the interlock switch and
handle switch. If you notice anything unusual with either
of these switches, stop operation immediately and have
them checked by your nearest Makita Authorized
Service Center.
Fig.6
1. Insert the lock key into the interlock switch.
1
2
012603
2. Depress the switch button.
3. Pull the switch lever toward you while depressing
the switch button.
4. Release the switch button as soon as the motor
starts running. The mower will continue to run until
you release the switch lever.
5. Release the switch lever to stop the motor.
6. When not in use, remove the lock key. Store the
lock key in a safe place out of reach of children.
1. Switch button
2. Switch lever
1. Battery converter (BCV03)

9
Adjusting the mowing height
WARNING:
• Never put your hand or leg under the mower unit
when adjusting the mowing height.
• Always make sure that the lever fits in the groove
properly before operation.
The mowing height can be adjusted in the range of
between 20 mm - 75 mm.
1. Remove the lock key.
Fig.7
2. Pull the mowing height adjusting lever toward
yourself and move it to your desired mowing
height.
Make sure that the protrusion on the mowing height
adjusting lever fits in the groove in the mower.
NOTE:
• The mowing height figures should be used just as
a guideline, as the state of the lawn or ground may
cause lawn height to be slightly different to the set
height figure.
• Try a test mowing of grass in a less conspicuous
place to get your desired height.
Battery protection system
Lithium-ion batteries are equipped with a protection
system. This system automatically cuts off power to the
tool to extend battery life.
The tool will automatically stop during operation if the
tool and/or battery are placed under one of the following
conditions:
• Overloaded:
The tool is operated in a manner that causes
it to draw an abnormally high current.
In this situation, release the trigger switch on
the tool and stop the application that caused
the tool to become overloaded. Then pull the
trigger switch again to restart.
If the tool does not start, the battery is
overheated. In this situation, let the battery
cool before pulling the trigger switch again.
• Low battery voltage:
The remaining battery capacity is too low and
the tool will not operate. In this situation,
remove and recharge the battery.
Battery remaining capacity indicator
(only for models with Battery BL3622A)
Battery BL3622A is equipped with the battery remaining
capacity indicator.
1
2
011715
Press the CHECK button to indicate the battery
remaining capacity. The indicator lamps will then light for
approx. three seconds.
Indicator lamps
Lighted Off Blinking
EF
Remaining capacity
70% to 100%
45% to 70%
20% to 45%
0% to 20%
Charge the battery.
The battery may have
malfunctioned.
011713
•
When only the lowermost indicator lamp (next to the
“E”) blinks, or when none of the indicator lamps light,
the battery capacity has run out, so the tool does not
operate. In these cases, charge the battery or
replace the empty battery with a fully charged one.
• When two or more indicator lamps do not light
even after charging is complete, the battery has
reached the end of its service life.
•
When the upper two and lower two indicator lamps
light alternately, the battery may have malfunctioned.
Contact your local Makita authorized service center.
NOTE:
•
The indicated capacity may be lower than the actual
level during use or immediately after using the tool.
• Depending on the conditions of use and the
ambient temperature, the indication may differ
slightly from the actual capacity.
1. Indicator lamps
2. CHECK button

10
ASSEMBLY
WARNING:
• Always be sure that the lock key and battery
cartridge are removed before carrying out any
work on the mower. Failure to remove the lock
key and the battery cartridge may result in serious
personal injury from accidental start-up.
• Never start the tool unless it is completely
assembled. Operation of the tool in a partially
assembled state may result in serious personal
injury from accidental start-up.
Installing the handle
WARNING:
• When installing handles, position the wires so that
they are not caught by anything in between the
handles.
1. Loosen the clamping screws (two pcs).
1
2
3
012385
Expand the lower handle to its both sides and with it
expanded in that position pivot it backward and then fit it
in the groove in the deck.
2. Tighten the clamping screws on both sides to
secure the lower handle.
Fig.8
Fig.9
3. Raise the upper handle and align the screw holes
in the upper handle with those in the lower handle
and then secure it with the supplied screws and
clamping nuts.
NOTE:
• At this time, keep a firm grip on the upper handle
so that it does not drop off your hand.
Fig.10
Fig.11
NOTE:
• Install the upper handle so that the direction of the
upper handle and the power supply cord are
positioned as shown in the figure.
Fig.12
NOTE:
• The upper handle has two holes each on both
sides. Using the different position holes for the
screws and clamping nuts allows the handle height
adjustment.
Removing or installing the blade
WARNING:
• Always remove the lock key and battery cartridge
when removing or installing the blade. Failure to
remove the lock key and battery cartridge may
cause a serious injury.
• The blade coasts for a few seconds after releasing
the switch. Make sure that the blade has come to a
complete stop.
• Always wear gloves when handling the blade.
2
1
3
012304
1. Put the mower on its side so that the mowing
height adjusting lever is placed on the upper side.
2. To lock the blade, insert a screwdriver available or
the similars in market into a hole in the mower.
3.
Loosen the bolt counterclockwise with the wrench.
1. Lower handle
2. Groove on the deck
3. Clamping screw
1. Screwdriver
2. Blade
3. Bolt

11
1
2
3
4
5
012601
4. Remove the bolt, outer flange, blade and inner
flange in order.
To install the blade, take the blade removal procedure in
reverse.
WARNING:
• Install the inner flange, the blade and the outer
flange carefully as these have a top/bottom facing.
•
Tighten the bolt clockwise firmly to secure the blade.
• Put the blade so that the blade side with a
rotational direction arrow faces outward.
• Make sure that the blade is installed securely.
• Always take away the screwdriver or similars
inserted in a hole to lock the blade.
Installing the grass basket
Remove the lock key.
1
2
012302
1
2
3
012301
Raise the rear guard of the mower unit and hook the
grass basket on the groove of the mower unit.
OPERATION
Mowing
WARNING:
• Before mowing, clear away sticks and stones from
mowing area. Furthermore, clear away any weeds
from mowing area in advance.
• Always wear the safety goggles or safety glasses
with side shields when operating the mower.
Firmly hold the lawn mower handle with both hands
when mowing.
The front wheel outside edges of the main unit provide a
guideline to mowing width. Using the two front wheel
outside edges as a guideline, mow in strips, overlapping
by one half to one third the previous strip, to mow the
lawn evenly.
Periodically check the level of the grass basket, and
empty before it becomes full. Before every periodical
checks, be sure to stop the mower and remove the lock
key and the battery cartridge.
NOTE:
•
Using the lawn mower with the grass basket full
prevents smooth blade rotation and places an extra
load on the motor, which may cause breakdown.
Mowing a long-grass lawn
Fig.13
Do not try to cut long grass all in one go. Instead, mow
the lawn in stages, leaving it for a day or two between
mows, until the lawn is evenly short.
NOTE:
• Mowing long grass to a short length all in one go
may cause the grass to die and/or block up the
1. Inner flange
2. Arrow
3. Outer flange
4. Bolt
5. Blade
1. Rear guard
2. Groove
1. Rear guard
2. Groove
3. Grass basket

12
inside of the main unit.
Emptying the grass basket
WARNING:
• To reduce a risk of accident, regularly check the
grass basket for any damage or weakened
strength and replace it if necessary.
1. Release the switch lever.
2. Remove the lock key.
1
2
012307
3. Open the rear guard and take out the grass
basket with its handle.
4. Empty the grass basket.
MAINTENANCE & STORAGE
WARNING:
• Always be sure that the lock key and battery
cartridge are removed from the mower before
storage or attempting to perform inspection or
maintenance.
• Wear gloves when performing inspection or
maintenance.
CAUTION:
• Never use gasoline, benzine, thinner, alcohol or
the like. Discoloration, deformation or cracks may
result.
MAINTENANCE
1. REMOVE THE LOCK KEY. Store it in a safe place
out of the reach of children.
2. Clean your mower using only mild soap and a
damp cloth. Do not spray or pour water on your
mower when cleaning.
3. Turn mower on its side and clean grass clippings
that have accumulated on the underside of mower
deck.
4. Check all nuts, bolts, knobs, screws, fasteners etc.
for tightness.
5. Inspect moving parts for damage, breakage, and
wear. Have repairs made on any damaged or
missing parts.
6. Before storing the mower, remove the battery
cartridge from it.
7. Store mower indoors in a cool, dry and locked
place. Don't store the mower and charger in
locations where the temperature may reach or
exceed 40 ゚C (l04 ゚F).
Storage
Fig.14
WARNING:
• When carrying or storing the mower, do not hold
the folded handles but the front grip of the mower.
Holding the folded handles may cause a serious
injury or damage to the mower.
Fig.15
The mower can be stored in upright position.
1
2
3
4
5
012298
1. Loosen the clamping screw, expand the lower
handle to both sides and then move down the
handle forward.
NOTE:
• At this time, keep a firm grip on the lower handle so
that it does not fall down to the far side from the
tool.
2. Loosen the clamping nut and pivot the upper
handle back.
1. Rear guard
2. Grass basket
1. Clamping screw
2. Expand
3. Move down forward
4. Clamping nut
5. Pivot back

13
1
2
012602
3. Take off the grass basket and put the mower in
the upright position.
Fig.16
NOTE:
• When putting the mower in the upright position, do
not hold the handle but use the front grip of the
mower.
Fig.17
4. Store the grass basket between the handle and
the mower body.
To maintain product SAFETY and RELIABILITY, repairs,
any other maintenance or adjustment should be
performed by Makita Authorized Service Centers,
always using Makita replacement parts.
1. Rear guard
2. Grass basket

14
TROUBLE SHOOTING
Before asking for repairs, conduct your own inspection
first. If you find a problem that is not explained in the
manual, do not attempt to dismantle the tool. Instead,
ask Makita Authorized Service Centers, always using
Makita replacement parts for repairs.
Malfunction status
Mower does not start.
Cause
Battery cartridge is not installed.
Battery problem (under voltage)
Cutting height set is too low.
Battery power is dropping.
Electric or electronic malfunction.
Action
Install the battery cartridge.
Remove the foreign object.
Motor stops running after
a little use.
It does not reach maximum
RPM.
Cutting tool does not rotate:
stop the machine immediately!
Abnormal vibration:
stop the machine immediately!
Cutting tool and motor cannot
stop:
Remove the battery
immediately!
Blade is imbalanced, excessively
or unevenly worn
The drive system does not work
correctly.
Foreign object such as a branch is
jammed near the blade.
The drive system does
not work correctly.
Battery is installed improperly.
Battery's charge level is low.
Recharge the battery. If recharging
is not effective, replace battery.
Ask your local authorized service
center for repair.
Ask your local authorized service
center for repair.
Replace the blade.
Remove the battery and ask your
local authorized service center for
repair.
Recharge the battery. If recharging
is not effective, replace battery.
Install the battery cartridge as
described in this manual.
Raise the height.
Recharge the battery. If recharging
is not effective, replace battery.
The lock key is not inserted. Insert the lock key.
012350
OPTIONAL ACCESSORIES
CAUTION:
• These accessories or attachments are
recommended for use with your Makita tool
specified in this manual. The use of any other
accessories or attachments might present a risk of
injury to persons. Only use accessory or
attachment for its stated purpose.
If you need any assistance for more details regarding
these accessories, ask your local Makita Service Center.
• Blade
• Makita genuine battery and charger
NOTE:
• Some items in the list may be included in the tool
package as standard accessories. They may differ
from country to country.

15
SVENSKA (Originalbruksanvisning)
Förklaring till översiktsbilderna
1-1. Säkerhetsnyckeln
2-1. Batterikonverterare (BCV01)
2-2. Monteringshål
2-3. Krok
3-1. Batterihölje
3-2. Monteringsadapter för BCV01
4-1. Kabel
4-2. Skåra
4-3. Övre fästen
5-1. Batterikonverterare (BCV03)
6-1. Säkerhetsnyckeln
7-1. Justeringsspak för klipphöjd
8-1. Övre handtag
8-2. Nedre handtag
8-3. Skruvhål
8-4. Skruvhål
9-1. Låsmutter
9-2. Nedre handtag
9-3. Övre handtag
9-4. Skruvhål
9-5. Skruv
10-1. Fästen
10-2. Kabel
11-1. Fästen
11-2. Kabel
12-1. Skruv
12-2. Låsmutter
12-3. Övre handtag
12-4. Nedre handtag
16-1. Främre handtag
SPECIFIKATIONER
Modell BLM430 / LM430D
Klippbredd 430 mm
Obelastat varvtal 3 600 min-1
under användning 1 450 mm -1 490 mm x 460 mm x 950 mm -1 020 mm
Mått (L x B x H) vid förvaring 490 mm - 500 mm x 460 mm x 810 mm
Vikt 17,9 kg
Märkspänning 36 V likström
Standard-batterikassett/batterikassetter
Varning! Använd endast den/
de batterikassetten/batterikassetterna som beskrivits.
BL3626 / BL3622A
• På grund av vårt pågående program för forskning och utveckling kan dessa specifikationer ändras utan föregående meddelande.
• Specifikationer och batterikassett kan variera från land till land.
• Vikt med batterikassett i enlighet med EPTA-procedur 01/2003
END016-2
Symboler
Följande visar symbolerna som används för
utrustningen. Se till att du förstår innebörden innan du
använder borrmaskinen.
・Var särskilt försiktig och uppmärksam!
・Läs igenom bruksanvisningen.
・Fara! Se upp för flygande föremål.
・Avståndet mellan maskinen och
åskådare måste vara minst 15 m.
・Placera aldrig dina händer eller fötter
nära kniven under gräsklipparen.
・Ta bort säkerhetsnyckeln före kontroll,
justering, rengöring, service, förvaring
eller om gräsklipparen lämnas
obevakad.
・Gäller endast Europa
Elektrisk utrustning eller batteripaket får
inte kastas i hushållsavfallet!
Enligt direktivet 2002/96/EG som avser
deponering av elektrisk och elektronisk
utrustning, 2006/66/EC om batterier
och ackumulatorer och förbrukade
batterier och ackumulatorer samt
tillhörande föreskrifter i det aktuella
landets lagstiftning, ska uttjänt elektrisk
utrustning och batteripaket sopsorteras
och lämnas till miljöstation för
återvinning.
ENG905-1
Buller
Typiska A-vägda bullernivån är mätt enligt EN60335:
Ljudtrycksnivå (LpA) : 80 dB (A)
Ljudtrycksnivå (LWA) : 93 dB (A)
Mättolerans (K) : 3 dB (A)
Använd hörselskydd
ENG900-1
Vibration
Vibrationens totalvärde (tre-axlars vektorsumma) mätt
enligtEN60335:
Vibrationsemission (ah) : 2,5 m/s2eller mindre
Mättolerans (K) : 1,5 m/s2
ENG901-1
• Det deklarerade vibrationsemissionsvärdet har
uppmätts i enlighet med standardtestmetoden och
kan användas för jämförandet av en maskin med
en annan.
Cd
Ni-MH
Li-ion

16
• Det deklarerade vibrationsemissionsvärdet kan
också användas i preliminär bedömning av
exponering för vibration.
VARNING!
• Viberationsemissionen under faktisk användning
av maskinen kan skilja sig från det deklarerade
emissionsvärdet, beroende på hur maskinen
används.
•
Se till att hitta säkerhetsåtgärder som kan skydda
användaren och som grundar sig på en uppskattning
av exponering i verkligheten (ta med i beräkningen
alla delar av användandet såsom antal gånger
maskinen är avstängd och när den körs på tomgång
samt då startomkopplaren används).
ENH217-1
Gäller endast Europa
EU-konformitetsdeklaration
Vi Makita Corporation som ansvariga tillverkare
deklarerar att följande Makita-maskin(er):
Maskinbeteckning:
Batteridriven gräsklippare
Modellnr./-typ: BLM430, LM430D
Specifikationer: se tabellen “SPECIFIKATIONER“.
är serieproduktionstillverkad och
Följer följande EU-direktiv:
2000/14/EU, 2006/42/EU
Och är tillverkade enligt följande standarder eller
standardiseringsdokument:
EN60745, EN60335
Den tekniska dokumentationen förs av vår auktoriserade
representant i Europa som är:
Makita International Europe Ltd.
Michigan Drive, Tongwell,
Milton Keynes, Bucks MK15 8JD, England
Konformitetsgodkännandet som krävs av direktiv
2000/14/EU, var i överensstämmelse med Annex VI.
Anmält organ:
TÜV Rheinland LGA Products GmbH
Am Grauen Stein 29
51105 Köln Tyskland
Identifikationsnummer 0197
Uppmätt ljudeffektnivå: 93 dB (A)
Garanterad ljudeffektnivå: 94 dB (A)
7.9.2011
000230
Tomoyasu Kato
Direktör
Makita Corporation
3-11-8, Sumiyoshi-cho,
Anjo, Aichi, 446-8502, JAPAN
GEB091-5
VIKTIGA
SÄKERHETSANVISNINGAR
VARNING! Läs igenom alla säkerhetsvarningar
och anvisningar. Underlåtenhet att följa varningar och
anvisningar kan leda till elektrisk stöt, brand och/eller
allvarliga personskador.
Spara alla varningar och
instruktioner för framtida
referens.
1. Sätt inte i nyckeln i gräsklipparen förrän den
är klar att användas.
2. Denna maskin är inte avsedd att användas av
personer (inklusive barn) med nedsatt fysisk,
sensorisk eller mental förmåga, eller personer
utan erfarenhet av och kunskap om maskinen,
såvida de inte har övervakats eller fått
instruktioner angående användningen av
maskinen av en person som är ansvarig för
deras säkerhet.
3. Barn skall övervakas så att de inte leker med
maskinen.
4. Låt aldrig maskinen användas av barn eller av
personer som inte känner till dessa
anvisningar. Lokala bestämmelser kan ange
en åldersgräns för användaren.
5. Använd aldrig maskinen när personer
(speciellt barn) eller djur finns i närheten.
6. Glöm inte att användaren är ansvarig för
olyckor eller eventuell fara gentemot andra
personer och deras egendom.
7. Bär alltid kraftiga skor och långbyxor när du
använder maskinen. Använd inte maskinen
barfota eller med öppna skor. Undvik att bära
kläder eller smycken som sitter löst eller som
har hängande snoddar eller band. De kan
fångas upp av rörliga delar.
8. Använd maskinen endast i dagsljus eller i god
belysning.
9. Undvik att använda maskinen i vått gräs.
10. Använd aldrig gräsklipparen i regn.
11. Användning av batteriverktyg
- Ladda endast med den batteriladdare som
angetts av tillverkaren. En laddare som passar
en typ av batteri kan skapa risk för brand när den
används tillsammans med annan typ av batteri.
- Använd endast maskinen tillsammans med
särskilt angivna batterier. Om andra batterier
används kan risken för skada och brand öka.
12. Håll alltid stadigt i handtaget.
13. Se alltid till att ha balans på sluttningar.
14. Gå, spring aldrig.
15. Ta inte tag i de oskyddade knivbladen eller
kniveggarna när du tar upp eller håller i
maskinen.

17
16. Fysiskt tillstånd - Använd inte gräsklipparen
under påverkan av droger, alkohol eller
mediciner.
17. SE TILL ATT SKYDDEN ÄR PÅ PLATS och i
dugligt skick.
18. Håll händer och fötter borta från rörliga knivar.
Försiktighet - Knivarna stannar inte
omedelbart när maskinen stängs av.
19. Ta bort nyckeln före service, rengöring eller
innan du tar bort material från
trädgårdsmaskinen.
20. Använd endast tillverkarens originalknivar
som specificerats i denna bruksanvisning.
21.
Kontrollera före användning att sågbladen inte
är spruckna eller skadade. Byt omedelbart ut
ett skadat eller sprucket sågblad.
22. Kontrollera att det inte finns några personer i
området före gräsklippningen. Stäng av
gräsklipparen om någon närmar sig.
23. Ta bort främmande föremål som stenar, vajrar,
flaskor, ben och långa pinnar från
arbetsområdet innan gräsklippningen för att
undvika personskador eller skada på
gräsklipparen.
24. Stanna maskinen omedelbart om du lägger
märke till något onormalt. Stäng av
gräsklipparen och ta bort nyckeln från
maskinen. Kontrollera sedan gräsklipparen.
25. Försök aldrig att justera hjulhöjden när
gräsklipparen är igång.
26. Släpp säkerhetsgreppet och vänta tills kniven
har stannat innan du korsar en uppfart,
gångväg, väg eller annat grustäckt område. Ta
också bort nyckeln om du lämnar den,
sträcker dig för att plocka upp eller ta bort
något som ligger i vägen, eller någon annan
orsak till att du distraheras från arbetet.
27. Föremål som träffas av gräsklipparens kniv
kan orsaka allvarliga personskador.
Gräsmattan ska alltid undersökas väl och
röjas från föremål före varje klippning.
28. Följ dessa steg om gräsklipparen slår emot ett
främmande föremål:
-
Stanna gräsklipparen, släpp säkerhetsgreppet
och vänta tills kniven stannat helt.
-
Ta bort säkerhetsnyckeln och batterikassetten.
- Kontrollera gräsklipparen grundligt så att
skada inte har uppstått.
- Byt ut kniven om den är skadad på något sätt.
Reparera eventuella skador innan du startar om
och fortsätter att använda gräsklipparen.
29. Kontrollera uppsamlingspåsen regelbundet
för slitage eller försämring. Se alltid till att
uppsamlingspåsen är tom när maskinen
förvaras. Byt ut en sliten påse mot en ny från
fabriken för säker användning.
30. Stanna motorn och ta bort nyckeln varje gång
du lämnar utrustningen, före rengöring av
gräsklipparkåpan och innan några
reparationer eller kontroller utförs.
31. Var mycket försiktig när du vänder maskinen
eller drar den mot dig.
32. Stoppa kniven/knivarna om maskinen måste
lutas för att transporteras över gräsfria ytor
och när maskinen transporteras till och från
området som ska klippas.
33. Använd aldrig maskinen med skadade skydd
eller utan säkerhetsutrustningen, t ex
stenskydd och/eller gräsuppsamlare, på plats.
34. Starta motorn omsorgsfullt enligt
anvisningarna och med fötterna på bra
avstånd från kniven/knivarna.
35. Luta inte maskinen när du startar motorn
förutom när maskinen måste lutas för start. I
så fall ska den inte lutas mer än vad som är
absolut nödvändigt och lyft endast den delen
som är längst bort från användaren.
36. Starta inte maskinen när du står framför
utkastöppningen.
37. Placera inte händer och fötter i närheten eller
under roterande delar. Stå alltid långt ifrån
utkastöppningen.
38. Transportera inte maskinen medan
gräsklipparen är igång.
39. Stanna maskinen och ta bort
säkerhetsnyckeln och batterikassetten. Se till
att alla rörliga delar har stannat helt
- när du lämnar maskinen,
- innan du tar bort något som fastnat eller
rensar utkastningsrännan,
- före kontroll, rengöring eller arbete på
maskinen,
- när du slagit emot ett främmande föremål.
Kontrollera maskinen om det uppstått skador
och utför reparationer innan maskinen startas
om och används på nytt.
40. Om maskinen börjar vibrera onormalt
(kontrollera omedelbart)
- kontrollera om skada har uppstått,
- byt ut eller reparera skadade delar,
- kontrollera och dra åt lösa delar.
41. Var försiktig under justering av maskinen för
att undvika att fastna med fingrarna mellan
rörliga knivar och fasta maskindelar.
42. Klipp längsmed sluttningar, aldrig uppåt och
nedåt. Var särskilt försiktig vid byte av riktning
i sluttande terräng. Klipp inte mycket branta
sluttningar.
43. Spola inte av maskinen med en slang, undvik
att få in vatten i motorn och elektriska
kopplingar.
44. Kontrollera knivens monteringsbult
regelbundet så att den är åtdragen ordentligt.
45. Se till att alla muttrar, bultar och skruvar är
åtdragna för att alltid bibehålla utrustningen i
säkert arbetsskick.

18
46. Låt alltid maskinen svalna innan du förvarar
den.
47. Var uppmärksam på vid service av knivarna att
de fortfarande kan snurra även om
strömkällan är avstängd.
48. Byt ut slitna eller skadade delar för säker
användning. Använd endast originaldelar och
–tillbehör.
SPARA DESSA ANVISNINGAR.
VARNING!
GLÖM INTE att noggrant följa
säkerhetsanvisningarna för maskinen även efter det
att du har blivit van att använda den. OVARSAM
hantering eller underlåtenhet att följa
säkerhetsanvisningarna i denna bruksanvisning kan
leda till allvarliga personskador.
ENC007-7
VIKTIGA
SÄKERHETSANVISNINGAR
FÖR BATTERIKASSETT
1. Innan batterikassetten används ska alla
instruktioner och varningsmärken på (1)
batteriladdaren, (2) batteriet och (3) produkten
läsas.
2. Montera inte isär batterikassetten.
3. Om driftstiden blivit avsevärt kortare ska
användningen avbrytas omedelbart. Det kan
uppstå överhettning, brännskador och t o m
en explosion.
4. Om du får elektrolyt i ögonen ska de sköljas
med rent vatten och läkare uppsökas
omedelbart. Det finns risk för att synen
förloras.
5. Kortslut inte batterikassetten.
(1) Rör inte vid polerna med något
strömförande material.
(2) Undvik att förvara batterikassetten
tillsammans med andra metallobjekt som t
ex spikar, mynt etc.
(3) Skydda batteriet mot vatten och regn.
Ett kortslutet batteri kan orsaka ett stort
strömflöde, överhettning, risk för brännskador
och maskinen kan till och med gå sönder.
6. Förvara inte maskinen och batterikassetten på
platser där temperaturen kan nå eller
överstiga 50 ゚C (122 ゚F).
7. Bränn inte upp batterikassetten även om den
är svårt skadad eller helt utsliten.
Batterikassetten kan explodera i öppen eld.
8. Var försiktig så att du inte råkar tappa batteriet
och utsätt det inte för stötar.
9. Använd inte ett skadat batteri.
SPARA DESSA ANVISNINGAR.
Tips för att uppnå batteriets maximala
livslängd
1. Ladda batterikassetten innan den är helt
urladdad.
Sluta att använda maskinen och ladda
batterikassetten när du märker att kraften
avtar.
2. Ladda aldrig en fulladdad batterikassett.
Överladdning förkortar batteriets livslängd.
3. Ladda batterikassetten vid rumstemperaturer
mellan 10 ゚C och 40 ゚C (50 ゚F - 104 ゚F). Låt en
varm batterikassett svalna innan den laddas.
4. Ladda batterikassetten om du inte har använt
den på mer än sex månader.

19
FUNKTIONSBESKRIVNING
Montera eller demontera batterikassetten
FÖRSIKTIGT!
• Stäng alltid av maskinen innan du monterar eller
tar bort batterikassetten.
• Se till att du låser batterikåpan före användning. I
annat fall kan lera, smuts eller vatten orsaka skada
på produkten eller batterikassetten.
32
1
012296
Montera batterikassetten.
1. Dra batterikåpans låsreglage mot dig och öppna
batterikåpan.
2. Sätt i batterikassetten i den riktning som visas i
figuren, tills ett klickljud hörs.
Fig.1
3. Sätt i säkerhetsnyckeln på platsen som visas i
figuren, så långt det går.
4. Stäng batterikåpan och tryck på den tills den är
fast med låsreglaget.
Ta bort batterikassetten från gräsklipparen.
1. Dra batterikåpans låsreglage mot dig och öppna
batterikåpan.
2. Dra ut säkerhetsnyckeln.
3. Dra bort batterikassetten från maskinen medan du
skjuter knappen framtill på kassetten.
4. Stäng batterikåpan.
Batterikonverterare (valfritt tillbehör)
VARNING!
• Ta bort säkerhetsnyckeln före montering eller
borttagning av batterikonverterare BCV01/BCV03.
BCV01 (valfritt tillbehör)
VARNING!
• Fäst aldrig BCV01 till någon del av kroppen när du
använder den. I annat fall kan det orsaka allvarlig
skada.
Fig.2
Skjut in batterikonverteraren BCV01 i monteringshålet
tills den stoppar.
Fig.3
Öppna batterikåpan på gräsklipparen och skjut sedan
monteringsadaptern BCV01 hela vägen in och klicka
fast den i batteriporten på gräsklipparen.
För sladden för BCV01 genom skåran i batterikåpan och
stäng batterikåpan.
Fig.4
Fäst sladden för BCV01 i de övre fästena på handtaget.
OBS!
• Haka fast strömsladden i det angivna fästet på
gräsklipparen när batterikonverterare BCV01
används (valfritt tillbehör). I annat fall kan det leda
till att sladden klipps av.
Ta bort BCV01 från gräsklipparen genom att öppna
batterikåpan och sedan trycka på haken på
monteringssidan av batteriet BCV01.
BCV03 (valfritt tillbehör)
Fig.5
Öppna batterikåpan och klicka i BCV03 i batteriporten
på gräsklipparen.
Stäng batterikåpan.
1
014473
Ta bort BCV03 genom att trycka på haken för BCV03
och dra ut den med båda händerna.
Säkerhetsgreppfunktion
VARNING!
• Innan batterikassetten sätts i maskinen ska du
alltid kontrollera att säkerhetsgreppet fungerar
korrekt och går tillbaka till ursprungsläge när
det släpps. Att använda en maskin med ett
felaktigt säkerhetsgreppet kan leda till förlorad
kontroll och allvarlig personskada.
1. Låsreglage för batterikåpa
2. Batterikassett
3. Batterihölje
1. Batterikonverterare (BCV03)

20
OBS!
• Att försöka klippa mycket gräs på en gång kan leda
till att motorn inte startar på grund av
överbelastning. Ändra i så fall klipphöjden till en
högre nivå och starta om.
• Gräsklipparen startar inte utan att startknappen
trycks in, även om säkerhetsgreppet kläms ihop.
Denna gräsklippare är utrustad med en spärrbrytare och
handtagsbrytare. Om du lägger märke till något onormalt
med någon av dessa brytare ska du genast sluta
använda maskinen och låta ditt närmaste auktoriserade
servicecenter för Makita kontrollera dem.
Fig.6
1. Sätt i säkerhetsnyckeln i spärrbrytaren.
1
2
012603
2. Tryck ned startknappen.
3. Dra säkerhetsgreppet mot dig medan du trycker
ned startknappen.
4. Släpp startknappen så fort motorn startar.
Gräsklipparen kommer fortsätta att gå tills du
släpper säkerhetsgreppet.
5. Släpp säkerhetsgreppet för att stanna motorn.
6. Ta bort säkerhetsnyckeln när maskinen inte
används. Förvara säkerhetsnyckeln på en säker
plats utom räckhåll för barn.
Justering av klipphöjden
VARNING!
• Placera aldrig din hand eller fot under
gräsklipparen när du justerar klipphöjden.
• Kontrollera alltid att spaken sitter ordentligt i spåret
före användning.
Klipphöjden kan justeras mellan 20 mm – 75 mm.
1. Ta bort säkerhetsnyckeln.
Fig.7
2. Dra justeringsspaken för klipphöjd mot dig och
flytta den till önskad klipphöjd.
Kontrollera att den utskjutande delen på
justeringsspaken för klipphöjd passar i spåret på
gräsklipparen.
OBS!
• Figurerna för klipphöjden ska användas som en
riktlinje eftersom gräsmattans eller markens skick
kan leda till att gräsmattans höjd inte blir samma
som figuren för höjdinställning.
• Gör en testklippning i ett mindre synligt område för
att få önskad höjd.
Skyddssystem för batteri
Litium-ion-batterier är utrustade med ett skyddssystem.
Detta system bryter automatiskt strömmen till maskinen
för att förlänga batteriets livslängd.
Maskinen stanna automatiskt under användningen om
maskinen och/eller batteriet hamnar i en av följande
situationer:
• Överbelastad:
Maskinen används på ett sätt som orsakar att
den förbrukar onormalt mycket ström.
I detta läge ska du släppa avtryckaren på
maskinen och stoppa handlingen som
orsakar maskinen att bli överbelastad. Tryck
sedan in avtryckaren igen för att starta om.
Om maskinen inte startar är batteriet
överhettat. I detta läge ska du låta batteriet
svalna innan du trycker in avtryckaren igen.
• Batterispänningen faller:
Den kvarvarande batterikapaciteten är för låg
och maskinen fungerar inte. I detta läge tar
du bort batteriet och laddar det.
Indikator för batterikapaciteten
(endast för modeller med batteri BL3622A)
Batteri BL3622A är utrustat med indikator för
batterikapaciteten.
1
2
011715
Tryck på CHECK-knappen för att se kvarvarande
batterikapacitet. Indikatorlamporna lyser då i cirka tre
sekunder.
1. Indikatorlampor
2. CHECK-knapp
1. Knappbrytare
2. Avtryckare
Other manuals for BLM430
6
This manual suits for next models
1
Table of contents
Languages:
Other Makita Lawn Mower manuals

Makita
Makita ELM4110 User guide

Makita
Makita DLM533 User manual

Makita
Makita PLM5102 User guide

Makita
Makita BLM430 User manual

Makita
Makita DLM460 User manual

Makita
Makita DLM460 User manual

Makita
Makita DLM431 User manual

Makita
Makita DLM330 User manual

Makita
Makita LM001C User manual

Makita
Makita XML12 User manual

Makita
Makita ELM4610 User guide

Makita
Makita PLM4631 User guide

Makita
Makita DLM462 User manual

Makita
Makita DLM380 User manual

Makita
Makita PLM4630N2 User manual

Makita
Makita DLM535 User manual

Makita
Makita DLM462 User manual

Makita
Makita LM001G User manual

Makita
Makita PLM5110 User manual

Makita
Makita DLM382 User manual