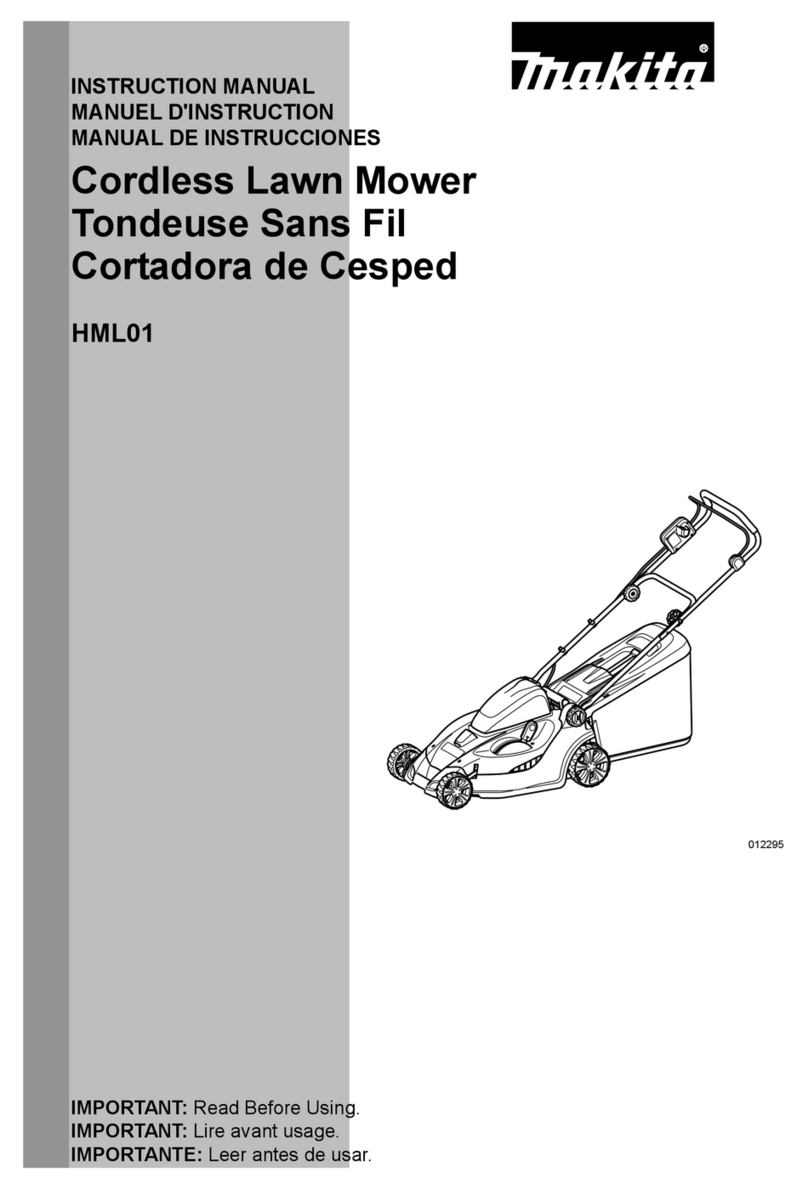
Makita HML01 User manual

1
INSTRUCTION MANUAL
MANUEL D'INSTRUCTION
MANUAL DE INSTRUCCIONES
IMPORTANT: Read Before Using.
IMPORTANT: Lire avant usage.
IMPORTANTE: Leer antes de usar.
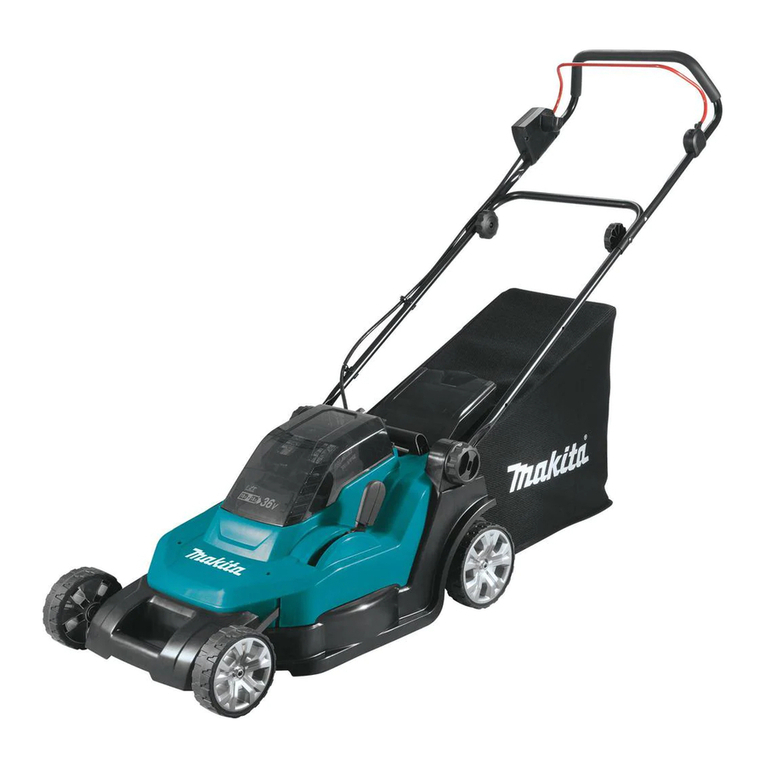
Cordless Lawn Mower
Tondeuse Sans Fil
Cortadora de Cesped
HML01
012295

2
ENGLISH (Original instructions)
SPECIFICATIONS
Model HML01
Mowing width 430 mm (17")
No load speed (RPM) 3,600/min
1,450 mm -1,490 mm x 460 mm x 950 mm -1,020 mm
during operation (57" - 58-3/4" x 18-1/8" x 37-1/2" - 40-1/4")
490 mm - 500 mm x 460 mm x 810 mm
Dimensions (L x W x H) when stored (19-1/4" - 19-3/4" x 18-1/8" x 32" )
Net weight 18.1 kg (39.9 lbs)
Rated voltage D.C. 36 V
Standard battery cartridge(s)
Warning: Use only the battery cartridge(s) described. BL3626 / BL3622A
Due to our continuing program of research and development, the specifications herein are subject to change without notice.
Specifications and battery cartridge may differ from country to country.
Weight, with battery cartridge, according to EPTA-Procedure 01/2003
USB105-5
IMPORTANT SAFETY
INSTRUCTIONS
WARNING! Read all safety warnings and all
instructions. Failure to follow the warnings and
instructions may result in electric shock, fire and/or
serious injury.
Save all warnings and
instructions for future reference.
This cutting machine is capable of amputating
hands and feet and throwing objects. Failure to
observe the following safety instructions could result in
serious injury or death.
1. Read, understand, and follow all instructions
on the mower and in the instruction manuals.
Be thoroughly familiar with the controls and
the proper use of the mower before starting.
2. Do not put hands or feet near or under rotating
parts. Keep clear of the discharge opening at
all times.
3. Only allow responsible individuals, who are
familiar with the instruction, to operate the
mower.
4. Clear the area of object such as rocks, toys,
wire, bones, sticks, etc., which could be
picked up and thrown by the blade.
5. Be sure the area is clear of other people
before mowing. Stop mower if anyone enters
the area.
6. Dress properly. Do not operate the mower
when barefoot or wearing open sandals.
Always wear substantial foot wear. Do not
wear loose clothing or jewelry. They can be
caught in moving parts. Use of rubber gloves
and footwear is recommended when working
outdoors.
7. Do not pull the mower backwards unless
absolutely necessary. When you are
compelled to back the mower from a fence or
other similar obstruction, look down and
behind before and while moving backwards.
8. KEEP GUARDS IN PLACE and in working
order.
9. Do not operate the mower without proper
guards, plates, grass catcher or other safety
protective devices in place.
10. Use right appliance. Do not use lawn mower
for any job except that for which it is intended.
11. Dont force the lawn mower - It will do the job
better and safer at the rate for which it was
designed.
12. Dont overreach - Keep proper footing and
balance at all times.
13. See instructions in the instruction manuals for
proper operation and installation of
accessories. Only use the manufacturer
genuine accessories specified in this manual.
14. Release switch lever and wait for blade
rotation to stop before crossing driveways,
walks, roads and any gravel-covered areas.
Also remove key if you leave it, reach to pick
up or remove something out of your way, or
for any other reason that may distract you
from what you are doing.
15. Stop the motor and remove the key whenever
you leave the equipment, before cleaning the
mower or unclogging the chute and making

3
any repairs or inspections.
16. Shut the motor off and wait until the blade
comes to a complete stop before removing the
grass catcher. Beware that the blades coast
after turn off.
17. Mow only in daylight or good artificial light.
18. Stay alert, watch what you are doing and use
common sense when operating the mower. Do
not use the mower while you are tired or under
the influence of drugs, alcohol or medication.
A moment of inattention while operating the
mower may result in serious personal injury.
19. Never operate the mower in damp or wet
conditions or in the rain. Always be sure of
your footing: keep a firm hold on the handle
and walk; never run.
20. If the mower strikes a foreign object, follow
these steps:
- Stop the mower by releasing the switch lever,
wait until the blade comes to a complete stop,
and then remove the key and the battery
cartridge.
- Thoroughly inspect the mower for any
damage.
- Replace the blade if it is damaged in any way.
Repair any damage before restarting and
continuing to operate the mower.
21. Use identical replacement blades only.
22. Disengage the self-propelled mechanism or
drive clutch on the mower so equipped before
starting the motor
23. If the equipment should start to vibrate
unusually, stop the motor and check
immediately for the cause. Vibration is generally
a warning of trouble.
24. Always wear the safety goggles or safety
glasses with side shields when operating the
mower.
25. Battery tool use
- Recharge only with the charger specified by
the manufacturer. A charger that is suitable for
one type of battery pack may create a risk of fire
when used with another battery pack.
- Use power tools only with specifically
designated battery packs. Use of any other
battery packs may create a risk of injury and fire.
26. Do not insert key into mower until it is ready to
be used.
27. Don't grasp the exposed cutting blades or
cutting edges when picking up or holding the
appliance.
28. Check the blades carefully for cracks or
damage before operation. Replace cracked or
damaged blades immediately.
29. Never attempt to make wheel height
adjustments while mower is running.
30. Objects struck by the lawn mower blade can
cause severe injuries to persons. The lawn
should always be carefully examined and
cleared of all objects prior to each mowing.
31. Check the rear bag frequently for wear or
deterioration. For storage, always make sure
the rear bag is empty. Replace a worn bag with
a new factory replacement bag for safety.
32. Mow across the face of slopes, never up and
down. Exercise extreme caution when
changing direction on slopes. Do not mow
excessively steep slopes.
33. Do not wash with a hose; avoid getting water
in motor and electrical connections.
34. Check the blade mounting bolt at frequent
intervals for proper tightness.
35. Keep all nuts. bolts, and screws tight to be
sure the equipment is in safe working
condition. USG001-2
WARNING:
Use of this product can create dust containing chemicals
which may cause respiratory or other illnesses.
Some examples of these chemicals are compounds
found in pesticides, insecticides, fertilizers and
herbicides.
Your risk from these exposures varies, depending on
how often you do this type of work. To reduce your
exposure to these chemicals: work in a well ventilated
area, and work with approved safety equipment, such as
those dust masks that are specially designed to filter out
microscopic particles. USD301-1
Symbols
The followings show the symbols used for tool.
volts
direct current
no load speed
revolutions or reciprocation per minute
ENC007-7
IMPORTANT SAFETY
INSTRUCTIONS
FOR BATTERY CARTRIDGE
1. Before using battery cartridge, read all
instructions and cautionary markings on (1)
4
battery charger, (2) battery, and (3) product
using battery.
2. Do not disassemble battery cartridge.
3. If operating time has become excessively
shorter, stop operating immediately. It may
result in a risk of overheating, possible burns
and even an explosion.
4. If electrolyte gets into your eyes, rinse them
out with clear water and seek medical
attention right away. It may result in loss of
your eyesight.
5. Do not short the battery cartridge:
(1) Do not touch the terminals with any
conductive material.
(2) Avoid storing battery cartridge in a
container with other metal objects such as
nails, coins, etc.
(3) Do not expose battery cartridge to water
or rain.
A battery short can cause a large current flow,
overheating, possible burns and even a
breakdown.
6. Do not store the tool and battery cartridge in
locations where the temperature may reach or
exceed 50 C (122 F).
7. Do not incinerate the battery cartridge even if
it is severely damaged or is completely worn
out. The battery cartridge can explode in a fire.
8. Be careful not to drop or strike battery.
9. Do not use a damaged battery.
SAVE THESE INSTRUCTIONS.
Tips for maintaining maximum battery life
1. Charge the battery cartridge before
completely discharged.
Always stop tool operation and charge the
battery cartridge when you notice less tool
power.
2. Never recharge a fully charged battery
cartridge.
Overcharging shortens the battery service life.
3. Charge the battery cartridge with room
temperature at 10 C - 40 C (50 F - 104 F).
Let a hot battery cartridge cool down before
charging it.
4. Charge the battery cartridge once in every six
months if you do not use it for a long period of
time.
FUNCTIONAL DESCRIPTION
Installing or removing battery cartridge
CAUTION:
Always switch off the tool before installing or
removing the battery cartridge.
Make sure that you lock the battery cover before
use. Otherwise, mud, dirt, or water may cause
damage to the product or the battery cartridge.
32
1
012296
To install the battery cartridge;
1. Pull the battery cover locking lever toward
yourself and open the battery cover.
2. Insert the battery cartridge in the direction shown
in the figure until a click is heard.
1
012297
3. Insert the lock key in the place shown in the figure
as far as it will go.
4. Close the battery cover and push it on until it is
latched with the locking lever.
To remove the battery cartridge from the mower;
1. Pull the battery cover locking lever toward
yourself and open the battery cover.
2. Pull out the lock key.
1. Lock key
1. Battery cover locking lever
2. Battery cartridge
3. Battery cove
r

5
3. Withdraw it from the tool while sliding the button
on the front of the cartridge.
4. Close the battery cover.
Battery converter (optional accessory)
BCV02 (optional accessory)
WARNING:
Before installing or removing the battery converter
BCV02, remove the lock key.
1
012383
Open the battery cover and click in the BCV02 into the
battery port on the mower.
Close the battery cover.
1
012384
To remove the BCV02, press on the hook of the BCV02
and withdraw it with both hands.
Power switch action
WARNING:
Before inserting the battery cartridge in the
tool, always check to see that the switch lever
actuates properly and returns to the original
position when released. Operating a tool with a
switch that does not actuate properly can lead to
loss of control and serious personal injury.
NOTE:
Trying to mow much grass at a time may not allow
the motor to start due to the overload. At this time,
change the mowing height to higher level to restart.
The mower does not start without pressing the
switch button even if the switch lever is squeezed.
This mower is equipped with the interlock switch and
handle switch. If you notice anything unusual with either
of these switches, stop operation immediately and have
them checked by your nearest Makita Authorized or
Factory Service Center.
1
012297
1. Insert the lock key into the interlock switch.
1
2
012603
2. Depress the switch button.
3. Pull the switch lever toward you while depressing
the switch button.
4. Release the switch button as soon as the motor
starts running. The mower will continue to run until
you release the switch lever.
5. Release the switch lever to stop the motor.
6. When not in use, remove the lock key. Store the
lock key in a safe place out of reach of children.
1. Lock key
1. Battery
converter
(BCV02)
1. Battery converter (BCV02) 1. Switch button
2. Switch lever

6
Adjusting the mowing height
WARNING:
Never put your hand or leg under the mower unit
when adjusting the mowing height.
Always make sure that the lever fits in the groove
properly before operation.
The mowing height can be adjusted in the range of
between 20 mm - 75 mm (0.8" - 3.0").
1. Remove the lock key.
1
012303
2. Pull the mowing height adjusting lever toward
yourself and move it to your desired mowing
height.
Make sure that the protrusion on the mowing
height adjusting lever fits in the groove in the
mower.
NOTE:
The mowing height figures should be used just as
a guideline, as the state of the lawn or ground may
cause lawn height to be slightly different to the set
height figure.
Try a test mowing of grass in a less conspicuous
place to get your desired height.
Battery protection system
Lithium-ion batteries are equipped with a protection
system. This system automatically cuts off power to the
tool to extend battery life.
The tool will automatically stop during operation if the
tool and/or battery are placed under one of the following
conditions:
Overloaded:
The tool is operated in a manner that causes
it to draw an abnormally high current.
In this situation, release the trigger switch on
the tool and stop the application that caused
the tool to become overloaded. Then pull the
trigger switch again to restart.
If the tool does not start, the battery is
overheated. In this situation, let the battery
cool before pulling the trigger switch again.
Low battery voltage:
The remaining battery capacity is too low and
the tool will not operate. In this situation,
remove and recharge the battery.
Battery remaining capacity indicator (only for
models with Battery BL3622A)
Battery BL3622A is equipped with the battery remaining
capacity indicator.
1
2
011715
Press the CHECK button to indicate the battery
remaining capacity. The indicator lamps will then light for
approx. three seconds.
Indicator lamps
Lighted Off Blinking
E F
Remaining capacity
70% to 100%
45% to 70%
20% to 45%
0% to 20%
Charge the battery.
The battery may have
malfunctioned.
011713
When only the lowermost indicator lamp (next to
the E) blinks, or when none of the indicator lamps
light, the battery capacity has run out, so the tool
does not operate. In these cases, charge the
battery or replace the empty battery with a fully
charged one.
When two or more indicator lamps do not light
even after charging is complete, the battery has
reached the end of its service life.
When the upper two and lower two indicator lamps
light alternately, the battery may have
malfunctioned. Contact your local Makita
authorized service center.
NOTE:
The indicated capacity may be lower than the
actual level during use or immediately after using
the tool.
Depending on the conditions of use and the
ambient temperature, the indication may differ
slightly from the actual capacity.
1. Indicator lamps
2. CHECK button
1. Mowing height
adjusting lever

7
ASSEMBLY
WARNING:
Always be sure that the lock key and battery
cartridge are removed before carrying out any
work on the mower. Failure to remove the lock
key and the battery cartridge may result in serious
personal injury from accidental start-up.
Never start the tool unless it is completely
assembled. Operation of the tool in a partially
assembled state may result in serious personal
injury from accidental start-up.
Installing the handle
WARNING:
When installing handles, position the wires so that
they are not caught by anything in between the
handles.
1. Loosen the clamping screws (two pcs).
1
2
3
012385
Expand the lower handle to its both sides and with it
expanded in that position pivot it backward and then fit it
in the groove in the deck.
2. Tighten the clamping screws on both sides to
secure the lower handle.
1
2
3
4
012386
1
2
3
4
5
012606
3. Raise the upper handle and align the screw holes
in the upper handle with those in the lower handle
and then secure it with the supplied screws and
clamping nuts.
NOTE:
At this time, keep a firm grip on the upper handle
so that it does not drop off your hand.
1
2
012421
1
2
012605
NOTE:
Install the upper handle so that the direction of the
upper handle and the power supply cord are
positioned as shown in the figure.
1. Holders
2. Cord
1. Holders
2. Cord
1. Clamping nut
2. Lower handle
3. Upper handle
4. Screw holes
5. Screw
1. Upper handle
2. Lower handle
3. Screw holes
4. Screw holes
1. Lower handle
2. Groove on the deck
3. Clamping screw

8
1
23
4
012389
NOTE:
The upper handle has two holes each on both
sides. Using the different position holes for the
screws and clamping nuts allows the handle height
adjustment.
Removing or installing the blade
WARNING:
Always remove the lock key and battery cartridge
when removing or installing the blade. Failure to
remove the lock key and battery cartridge may
cause a serious injury.
The blade coasts for a few seconds after releasing
the switch. Make sure that the blade has come to a
complete stop.
Always wear gloves when handling the blade.
2
1
3
012304
1. Put the mower on its side so that the mowing
height adjusting lever is placed on the upper side.
2. To lock the blade, insert a screwdriver available or
the similars in market into a hole in the mower.
3. Loosen the bolt counterclockwise with the wrench.
1
2
3
4
5
012601
4. Remove the bolt, outer flange, blade and inner
flange in order.
To install the blade, take the blade removal procedure in
reverse.
WARNING:
Install the inner flange, the blade and the outer
flange carefully as these have a top/bottom facing.
Tighten the bolt clockwise firmly to secure the
blade.
Put the blade so that the blade side with a
rotational direction arrow faces outward.
Make sure that the blade is installed securely.
Always take away the screwdriver or similars
inserted in a hole to lock the blade.
1. Screw
2. Clamping nut
3. Upper handle
4. Lower handle
1. Inner flange
2. Arrow
3. Outer flange
4. Bolt
5. Blade
1. Screwdriver
2. Blade
3. Bolt

9
Installing the grass basket
Remove the lock key.
1
2
012302
1
2
3
012301
Raise the rear guard of the mower unit and hook the
grass basket on the groove of the mower unit.
OPERATION
Mowing
WARNING:
Before mowing, clear away sticks and stones from
mowing area. Furthermore, clear away any weeds
from mowing area in advance.
Always wear the safety goggles or safety glasses
with side shields when operating the mower.
Firmly hold the lawn mower handle with both hands
when mowing.
The front wheel outside edges of the main unit provide a
guideline to mowing width. Using the two front wheel
outside edges as a guideline, mow in strips, overlapping
by one half to one third the previous strip, to mow the
lawn evenly.
Periodically check the level of the grass basket, and
empty before it becomes full. Before every periodical
checks, be sure to stop the mower and remove the lock
key and the battery cartridge.
NOTE:
Using the lawn mower with the grass basket full
prevents smooth blade rotation and places an
extra load on the motor, which may cause
breakdown.
Mowing a long-grass lawn
012382
Do not try to cut long grass all in one go. Instead, mow
the lawn in stages, leaving it for a day or two between
mows, until the lawn is evenly short.
NOTE:
Mowing long grass to a short length all in one go
may cause the grass to die and/or block up the
inside of the main unit.
Emptying the grass basket
WARNING:
To reduce a risk of accident, regularly check the
grass basket for any damage or weakened
strength and replace it if necessary.
1. Release the switch lever.
2. Remove the lock key.
1. Rear guard
2. Groove
1. Rear guard
2. Groove
3. Grass basket

10
1
2
012307
3. Open the rear guard and take out the grass
basket with its handle.
4. Empty the grass basket.
MAINTENANCE & STORAGE
WARNING:
Always be sure that the lock key and battery
cartridge are removed from the mower before
storage or attempting to perform inspection or
maintenance.
Wear gloves when performing inspection or
maintenance.
CAUTION:
Never use gasoline, benzine, thinner, alcohol or
the like. Discoloration, deformation or cracks may
result.
MAINTENANCE
1. REMOVE THE LOCK KEY. Store it in a safe place
out of the reach of children.
2. Clean your mower using only mild soap and a
damp cloth. Do not spray or pour water on your
mower when cleaning.
3. Turn mower on its side and clean grass clippings
that have accumulated on the underside of mower
deck.
4. Check all nuts, bolts, knobs, screws, fasteners etc.
for tightness.
5. Inspect moving parts for damage, breakage, and
wear. Have repairs made on any damaged or
missing parts.
6. Before storing the mower, remove the battery
cartridge from it.
7. Store mower indoors in a cool, dry and locked
place. Don't store the mower and charger in
locations where the temperature may reach or
exceed 40 C (l04 F).
Storage
012604
WARNING:
When carrying or storing the mower, do not hold
the folded handles but the front grip of the mower.
Holding the folded handles may cause a serious
injury or damage to the mower.
012309
The mower can be stored in upright position.
1
2
3
4
5
012298
1. Rear guard
2. Grass basket
1. Clamping screw
2. Expand
3. Move down forward
4. Clamping nut
5. Pivot back

11
1. Loosen the clamping screw, expand the lower
handle to both sides and then move down the
handle forward.
NOTE:
At this time, keep a firm grip on the lower handle so
that it does not fall down to the far side from the
tool.
2. Loosen the clamping nut and pivot the upper
handle back.
1
2
012602
3. Take off the grass basket and put the mower in
the upright position.
1
012600
NOTE:
When putting the mower in the upright position, do not
hold the handle but use the front grip of the mower.
012420
4. Store the grass basket between the handle and
the mower body.
To maintain product SAFETY and RELIABILITY, repairs,
any other maintenance or adjustment should be
performed by Makita Authorized or Factory Service
Centers, always using Makita replacement parts.
1. Front grip
1. Rear guard
2. Grass basket

12
TROUBLE SHOOTING
Before asking for repairs, first, conduct your own
inspection. If you find a problem that is not explained in
the manual, do not attempt to dismantle the tool. Instead,
ask Makita Authorized or Factory Service Centers,
always using Makita replacement parts.
012350

13
OPTIONAL ACCESSORIES
CAUTION:
These accessories or attachments are
recommended for use with your Makita tool
specified in this manual. The use of any other
accessories or attachments might present a risk of
injury to persons. Only use accessory or
attachment for its stated purpose.
If you need any assistance for more details regarding
these accessories, ask your local Makita Service Center.
Blade
Makita genuine battery and charger
NOTE:
Some items in the list may be included in the tool
package as standard accessories. They may differ
from country to country.
MAKITA LIMITED ONE YEAR WARRANTY
Warranty Policy
Every Makita tool is thoroughly inspected and tested
before leaving the factory. It is warranted to be free of
defects from workmanship and materials for the period
of ONE YEAR from the date of original purchase.
Should any trouble develop during this one year period,
return the COMPLETE tool, freight prepaid, to one of
Makitas Factory or Authorized Service Centers. If
inspection shows the trouble is caused by defective
workmanship or material, Makita will repair (or at our
option, replace) without charge.
This Warranty does not apply where:
IN NO EVENT SHALL MAKITA BE LIABLE FOR ANY
INDIRECT, INCIDENTAL OR CONSEQUENTIAL
DAMAGES FROM THE SALE OR USE OF THE
PRODUCT. THIS DISCLAIMER APPLIES BOTH
DURING AND AFTER THE TERM OF THIS
WARRANTY.
MAKITA DISCLAIMS LIABILITY FOR ANY IMPLIED
WARRANTIES, INCLUDING IMPLIED WARRANTIES
OF "MERCHANTABILITY" AND "FITNESS FOR A
SPECIFIC PURPOSE,"AFTER THE ONE YEAR TERM
OF THIS WARRANTY.
This Warranty gives you specific legal rights, and you
may also have other rights which vary from state to
state. Some states do not allow the exclusion or
limitation of incidental or consequential damages, so
the above limitation or exclusion may not apply to you.
Some states do not allow limitation on how long an
implied warranty lasts, so the above limitation may not
apply to you.
repairs have been made or attempted by others:
repairs are required because of normal wear and
tear:
the tool has been abused, misused or improperly
maintained:
alterations have been made to the tool.
EN0006-1

14
FRANÇAIS (Mode demploi original)
SPÉCIFICATIONS
Modèle HML01
Largeur de coupe 430 mm (17")
Vitesse à vide (T/MIN) 3 600/min.
1 450 mm -1 490 mm x 460 mm x 950 mm -1 020 mm
durant le fonctionnement (57" - 58-3/4" x 18-1/8" x 37-1/2" - 40-1/4")
490 mm - 500 mm x 460 mm x 810 mm
Dimensions (L x P x H) entreposée (19-1/4" - 19-3/4" x 18-1/8" x 32" )
Poids net 18,1 kg (39,9 lbs)
Tension nominale C.C. 36 V
Batterie(s) standard(s)
Avertissement : Utilisez seulement la/les batterie(s) décrite(s).
BL3626 / BL3622A
Étant donné lévolution constante de notre programme de recherche et de développement, les caractéristiques techniques
contenues dans ce manuel peuvent être modifiées sans préavis.
Les caractéristiques techniques et la batterie peuvent varier suivant les pays.
Poids, batterie comprise, conforme à la procédure EPTA de 01/2003
USB105-5
CONSIGNES DE SÉCURITÉ
IMPORTANTES
AVERTISSEMENT! Veuillez lire toutes les mises
en garde de sécurité et toutes les instructions.
Lignorance des mises en garde et des instructions
comporte un risque de décharge électrique, dincendie
et/ou de blessure grave.
Conservez toutes les mises en
garde et instructions pour
référence future.
Cette machine coupante est capable d'amputer des
mains et des pieds et projeter des objets. Le
non-respect des instructions de sécurité suivantes peut
entraîner de graves blessures ou la mort.
1. Lisez, comprenez et respectez toutes les
instructions indiquées sur la tondeuse et dans
le manuel d'utilisation. Maîtrisez les boutons
de commande et l'utilisation en elle-même de
la tondeuse avant de commencer.
2. Éloignez les mains et les pieds des parties
tournantes. Tenez-vous éloigné de l'ouverture
de décharge en tout temps.
3. N'autorisez que des individus responsables,
qui connaissent les instructions, à utiliser la
tondeuse.
4. Enlevez de la zone de travail tous les objets,
tels que les pierres, les jouets, les fils, les os,
les branches, qui peuvent être pris et projetés
par la lame.
5. Assurez-vous que les tierces personnes sont
éloignés de la zone avant de tondre. Arrêtez la
tondeuse si quelqu'un pénètre dans la zone.
6. Habillez-vous convenablement. Ne faites pas
fonctionner la tondeuse si vous êtes pieds
nus ou si vous portez des sandales ouvertes.
Portez toujours des chaussures solides. Ne
portez ni vêtements amples ni bijoux. Ils
pourraient être happés par les pièces mobiles.
L'utilisation de gants de caoutchouc et de
chaussures robustes est recommandée lors
de travaux extérieurs.
7. Ne tirez pas la tondeuse vers l'arrière à moins
que cela soit absolument nécessaire. Si vous
devez tirer la tondeuse pour éviter une clôture
ou un autre obstacle similaire, regardez en bas
et derrière avant et pendant la marche arrière.
8. MAINTENEZ LES PROTECTEURS EN PLACE
et en bon état de fonctionnement.
9. N'utilisez pas la tondeuse sans que ne soient
installés des protecteurs ou des plaques
approprié(e)s, un collecteur d'herbe ou
d'autres équipements de protection.
10. Utilisez l'outil approprié. N'utilisez pas la
tondeuse à gazon pour aucune tâche sauf
celle pour laquelle elle est conçue.
11. Ne forcez pas la tondeuse à gazon - Elle
fonctionnera mieux et de façon plus
sécuritaire à la vitesse pour laquelle elle a été
conçue.
12. Maintenez une bonne position - Assurez-vous
dune prise au sol et dune bonne position
déquilibre en tout temps.

15
13. Suivez les instructions dans le manuel
d'utilisation relatives à l'installation et
l'utilisation des accessoires. N'utilisez que des
accessoires approuvés par le fabricant
précisés dans ce manuel.
14. Relâchez le levier de l'interrupteur et attendez
que la lame cesse de tourner avant de
traverser une allée, une route ou toute surface
couverte de graviers. Retirez également la clé
si vous vous éloignez de la machine, si vous
vous baissez pour ramasser ou enlever
quelque chose de votre passage, ou pour
toute autre raison qui pourrait détourner votre
attention.
15. Arrêtez le moteur et retirez la clé chaque fois
que vous vous éloignez du matériel, avant de
nettoyer la tondeuse ou de déboucher le
déflecteur et de faire des réparations ou
inspections.
16. Éteignez le moteur et attendez que la lame
s'immobilise complètement avant de retirer le
collecteur d'herbe. Faites attention que la
lame continue de tourner en roue libre après
que le moteur soit arrêté.
17. N'utilisez la tondeuse qu'à la lumière du jour
ou avec une bonne lumière artificielle.
18. Restez vigilant, attentif à vos gestes, et faites
preuve de bon sens lorsque vous utilisez la
tondeuse. Évitez d'utiliser la tondeuse si vous
êtes fatigué ou sous influence de drogues,
d'alcool ou de médicaments. Un moment
d'inattention pendant l'utilisation de la tondeuse
peut entraîner une blessure grave.
19. N'utilisez jamais la tondeuse dans un
environnement humide ou mouillé et ne
l'utilisez jamais sous la pluie. Vérifiez toujours
votre posture : tenez le guidon de la tondeuse
fermement. Marchez, ne courez jamais.
20. Si la tondeuse frappe un objet étranger, suivez
ces étapes :
- Arrêtez la tondeuse en relâchant le levier de
l'interrupteur, attendez que la lame
s'immobilise complètement et enlevez ensuite
la clé et la batterie.
- Inspectez attentivement la tondeuse pour
desceller les dommages.
- Remplacez la lame si elle est endommagée
d'une façon ou d'une autre. Réparez tout
dommage avant de démarrer et de continuer à
utiliser la tondeuse.
21. N'utilisez que des lames de remplacement
identiques.
22. Désengagez le mécanisme automoteur ou
l'embrayage de la tondeuse avant d'allumer le
moteur.
23. Si la tondeuse se met à vibrer de façon
anormale, arrêtez le moteur et vérifiez
immédiatement la cause. La vibration est
généralement signe de problème.
24. Portez toujours des lunettes de sécurité avec
des écrans latéraux lorsque vous utilisez la
tondeuse.
25. Utilisation des outils alimentés par batterie
- Pour recharger, utilisez uniquement le
chargeur spécifié par le fabricant.L'utilisation
d'un chargeur conçu pour un type donné de
bloc-batterie comporte un risque d'incendie
lorsqu'il est utilisé avec un autre type de
bloc-batterie.
- N'utilisez un outil électrique qu'avec le
bloc-batterie conçu spécifiquement pour la
machine. Il y a risque de blessure ou d'incendie si
un autre bloc-batterie est utilisé.
26. N'insérez pas la clé dans la tondeuse avant
qu'elle ne soit prête à être utilisée.
27. Lorsque vous prenez la machine,
assurez-vous de ne pas la prendre par la partie
exposée de la lame ou le bord tranchant.
28. Vérifiez attentivement la présence de fissures
ou de dommages sur les fers avant d'utiliser
l'outil. Remplacez immédiatement tout fer
fissuré ou endommagé.
29. N'essayez jamais de régler la hauteur des
roues alors que la tondeuse est en marche.
30. Des objets frappés par la lame de la tondeuse
peuvent causer de graves blessures aux
personnes. La pelouse devrait toujours être
examinée attentivement et nettoyée de tout
objet avant la tonte.
31. Vérifiez régulièrement l'usure ou la
détérioration du sac arrière. Veillez à ce que le
sac arrière soit vide pour l'entreposage.
Remplacez un sac déchiré par un nouveau sac
de remplacement pour plus de sécurité.
32. Tondez les pentes dans le sens transversal,
jamais en montant ou en descendant. Soyez
particulièrement prudent lors des
changements de direction sur les terrains en
pente. Ne tondez pas sur des pentes
excessivement raides.
33. Ne lavez pas la machine avec un tuyau
d'arrosage ; évitez que de l'eau ne pénètre
dans le moteur ou dans les connexions
électriques.
34. Vérifiez à intervalles réguliers si la vis de
fixation de la lame est serrée.
35. Assurez-vous que tous les écrous, les
boulons et les vis sont bien serrés pour
garantir un fonctionnement sécuritaire.

16
USG001-2
AVERTISSEMENT:
L'utilisation de ce produit peut lever une poussière
contenant des produits chimiques susceptibles
d'entraîner des troubles respiratoires ou d'autres
maladies.
Parmi ces produits chimiques, on trouve des
composants de pesticides, insecticides, engrais et
herbicides.
Les risques varient en fonction de la fréquence à
laquelle vous utilisez loutil. Pour réduire les risques liés
à lexposition à ces produits chimiques : travaillez dans
une pièce bien ventilée et portez des dispositifs de
sécurité homologués, tels que des masques
antipoussières spécialement conçus pour filtrer les
particules microscopiques. USD301-1
Symboles
Les symboles utilisés pour l'outil sont indiqués
ci-dessous. volts
courant continu
vitesse à vide
tours ou alternances par minute
ENC007-7
CONSIGNES DE SÉCURITÉ
IMPORTANTES
POUR LA BATTERIE
1. Avant d'utiliser la batterie, lisez toutes les
instructions et précautions relatives (1) au
chargeur de batterie, (2) à la batterie, et (3) à
l'outil utilisant la batterie.
2. Ne démontez pas la batterie.
3. Cessez immédiatement l'utilisation si le temps
de fonctionnement devient excessivement
court. Il y a risque de surchauffe, de brûlures,
voire d'explosion.
4. Si l'électrolyte pénètre dans vos yeux,
rincez-les à l'eau claire et consultez
immédiatement un médecin. Il y a risque de
perte de la vue.
5. Ne court-circuitez pas la batterie :
(1) Ne touchez les bornes avec aucun
matériau conducteur.
(2) Évitez de ranger la batterie dans un
conteneur avec d'autres objets
métalliques, par exemple des clous, des
pièces de monnaie, etc.
(3) Évitez d'exposer la batterie à l'eau ou à la
pluie.
Un court-circuit de la batterie pourrait
provoquer un fort courant, une surchauffe,
parfois des brûlures et même une panne.
6. Ne rangez pas l'outil ou la batterie dans des
endroits où la température risque d'atteindre
ou de dépasser 50 C (122 F).
7. Ne jetez pas la batterie au feu même si elle est
sérieusement endommagée ou complètement
épuisée. La batterie peut exploser au contact
du feu.
8. Prenez garde d'échapper ou de heurter la
batterie.
9. N'utilisez pas une batterie si elle est
endommagée.
CONSERVEZ CE MODE
D'EMPLOI.
Conseils pour obtenir la durée de service
maximale de la batterie
1. Rechargez la batterie avant qu'elle ne soit
complètement déchargée.
Arrêtez toujours l'outil et rechargez la batterie
quand vous remarquez que la puissance de
l'outil diminue.
2. Ne rechargez jamais une batterie
complètement chargée.
La surcharge réduit la durée de service de la
batterie.
3. Rechargez la batterie à une température
ambiante comprise entre 10 C et 40 C (50
F - 104 F). Si la batterie est chaude, laissez-la
refroidir avant de la recharger.
4. Rechargez la batterie tous les six mois si
lappareil nest pas utilisé pendant de longues
périodes.

17
DESCRIPTION DU
FONCTIONNEMENT
Installation ou retrait de la batterie
ATTENTION:
Mettez toujours lappareil hors tension avant
dinstaller ou de retirer la batterie.
Assurez-vous de verrouiller le couvercle de
batterie avant lutilisation. Sil nest pas verrouillé,
la boue, la saleté ou leau pourraient endommager
le produit ou la batterie.
32
1
012296
Pour installer la batterie ;
1. Tirez le levier de fermeture du couvercle de la
batterie vers vous et ouvrez le couvercle de la
batterie.
2. Insérez la batterie dans la direction indiquée sur le
schéma jusqu'à ce que vous entendiez un clic.
1
012297
3. Insérez la clé d'utilisation à l'endroit montré sur le
schéma jusqu'au bout.
4. Fermez le couvercle de la batterie et poussez
dessus jusqu'à ce qu'il se clipse au levier de
fermeture.
Pour retirer la batterie de la tondeuse :
1.
Tirez le levier de fermeture du couvercle de la batterie
vers vous et ouvrez le couvercle de la batterie.
2. Retirez la clé d'utilisation.
3. Retirez-la de l'outil tout en faisant glisser le
bouton situé sur le devant de la batterie.
4. Fermez le couvercle de la batterie.
Convertisseur de batterie (accessoire en
option)
BCV02 (accessoire en option)
AVERTISSEMENT:
Avant d'installer ou de retirer le convertisseur de
batterie BCV02, retirez la clé d'utilisation.
1
012383
Ouvrez le couvercle de la batterie et insérez le BCV02
jusqu'à entendre un clic dans le logement de la batterie
sur la tondeuse.
Fermez le couvercle de la batterie.
1
012384
Pour enlever le BCV02, pressez sur le crochet du
BCV02 et retirez-le à deux mains.
Activation du commutateur d'alimentation
AVERTISSEMENT:
Avant d'insérer la batterie dans l'outil, vérifiez
toujours que le levier de l'interrupteur se met
1. Convertisseur
de batterie
(BCV02)
1. Clé d'utilisation
1. Levier de fermeture du couvercle de la batterie
2. Batterie
3. Couvercle de batterie
1. Convertisseur de batterie (BCV02)

18
correctement en marche et revient à sa
position initiale lorsqu'il est relâché. Faire
fonctionner un outil avec un levier qui ne se
déclenche pas correctement peut résulter en une
perte de contrôle et en de graves blessures.
NOTE:
N'essayez pas de tondre trop d'herbe en même
temps, car le moteur pourrait ne pas démarrer pour
cause de bourrage. Dans ce cas, modifiez la
hauteur de coupe à un niveau plus haut pour
redémarrer.
La tondeuse ne démarre pas si vous n'avez pas
pressé l'interrupteur même si le levier de
l'interrupteur est enclenché.
Cette tondeuse est équipée d'un interrupteur de
verrouillage et d'un bouton pour le guidon. Si vous
remarquez quelque chose d'inhabituel avec ces boutons,
arrêtez immédiatement le fonctionnement et faites-les
vérifier à votre Makita Service Center agréé le plus
proche ou Factory Service Center.
1
012297
1. Insérez la clé d'utilisation dans l'interrupteur de
verrouillage.
1
2
012603
2. Appuyez sur l'interrupteur.
3. Tirez le levier de l'interrupteur vers vous tout en
appuyant sur l'interrupteur.
4. Relâchez l'interrupteur dès que le moteur se met
en marche. La tondeuse continuera de
fonctionner jusqu'à ce que vous relâchiez le levier
de l'interrupteur.
5. Relâchez le levier de linterrupteur pour arrêter le
moteur.
6. Lorsque vous n'utilisez pas la machine, retirez la
clé d'utilisation. Mettez la clé d'utilisation dans un
endroit sûr, hors d'atteinte des enfants.
Régler la hauteur de coupe
AVERTISSEMENT:
Ne mettez jamais votre main ou pied sous la
tondeuse lorsque vous réglez la hauteur de coupe.
Veillez toujours à ce que le levier soit bien dans la
rainure avant d'effectuer le réglage.
La hauteur de coupe peut être réglée entre 20 mm et 75
mm (0,8" - 3,0").
1. Retirez la clé d'utilisation.
1
012303
2. Tirez le levier de réglage de la hauteur de la
coupe vers vous et placez-le à la hauteur de
coupe souhaitée.
Veillez à ce que la saillie du levier de réglage soit
en place sur la tondeuse.
NOTE:
Les chiffres de la hauteur de coupe ne sont là qu'à
titre indicatif puisque l'état de la pelouse ou du sol
peuvent légèrement modifier la hauteur de coupe
fixée.
Testez la tonte de la pelouse dans un endroit
moins visible pour obtenir la hauteur souhaitée.
Système de protection de la batterie
Les batteries lithium-ion sont équipées d'un système de
protection. Ce système coupe automatiquement
lalimentation de loutil pour augmenter la durée de vie
de la batterie.
L'outil sarrête automatiquement pendant l'utilisation
lorsque l'outil et/ou la batterie sont dans lune des
situations suivantes :
En surcharge :
L'outil est utilisé dune manière entraînant
une consommation anormale de courant.
Dans cette situation, relâchez la gâchette et
1. Levier de
réglage de la
hauteur de
coupe
1. Clé d'utilisation
1. Bouton de commutateur
2. Levier d'interrupteur

19
arrêtez l'activité qui entraîne une surcharge
de l'outil. Puis appuyez de nouveau sur la
gâchette pour redémarrer.
Si loutil ne démarre pas, la batterie est en
surchauffe. Dans cette situation, laissez
refroidir la batterie avant d'appuyer de
nouveau sur la gâchette.
Tension de la batterie faible :
La capacité restante de la batterie est trop
faible pour que l'outil puisse fonctionner.
Dans cette situation, retirez et rechargez la
batterie.
Indicateur de capacité résiduelle de batterie
(seulement pour les modèles équipés de la
batterie BL3622A)
La batterie BL3622A est munie dun indicateur de
capacité résiduelle.
011715
Appuyez sur le bouton CHECK pour connaître la
capacité résiduelle de la batterie. Les témoins
sallumeront alors pendant environ trois secondes.
011713
Si vous constatez que seul le dernier témoin (près
de la lettre « E ») clignote, ou encore si aucun des
témoins ne sallume, la capacité de la batterie est
épuisée et loutil ne peut fonctionner. Dans ce cas,
rechargez la batterie ou remplacez la batterie
épuisée par une autre chargée à pleine capacité.
Si deux témoins ou plus restent éteints même
après une recharge complète, la batterie a atteint
la fin de sa durée de vie.
Lorsque les deux premiers et deux derniers
témoins clignotent en salternant, il est possible
que la batterie présente un défaut de
fonctionnement. Communiquez avec le centre de
service Makita agréé de votre région.
NOTE:
La capacité relevée durant lutilisation ou
immédiatement après lutilisation de loutil peut
être inférieure à la capacité réelle.
Selon les conditions dutilisation et la température
ambiante, il est possible que la capacité relevée
soit légèrement différente par rapport à la capacité
réelle.
ASSEMBLAGE
AVERTISSEMENT:
Assurez-vous toujours que la clé d'utilisation
et la batterie sont retirées avant d'effectuer une
quelconque opération sur la tondeuse. Si vous
ne respectez pas cette précaution, vous risquez de
graves blessures dues à un démarrage accidentel.
Ne démarrez jamais loutil sil nest pas
complètement assemblé. Dans le cas contraire,
vous risquez de vous blesser à cause dun
démarrage accidentel.
Installation de la poignée
AVERTISSEMENT:
Lorsque vous installez les guidons, positionnez les
câbles de sorte qu'ils ne soient pas pris entre les
guidons.
1. Desserrez les vis de serrage (deux pcs).
1
2
3
012385
1. Témoins
2. Bouton CHECK
1. Guidon inférieur
2. Rainure sur le châssis
3. Vis de serrage

20
Dépliez le guidon inférieur des deux côtés et, ainsi
étendu, orientez-le vers l'arrière et placez-le dans
l'ouverture prévue sur le châssis.
2. Fixez le guidon inférieur à l'aide des vis de
serrage des deux côtés.
1
2
3
4
012386
1
2
3
4
5
012606
3.
Soulevez le guidon supérieur et alignez les trous
des vis à ceux du guidon inférieur et fixez-le ensuite
avec les vis et les écrous de serrage fournis.
NOTE:
Ce faisant, tenez fermement le guidon supérieur
pour éviter quil ne glisse de votre main.
1
2
012421
1
2
012605
NOTE:
Installez le guidon supérieur afin que la direction
de ce guidon et le câble soient positionnés comme
indiqué sur le schéma.
1
23
4
012389
NOTE:
Le guidon supérieur a deux trous de chaque côté.
Pour régler la hauteur du guidon, sélectionnez un
trou de fixation pour les vis et les écrous de
serrage.
Pose et dépose de la lame
AVERTISSEMENT:
Enlevez toujours la clé d'utilisation et la batterie
lorsque vous retirez ou installez la lame. Si vous ne
respectez pas cette précaution, vous risquez de
graves blessures.
La lame continue de tourner pendant quelques
secondes après avoir relâché l'interrupteur. Veillez
à ce que la lame soit complètement immobilisée.
Portez toujours des gants lorsque vous manipulez
la lame.
2
1
3
012304
1. Retournez la tondeuse sur le côté afin que le
levier de réglage de la hauteur de la coupe soit
placé sur le côté supérieur.
2. Pour bloquer la lame, insérez un tournevis
disponible ou un provenant du marché dans un
trou de la tondeuse.
1. Vis
2. Écrou de
serrage
3. Guidon
supérieur
4. Guidon inférieur
1. Clips attache
2. Cordon
1. Clips attache
2. Cordon
1. Écrou de
serrage
2. Guidon inférieur
3. Guidon
supérieur
4. Trous pour vis
5. Vis
1. Guidon
supérieur
2. Guidon inférieur
3. Trous pour vis
4. Trous pour vis
1. Tournevis
2. Fer
3. Boulon
Other manuals for HML01
1
Table of contents
Languages:
Other Makita Lawn Mower manuals

Makita
Makita PLM4600 User manual

Makita
Makita DLM465 User manual

Makita
Makita DLM382 User manual

Makita
Makita PLM4615NP Operation instructions

Makita
Makita LM003J User manual

Makita
Makita DLM460 User manual

Makita
Makita DCU180 User manual

Makita
Makita DLM533 User manual

Makita
Makita DLM382 User manual

Makita
Makita DLM431 User manual

Makita
Makita LM004J User manual

Makita
Makita PLM5600N User manual

Makita
Makita DLM382 User manual

Makita
Makita LM001G User manual

Makita
Makita DLM330 User manual

Makita
Makita LM001G User manual

Makita
Makita DLM480 User manual

Makita
Makita DLM463 User manual

Makita
Makita DLM462Z User manual

Makita
Makita DLM382 User manual