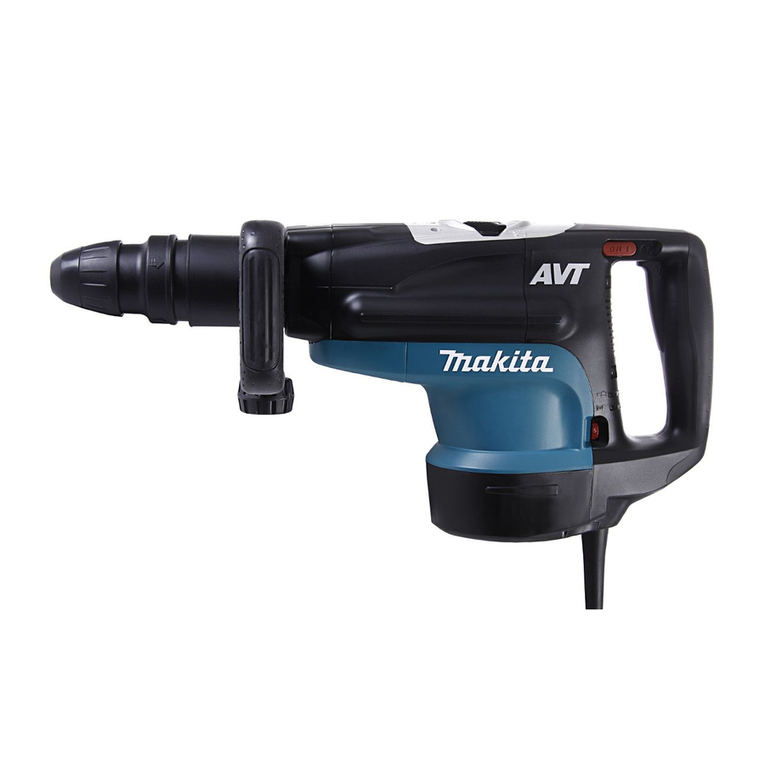
Makita HR4001C Manual

Model No.
Description
NEW TOOL
CONCEPT AND MAIN APPLICATIONS
P 1 / 20
Specification
Standard equipment
Optional accessories
Continuous Rating (W)
Voltage (V)
No load speed: min-1=rpm.
Blow per min: min-1=bpm.
Cycle (Hz) Input Output
500
Max. Output (W)
110
120
220
230
240
12
11
6.2
6.2
6.2
50 / 60
50 / 60
50 / 60
50 / 60
50 / 60
1,100
1,100
1,100
1,100
1,100
1,500
1,500
1,200
1,200
1,500
Current (A)
Model No.
Side handle assembly (D-shaped) .......... 1 pc
Side handle (Bar-shaped) ....................... 1 pc
Depth gauge ........................................... 1 pc
Assorted T.C.T. hammer bits
Assorted Bull points
Assorted Core bits
Assorted Cold chisels
Assorted Scaling chisels
Chisel for tile removal
Grooving chisel
Clay spade
Bushing tool
Rammer
Shank for rammer and bushing tool
Chemical anchor adaptor
Bit Grease
Grease vessel
Side handle assembly (D-shaped)
Plastic Carrying Case
Blow Out Bulb
Safety Goggle
Hammer Service Kit
Bit grease ................................. 1 pc
Plastic carrying ........................ 1 pc
Cleaning cloth .......................... 1 pc
HR4001C HR4010C
6.3 (13.9)5.9 (13.0)
Europe: 4.0 (13.1); Brazil, Chile: 2.0 (6.6); Other countries: 5.0 (16.4)
HR4011C
Dimensions: mm (")
Width (W)
Height (H)
Length (L)
Model No. HR4001C HR4010C HR4011C
468(18-1/2)
116(4-9/16)106(4-3/16)
261(10-1/4)
Note: The standard equipment for the tool shown above may differ by country.
HR4001C, HR4010C, HR4011C
Rotary Hammers 40mm (1-9/16")
Bit type
Capacity: mm (")
Torque limiter
Double insulation
Net weight: kg (lbs)
Power supply cord: m (ft)
Electronic
features
Variable speed control by dial
Constant speed control
Soft start
Yes
Yes
Yes
Yes
Yes
Concrete: 40 (1-9/16)
105 (4-1/8)
235 - 480
1,350 - 2,750
Max Core bit diameter
Max bit diameter
SDS Max-drive, Shank diameter: 18mm (11/16")
These three rotary hammers have been developed to surpass
competitions in vibration level, operation efficiency and
cost-effectiveness.
Listed below are their main features.
Active dynamic vibration absorber
Model No.
Vibration absorbing handle
Selectable two on-off switches
HR4001C
Yes Yes
Yes
YesYes
No
No
HR4010C HR4011C
No
No
HR4001C
L
H
W
L
H
W
L
H
W
HR4010C
HR4011C
500
550
550
550
TECHNICAL INFORMATION

P 2 / 20
Repair
[1] NECESSARY REPAIRING TOOLS
CAUTION: Disconnect the machine from the power source for safety before repair/maintenance!
1R003 Retaining Ring S Pliers ST-2N
1R022 Bearing Plate
Removing/ installing Ring springs
Removing/ installing Ring springs (for modular use with No.1R003)
Removing Helical gear 38
Removing Armature1R045 Gear extractor, large
1R167 T-Type Hex Wrench 3-70 Removing Barrel cover complete
1R346 Center Attachment for 1R045 Removing Armature (for modular use with 1R045)
1R212 Tip for Retaining Ring Pliers
1R230 1/4" Hex Shank Bit for M6
1R214 Taper Sleeve
Removing/ installing Barrel complete
1R213 Cylinder Extractor Removing Cylinder
Replacing Ball bearings
Installing Fluoride ring
1R269 Bearing Extractor
1R350 Ring 60 Removing Cylinder
Code No. Description Use for
22 Tool holder
About 5g on the inside surface that contacts Impact bolt
Outside surface that contacts Spacer and Chuck ring
25 Fluoride ring 25 on impact bolt
Two elliptic holes that contact Tool retainers
24 O ring 20 on impact bolt
26 X ring 18 on impact bolt Whole portion
Item No. Grease typeDescription Portion to lubricate
32 O ring 22 on striker
37 O ring 21 on piston
38 O ring 22 on piston
About 5g on the inside surface that contacts Piston and
Impact bolt
46 Cylinder 28.5
Fig. 1A
Impact bolt
Tool retainer
Chuck ring
Spacer
Tool retainer
Striker Piston
[2] LUBRICATION
Apply the following grease to the portions designated with the triangle to protect parts and product from unusual abrasion.
:Makita grease R.No.00
R.No.00
R.No.00
:Makita grease N.No.2 Note:
For long tool life, at the same time when
Carbon brushes are replaced,
it is recommended;
1) to replace the following parts:
N.No.2
(See "[4] Maintenance Program".)
2) to lubricate the following parts with
Makita grease R.No.00:

P 3 / 20
Repair
[2] LUBRICATION
Apply Makita grease R. No.00 to the portions designated with black triangle to protect parts and product
from unusual abrasion.
80 Crank housing complete
83 O ring 18
About 20g into the Crank room
92 Gear housing complete About 22g into the Gear room
86 Crank shaft
54 Counter weight (2 pcs)
Active dynamic vibration absorber of HR4010C and HR4011C
Crank pin portion
90 Flat washer 10
Whole portion
89 Helical gear 38 Teeth portion
Surface that contacts Helical gear 38
Surface that contacts Torque limiter assembly99 Driving flange
Item No. Description Portion to lubricate
Teeth portion of Helical gear 61
Teeth portion of Straight bevel gear 7
--- Torque limiter assembly
Fig. 1B
Link lever
Pan head screw M4x10
Crank cap
Crank cap cover
Control plate
Crank lever
Connecting rod
Apply adhesive to the
threaded portion when
tightening this screw.
Armature
Pipe 16
Pipe holder
Pipe holder
Compression
spring 11
Compression
spring 11
Active dynamic vibration absorber
of HR4010C and HR4011C
Surface that contacts Pipe 16
Note:
For long tool life, at the same time
when Carbon brushes are replaced,
it is recommended to lubricate
Crank housing complete with
Makita grease R.No.00.
(See "[4] Maintenance Program".)
Torque limiter
assembly

Tool holder cap
P 4 / 20
Repair
[3] DISASSEMBLY/ASSEMBLY
[3] -1. Chuck Section
Fig. 2
Fig. 4 Fig. 5
DISASSEMBLING
ASSEMBLING
Ring spring 25
Ring spring 25
Flat washer 28
Flat washer 28
1) Remove Tool holder cap with a slotted screwdriver and by hand. Using Retaining ring S pliers ST-2N (No.1R003),
put Ring spring 25 out of the ring installation groove on Tool holder. Then using No.1R003 and Tip for retaining ring
pliers (No.1R212), remove Ring spring 25 from Tool holder. Now Flat washer 28, Chuck cover and Spacer can be
removed. (Fig. 2)
2) Remove the other Ring spring 25 using No.1R003 and No.1R212. Chuck ring and Release cover can now be
removed. Now you will see a pair of Tool retainers assembled on Tool retainer. (Fig. 3)
4) Remove the two Tool retainers while pushing down Spring guide towards the Barrel cover side. (Fig. 4)
5) Remove Spring guide and Compression spring 48, and unscrew Hex socket head bolt M4x16 using No.1R167 or
hex wrench 3. Barrel cover complete can be now removed. (Fig. 5)
Chuck cover
Spacer
Release cover
Fig. 3
Ring spring 25
Chuck ring
Release cover
Tool retainer (2pcs)
Tool retainer
(2pcs)
Do the reverse of the the disassembling steps.
Compression
spring 48
Barrel cover complete
Hex socket head
bolt M4x16
Tool holder
Spring guide
Spring guide (2pcs)
Chuck ring

P 5 / 20
Repair
[3] DISASSEMBLY/ASSEMBLY
[3] -2. Blowing Mechanism (Impact bolt, Striker, etc.)
Fig. 7
1) In order to replace the inner parts of the blowing mechanism, first remove Crank housing cover after removing
the Chuck section, (Fig. 6)
2) Then remove the assembly of Barrel complete
and Tool holder (Fig. 7).
3) Remove Impact bolt from Tool holder by tapping
the edge of Tool holder with plastic hammer.
(Fig. 8)
Important:
If contaminated with dust, clean up the inside
of Tool holder.
4) O ring 20 is installed under Fluoride ring 25.
If Fluoride ring 25 is worn out, the orange color
of O ring 20 will be visible. (Fig. 9)
In this case, replace Fluoride ring 25 together
with O ring 20 and X ring 18.
Do not replace the Fluoride ring alone.
Remove Crank housing cover from
Crank housing complete while expanding
the rear end.
Using No.1R230 or the like, unscrew four
M6x30 Hex socket head bolts.
Now the assembly of Barrel and Tool holder
can be separated from Crank housing comp.
Hex socket head
bolt M6x30 (4pcs)
Tool holder
Barrel complete
Fig. 6
Crank housing cover
Release the interlock between Crank housing cover
and Crank cap cover.
Crank cap cover
DISASSEMBLING
Crank housing
complete
Fig. 9
O ring 20
(color: orange)
Fluoride ring 25, worn out
X ring 18
Impact bolt
Fig. 8
Impact bolt
Tool holder
Barrel complete

P 6 /20
Repair
[3] DISASSEMBLY/ASSEMBLY
5) Separate Tool holder from Barrel complete.
Then remove Urethane ring 45 and
Flat washer 45 from Tool holder. (Fig. 10)
6) From Crank housing complete, remove Ring 17,
Rubber ring 17, Slide sleeve, Ring 33,
Compression spring 37 and Striker.
Remove O ring 22 from Striker. (Fig. 11)
Fig. 11
ASSEMBLING
Do the reverse of the disassembling steps. Be sure to remember the following notes.
Note 1) When assembling Fluoride ring to Impact bolt;
After installing Fluoride ring 25 on the groove of Impact bolt, the Ring is stretched and its edges are protruding from
the groove. In order to correct the deformation, insert the Ring into the repairing tool, Taper Sleeve (Tool No.1R214),
and leave it in the tool about one minute. (Fig. 12)
Note 3) Be sure that the following parts are not reversible when assembled;
Impact bolt (See Fig. 13.)
Ring 17, Rubber ring 17, Slide sleeve, Ring 33, Striker
(See Fig. 11.)
Note 2) The installations are not exchangeable between Urethane washer 45 and Flat washer 45 when they are
assembled to Tool holder. (See Fig. 10.)
Taper Sleeve
(No.1R214)
Correction
Insert Impact bolt from
the HR4000C side of
the Taper Sleeve.
Impact Bolt
Fig. 12
Fig. 10
Tool holder
Urethane ring 45 Flat washer 45
Barrel complete
Crank housing complete
Compression
spring 37
StrikerRubber ring 17Ring 17 Ring 33
O Ring 22
Slide sleeve
Note:
When inserting Impact bolt into Tool holder, be careful not to push
the rings out of the groove on Impact bolt.
Before Correction :
Rings' edges are protruding from
the top edge of the groove on
Impact bolt.
groove on Impact bolt
Fluoride Ring 25
X ring 18
O ring 20
After Correction :
Rings' edges are positioned
under the top edge of the
groove on Impact bolt.
corrected
chamfered end flanged end flanged endsteel plate
O Ring
installation end
Impact BoltTool holder
[Crank housing side]
Fig. 13

P 7 /20
Repair
DISASSEMBLING
[3] DISASSEMBLY/ASSEMBLY
[3] -3. Crank Section
HR4001C/HR4010C HR4011C
1) After removing the parts of the blowing mechanism (Refer to [3]-2.), remove Handle, Change lever and
Crank cap cover by unscrewing Tapping screws as illustrated in Fig. 14.
2) See Fig. 15.
By unscrewing six M4x18 pan head screws;
HR4001C/HR4010C:
Remove the assembly of Crank cap and
Control plate.
HR4011C: Remove Crank cap.
Seal ring between Crank cap and Crank
housing complete can be removed in this step.
Link plate
Link plate guide
Link plate
Link plate guide
[Tool holder side]
Fig. 16
Crank cap cover
Change lever
Tapping screw 4x14
Tapping screw
4x14 (2pcs)
Tapping screw
4x14 (2pcs)
Handle
Control plate
Fig. 14
Compression spring 11
Crank cap cover
Change lever
Tapping screw 4x14
Tapping screw
5x25 (4pcs)
Tapping screw
5x25 (4pcs)
Handle
(The image is HR4010C.)
3) Remove Link plate together with link plate guide while pushing toward the Tool holder side. (Fig. 16)
Fig.15
Crank cap Control plate
Pan head screw M4x18
(6pcs)
Crank cap
Pan head screw M4x18
(6pcs)
HR4001C/HR4010C HR4011C

P 8 /20
Repair
[3] DISASSEMBLY/ASSEMBLY
HR4010C/HR4011C
Straight bevel gear 25
Lock sleeve
Fig. 17
4) Remove Lock sleeve from Crank housing complete as illustrated in Fig. 17. Then remove Spiral bevel gear 25.
5) In order to separate Cylinder from Crank housing complete, first remove Ring spring 31 from the end of Cylinder 28.5
with a small screwdriver. Then remove Ring 33 from Cylinder 28.5. (Fig. 18)
HR4010C/ HR4011C: Two Seal plates, Air pipe and two Air pipe seals can be replaced in this step. (Fig. 19)
6) Set Cylinder Extractor (No.1R213 ) and two diameter 60 Rings (No.1R350) on Cylinder 28.5 and Crank housing
complete as illustrated in Fig. 20. And pull off the Cylinder by turning the handle of the Extractor clockwise.
Use two Phillips screwdrivers as illustrated in Fig. 21 if No.1R213 and No.1R350 are not available.
Fig. 20 Fig. 21
No.1R213
No.1R350
Cylinder 28.5
Crank housing comp.
Cylinder 28.5
Phillips Screwdriver
Crank housing
comp.
Put pieces of wood or the like
to protect the machined surface
of Crank housing complete from
damages and scratches.
Push the rear end of the rod of Lock sleeve
from the crank room side.
Fig. 18
Ring 33 Ring spring 31
Fig. 19
Seal plate
Air pipe
Insert two Phillips screwdrivers into the side holes
of Cylinder 28.5, and lever up the Cylinder.
Air pipe seal
Turn the handle
clockwise to remove
Cylinder 28.5.
Grasp Cylinder 28.5 by
inserting the pins of
No.1R213 into the side
holes of the Cylinder.

P 9 /20
Repair
[3] DISASSEMBLY/ASSEMBLY
Fig. 22
7) Place Piston at the rear dead point by turning Crank shaft. Then remove Piston and Rod from Crank shaft.
O ring 21 and O ring 22 can now be replaced. (Fig. 22)
Piston Connecting rod
Pin 7
O ring 21
O ring 22
Place Piston at the rear dead point
by turning Crank shaft.
Piston Connecting rod
[3] -4. Motor and Gear Section
DISASSEMBLING
Fig. 24
Tapping screw
4x18
Rear cover
Cord clamp base
Tapping screw
4x14
Connector of
lead unit
Fig. 25
Controller
Spiral spring
of brush holder unit
Carbon brush
ASSEMBLING
Do the reverse of the disassembling steps.
Note:
1) When assembling Cylinder 28.5 to Crank housing complete;
Do not forget to install two diameter 30 O rings and Ring spring 32
as illustrated in Fig. 23.
Use arbor press to insert the Cylinder into Crank housing complete
if No.1R213 and No.1R350 are not available.
2) Do not forget to put Ring 33 on Cylinder 28.5 when locking the
Cylinder to Crank housing complete with Ring spring 31. (Fig. 18)
O ring 30
Ring spring 32
Fig. 23
Cylinder 28.5
1) From Crank housing complete, remove Crank housing cover (Fig. 6) and Handle (Fig. 14).
It is not necessary to remove Change lever and Crank cap cover in this step.
2) After removing Rear cover, disconnect the connector of Lead unit from Controller. Then remove each two 4x14
Tapping screws that fasten Controller and Cord clamp base to Motor housing. Cord clamp base can now be removed.
(Fig. 24)
3) Remove Controller from Motor housing by levering up with screwdriver. Then move the spiral spring of Brush holder
unit off Carbon brush, and pull out Carbon brush to disconnect from Armature's commutator. (Fig. 25)

P 10 /20
Repair
[3] DISASSEMBLY/ASSEMBLY
Fig. 26
Fig. 27
Fig. 28
4) Remove Hex nut M6 by turning counterclockwise with impact driver while fixing Fan securely with gloved hand,
then remove Flat washer 6 from Armature shaft. (Fig. 26)
5) In case of HR4010C/HR4011C;
Referring to [3] -5. Active Dynamic Vibration Absorber (page), remove two Active dynamic vibration absorbers.
Hex nut M6
Flat washer 6
Hex nut M6
Flat washer 6
Fan
Fan
Baffle plate
Socket bit, hex 10mm
Impact driver
Motor housing
complete
[Motor housing complete
viewed from the Rear cover side]
6) Separate Motor housing complete by removing four 5x25 Tapping screws, then tapping the commutator end of
Armature shaft with plastic hammer. Then separate Gear housing complete from Crank housing complete.
At this time, be careful not to lose Flat washer 10 of Crank shaft because it can remain in Gear housing complete.
(Fig. 27)
7) Remove Armature from Gear housing cover
with Gear extractor, large (No.1R045) and
Center attachment (No.1R346). (Fig. 28)
Tapping screw
5x25 (4pcs)
No.1R045
Armature
Shoulder sleeve 6
No.1R346
Motor housing
complete
Crank housing
complete
Gear housing
complete
Flat washer 10
Gear housing
complete
Flat washer 12

P 11 /20
Repair
[3] DISASSEMBLY/ASSEMBLY
Fig. 29
8) Remove Torque limiter assembly from Gear housing complete by tapping the edge of Gear housing complete with
plastic hammer. If Torque limiter assembly remains on Crank housing complete, remove by tapping the edge of
Crank housing complete. (Fig. 29)
Gear housing complete
Torque limiter assembly
Change plate
Crank housing complete,
viewed from the Gear
housing side
Crank housing complete,
viewed from the Gear housing side
Torque limiter assembly
Change plate
9) After removing Change plate from Torque limiter assembly, remove Ball bearing 6904LLU and Ball bearing 608DDW
from Torque limiter assembly using Bearing extractor (No.1R269). (Fig. 30)
10) Then remove Cup washer, Conical compression spring 19-27 and Driving flange from Torque limiter. (Fig. 31)
Important: Never try to disassemble Torque limiter because it cannot be reassembled once disassembled.
Fig. 31
Torque limiter
(Do not disassemble.)
Cup washer 8
Driving flange
Conical compression
spring 19-27
Crank housing complete
Crank pin
at the rear dead point
11) When Crank shaft still remains in Crank housing complete, remove by first rotating Crank shaft till the crank pin is
placed at the rear dead point, then tapping Crank housing complete with plastic hammer. (Fig. 32)
12) The assembly of Crank shaft and Helical gear 38 can be disassembled using arbor press as illustrated in Fig. 33.
Assembly of
Crank shaft and
Helical gear 38
Fig. 30
Fig. 32
Fig. 33
Ball bearing 6904LLU Ball bearing 608DDW
Change plate
No.1R269
Crank shaft
Crank shaft Crank shaft
Retaining
ring S-12
Retaining
ring S-12
Ball bearing
6904LLU
Ball bearing
6904LLU
Helical gear 38
Bearing extractor
(No.1R269 )
Crank shaft
Bearing plate
(No.1R022)

P 12 /20
Repair
[3] DISASSEMBLY/ASSEMBLY
Fig. 34 Fig. 35
Fig. 36 Fig. 37
Fig. 37
Do the reverse of the disassembling steps. Remember the following notes.
Note 1. When Assembling Torque Limiter Assembly
Note 2. When Installing Torque Limiter Assembly on Gear Housing Complete
Note. 3. Do not forget to put Sponge sheet between
Controller and Motor housing complete. (Fig. 38)
ASSEMBLING
Cup washer 8 Ball bearing
608DDW
Driving flange
Torque limiter
Conical compression
spring 19-27
Groove on
Straight bevel gear 7
notch
largest gear of
Torque limiter
Change plate
Driving flange
1) Conical compression spring 19-27 and Driving flange are not reversible when assembled to Torque limiter.
As illustrated in Fig. 34, be sure to assemble so that;
Driving flange: the flanged end faces the Conical compression spring side.
Conical compression spring: the smaller diameter end faces the Driving flange side.
Cup washer 8: the side with a raised center faces the Ball bearing 608DDW side.
2) When assembling Cup washer 8 to Straight bevel gear 7 of Torque limiter;
first insert Cup washer 8 through Straight bevel gear 7 with the notch in the Cup washer aligned with the groove
on the Straight bevel gear. Then while pressing down Cup washer 8, turn the Cup washer 90 degrees.
Now Cup washer 8 is pre-fastened to Straight bevel gear 8, then securely fastened by press-fitting Ball bearing
608DDW with arbor press. (Fig. 35)
Cup washer 8
Ball bearing 608DDW
90 degrees
1) Set Change plate between Driving flange and the largest gear of Torque limiter. (Fig. 36)
2) Do not forget to insert Compression springs through the pins on Gear housing complete. (Fig. 37)
3) The Change plate installation side should be placed on the Compression spring installation side
of Gear housing complete. (Fig. 37)
Gear housing complete
Compression
spring 5
Change plate
Controller
Motor housing complete
Sponge sheet

P 13 /20
Repair
[3] DISASSEMBLY/ASSEMBLY
[3] -5. Active Dynamic Vibration Absorber of HR4010C and HR4011C
DISASSEMBLING
1) Remove Crank housing cover and Handle. (Fig. 38)
2) See Fig. 39.
Through the hole on the Absorber holder of Crank
housing complete, insert Phillips screwdriver into the hole
on one end of the Active dynamic vibration absorber,
and push Spring guide (inner part of the Absorber) with
the screwdriver.
The Spring guide will tilt to be locked inside the Absorber,
and this end of the Absorber is now released from Crank
housing complete.
Then do the same on the other end of the Absorber.
3) Now the Absorber can be levered off from Crank housing
complete using a slotted screwdriver (Fig. 40)
4) As illustrated in Fig. 41, Pipe holders can now be separated by turning
Pipe holders while pushing strong toward each other.
5) Now Active dynamic vibration absorber can be disassembled as illustrated
in Fig. 42.
An Active dynamic vibration absorber uses two each except for the
following parts: Pipe 16/ 1pc, Counter weight/ 1pc, O ring 8/ 4pcs.
Fig. 42
Pipe holder
O ring 8 O ring 18Rubber pin 6
Compression spring 11
Spring guide
Pipe 16 Counter weight
ASSEMBLING
Do the reverse of the disassembling steps.
Note:
Do not forget to lock the Absorber in the Absorber holder of crank housing complete. (Fig. 39)
Fig. 38
Active dynamic
vibration absorber
Handle
Crank housing cover
Fig. 39 Fig. 40
Absorber
holder
Compression spring 11
Spring guide
Absorber holder of
Crank housing complete
Phillips screwdriver Slotted screwdriver
Pipe holder
Fig. 41
Pipe holder

P 14 /20
Repair
[3] DISASSEMBLY/ASSEMBLY
[3] -6. Handle Section
HR4001C and HR4010C
(models with two selectable on-off switches)
DISASSEMBLING
1) See Fig. 43. After removing one 5x25 Tapping screw, Handle cover can be separated from Handle by levering off
with a slotted screwdriver inserted between Handle and Handle cover- the portion designated by the circle in Fig. 43.
main switch can now be replaced.
2) Separate Handle from Motor housing by removing four 5x25 Tapping screws.
By unscrewing two 4x14 Tapping screws, Controller and Power supply cord can now be replaced. (Fig. 44)
3) See Fig. 45.
Slide lever complete, Switch box and Slide switch can be
removed from Handle by unscrewing one 4x14 Tapping screw.
Note: Be careful not to lose Leaf spring.
4) Remove Change lever and Crank cap cover from Crank
housing. Control plate can now be removed. (Fig. 46)
Controller
Cord clamp base
Power supply cord
Tapping screw 4x14 (2pcs)
Handle
Fig. 44
Tapping screw
5x25 (4pcs)
Fig. 46
Crank cap cover
Change lever
Tapping screw 4x14
Tapping screw 4x14
Control plate
Crank lever
Tapping screw 5x25
Handle cover
Fig. 43
Slotted screwdriver
Handle
Handle
Fig. 45
Tapping screw
4x14
Slide switch Switch box
Leaf spring
Slide lever complete

P 15 /20
Repair
[3] DISASSEMBLY/ASSEMBLY
[3] -6. Handle Section
HR4001C and HR4010C
(models with two selectable on-off switches)
HR4011C
(model without two selectable on-off switches)
Crank cap cover
Control plate
Handle cover
1) See Fig. 48. After removing one 4x18 Tapping screw, Handle cover can be separated from Handle by levering off
with a slotted screwdriver inserted between Handle and Handle cover- the portion designated by the circle in Fig. 48.
main switch can now be replaced.
2) Separate the assembly of Handle and Handle base from Motor housing by removing four 5x25 Tapping screws.
By unscrewing two 4x14 Tapping screws, Controller and Power supply cord can now be replaced. (Fig. 49)
Slotted screwdriver
Fig. 48
ASSEMBLING
ASSEMBLING
Fig. 47
Control plate
Crank lever
Embossed part number
Do the reverse of the disassembling steps.
Note 1: Control plate is not reversible when fit on Crank lever. Be sure to install so that the side having embossed
part number is placed on the Crank cap cover side. (Fig. 47)
Note 2: Do not forget to mount Leaf spring between Slide lever complete and Slide switch when assembling them
to Handle. (Fig. 45)
Handle base
Fig. 49
Tapping screw 4x18
Do the reverse of the disassembling steps.
DISASSEMBLING
Handle base
Handle
Controller
Cord clamp base
Power supply cord
Tapping screw 4x14 (2pcs)
Handle
Tapping screw
5x25 (4pcs)

P 16 /20
Repair
[3] DISASSEMBLY/ASSEMBLY
[3] -6. Brush Holder Unit
[3] -7. Field
Fig. 51
Fig. 52
DISASSEMBLING
1) Referring to 1) to 5) of [3] -4, disassemble the Motor section.
Note: Before proceeding to the next step, be sure to disconnect Controller
from Brush holder unit. (Fig. 27)
2) Brush holder unit can now be separated from Motor housing by removing
four 4x18 tapping screws, (Fig. 50)
Fig. 50
Tapping screw
4x18 (4pcs)
Brush holder unit
Guiding line on the inside
surface of Motor housing
Brush holder unit
[Handle side]
Connector to Controller
Base portion of
Brush holder unit
ASSEMBLING
Terminals
Field cannot be installed in place on Motor if Brush holder unit is already
assembled in place.
When assembling Field to Motor housing, therefore, make sure that
Brush holder unit is not installed on Armature.
Following the steps described below, assemble Brush holder unit to Motor
housing (Fig. 51):
1) Place Brush holder unit so that the connector to Controller on the unit
faces toward the Motor housing side and toward the Handle side.
2) Align the top surface line of the base portion of Brush holder unit with
the guiding line on the inside surface of Motor housing.
3) Keeping the base portion of Brush holder unit parallel to the guiding line,
push straight into Motor housing.
4) Then fasten Brush holder unit to Motor housing with four 4x18 Tapping screws, and the terminals on Brush holder
unit is now connected with the receptacles on Field.
Note: Be careful not to tilt Brush holder unit in any direction when pushing into Motor housing.
Inserting tilted Brush holder unit into Motor housing will result in deformation of the receptacles on Field
and the terminals on Brush holder unit.
Receptacles

P 17/ 20
Repair
[4] Maintenance Program
When replacing carbon brush, it is recommended to replace the parts listed in the table below at the same time
for longer service life of the machine. (Fig. 53)
Fig. 53
Striker
Piston
Impact bolt
1
1 Tool holder cap
24 25 26
32
38
24
25
26
32
38
O ring 20
Apply Makita grease R No.00 after mounting to Impact bolt.
Apply Makita grease R No.00 after mounting to Striker.
Apply Makita grease R No.00 after mounting to Piston.
Fluoride ring 25
X ring 18
O ring 22
O ring 22
Item No. Description Note

Circuit diagram
P 18/ 20
HR4011C without Selectable Two On/Off Switches
Fig. 54
HR4001C and HR4010C with Selectable Two On/Off Switches
Brush holder unit
Power supply
cord
Field
Speed control dial
Brush holder unit
Power supply
cord
Field
Slide switch
for lock ON
Main Switch
Main Switch
Color index of lead wires' sheath
Black
White
Color index of lead wires' sheath
Black
White
Red
Fig. 55
Lead unit
Speed control dial
Lead unit

Wiring diagram
P 19/ 20
Lead Wires to Lock-On Slide Switch (HR4001C and HR4010C)
Main switch
Fix with the lead wire holders of Handle and Switch holder. (Fig. 56)
Fix with the lead wire holders on the inside surface of Handle. (Fig. 57)
Fig. 56
Fig. 57
Switch box
Handle viewed from
the Motor housing side Switch box viewed from
the Handle cover side
Lead wire (black)
to Controller
Lead wire (white)
from Main switch
to Controller
Lead wire (red)
to Main switch
Lock-on slide switch
Handle
Handle
[1] In Handle
Lead Wires from Main switch
Lead wire (white) to Controller
HR4011C:
Lead wire (black) to Controller
HR4001C and HR4010C:
Lead wire (red) to Lock-on slide switch
Lead wire holder of Switch holder
Lead wire holder of Handle
Fix with these
lead wire holders. Fix with this lead wire holder.

Wiring diagram
P 20/ 20
When assembling Handle to Motor housing, be careful not to pinch at the circled portion in Fig. 58.
Fig. 58
[2] In Motor Housing
Lead Wires of Power Supply Cord
Lead wires of
power supply cord
Motor housing
Controller Controller
Be careful not to pinch the lead wires of Power supply cord.
Other manuals for HR4001C
17
This manual suits for next models
2
Table of contents
Other Makita Rotary Hammer manuals

Makita
Makita HR3540C User manual

Makita
Makita HR1821 User manual

Makita
Makita HR5001C Quick start guide

Makita
Makita DHR171RMJ User manual

Makita
Makita HR006G User manual
Makita
Makita HR2450F User manual

Makita
Makita HR4001C User manual

Makita
Makita HR5000K User manual

Makita
Makita HR4003C User manual
Makita
Makita HR2451 User manual

Makita
Makita HR4001C User manual

Makita
Makita HR2010 Manual

Makita
Makita HR4501C User manual

Makita
Makita HR3000C User manual

Makita
Makita HR1830F User manual

Makita
Makita HR2430 User manual

Makita
Makita HR2410 User manual

Makita
Makita HR005GZ04 User manual

Makita
Makita HR5000 User manual

Makita
Makita HR2440 User manual