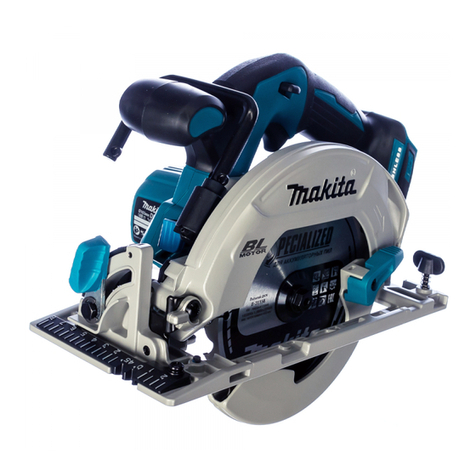
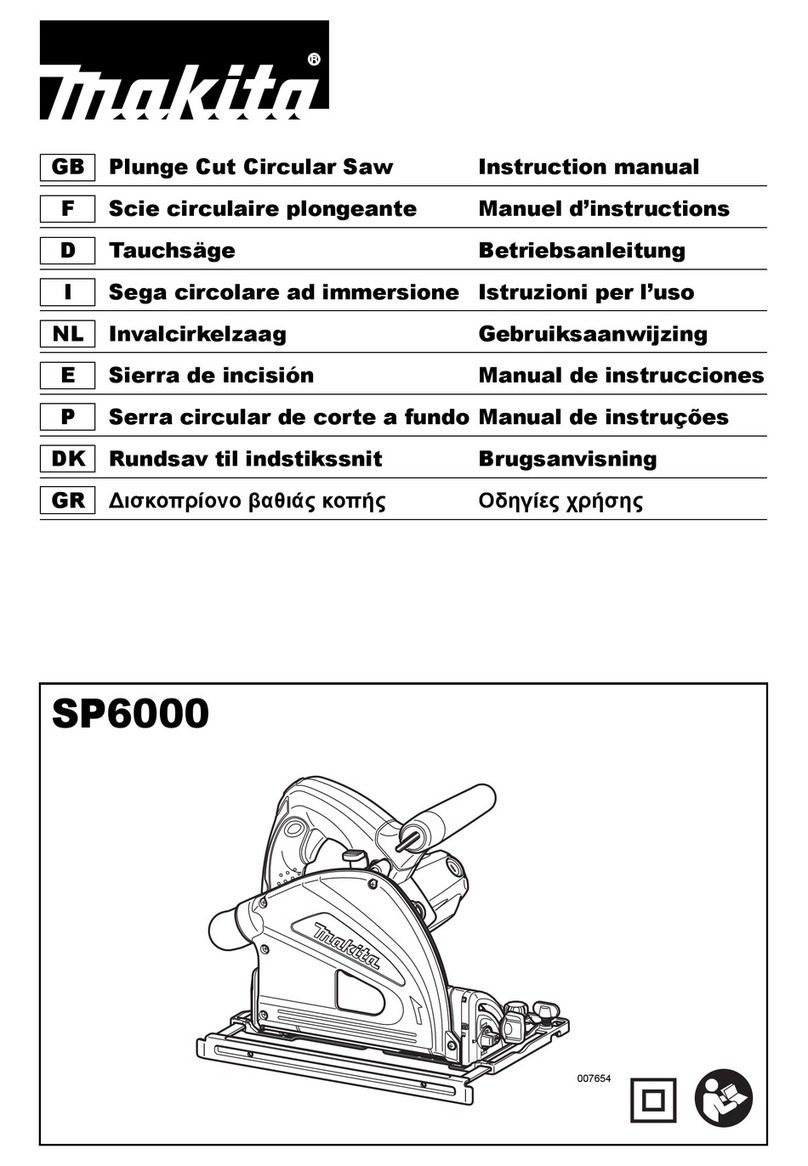
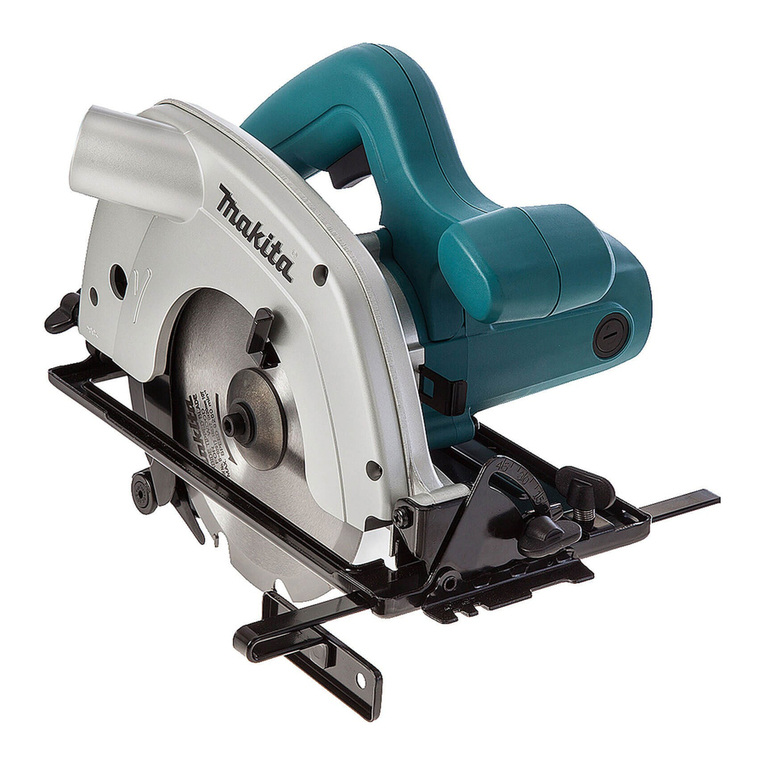
Makita 5606B User manual

5606B
5806B
EN Circular Saw INSTRUCTION MANUAL 4
ZHCN 电动圆锯 使用说明书 10
ID Gergaji Bundar PETUNJUK PENGGUNAAN 16
MS Gergaji Bulat MANUAL ARAHAN 23
VI Máy Cưa Đĩa Cầm Tay Hoạt
Động Bằng Động Cơ Điện TÀI LIỆU HƯỚNG DẪN 30
TH 36

1
12
BA
1
1
2
1
2
1
2
3
4
12
3
4
5
1
Fig.1
Fig.2
Fig.3
Fig.4
Fig.5
Fig.6
Fig.7
Fig.8
2

2
1
1
1
2
Fig.9
Fig.10
Fig.11
Fig.12
3

4ENGLISH
ENGLISH (Original instructions)
SPECIFICATIONS
Model 5606B 5806B
Blade diameter 160 mm 185 mm
Max. cutting depth at 90° 55 mm 66 mm
at 45° 36 mm 44 mm
No load speed (min-1)5,200 5,200
Overall length 268 mm 282 mm
Net weight 3.4 kg 3.4 kg
Safety class /II /II
• Due to our continuing program of research and development, the specications herein are subject to change with-
out notice.
• Specications may dier from country to country.
• Weight according to EPTA-Procedure 01/2003
Symbols
The following show the symbols used for the equip-
ment. Be sure that you understand their meaning before
use.
Read instruction manual.
DOUBLE INSULATION
Only for EU countries
Do not dispose of electric equipment
together with household waste material! In
observance of the European Directive, on
Waste Electric and Electronic Equipment
and its implementation in accordance with
national law, electric equipment that have
reached the end of their life must be col-
lected separately and returned to an envi-
ronmentally compatible recycling facility.
Intended use
The tool is intended for performing lengthways and
crossways straight cuts and mitre cuts with angles in
wood while in rm contact with the workpiece.
Power supply
The tool should be connected only to a power supply of
the same voltage as indicated on the nameplate, and
can only be operated on single-phase AC supply. They
are double-insulated and can, therefore, also be used
from sockets without earth wire.
General Power Tool Safety Warnings
WARNING Read all safety warnings and all
instructions. Failure to follow the warnings and instruc-
tions may result in electric shock, re and/or serious
injury.
Save all warnings and instruc-
tions for future reference.
The term “power tool” in the warnings refers to your
mains-operated (corded) power tool or battery-operated
(cordless) power tool.
Work area safety
1. Keep work area clean and well lit. Cluttered or
dark areas invite accidents.
2. Do not operate power tools in explosive atmo-
spheres, such as in the presence of ammable
liquids, gases or dust. Power tools create sparks
which may ignite the dust or fumes.
3. Keep children and bystanders away while
operating a power tool. Distractions can cause
you to lose control.
Electrical safety
4. Power tool plugs must match the outlet. Never
modify the plug in any way. Do not use any
adapter plugs with earthed (grounded) power
tools. Unmodied plugs and matching outlets will
reduce risk of electric shock.
5. Avoid body contact with earthed or grounded
surfaces such as pipes, radiators, ranges and
refrigerators. There is an increased risk of elec-
tric shock if your body is earthed or grounded.
6. Do not expose power tools to rain or wet con-
ditions. Water entering a power tool will increase
the risk of electric shock.
7. Do not abuse the cord. Never use the cord for
carrying, pulling or unplugging the power tool.
Keep cord away from heat, oil, sharp edges
or moving parts. Damaged or entangled cords
increase the risk of electric shock.
8. When operating a power tool outdoors, use an
extension cord suitable for outdoor use. Use of
a cord suitable for outdoor use reduces the risk of
electric shock.
9. If operating a power tool in a damp location
is unavoidable, use a residual current device
(RCD) protected supply. Use of an RCD reduces
the risk of electric shock.
10. Use of power supply via a RCD with a rated
residual current of 30 mA or less is always
recommended.

5ENGLISH
Personal safety
11. Stay alert, watch what you are doing and use
common sense when operating a power tool.
Do not use a power tool while you are tired or
under the inuence of drugs, alcohol or med-
ication. A moment of inattention while operating
power tools may result in serious personal injury.
12. Use personal protective equipment. Always
wear eye protection. Protective equipment such
as dust mask, non-skid safety shoes, hard hat, or
hearing protection used for appropriate conditions
will reduce personal injuries.
13. Prevent unintentional starting. Ensure the
switch is in the o-position before connecting
to power source and/or battery pack, picking
up or carrying the tool. Carrying power tools with
your nger on the switch or energising power tools
that have the switch on invites accidents.
14. Remove any adjusting key or wrench before
turning the power tool on. A wrench or a key left
attached to a rotating part of the power tool may
result in personal injury.
15. Do not overreach. Keep proper footing and
balance at all times. This enables better control
of the power tool in unexpected situations.
16. Dress properly. Do not wear loose clothing or
jewellery. Keep your hair, clothing, and gloves
away from moving parts. Loose clothes, jewel-
lery or long hair can be caught in moving parts.
17. If devices are provided for the connection of
dust extraction and collection facilities, ensure
these are connected and properly used. Use of
dust collection can reduce dust-related hazards.
Power tool use and care
18. Do not force the power tool. Use the correct
power tool for your application. The correct
power tool will do the job better and safer at the
rate for which it was designed.
19. Do not use the power tool if the switch does
not turn it on and o. Any power tool that cannot
be controlled with the switch is dangerous and
must be repaired.
20. Disconnect the plug from the power source
and/or the battery pack from the power tool
before making any adjustments, changing
accessories, or storing power tools. Such pre-
ventive safety measures reduce the risk of starting
the power tool accidentally.
21. Store idle power tools out of the reach of chil-
dren and do not allow persons unfamiliar with
the power tool or these instructions to operate
the power tool. Power tools are dangerous in the
hands of untrained users.
22. Maintain power tools. Check for misalignment
or binding of moving parts, breakage of parts
and any other condition that may aect the
power tool’s operation. If damaged, have the
power tool repaired before use. Many accidents
are caused by poorly maintained power tools.
23. Keep cutting tools sharp and clean. Properly
maintained cutting tools with sharp cutting edges
are less likely to bind and are easier to control.
24. Use the power tool, accessories and tool bits
etc. in accordance with these instructions, tak-
ing into account the working conditions and
the work to be performed. Use of the power tool
for operations dierent from those intended could
result in a hazardous situation.
Service
25. Have your power tool serviced by a qualied
repair person using only identical replacement
parts. This will ensure that the safety of the power
tool is maintained.
26. Follow instruction for lubricating and chang-
ing accessories.
27. Keep handles dry, clean and free from oil and
grease.
CIRCULAR SAW SAFETY
WARNINGS
Cutting procedures
1. DANGER: Keep hands away from cutting
area and the blade. Keep your second hand
on auxiliary handle, or motor housing. If both
hands are holding the saw, they cannot be cut by
the blade.
2. Do not reach underneath the workpiece. The
guard cannot protect you from the blade below the
workpiece.
3. Adjust the cutting depth to the thickness of
the workpiece. Less than a full tooth of the blade
teeth should be visible below the workpiece.
4. Never hold piece being cut in your hands or
across your leg. Secure the workpiece to a
stable platform. It is important to support the
work properly to minimize body exposure, blade
binding, or loss of control.
A typical illustration of proper hand support, workpiece
support, and supply cord routing (if applicable).
5. Hold the power tool by insulated gripping
surfaces only, when performing an operation
where the cutting tool may contact hidden
wiring or its own cord. Contact with a “live” wire
will also make exposed metal parts of the power
tool “live” and could give the operator an electric
shock.
6. When ripping, always use a rip fence or
straight edge guide. This improves the accuracy
of cut and reduces the chance of blade binding.
7. Always use blades with correct size and shape
(diamond versus round) of arbour holes.
Blades that do not match the mounting hardware
of the saw will run eccentrically, causing loss of
control.

6ENGLISH
8. Never use damaged or incorrect blade wash-
ers or bolt. The blade washers and bolt were
specially designed for your saw, for optimum
performance and safety of operation.
Kickback causes and related warnings
— kickback is a sudden reaction to a pinched, bound
or misaligned saw blade, causing an uncontrolled
saw to lift up and out of the workpiece toward the
operator;
— when the blade is pinched or bound tightly by the
kerf closing down, the blade stalls and the motor
reaction drives the unit rapidly back toward the
operator;
— if the blade becomes twisted or misaligned in the
cut, the teeth at the back edge of the blade can dig
into the top surface of the wood causing the blade
to climb out of the kerf and jump back toward the
operator.
Kickback is the result of saw misuse and/or incorrect
operating procedures or conditions and can be avoided
by taking proper precautions as given below.
9. Maintain a rm grip with both hands on the
saw and position your arms to resist kickback
forces. Position your body to either side of the
blade, but not in line with the blade. Kickback
could cause the saw to jump backwards, but
kickback forces can be controlled by the operator,
if proper precautions are taken.
10. When blade is binding, or when interrupting a
cut for any reason, release the trigger and hold
the saw motionless in the material until the
blade comes to a complete stop. Never attempt
to remove the saw from the work or pull the
saw backward while the blade is in motion
or kickback may occur. Investigate and take
corrective actions to eliminate the cause of blade
binding.
11. When restarting a saw in the workpiece, centre
the saw blade in the kerf and check that saw
teeth are not engaged into the material. If saw
blade is binding, it may walk up or kickback from
the workpiece as the saw is restarted.
12. Support large panels to minimise the risk of
blade pinching and kickback. Large panels tend
to sag under their own weight. Supports must be
placed under the panel on both sides, near the line
of cut and near the edge of the panel.
To avoid kickback, do support
board or panel near the cut.
Do not support board or
panel away from the cut.
13. Do not use dull or damaged blades.
Unsharpened or improperly set blades produce
narrow kerf causing excessive friction, blade
binding and kickback.
14. Blade depth and bevel adjusting locking levers
must be tight and secure before making cut. If
blade adjustment shifts while cutting, it may cause
binding and kickback.
15. Use extra caution when sawing into existing
walls or other blind areas. The protruding blade
may cut objects that can cause kickback.
16. ALWAYS hold the tool rmly with both hands.
NEVER place your hand or ngers behind the
saw. If kickback occurs, the saw could easily jump
backwards over your hand, leading to serious
personal injury.
17. Never force the saw. Push the saw forward at a
speed so that the blade cuts without slowing.
Forcing the saw can cause uneven cuts, loss of
accuracy, and possible kickback.
Lower guard function
18. Check lower guard for proper closing
before each use. Do not operate the saw if
lower guard does not move freely and close
instantly. Never clamp or tie the lower guard
into the open position. If saw is accidentally
dropped, lower guard may be bent. Raise the
lower guard with the retracting handle and make
sure it moves freely and does not touch the blade
or any other part, in all angles and depths of cut.
19. Check the operation of the lower guard spring.
If the guard and the spring are not operating
properly, they must be serviced before use.
Lower guard may operate sluggishly due to
damaged parts, gummy deposits, or a build-up of
debris.

7ENGLISH
20. Lower guard may be retracted manually only
for special cuts such as “plunge cuts” and
“compound cuts”. Raise lower guard by
retracting handle and as soon as blade enters
the material, the lower guard must be released.
For all other sawing, the lower guard should oper-
ate automatically.
21. Always observe that the lower guard is cov-
ering the blade before placing saw down on
bench or oor. An unprotected, coasting blade
will cause the saw to walk backwards, cutting
whatever is in its path. Be aware of the time it
takes for the blade to stop after switch is released.
22. To check lower guard, open lower guard by
hand, then release and watch guard closure.
Also check to see that retracting handle does
not touch tool housing. Leaving blade exposed
is VERY DANGEROUS and can lead to serious
personal injury.
Additional safety warnings
23. Use extra caution when cutting damp wood,
pressure treated lumber, or wood containing
knots. Maintain smooth advancement of tool with-
out decrease in blade speed to avoid overheating
the blade tips.
24. Do not attempt to remove cut material when
blade is moving. Wait until blade stops before
grasping cut material.Blades coast after turn o.
25. Avoid cutting nails. Inspect for and remove all
nails from lumber before cutting.
26. Place the wider portion of the saw base on that
part of the workpiece which is solidly sup-
ported, not on the section that will fall o when
the cut is made. As examples, Fig. 1 illustrates
the RIGHT way to cut o the end of a board,
and Fig. 2 the WRONG way. If the workpiece is
short or small, clamp it down. DO NOT TRY TO
HOLD SHORT PIECES BY HAND!
Fig. 1
Fig. 2
27. Before setting the tool down after completing
a cut, be sure that the lower guard has closed
and the blade has come to a complete stop.
28. Never attempt to saw with the circular saw
held upside down in a vise. This is extremely
dangerous and can lead to serious accidents.
29. Some material contains chemicals which may
be toxic. Take caution to prevent dust inhala-
tion and skin contact. Follow material supplier
safety data.
30. Do not stop the blades by lateral pressure on
the saw blade.
31. Always use blades recommended in this man-
ual. Do not use any abrasive wheels.
32. Keep blade sharp and clean. Gum and wood
pitch hardened on blades slows saw and
increases potential for kickback. Keep blade clean
by rst removing it from tool, then cleaning it with
gum and pitch remover, hot water or kerosene.
Never use gasoline.
33. Wear a dust mask and hearing protection when
use the tool.
SAVE THESE INSTRUCTIONS.
WARNING: DO NOT let comfort or famil-
iarity with product (gained from repeated
use) replace strict adherence to safety
rules for the subject product. MISUSE or
failure to follow the safety rules stated in
this instruction manual may cause serious
personal injury.
FUNCTIONAL
DESCRIPTION
► Fig.1: 1. Screw
CAUTION:
• Always be sure that the tool is switched o and
unplugged before adjusting or checking function
on the tool.

8ENGLISH
Adjusting depth of cut
CAUTION:
• After adjusting the depth of cut, always tighten
the clamping screw securely.
Loosen the clamping screw on the depth guide and
move the base up or down. At the desired depth of cut,
secure the base by tightening the clamping screw.
For cleaner, safer cuts, set cut depth so that no more
than one blade tooth projects below workpiece. Using
proper cut depth helps to reduce potential for danger-
ous KICKBACKS which can cause personal injury.
Bevel cutting
► Fig.2: 1. Bevel scale plate 2. Clamping screw
Loosen the clamping screw on the bevel scale plate on
the front of the base. Set for the desired angle (0° - 45°)
by tilting accordingly, then tighten the clamping screw
securely.
Sighting
► Fig.3: 1. Base plate
For straight cuts, align the A position on the front of the
base with your cutting line. For 45° bevel cuts, align the
B position with it.
Switch action
► Fig.4: 1. Switch trigger 2. Lock button / Lock-o
button
CAUTION:
• Before plugging in the tool, always check to see
that the switch trigger actuates properly and
returns to the “OFF” position when released.
For tool with lock button
To start the tool, simply pull the switch trigger. Release
the switch trigger to stop.
For continuous operation, pull the switch trigger and
then push in the lock button.
To stop the tool from the locked position, pull the switch
trigger fully, then release it.
For tool with lock-o button
To prevent the switch trigger from being accidentally
pulled, a lock-o button is provided. To start the tool,
push in the lock-o button and pull the switch trigger.
Release the switch trigger to stop.
For tool without lock button and lock-
o button
To start the tool, simply pull the switch trigger. Release
the switch trigger to stop.
ASSEMBLY
CAUTION:
• Always be sure that the tool is switched o and
unplugged before carrying out any work on the
tool.
Removing or installing saw blade
► Fig.5: 1. Hex wrench 2. Shaft lock
CAUTION:
• Be sure the blade is installed with teeth pointing
up at the front of the tool.
• Use only the Makita wrench to install or remove
the blade.
To remove the blade, press the shaft lock so that the
blade cannot revolve and use the wrench to loosen the
hex bolt counterclockwise. Then remove the hex bolt,
outer ange and blade.
To install the blade, follow the removal procedure in
reverse. BE SURE TO TIGHTEN THE HEX BOLT
CLOCKWISE SECURELY.
► Fig.6: 1. Hex bolt 2. Outer ange 3. Saw blade
4. Inner ange
► Fig.7: 1. Mounting shaft 2. Inner ange 3. Saw
blade 4. Outer ange 5. Hex bolt
The inner ange has a certain diameter protrusion on
one side of it and a dierent diameter protrusion on the
other side. Choose a correct side on which protrusion
ts into the saw blade hole perfectly.
Next, mount the inner ange onto the mounting shaft
so that the correct side of protrusion on the inner ange
faces outward and then place saw blade and outer
ange.
BE SURE TO TIGHTEN THE HEX BOLT CLOCKWISE
SECURELY.
CAUTION:
• Make sure that the protrusion “a” on the
inner ange that is positioned outside
ts into the saw blade hole “a” perfectly.
Mounting the blade on the wrong side can result
in the dangerous vibration.
Side grip (auxiliary handle)
(Accessory)
► Fig.8: 1. Side grip
Install the side grip on the tool so that its hook is on the
rib of the blade case (upper blade guard).

9ENGLISH
OPERATION
CAUTION:
• Be sure to move the tool forward in a straight
line gently. Forcing or twisting the tool will result
in overheating the motor and dangerous kick-
back, possibly causing severe injury.
Hold the tool rmly. Set the base plate on the work-
piece to be cut without the blade making any contact.
Then turn the tool on and wait until the blade attains
full speed. Now simply move the tool forward over the
workpiece surface, keeping it at and advancing slowly
until the sawing is completed. To get clear cuts, keep
your sawing line straight and your speed of advancing
uniform.
► Fig.9
Rip fence (Guide rule)
► Fig.10: 1. Screw 2. Rip fence (Guide rule)
The handy rip fence allows you to do extra-accurate
straight cuts. Simply slide the rip fence up snugly
against the side of the workpiece and secure it in
position with the screw on the front of the base. It also
makes repeated cuts of uniform width possible.
MAINTENANCE
CAUTION:
• Always be sure that the tool is switched o and
unplugged before attempting to perform inspec-
tion or maintenance.
• Never use gasoline, benzine, thinner, alcohol
or the like. Discoloration, deformation or cracks
may result.
Replacing carbon brushes
► Fig.11: 1. Limit mark
Remove and check the carbon brushes regularly.
Replace when they wear down to the limit mark. Keep
the carbon brushes clean and free to slip in the holders.
Both carbon brushes should be replaced at the same
time. Use only identical carbon brushes.
Use a screwdriver to remove the brush holder caps.
Take out the worn carbon brushes, insert the new ones
and secure the brush holder caps.
► Fig.12: 1. Screwdriver 2. Brush holder cap
To maintain product SAFETY and RELIABILITY, repairs,
any other maintenance or adjustment should be per-
formed by Makita Authorized Service Centers, always
using Makita replacement parts.
OPTIONAL
ACCESSORIES
CAUTION:
• These accessories or attachments are recom-
mended for use with your Makita tool specied
in this manual. The use of any other accessories
or attachments might present a risk of injury to
persons. Only use accessory or attachment for
its stated purpose.
If you need any assistance for more details regard-
ing these accessories, ask your local Makita Service
Center.
• Saw blades
• Rip fence (Guide rule)
• Hex wrench
• Wrench holder
• Grip assembly
NOTE:
• Some items in the list may be included in the
tool package as standard accessories. They
may dier from country to country.

10
中文简体
中文简体 (原本)
规格
型号 5606B 5806B
锯片直径 160 mm 185 mm
最大切割深度 90°时55 mm 66 mm
45°时36 mm 44 mm
空载速度(/min)5,200 5,200
总长度 268 mm 282 mm
净重 3.4 kg 3.4 kg
安全等级 /II /II
• 由于研发计划将持续进行,生产者保留变更规格不另行通知之权利。
• 规格可能因销往国家之不同而异。
• 重量符合EPTA-Procedure 01/2003
符号
以下显示本工具使用的符号。在使用工具之
前请务必理解其含义。
阅读使用说明书。
II类工具
仅限于欧盟国家
请勿将电气设备与家庭普通废
弃物一同丢弃!请务必遵守欧
洲关于废弃电子电气设备的指
令,根据各国法律法规执行。
达到使用寿命的电气设备必须
分类回收至符合环境保护规定
的再循环机构。
用途
本工具用于木材中笔直的纵向和交叉切割以
及以一定角度的斜切角切割(工具与工件紧
密接触)。
电源
本工具只可连接电压与铭牌所示电压相同的
电源,且仅可使用单相交流电源。本工具双
重绝缘,因此也可用于不带接地线的插座。
电动工具通用安全警告
警告!阅读所有警告和所有说明。不遵
照以下警告和说明会导致电击、着火和/或
严重伤害。
保存所有警告和说明书以备
查阅。
在所有下列的警告中术语“电动工具”指市
电驱动(有线)电动工具或电池驱动(无
线)电动工具。
工作场地的安全
1. 保持工作场地清洁和明亮。混乱和黑暗
的场地会引发事故。
2. 不要在易爆环境,如有易燃液体、气体
或粉尘的环境下操作电动工具。电动工
具产生的火花会点燃粉尘或气体。
3. 让儿童和旁观者离开后操作电动工具。
注意力不集中会使操作者失去对工具的
控制。
电气安全
4. 电动工具插头必须与插座相配。绝不能
以任何方式改装插头。需接地的电动工
具不能使用任何转换插头。未经改装的
插头和相配的插座将减少电击危险。
5. 避免人体接触接地表面,如管道、散热
片和冰箱。如果你身体接地会增加电击
危险。
6. 不得将电动工具暴露在雨中或潮湿环境
中。水进入电动工具将增加电击危险。
7. 不得滥用电线。绝不能用电线搬运、拉
动电动工具或拔出其插头。使电线远离
热源、油、锐边或运动部件。受损或缠
绕的软线会增加电击危险。
8. 当在户外使用电动工具时,使用适合户
外使用的外接软线。适合户外使用的软
线将减少电击危险。

11
中文简体
9. 如果在潮湿环境下操作电动工具是不可
避免的,应使用剩余电流动作保护器
(RCD)。使用RCD可减小电击危险。
10. 始终建议通过额定剩余电流为30mA或
以下的RCD来使用电源。
人身安全
11. 保持警觉,当操作电动工具时关注所从
事的操作并保持清醒。当你感到疲倦,
或在有药物、酒精或治疗反应时,不要
操作电动工具。在操作电动工具时瞬间
的疏忽会导致严重人身伤害。
12. 使用个人防护装置。始终佩戴护目镜。
安全装置,诸如适当条件下使用防尘面
具、防滑安全鞋、安全帽、听力防护等
装置能减少人身伤害。
13. 防止意外起动。确保开关在连接电源和/
或电池盒、拿起或搬运工具时处于关断位
置。手指放在已接通电源的开关上或开关
处于接通时插入插头可能会导致危险。
14. 在电动工具接通之前,拿掉所有调节钥
匙或扳手。遗留在电动工具旋转零件上
的扳手或钥匙会导致人身伤害。
15. 手不要伸展得太长。时刻注意立足点和
身体平衡。这样在意外情况下能很好地
控制电动工具。
16. 着装适当。不要穿宽松衣服或佩戴饰品。
让衣服、手套和头发远离运动部件。宽
松衣服、佩饰或长发可能会卷入运动部
件中。
17. 如果提供了与排屑、集尘设备连接用的装
置,要确保他们连接完好且使用得当。使
用这些装置可减少尘屑引起的危险。
电动工具使用和注意事项
18. 不要滥用电动工具,根据用途使用适当
的电动工具。选用适当设计的电动工具
会使你工作更有效、更安全。
19. 如果开关不能接通或关断工具电源,则
不能使用该电动工具。不能用开关来控
制的电动工具是危险的且必须进行修理。
20. 在进行任何调节、更换附件或贮存电动
工具之前,必须从电源上拔掉插头和/
或使电池盒与工具脱开。这种防护性措
施将减少工具意外起动的危险。
21. 将闲置不用的电动工具贮存在儿童所及范
围之外,并且不要让不熟悉电动工具或对
这些说明不了解的人操作电动工具。电动
工具在未经培训的用户手中是危险的。
22. 保养电动工具。检查运动件是否调整到
位或卡住,检查零件破损情况和影响电
动工具运行的其他状况。如有损坏,电
动工具应在使用前修理好。许多事故由
维护不良的电动工具引发。
23. 保持切削刀具锋利和清洁。保养良好的
有锋利切削刃的刀具不易卡住而且容易
控制。
24. 按照使用说明书,考虑作业条件和进行
的作业来使用电动工具、附件和工具的
刀头等。将电动工具用于那些与其用途
不符的操作可能会导致危险。
维修
25. 将你的电动工具送交专业维修人员,使
用同样的备件进行修理。这样将确保所
维修的电动工具的安全性。
26. 上润滑油及更换附件时请遵循本说明书
指示。
27. 手柄务必保持干燥、清洁、无油(脂)。
电动圆锯使用安全警告
切割步骤
1. 危险: 请使双手远离切割区域和锯
片。请将另一只手放在辅助手柄或电机
外壳上。如果双手握持电圆锯,就不会
被锯片切割到。
2. 请勿将手伸到工件下方。在工件的下方,
保护罩无法保护您不碰到锯片。
3. 根据工件的厚度调节切割深度。深度不
得超过工件下方一个锯齿的位置。
4. 切勿将工件拿在手里或放在腿上进行切
割。将工件固定在稳定的平台上。正确
地支撑工件非常重要,可尽量减少身体
暴露在切割区域的部分,也可最大限度
地减少锯片卡滞或工具失控现象。
ጸฬܿ༇ؠፀڄˈፀڄݢኑღ؝ღ˄ቂ˅ܿݟᄲஂȃ
5. 当进行作业时切割工具可能会接触到隐
藏的电线或自身的电线,请仅握住工具
的绝缘抓握表面。接触到“带电”的电
线时,工具上曝露的金属部分也会“带
电”,并使操作者触电。

12
中文简体
6. 进行切锯时,请始终使用切锯导板或直
刃导板。这样可提高切割精度,并降低
锯片卡滞的可能性。
7. 请始终使用具有正确轴孔尺寸和形状
(钻石形和圆形)的锯片。与电圆锯的
安装硬件不匹配的锯片无法正常运行,
会导致失控。
8. 切勿使用损坏的或不正确的锯片垫圈或
螺栓。锯片垫圈和螺栓必须为电圆锯所
专用,以保证工具的最佳性能和操作的
安全性。
反弹原因和相关警告
— 反弹是锯片收缩、卡滞或方向偏离时突
然产生的反作用力,会导致失控的电圆
锯上升或脱离工件而朝向操作者;
— 当锯片被压缩或卡滞在锯痕上,锯片将
停止动作,电机反作用力驱使工具快速
地朝操作者反弹;
— 如果锯片被扭曲或切割时方向偏离,则
锯片背面的齿缘可能进入木材上表面,
导致锯片脱离锯痕或弹向操作者。
电圆锯误操作和/或不正确的操作步骤或操
作条件将导致反弹,遵守以下所述的注意事
项即可避免。
9. 使用电圆锯时请双手牢固持握把手,调
整手臂位置以防止反弹力。身体可位于
锯片的任意一侧,但不得与锯片成一直
线。反弹会使电圆锯向后跳出,但如果
遵守了正确的注意事项,操作者可控制
反弹力。
10. 当锯片卡滞或因任何原因中断切割操作
时,请释放扳机并将电圆锯保持在切割
材料中不动,直至锯片完全停止。当锯
片还在运动中时,切勿试图将电圆锯从
工件中取出或将工具往后拉,否则可能
会造成反弹。研究并采取正确的措施以
避免锯片卡滞。
11. 当在工件中重新启动电圆锯时,将锯片
置于锯痕的中央,并检查锯齿是否与切
割材料咬合在一起。如果锯片卡滞,则
当电圆锯重新起动时,锯片可能会沿卡
滞处移动或从工件上反弹。
12. 请使用较大的支撑面板以最大限度地降
低锯片收缩和反弹的可能。大面板会因
自身的重量而下陷。必须在面板下面两
侧靠近切割线和面板边缘的位置放置支
撑件。
ၓןಁ߫ܪˈข૦෧ࢃۃ
ፀڄ֊ডಅ֊ȃ
ข႙ፀڄ֊ডಅ֊
ና୰෧ࢃۃȃ
13. 请勿使用钝的或损坏的锯片。锯片未经
打磨或放置不正确会使锯痕狭窄,导致
摩擦过大、锯片卡滞或反弹。
14. 在进行切割操作之前,必须紧固锯片深
度和斜角调节锁定杆。如果在切割时锯
片调节杆移动,则可能导致锯片卡滞和
反弹。
15. 当在墙壁或其他盲区进行切割时请尤其
小心。凸出的锯片可能会切割到容易引
起反弹的物体。
16. 请务必用双手握紧工具。切勿将手或手
指放在圆锯的后面。如果发生反弹,电
圆锯很容易向后跳到您的手上,从而导
致严重的人身伤害。

13
中文简体
17. 切勿对电圆锯施力过大。以一定的速度
向前推进电圆锯,使锯片保持恒定的速
度切割。对电圆锯施力过大会导致切割
不均匀,降低切割精度,并可能导致
反弹。
下部保护罩功能
18. 在每次使用之前请检查下部保护罩是否
正确闭合。如果下部保护罩无法自由移
动和快速闭合,则请勿使用圆锯。切勿
将下部保护罩置于打开位置。如果圆锯
意外跌落,下部保护罩可能会弯曲。使
用缩回把手升起下部保护罩,并确保其
能在各种角度和深度的切割操作中自由
移动且不碰触到锯片或其他任何部件。
19. 检查下部保护罩弹簧的操作情况。如果保
护罩和弹簧无法正常工作,则在使用前必
须对其进行修理。如果有部件损坏、存在
卡滞物或积聚有碎片,则下部保护罩可能
会操作迟缓。
20. 仅当进行“切入式切割”和“复合切割”
等特殊切割操作时,下部保护罩可手动
收回。通过缩回把手升起下部保护罩,
一旦锯片进入切割材料,必须释放下部
保护罩。在进行所有其他切锯操作时,
下部保护罩应自动操作。
21. 在将圆锯置于工作台或地板上之前,请
始终查看下部保护罩是否覆盖住锯片。
未受保护的滑动的锯片会导致电动圆锯
向后移动,切割到在其移动路径上的物
体。请注意从释放开关扳机之后到锯片
停止所需的时间。
22. 要检查下部保护罩时,请用手打开下部
保护罩,然后松开并查看保护罩。请同
样查看缩回把手,确保其不会碰触到工
具外壳。将锯片暴露在外是非常危险的,
会导致严重的人身伤害。
附加安全警告
23. 切割潮湿的木头、经过加压处理的木材
或含有树节的树木时请特别小心。保持
平滑推动工具而不降低锯片速度以避免
锯齿过热。
24. 当锯片正在移动时,请勿试图移开切割
材料。请等到锯片完全停止之后再抓取
切割材料。电源关闭之后锯片还将移动
一段距离。
25. 注意不要切割到铁钉。切割之前请检查
木材上是否有钉子并将其清除。
26. 进行切割时,请将电圆锯基座较宽的部分
置于工件被稳固支撑的部分,不要放在将
被切割下来的部分上。例如,图1显示了
切下板的一端的正确方式。图2显示了错
误的切割方式。如果工件很短或很小,请
将其夹住。切勿试图手持短小的工件!
Fig. 1
Fig. 2
27. 在完成切割后放下工具之前,请确保下
部保护罩已关闭,且锯片完全停止。
28. 切勿试图使用虎钳倒持电圆锯进行切锯
操作。这样做非常危险,会导致严重的
事故。
29. 某些材料含有有毒化学物质。小心不要
吸入粉尘,并避免皮肤接触。遵循材料
供应商的安全提示。
30. 请勿通过对锯片施加侧面的压力使锯片
停止。
31. 请务必使用本说明书中建议的锯片。请
勿使用任何砂轮。

14
中文简体
32. 保持锯片锋利和清洁。卡滞在锯片上变
硬的树脂和木沥青会使电圆锯的速度变
慢,并增加反弹的可能性。因此,请先
将锯片从工具上拆下,然后使用树脂和
沥青清除剂、热水或煤油进行清洁。保
持锯片清洁。切勿使用汽油。
33. 使用工具时请佩带防尘面罩和保护耳罩。
请保留此说明书。
警告: 请勿为图方便或因对产品
足够熟悉(由于重复使用而获得的经
验)而不严格遵循相关产品安全规
则。使用不当或不遵循使用说明书中
的安全规则会导致严重的人身伤害。
功能描述
►图片1: 1. 螺丝
小心:
• 在调节或检查工具功能之前,请务必关
闭工具电源开关并拔下电源插头。
调节切割深度
小心:
• 调节了切割深度之后,请务必紧固夹紧
螺丝。
拧松深度导板上的夹紧螺丝,向上或向下移
动基座。在所需的切割深度处,拧紧夹紧螺
丝以紧固基座。
为使切割更干净、更安全,设定切割深度时
注意不得超过工件下方一个锯齿的位置。危
险的反弹会导致人身伤害,使用正确的切割
深度有助于降低反弹的可能。
斜切角切割
►图片2: 1. 斜刻度板 2. 夹紧螺丝
拧松基座前部斜刻度板上的夹紧螺丝。通过相
应地倾斜工具来设定所需的角度(0° - 45°),
然后拧紧夹紧螺丝。
对齐
►图片3: 1. 基板
进行直线切割时,将基座前端的A位置与您的
切割线对齐。进行45°斜切角切割时,请将B
位置与切割线对齐。
开关操作
►图片4: 1. 开关扳机 2. 锁定按钮/锁止
按钮
小心:
• 插上工具电源插头之前,请务必确认
开关扳机能够正常工作,松开时能回
到“OFF”(关闭)位置。
对于带锁定按钮的工具
启动工具时,只要扣动开关扳机即可。松开
开关扳机工具即停止。
连续操作时,扣动开关扳机并按下锁定按钮。
要从锁定位置停止工具时,可将开关扳机扣
到底,然后松开。
对于带锁止按钮的工具
为避免使用者不小心扣动开关扳机,本工具
采用锁止按钮。要启动工具时,按下锁止按
钮,然后扣动开关扳机即可。松开开关扳机
工具即停止。
对于不带锁定按钮和锁止按钮的工具
启动工具时,只要扣动开关扳机即可。松开
开关扳机工具即停止。
装配
小心:
• 对工具进行任何装配操作前请务必确认
工具已关闭且已拔下电源插头。
拆卸或安装锯片
►图片5: 1. 六角扳手 2. 轴锁
小心:
• 安装锯片时,请确保锯齿向上指向工具
前部。
• 请仅使用Makita(牧田)扳手来安装或
拆卸锯片。
要拆卸锯片时,用力压入轴锁,以使锯片无法转
动,然后使用扳手逆时针方向拧松六角螺栓。然
后拆下六角螺栓、外法兰盘和锯片。

15
中文简体
要安装锯片时,可按与拆卸时相反的步骤进
行。务必顺时针拧紧六角螺栓。
►图片6: 1. 六角螺栓 2. 外法兰盘 3. 锯片
4. 内法兰盘
►图片7: 1. 安装轴 2. 内法兰盘 3. 锯片
4. 外法兰盘 5. 六角螺栓
内法兰盘的一侧带有一定直径的凸起部分,
另一侧带有不同直径的凸起部分。选择正确
的一侧,使该侧的凸起部分可以很好地与锯
片孔相配合。
接下来将内法兰盘安装在安装轴上,使法兰盘
正确的一侧朝外,然后放置锯片和外法兰盘。
务必顺时针拧紧六角螺栓。
小心:
• 确保内法兰盘上向外凸出的凸起部分
“a”与锯片孔“a”能够很好地配
合。将锯片安装至错误的一侧会导致
危险的振动。
侧把手(辅助手柄)(附件)
►图片8: 1. 侧把手
在工具上安装侧把手,使其挂钩处于锯片基
座(上部锯片保护罩)的肋片上。
操作
小心:
• 请确保慢慢地以直线向前移动工具。使
用强力或扭曲工具会导致电机过热和危
险的反弹,可能导致严重伤害。
请牢握本工具。将基板放在要切割的工件上,
锯片不得与工件有任何接触。然后启动工具并
等待,直至锯片达到全速运转时再进行操作。
现 在 ,您 只 需 在 工 件 表 面 向 前 移 动 本 工 具 ,使
其平稳地保持平坦前进,直至切锯操作完成即
可 。为 使 切 割 顺 畅 ,请 保 持 切 锯 线 路 笔 直 ,并
且锯片前进的速度保持一致。
►图片9
切锯导板(导尺)
►图片10: 1. 螺丝 2. 切锯导板(导尺)
随附的切锯导板有助于您进行超精确的直线
切割。只需简单地沿着工件侧向上滑切锯
导板,然后使用基座前部的螺丝将其紧固到
位。也可利用切锯导板进行宽度一致的重复
切割。
保养
小心:
• 检查或保养工具之前,请务必关闭工具
电源开关并拔下插头。
• 切勿使用汽油、苯、稀释剂、酒精或类
似物品清洁工具。否则可能会导致工具
变色、变形或出现裂缝。
更换碳刷
►图片11: 1. 界限磨耗线
定期拆下碳刷进行检查。在碳刷磨损到界限
磨耗线时进行更换。请保持碳刷清洁并使其
在碳刷夹内能自由滑动。两个碳刷应同时替
换。请仅使用相同的碳刷。
使用螺丝起子拆下碳刷夹盖。取出已磨损的
碳刷,插入新的碳刷,然后紧固碳刷夹盖。
►图片12: 1. 螺丝起子 2. 碳刷夹盖
为了保证产品的安全与可靠性,维修、任何
其他的维修保养或调节需由Makita(牧田)
授权的维修服务中心完成。务必使用Makita
(牧田)的替换部件。
选购附件
小心:
• 这些附件或装置专用于本说明书所列的
Makita(牧田)电动工具。使用其他配
件或装置存在人身伤害风险。仅可将附
件或装置用于规定目的。
如您需要了解更多关于这些选购附件的信
息,请咨询当地的Makita(牧田)维修服务
中心。
• 锯片
• 切锯导板(导尺)
• 六角扳手
• 扳手仓
• 把手组件
注:
• 本列表中的一些部件可能作为标准配件
包含于工具包装内。它们可能因销往国
家之不同而异。

16 BAHASA INDONESIA
BAHASA INDONESIA (Petunjuk Asli)
SPESIFIKASI
Model 5606B 5806B
Diameter mata pisau 160 mm 185 mm
Kedalaman pemotongan maks. pada 90° 55 mm 66 mm
pada 45° 36 mm 44 mm
Kecepatan tanpa beban (min-1)5.200 5.200
Panjang keseluruhan 268 mm 282 mm
Berat bersih 3,4 kg 3,4 kg
Kelas keamanan /II /II
• Karena kami terus melakukan program penelitian dan pengembangan, spesikasi yang disebutkan di sini dapat
berubah tanpa pemberitahuan.
• Spesikasi dapat berbeda di setiap negara.
• Berat menurut Prosedur EPTA 01/2003
Simbol
Berikut ini adalah simbol-simbol yang digunakan pada
peralatan ini. Pastikan Anda memahami arti masing-
masing simbol sebelum menggunakan alat.
Baca petunjuk penggunaan.
ISOLASI GANDA
Hanya untuk negara-negara Uni Eropa
Jangan membuang peralatan listrik
atau baterai bersama-sama dengan
bahan limbah rumah tangga! Dengan
memerhatikan Petunjuk Eropa, tentang
Limbah Peralatan Listrik dan Elektronik
serta pelaksanaannya sesuai dengan
ketentuan hukum nasional, peralatan
listrik yang telah habis umur pakainya
harus dikumpulkan secara terpisah dan
dikembalikan ke fasilitas daur ulang yang
kompatibel secara lingkungan.
Tujuan penggunaan
Mesin ini digunakan untuk pemotongan lurus
memanjang dan melintang serta pemotongan miter
dengan sudut pada kayu sambil menjaga kontak yang
kuat dengan benda kerja.
Pasokan daya
Mesin harus terhubung dengan pasokan daya listrik
yang bervoltase sama dengan yang tertera pada pelat
nama, dan hanya dapat dijalankan dengan listrik AC
fase tunggal. Mesin diisolasi ganda sehingga dapat
juga dihubungkan dengan soket tanpa kabel arde.
Peringatan Keselamatan Umum
Mesin Listrik
PERINGATAN Bacalah semua peringatan
keselamatan dan semua petunjuk. Kelalaian
mematuhi peringatan dan petunjuk dapat menyebabkan
sengatan listrik, kebakaran dan/atau cedera serius.
Simpanlah semua peringatan
dan petunjuk untuk acuan di
masa depan.
Istilah “mesin listrik” dalam semua peringatan mengacu
pada mesin listrik yang dijalankan dengan sumber listrik
jala-jala (berkabel) atau baterai (tanpa kabel).
Keselamatan tempat kerja
1. Jaga tempat kerja selalu bersih dan
berpenerangan cukup. Tempat kerja yang
berantakan dan gelap mengundang kecelakaan.
2. Jangan gunakan mesin listrik dalam
lingkungan yang mudah meledak, misalnya
terdapat cairan, gas, atau debu yang mudah
terbakar. Mesin listrik menimbulkan bunga api
yang dapat membakar debu atau uap tersebut.
3. Jauhkan anak-anak dan orang lain saat
menggunakan mesin listrik. Jika perhatian
terpecah, Anda mungkin saja kehilangan kendali.
Keamanan Kelistrikan
4. Steker mesin listrik harus cocok dengan
stopkontak. Jangan sekali-kali mengubah
steker dengan cara apa pun. Jangan
menggunakan steker adaptor dengan mesin
listrik yang terbumi (dibumikan). Steker yang
tidak diubah dan stopkontak yang cocok akan
mengurangi risiko sengatan listrik.
5. Hindari sentuhan tubuh dengan permukaan
yang terbumi atau dibumikan seperti pipa,
radiator, kompor, dan kulkas. Risiko sengatan
listrik bertambah jika ada bagian tubuh Anda yang
menyentuh bumi atau tanah.
6. Jangan membiarkan mesin listrik kehujanan
atau basah. Air yang masuk ke dalam mesin listrik
akan meningkatkan risiko sengatan listrik.
7. Jangan menyalahgunakan kabel. Jangan
sekali-kali menggunakan kabel untuk
membawa, menarik, atau mencabut mesin
listrik dari stopkontak. Jauhkan kabel dari
panas, minyak, tepian tajam, atau bagian
yang bergerak. Kabel yang rusak atau kusut
memperbesar risiko sengatan listrik.

17 BAHASA INDONESIA
8. Jika menggunakan mesin listrik di luar
ruangan, gunakan kabel ekstensi yang
sesuai dengan penggunaan di luar ruangan.
Menggunakan kabel yang sesuai dengan
penggunaan luar ruangan akan mengurangi risiko
sengatan listrik.
9. Jika mengoperasikan mesin listrik di lokasi
lembap tidak terhindarkan, gunakan pasokan
daya yang dilindungi peranti imbasan arus
(residual current device - RCD). Penggunaan
RCD mengurangi risiko sengatan listrik.
10. Disarankan untuk menggunakan pasokan daya
melalui RCD dengan kapasitas arus sisa 30mA
atau kurang.
Keselamatan Diri
11. Jaga kewaspadaan, perhatikan pekerjaan Anda
dan gunakan akal sehat saat menggunakan
mesin listrik. Jangan menggunakan mesin
listrik saat Anda lelah atau di bawah pengaruh
obat-obatan, alkohol, atau dalam masa
pengobatan. Sesaat saja Anda lalai saat
menggunakan mesin listrik dapat menyebabkan
cedera badan serius.
12. Gunakan alat pelindung diri. Selalu gunakan
pelindung mata. Penggunaan peralatan
pelindung seperti masker debu, sepatu pengaman
anti-selip, helm pengaman, atau pelindung telinga
untuk kondisi yang sesuai akan mengurangi risiko
cedera badan.
13. Cegah penyalaan yang tidak disengaja.
Pastikan bahwa sakelar berada dalam posisi
mati (o) sebelum menghubungkan mesin
ke sumber daya dan/atau paket baterai,
mengangkat, atau membawanya. Membawa
mesin listrik dengan jari berada di sakelar atau
mengalirkan listrik pada mesin listrik dengan
sakelar hidup (on) akan mengundang kecelakaan.
14. Lepaskan kunci-kunci penyetel sebelum
menghidupkan mesin listrik. Kunci-kunci yang
masih terpasang pada bagian mesin listrik yang
berputar dapat menyebabkan cedera.
15. Jangan meraih terlalu jauh. Selalu
jagalah pijakan dan keseimbangan. Hal ini
memungkinkan pengendalian mesin listrik yang
lebih baik dalam situasi yang tidak diharapkan.
16. Kenakan pakaian dengan baik. Jangan
memakai pakaian yang kedodoran atau
perhiasan. Jaga jarak antara rambut, pakaian,
dan sarung tangan Anda dengan bagian mesin
yang bergerak. Pakaian kedodoran, perhiasan,
atau rambut panjang dapat tersangkut pada
bagian yang bergerak.
17. Jika pada peranti tersedia fasilitas untuk
menghisap dan mengumpulkan debu, pastikan
fasilitas tersebut terhubung listrik dan
digunakan dengan baik. Penggunaan pembersih
debu dapat mengurangi bahaya yang terkait
dengan debu.
Penggunaan dan pemeliharaan mesin listrik
18. Jangan memaksa mesin listrik. Gunakan
mesin listrik yang tepat untuk keperluan
Anda. Mesin listrik yang tepat akan menuntaskan
pekerjaan dengan lebih baik dan aman jika pada
kecepatan sesuai rancangannya.
19. Jangan menggunakan mesin listrik jika sakelar
tidak dapat menyalakan dan mematikannya.
Mesin listrik yang tidak dapat dikendalikan dengan
sakelarnyaakan berbahaya dan harus diperbaiki.
20. Cabut steker dari sumber listrik dan/atau paket
baterai dari mesin listrik sebelum melakukan
penyetelan, penggantian aksesori, atau
menyimpan mesin listrik. Langkah keselamatan
preventif tersebut mengurangi risiko hidupnya
mesin secara tak sengaja.
21. Simpan mesin listrik jauh dari jangkauan
anak-anak dan jangan biarkan orang yang
tidak paham mengenai mesin listrik tersebut
atau petunjuk ini untuk menggunakan mesin
listrik. Mesin listrik sangat berbahaya di tangan
pengguna yang tidak terlatih.
22. Rawatlah mesin listrik. Periksa apakah ada
bagian bergerak yang tidak sejajar atau macet,
bagian yang pecah, dan kondisi lain yang
dapat memengaruhi penggunaan mesin listrik.
Jika rusak, perbaiki mesin listrik terlebih
dahulu sebelum digunakan. Banyak kecelakaan
disebabkan oleh kurangnya pemeliharaan mesin
listrik.
23. Jaga agar mesin pemotong tetap tajam dan
bersih. Mesin pemotong yang terawat baik
dengan mata pemotong yang tajam tidak mudah
macet dan lebih mudah dikendalikan.
24. Gunakan mesin listrik, aksesori, dan mata
mesin, dll. berdasarkan petunjuk ini, dengan
memperhitungkan kondisi kerja dan jenis
pekerjaan yang dilakukan. Pemakaian
mesin listrik untuk penggunaan selain yang
diperuntukkan dapat menimbulkan situasi
berbahaya.
Servis
25. Bawa mesin listrik untuk diperbaiki hanya
kepada oleh teknisi yang berkualikasi
menggunakan hanya suku cadang pengganti
yang serupa. Hal ini akan menjamin terjaganya
keamanan mesin listrik.
26. Patuhi petunjuk pelumasan dan penggantian
aksesori.
27. Jagalah agar gagang kering, bersih, serta
bebas dari minyak dan gemuk.
PERINGATAN KESELAMATAN
GERGAJI BUNDAR
Prosedur pemotongan
1. BAHAYA: Jauhkan tangan dari area
pemotongan dan mata pisau. Letakkan tangan
kedua Anda pada pegangan tambahan, atau
tempat motor mesin berada. Kedua tangan
tidak akan terpotong mata pisau jika keduanya
memegang gergaji.
2. Jangan meraih bagian bawah benda kerja.
Pelindung tidak dapat melindungi Anda dari mata
pisau yang ada di bawah benda kerja.
3. Setel kedalaman pemotongan terhadap
ketebalan benda kerja. Sebagian gigi mata pisau
harus terlihat di bawah benda kerja.

18 BAHASA INDONESIA
4. Jangan pernah memegang benda kerja
dipotong dengan diletakkan di tangan atau
melewati kaki Anda. Kencangkan benda
kerja di platform yang stabil. Sangat penting
untuk menunjang pekerjaan dengan benar untuk
meminimalkan tubuh terpapar, mata pisau terikat,
atau kehilangan kontrol.
Ilustrasi umum dari penopang tangan yang tepat, penopang
benda kerja, dan rute kabel suplai (jika ada).
5. Pegang mesin listrik hanya pada permukaan
genggam yang terisolasi saat melakukan
pekerjaan bila alat pemotong mungkin
bersentuhan dengan kawat tersembunyi atau
kabelnya sendiri. Sentuhan kawat “hidup” dapat
menyebabkan bagian logam pada mesin teraliri
arus listrik dan menyengat pengguna.
6. Saat membelah, selalu gunakan pagar
pembelah atau petunjuk tepi lurus. Hal ini
meningkatkan akurasi potongan dan mengurangi
kemungkinan terikatnya mata pisau.
7. Selalu gunakan mata pisau dengan ukuran
dan bentuk yang tepat (bentuk berlian versus
lingkaran) dari lubang lengkung. Mata pisau
yang tidak cocok untuk dipasang pada perangkat
keras gergaji akan bekerja secara eksentrik,
mengakibatkan hilangnya kontrol.
8. Jangan pernah gunakan cincin mata pisau
atau baut yang salah. Cincin mata pisau dan
baut dirancang secara khusus untuk gergaji Anda,
untuk kinerja yang optimal dan keselamatan
pengoperasian.
Penyebab hentakan balik dan peringatan terkait
— hentakan balik adalah reaksi mendadak dari mata
gergaji yang terjepit, terikat atau tidak sejajar,
menyebabkan gergaji yang tidak terkontrol
mengangkat dan keluar dari benda kerja ke arah
operator;
— saat mata pisau terjepit atau terikat kuat oleh
goresan menutup, mata pisau mati dan reaksi
motor menggerakkan unit kembali ke arah
operator dengan cepat;
— jika mata pisau terikat atau tidak sejajar pada
potongan, gigi pada tepi belakang mata pisau
dapat menggali ke permukaan atas kayu
menyebabkan mata pisau keluar naik dari goresan
dan melompat kembali ke arah operator.
Hentakan balik merupakan akibat dari salah cara
menggunakan gergaji dan/atau prosedur atau kondisi
pengoperasian yang salah dan dapat dihindari
dengan melakukan tindakan kewaspadaan yang tepat
sebagaimana diuraikan di bawah ini.
9. Pertahankan pegangan yang kuat pada
gergaji dengan kedua tangan dan posisikan
lengan Anda untuk menahan kekuatan balik.
Posisikan tubuh Anda di sisi mata pisau,
bukan sejajar dengan mata pisau. Hentakan
balik dapat menyebabkan gergaji melompat ke
belakang, namun kekuatan hentakan balik dapat
dikontrol oleh operator, jika dilakukan tindakan
pencegahan yang tepat.
10. Saat mata pisau terikat, atau saat menyela
pemotongan, lepaskan picu dan pegang
gergaji tidak bergerak dalam bahan kerja
sampai mata pisau benar-benar berhenti.
Jangan pernah mencoba melepas gergaji
dari pekerjaan atau menarik gergaji ke
belakang saat mata pisau bergerak, jika
tidak, akan terjadi hentakan balik. Periksa dan
ambil tindakan yang tepat untuk menyingkirkan
penyebab terikatnya mata pisau.
11. Saat memulai ulang gergaji pada benda kerja,
pusatkan mata gergaji di goresan dan periksa
gigi gergajinya tidak terikat pada bahan kerja.
Jika mata gergaji terikat, maka mata gergaji dapat
keluar atau menghentak balik dari benda kerja
saat gergaji dimulai ulang.
12. Tunjang panel besar untuk meminimalkan
risiko mata pisau terjepit dan terhentak balik.
Panel besar cenderung melengkung karena
beratnya. Penunjang harus ditempatkan di bawah
panel pada kedua sisi, dekat garis pemotongan
dan tepi panel.
Untuk menghindari hentakan balik,
lakukan topangan pada papan atau
panel di dekat pemotongan.
Jangan menopang papan atau
panel jauh dari pemotongan.
13. Jangan gunakan mata pisau yang tumpul atau
rusak. Set mata pisau yang tidak diasah atau
tidak tepat dapat menghasilkan goresan yang
tipis yang dapat menyebabkan gesekan berlebih,
terikatnya mata pisau dan hentakan balik.

19 BAHASA INDONESIA
14. Ketajaman mata pisau dan tuas pengunci
penyetel sudut harus kencang dan aman
sebelum pemotongan. Apabila penyetelan mata
pisau bergeser saat memotong, hal ini dapat
menyebabkan mata pisau terikat dan terhentak
balik.
15. Berhati-hatilah saat menggergaji dinding
atau area buta lain. Mata pisau yang mencuat
dapat memotong objek yang dapat menyebabkan
hentakan balik.
16. SELALU pegang mesin kuat-kuat
dengan kedua tangan. JANGAN PERNAH
menempatkan tangan atau jari Anda di
belakang gergaji. Apabila terjadi hentakan
balik, gergaji dapat dengan mudah melompat
ke belakang tangan Anda, dan mengakibatkan
cedera serius.
17. Jangan sekali-kali menekan gergaji. Dorong
gergaji ke depan dengan satu kecepatan
sehingga mata pisau memotong tanpa
melambat. Menekan gergaji dapat menyebabkan
potongan yang tidak merata, tidak adanya akurasi,
dan kemungkinan terjadinya hentakan balik.
Fungsi pelindung bagian bawah
18. Periksa apakah pelindung bagian bawah
tertutup dengan baik setiap kali akan
digunakan. Jangan mengoperasikan gergaji
jika pelindung bagian bawah tidak bergerak
bebas dan menutup dengan cepat. Jangan
pernah menjepit atau mengikat pelindung
bagian bawah ke posisi terbuka. Jika gergaji
terjatuh dengan tidak sengaja, pelindung bagian
bawah dapat bengkok. Naikkan pelindung bagian
bawah menggunakan pegangan penarik dan
pastikan pelindung bergerak bebas dan tidak
menyentuh mata pisau atau bagian lain, dalam
semua sudut dan kedalaman potongan.
19. Periksa pengoperasian pegas pelindung
bagian bawah. Jika pelindung dan pegas tidak
beroperasi dengan benar, maka pelindung
dan pegas harus diservis sebelum digunakan.
Pelindung bagian bawah dapat beroperasi dengan
lambat karena ada bagian yang rusak, lapisan
yang lengket, atau serpihan.
20. Pelindung bagian bawah dapat ditarik secara
manual hanya untuk pemotongan khusus
seperti “potongan plunge” dan “potongan
campuran”. Naikkan pelindung bagian
bawah menggunakan pegangan penarik, dan
pelindung bagian bawah harus dilepas segera
setelah mata pisau memasuki material. Untuk
semua penggergajian lainnya, pelindung bagian
bawah harus beroperasi secara otomatis.
21. Selalu perhatikan apakah pelindung bagian
bawah menutupi mata pisau sebelum
menempatkan gergaji pada bangku atau
lantai. Mata pisau yang tidak terlindung dan
meluncur akan menyebabkan gergaji berjalan
mundur, memotong apa saja yang ada di jalurnya.
Perhatikanlah waktu yang diperlukan mata pisau
untuk berhenti setelah sakelar dilepas.
22. Untuk memeriksa pelindung bagian bawah,
buka pelindung bawah dengan tangan lalu
lepas dan perhatikan penutupan pelindung.
Periksa juga untuk melihat apakah pegangan
penarik tidak menyentuh rumah mesin.
Membiarkan mata pisau terbuka adalah hal yang
SANGAT BERBAHAYA dan dapat menyebabkan
cedera serius.
Peringatan keselamatan tambahan
23. Berhati-hatilah saat memotong kayu
yang basah, kayu balok, atau kayu yang
mengandung mata kayu. Pertahankan laju
mesin yang halus tanpa mengurangi kecepatan
mata pisau untuk menghindari panas berlebih
pada ujung mata pisau.
24. Jangan mencoba menghilangkan material
pemotongan saat mata pisau bergerak.
Tunggu sampai mata pisau berhenti sebelum
memegang material pemotongan.Mata pisau
meluncur setelah dimatikan.
25. Hindari memotong paku. Periksa dan
buang semua paku dari kayu sebelum
pengoperasian.
26. Tempatkan bagian yang lebih besar dari
dudukan gergaji pada bagian benda kerja yang
disokong dengan kuat, bukan pada bagian
yang akan jatuh saat pemotongan. Sebagai
contoh, Gb. 1 mengilustrasikan cara BENAR
untuk memotong ujung papan, dan Gb. 2
adalah cara yang SALAH. Jepit benda kerja
jika berukuran kecil atau pendek. JANGAN
MENCOBA MEMEGANG BAGIAN YANG
PENDEK DENGAN TANGAN!
Fig. 1

20 BAHASA INDONESIA
Fig. 2
27. Sebelum menyetel mesin setelah
menyelesaikan satu potongan, pastikan
pelindung bawah telah tertutup dan mata pisau
telah benar-benar berhenti.
28. Jangan pernah mencoba menggergaji dengan
gergaji bundar yang dipasang terbalik pada
ragum. Hal ini sangat berbahaya dan dapat
mengakibatkan kecelakaan serius.
29. Bahan tertentu mengandung zat kimia
yang mungkin beracun. Hindari menghirup
debu dan kontak dengan kulit. Ikuti data
keselamatan bahan dari pemasok.
30. Jangan menghentikan mata pisau dengan
tekanan lateral pada mata gergaji.
31. Selalu gunakan mata pisau yang dianjurkan
dalam panduan ini. Jangan gunakan roda
ampelas apa pun.
32. Jaga mata pisau tetap tajam dan bersih.
Getah dan ter kayu yang mengeras pada mata
pisau memperlambat gergaji dan meningkatkan
risiko terjadinya hentakan balik. Jaga agar mata
pisau tetap bersih dengan melepasnya terlebih
dahulu dari mesin, lalu membersihkannya dengan
penghilang getah dan ter, air panas atau kerosin.
Jangan pernah gunakan bensin.
33. Gunakan masker debu dan pelindung telinga
saat menggunakan mesin.
SIMPAN PETUNJUK INI.
PERINGATAN: JANGAN biarkan
kenyamanan atau terbiasanya Anda dengan
produk (karena penggunaan berulang)
mengurangi kepatuhan yang ketat terhadap
aturan keselamatan untuk produk yang
terkait. PENYALAHGUNAAN atau kelalaian
dalam mematuhi aturan keselamatan
yang tertera pada petunjuk ini dapat
menyebabkan cedera badan serius.
DESKRIPSI FUNGSI
► Gbr.1: 1. Sekrup
PERHATIAN:
• Selalu pastikan bahwa mesin dalam keadaan
mati dan steker tercabut sebelum menyetel atau
memeriksa kerja mesin.
Menyetel kedalaman pemotongan
PERHATIAN:
• Setelah menyesuaikan kedalaman potongan,
selalu kencangkan sekrup penjepit dengan kuat.
Kendurkan sekrup penjepit pada pemandu kedalaman
dan pindahkan dudukan ke atas atau ke bawah. Pada
kedalaman potongan yang diinginkan, amankan
dudukan dengan mengencangkan sekrup penjepit.
Untuk pemotongan yang lebih bersih dan lebih aman,
tetapkan kedalaman potongan sehingga tidak ada
lebih dari satu gigi mata pisau yang timbul di bawah
benda kerja. Menggunakan kedalaman potongan
secara tepat membantu mengurangi kemungkinan
terjadinya SENTAKAN BALIK berbahaya yang dapat
menyebabkan cedera.
Pemotongan siku-siku
► Gbr.2: 1. Pelat skala sudut siku-siku 2. Sekrup
penjepit
Kendurkan sekrup penjepit pada pelat skala sudut siku-
siku di depan dudukan. Tetapkan sudut yang diinginkan
(0° - 45°) dengan memiringkannya, lalu kencangkan
sekrup penjepit dengan kuat.
Pengamatan
► Gbr.3: 1. Pelat dudukan
Untuk potongan yang lurus, luruskan posisi A di depan
dudukan dengan garis pemotongan. Untuk potongan
siku-siku sebesar 45°, sejajarkan posisi B dengan garis
pemotongan.
Kerja sakelar
► Gbr.4: 1. Pelatuk sakelar 2. Tombol kunci / Tombol
buka kunci
Other manuals for 5606B
1
This manual suits for next models
1
Table of contents
Languages:
Other Makita Saw manuals

Makita
Makita LS1017 User manual

Makita
Makita 5104 User manual

Makita
Makita DSP601ZJU User manual

Makita
Makita JR002G User manual

Makita
Makita DSP600ZJ User manual

Makita
Makita 5800NB User manual

Makita
Makita 5604R User manual

Makita
Makita DPB180 User manual

Makita
Makita 5008MG User manual

Makita
Makita JR3060T User manual