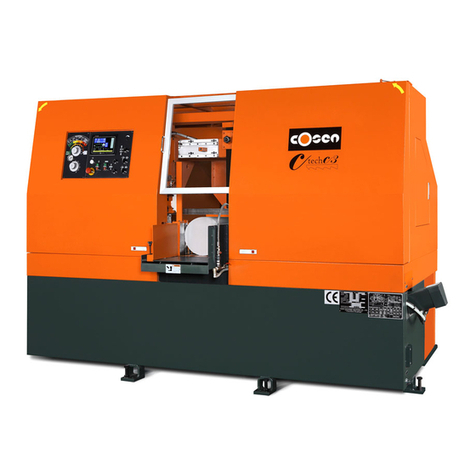
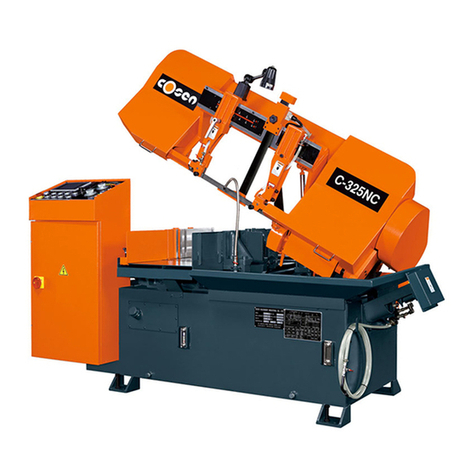
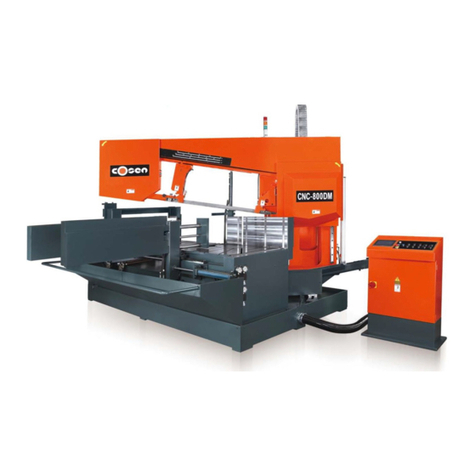
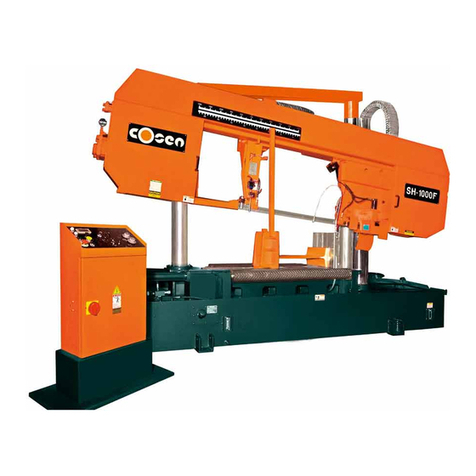
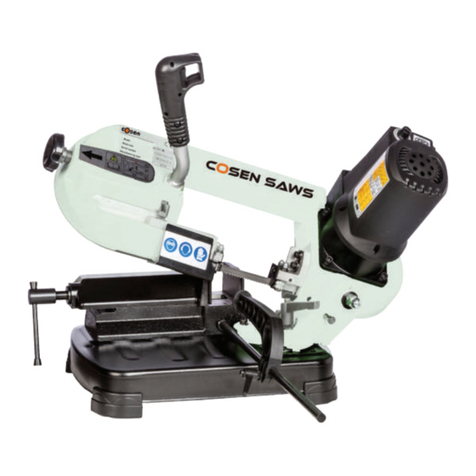
Cosen SH-250R User manual

COSEN SAWS
SH-250R
Semi‐Automatic
Hinge‐TypeHorizontalBandsaw
(Non‐CE&CEModels)
InstructionManual
ThePinnacleofCuttingPerformance
CosenMechatronicsCo.,Ltd.


NOTE:
Readthisinstructionmanualcarefullytofamiliarizeyourselfwiththeinstallation,
operationandmaintenanceofyourCOSENbandsawmachine.
Operatethemachinefollowingtheproceduresdescribedinthemanualtoprevent
personalinjuriesormachinedamage.
Keepthismanualhandyandrefertoitwheneveryouareuncertainofhowto
performanyoftheprocedures.
Fortechnicalsupportorpartspurchase,pleasecontactyournearestCOSEN
representativeorourservicecenter:
ForUS,Mexico,andCanada:
email:[email protected].
phone:+1‐704‐943‐1030
tollfree:+1‐877‐SAWING1
fax:+1‐704‐943‐1031
ForTaiwanandothercountries:
email:[email protected]
phone:+886‐3‐5332143
fax:+886‐3‐5348324
ForEurope:
email:[email protected]
phone:+31‐77‐7600280
fax:+31‐77‐7600288
ForChina:
email:[email protected]
phone:+86‐152‐50127815
InstructionManual:SH‐250R
Semi‐AutomaticHinge‐TypeHorizontalBandsaw
(Non‐CE&CEmodels)
Ver.22016/3/30
©2014byCOSENMECHATRONICSCO.,LTD.
NopartofthispublicationmaybephotocopiedorotherwisereproducedwithoutthepriorwrittenpermissionofCOSEN
PrintedinTaiwan
FROMTHEMANUFACTURER
ThankyouforyourpurchaseofCOSEN’sbandsawmachineandyourtrustintheCOSEN
brand.
Weareexcitedtohaveyouasourvaluedcustomerandlookforwardasmuchasyoudo
totheacceleratedproductivity,long‐lastingenduranceandsuperbcost‐effectivenessthis
machineisabouttobringtoyou.
Toensureyouarefullyutilizingourmachineandbeingadvantagedineverypossibleway,
pleasedotakeyourtimeandreadthroughthisinstructionmanual.
Anycommentorsuggestioninmakingourservicebetter,pleasedonothesitatetoletus
know.Thankyouagain!

Safety rules
Makesureyourworkareaisclearedofuninvitedpeopleandobstacleseverytimebeforeyoustart
operatingthemachine.
Neverwearglovesorlooseclothingwhenoperatingthemachine.Itmayleadtoseriousinjuryifthey
arecaughtintherunningmachine.Wraporcoverlonghair.
Useawater‐solublecuttingfluidonthismachine.Oil‐basedcuttingfluidsmayemitsmokeorcatch
fire,dependingonhowtheyareused.
Nevercutcarbonoranyothermaterialthatmayproduceanddisperseexplosivedust.Itispossible
thatsparksfrommotorsandothermachinepartswilligniteandexplodetheair‐bornedust.
Makesureanyuseoffireisprohibitedintheshopandinstallafireextinguisherorotherfirecontrol
devicenearthemachinewhencuttingtitanium,magnesium,oranyothermaterialthatproduces
flammablechips.Neverleavethemachineunattendedwhencuttingflammablematerials.
Neveradjustthewirebrushorremovechipswhilethesawbladeisstillrunning.Itisextremely
dangerousifhandsorclothingarecaughtbytherunningblade.
Nevertouchtherunningsawbladewithglovesornot.Itisdangerousifyourhands,clothingor
glovesarecaughtbytherunningblade.
Stopthesawbladebeforeyoucleanthemachine.Itisdangerousifhandsorclothingarecaughtby
therunningblade.
Neverstartthesawbladeunlesstheworkpiecehasbeenclampedfirmly.Iftheworkpieceisnot
securelyclamped,itwillbeforcedoutoftheviseduringcutting.
Takepreventivemeasureswhencuttingthinorshortpiecesfromtheworktokeepthemfrom
falling.Itisdangerousifthecutpiecesfall.
Userollertablesatthefrontandrearsidesofthemachinewhencuttinglongwork.Itisdangerousif
theworkpiecefallsoffthemachine.
Neversteporstandontherollertable.Yourfootmaysliportripontherollersandyouwillfall.
Turnofftheshopcircuitbreakerswitchbeforeperformingmaintenanceonthemachine.
Postasignindicatingthemachineisundermaintenance.

i
T
able of Contents
Section1–SafetyInformation1‐1
SafetyInstructions……………………………………………………………………………………………………… 1‐1
SafeguardDevices………………………………………………………………………………………………………. 1‐3
EmergencyStop…………………………………………………………………………………………………………. 1‐4
Illustration:EmergencyStop……………………………………………………………………………………… 1‐5
SafetyLabels………………………………………………………………………………………………………………. 1‐6
Illustration:SafetyLabels………………………………………………………………………………………..… 1‐9
HearingProtection……………………………………………………………………………………………………... 1‐10
CECompliance……………………………………………………………………………………………………………. 1‐10
RiskAssessment…………………………………………………………………………………………………………. 1‐10
Section2–GeneralInformation2‐1
Specification……………………………………..……………………………………………………………………….. 2‐2
MachinePartsIdentification………………………………………………………………………………………. 2‐3
FloorPlan…………………………………………………………………………………………………..………………. 2‐4
Section3–Moving&Installation3‐1
Location&Environment………………………………..…………………………………………………………… 3‐1
Unpacking&Inspecting……..………………………………………………………………………………………. 3‐2
Lifting…………………………………………..………………………………………………………………….…………. 3‐3
Illustration:LiftingPoints…………………………………………………………………….……………….…… 3‐5
RemovingShippingBracket…………………………..……………………………………………….…………... 3‐6
Cleaning…………………………………………..…………………………………………………………….…………… 3‐6
Installing…………………………...………………………………………………………………………….……………. 3‐6
SupplyingHydraulicOil…………………………………………………………………….……………. 3‐6
SupplyingCoolant………..………………………………………………………………….…………….. 3‐7
ConnectingElectricPower……………………………………………………………….…………….. 3‐7
Leveling…………………………………………………………………….…………………………………… 3‐8
AnchoringtheMachine…………………………………………………………………….…………… 3‐9
InstallingRollerTable(Optional)………………………………………………….…………………. 3‐9
InstallingFireControlDevice………………………………………………….……………………… 3‐9
Relocating………………………...…………………………………………………………………….…………………. 3‐9
Section4–OperatingInstructions4‐1
SafetyPrecautions…………………..…………………..……………………………………….……………………. 4‐2
BeforeOperating…………………………..……………………………………………………………………………. 4‐3
ControlPanel……..……………………………………..………………………………………….……………………. 4‐4
ControlPanel………………….………………………………………………………………………..……. 4‐4

ii
T
able of Contents
ControlButtons……………………………………………………………………………………….…….. 4‐5
StandardAccessories………….………………………..……………………………………………….…………… 4‐6
OptionalAccessories…….…….………………………..…………………………………………….……………… 4‐7
Unrolling&InstallingtheBlade…………………………………………………………………….……………. 4‐8
AdjustingBladeSpeed………..………..……………………………………………………………………………. 4‐10
AdjustingSawArm………………………..……..………..…………………………………….……………………. 4‐11
AdjustingCoolantFlow………..………..…………………………………………………………………..………. 4‐11
AdjustingVise………..………..………………………………………………………………………………………… 4‐12
AngleCutting………………….………………………………………………………………………..……. 4‐12
QuickAdjustingMovableVisePosition………………………………………………………….. 4‐13
InstallingMaterialStopBracket………………………………………………………………………………….. 4‐13
AdjustingWireBrush………..……………………………………………………………………….………………. 4‐14
AdjustingHorizontalStopSpringCushion………………………..……..………..………………………… 4‐14
Test‐RunningtheMachine....………..……………………………………………..…………………………….. 4‐15
Breaking‐IntheBlade………..………..…………………………………………………………………..…………. 4‐15
CuttingOperation………..………..……………………………………………..……………………………………. 4‐16
TerminatingaCuttingOperation………..………..…………………………………….………………………. 4‐16
Section5–ElectricalSystem5‐1
ElectricalCircuitDiagrams……….…………………..…………………………………………………………….. 5‐1
Section6–HydraulicSystem6‐1
HydraulicCircuitDiagrams……….…………………..……………………………………………………………. 6‐1
Section7–BandsawCutting:APracticalGuide7‐1
Introduction……………………….…….…………………..……………………………………………………………. 7‐1
SawBladeSelection………………….…………………..…………………………………………………………… 7‐1
SomeSawingPractices…………….…………………..………………………………………….………………… 7‐4
SawPitchSelection……………………………………………………………………….……………….. 7‐4
MaterialSizeandSawPitch………………………………………………….….……………………. 7‐4
Section8–Maintenance&Service8‐1
Introduction……………………….…….…………………..……………………………………………………………. 8‐1
BasicMaintenance………………….…………………..…………………………………………….………………. 8‐1
MaintenanceSchedule…………….…………………..……………………………………………………………. 8‐1
BeforeBeginningaDay’sWork………………………………………………………………………. 8‐2
AfterEndingaDay’sWork…………………………………………………….……………………….. 8‐2
EveryMonth………………………………………………………………………….………………………. 8‐2
EveryThreeMonths………………..…………………………………………….………………………. 8‐2
EverySixMonths……………….………………………………………………….………………………. 8‐3

iii
T
able of Contents
StorageConditions…………………………....………..…………………………………………………………….. 8‐3
TerminatingtheUseofMachine……..…………..…………………………………………………………….. 8‐3
OilRecommendationforMaintenance………………………………………………………………………. 8‐4
Section9–Troubleshooting9‐1
Introduction……………………….…….…………………..……………………………………………………………. 9‐1
Precautions………………….…………………..……………………………………………………………………..... 9‐2
GeneralTroubles&Solutions………………………..……………………………………………………………. 9‐2
MinorTroubles&Solutions………………………..………………………………………………..……………. 9‐3
MotorTroubles&Solutions………………………..…………………………………………………..…………. 9‐3
BladeTroubles&Solutions………………………..……………………………………………………………….. 9‐4
SawingProblems&Solutions………………………..…………………………………………………………… 9‐5
Re‐AdjustingtheRollerTable………………………..……………………………………………………………. 9‐6
Section10–Warranty10‐1
Warranty…………………..……………………………………………………………………………………………….. 10‐1
Section11–Parts11‐1
SparePartsRecommendations…………………..………………………………………………………………. 11‐1
PartsList…………………..………………………………………………………………………………………………… 11‐2


1‐1
Section1
SAFETY
INFORMATION
SAFETYINSTRUCTIONS
SAFEGUARDDEVICES
EMERGENCYSTOP
SAFETYLABELS
HEARINGPROTECTION
CECOMPLIANCE
RISKASSESSMENT
Safetyisacombinationofawell‐designedmachine,operator’sknowledgeaboutthemachineand
alertnessatalltimes.COSEN’sbandmachinehasincorporatedmanysafetymeasuresduringthe
designprocessandusedprotectivedevicestopreventpersonalinjuriesandpotentialrisks.Warning
labelsalsoserveasaremindertotheoperator.
Throughoutthismanual,youwillalsoseevarioussafety‐relatedsymbolsindicatingimportant
informationthatyoushouldtakenoteofpriortouseofthemachineorpartofitsfunctions.These
importantsafetyinstructionsdonotcoverallpossiblesituationsthatmightoccur.Itisyour
responsibilitytotakecautionandfollowproceduresstatedinthismanualwheninstalling,
maintainingandoperatingyourmachine.Cosenwillnotbeliablefordamagesresultingfrom
improperuse.
SAFETYINSTRUCTIONS
Whattheiconsandsignsinthisusermanualmean:
ThisiconmarksDANGER;hazardsorunsafepracticesthatmayresultinsevere
personalinjuryordeath.
ThisiconmarksWARNING;hazardsorunsafepracticesthatmayresultin
personalinjuryordamagetothemachine.
ThisiconmarksCAUTION;informationthatshouldbereadbeforeusetoprevent
damagetothemachine.
Supplementaryinformationtotheproceduresdescribedinthismanual.
Callyourlocalagentorourservicecenterforhelp.

1‐2
Thismanualhasimportantsafety
information.Readthroughitcarefully
beforeoperatingthismachinetoprevent
personalinjuryormachinedamage.Learn
theoperation,limitationandthespecific
potentialhazardspeculiartothisband
saw.
Donotoperatethismachineunlessitis
completelyassembled.
Makesurethepowerswitchisoffbefore
plugginginpowercord.
Disconnectthepowercordbeforemaking
adjustment,maintenanceorblade
changes.
Keepallguardsandshieldsinplacebefore
installingorstartingupthemachine.
Wearproperapparelduringoperation
andwhenservicingthemachine.
Keepunauthorizedpersonnelaway.
Donotreachoverorstandonanypartof
themachine.
Neverholdthematerialbyhandfor
cutting.Alwaysusetheviseandmake
surethematerialisclampedsecurely
beforecutting.
Itisdangeroustooperatethemachine
whenthefloorisslippery.Keepthefloor
cleananddry.Checkforice,moisture,or
greasebeforeentering.
Donotusethemachinetocutexplosive
materialorhighpressurevesselsasitwill
generategreatamountofheatduringthe
sawingprocessandmayignitean
explosion.
Keeptheworkenvironmentsafe.Donot
usebandsawinadamporwetlocation.
Neveroperatewhileundertheinfluence
ofdrugs,alcoholormedication.
Allusersmustreaditbeforeperformingany
activityonthemachine,suchasreplacing
thesawbandordoingregularmaintenance.
Somepersonalprotectiveequipmentis
requiredforthesafeuseofthemachine,e.g.
protectiongoggles.
Keepbladeprotectioncoverandwheel
coversinplaceandinworkingorder.
Userecommendedaccessories.Improper
accessoriesmaybehazardous.
Keepyourworkareawellilluminatedat
minimum500lumen.
Keepyourworkareaclean.Clutteredand
slipperyfloorsinviteaccidents.
Removeadjustingkeys,wrenchesorany
loosepartsoritemsfromthemachine
beforeturningonpower.
Checkfordamagedparts.Beforecontinuing
usingthemachine,thedamagedpartshould
becheckedandreplaced.
Movingpartsshouldbekeptinproper
alignmentandconnectionwiththemachine.
Checkforbreakage,mountingandanyother
conditionsthatmayaffectitsoperation.Any
damagedpartorguardshouldbeproperly
repairedorreplaced.
Whenaworkpieceistoolongorheavy,
makesureitissupportedwitharollertable
(recommended).
Alwaysremembertoswitchoffthemachine
whentheworkiscompleted.
Useasharpsawbladeandkeepthemachine
initsbestandsafestperformanceby
followingaperiodicalmaintenanceschedule.
Donotforcethebandsawbeyondits
intendeduse.Itissafertooperatewiththe
cuttingrateforwhichitwasdesigned.
1‐3
SAFEGUARDDEVICES
Thesafeguarddevicesincorporatedinthismachineincludethefollowingtwomainparts:
1. Protectioncovers&guards
2. Safety‐relatedswitches
ProtectionCovers&Guards
1. Idlewheelhousingcover
2. Drivewheelhousingcover
3. Gearreducercover
4. Wirebrushbeltcover
5. Bladeguardcover(left&right)
Theprotectiondevicesshouldalwaysbemountedonthemachinewheneverthemachineisrunning.
Donotremoveanyofthesesafeguarddevicesunderanycircumstancesexceptwhenservicingthe
machine.Evenskilledservicetechniciansshouldstilltakecautionswhenperformingrepairsorservice
onthemachinewithanyoftheseprotectorsremoved.Itistheresponsibilityoftheusertomakesureall
theseelementsarenotlostanddamaged.
Takenoteofthefollowingmainmovingpartsonthemachinepriortoandduringmachineoperation:
Sawbowassembly
Driveandidlewheels
Bladeguidearm
Sawbladeguiderollers
Quickapproachdevice
Wirebrush
Chipconveyor(optional)
Workpiececlampingvises
Shuttlevisesandworkbedrollers
Topclamps(optional)
Gearreducer

1‐4
SafetyRelatedSwitches
Toprotecttheoperator,thefollowingsafetyrelatedswitchesonthemachineareactuatedwhenthe
machineisinoperation.
WheelmotiondetectorThisisaproximitysensorusedtodetectthemotion
ofthedrivewheel.Oncethesawbladeisbrokenor
assoonasitstartsslipping,thesensorwilldetect
andstopthedrivewheelandthemachine.
PowerswitchLocatedonthecoverofelectricalcabinet,thepower
switchcontrolsthemainpowerofthemachine.Up
toyourcompany’sinternalrules,thispowerswitch
canbelockedwithapadlockoraluggagelockto
protecttheoperatorandthemachine.
EmergencystopbuttonLocatedonthecontrolpanel,thebuttonwhen
pressedwillstopthemachinecompletely.
ViseclampswitchThisswitchassuresfirmclampingoftheworkpiece.If
theworkpieceisnotclampedproperly,thesaw
bladeisnotallowedtorun.
Wheelcoverinterlockswitches
(CEmodelonly)
Locatedonthetwowheelhousings,theseswitches
areusedtoassurethatthemachinewillstop
wheneverthewheelcoversareopen.Thisdeviceis
toprotectusersfrombeingcutbytherunningsaw
blades.
Amongallthesesafetyswitches,someofthemareusedtoprotecttheusersandsomeofthemare
usedtopreventdamagetosawblades,theworkpieceandthemachineitself,etc.Wehavetaken
everyprecautiontopreventinjuryordamageandtoprovidesafeandeconomicaloperationofthe
machine.
EMERGENCYSTOP
Designedtobeeasilyaccessible,theemergencystopbuttonislocatedontheleftbottomcorneron
thecontrolpanelandismadeinredcolorandrubbermaterial.ForCEmodels,supplementary
emergencystopbuttonmaybeavailableatotherarea(s)ofthemachinedependingonmachinetype.
PleaserefertoIllustration:EmergencyStop.
Whenyoupressthebutton,themachinewillimmediatelycometoafullstoptoavoidinjuryor
damagewhenanaccidentoccurs.Thebuttonwillbelockedwhenyoupressit.Tounlockit,pullit
upward.
Youshouldpressitimmediatelywithoutanyhesitationwhenobserving:
Anemergencysituationthatwouldcauseanyinjuryordamage
Anabnormalsituationorproblemsuchasfire,smoke,abnormalnoiseandetc.

1‐5
Illustration:EmergencyStop
Non‐CEmodel
CEmodel
EmergencyStop
EmergencyStop

1‐6
SAFETYLABELS
Safety‐relatedlabelsmountedonthemachinearecategorizedintothefollowingfourcategories.
Pleasereadthroughandunderstandthembeforeoperatingthemachine.RefertoIllustration:Safety
Labels.
DANGERLabels
AredandwhiteDANGERlabelsmarksshazardsorunsafepracticesthatwillresultinseverepersonal
injuryordeath.
LabelMeaningLabelMeaning
HazardousVoltage
TURNPOWEROFFbefore
servicing.Failureto
followingthewarningcan
resultinsevereinjury.
DANGER:RunningBlade
Bladerunsthroughthisarea.Keep
yourhandsawayfromarunning
bladetoavoidsevereinjury.The
arrowindicatesdirectionofthe
blade.
WARNINGLabels
AnorangeandblackWARNINGlabelmarkshazardsorunsafepracticesthatcanresultinsevere
personalinjuryordamagetothemachine.
LabelMeaningLabelMeaning
CuttingHazard
KEEPCOVERCLOSEDwhile
thebladeisrunning.Turn
poweroffbeforeopening
cover.Failuretofollowthe
warningcanresultinsevere
injury.
CuttingHazard
KEEPHANDOFFwhilethebladeis
running.Turnpoweroffbefore
openingcover.Failuretofollowthe
warningcanresultinsevereinjury.
Pleaseaddantifreeze
coolantwhentheambient
temperatureisbelow0˚C
(32˚F).
LooseHandHazard
KEEPHANDOFF.Donottouchchip
conveyor.Failuretofollowthe
warningcanresultinsevereinjury.
ImpactHazard
WEARSAFETSHOES.Donot
approachdroppingarea
duringoperation.

1‐7
CAUTIONLabels
YellowandblackCAUTIONlabelsmarkhazardsorunsafepracticesthatcanresultin
considerablepersonalinjury.
LabelMeaning
Keephandsoutofthemachinewhilethebladeisrunning.
Powertomachinemustbeturnedoffwhenchangingbladesor
adjustingwirebrush.
NOTICELabels
BlueandwhiteNOTICElabelsmeanunsafepracticesthatcouldresultindamagetoproductsor
property.
LabelMeaning
Replacethehydraulicoileverysixmonthsorevery1,200hours
ofoperation.
Oilspecification:ShellTELLUS27orMobilDTEOILLIGHT/
HYDRAULIC28
Toextendbladelife,alwaysadjustthelocationofwirebrushso
thatitisproperlytouchingtheblade.Alsoreplaceawornwire
brushwithanewone.

1‐8
SAFETYINSTRUCTIONLabels
GreenandwhiteSAFETYINSTRUCTIONSareimportantremindersthatshouldbereadbefore
operatingthemachine.
LabelMeaning
1. Readandunderstandtheinstructionmanualandwarning
signsbeforeoperatingmachine.Failuretofollowthese
instructionsandwarningscanresultinseriousinjuryor
death.
2. Donotweargloves,neckties,jewelryorlooseclothing
whileoperatingthemachine.
3. Alwaysweareyeprotectiongoggles.
4. Checkbladetensionandadjustbladeguidebeforestarting
tocut.
5. Alwaysclampstockfirmlyinplacebeforecutting.
6. Donotremovejammedorcut‐offpiecesuntilbladehas
stopped.
7. Keepfingersoutofpathofblade.
8. Bladeguardsshouldbeinplaceandusedatalltimes.
9. Disconnectmachinefrompowersourcebeforemarking
repairsoradjustments.
10. Donotoperatewhileundertheinfluenceofdrugs,alcohol
ormedication.

1‐9
Illustration:SafetyLabels

1‐10
HEARINGPROTECTION
Alwaysuseearprotection!
Whenyourmachineisrunning,noisegeneratedbythemachinemaycomefromthefollowing:
Sawbladeduringcuttingormaterialfeedmechanism
Wirebrushunit
Chipconveyorunit
Speedreducer
Hydraulicmotor/pump
Belttransmissionsvariablespeedmotors
Blademotor
Coolantpump
Drivewheel
Partsnotassembledtightlycausingmechanicalvibration
Ourproductspassnoisetestinglessthan78dBA.Noiselevelvaryaccordingtoworkingconditions
andwerecommendearplugsorotherhearingprotectionatalltime.Ifyourmachineproducesan
undesirablenoisewhileitisrunning,youshould:
1. Makesureallmaintenancetaskshavebeenperformedfollowingtheprescribedmaintenance
schedule(RefertoSection8).
2. Ifmaintenancedoesnotseemtosolvetheproblem,followthetroubleshootingprocedures
underSection9.
CECOMPLIANCE
Cosen’sCEmodelisdesignedtosatisfyregulationsoftheCouncilDirectiveontheapproximationof
thelawsoftheMemberStatesrelatingtomachinery(2006/42/EC)‐AnnexIEssentialhealthand
safetyrequirementsrelatingtothedesignandconstructionofmachinery.
RISKASSESSMENT
Riskassessmentgenerallytakesaccountofintendeduseandforeseeablemisuse,includingprocess
controlandmaintenancerequirements.Wemadeeveryefforttoavoidanypersonalinjuryor
equipmentdamageduringthemachinedesignstage.However,theoperator(orotherpeople)still
needstotakeprecautionswhenhandlinganypartofthemachinethatisunfamiliarandanywhereon
themachinethathaspotentialhazards(e.g.theelectricalcontrolbox).

2‐1
Section2
GENERAL
INFORMATION
SPECIFICATION
MACHINEPARTSIDENTIFICATION
FLOORPLAN
ThisbandsawmachineisdesignedbyCosen’sR&Dengineerstoprovideyouthefollowingfeatures
andadvantages:
Safety
Thismachineisdesignedtofullyprotecttheoperatorfromitsmovingpartsduringcutting
operation.
Themachineandeachcompomenthaspassedstricttesting(CouncilDirectiveonthe
approximationofthelawsoftheMemberStatesrelatingtoMachinery).
Themachinewillshutoffautomaticallywhenthesawbladeisbroken,protectingboththe
operatorandthemachine.
Convenience&High‐Performance
Themachineisdesignedinthewaythattheoperationandadjustmentcanbeeasily
performed.
Themachinewillstopautomaticallywhenoutofstock.
Dualvalvesystemisdesignedtoachieveoptimalcuttingperformancewiththesimple
settingoffeedrateandperspectivecuttingpressurefordifferentmaterial.
Durability
Theintendedlife‐spanofthemachineiscountedbasedonregulardailyoperation.Itis
calculatedwiththelifeexpectancyof10yearsundernormaloperatingconditionandexact
attentiontothemaintenanceschedule.
8hours×5days×52weeks×10years=20,800hours

2‐2
SPECIFICATION
ModelSH‐250R
Semi‐AutomaticHinge‐TypeHorizontalBandsaw
Capacity
250mm(9.8in.)
230x230mm(9.0x9.0in.)
(H×W)230x300mm(9.0x11.8in.)
SawBlade
Speed50Hz19,31,48,78m/min(62,102,157,256ft/min)
60Hz23,37,58,93m/min(75,121,190,305ft/min)
Size(LxWxT) 3350x27x0.9mm(132x1.06x0.035in.)
TensionManual
MotorOutput
SawBlade2HP(1.5kW)
Hydraulic0.25HP(0.18kW)
CoolantPump0.125HP(0.1kW)
TankCapacity
Hydraulic15L(3.96gal.)
Coolant40L(10.56gal.)
WorkbedHeight640mm(25")
GrossWeight580kgs(1276lbs)
FloorSpace(LxWxH)1850×900×1040mm(73×35.4×41in.)
Table of contents
Other Cosen Saw manuals

Cosen
Cosen MH-350DM User manual

Cosen
Cosen SH-1300LDM User manual

Cosen
Cosen C2 User manual

Cosen
Cosen MH-1016JA User manual

Cosen
Cosen SH-7550S User manual

Cosen
Cosen SH-1000F User manual

Cosen
Cosen SH-5542 User manual

Cosen
Cosen C-650MNC User manual

Cosen
Cosen C-320NC User manual

Cosen
Cosen CNC-800DM User manual