4
(6)
(7)
(8)
(9)
Resting•
Transporting•
Refuelling•
Maintenance•
Tool Replacement•
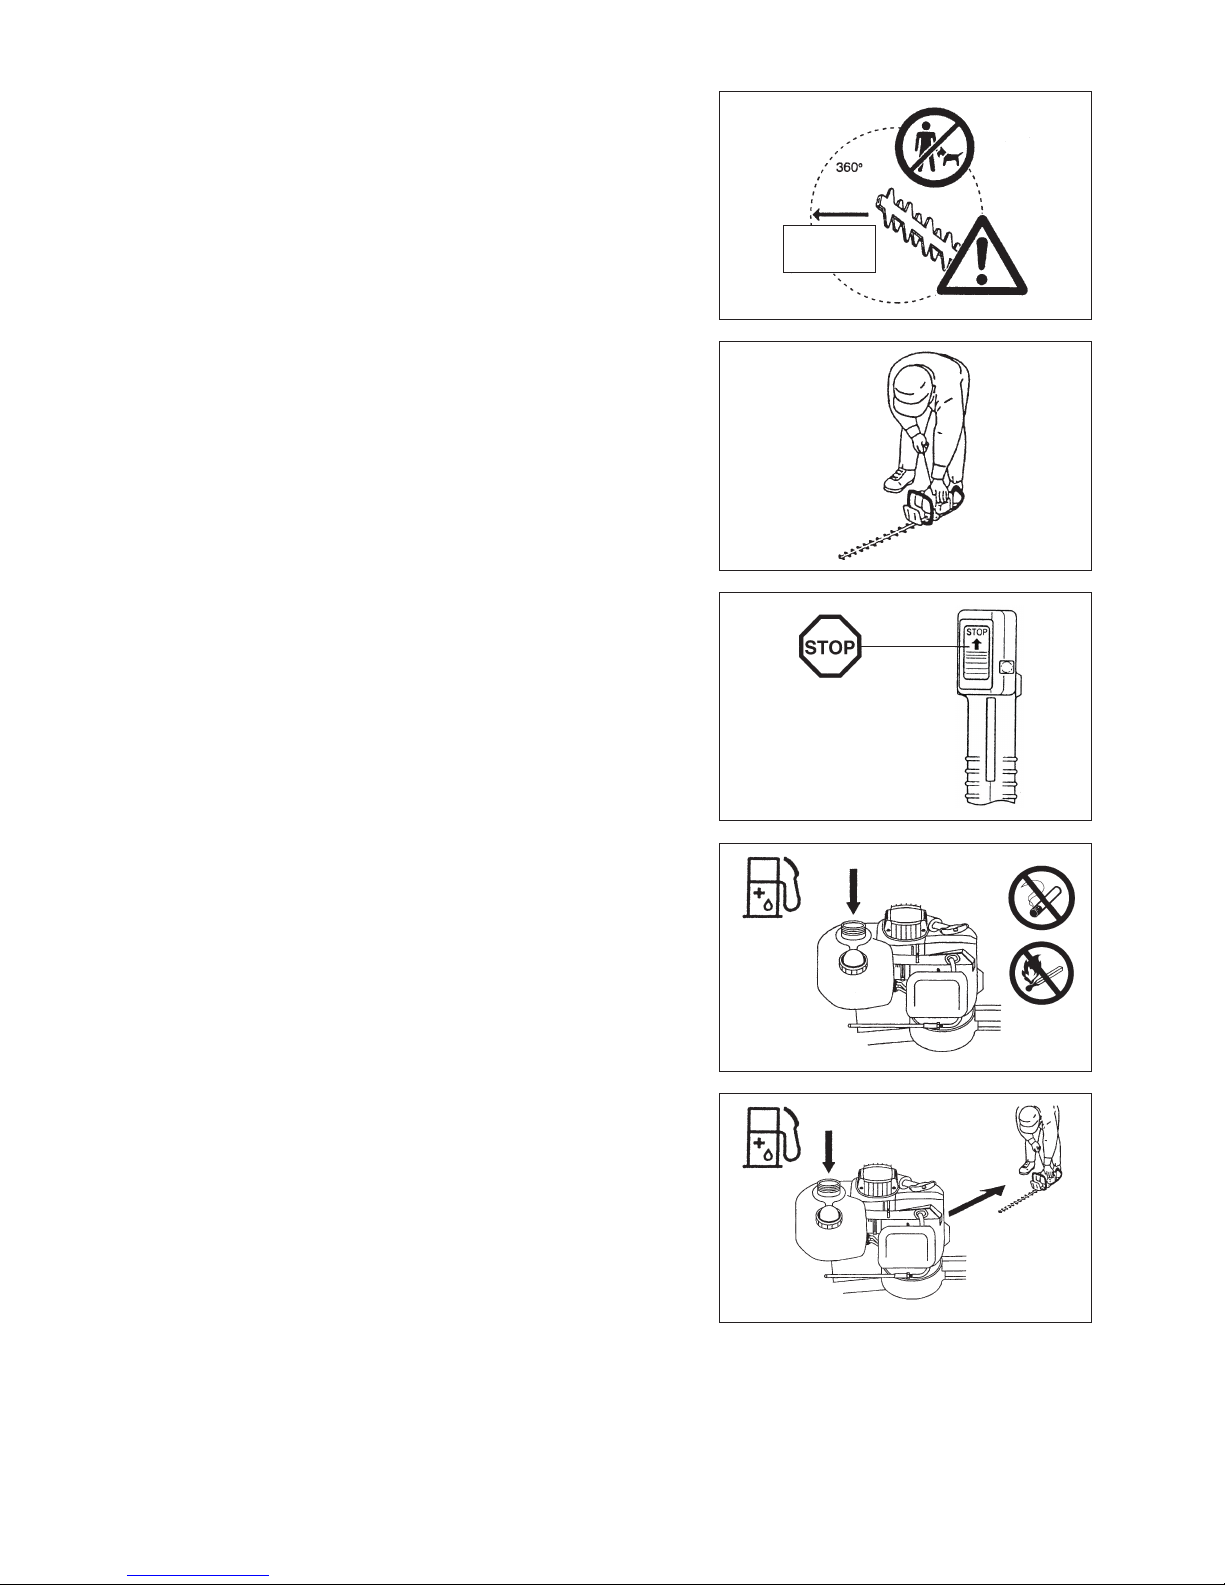
3 meters
Starting up the Hedge Trimmer
Pleasemakesurethattherearechildrenorotherpeoplewithinaworking–
range of 50 feet or 15 meters (5), also pay attention to any animals in the
workingvicinity.
Before operating, always check that the Hedge Trimmer is safe for–
operation:
Check the security of the throttle lever. The throttle lever should be checked
for smooth and easy action. Check for proper functioning of the throttle lever
lock. Check for clean and dry handles and test the function of the STOP
switch.Keephandlesfreeofoilandfuel.
StarttheHedgeTrimmeronlyinaccordancewiththeinstructions.
Do not use any other methods for starting the engine (6)!
UsetheHedgeTrimmeronlyforapplicationsspecied.–
Start the Hedge Trimmer engine only after the entire assembly is done.–
Operation of the Hedge Trimmer is permitted only after all the appropriate
accessories are attached!
Beforestarting,makesurethatthecutterbladewillnotcontactanyobjects–
such as branches, stones, etc.
The engine is to be stopped immediately if there are any engine problems.–
WhenworkingwiththeHedgeTrimmer,keepbothhandsonhandlesalways–
wrapyourngerstightlyaroundthehandle,keepingthecontrolhandle
cradledbetweenyourthumbandforenger.Keepyourhandinthispositionto
have your machine under control at all times. Make sure your control handle
is in good condition and free of moisture, pitch, oil or grease.
Always ensure a safe, well-balanced footing.
Only use outdoors.–
Operate the Hedge Trimmer in such a manner as to avoid inhalation of the–
exhaustgases.Neverruntheengineinenclosedrooms(riskofsuffocation
andgaspoisoning).Carbonmonoxideisanodorlessgas.Alwaysensure
there is adequate ventilation.
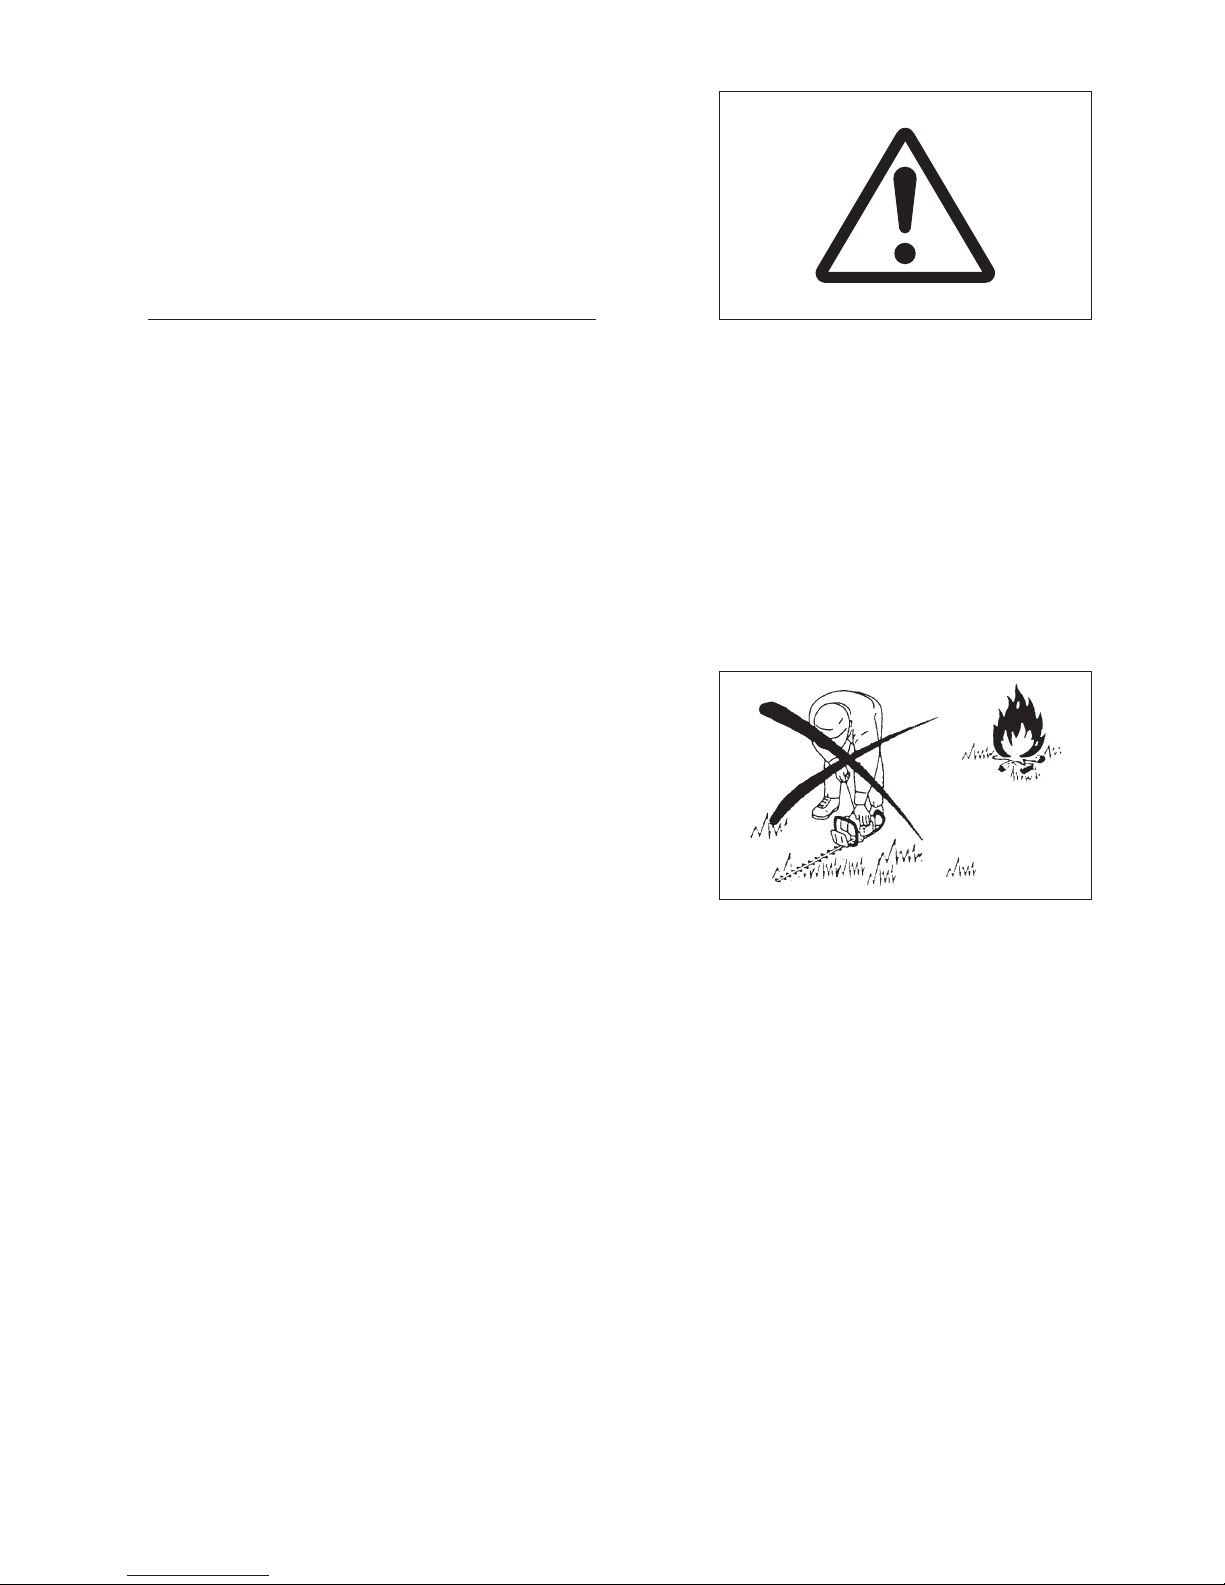
StoptheenginewhenrestingandwhenleavingtheHedgeTrimmer–
unattended.Placeitinasafelocationtopreventdangertoothers,settingre
to combustible materials or damage to the machine.
NeverlaydownthehotHedgeTrimmerontodrygrassorontoany–
combustible materials.
Neveroperatetheenginewithafaultyexhaustmufer.–
Stop the engine during transport (7).–
Secure the tool properly before transporting in vehicle to avoid fuel leakage.–
When transporting the Hedge Trimmer ensure that the fuel tank is completely–
empty to avoid fuel leakage.
Refuelling
Toreducetheriskofreandburninjuryhandlefuelwithcare.–
Itishighlyammable.
Stoptheenginebeforerefuelling(7),keepwellawayfromopename(8)and–
do not smoke.
Do not attempt to refuel a hot or a running engine.–
Avoidskincontactwithpetroleumproducts.Donotinhalefuelvapor.Always–
wearprotectiveglovesduringrefuelling.
Change and clean protective clothing at regular intervals.
Takecarenottospilleitherfueloroilalwayswipeunitdrybeforestarting–
engine.Allowwetclothstodrybeforedisposinginproper,coveredcontainer
to prevent spontaneous combustion.
Avoidanyfuelcontactwithyourclothing.Changeyourclothingimmediatelyif–
fuelhasbeenspilledonit(dangerhazard).
Inspect the fuel cap at regular intervals making sure that it stays securely–
fastened.
Carefullytightenthelockingscrewofthefueltank.Moveatlease10ft–
(3meters)awayfromtherefuellingpointbeforestartingengine.
Never refuel in closed rooms. Fuel vapors accumulate at ground level (risk of–
explosions).
Only transport and store fuel in approved containers. Make sure stored fuel is–
not accessible to children.
Whenmixinggasolinewithtwocycleengineoil,useonlygasolinewhich–
contains no ethanol or methanol (types of alcohol).
Thiswillhelptopreventdamagetofuellinesandotherengineparts.
Make sure the unit is properly assembled and in good operating condition.–
(5)
15 meters
(50 feet)