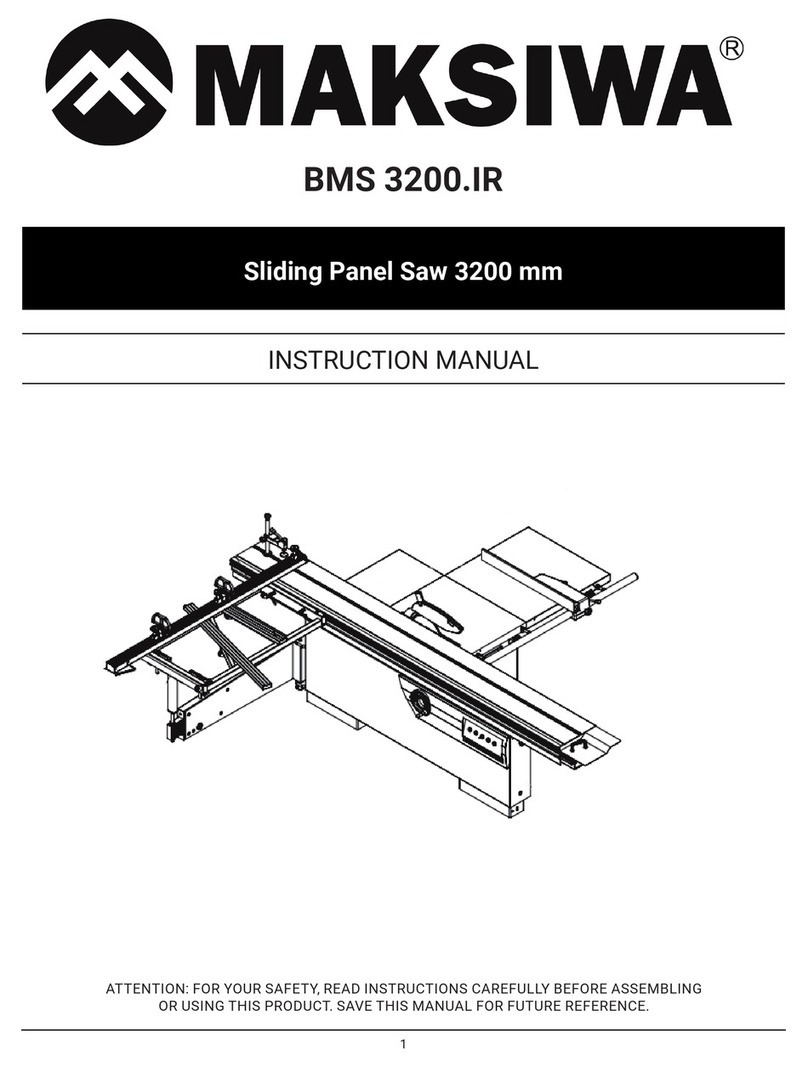
MAKSIWA BMS.3200.IR User manual

1
BMS.3200.IR
INSTRUCTION MANUAL
S. C. Sliding Panel Saw 3200 mm
Attention: Read this manual before using the machine.

2
Greetings,
Congratulations, you just purchased the BMS.3200.IR Precision Saw, which was developed with the
Maksiwa’s highest standards of technology and quality. Your BMS.3200.IR Precision Saw allows you
to have the highest productivity in woodworking. Besides a great nish, the BMS.3200.IR ensures that
your cuts are always precise. It should be noted that to use this machine with maximum eciency,
you should read and understand the instructions in this manual.
Visit our website to know about our launches and other product lines:
www.maksiwa.com

3
Index
1 Safey Regulations..........................................................................................................................................................05
1.1 Workspace...................................................................................................................................................................05
1.2 Electrical Safety........................................................................................................................................................05
1.3 Personal Safety.........................................................................................................................................................06
1.4 Machine Safety..........................................................................................................................................................06
2 Description.......................................................................................................................................................................09
2.1 Specications............................................................................................................................................................09
2.2 Components...............................................................................................................................................................10
2.2.1 Mobile Arm.............................................................................................................................................................11
2.2.2 Mobile Table Guide.............................................................................................................................................11
2.2.3 Blade Tilt Control Handle................................................................................................................................12
2.2.4 Control Panel......................................................................................................................................................13
2.2.5 Emergency Buttons/Switches.....................................................................................................................14
2.2.6 Main Table Lock.................................................................................................................................................15
2.2.7 Sliding Table Handle........................................................................................................................................15
2.2.8 Adjustable Table Handle................................................................................................................................16
2.2.9 Adjustable Angle Guide.................................................................................................................................17
2.2.10 Rear Extension Table.......................................................................................................................................17
2.2.11 Rear Extension Table Guide.........................................................................................................................18
2.2.12 Panel Pushing Handle....................................................................................................................................19
2.2.13 Blade Protector Cover...................................................................................................................................19
2.2.14 Dust Collection Port.....................................................................................................................................20
2.2.15 Support Table....................................................................................................................................................21
2.2.16 Wood Panel Clamp........................................................................................................................................21
2.2.17 Aluminum Table Guide.................................................................................................................................22
2.2.18 Scoring Blade Adjustment Handles........................................................................................................23
2.2.19 Wood Panel Stopper....................................................................................................................................24
2.2.20 Blade Height Adjustment Handle...........................................................................................................25
2.2.21 Aluminum Guide Extensions......................................................................................................................25
3 Installation.........................................................................................................................................................................26
3.1 Electrical Installation...............................................................................................................................................26
3.2 Assembly....................................................................................................................................................................28
4 Operation............................................................................................................................................................................41
4.1 Cutting Setup.............................................................................................................................................................41
4.1.1 Main Blade Adjustments..................................................................................................................................42

4
4.1.2 Scoring Blade Adjustments..........................................................................................................................43
4.1.3 How to Cut at Dierent Angles....................................................................................................................45
4.1.4 How to Setup for Recurrent Cuts.................................................................................................................46
4.1.5 Running a Piece.................................................................................................................................................47
4.1.6 Cross Cutting.....................................................................................................................................................48
4.1.7 Cutting Frames, Boxes and Other Four-Sided Pieces......................................................................48
4.1.8 Bevel Cuts..........................................................................................................................................................49
4.1.9 Support for Long Parts................................................................................................................................49
5 Maintenance.....................................................................................................................................................................50
5.1 General Cleanliness................................................................................................................................................50
5.2 Electrical Maintenance..........................................................................................................................................50
5.3 Mechanical Maintenance......................................................................................................................................50
5.4 Saw Blade Lubrication Chart...............................................................................................................................51
5.5 Part Replacement and Disposal.........................................................................................................................51
6 Troubleshooting Guide..................................................................................................................................................52
7 Terms of Warranty...........................................................................................................................................................53

5
1 Safety Regulations
Read all instructions in this manual. Failure to follow all instructions listed below may result in
personal injury and equipment damage. WARNING: When using electrical equipment, always follow
the safety precautions to reduce risk of re, electric shock and personal injury. The manufacturer
declares that they are not liable for damages to person(s) or object(s) which may be caused by
failure to comply with the safety regulations.
1.1 Workspace
• Keep the work surface clean. Disorganized surfaces and areas are an invitation, for accidents in
the work place.
• Do not use the saw in hazardous environments. Do not use the machine in places that are damp,
wet, exposed to rain, or in the presence of ammable liquids or gases. Keep your work area well
lit.
• Visitors must be kept at a safe distance from the workspace. Take the appropriate precaution by
using padlocks or following the appropriate lock-out-tag procedures.
1.2 Electrical Safety
• Ensure that your power supply is in accordance with the rating of the machine. A 10% increase
or decrease in voltage will cause power loss and overheating. All Maksiwa equipment is factory
tested. If this Machine does not operate properly, rst check the power supply.
• The BMS.3200.IR is constructed with two separate layers of electrical insulation. You do not have
to ground the machine if the power supply comes built with an ground.
• NOTE: Double insulation is not a substitute for normal safety precautions when operating this
machine. The insulation system is to add protection against personal accidents resulting from a
possible failure of the machines electrical insulation.
• CAUTION: WHEN SERVICING OR REPAIRING THE MACHINE, ONLY USE OEM PARTS.
• The plug used for the machine must be rated for the correct voltage/Amps and compatible with
the electrical outlet. Never modify the plug.
• Do not use any adapter plugs. Using the correct plug (without modications) with the correct
outlet will reduce the risk of electrical shock.
1 Safety Regulations

6
1.3 Personal Safety
• Stay alert, pay attention at what you are doing and use common sense when operating the
machine. Do not use the machine when you are tired or under the inuence of drugs, alcohol, or
medication. If distracted, while operating the machine, it may in result in serious personal injury.
ALWAYS USE PROPER PROTECTION WHEN OPERATING THIS EQUIPMENT.
• Always wear safety glasses, face protection, safety anti-slip shoes, and ear protection to reduce
personal injury.
• Do not wear loose clothing, gloves, chains, rings, bracelets or other accessories. It is also
recommended to use hair protection.
• Do not over stretch to reach. Keep balanced and feet rmly planted at all times.
• Disconnect the machine from the power supply before servicing or performing repairs.
• Reduce the risk of unintended starts by making sure that the main power switch is turned o
before plugging the cord into the outlet.
• Use recommended accessories. Refer to the instruction manual to check the recommended
accessories. Improper use of the accessories may cause personal injury.
• Never stand on the machine. serious accidents can occur if the machine is tilted or if the blade
is accidentally touched.
1.4 Machine Safety
• Turn o the saw, unplug the power cord, and wait until the blade stops, before performing any
maintenance or adjustments to the machine.
• Make sure the blades are not worn, as for this will prevent the machine from cutting properly
and overload the motors. Do not overload the Machine, it will perform the job better and safer
if used as indicated. Do not force the machine by performing a job for which it was not intended
for.
• Firmly secure your workpiece. Use clamps if necessary when you cannot secure the workpiece
on to the table and against the guide by hand, or when your hand is dangerously close to the
blade.
• Inspect the machine. Keep the blades sharp and clean for optimal performance. Follow the
instructions on lubricating and changing accessories. Check the alignment of moving parts and
for any damaged parts, before continuing to use the machine. A part that is damaged should
be carefully examined to determine, if it is functioning properly and if it will aect the machines
1 Safety Regulations

7
performance. A blade cover or any other part that is damaged must be repaired or replaced
immediately. Do not use the machine if any the switches do not work properly.
• Never leave the machine running unattended. Turn o the main power switch when not in use
to prevent any accidents.
• Protect the power supply circuit with at least a fuse or circuit breaker. Do not attempt to operate
the saw at any voltage other than the designated voltage.
• Make sure all blade washers and fasteners are clean. Tighten the shaft nut securely. Keep the
saw blades sharp, make sure that the blades are facing the correct directions (main blade spins
clockwise) (Scoring blade spins counter-clockwise). See g 13-4 on pg. 39.
• Keep motor vents free of splinters or saw dust.
• Always use the blade guard cover.
• Keep your hands out of the way of the blades.
• Support long pieces with a wood fastening device.
• Do not use blades larger or smaller than recommended.
• Be careful not bend or damage the cooling fan on the rear of the motors.
• Do not force a cut, partial or complete, motor will shut down and can cause serious damage.
Allow the motor to reach its top speed before starting the cut.
• Do not cut ferrous metals (those containing iron or steel in their composition) or any other
masonry material.
• Do not use abrasives. Excessive heat generated by abrasive particles will damage the saw blades.
• Do not use blades designated for less than recommend amount.
• Do not cut small pieces without the aid of a fastener. Keep hands away from blades.
• Do not perform any hands-free operation.
• Do not reach around or behind the blades.
• Do not put your hands within 6 inches of the saw blades.
• Do not place your hands under the saw unless it is o and unplugged. The saw blades are
exposed in the lower portion of the saw.
• Do not move the workpiece or lift the cover until the blade has stopped.
• Do not use the saw without the support base or if the support base is not properly secured.
• Do not use lubricants or cleaning products (particularly sprays and aerosols) in the vicinity
of the plastic protector. The polycarbonate material used on the cover is sensitive to certain
products chemicals.
• To Avoid KICKBACK (“Kickback” - the natural tendency of the workpiece to be thrown back
towards the operator) keep the blade sharp, free of rust and dry resin; keep the cutting guide
parallel to the saw blade; use the saw guards for all work where possible; push the workpiece
completely through the saw blade before releasing it; Do not make longitudinal cuts on a
workpiece that is twisted, deformed, or that does not have a straight end that serves as a guide;
use an anti-kickback device when possible; never cut workpieces that cannot be xed; Use the
1 Safety Regulations

8
guide when making a cross-section cut; and never cut a large workpiece with loose knots or
other defects.
• ATTENTION: Any powder created by sanding, cutting, grinding, drilling, and other activities
contains chemicals that can cause cancer, birth and other reproductive harm. Some examples of
these products are: in lead; crystal silica brick, cement and other masonry products; and arsenic
and chromium from chemically treated wood.
• CAUTION: Do not connect the machine to the power outlet until this manual is read and
understood.
• Always tighten the adjusting tabs before using the saw. Keep hands 15 cm (6 in) away from the
saw blade. Never perform operations hands-free and never cross your arms in front of the saw
blade. Think, “ How can I avoid accidents?”.
• Do not operate the saw without the guards being in place. Never put your hands on the saw
blade. Always wear safety goggles. Turn o the power and wait for the blade to stops before
starting to service or making adjustments.
1 Safety Regulations

9
2 Description
The BMS.3200.IR Black Edition precision saw is designed to provide excellent nishing cuts of MDF
sheets. It has a slope of axis from 0º to 45º with digital display. Reinforced structure the BMS.3200.IR
Black Edition supports panels with a thickness of 25 mm (1 in). It also has a scoring blade to provide
quality cuts. It has Independent motors, where the main saw motor has 5.0 HP for long periods of
heavy work. With precision aluminum guides, the BMS.3200.IR Black Edition is the right choice for
anyone looking for quality and accuracy in their cuts.
2.1 Specications
General:
• Weight: 1,470 LBS
• Machine dimensions (closed): L 131” X W 132” X H 48’’
• Machine dimensions (max): L 188” X W 270” X H 65’’
• Mobile table dimension: 14 3/4” X 132”
• Mobile table max travel length: 270”
• Fixed table max width: 52”
• Guide size (closed): 71”
• Guide size (max): 128’’
• Slope inclination: 0° to 45°
Dust collection:
• Port 1 diameter: 3’’
• Port 2 diameter: 3’’
• Minimum CFM needed: 600 CFM
Blade:
• Main blade diameter: 13 25/32”
• Main blade arbor size: 1 3/16”
• Scoring blade diameter: 4 ¾’’
• Scoring blade arbor size: 25/32”
• Max tilt: 45°
• Max depth cut: 3 15/16”
• Max cutting length: 125 63/64”
NOTE: Pictures and illustrations in this manual are ILLUSTRATIVE only and may not be the actual
color, contain the same labels or accessories, and are intended only to illustrate the technical part.
2 Description

10
2 Description
2.2 Components
1. Mobile Arm
2. Mobile Table Guide
3. Blade Tilt Control Handle
4. Control Panel
5. Emergency Buttons/Switches
6. Main Table Lock
7. Sliding Table Handle
8. Adjustable Table Handle
9. Adjustable Angle Guide
10. Side Extension Table
11. Rear Extension Table Guide
12. Panel Pushing Handle
13. Blade Protector Cover
14. Dust Collection Port
15. Support Table
16. Wood Panel Clamp
17. Aluminum Table Guide
18. Scoring Blade Adjustment Handles
19. Wood Panel Stopper
20. Blade Height Adjustment Handle
21. Aluminum Guide Extensions

11
2 Description
2.2.1 Mobile Arm
Enables greater cutting range and greater ergonomics for the operator.
2.2.2 Mobile Table Guide
It is used to support larger workpieces and make cross cuts. Can be placed throughout the movable
table.

12
2 Description
2.2.3 Blade Tilt Control Handle
It is used to tilt both saw blades manually.
The slope of the saw ranges from 0 to 45 degrees.

13
2 Description
2.2.4 Control Panel
At the control panel you control all the functions and cutting devices of the machine.
1. Digital panel: Shows the angle of the saw blades.
2. POWER button: When the STOP button is released, the POWER button lights up. The machine
will be energized.
3. Green button ON: When pressed, it turns on the main blade.
4. Green button ON: When pressed, it turns on scoring blade.
5. Red button OFF: When pressed, the main saw and scoring blade are switched o.
6. STOP button: This is a safety button. It must be released to operate the main and scoring blades.
When it is pressed in the machine turns o.

14
2 Description
2.2.5 Emergency Buttons/Switches
The emergency switches are used to power the machine and turn it o.
1. Main Power Switch: Powers the machine and the machine control panel.

15
2 Description
2.2.6 Main Table Lock
When applied it locks the movable table structure, when released it unlocks the movable table.
2.2.7 Sliding Table Handle
It is used to push the movable table during the cut.
Ensures greater operator ergonomics.

16
2 Description
2.2.8 Adjustable Table Handle
It is used to push the movable table during the cut and It can be moved through the table.

17
2 Description
2.2.9 Adjustable Angle Guide
It is used to make cross cuts from 0 to 45 degrees.
2.2.10 Rear Extension Table
Provides an increase to the work area. It holds a ruler.

18
2 Description
2.2.11 Rear Extension Table Guide
It is intended to be used as a reference to cut multiple pieces at the same measurement.
1. Guide ruler: It is xed throughout the table.
2. Guide frame: Made of cast iron.
3. Aluminum guide: It is xed to the guide frame and serves as a support for the workpiece.

19
2 Description
2.2.12 Panel Pushing Handle
It is used to push the workpiece providing safety for the operator.
2.2.13 Blade Protector Cover
It has the function of protecting the operator against splinters and saw dust from cuts.

20
2 Description
2.2.14 Dust Collection Port
Its function is to collect residues and saw dust from cuts.
The two outputs have a diameter of 100 mm (3 in).
1. Outlet for upper dust collector: It is located in the saw protection cover.
2. Lower dust collector outlet: It is located on the side of the machine.
Other manuals for BMS.3200.IR
2
Table of contents
Other MAKSIWA Power Tools manuals
Popular Power Tools manuals by other brands

Worcraft PROFESSIONAL
Worcraft PROFESSIONAL CHG-S20Li instruction manual
Weber
Weber SRV 62 Operating and maintenance instructions
Campbell Hausfeld
Campbell Hausfeld Air Ratchet operating instructions
Rikon Power Tools
Rikon Power Tools 30-120 Operator's manual

Hilti
Hilti SJT 6-A22 manual
Rosenberger
Rosenberger 08CK001-150 user manual
