MALTEC DryMaster500W User manual

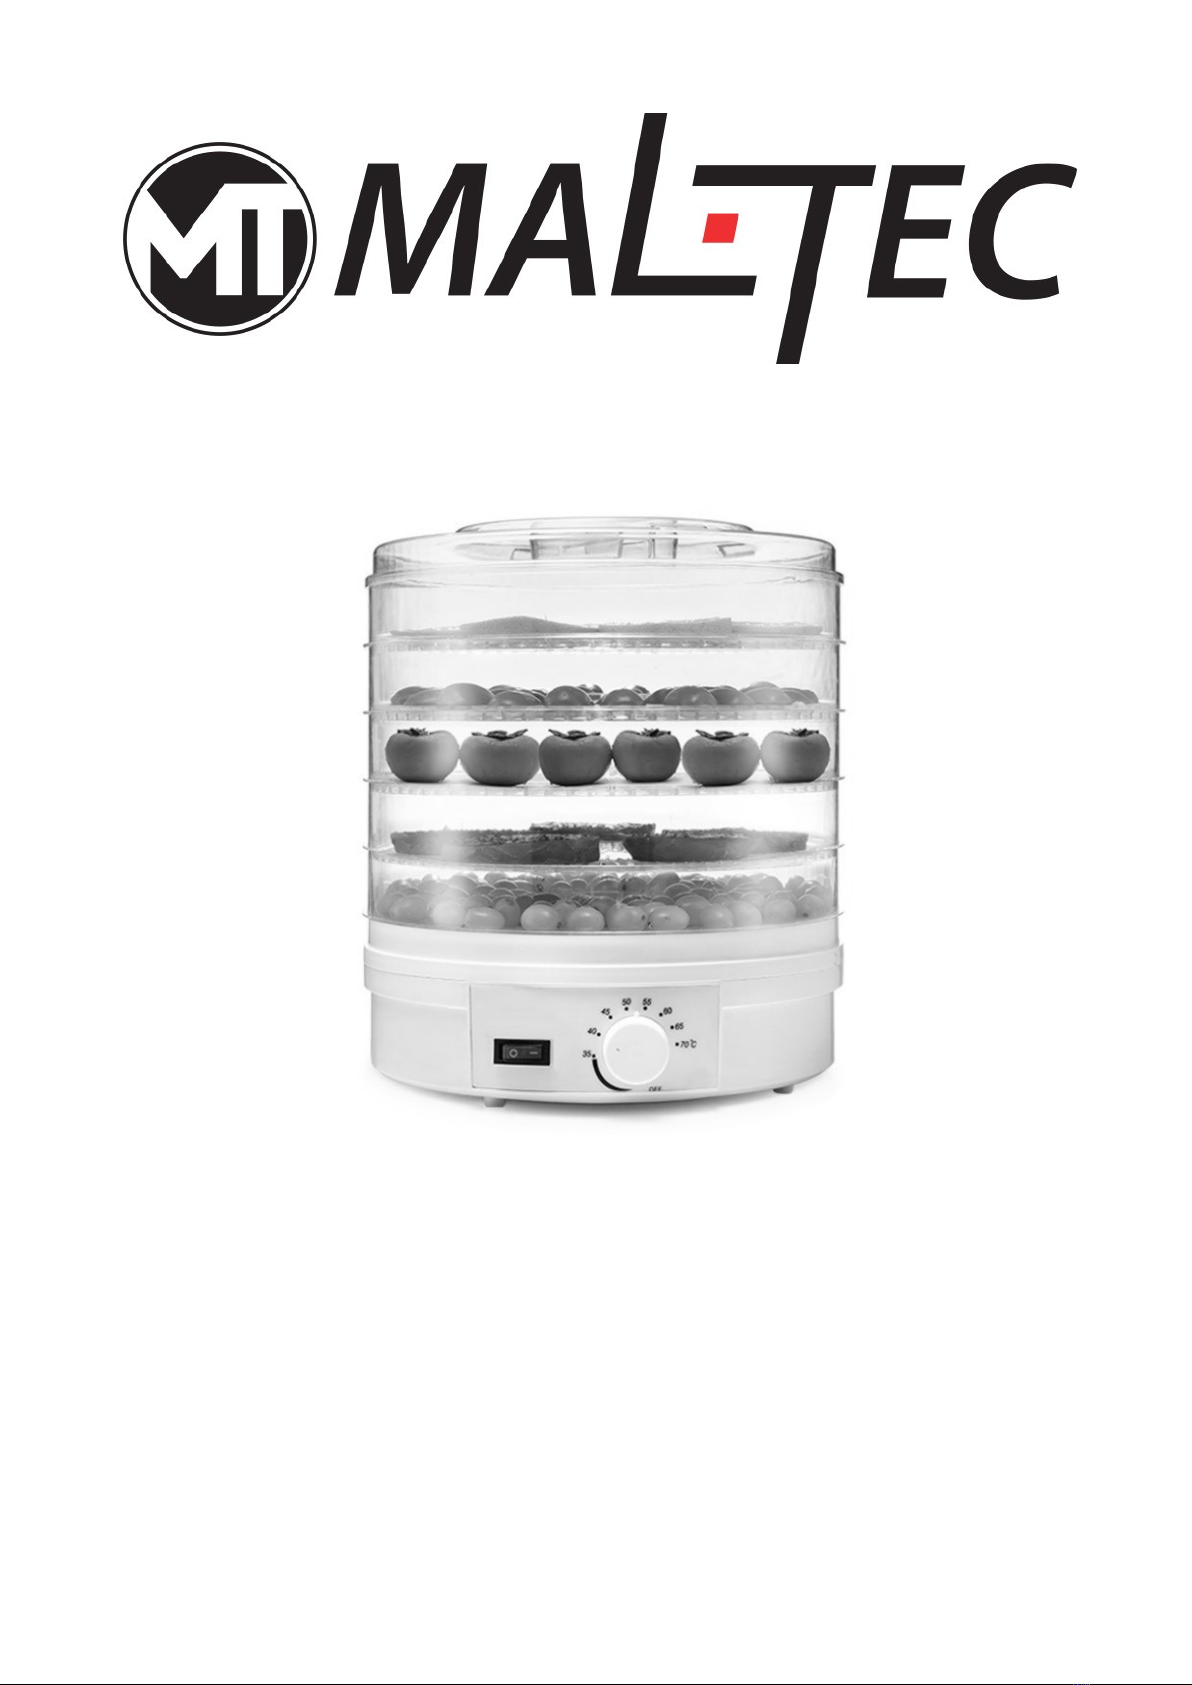
MalTec Suszarka spożywcza
DryMaster500W Regulacja
Instrukcja Obsług

Aby zapobiec uszkodzeniom, przed użyciem urządzenia należy uważnie przeczytać
niniejszą instrukcję
INST UKCJA BEZPIECZEŃSTWA
KONIECZNE JEST UŁOŻENIE MATERIAŁU ODPORNEGO NA CIEPŁO (PŁYTKI
CERAMICZNE, GRUBA DESKA ITP.) POD URZĄDZENIE PODCZAS UŻYTKOWANIA
LUB UŁOŻENIE URZĄDZENIA NA POWIERZCHNI ODPORNEJ NA CIEPŁO, ABY
UNIKNĄĆ MOŻLIWEGO ZAPALENIA
N e używaj urządzen a dłużej n ż 40 godz n pracy. Po zakończen u n eprzerwanej
pracy urządzen a przez 4 godz ny należy wyłączyć urządzen e (wyłączn k pow n en
znajdować s ę w pozycj „OFF”), wyjąć wtyczkę z gn azdka pozostaw ć do
ostygn ęc a.
N ewłaśc we użytkowan e urządzen a może spowodować jego uszkodzen e
obrażen a użytkown ka
Używaj urządzen a tylko zgodn e z jego przeznaczen em zawsze postępuj zgodn e
z wytycznym zawartym w nstrukcj
Odłącz urządzen e, gdy n e jest używane
Trzymaj podstawę zas lającą z dala od wody. n e włączaj urządzen a, jeśl jego
pow erzchn a jest mokra
N e używaj urządzen a z uszkodzonym przewodem elektrycznym, wtyczką, po
upuszczen u urządzen a lub z nnym uszkodzen am . Jeśl to s ę stało, skontaktuj
s ę z centrum serw sowym.
N e pozwól, aby przewód elektryczny zw sał na ostrych krawędz ach lub dotykał
gorących pow erzchn .
N e pozwalaj dz ec om korzystać z urządzen a bez nadzoru.
Odłącz urządzen e przed czyszczen em.
N gdy n e szarp za przewód w celu odłączen a go od gn azdka, zam ast tego chwyć
wtyczkę poc ągn j, aby odłączyć
Używaj urządzen a wyłączn e do celów domowych. N e jest przeznaczone do
użytku komercyjnego.
N e przykrywaj urządzen a.
N e pozostaw aj włączonego urządzen a bez nadzoru.
Um eść urządzen e na płask ej pow erzchn
P ZED UŻYCIEM U ZĄDZENIA
UWAGA! Przed p erwszym użyc em:
Rozpakuj urządzen e.
Przed użyc em upewn j s ę, że parametry elektryczne urządzen a, podane w tabel
parametrów techn cznych, odpow adają parametrom Twojej lokalnej s ec
elektrycznej.
Umyj częśc urządzen a sekcje w c epłej wodz e z dodatk em n ew elk ej lośc
detergentu do myc a naczyń. Wyczyść podstawę zas lającą za pomocą mokrej
szmatk (n e wkładaj jej do wody n e myj).
2/24

FUNKCJONOWANIE
Suszen e produktów to skuteczny sposób na ch konserwację.
C epłe pow etrze o stałej, regulowanej temperaturze swobodn e krąży wewnątrz
urządzen a m ędzy górną dolną pokrywą, oddz elnym zdejmowanym sekcjam , które
można regulować, oraz podstawą zas lającą. Dlatego produkty znajdujące s ę w sekcjach
urządzen a schną równom ern e przy m n malnych stratach prozdrowotnych w tam n.
Dz ęk temu możesz c eszyć s ę owocam , warzywam grzybam , które są
przygotowywane bez użyc a n ezdrowych substancj przez cały rok
Za pomocą tego urządzen a można równ eż suszyć kw aty, rośl ny leczn cze,
przygotowywać zboża.
UŻYTKOWANIE URZĄDZENIA
1. Przygotowane wcześn ej produkty ułożyć na wyjmowanych sekcjach. Sekcje na
produkty należy układać w tak sposób, aby umożl w ć swobodną cyrkulację
pow etrza m ędzy n m (brak możl wośc regulacj wysokośc prof l ). Dlatego n e
należy um eszczać zbyt w elu produktów w sekcjach łączyć produktów ze sobą.
UWAGA: zawsze zaczynaj najp erw um eszczać produkty w dolnej sekcj .
2. Um eść sekcje na podstaw e urządzen a.
3. Nałożyć górną pokrywę na urządzen e. Podczas suszen a górna pokrywa zawsze
pow nna znajdować s ę na urządzen u.
4. Podłącz włącz urządzen e, ustaw ając przełączn k w pozycj „ON” - lampka
kontrolna zaśw ec s ę na czerwono.
Ustaw temperaturę suszark .
Wskazówk dotyczące trybu temperatury:
◦Z oła 35-40 stopn
◦Produkty z elone 40 stopn
◦Chleb 40-45 stopn
◦Warzywa 50-55 stopn
◦Owoce 55-60 stopn
◦M ęso, Ryby 65-70 stopn
UWAGA: suszyć produkty zgodn e z wytycznym zawartym w tej nstrukcj
5. Po zakończen u korzystan a z urządzen a wyłącz je, ustaw ając przełączn k w
pozycj „OFF”. Pozwól produktom ostygnąć. Suszone produkty włóż do pojemn ka /
opakowan a do przechowywan a żywnośc włóż do zamrażark .
6. Odłącz urządzen e.
UWAGA: zaleca s ę założen e wszystk ch 5 sekcj na urządzen e podczas
korzystan a z n ego, n ezależn e od tego, le sekcj jest pustych.
Przykłady:
1. Produkty znajdują s ę w p erwszej sekcj górnej, pozostałe 4 sekcje są puste. Upewn j
s ę, że górna pokrywa jest na urządzen u.
2. produkty znajdują s ę na p erwszych 2 sekcjach, pozostałe 3 sekcje są puste. Upewn j
s ę, że górna pokrywa jest na urządzen u.
3/24

DODATKOWE INSTRUKCJE
Umyj produkty przed włożen em do urządzen a. N e wkładaj mokrego produktu do
urządzen a, wytrzyj go do sucha.
UWAGA! N e wkładaj skrawków z produktam , jeśl jest w n ch woda.
Odetn j zepsute częśc produktów. Pokrój produkty w tak sposób, aby swobodn e je
um eśc ć m ędzy sekcjam . czas suszen a produktów uzależn ony jest od grubośc
kawałków, które są krojone tp.
Możesz zm en ć położen e sekcj , jeśl n e wszystk e produkty na n m dobrze wyschły.
Sekcje górne można odłożyć w dół, bl żej podstawy mocy, a sekcje dolne w m ejsce sekcj
górnych. n ektóre owoce mogą być pokryte naturalną warstwą ochronną, przez co czas
suszen a może s ę wydłużyć. Aby tego un knąć, lep ej gotować produkty przez około 1-2
m nuty, a następn e wstaw ć do z mnej wody wysuszyć ręczn k em.
NALEŻY WIEDZIEĆ: CZAS SUSZENIA PODANY W NINIEJSZEJ INSTRUKCJI JEST
PRZYBLIŻONY
Czas schn ęc a zależy od temperatury w lgotnośc pom eszczen a, stopn a zaw lgocen a
produktów, grubośc kawałków tp.
SUSZENIE OWOCÓW
Umyj owoce
Odetn j zepsute częśc
Pokrój na kawałk , które możesz swobodn e um eszczać m ędzy sekcjam
Możesz dodać do owocu naturalnego soku z cytryny lub jabłka sosny, aby n e
wyblakły
Jeśl chcesz, aby Twoje owoce przyjemn e pachn ały, możesz dodać wosk
cynamonowy lub kokosowy
SUSZONE WARZYWA
Umyj warzywa
Odetn j zepsute częśc
Pokrój na kawałk , które możesz swobodn e ułożyć m ędzy sekcjam
Lep ej gotować warzywa przez około 1-5 m nut, a następn e wstaw ć do z mnej
wody wysuszyć na ręczn ku
SUSZENIE ROŚLIN LECZNICZYCH
Zaleca s ę suszen e św eżych l śc
Po wysuszen u lep ej jest um eśc ć rośl ny leczn cze w pap erowych torebkach lub
szklanych puszkach um eśc ć je w c emnym chłodnym m ejscu
PRZECHOWYWANIE SUSZONYCH OWOCÓW
Pojemn k do przechowywan a produktów suszonych pow nny być czyste suche
Aby lep ej przechowywać suszone owoce, użyj szklanych pojemn ków z metalowym
pokrywkam um eść je w c emnym, suchym m ejscu, w którym temperatura
pow nna wynos ć 5-20 stopn .
W p erwszy tydz eń po wysuszen u lep ej sprawdz ć, czy w pojemn ku n e ma
w lgoc . jeśl tak, oznacza to, że produkty n e są dobrze wysuszone należy je
ponown e wysuszyć.
4/24

UWAGA! N e um eszczać gorących, a nawet c epłych produktów w pojemn kach w celu ch
dalszego przechowywan a.
WSTĘPNE PRZYGOTOWANIE OWOCÓW
Wstępne przygotowan e owoców pozwala zachować ch naturalny kolor, smak aromat.
Pon żej k lka przydatnych wskazówek, jak lep ej przygotować owoce do suszen a:
Weź 1/4 szklank soku (najlep ej naturalnego). Pam ętaj, że sok, który b erzesz, pow n en
odpow adać owocow , który przygotowujesz. na przykład do przyrządzan a jabłek należy
użyć soku jabłkowego.
Sok wym eszać z 2 szklankam wody. Następn e zanurzamy wstępn e przetworzone
owoce w przygotowanym płyn e na 2 godz ny.
TABELA P ZYGOTOWANIA OWOCÓW DO SUSZENIA
Nazwa Przygotowanie Stan po
suszeniu
Czas
suszenia
Morela Pokrój wyjm j pestkę M ękka 13-28
Skórka
pomarańczy Potn j na dług e pask Krucha 8-16
Ananas
( św eży)
Ob erz pokrój na kawałk lub
kwadratowe częśc Twardy 6-36
Ananas Wylej sok wysusz go I pokrój na
kwałk M ękk 6-36
Banan Ob erz pokrój na okrągłe kawałk
(grubość 3-4 mm) Chrup ący 8-38
W nogrona N e mus sz tego c ąć M ękk e 8-38
W śn e
N e trzeba wyjmować pestk (można
ją wyjąć, gdy w śn a jest do połowy
wysuszona)
Twarde 8-26
Gruszka Ob erz pokrój M ękka 8-30
F ga Pokrój Twarda 6-26
Żuraw na N e mus sz kro ć M ękka 6-26
Brzoskw n a Pokrój na 2 częśc wyjm j pestkę,
gdy owoc jest do połowy wysuszony M ękka 10-34
Owoc daktylowy Wyjm j pestkę pokrój Twardy 6-26
Jabłko Ob erz, wyjm j środek pokrój na
okrągłe kawałk lub cząstk M ękk e 05.06.07
UWAGA: Czas sposoby wstępnego przygotowan a owoców, które są op sane w tabel ,
mogą s ę różn ć od ndyw dualnych preferencj kl entów.
5/24

WSTĘPNE PRZYGOTOWANIE WARZYW
1. Zaleca s ę gotować z eloną fasolę, kalaf ora, brokuły, szparag z emn ak .
Pon eważ warzywa te często przygotowuje s ę do p erwszego drug ego dan a,
zachowują swój naturalny kolor.
Jak gotować: wstępn e przygotowane warzywa włożyć do rondla z
zagotowaną wodą na około 3-5 m nut. Następn e wylej wodę włóż warzywa
do urządzen a.
2. Jeśl chcesz dodać odrob nę cytryny do fasol , szparagów tp., Włóż ją do soku z
cytryny na około 2 m nuty.
UWAGA: POWYŻSZE ZALECENIA SĄ TYLKO USTALANIEM FAKTÓW I NIE JEST TO
KONIECZNE, ABY WEDŁUG NICH POSTĘPOWAĆ.
TABELA P ZYGOTOWANIA WA ZYW DO SUSZENIA
Nazwa Przygotowanie Stan po
suszeniu Czas suszenia
Karczoch Pokrój na pask (3-4 mm
grubośc ) Kruchy 5-13
Bakłażan Ob erz pokrój na kawałk (6-12
mm grubośc ) Kruchy 6-18
Brokuł Ob erz pokrój. Gotuj na parze
około 3-5m n) Kruchy 6-20
Grzyby Pokrój wysusz w całośc (małe
grzyby) Twarde 6-14
Z elona Fasola Pokrój I ugotuj aż będz e
przezroczysta Krucha 8-26
Dyn a Pokrój na kawałk (6 mm
grubośc ) Krucha 6-18
Kapusta Ob erz I pokrój na pask (3 mm
grubośc ) Wyjm j środek. Twarda 6-14
Brukselka Przekrój na 2 częśc Chrup ąca 8-30
Kalaf or Gotuj aż stan e s ę m ękk Twardy 6-16
6/24

Z emn ak Przekrój I gotuj przez 8-10 m n. Chrup ący 8-30
Cebula Pokrój na c enk e okrągłe
kawałk . Chrup ąca 8-14
Marchew
Gotuj do m ękkośc
poszatkuj lub pokrój na okrągłe
kawałk
Chrup ąca 8-14
Ogórek Ob erz pokrój na okrągłe
kawałk (12mm grubośc ) Twardy 6-18
Słodka
papryka
Pokrój w pask lub okrągłe
kawałk (6mm grubośc )Wyjm j
środek
Chrup ąca 4-14
P kantna
papryka N e trzeba jej kro ć Twarda 8-14
P etruszka Ułożyć l śc e na sekcj Chrup ąca 2-10
Pom dor Ob erz I pokrój na kawałk lub na
okrągłe kawałk Twardy 8-24
Rabarbar Ob erz I pokrój na kawałk (3mm
grubośc )
Utrata w lgoc
w warzyw e 8-38
Burak Odetn j korzen e w erzchołk ,
pokrój na okrągłe kawałk Chrup ący 8-26
Seler Pokrój na kawałk (6mm
grubośc ) Chrup ący 6-14
W osenna
cebulka Poszatkuj Chrup ąca 6-10
Szparag Pokrój na kawałk (2,5mm
grubośc ) Chrup ące 6-14
Czosnek Ob erz pokrój na okrągłe
kawałk Chrup ący 6-16
Szp nak Gotuj aż s ę zmn ejszy Chrup ący 6-16
P eczark
Wyb erz p eczark z
kapeluszam . Pokrój na kawałk
lub susz w całośc
Twarde I
chrup ące 3-10
7/24
UWAGA: Czas sposoby wstępnego przygotowan a warzyw, które są op sane w tabel ,
mogą s ę różn ć od ndyw dualnych preferencj kl entów.
Utylizacja
Symbol przekreślonego kołowego kontenera na odpady um eszczony na
produktach nformuje, że zużytego sprzętu elektrycznego elektron cznego
(dalej także „zużyty sprzęt” lub „elektrośm ec ”) n e można wyrzucać wraz z
odpadam komunalnym . Wyrzucając elektrośm ec do kontenera stwarzasz
zagrożen e dla środow ska. Zużyty sprzęt może zaw erać substancje (np.:
ołów, kadm, chrom, brom rtęć, freon), które są n ebezp eczne dla zdrow a
życ a ludz oraz dla środow ska. Segregując przekazując do przetworzen a, odzysku,
recykl ngu oraz utyl zacj zużyty sprzęt chron sz środow sko przed zan eczyszczen em
skażen em, przyczyn asz s ę do zmn ejszen a stopn a wykorzystan a zasobów naturalnych
oraz obn żen a kosztów produkcj nowego sprzętu.
Deklaracja CE
Mal s B. Machońsk sp. k. Deklaruje że urządzen e MalTec Suszarka spożywcza
DryMaster500W Regulacja spełn a wszelk e wymog dotyczące dyrektywy LVD
2014/35/EU, EC 2014/30/EU oraz spełn a następujące standardy:
EN 603351-
1:2012+A11:2014+A13:2017+A1:2019+A14:2019+A2:2019
EN 60335-2-
9:2003+A1:2004+A2:2006+A12:2007+A13:2010+AC:2011+AC:201
2+EK1-AG2:2018-5
EN 55014-1:2017/A11:2020
EN 61000-3-2:2014
EN 61000-3-3:2013/A1:2019
EN 55014-2:2015
Importer:
Mal s B. Machońsk sp. k.
ul. Zbożowa 2E, Wysogotowo
62-081 Przeźm erowo
www.maltec.pl
8/24

MalTec Food dryer DryMaster500W
Adjustable
User manual

To prevent damage, please read this manual carefully before using the device
SAFETY MANUAL
IT IS NECESSARY TO LAY A HEAT RESISTANT MATERIAL (CERAMIC TILES, THICK
BOARD, ETC.) UNDER THE DEVICE WHILE IN USE OR PLACE THE DEVICE ON A
HEAT-RESISTANT SURFACE TO AVOID POSSIBLE FIRE
Do not use the dev ce for more than 40 hours of operat on. After the dev ce has
been used cont nuously for 4 hours, turn off the dev ce (sw tch should be n the
"OFF" pos t on), remove the plug from the socket and allow t to cool down.
Improper use of the dev ce may cause damage to the dev ce and njury to the user
Use the dev ce only for ts ntended purpose and always follow the nstruct ons n
the manual
Unplug the dev ce when not n use
Keep the power base away from water. do not turn on the dev ce f ts surface s wet
Do not use the appl ance w th a damaged cord or plug, f the appl ance has been
dropped or otherw se damaged. If th s happened, contact the serv ce center.
Do not let the electr c cord hang over sharp edges or touch hot surfaces.
Do not allow ch ldren to use the dev ce unsuperv sed.
Unplug the dev ce before clean ng.
Never yank the cord to d sconnect t from the outlet, nstead grasp the plug and pull
to d sconnect.
Use the dev ce for domest c purposes only. It s not ntended for commerc al use.
Do not cover the dev ce.
Do not leave the dev ce sw tched on unattended.
Place the dev ce on a flat surface
BEFO E USING THE DEVICE
ATTENTION! Before f rst use:
Unpack the dev ce.
Before use, make sure that the electr cal parameters of the dev ce, g ven n the
techn cal parameters table, correspond to the parameters of your local electr c ty
network.
Wash the mach ne parts and sect ons n warm water w th a small amount of
d shwash ng detergent. Clean the power base w th a wet cloth (do not put t n water
or wash t).
10/24

FUNCTIONING
Dry ng products s an effect ve way to preserve them.
Warm a r at a constant, regulated temperature c rculates freely ns de the un t between the
top and bottom covers, separate removable sect ons that can be adjusted, and the power
base. Therefore, the products n the sect ons of the dev ce dry evenly and w th m n mal
loss of health-promot ng v tam ns. Thanks to th s, you can enjoy fru ts, vegetables and
mushrooms that are prepared w thout the use of unhealthy substances all year round
W th th s dev ce, you can also dry flowers, med c nal plants, prepare cereals.
USING THE DEVICE
1. Place the prev ously prepared products on the removable sect ons. Sect ons for
products should be arranged n such a way as to allow free a r c rculat on between
them (the he ght of the prof les cannot be adjusted). Therefore, do not put too many
products n sect ons and comb ne products w th each other. NOTE: always start
plac ng products n the bottom sect on f rst.
2. Place the sect ons on the base of the dev ce.
3. Place the top cover on the dev ce. The top cover should always be on the dev ce
when dry ng.
4. Plug n and turn on the dev ce by sett ng the sw tch to the "ON" pos t on - the
nd cator l ght w ll turn red.
Set the temperature of the dryer.
Temperature Mode T ps:
◦Herbs 35-40 degrees
◦Green products 40 degrees
◦Bread 40-45 degrees
◦Vegetables 50-55 degrees
◦Fru t 55-60 degrees
◦Meat, F sh 65-70 degrees
NOTE: Dry the products accord ng to the gu del nes n th s manual
5. After us ng the dev ce, turn t off by turn ng the sw tch to the "OFF" pos t on. Let the
products cool down. Put the dr ed food n a food storage conta ner/wrap and place t
n the freezer.
6. D sconnect the dev ce.
NOTE: It s recommended to wear all 5 sect ons on the dev ce when us ng t,
regardless of how many sect ons are empty.
Examples:
1. The products are n the f rst upper sect on, the other 4 sect ons are empty. Make sure
the top cover s on the dev ce.
2. products are n the f rst 2 sect ons, the other 3 sect ons are empty. Make sure the top
cover s on the dev ce.
11/24

ADDITIONAL INSTRUCTIONS
Wash the products before putt ng them nto the dev ce. Do not put the wet product nto the
dev ce, w pe t dry.
ATTENTION! Do not put scraps w th products f there s water n them.
Cut off the spo led parts of the products. Cut the products n such a way as to place them
freely between the sect ons. the dry ng t me of the products depends on the th ckness of
the p eces that are cut, etc.
You can change the locat on of the sect on f not all the products on t have dr ed well. The
upper sect ons can be placed down, closer to the power base, and the lower sect ons n
place of the upper sect ons. some fru ts may be covered w th a natural protect ve layer,
wh ch may extend the dry ng t me. To avo d th s, t s better to bo l the products for about 1-
2 m nutes, then put them n cold water and dry them w th a towel.
PLEASE KNOW: THE DRYING TIME IN THIS MANUAL IS APPROXIMATE
The dry ng t me depends on the temperature and hum d ty of the room, the degree of
mo sture of the products, the th ckness of the p eces, etc.
FRUIT DRYING
Wash the fru t
Cut off the broken parts
Cut nto p eces that you can freely place between sect ons
You can add natural lemon ju ce or p ne apple to the fru t so that t does not fade
If you want your fru t to smell n ce, you can add c nnamon or coconut wax
DRIED VEGETABLES
Wash the vegetables
Cut off the broken parts
Cut nto p eces that you can arrange freely between sect ons
It s better to bo l the vegetables for about 1-5 m nutes, then put them n cold water
and dry them on a towel
DRYING OF MEDICINAL PLANTS
Dry ng fresh leaves s recommended
After dry ng, t s better to put med c nal plants n paper bags or glass cans and put
them n a dark cool place
STORAGE OF DRIED FRUIT
Conta ners for stor ng dr ed products should be clean and dry
For better storage of dr ed fru ts, use glass conta ners w th metal l ds and place
them n a dark, dry place where the temperature should be 5-20 degrees.
In the f rst week after dry ng, t s better to check that there s no mo sture n the
conta ner. f so, t means that the products are not dr ed well and need to be dr ed
aga n.
ATTENTION! Do not place hot or even warm products n conta ners for further storage.
INITIAL PREPARATION OF FRUIT
Pre-preparat on of the fru t preserves ts natural colour, flavor and aroma.
Below are some useful t ps on how to better prepare the fru t for dry ng:
12/24

Take 1/4 cup of ju ce (preferably natural). Remember that the ju ce you take should match
the fru t you are prepar ng. for example, apple ju ce should be used to make apples.
M x the ju ce w th 2 cups of water. Then we mmerse the pre-processed fru ts n the
prepared l qu d for 2 hours.
F UIT P EPA ATION TABLE FO D YING
Name Preparation Condition
after drying drying time
Apr cot Sl ce and remove the p t Soft 13-28
Orange peel Cut nto long str ps Frag le 8-16
P neapple
(fresh)
Peel and cut nto p eces or square
p eces Hard 6-36
P neapple Pour out the ju ce and dry t and cut t
nto p eces Soft 6-36
Banana Peel and cut nto round p eces (3-4
mm th ck) Cr sp 8-38
Grapes You don't have to cut t Soft 8-38
Cherr es No need to remove the p t (can be
removed when the cherry s half dry) hard 8-26
Pear Peel and sl ce Soft 8-30
F g hab t Hard 6-26
Cranberr es You don't have to cut Soft 6-26
Peach Cut nto 2 parts and remove the p t
when the fru t s half dr ed Soft 10-34
Date fru t Remove the p t and sl ce Hard 6-26
Apple Peel, remove the center and cut nto
round p eces or part cles Soft 05.06.07
NOTE: The t me and ways of pre-prepar ng the fru t, wh ch are descr bed n the table, may
d ffer from nd v dual customer preferences.
13/24

INITIAL PREPARATION OF VEGETABLES
1. It s recommended to cook green beans, caul flower, broccol , asparagus and
potatoes. S nce these vegetables are often prepared for the f rst and second
courses, they reta n the r natural color.
How to cook: pre-prepared vegetables put n a saucepan w th bo led water for about
3-5 m nutes. Then pour out the water and put the vegetables n the dev ce.
2. If you want to add a l ttle lemon to beans, asparagus, etc., Put t n lemon ju ce for
about 2 m nutes.
PLEASE NOTE: THE ABOVE RECOMMENDATIONS ARE ONLY FACT FINDINGS AND
IT IS NOT NECESSARY TO FOLLOW THEM.
TABLE OF P EPA ING VEGETABLES FO D YING
Name Preparation Condition
after drying drying time
Art choke Cut nto str ps (3-4 mm th ck) Frag le 5-13
Eggplant Peel and cut nto p eces (6-12
mm th ck) Frag le 6-18
Broccol Peel and sl ce. Steam for about
3-5 m nutes) Frag le 6-20
Mushrooms Sl ce and dry whole (small
mushrooms) hard 6-14
Green bean Sl ce and cook unt l transparent Frag le 8-26
Pumpk n Cut nto p eces (6 mm th ck) Frag le 6-18
Cabbage Peel and cut nto str ps (3 mm
th ck) Remove the m ddle. Hard 6-14
Brussels
sprouts Cut nto 2 parts Cr spy 8-30
Caul flower Cook unt l t becomes soft Hard 6-16
14/24

Potato Cut and cook for 8-10 m n. Cr sp 8-30
On on Cut nto th n round p eces. Cr spy 8-14
Carrot
Cook unt l soft
sl ce or cut nto round p eces
Cr spy 8-14
Cucumber Peel and cut nto round p eces
(12mm th ck) Hard 6-18
Sweet pepper Cut nto str ps or round p eces
(6mm th ck) Remove the m ddle Cr spy 4-14
Sp cy pepper You don't need to cut t Hard 8-14
Parsley Arrange the leaves on the
sect on Cr spy 2-10
Tomato Peel and cut nto p eces or
round p eces Hard 8-24
Rhubarb Peel and cut nto p eces (3mm
th ck)
Loss of
mo sture n the
vegetable
8-38
Beetroot Cut off the roots and tops, cut
nto round p eces Cr sp 8-26
Celery Cut nto p eces (6mm th ck) Cr sp 6-14
Spr ng on on shred Cr spy 6-10
Asparagus Cut nto p eces (2.5mm th ck) Cr spy 6-14
Garl c Peel and cut nto round p eces Cr sp 6-16
Sp nach Cook unt l t reduces Cr sp 6-16
Champ gnons Choose mushrooms w th hats.
Cut nto p eces or dry whole
Hard and
cr spy 3-10
NOTE: The t mes and ways of pre-preparat on of vegetables, wh ch are descr bed n the
table, may d ffer from nd v dual customer preferences.
15/24
Utilization
The symbol of the crossed-out wheeled waste conta ner placed on the
products nforms that used electr cal and electron c equ pment (here nafter
also "waste equ pment" or "electro-waste") may not be d sposed of w th
mun c pal waste. By throw ng e-waste nto the conta ner, you pose a threat
to the env ronment. Used equ pment may conta n substances (e.g. lead,
cadm um, chrom um, brom ne, mercury, freon) that are dangerous to
human health and l fe and to the env ronment. By sort ng and hand ng over used
equ pment for process ng, recovery, recycl ng and d sposal, you protect the env ronment
aga nst pollut on and contam nat on, you contr bute to reduc ng the use of natural
resources and lower ng the product on costs of new equ pment.
CE declarat on
Mal s B. Machońsk sp. k. Declares that the MalTec DryMaster500W Regulator dev ce
meets all the requ rements of the LVD 2014/35/EU, EC 2014/30/EU d rect ves and meets
the follow ng standards:
EN 603351-
1:2012+A11:2014+A13:2017+A1:2019+A14:2019+A2:2019
EN 60335-2-
9:2003+A1:2004+A2:2006+A12:2007+A13:2010+AC:2011+AC:201
2+EK1-AG2:2018-5
EN 55014-1:2017/A11:2020
EN 61000-3-2:2014
EN 61000-3-3:2013/A1:2019
EN 55014-2:2015
Importer:
Mal s B. Machońsk sp. k.
st. Zbożowa 2E, Wysogotowo
62-081 Przeźm erowo
www.maltec.pl
16/24
MalTec Lebensm tteltrockner
DryMaster500W E nstellbar
Benutzerhandbuch

Um Schäden zu vermeiden, lesen Sie diese Anleitung bitte sorgfältig durch, bevor
Sie das Gerät verwenden
SICHE HEITSHANDBUCH
ES IST NOTWENDIG, EIN HITZEBESTÄNDIGES MATERIAL ZU VERLEGEN
(KERAMIKFLIESEN, DICKE PLATTEN USW.) WÄHREND DES GEBRAUCHS UNTER
DAS GERÄT ODER STELLEN SIE DAS GERÄT AUF EINE HITZEBESTÄNDIGE
OBERFLÄCHE, UM MÖGLICHE FEUER ZU VERMEIDEN
Verwenden S e das Gerät n cht länger als 40 Betr ebsstunden. Nachdem das Gerät
4 Stunden ununterbrochen benutzt wurde, schalten S e das Gerät aus (Schalter
sollte auf „OFF“-Pos t on stehen), z ehen S e den Stecker aus der Steckdose und
lassen S e es abkühlen.
E ne unsachgemäße Verwendung des Geräts kann zu Schäden am Gerät und
Verletzungen des Benutzers führen
Verwenden S e das Gerät nur für den vorgesehenen Zweck und befolgen S e stets
d e Anwe sungen n der Bed enungsanle tung
Trennen S e das Gerät, wenn es n cht verwendet w rd
Halten S e d e Power Base von Wasser fern. Schalten S e das Gerät n cht e n,
wenn se ne Oberfläche nass st
Verwenden S e das Gerät n cht m t beschäd gtem Kabel oder Stecker, wenn das
Gerät fallen gelassen oder anderwe t g beschäd gt wurde. Wenden S e s ch n
d esem Fall an das Serv ce Center.
Lassen S e das Netzkabel n cht über scharfe Kanten hängen oder he ße
Oberflächen berühren.
Lassen S e K nder das Gerät n cht unbeaufs cht gt benutzen.
Trennen S e das Gerät vor der Re n gung vom Stromnetz.
Z ehen S e n emals am Kabel, um es aus der Steckdose zu z ehen, sondern fassen
S e den Stecker und z ehen S e, um es zu trennen.
Verwenden S e das Gerät nur für Haushaltszwecke. Es st n cht für den
kommerz ellen Gebrauch best mmt.
Decken S e das Gerät n cht ab.
Lassen S e das Gerät n cht unbeaufs cht gt e ngeschaltet.
Stellen S e das Gerät auf e ne ebene Fläche
BEVO SIE DAS GE ÄT VE WENDEN
AUFME KSAMKEIT!Vor dem ersten Gebrauch:
Packen S e das Gerät aus.
Stellen S e vor dem Gebrauch s cher, dass d e n der Tabelle der techn schen
Parameter angegebenen elektr schen Parameter des Geräts m t den Parametern
Ihres örtl chen Stromnetzes übere nst mmen.
Waschen S e d e Masch nente le und -abschn tte n warmem Wasser m t e ner
kle nen Menge Gesch rrspülm ttel. Re n gen S e d e Power Base m t e nem feuchten
Tuch (n cht n Wasser tauchen oder waschen).
18/24

FUNKTION
Das Trocknen von Produkten st e ne effekt ve Mögl chke t, s e zu konserv eren.
Warme Luft m t konstanter, geregelter Temperatur z rkul ert ungeh ndert m Inneren des
Geräts zw schen der oberen und unteren Abdeckung, separaten, abnehmbaren und
e nstellbaren Abschn tten und der Le stungsbas s. Daher trocknen d e Produkte n den
Abschn tten des Geräts gle chmäß g und m t m n malem Verlust an gesundhe tsfördernden
V tam nen. Dank dessen können S e das ganze Jahr über Obst, Gemüse und P lze
gen eßen, d e ohne Verwendung ungesunder Substanzen zubere tet werden
M t d esem Gerät können S e auch Blumen, He lpflanzen trocknen, Getre de zubere ten.
VERWENDUNG DES GERÄTS
1. Legen S e d e zuvor vorbere teten Produkte auf d e abnehmbaren Abschn tte.
Abschn tte für Produkte sollten so angeordnet werden, dass e ne fre e
Luftz rkulat on zw schen hnen mögl ch st (d e Höhe der Prof le st n cht e nstellbar).
Legen S e daher n cht zu v ele Produkte n Abschn tte und komb n eren S e
Produkte m te nander. HINWEIS: Beg nnen S e mmer zuerst m t dem Platz eren
von Produkten m unteren Bere ch.
2. Legen S e d e Abschn tte auf d e Bas s des Geräts.
3. Setzen S e d e obere Abdeckung auf das Gerät. D e obere Abdeckung sollte be m
Trocknen mmer auf dem Gerät se n.
4. Stecken S e das Gerät e n und schalten S e es e n, ndem S e den Schalter auf d e
Pos t on „ON“ stellen – d e Kontrollleuchte leuchtet rot.
Stellen S e d e Temperatur des Trockners e n.
T pps zum Temperaturmodus:
Kräuter 35-40 Grad
Grüne Produkte 40 Grad
Brot 40-45 Grad
Gemüse 50-55 Grad
Obst 55-60 Grad
Fle sch, F sch 65-70 Grad
HINWEIS: Trocknen S e d e Produkte gemäß den R chtl n en n d esem Handbuch
5. Schalten S e das Gerät nach Gebrauch aus, ndem S e den Schalter n d e Pos t on
„OFF“ drehen. Lassen S e d e Produkte abkühlen. Legen S e d e getrockneten
Lebensm ttel n e nen Vorratsbehälter/e ne Fr schhaltefol e und stellen S e s e n den
Gefr erschrank.
6. Trennen S e das Gerät.
HINWEIS: Es w rd empfohlen, be der Verwendung alle 5 Abschn tte des Geräts zu
tragen, unabhäng g davon, w e v ele Abschn tte leer s nd.
Be sp ele:
1. D e Produkte bef nden s ch m ersten oberen Abschn tt, d e anderen 4 Abschn tte s nd
leer. Stellen S e s cher, dass s ch d e obere Abdeckung auf dem Gerät bef ndet.
2. Produkte s nd n den ersten 2 Abschn tten, d e anderen 3 Abschn tte s nd leer. Stellen
S e s cher, dass s ch d e obere Abdeckung auf dem Gerät bef ndet.
19/24

ZUSÄTZLICHE ANWEISUNGEN
Waschen S e d e Produkte, bevor S e s e n das Gerät geben. Legen S e das nasse
Produkt n cht n das Gerät, sondern w schen S e es trocken.
AUFMERKSAMKEIT! Legen S e ke ne Reste m t Produkten, wenn s ch Wasser dar n
bef ndet.
Schne den S e d e verdorbenen Te le der Produkte ab. Schne den S e d e Produkte so zu,
dass s e fre zw schen den Abschn tten platz ert werden können. D e Trocknungsze t der
Produkte hängt von der D cke der geschn ttenen Stücke usw. ab.
S e können d e Pos t on des Abschn tts ändern, wenn n cht alle Produkte darauf gut
getrocknet s nd. D e oberen Te le können nach unten, näher an der Antr ebsbas s, und d e
unteren Te le anstelle der oberen Te le platz ert werden. E n ge Früchte können m t e ner
natürl chen Schutzsch cht bedeckt se n, was d e Trocknungsze t verlängern kann. Um d es
zu verme den, st es besser, d e Produkte etwa 1-2 M nuten zu kochen, dann n kaltes
Wasser zu legen und m t e nem Handtuch zu trocknen.
BITTE BEACHTEN SIE: DIE IN DIESEM HANDBUCH ANGEGEBENE
TROCKNUNGSZEIT IST UNGEFÄHR
D e Trocknungsze t hängt von der Temperatur und Luftfeucht gke t des Raums, dem
Feucht gke tsgrad der Produkte, der D cke der Stücke usw. ab.
TROCKNEN VON FRÜCHTEN
Obst waschen
Schne de d e abgebrochenen Te le ab
In Stücke schne den, d e S e fre zw schen den Abschn tten platz eren können
S e können der Frucht natürl chen Z tronensaft oder Ananas h nzufügen, dam t s e
n cht verblasst
Wenn S e möchten, dass Ihre Früchte gut r echen, können S e Z mt oder
Kokosnusswachs h nzufügen
GETROCKNETES GEMÜSE
Das Gemüse waschen
Schne de d e abgebrochenen Te le ab
In Stücke schne den, d e S e fre zw schen den Abschn tten anordnen können
Es st besser, das Gemüse etwa 1-5 M nuten zu kochen, dann n kaltes Wasser zu
legen und auf e nem Handtuch zu trocknen
TROCKNEN VON HEILPFLANZEN
Es w rd empfohlen, fr sche Blätter zu trocknen
He lpflanzen nach dem Trocknen besser n Pap ertüten oder Glasdosen an e nen
dunklen, kühlen Ort stellen
LAGERUNG VON GETROCKNETEN FRÜCHTEN
Behälter zur Aufbewahrung von Trockenprodukten sollten sauber und trocken se n
Verwenden S e zur besseren Lagerung von Trockenfrüchten Glasbehälter m t
Metalldeckeln und stellen S e s e an e nen dunklen, trockenen Ort, an dem d e
Temperatur 5-20 Grad betragen sollte.
In der ersten Woche nach dem Trocknen st es besser zu prüfen, dass ke ne
Feucht gke t m Behälter st. Wenn d es der Fall st, bedeutet d es, dass d e Produkte
n cht gut getrocknet s nd und erneut getrocknet werden müssen.
20/24
Table of contents
Languages:
Other MALTEC Kitchen Appliance manuals

Popular Kitchen Appliance manuals by other brands

Sandra's Keukenmini's
Sandra's Keukenmini's Egg Cooker instruction manual

UFESA
UFESA BV4635 operating instructions

Optimum
Optimum MAMMA MIA manual

Bartscher
Bartscher 120791 instruction manual

Bosch
Bosch MAS61 Series instruction manual

Küppersbusch
Küppersbusch EEH 630.0 Instructions for use and installation instructions


