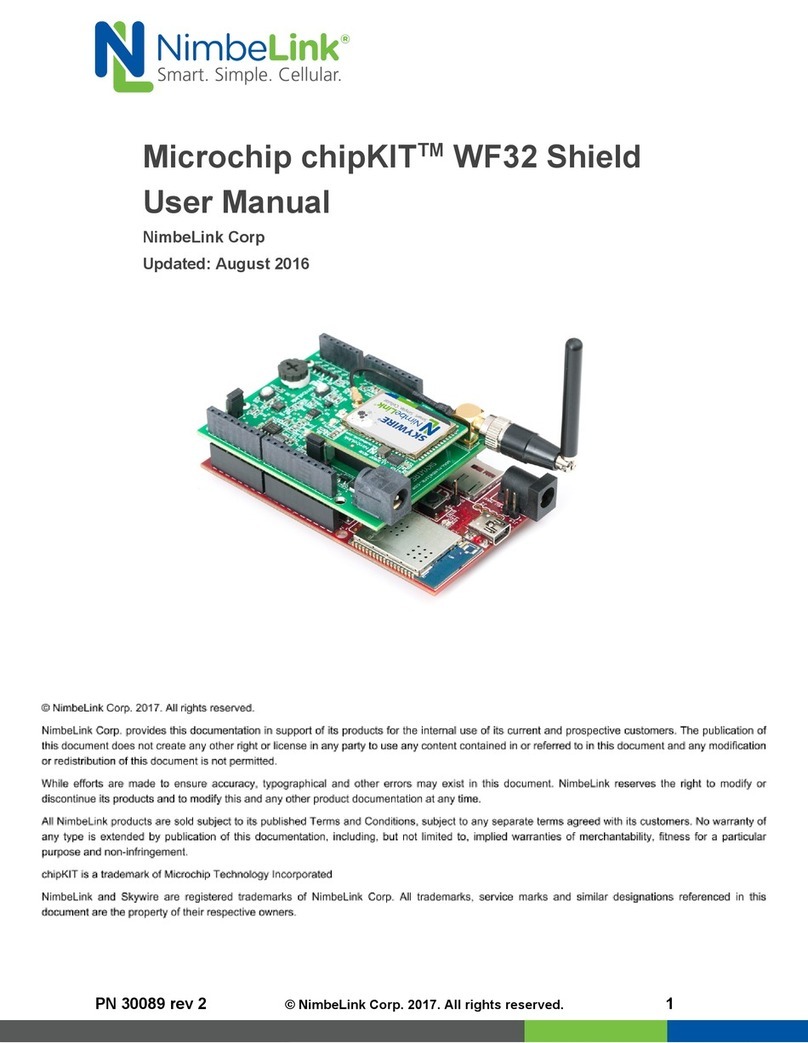
mangOH Red User manual

mangOH®Red
Getting Started Guide
(non-Octave)
41113734
Rev 1
Contents subject to change

mangOH Red Getting Started Guide (non-Octave)
Rev 1 2020-03-01 2 41113734
Important
Notice
Due to the nature of wireless communications, transmission and reception of data can
never be guaranteed. Data may be delayed, corrupted (i.e., have errors) or be totally
lost. Although significant delays or losses of data are rare when wireless devices such
as the Sierra Wireless modem are used in a normal manner with a well-constructed
network, the Sierra Wireless modem should not be used in situations where failure to
transmit or receive data could result in damage of any kind to the user or any other
party, including but not limited to personal injury, death, or loss of property. Sierra
Wireless accepts no responsibility for damages of any kind resulting from delays or
errors in data transmitted or received using the Sierra Wireless modem, or for failure
of the Sierra Wireless modem to transmit or receive such data.
Limitation of
Liability
The information in this manual is subject to change without notice and does not
represent a commitment on the part of Sierra Wireless. SIERRA WIRELESS AND ITS
AFFILIATES SPECIFICALLY DISCLAIM LIABILITY FOR ANY AND ALL DIRECT,
INDIRECT, SPECIAL, GENERAL, INCIDENTAL, CONSEQUENTIAL, PUNITIVE OR
EXEMPLARY DAMAGES INCLUDING, BUT NOT LIMITED TO, LOSS OF PROFITS
OR REVENUE OR ANTICIPATED PROFITS OR REVENUE ARISING OUT OF THE
USE OR INABILITY TO USE ANY SIERRA WIRELESS PRODUCT, EVEN IF
SIERRA WIRELESS AND/OR ITS AFFILIATES HAS BEEN ADVISED OF THE
POSSIBILITY OF SUCH DAMAGES OR THEY ARE FORESEEABLE OR FOR
CLAIMS BY ANY THIRD PARTY.
Notwithstanding the foregoing, in no event shall Sierra Wireless and/or its affiliates
aggregate liability arising under or in connection with the Sierra Wireless product,
regardless of the number of events, occurrences, or claims giving rise to liability, be in
excess of the price paid by the purchaser for the Sierra Wireless product.
Patents This product may contain technology developed by or for Sierra Wireless Inc.
This document contains information which is proprietary to Sierra Wireless Inc. and is
licensed pursuant to Creative Commons Attribution 4.0 International License.
Document
details
Title: mangOH Red Getting Started Guide (non-Octave)
Author: Sierra Wireless
Source: http://mangoh.io/
Copyright © March 1, 2020 Sierra Wireless. Licensed under the Creative Commons Attribution
4.0 license, http://creativecommons.org/licenses/by/4.0/
Disclaimer Indicate any modifications made to the original document.

Rev 1 2020-03-01 3 41113734
Trademarks mangOH™ and the mangOH logo are trademarks of Sierra Wireless.
Mac and macOS are trademarks of Apple Inc., registered in the U.S. and other
countries.
Other trademarks are the property of their respective owners.
Revision
History
Revision
number
Release date Changes
1March 2020 Combined Windows/Leaf GSGs (rev5) and converted installation content to use Leaf

Rev 1 2020-03-01 4 41113734
Contents
Get Started. . . . . . . . . . . . . . . . . . . . . . . . . . . . . . . . . . . . . . . . . . . . . . . . . . . . . . . . . . . . . . . . 5
Register a mangoh.io Account . . . . . . . . . . . . . . . . . . . . . . . . . . . . . . . . . . . . . . . . . . . . . . . 6
Set Up Your mangOH Red . . . . . . . . . . . . . . . . . . . . . . . . . . . . . . . . . . . . . . . . . . . . . . . . . . . 7
Peel Your mangOH Red . . . . . . . . . . . . . . . . . . . . . . . . . . . . . . . . . . . . . . . . . . . . . . . . . . . 7
Quick Components Overview . . . . . . . . . . . . . . . . . . . . . . . . . . . . . . . . . . . . . . . . . . . . . . . 8
(Windows only) Install CF3 Module Drivers . . . . . . . . . . . . . . . . . . . . . . . . . . . . . . . . . . . . . 9
(Linux only) Remove modemmanager. . . . . . . . . . . . . . . . . . . . . . . . . . . . . . . . . . . . . . . . . 9
(Virtual Machine Users) Install the mangOH Virtual Machine . . . . . . . . . . . . . . . . . . . . . . . 9
Prepare Your mangOH Red. . . . . . . . . . . . . . . . . . . . . . . . . . . . . . . . . . . . . . . . . . . . . . . . . 9
Register on the Mobile Network. . . . . . . . . . . . . . . . . . . . . . . . . . . . . . . . . . . . . . . . . . . . . . 14
Connect to AirVantage (The Cloud). . . . . . . . . . . . . . . . . . . . . . . . . . . . . . . . . . . . . . . . . . . 17
Claim Your Free AirVantage Account . . . . . . . . . . . . . . . . . . . . . . . . . . . . . . . . . . . . . . . . 17
Send Sensor Data to AirVantage. . . . . . . . . . . . . . . . . . . . . . . . . . . . . . . . . . . . . . . . . . . . 22
Prepare Your System For Development . . . . . . . . . . . . . . . . . . . . . . . . . . . . . . . . . . . . . . . 27
Install and Configure Leaf Workspace Manager . . . . . . . . . . . . . . . . . . . . . . . . . . . . . . . . 27
(Linux only) Install Leaf Workspace Manager . . . . . . . . . . . . . . . . . . . . . . . . . . . . . . . .27
Configure Your mangOH Development Environment . . . . . . . . . . . . . . . . . . . . . . . . . .28
Build/Install the mangOH Development Package . . . . . . . . . . . . . . . . . . . . . . . . . . . . . . . 29
Updating the Firmware on a mangOH . . . . . . . . . . . . . . . . . . . . . . . . . . . . . . . . . . . . . . . . . 32
Hardware Tips . . . . . . . . . . . . . . . . . . . . . . . . . . . . . . . . . . . . . . . . . . . . . . . . . . . . . . . . . . . . 35
Dipswitch Settings . . . . . . . . . . . . . . . . . . . . . . . . . . . . . . . . . . . . . . . . . . . . . . . . . . . . . . . 35
Register and Activate AT&T SIM . . . . . . . . . . . . . . . . . . . . . . . . . . . . . . . . . . . . . . . . . . . . . 36

Rev 1 2020-03-01 5 41113734
1
1: Get Started
Thanks for purchasing the mangOH®Red development kit! Use this guide to prepare your mangOH Red and
computer for IoT development.
Note: This guide has been tested using the Legato Virtual Machine (64-bit Ubuntu 18.04), available at https://mangoh.io/
setting-up-vm, and on Ubuntu 18.04. For assistance with different configurations, visit the mangOH forum at forum.mangoh.io.
When you are ready to begin, work straight through the rest of this guide:
•STEP 1: Register a mangoh.io Account on page 6
•STEP 2: Set Up Your mangOH Red on page 7
•STEP 3: Register on the Mobile Network on page 14
•STEP 4: Connect to AirVantage (The Cloud) on page 17
And then to make the most of your mangOH Red ...
Table 1-1: Minimum System Requirements
O/S
•Windows®7 and higher
•(64-bit) Ubuntu 16.04
•macOS X
CPU Dual core @ 2.6 GHz
RAM 4GB
HDD 10 GB free space
USB Ports •Preferred—2 (for full functionality)
•Minimum—1
Visit mangoh.io/mangoh-red-resources for mangOH Red guides, tutorials, and more.
Visit forum.mangoh.io to participate in the mangOH community.
mangOH Forum

Rev 6 2020-03-01 6 41112261
2
2: Register a mangoh.io Account
The mangOH ecosystem of products, tutorials, documentation and more is constantly evolving.
Please register for a mangoh.io account to:
•Get access to mangOH documentation
•Receive notices of new mangOH products, IoT cards, and project code samples
•Receive periodic device-specific notices
•Be automatically included for a chance to win IoT cards in periodic giveaways
If you already have an account, please log in and register your new device so we can provide you with news about
your device.
To register for an account:
1. Go to https://mangoh.io and click Register.
2. Enter the requested data to create your account.
Note: • E-mail address—This will be your mangOH account login.
• Password—8-29 characters (including at least 1 lowercase letter, 1 uppercase lettter, and 1 number.)
• IoT Applications—Please let us know all the fields you are developing for so we can improve the mangOH
ecosystem for you!
3. Click Register.
If all required fields are filled correctly, your account is created and you are logged in automatically.
Otherwise, the fields that must be updated are indicated. Fix them, re-enter the password fields, and click Reg-
ister again.
4. Now that you’re logged into your account, click Device Registration.
5. Select mangOH Red as your new mangOH type.
6. Choose the SIM type included in your kit:
·AT&T—Activate your SIM by clicking the AT&T link to connect to AT&T’s IoT Marketplace. See Register
and Activate AT&T SIM on page 36 for details.
·Sierra Wireless—Your SIM will be activated later in this guide when you register for your AirVantage
account.
·Other—Activate your SIM at your SIM card provider’s website.
Important: If your mangOH Red kit contains an HL78xx module, finish registering and then use the mangOH Red
HL78xx Getting Started Guide available from https://mangoh.io/mangoh-red-resources-getting-started.
7. Click Submit. Your mangOH account is updated with your device type.
Now you’re ready to
Set Up Your mangOH Red on page 7.

Rev 1 2020-03-01 7 41113734
3
3: Set Up Your mangOH Red
3.1 Peel Your mangOH Red
Open your mangOH Red kit and make sure you have all the parts—the mangOH Red kit typically includes:
•(1) mangOH Red board with pre-installed CF3 module (WP76xx, WP77xx, WP8548, etc.)
Note: The module ships with Legato already installed. In this guide, you will install the latest mangOH Red approved build.
•(2) module covers (for 2.5 mm and 4.0 mm height modules)—One pre-installed with the module, and one for
use with a CF3 module of a different height.
Note: The images used in this guide show the 4.0 mm cover.
•(1) module cover release tool
•(2) micro-USB cables
•(1 or 2) Ultra Wide Band antennas (taoglas FXUB63)—2nd antenna included if CF3 module supports diversity
•(1) GNSS antenna (taoglas AGGBP.25B)
•(1) micro-SIM card (Sierra Wireless, AT&T, or other provider)
•(1) Breakout board (IoT expansion card format)
•(2) M2 screws for IoT card installation
Important: In this guide, your mangOH Red is powered by your computer. Going forward, a dedicated 2.5 A USB power
supply is recommended, since USB ports on many PCs and laptops may not provide sufficient current to power the
mangOH during high power bursts.
Cover and 4.0 mm module Cover and 2.5 mm module
(e.g. WP8548, WP76xx) (e.g. WP77xx)

mangOH Red Getting Started Guide (non-Octave)
Rev 1 2020-03-01 8 41113734
3.2 Quick Components Overview
Many components and connectors are already built into the mangOH Red. Some of these include:
Inputs / Outputs
Modules and Power
Buzzer
Low
Power
I/O
Low
Power
I/O
Real
Time
I/O
Real
Time
I/O
Power LED
Generic push-button
Generic LED WWAN LED
IoT/Card Detect
LED
Tx LED
Buzzer
CF3
CF3
CF3
CF3
RESET
RESET
Raspberry Pi
Connector
Raspberry Pi
Connector
IoT
Connector
IoT
Connector
Power
Selector
Power
Selector uSD Tray
uSD Tray
micro-SIM
Tray
micro-SIM
Tray
ULPM /
PWR_ON switch
CF3
module
Console USB
connector
CF3 USB
connector
USB Host

3.3: (Windows only) Install CF3 Module Drivers
Rev 1 2020-03-01 9 41113734
3.3 (Windows only) Install CF3 Module Drivers
Windows systems require drivers for the mangOH Red’s CF3 module.
To download the drivers:
1. Go to https://mangoh.io/mangoh-red-resources-software.
2. Click Download Windows Drivers to download the driver installation file.
3. Run the downloaded .exe file and follow the prompts to install the drivers.
3.4 (Linux only) Remove modemmanager
Make sure the modemmanager package is removed from your Linux system—this package causes problems with
the mangOH Red if it is not removed:
$ sudo apt-get remove -y modemmanager
3.5 (Virtual Machine Users) Install the mangOH Virtual
Machine
If you prefer to develop on a virtual machine on your Mac OS X, Windows or Linux system:
•Follow the instructions at mangoh.io/setting-up-vm to download and install VirtualBox, and load a virtual
machine for mangOH development.
The mangOH VM is pre-installed with Sierra Wireless’ Leaf Workspace Manager.
Note: If the prompt "[sudo] password for mangoh" appears while in the VM, type "mangoh" and press Enter. (The VM’s
account name and password are both "mangoh".)
3.6 Prepare Your mangOH Red
Your mangOH Red comes partially assembled with the CF3 module and cover pre-installed. All you need to do is
connect a few components and a power source:
1. Make sure the dipswitches are set correctly:
a. Remove the protective film from the dip switch block.
Remove this film

mangOH Red Getting Started Guide (non-Octave)
Rev 1 2020-03-01 10 41113734
b. Make sure the dipswitches are set as follows:
·ON—1,3,5,8
·OFF—2,4,6,7
For switch details (not needed for this tutorial), see Dipswitch Settings on page 35.
2. Insert a micro-SIM (either the one included with the kit, or one that has been activated by another mobile
network provider.)
Note: If you do not have an activated SIM, you can continue the tutorial, but will not be able to complete Register on the
Mobile Network on page 14 and Connect to AirVantage (The Cloud) on page 17.
Note: If you need to switch SIMs at a later time, you must disconnect the power or press the Reset button before switching
SIMs so the mangOH_Red can detect the SIM while powering on.
Note the location of
the notched corner. Inserted in bottom slot

3.6: Prepare Your mangOH Red
Rev 1 2020-03-01 11 41113734
3. Attach the antenna(s)—main, GNSS and (for WP76xx modules) diversity.
Tip: If you have trouble connecting an antenna, make sure it is positioned directly on the connector and push straight
down. The antenna will not connect at an angle.
4. Make sure the power select jumper is on the pins closes to the battery connector. (This selects the CF3 USB
connector as the power supply.)
Note: The mangOH Red has two micro-B USB connectors:
• CF3 USB is used for SSH connections, AT commands, and firmware downloads.
• CONSOLE_USB is a serial connection used to access the module’s console for diagnostic purposes.
Main
GNSS
Diversity
CF3 USB power (jumper on pins
closest to battery connector)
CF3 USB connector
(bottom side of board)
CONSOLE USB connector
Battery connector

mangOH Red Getting Started Guide (non-Octave)
Rev 1 2020-03-01 12 41113734
5. Power up the mangOH Red—Use a micro-USB cable to connect the CF3 USB connector to a powered USB
port on your computer.
Important: For mangOH Red Kits with WP7702 modules—If LTE-M coverage is not available, the mangOH Red’s
WP7702 module will fall back to 2G, which consumes up to 2 A of current for short bursts. In this case, USB power is insuf-
ficient (500 mA) and the module may repeatedly brown out and reboot. Use a Li-ion/Li-polymer (3.7 V nominal) battery or
2.5 A USB power supply for sufficient power. (See the mangOH Red User Guide for details.)
As soon as the mangOH Red is powered:
·The Power LED turns solid green and the CF3 module begins to boot.
·The module will enumerate its interfaces. The time it takes to enumerate will vary depending on your
operating system and computer hardware, but will typically take up to 1 minute (on Linux systems) or
2 minutes (on Windows systems). You can test that it has enumerated by pinging the device and waiting
for a response:
$ ping 192.168.2.2
If necessary, press Ctrl+C to cancel the ping request and return to the prompt.
CF3 USB connector
(bottom side of board)
Power LED

3.6: Prepare Your mangOH Red
Rev 1 2020-03-01 13 41113734
Tip: If the Power LED does not turn on:
• Make sure the USB cable is securely connected to the correct micro-B USB connector (as shown in the image).
• Make sure the jumper block is on the correct pins (as shown in the image).
Important: For future reference, the mangOH Red’s power supply (USB port on your dev machine, or a dedicated
2.5 A USB power supply) connects to the board via either USB connector—CF3 USB or CONSOLE USB (depending
on the jumper position on the power header).
If a dedicated USB power supply is connected to the CF3 USB connector, SSH/AT connections are not possible; if it
is connected to CONSOLE USB, serial USB connections are not possible.
Going forward, a dedicated 2.5 A USB power supply is recommended, since USB ports on many PCs and laptops
may not provide sufficient current to power the mangOH Red during high power bursts.
6. Upgrade the firmware on your mangOH Red’s module with the latest approved software image, which includes
applications built for mangOH Red:
a. Go to mangoh.io/mangoh-red-resources-software and download the appropriate firmware image for your
module:
·SPK image—Image to installed using swiflash or fwupdate applications
·EXE image—Windows-only one-click install
b. Follow the instructions in Updating the Firmware on a mangOH on page 32.
Now that you’ve peeled and prepared your mangOH Red, you are ready to Register on the Mobile
Network on page 14.

Rev 1 2020-03-01 14 41113734
4
4: Register on the Mobile Network
Now that your mangOH Red is powered on and running, make sure it can register on your SIM provider’s mobile
network, and configure it for use with AirVantage.
Note: The commands that you enter in the rest of this guide are done on your computer (e.g. on a native Linux system or in the
VM) or on the mangOH Red. Development system examples show a ’$’ command prompt with a brown background, and
mangOH Red examples show a ’#’ command prompt with a blue background.
1. From your computer’s command prompt, test the USB connection:
$ ping 192.168.2.2
You should receive ping responses by ‘pinging’ the CF3 module (which has a default IP address of
192.168.2.2). Press Ctrl+C to cancel the ping request and return to the command prompt.
2. Connect to the mangOH Red using your terminal emulator:
3. The following message appears if you are using your CF3 module for the first time (modules are shipped
without a password).
For now, type 3and press Enter, then type Yand press Enter to be reminded the next time you connect.
(During this tutorial, do this each time you open an SSH connection to the mangOH Red.)
Note: After completing this tutorial, you should select an appropriate login authentication method (ssh keys or password)
from this menu—see docs.legato.io/latest/basicTarget.html for details.
4. Turn off the CF3 module’s radio (it may have been started automatically by other processes):
# cm radio off
5. Set the CF3 module to use IPv4 addressing (this ensures that connections to AirVantage (later in this guide)
will work correctly):
# cm data pdp ipv4
$ ping 192.168.2.2
PING 192.168.2.2 (192.168.2.2) 56(84) bytes of data.
64 bytes from 192.168.2.2: icmp_seq=1 ttl=64 time=0.596 ms
64 bytes from 192.168.2.2: icmp_seq=1 ttl=64 time=0.518 ms
64 bytes from 192.168.2.2: icmp_seq=1 ttl=64 time=0.409 ms
64 bytes from 192.168.2.2: icmp_seq=1 ttl=64 time=0.648 ms
64 bytes from 192.168.2.2: icmp_seq=1 ttl=64 time=0.407 ms
^C
--- 192.168.2.2 ping statistics ---
5 packets transmitted, 5 received, 0% packet loss, time 2578ms
rtt min/avg/max/mdev = 0.407/0.516/0.648/0.100 ms
Replies received,
connection working
Ctrl+C pressed to
cancel ping
It is strongly recommended to setup credentials for remote login.
Please select one of the following options:
1) Setup ssh keys and disable passwords-based authentication via ssh
(the most secure)
2) Setup password (better than nothing)
3) Do nothing

4:: Register on the Mobile Network
Rev 1 2020-03-01 15 41113734
6. (WP7702 modules only) If your mangOH Red has a new WP7702 module, by default it has LTE-M1 support
enabled. If your mobile network does not provide LTE-M1, the module will fall back to 2G after approximately
5 minutes.
To configure the module to try to register on 2G (without trying to register on LTE-M1):
# cm radio rat GSM
7. Turn on the radio:
# cm radio on
8. You must be using an activated SIM for the radio to successfully register on the mobile network.
If you are using:
·a Sierra Wireless SIM provided with the kit, continue to the next step. (The SIM will be activated by
AirVantage in the next chapter.
·a non-activated SIM—Activate it with your provider, then continue to the next step.
·an activated SIM—Continue to the next step.
Important: Typically, your module will register on a network in < 1 minute. However, the very first time your CF3 module
and Sierra SIM are used, registration may take from 5–20 minutes.
9. To set up your AirVantage account in the next chapter, you need the serial number (FSN) and IMEI of your
mangOH Red’s CF3 module, and the ICCID of your SIM:
a. To display the module information, enter the following command:
# cm info
b. To display the Display the SIM card’s ICCID value (which will be used when you register for your free
AirVantage account):
# cm sim info
Note: The Home Network Operator is the ISP that provides the network on which the CF3 module is connected. This
may be different than the provider of the SIM if you are connecting to a network that your SIM’s provider has an
agreement with. For example, Sierra Wireless SIMs will connect to a variety of networks as in the example above.
# cm info
Device: WP7603
IMEI: 352959095987162
IMEISV: 4
FSN: 4l933959959959
Firmware Version: SWI9X06Y_02.32.02.00 c2e98c jenkins 2019/08/30 07:28:21
Bootloader Version: SWI9X06Y_02.32.02.00 c2e98c jenkins 2019/08/30 07:28:21
...
root@swi-mdm9x28: ~# cm sim info
Type: EXTERNAL_SLOT_1
ICCID: 89332401000004550147
Home Network Operator: I TIM
EID:
IMSI: 222013094587037
Phone Number:

mangOH Red Getting Started Guide (non-Octave)
Rev 1 2020-03-01 16 41113734
10. Make sure you are using the correct APN for your SIM:
# cm data
If you are using:
·Sierra Wireless SIM—The module should automatically set the appropriate APN for the SIM (likely
internet.sierrawireless.com, internet.swir, lp.swir, etc.) If no APN is shown, you should use
internet.sierrawireless.com.
·AT&T SIM (included with ATT_mangOH_Red kit only)—Your APN should be m2m.com.attz
·Any other SIM—Check with the mobile network provider, or search the Internet for "<provider> APN".
For example, "Rogers Wireless APN"
Note: If your mobile network operator uses different APNs for 3G and LTE, make sure to use the correct APN for your
CF3 module type. (e.g. WP8548 is a 3G module, and WP7603 is an LTE module.
a. If "cm data" showed the wrong APN, set the correct APN (replace <apn_value>):
# cm data apn <apn_value>
b. Check the connection status again to make sure you set the APN correctly:
# cm data
c. If the APN is not the value you set, go back to step a.
11. The CF3 module is registered on a mobile network (if using an activated SIM), and the SIM is installed and
configured with the correct APN.
Now that you’ve registered on the network, you can Connect to AirVantage (The Cloud) on page 17
and see how the mangOH Red sends data to the cloud.
root@swi-mdm9x28: ~# cm data
Index: 1
APN: internet.sierrawireless.com
PDP Type: IPV4
Connected: no
Example response when Not connected,
and APN is set
root@swi-mdm9x28: ~# cm data
Index: 1
APN:
PDP Type: IPV4
Connected: no
Example response when Not connected,
and no APN
root@swi-mdm9x28: ~# cm data apn internet.sierrawireless.com
root@swi-mdm9x28: ~# cm data
Index: 1
APN: internet.sierrawireless.com
PDP Type: IPV4
Connected: no
root@swi-mdm9x28: ~# cm data
Index: 1
APN: internet.sierrawireless.com
PDP Type: IPV4
Connected: no

Rev 1 2020-03-01 17 41113734
5
5: Connect to AirVantage (The Cloud)
Now that your mangOH Red is working, it’s time to send its sensor data to the cloud.
Your mangOH Red kit includes a free mangOH-customized account on the AirVantage IoT Acceleration Platform
for your CF3 module. This platform provides a cloud-based service to collect data from your device, and the
infrastructure for you to build, connect, and operate your IoT applications in a single platform.
Note: You can register up to five devices on your free account.
5.1 Claim Your Free AirVantage Account
To use AirVantage, you must register your CF3 module and then connect your mangOH Red to the AirVantage
server. If you have an AirVantage account for non-mangOH devices, register for a new account for your mangOH
device(s) to enable access to the mangOH-specific customizations.
To claim your free AirVantage account:
1. Go to https://eu.airvantage.net/accounts/signup?type=Mangoh.
In the next step, use this link if you
In the next step, use this link if you need
already have a mangOH AirVantage account.
to create a Sierra Wireless account.

mangOH Red Getting Started Guide (non-Octave)
Rev 1 2020-03-01 18 41113734
2. Log in to AirVantage:
·If you have not already created an AirVantage account for mangOH boards, click SIGN UP. and go to
step 3.
·If you already have a mangOH AirVantage account, click the here link in the AirVantage Login section,
sign in, and go to Step 7 on page 19.
3. To create a new Sierra Wireless User Account:
a. Enter your information and click SIGN UP to create the account.
b. Follow the instructions that appear to complete your Sierra Wireless account activation.
(When you receive your activation email, use it within 24 hours to register your Sierra Wireless account.)
c. Follow the prompts to log in with your new account. An AirVantage Signup Request window will appear.
Note: You can use your Sierra Wireless account to access your AirVantage account, mangOH.io, the Source, and other
Sierra Wireless sites.
4. Enter the information to create your AirVantage account (Company), which will be used to hold your mangOH
device(s), and click CONFIRM SIGN UP when finished.
Important: The company name must be unique (e.g. use a combination of your company name, the project name,
your name, etc.)—If the name has been used by any other person to set up their account, you will have to change this
to make it unique.
5. An email is sent automatically to your email address with a link to AirVantage. Click the link to access your
account for the first time (https://eu.airvantage.net/start).

5.1: Claim Your Free AirVantage Account
Rev 1 2020-03-01 19 41113734
6. The first time you log in to your AirVantage account, a walkthrough tutorial appears.
If you don’t want to use it, click Skip. Otherwise, click Next to step through it.
7. Link your mangOH Red’s CF3 module and SIM to your AirVantage account:
a. In the mangOH tile, click Register.
b. In the Register a new mangOH window, enter your SIM and device information:
Note: If you are using a Sierra Wireless SIM provided with the kit, it is now activated and your CF3 module will be able
to register on a mobile network.
8. Now that your ’system’ (module + SIM combination) is registered, go to the system dashboard and make any
final required configuration adjustments:
a. Click Monitor, then select Systems to display your registered devices.

mangOH Red Getting Started Guide (non-Octave)
Rev 1 2020-03-01 20 41113734
b. Click anywhere in the line showing your device to display the system’s dashboard (System Details).
Note: (All the devices registered on your account appear in this list; make sure to click the correct device.)
The dashboard appears, showing information about the system, recent communications, and widgets for
the sensor data sent by your mangOH Red.
Click anywhere on the
correct device line
Other manuals for Red
4
Table of contents
Other mangOH Microcontroller manuals