manuals.online logo
Brands
  1. Home
  2. •
  3. Brands
  4. •
  5. Manhattan
  6. •
  7. Media Converter
  8. •
  9. Manhattan 151047 User manual

Manhattan 151047 User manual

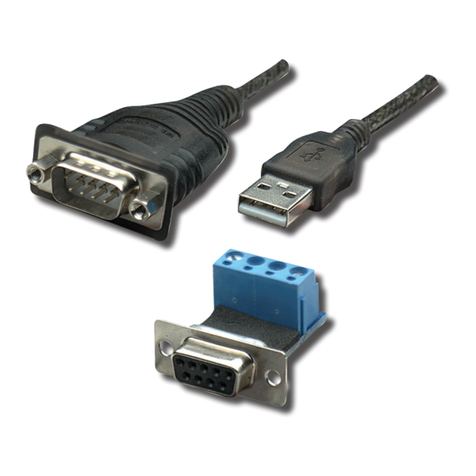
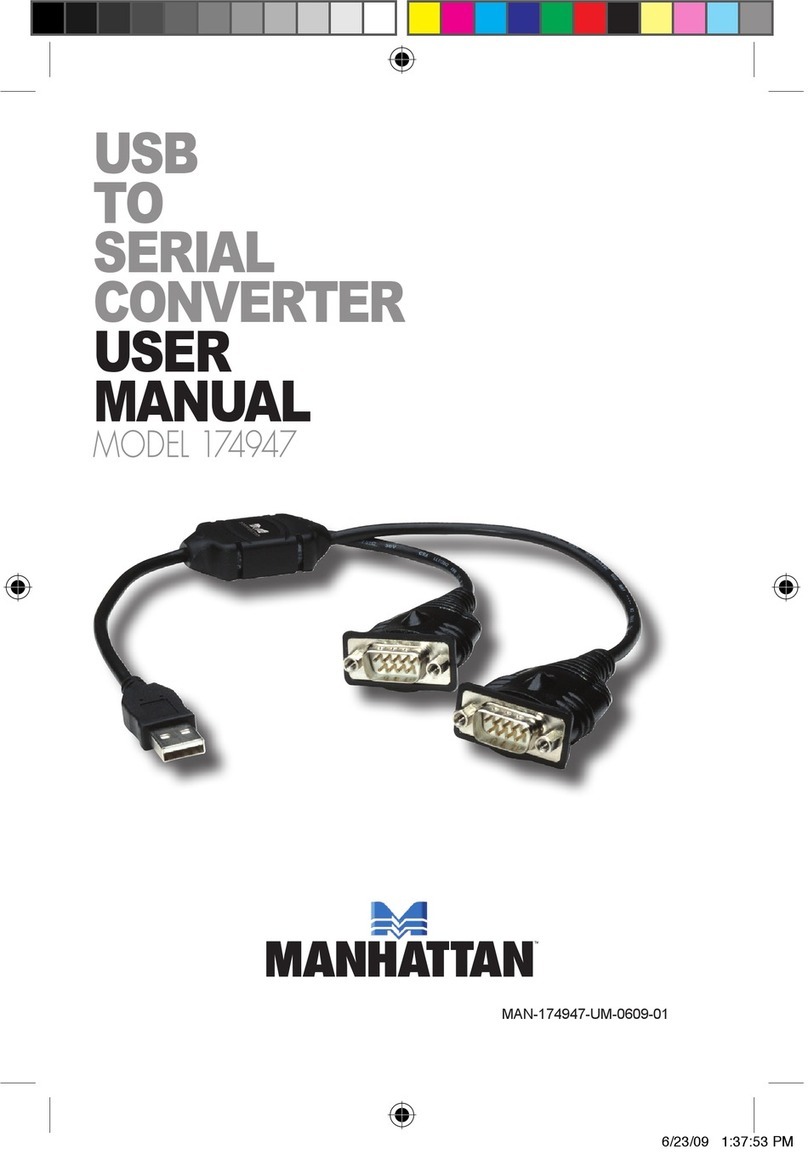
USB TO SERIAL CONVERTER
INSTRUCTIONS
MODEL 151047
WARRANTY INFORMATION
English: For warranty information, go to manhattan-products.com/warranty.
Deutsch: Garantieinformationen finden Sie unter manhattan-products.com/warranty.
Español: Si desea obtener información sobre la garantía, visite manhattan-products.com/warranty.
Français: Pour consulter les informations sur la garantie, visitez manhattan-products.com/warranty.
Polski: Informacje dotyczące gwarancji znajdują się na stronie manhattan-products.com/warranty.
Italiano: Per informazioni sulla garanzia, accedere a manhattan-products.com/warranty.
En México: Póliza de Garantía Manhattan – Datos del importador y responsable ante el consumidor IC Intracom México, S.A.P.I. de C.V. • Av. Interceptor
Poniente # 73, Col. Parque Industrial La Joya, Cuautitlán Izcalli, Estado de México, C.P. 54730, México. • Tel. (55)1500-4500
La presente garantía cubre los siguientes productos contra cualquier defecto de fabricación en sus materiales y mano de obra.
A. Garantizamos los productos de limpieza, aire comprimido y consumibles, por 60 dias a partir de la fecha de entrega, o por el tiempo en que se agote
totalmente su contenido por su propia función de uso, lo que suceda primero.
B. Garantizamos los productos con partes móviles por 3 años.
C. Garantizamos los demás productos por 5 años (productos sin partes móviles), bajo las siguientes condiciones:
1. Todos los productos a que se reere esta garantía, ampara su cambio físico, sin ningún cargo para el consumidor.
2. Elcomercializadornotienetalleresdeservicio,debidoaquelosproductosquesegarantizannocuentanconreparaciones,nirefacciones,yaquesu
garantía es de cambio físico.
3. La garantía cubre exclusivamente aquellas partes, equipos o sub-ensambles que hayan sido instaladas de fábrica y no incluye en ningún caso el
equipo adicional o cualesquiera que hayan sido adicionados al mismo por el usuario o distribuidor.
Para hacer efectiva esta garantía bastará con presentar el producto al distribuidor en el domicilio donde fue adquirido o en el domicilio de IC Intracom
México, S.A.P.I. de C.V., junto con los accesorios contenidos en su empaque, acompañado de su póliza debidamente llenada y sellada por la casa
vendedora (indispensable el sello y fecha de compra) donde lo adquirió, o bien, la factura o ticket de compra original donde se mencione claramente el
modelo, número de serie (cuando aplique) y fecha de adquisición. Esta garantía no es válida en los siguientes casos: Si el producto se hubiese utilizado
en condiciones distintas a las normales; si el producto no ha sido operado conforme a los instructivos de uso; o si el producto ha sido alterado o tratado
de ser reparado por el consumidor o terceras personas.
manhattan-products.com
Important: Read before use. • Importante: Leer antes de usar.
English: This symbol on the product or its packaging indicates that this product
shall not be treated as household waste. Instead, it should be taken
to an applicable collection point for the recycling of electrical and
electronicequipment.Byensuringthisproduct is disposed ofcorrectly,
you will help prevent potential negative consequences to the en-
vironment and human health, which could otherwise be caused by inap-
propriate waste handling of this product. If your equipment contains easily
removable batteries or accumulators, dispose of these separately according
to your local requirements. The recycling of materials will help to conserve
natural resources. For more detailed information about recycling of this prod-
uct, contact your local city office, your household waste disposal service or
the shop where you purchased this product. In countries outside of the EU: If
you wish to discard this product, contact your local authorities and ask for the
correct manner of disposal.
Deutsch: Dieses auf dem Produkt oder der Verpackung angebrachte Symbol
zeigt an, dass dieses Produkt nicht mit dem Hausmüll entsorgtwerden darf. In
Übereinstimmung mit der Richtlinie 2002/96/EG des Europäischen Parla-
ments und des Rates über Elektro- und Elektronik-Altgeräte (WEEE) darf
dieses Elektrogerät nicht im normalen Hausmüll oder dem Gelben Sack
entsorgt werden. Wenn Sie dieses Produkt entsorgen möchten, bringen Sie
es bitte zur Verkaufsstelle zurück oder zum Recycling-Sammelpunkt Ihrer
Gemeinde.
Español: Este símbolo en el producto o su embalaje indica que el producto
no debe tratarse como residuo doméstico. De conformidad con la Directiva
2002/96/CE de la UE sobre residuos de aparatos eléctricos y electrónicos
(RAEE), este producto eléctrico no puede desecharse se con el resto de re-
siduos no clasificados. Deshágase de este producto devolviéndolo a su punto
de venta o a un punto de recolección municipal para su reciclaje.
Français: Ce symbole sur Ie produit ou son emballage signifie que ce produit
ne doit pas être traité comme un déchet ménager. Conformément à la Direc-
tive 2002/96/EC sur les déchets d’équipements électriques et électroniques
(DEEE), ce produit électrique ne doit en aucun cas être mis au rebut sous
forme de déchet municipal non trié. Veuillez vous débarrasser de ce produit
en Ie renvoyant à son point de vente ou au point de ramassage local dans
votre municipalité, à des fins de recyclage.
Italiano: Questo simbolo sui prodotto o sulla relativa confezione indica che
il prodotto non va trattato come un rifiuto domestico. In ottemperanza alla
Direttiva UE 2002/96/EC sui rifiuti di apparecchiature elettriche ed elettron-
iche (RAEE), questa prodotto elettrico non deve essere smaltito come riuto
municipale misto. Si prega di smaltire il prodotto riportandolo al punto ven-
dita o al punto di raccolta municipale locale per un opportuno riciclaggio.
Polski: Jeśli na produkcie lub jego opakowaniu umieszczono ten symbol,
wówczas w czasie utylizacji nie wolno wyrzucać tego produktu wraz z od-
padami komunalnymi. Zgodnie z Dyrektywą Nr 2002/96/WE w sprawie
zużytego sprzętu elektrycznego i elektronicznego (WEEE), niniejszego
produktu elektrycznego nie wolno usuwać jako nie posortowanego odpadu
komunalnego. Prosimy o usuniecie niniejszego produktu poprzez jego zwrot
do punktu zakupu lub oddanie do miejscowego komunalnego punktu
zbiórki odpadów przeznaczonych do recyklingu.
WASTE ELECTRICAL & ELECTRONIC EQUIPMENT
Disposal of Electric and Electronic Equipment (applicable in the European Union and other European countries with separate collection systems)
Driver Installation and Operation
1Load the included driver CD. If the CD
doesn’t auto-run, run the setup file
and follow the on-screen prompts.
When the driver installation is
complete, restart the computer.
2
Plug the converter into a USB port. The
Power LED on the converter lights
green to indicate the four RS232 ports
are ready to support connected
devices.
Verfiying the Driver Installation
1Go to Start on your desktop; right-
click “My Computer”; select “Manage.”
2Select “Device Manager.”
3 Click the plus sign (+) in front of “Ports
(COM&LPT)” and conrm that four
“Hi-Speed USB Serial Port...” listings
are displayed.
Changing the COM Port Number
Note:
Some serial devices need a special
COM port in order to work. If your serial
device works properly, do not change
this setting. If it doesn’t:
1On the Device Manager screen,
double-click “Ports (COM&LPT)”; then
double-click the “Hi-Speed USB Serial
Port...” or “MosChip Hi-Speed USB
Serial Port...” listing you want to
change.
2On the Features screen, use the drop-
down menu next to the “COM Port
Number” box to select a COM port not
in use, then click OK to save the change.
For specifications, go to manhattan-
products.com.
REGULATORY STATEMENTS
FCC Class B
This equipment has been tested and found to comply with the limits for a Class B digital device, pursuant to Part 15 of Federal Communications
Commission (FCC) Rules. These limits are designed to provide reasonable protection against harmful interference in a residential installation. This
equipment generates, uses and can radiate radio frequency energy, and if not installed and used in accordance with the instructions may cause harm-
ful interference to radio communications. However, there is no guarantee that interference will not occur in a particular installation. If this equipment
does cause harmful interference to radio or television reception, which can be determined by turning the equipment off and on, the user is encour-
aged to try to correct the interference by one or more of the following measures: reorient or relocate the receiving antenna; increase the separation
between the equipment and the receiver; connect the equipment to an outlet on a circuit different from the receiver; or consult the dealer or an
experienced radio/TV technician for help.
CE / R&TTE
English: This device complies with the requirements of R&TTE Directive 1999/5/EC. The Declaration of Conformity for this product is available at:
Deutsch: Dieses Gerät enspricht der Direktive R&TTE Direktive 1999/5/EC. Die Konformitätserklärung für dieses Produkt nden Sie unter:
Español: Este dispositivo cumple con los requerimientos de la Directiva R&TTE 1999/5/EC. La declaración de conformidad para este producto esta disponible en:
Français: Cet appareil satisfait aux exigences de la directive R&TTE 1999/5/CE. La Déclaration de Conformité pour ce produit est disponible à l’adresset:
Polski: Urządzenie spełnia wymagania dyrektywy R&TTE 1999/5/EC. Deklaracja zgodności dostępna jest na stronie internetowej producenta:
Italiano: Questo dispositivo è conforme alla Direttiva 1999/5/EC R&TTE. La dichiarazione di conformità per questo prodotto è disponibile al:
manhattan-products.com
LED / DEL / Dioda
USB
RS232
Treiberinstallation und Betrieb
1 Legen Sie die beiliegende Treiber-CD. Wenn die CD
nicht automatisch starten, führen Sie die Setup-Datei
und folgen Sie den Anweisungen auf dem Bildschirm.
Wenn die Treiberinstallation bgeschlossen ist, starten
Sie den Computer neu.
2 Schließen Sie den Konverter an einen USB-Port an. Eine
grün leuchtende Power-LED am Konverter zeigt an, dass
die vier RS232-Ports für den Geräte anschluss bereit sind.
Überprüfung der Treiberinstallation
1Klicken Sie auf Ihrem Desktop auf Start; rechtsklicken
Sie auf “Computer “ und klicken Sie dann auf “Verwalten“.
2 Klicken Sie auf “Geräte-Manager”.
3
Klicken Sie auf das Plus-Zeichen (+) vor “Ports (COM&LPT)”
und prüfen Sie, dass vier Einträge “Serieller Hi-Speed
USB 2.0 Port...” angezeigt werden.
Änderung der COM-Port-Nummer
Hinweis: Einige serielle Geräte benötigen für den Betrieb
einen speziellen COM-Port. Wenn Ihr serielles Gerät
ordnungsgemäß funktioniert, ändern Sie diese Einstellung
nicht. Ist dies nicht der Fall:
1 Doppelklicken Sie im Geräte-Manager auf “Ports
(COM&LPT)”; dann doppelklicken ie auf den Eintrag
“Serieller Hi-Speed USB 2.0 Port” oder “Serieller MosChip
Hi-Speed USB 2.0 Port...”, den Sie ändern möchten.
2 Verwenden Sie das Dropdown-Menü neben “COM Port
Number” auf der “Funktionen” Bildschirm, wählen Sie
einen COM-Port, die nicht in Gebrauch ist, und klicken
Sie auf OK, um die Änderung zu speichern.
Die Spezikationen nden Sie auf manhattan-products.com.
Deutsch: USB auf Seriell Konverter
Français: Convertisseur USB/série
MAN-151047-MAN-ML1-0513-02-0
Printed on recycled paper.
© IC Intracom. All rights reserved.
Manhattan is a trademark of IC Intracom, registered in the U.S. and other countries.
All trademarks and trade names are the property of their respective owners.
Alle Marken und Markennamen sind Eigentum Ihrer jeweiligen Inhaber.
Todas las marcas y nombres comerciales son propiedad de sus respectivos dueños.
Toutes les marques et noms commerciaux sont la propriété de leurs propriétaires respectifs.
Wszystkie znaki towarowe i nazwy handlowe należą do ich właścicieli.
Tutti i marchi registrati e le dominazioni commerciali sono di proprietà dei loro rispettivi proprietari.
North & South America
IC Intracom Americas
550 Commerce Blvd.
Oldsmar, FL 34677
USA
Asia & Africa
IC Intracom Asia
Far Eastern Technology Center
7-F No. 125, Section 2, Da Tong Rd.
Shijr, Taipei, Taiwan, ROC
Europe
IC Intracom Europe
Löhbacher Str. 7
D-58553 Halver
Germany
Instalación del controlador
1Inserte el CD incluido. Si no se ejecuta el auto-arranque,
ejecute manualmente el archivo de configuración y siga
las instrucciones. Cuando se complete la instalación,
reinicie la computadora.
2Conecte el convertidor en un puerto USB. El LED de
energía encenderá en verde para indicar que los cuatro
puertos RS232 están listos para conectarse a los
dispositivos.
Verificando la instalación del controlador
1
En el menú inicio; haga clic-derecho en “Mi PC” y
seleccione
“Administrar”.
2 Elija “Administrador de Dispositivos”.
3 Haga clic en el signo de más (+) frente a “Puertos
COM&LPT” conrme que “Hi-Speed USB Serial Port...”
se lista cuatro veces.
Cambiar el número de puerto COM
Nota: Algunos dispositivos seriales necesitan un puerto
especial COM para funcionar. Si su dispositivo serial funciona,
no cambie los ajustes. De lo contrario:
1En el administrador de dispositivos, haga doble clic en
“Puertos COM&LPT”; después en “Hi-Speed USB Serial
Port...” o “MosChipHi-Speed USB Serial Port...” elija cual
es que quiere cambiar.
2 En la pantalla de funciones, utilice el menú desplegable
junto al cuadro “Número de puerto COM” para
seleccionar un puerto COM no está en uso, haga clic en
OK para salvar los cambios.
Para más especificaciones, visite manhattan-products.com.
Español: Convertidor USB a Serie
Installation de pilote et emploi
1Insérez le CD de pilote fourni. Si le CD ne démarre pas
automatiquement, exécutez le fichier d’installation et
suivez les instructions à l’écran. Lorsque l’installation du
pilote est terminée, redémarrez l’ordinateur.
2Connectez le convertisseur à un port USB. La DEL
alimentation sur le convertisseur s’allume vert pour
afficher que les quatre ports RS232 sont prêts à la
connexion des périphériques.
Vérifier l’installation de pilote
1Cliquez sur Démarrer sur votre bureau; cliquez-droit sur
“Mon ordinateur”; puis sur “Gérer”.
2 Sélectionnez “Gestionnaire de périphérique”.
3 Cliquez sur le signe plus (+) devant “Ports (COM&LPT)”
et conrmez que quatre entrées “USB haut débit port
série...” sont achées.
Changer le numéro de port COM
Remarque: Quelques périphériques requièrent un port
COM spécial pour fonctionner. Si votre périphérique série
fonctionne correctement, ne changez pas cette
conguration. Si ce n’est pas le cas:
1Au Gestionnaire de périphérique, double-cliquez sur
“Ports (COM&LPT)”; puis sur l’entrée “USB haut débit
port série...” ou “MosChip USB haut débit port série...”
que vous voudriez changer.
2Sur l’écran Fonctions, utilisez le menu déroulant à côté
de la case “COM Port Number” pour sélectionner un
port COM n’est pas utilisé, puis cliquez sur OK pour
enregistrer le changement.
Vous trouvez les spécifications sur manhattan-products.com.
Polski: Konwerter USB na port szeregowy
Instalacja sterownika
1 Włóż do napędu załączoną płytę CD ze sterownikami.
Jeśli płyta nie odtworzy się automatycznie, należy
uruchomić plik instalacyjny i postępować zgodnie z
instrukcjami wyświetlanymi na ekranie. Po zakończeniu
instalacji sterownika uruchom ponownie komputer.
2 Podłącz konwerter do portu USB. Dioda zasilania
konwertera zaświeci się na zielono sygnalizując
gotowość urządzenia do obsługi urządzeń RS232.
Weryfikacja instalacji
1
Wyświetl właściwości systemowej ikony „Mój komputer”.
2 Wybierz „Menadżer urządzeń”.
3 Rozwiń pozycję Porty (COM i LPT) i upewnij się, że na
liście znajdują się cztery urządzenia: „Hi-Speed USB
Serial Port...”.
Zmiana numeru portu COM
Uwaga: Niektóre urządzenia wymagają określonego
numeru portu. Jeśli Twoje urządzenia działa prawidłowo,
nie zmieniaj ustawień.
1 W oknie menadżera urządzeń rozwiń pozycję Porty
(COM i LPT), następnie wyświetl właściwości portu,
którego ustawienia chcesz zmienić.
2 Wybierz kartę „Ustawienia portu”, następie wybierz
„Zaawansowane”. Z rozwijanej listy wybierz określony
numer portu, który aktualnie nie jest używany. Wciśnij
OK, aby zapamiętać ustawienia.
Pełną specykację produktu znajdziecie Państwo na
stronie manhattan-products.com.
Italiano: Convertitore da USB a 4 porte seriale
Installazione dei driver e funzionamento
1Inserte el CD incluido. Si no se ejecuta el auto-arranque,
ejecute manualmente el archivo de configuración y
siga las instrucciones. Cuando se complete la
instalación, reinicie la computadora.
2Collegare il convertitore nella porta USB. Il LED di
alimentazione sul convertitore si illuminerà in verde
per indicare che le quattro porte RS232 sono pronte
per supportare le periferiche connesse.
Verifica dell’installazione dei driver
1 Andare su Start (Avvio) sul tuo desktop; cliccare con il
tasto destro del mouse sull’icona “My Computer”;
selezionare “Manage.” (Gestione)
2 Selezionare “Device Manager.” (Gestione periferiche)
3 Cliccare sul segno più (+) davanti a “Ports (COM&LPT)”
(Porte) e vericare che le quattro porte Hi-Speed USB
Seriali siano presenti nella lista.
Modifica del numero della porta COM
Nota: Alcune periferiche seriali hanno bisogno di una
porta COM speciale per poter funzionare. Se la tua
periferica seriale funziona correttamente, non modificare
questa impostazione. Se non dovesse funzionare:
1
Sulla schermata Device Manager (Gestione periferiche),
cliccare due volte su “Ports (COM&LPT)” (Porte); quindi
cliccare due volte su Porta Hi-Speed USB Seriale...” o su
Porta MosChip Hi-Speed USB Seriale...” che si desidera
cambiare.
2 Nella schermata Funzioni, utilizzare il menu a discesa
accanto alla casella “COM Port Number” per selezionare
una porta COM non è in uso, quindi cliccare OK per
salvare le modifiche.
Per ulteriori specifiche, visita il sito manhattan-products.com.
Other Manhattan Media Converter manuals

Manhattan 150095 User manual

Manhattan

Manhattan 150095 User manual

Manhattan IADAP USB32-HDMIPD User manual

Manhattan

Manhattan IADAP USB32-HDMIPD User manual

Manhattan 179225 User manual

Manhattan

Manhattan 179225 User manual

Manhattan 179041 User manual

Manhattan

Manhattan 179041 User manual

Manhattan 162579 User manual

Manhattan

Manhattan 162579 User manual

Manhattan 174947 User manual

Manhattan

Manhattan 174947 User manual

Manhattan 158138 User manual

Manhattan

Manhattan 158138 User manual

Manhattan 152303 User manual

Manhattan

Manhattan 152303 User manual

Manhattan 205146 User manual

Manhattan

Manhattan 205146 User manual

Manhattan 158282 User manual

Manhattan

Manhattan 158282 User manual

Manhattan 151788 User manual

Manhattan

Manhattan 151788 User manual

Manhattan 179119 User manual

Manhattan

Manhattan 179119 User manual

Manhattan 152297 User manual

Manhattan

Manhattan 152297 User manual

Manhattan 207959 User manual

Manhattan

Manhattan 207959 User manual

Manhattan 162579 User manual

Manhattan

Manhattan 162579 User manual

Manhattan 151283 User manual

Manhattan

Manhattan 151283 User manual

Manhattan 179225 User manual

Manhattan

Manhattan 179225 User manual

Manhattan 207959 User manual

Manhattan

Manhattan 207959 User manual

Manhattan 308250 User manual

Manhattan

Manhattan 308250 User manual

Manhattan 151443 User manual

Manhattan

Manhattan 151443 User manual

Manhattan 179041 User manual

Manhattan

Manhattan 179041 User manual

Manhattan 173384 User manual

Manhattan

Manhattan 173384 User manual

Manhattan 205146 User manual

Manhattan

Manhattan 205146 User manual

Manhattan 317016 User manual

Manhattan

Manhattan 317016 User manual

Popular Media Converter manuals by other brands

Extron electronics DSC 3G-HD A Setup guide

Extron electronics

Extron electronics DSC 3G-HD A Setup guide

StarTech.com UVCHDCAP quick start guide

StarTech.com

StarTech.com UVCHDCAP quick start guide

Weidmüller Wave Series operating instructions

Weidmüller

Weidmüller Wave Series operating instructions

Pentax EPK-700 owner's manual

Pentax

Pentax EPK-700 owner's manual

VINCENT DAC-7 Instructions for use

VINCENT

VINCENT DAC-7 Instructions for use

Kramer WP-789R quick start guide

Kramer

Kramer WP-789R quick start guide

HiFiMAN HM1000 user guide

HiFiMAN

HiFiMAN HM1000 user guide

Oval SU1312 instructions

Oval

Oval SU1312 instructions

MyTek Stereo 192-DSD DAC user manual

MyTek

MyTek Stereo 192-DSD DAC user manual

ANTAIRA FCU-1802P Series user manual

ANTAIRA

ANTAIRA FCU-1802P Series user manual

PESA QuStream Integrity CS Series quick start guide

PESA

PESA QuStream Integrity CS Series quick start guide

evertz 7772MFX-HD manual

evertz

evertz 7772MFX-HD manual

Black Box IC442A-R2 Installation

Black Box

Black Box IC442A-R2 Installation

3One data 485P Quick installation guide

3One data

3One data 485P Quick installation guide

Delta Light RGBW DRIVER Installation instruction

Delta Light

Delta Light RGBW DRIVER Installation instruction

IPEX PH485iX user manual

IPEX

IPEX PH485iX user manual

Delta PMC-DSPV100W1A instruction manual

Delta

Delta PMC-DSPV100W1A instruction manual

SMART-AVI V2V series installation manual

SMART-AVI

SMART-AVI V2V series installation manual

manuals.online logo
manuals.online logoBrands
  • About & Mission
  • Contact us
  • Privacy Policy
  • Terms and Conditions

Copyright 2025 Manuals.Online. All Rights Reserved.