Mara GEA-SYS-16-0500 User manual

1
MARA OPERATOR’S MANUAL
Mara Console
(MODEL #GEN--)
Mara™Water Vapor Ablation System
GEA-SYS-16-0500
Operator’s Manual

2 3
MARA OPERATOR’S MANUAL MARA OPERATOR’S MANUAL
TABLE OF CONTENTS
SECTION 1
Introduction to Mara Water Vapor Ablation System ............................................................ 5
SECTION 2
Controls, Indicators and Receptacles ............................................................................................... 9
SECTION 3
Preparing the Console for Use .............................................................................................................11
SECTION 4
After the Procedure ..................................................................................................................................... 20
SECTION 5
Troubleshooting ...............................................................................................................................................21
SECTION 6
Maintenance and Repair ......................................................................................................................... 45
APPENDIX A
Technical Description ..................................................................................................................................47
APPENDIX B
Display Screens ............................................................................................................................................... 54
APPENDIX C
Symbol Definitions on Labeling ......................................................................................................... 58

4 5
MARA OPERATOR’S MANUAL MARA OPERATOR’S MANUAL
SECTION
INTRODUCTION TO MARA WATER VAPOR
ABLATION SYSTEM
System Description
The Mara Water Vapor Ablation System
consists of: (1) a reusable Mara Console
with attached Cartridge and Cartridge
Cable, and AC power cord; and (2) the
single use Mara Water Vapor Probe Kit
that includes a sterile Mara Water Vapor
Probe with attached saline delivery
conduit, syringe and saline supply line
with spiked end.
The single use Mara Water Vapor Probe has been designed with SmartSeal™
technology to optimize device placement and to protect the cervix and
vagina from thermal effects. The soft slender tip of the Water Vapor Probe
is inserted transcervically into the uterine cavity. The Water Vapor Probe
delivers water vapor to ablate the endometrial lining of the uterus. The water
vapor is created within the Water Vapor Probe from saline, using energy
provided by the Console.
The Mara Water Vapor Ablation System has been designed with the
IntegrityPro™ safety feature which utilizes SmartSeal technology designed
to ensure that the Water Vapor Probe tip is correctly placed in the uterine
cavity and that there are no leaks from the uterine cavity or cervix through
which water vapor could escape. The IntegrityPro safety feature is comprised
of a Uterine Cavity Integrity Test and a Device Lumen Patency Test. Both
tests are performed with normal saline (0.9% NaCl) after placement of the
Read all instructions, cautions and warnings prior to use.
For comprehensive procedural instructions, warnings, precautions and potential
adverse events for the combined use of the Mara Console and the Mara Water Vapor
Probe, please refer to the Mara Water Vapor Ablation System
Instructions for Use
(packaged with the Mara Water Vapor Probe Kit).
Failure to follow any instructions or to heed any warnings or precautions could result in
serious patient injury.
The Mara Water Vapor Probe and Mara Console must be used only in conjunction with
each other. Both are to be used only by physicians who have reviewed and understand the
Mara Water Vapor Ablation System labeling and training materials.
Contact AEGEA Medical with any questions about the information contained in the
Instructions for Use or in the Mara Console Operator’s Manual.
Mara Console and Water
Vapor Probe
CAUTION: FEDERAL LAW RESTRICTS THIS
DEVICE TO SALE BY OR ON THE ORDER
OF A PHYSICIAN TRAINED IN THE USE
OF THE MARA WATER VAPOR ABLATION
SYSTEM.

6 7
MARA OPERATOR’S MANUAL MARA OPERATOR’S MANUAL
• Utilize the same settings for delivery of water vapor to each patient,
including time and intrauterine water vapor pressure
• Maintain a nominal intrauterine pressure during water vapor treatment
• Constantly monitor for potential alert conditions and automatically stop
delivery of water vapor to the endometrial cavity accordingly.
The Console monitors the following:
• The elapsed water vapor delivery time
• Cervical temperature
• The intrauterine water vapor pressure
• Internal states and conditions including the triple balloon system
through a variety of checks that are performed throughout the process
that are designed for safety of the patient and user as well as proper
performance
Indication for Use
The Mara Water Vapor Ablation System is indicated to ablate the
endometrial lining of the uterus in premenopausal women with
menorrhagia (excessive uterine bleeding) due to benign causes
for whom childbearing is complete.
Water Vapor Probe and prior to water vapor delivery. The Uterine Cavity
Integrity Test is designed to assess for leaks in the uterus or in the cervical
canal through which water vapor could escape. The Device Lumen Patency
Test is performed directly following a successful Uterine Cavity Integrity
Test. The Device Lumen Patency test is designed to confirm the Water
Vapor Probe tip is positioned appropriately and that the Water Vapor Probe
delivery lumen is not blocked by blood or tissue that could have impacted
the saline flow rate and results of the Integrity Test. Water vapor delivery is
initiated only after both tests pass consecutively.
Water vapor is delivered to the uterus for 140 seconds, with a treatment
time of 120 seconds. The first 20 seconds of water vapor delivery serve to
displace saline remaining in the uterus and device lines after the Device
Lumen Patency Test. These 20 seconds are referred to as the “saline flush.”
Intrauterine water vapor pressure is regulated by the Mara Console, based
on feedback from a pressure sensor near the distal tip of the Water Vapor
Probe. The patient’s uterus will be exposed to a temperature of 101˚C
(nominal) during water vapor delivery.
During treatment, SmartSeal provides automated real-time monitoring
of sealing balloon pressure, uterine pressure and cervical temperature, with
active management of uterine and cervical seals, designed to ensure that
water vapor delivery is confined to the uterine cavity or terminated if a
leak is detected.
The Console is designed to:
• Guide the physician through the procedure by use of a graphical user
interface (GUI)
• Regulate the creation of water vapor in the Water Vapor Probe
• Test the Water Vapor Probe upon connection and preparation for use
• Perform an automated Uterine Cavity Integrity Test designed to assess
for leaks from the uterine cavity before the Device Lumen Patency
Test and delivery of water vapor can be initiated
• Perform an automated Device Lumen Patency Test designed to confirm
the Water Vapor Probe tip is positioned appropriately and that the
Water Vapor Probe delivery lumen is not blocked by blood or tissue that
could have impacted the saline flow rate and results of the Integrity Test

8 9
MARA OPERATOR’S MANUAL MARA OPERATOR’S MANUAL
SECTION
CONTROLS, INDICATORS AND RECEPTACLES
Contraindications
The Mara Water Vapor Ablation System is contraindicated for use in:
• A patient who is pregnant or who wants to become pregnant in the future
PREGNANCIES FOLLOWING ABLATION CAN BE DANGEROUS FOR
BOTH MOTHER AND FETUS
• A patient with known or suspected uterine cancer or pre-malignant
conditions of the endometrium, such as unresolved adenomatous
hyperplasia
• A patient with endometrial hyperplasia as confirmed by histology
• A patient with any anatomic condition (e.g., history of previous classical
cesarean section or transmural myomectomy, including hysteroscopic
and/or laparoscopic myomectomy performed immediately prior to the
Mara Water Vapor Ablation Treatment)
• A patient currently on medications that could thin the myometrial
muscle, such as long-term steroid use (except for inhaler or nasal
therapy for asthma)
• A patient with a uterine length < 6cm (external cervical ostium to
internal fundus)
• A patient with a history of a prior completed endometrial ablation
procedure and/or endometrial resection (including endometrial ablation/
resection performed immediately prior to the Mara Water Vapor Ablation
Treatment) regardless of the modality by which it was performed
REPEAT ABLATION MAY RESULT IN SERIOUS PATIENT INJURY
• A patient with active genital or urinary tract infection (e.g., cervicitis,
vaginitis, endometritis, salpingitis or cystitis) at the time of treatment
• A patient with bacteremia, sepsis or systemic infection
• A patient with an intrauterine device (IUD) currently in place
• A patient with active pelvic inflammatory disease or known or
suspected hydrosalpinx based on history or ultrasound at screening
• A patient with undiagnosed vaginal bleeding
1. Front Panel Power Button
2. Cartridge Cable
3. Syringe Port
4. Interrupt Button
5. Graphical User Interface
(GUI) Display
6. Warning Light
7. Cartridge (see below for detailed view)
8. Cable Storage Location
9. Cradle
10. Saline Supply Hook
9 8
6
3
10
5
7
4
1
2
1

10 11
MARA OPERATOR’S MANUAL MARA OPERATOR’S MANUAL
SECTION
PREPARING THE CONSOLE FOR USE
Carefully read and understand all instructions, cautions and warnings
prior to use. Carefully read and understand the Instructions For Use,
Mara Water Vapor Ablation System prior to use. Failure to follow any
instructions or failure to heed any warnings or precautions could result
in serious patient injury.
Clinical Use Checklist
Prior to use of the Mara Water Vapor Ablation System on a patient, the
physician should complete the following checklist to better ensure a
safe and effective use of the system. Note that this is not a comprehensive
list, but an attempt to cover some of the key issues before a physician
uses the Mara Water Vapor Ablation System.
The physician must:
• Along with ancillary personnel, thoroughly read and understand
the Instructions For Use, Mara Console Operators Manual, Indications,
Contraindications, Warnings, Technical Warnings and Precautions
supplied with the Mara Water Vapor Ablation System
• Be able to maintain proper placement of the Water Vapor Probe
and be able to maintain control of the Water Vapor Probe throughout
the procedure
• Neither advance nor withdraw the Water Vapor Probe into or out
of the uterine cavity once the Uterine Cavity Integrity Test and Device
Lumen Patency Test have successfully completed and water vapor
delivery is initiated, until prompted to remove the Water Vapor Probe
from the patient
• Be aware of appropriate sequence of actions to stop water vapor
delivery, resolve and/or continue treatment, in the event the Mara Water
Vapor Ablation System stops water vapor delivery during treatment
14
1311 15 12
10
Cartridge Detailed View
10. Saline Supply Hook
11. Power Cord Receptacle
12. Service Door (service only)
13. Circuit Breaker Reset Switch
14. Saline Supply Pole Release Lever
15. Equipotential Stud

12 13
MARA OPERATOR’S MANUAL MARA OPERATOR’S MANUAL
Quick Setup Instructions
If you are familiar with the Mara Console, you may prefer to follow these
abbreviated instructions. Otherwise, use the detailed instructions that
begin on the next page. All warnings and precautions from the detailed
instructions need to be followed.
1. Attach the power cord from the Console’s rear panel receptacle to a
grounded wall receptacle
2. Press the Front Panel Power Button to turn on the Console. Verify that
the initial Console self-test successfully completes and that there are
no alerts displayed
3. Enter the device-specific password to continue
4. Firmly insert and rotate the Syringe clockwise to engage it in the
Syringe Port in the top of the Console
5. Spike the saline bag with the Saline Supply line
6. Attach the Cartridge to the Water Vapor Probe Handle.
Tip: Momentarily press the Cartridge Release Button at the base
of the Water Vapor Probe to facilitate insertion
7. Follow the on-screen prompts to test the Water Vapor Probe
The system is ready for use. Follow the instructions in the Mara Water
Vapor Ablation System Instructions for Use and on the Console display.
Proceed to Section 4 after the procedure.
General Warnings
Refer to the Mara Water Vapor Ablation System IFU for additional Warnings.
The Console is not packaged as sterile.
The Console may contain materials that are hazardous to the environment.
Do not dispose. Contact AEGEA Medical for further information.
Equipment and Accessory Requirements
The following items are required when using the Mara Water Vapor
Ablation System:
• One sterile, single-use Mara Water Vapor Probe Kit (includes a sterile
Mara Water Vapor Probe with attached saline delivery conduit, syringe
and saline supply line with spiked end)
• One Mara Console (with attached Cartridge and Cartridge Cable,
and AC power cord)
For proper operation of the system, the following hospital supplies
are also required:
• 1L bag of 0.9% normal saline. It is recommended that Normal Saline
should be supplied at body temperature
• Patient fluid / waste collection container
• Uterine sound
• 10 inch tenaculum, straight-arm with ratchet
• Speculum

14 15
MARA OPERATOR’S MANUAL MARA OPERATOR’S MANUAL
⚠Precaution: Console requires hospital grade power supply 110 to 120 V,
60 Hz with a minimum of 15 amp service. Hospital grade receptacles
may be marked with a green dot, or wording such as “Hospital Grade” or
“Hosp. Grade.” Consult your institution’s biomedical department if unsure.
⚠Warning: The use of accessories, transducers and cables, other than
those specified by AEGEA Medical Inc., may result in increased emissions
or decreased immunity of the Console. Do not use accessories,
transducers and cables other than those specified.
4. Insert the power cord to a grounded wall receptacle.
⚠Warning: Connect the Console power cord to a properly grounded
receptacle. Do not use power plug adapters. Do not use extension cords.
⚠Warning: Ensure that the Console is connected to a reliable power
source. Unreliable or inconsistent power may cause power loss to the
Console resulting in an interruption of the procedure.
⚠Warning: To avoid the risk of electric shock, this equipment must only
be connected to a supply mains with protective earth.
⚠Precaution: A temporary circuit overload can cause the internal circuit
breaker to trip. If this were to occur, the power should be turned off, the
Circuit Breaker reset switch should be pressed back in, and then the
unit can be powered back on.
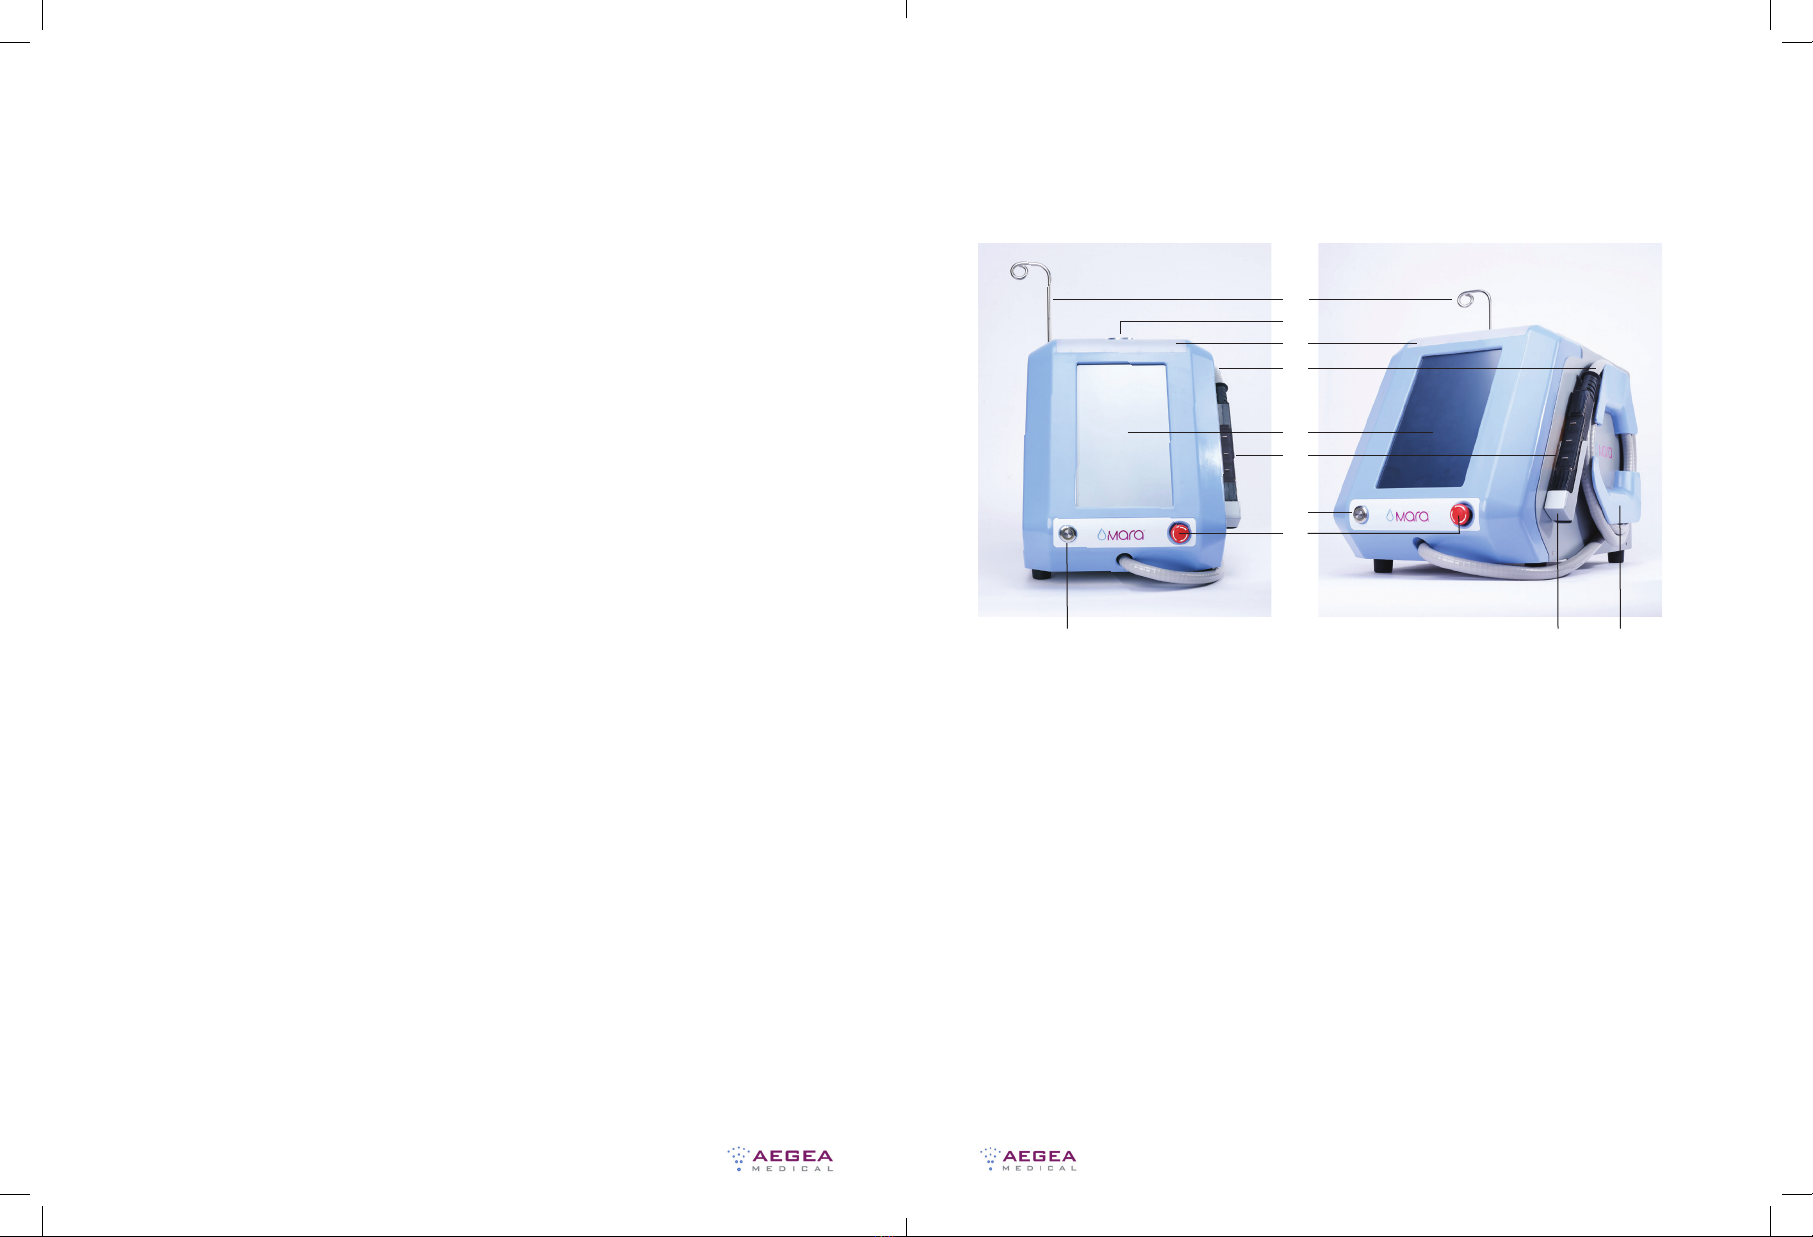
5. Verify that the red Interrupt Button on the front panel is not engaged
(twist to disengage).
6. Press the Front Panel Power Button to turn on the Console, and verify
the following:
a. The blue light on the power button illuminates when the power is on
b. The light above the display temporarily illuminates
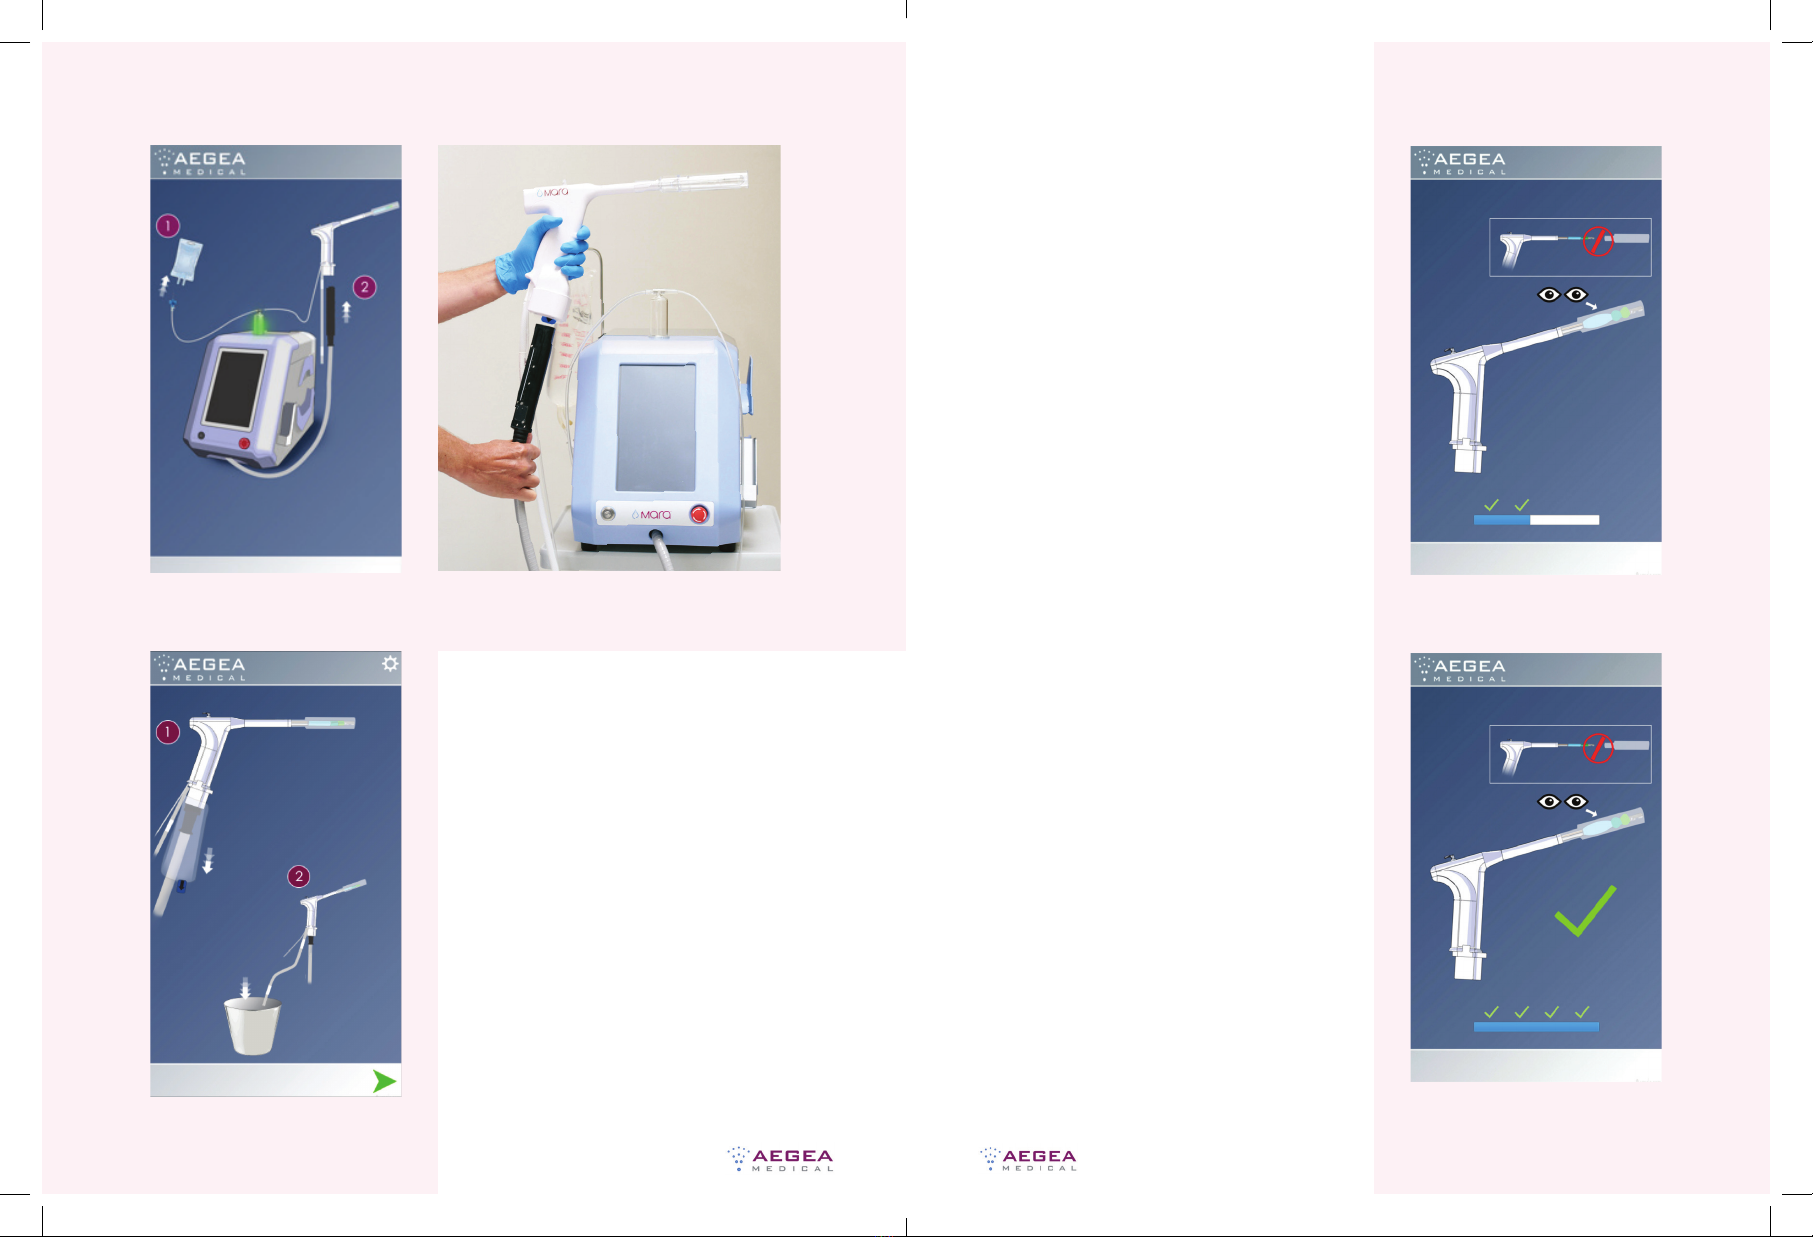
c. The display turns on and temporarily flashes an AEGEA logo ( i m ag e 1)
d. An activation tone sounds indicating the speaker is functional
e. The Console self-test (power on self-test) successfully completes
(a status bar will show progression of the power on self-test)
Setup Instructions
• If the Console was transported or stored at temperatures outside the
Transport and Storage ambient temperature range, allow at least
one hour for the Console to reach room temperature before use. Refer
to Appendix A for more information.
• If the Console was stored without use for longer than one year, the
Console should be tested and calibrated before use.
Setting up the Mara Console for the first time:
1. Unbox the Console. Place the Console on a sturdy cart or table with a
stable flat surface to the left or right side of the user. The front panel
should be facing the user such that there is an unobstructed view of
the touchscreen.
2. With the Console on a cart or table, ensure there are at least four to six
inches of space from the sides and top of the Console to ensure proper
airflow for cooling. It is normal for the outer surfaces of the Console to
be warm when in use.
⚠Precaution: The Console should not be stacked or used adjacent to
other electrical equipment. Do not stack equipment to block the vents
on the bottom or sides of the Console. If stacked or adjacent use is
necessary, the Console should be observed to verify normal operation.
⚠Precaution: Provide as much distance as possible between the Console
and other electrical equipment to prevent interference. Portable and
mobile RF communications equipment can affect the Console.
⚠Warning: Portable RF communications equipment (including
peripherals such as antenna cables and external antennas) should be
used no closer than 30 cm (12 inches) to any part of the Mara Water
Vapor Ablation System, including cables specified by AEGEA Medical
Inc. Otherwise, degradation of the performance of this equipment
could result.
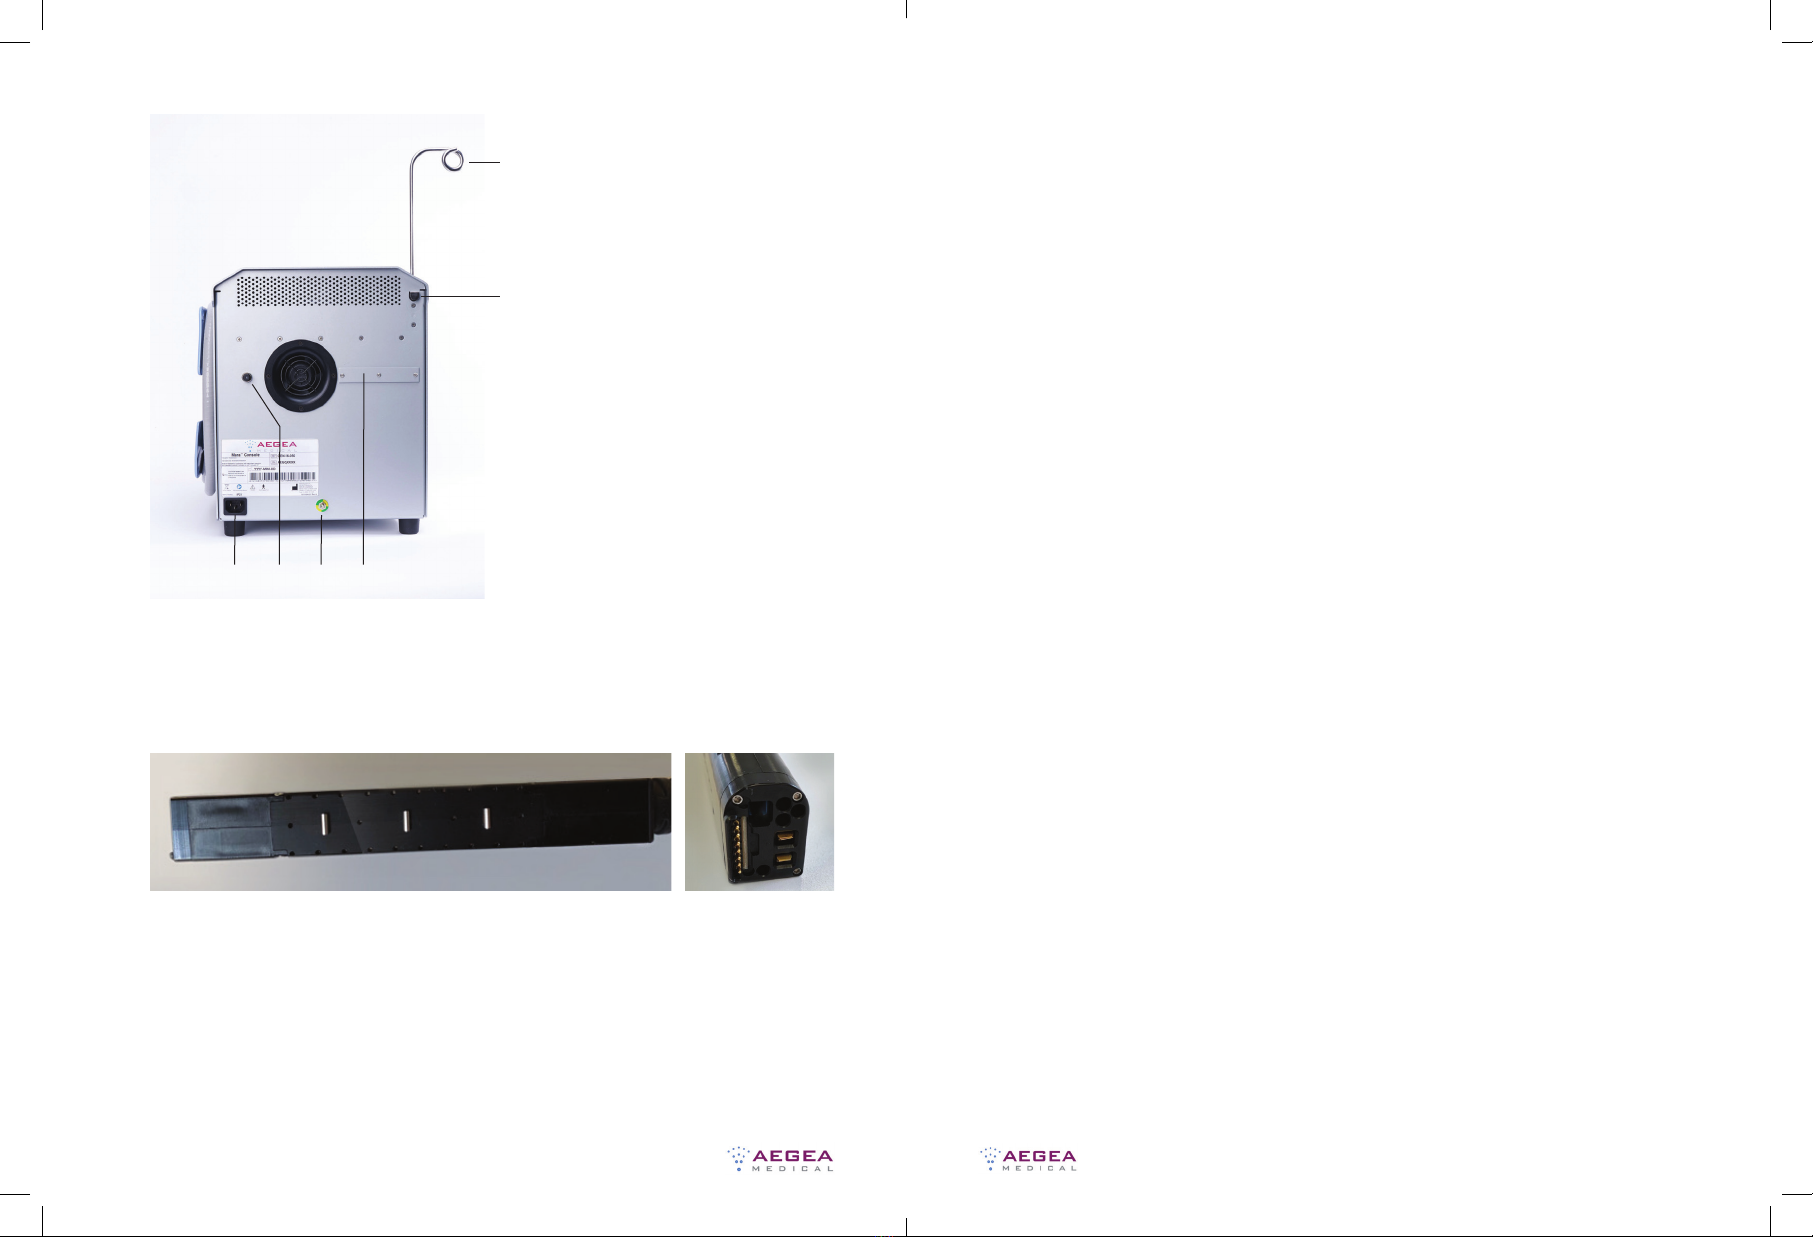
3. Attach the power cord provided with the Console to the Console’s
rear panel receptacle.

16
MARA OPERATOR’S MANUAL
17
MARA OPERATOR’S MANUAL
• Orange (solid) – Alert
(Information Signals). Clear
the message and continue
the procedure.
• Off (default)
• Green – Ready for Treatment
• Blue – Water Vapor Treatment
7. Enter the device-specific passcode
to continue (image 2)
.
8. Prepare the Water Vapor Probe
following standard aseptic
procedures to maintain sterility
of the Water Vapor Probe, while
passing the Syringe with attached
tubing out of the sterile field for
connection to the Console.
⚠Warning: Aseptic technique –
Use aseptic technique in all patient
procedures.
9. Firmly insert and rotate the Syringe
clockwise to engage it in the
Syringe Port on the top of the
Console (images 3 and 4). Syringe
will illuminate green to indicate
proper insertion.
10. Spike the saline bag with the Saline
Supply line. Ensure the pole for the
Saline Bag is locked in the upright
position, and hang the Saline Bag on
the Saline Supply Hook (image 5).
Note: If the self-test is unsuccessful,
an alarm tone will sound and an alert
number will appear on the display.
The Console will be disabled and will
require the power to be turned OFF.
Refer to the Troubleshooting Guide in
Section 5 for more information about
alert numbers.
f. The display transitions to the “IFU”
screen at the completion of the power
on self-test. Refer to #8 on the
next page.
Note: The display allows adjustment
of the speaker volume. Press the “gear”
symbol and select volume, if desired.
Note: The Graphical User Interface
Display will provide instructions
and guidance to assist with
performance of the procedure. It
is also a touch screen to allow the
user to respond to prompts and
to control the procedure.
Note: There is a Warning Light above
the display that will illuminate to
indicate different status conditions,
as follows:
• Orange (flashing) – Fault. Turn off
the Console.
• Yellow (solid) – Alert (Alarm
Condition). Follow instructions and
continue the procedure.
Image 1
Image 2 Image 4
Image 3

18
MARA OPERATOR’S MANUAL
19
MARA OPERATOR’S MANUAL
13. Press green arrow on the Console
display to begin the Water Vapor
Probe Test and prepare it for use.
The Console screen will indicate
that the test is in progress and then
will indicate that the test passed
(images 8 and 9).
If the Water Vapor Probe test is
unsuccessful, the Console will indicate
an alert code.
⚠Warning: During the Water Vapor
Probe test, the three balloons on the
shaft of the Water Vapor Probe will
inflate. Visually confirm the inflation
of all three balloons. If one of the
balloons does not inflate, do not
proceed. Press the red Treatment
Interrupt Button to disconnect and
replace the Water Vapor Probe.
In addition to the balloon inflation
test, the Console will test the
intrauterine pressure sensor and the
saline flow system.
⚠Warning: During the Water Vapor
Probe test, the tip cover, distal
tip of the Vapor Probe and Water
Vapor Probe Outflow Tube may
become warm to the touch. Avoid
prolonged contact with personnel
or the patient.
11. Firmly insert the Console’s Cartridge
to the Water Vapor Probe handle
(image 6). Tip: Momentarily press the
Cartridge Release Button at the base
of the Water Vapor Probe handle to
facilitate insertion.
Note: Screen will automatically
advance when Cartridge is
connected properly.
12. Pull down on the Blue Tab at the base
of the Water Vapor Probe Handle
to pull the Sterile Sheath over the
Cartridge Cable (image 7).
Image 5 Image 6
Image 9
Image 8
Image 7

21
MARA OPERATOR’S MANUAL
20
MARA OPERATOR’S MANUAL
SECTION
TROUBLESHOOTING
The following is a list of common
malfunctions, alarms and alert codes.
Note: As indicated with # in the table
below, please follow these instructions
when removal of the Water Vapor
Probe is indicated: To remove the
Water Vapor Probe, press the red
Treatment Interrupt Button, twist to
release, choose either “Clear” or “Quit,”
and then disconnect the Water
Vapor Probe. If the issue persists with
multiple Water Vapor Probes, turn off
the Console and contact an AEGEA
Medical representative.
Note: If an error(s) continuously
occurs while a Water Vapor Probe is
connected to the Console, turn off
the Console’s power and disconnect
the Water Vapor Probe. Power on the
Console and continue using a new
Water Vapor Probe.
For service contact information, refer
to back of Operator’s Manual.
Malfunctions
Should the Console malfunction,
return to AEGEA Medical Inc. for
service. Do not attempt to repair
or service if troubleshooting
is ineffective.
SECTION
AFTER THE PROCEDURE
Powering Off and Storing the
Console:
1. Disconnect the Water Vapor Probe
handle from the Cartridge and
disconnect the Syringe from the
Syringe Port. Dispose per your
institution’s guidelines (image 10).
2. Wrap the Cartridge Cable around
the storage features on the side of
the Console and insert the Cartridge
into the Cradle (image 10).
3. Unlock and lower the pole for the
saline bag (image 10).
4. Press the Front Panel Power Button
on front of Console to turn the
unit off.
5. Disconnect the power cord from
the back of the Console. Store the
power cord with the Console.
Image 10

22 23
MARA OPERATOR’S MANUAL MARA OPERATOR’S MANUAL
SituationPossible CauseSolution
Console does not respond
when turned on
Console is on, but does
not complete Power On
Self-Test
Console is on but does not
deliver output
Console does not advance
to the next screen after
inputting passcode
Display exhibits
interference or is
unreadable
Water Vapor Probe is in
the patient and there is no
power on the Console
Water Vapor Probe is in
the patient and a Fault
condition requires turning
the Console off
Warning light is on (flashing
orange or flashing orange/
white) with either no
instructions or the display
is off
Display is off and the
Warning light is off, but the
Front Panel Power Button
is illuminated
Cartridge is submerged
in fluid
Water Vapor Probe internal
balloon inflates outside of
the uterus during Insertion
1. Check power cord connections
at wall outlet and Console.
Connect power cord to
a functional outlet. Replace
power cord.
2. Press the rear panel Circuit
Breaker Reset switch to reset
3. Contact your institution’s
biomedical department or
contact an AEGEA Medical
representative
1. Turn Console OFF and then
back ON
2. Turn off the unit, contact your
institution’s biomedical
department or contact an
AEGEA Medical representative
1. Follow on-screen prompts for
guidance. Check the Water
Vapor Probe connections with
the Cartridge. Replace Water
Vapor Probe if necessary (refer
to Table 3 for steps to
disconnect and replace the
Water Vapor Probe).
2. Twist the Interrupt Button to
disengage
3. Turn off the unit. Contact your
institution’s biomedical
department or contact an
AEGEA Medical representative.
1. Contact an AEGEA Medical
representative for the correct
passcode
2. Ensure the Interrupt Button is
not engaged. Turn Console OFF,
then back ON, and try again.
If still unsuccessful, contact an
AEGEA Medical representative –
the Console may need to be
serviced or replaced.
1. Check the power cord for
damage. Check the power
outlets for defective grounds.
2. Turn off the unit. Contact
your institution’s biomedical
department or contact an
AEGEA Medical representative.
Wait 10 seconds for water vapor
to dissipate from the uterus.
Disconnect the Cartridge from the
Water Vapor Probe to deflate the
Water Vapor Probe’s balloons.
After 5 seconds, remove the Water
Vapor Probe from the patient.
When facility power is restored,
the Console will automatically
start. Alerts may appear –
if so, ensure the Water Vapor
Probe is disconnected and then
cycle power.
Wait 10 seconds for water vapor
to dissipate from the uterus.
Disconnect the Cartridge from the
Water Vapor Probe to deflate the
Water Vapor Probe’s balloons.
After 5 seconds, remove the Water
Vapor Probe from the patient.
Turn off the Console. Contact your
institution’s biomedical department
or contact an AEGEA Medical
representative.
Turn off the Console. Contact your
institution’s biomedical department
or contact an AEGEA Medical
representative.
Remove the Cartridge from the
fluid and shake excess fluids off.
Repeat with the Cartridge inverted.
Do not operate until Cartridge is
fully dry
Do not insert with the internal
balloon inflated. Press the back
arrow to deflate the Internal
balloon and start the insertion
process again.
1. Disconnected power
cord, faulty wall
outlet or faulty power
cord
2. Internal circuit
breaker switch
tripped
3. Internal component
malfunction
1. Software malfunction
2. Internal component
malfunction
1. Water Vapor Probe
defective or not
ready
2. Interrupt Button
on front panel is
engaged
3. Internal component
malfunction
1. User entered wrong
passcode
2. Console not
recognizing correct
passcode
1. Faulty power
connections
2. Internal component
malfunction
Disconnected power
cord, faulty wall
outlet, faulty power
cord, or interruption
of facility power
Malfunction
Malfunction
Malfunction
Use error
Touchscreen error
Table 1: Troubleshooting

24 25
MARA OPERATOR’S MANUAL MARA OPERATOR’S MANUAL
Alarms/Alert Codes
The Console provides alerts to inform the user
of Alarm Conditions and additional Information
Signals. Table 2 and Table 4 list all alerts. Alert
Codes 101-199 are Information Signals, while
Alert Codes 201-299 are Low Priority Alarms. For
Alarm conditions, the system has determined
that operator awareness or response may
be required. Alarms will be accompanied by
a double-beep tone and solid yellow light.
Information signals will be accompanied by a
single beep tone and solid orange light. The
Alert system is not user adjustable, nor does it
require user testing to function.
Note: The Alarm tones may stutter during
certain alarm circumstances. This is
normal for the Console and does not indicate
a malfunction of the alarm hardware.
SituationPossible CauseSolution
Console does not respond
when turned on
Console is on, but does
not complete Power On
Self-Test
Console is on but does not
deliver output
Console does not advance
to the next screen after
inputting passcode
Display exhibits
interference or is
unreadable
Water Vapor Probe is in
the patient and there is no
power on the Console
Water Vapor Probe is in
the patient and a Fault
condition requires turning
the Console off
Warning light is on (flashing
orange or flashing orange/
white) with either no
instructions or the display
is off
Display is off and the
Warning light is off, but the
Front Panel Power Button
is illuminated
Cartridge is submerged
in fluid
Water Vapor Probe internal
balloon inflates outside of
the uterus during Insertion
1. Check power cord connections
at wall outlet and Console.
Connect power cord to
a functional outlet. Replace
power cord.
2. Press the rear panel Circuit
Breaker Reset switch to reset
3. Contact your institution’s
biomedical department or
contact an AEGEA Medical
representative
1. Turn Console OFF and then
back ON
2. Turn off the unit, contact your
institution’s biomedical
department or contact an
AEGEA Medical representative
1. Follow on-screen prompts for
guidance. Check the Water
Vapor Probe connections with
the Cartridge. Replace Water
Vapor Probe if necessary (refer
to Table 3 for steps to
disconnect and replace the
Water Vapor Probe).
2. Twist the Interrupt Button to
disengage
3. Turn off the unit. Contact your
institution’s biomedical
department or contact an
AEGEA Medical representative.
1. Contact an AEGEA Medical
representative for the correct
passcode
2. Ensure the Interrupt Button is
not engaged. Turn Console OFF,
then back ON, and try again.
If still unsuccessful, contact an
AEGEA Medical representative –
the Console may need to be
serviced or replaced.
1. Check the power cord for
damage. Check the power
outlets for defective grounds.
2. Turn off the unit. Contact
your institution’s biomedical
department or contact an
AEGEA Medical representative.
Wait 10 seconds for water vapor
to dissipate from the uterus.
Disconnect the Cartridge from the
Water Vapor Probe to deflate the
Water Vapor Probe’s balloons.
After 5 seconds, remove the Water
Vapor Probe from the patient.
When facility power is restored,
the Console will automatically
start. Alerts may appear –
if so, ensure the Water Vapor
Probe is disconnected and then
cycle power.
Wait 10 seconds for water vapor
to dissipate from the uterus.
Disconnect the Cartridge from the
Water Vapor Probe to deflate the
Water Vapor Probe’s balloons.
After 5 seconds, remove the Water
Vapor Probe from the patient.
Turn off the Console. Contact your
institution’s biomedical department
or contact an AEGEA Medical
representative.
Turn off the Console. Contact your
institution’s biomedical department
or contact an AEGEA Medical
representative.
Remove the Cartridge from the
fluid and shake excess fluids off.
Repeat with the Cartridge inverted.
Do not operate until Cartridge is
fully dry
Do not insert with the internal
balloon inflated. Press the back
arrow to deflate the Internal
balloon and start the insertion
process again.
1. Disconnected power
cord, faulty wall
outlet or faulty power
cord
2. Internal circuit
breaker switch
tripped
3. Internal component
malfunction
1. Software malfunction
2. Internal component
malfunction
1. Water Vapor Probe
defective or not
ready
2. Interrupt Button
on front panel is
engaged
3. Internal component
malfunction
1. User entered wrong
passcode
2. Console not
recognizing correct
passcode
1. Faulty power
connections
2. Internal component
malfunction
Disconnected power
cord, faulty wall
outlet, faulty power
cord, or interruption
of facility power
Malfunction
Malfunction
Malfunction
Use error
Touchscreen error

26 27
MARA OPERATOR’S MANUAL MARA OPERATOR’S MANUAL
Table 2: Alert Codes 101-299
Alert Code/Name Description/Action
Cervical
Temperature
Greater Than
Expected Body
Temperature
Water Vapor
Probe Cervical
Thermocouple
Fault
Syringe Attached
During Self-Test
Pressure Sensor
Not Zero
101
102
110
116
The Console has detected a high reading on the Cervical
thermocouple, indicating that the Water Vapor Probe may
be defective.
• Clear error message(s)
• If the issue persists, refer to Table 3 for instructions to
disconnect and reconnect/replace the Water Vapor
Probe from the Cartridge
The Console has detected that the Water Vapor Probe is
defective (thermocouple issue) because the temperature
reading is too low.
• Depending upon the stage of the procedure, the Console
may not allow the procedure to continue until the Water
Vapor Probe is replaced
• Ensure that the Water Vapor Probe is not touching
other equipment
• Clear error message(s)
• If the issue persists, refer to Table 3 for instructions
to disconnect and reconnect/replace the Water Vapor
Probe from the Cartridge
The Console has detected that the Syringe is attached before
the appropriate step.
• Please remove the Syringe to allow the Self-Test to proceed
The Console has detected an issue with initializing the Water
Vapor Probe’s Pressure Sensor.
• Check that the Water Vapor Probe tip is not pressed
against a surface
• Check that the Protective Tip Cover is properly installed
on the Water Vapor Probe.
• Check that the Cartridge Cable is not impinged or pressed
against any objects
• Clear error message(s)
• If the issue persists, refer to Table 3 for instructions to
disconnect and reconnect/replace the Water Vapor
Probe from the Cartridge
Alert Code/Name Description/Action
Pressure Sensor
Calibration Error
Saline Prime
Error
Saline Re-prime
Error
Saline Prime
Pressure Error
117
118
119
120
The Console has detected that the Water Vapor Probe Pressure
Sensor calibration is not within expected range.
• Check that the Protective Tip Cover is properly installed
on the Water Vapor Probe
• Check the Cartridge connection to the Water Vapor Probe
• Clear error message(s)
• If the issue persists, refer to Table 3 for instructions to
disconnect and reconnect/replace the Water Vapor Probe
from the Cartridge
The Console has detected that saline is not flowing as
expected.
• Check that the Vapor Probe tubing is connected to the
saline source
• Ensure that the tubing is not kinked or pinched
The Console has detected that saline is not flowing as
expected.
• Check that the Vapor Probe tubing is connected to the
saline source
• Ensure that the tubing is not kinked or pinched
The Console has detected a problem with the saline priming
process.
• Check that the Protective Tip Cover is properly installed
on the Water Vapor Probe
• Ensure that the tubing is not kinked or pinched
• Clear error message(s)
• If the issue persists, refer to Table 3 for instructions to
disconnect and reconnect/replace the Water Vapor
Probe from the Cartridge

28 29
MARA OPERATOR’S MANUAL MARA OPERATOR’S MANUAL
Alert Code/Name Description/Action
EEPROM Write
Failure
Pressure Sensor
Optical
Connection
Failure
Pressure Sensor
Memory
Water Vapor
Probe
Disconnected
125
127
128
129
The Console has detected a memory failure in the Water
Vapor Probe.
• The procedure can continue; there is no need to replace
the Vapor Probe. Procedural data may not be recorded in
the Vapor Probe’s memory
The Console has detected that the Water Vapor Probe is
defective or not fully connected.
• Check that the Cartridge is firmly inserted
• Clear error message(s)
• If the issue persists, refer to Table 3 for instructions to
disconnect and reconnect/replace the Water Vapor
Probe from the Cartridge
The Console has detected that the Water Vapor Probe is
defective or not fully connected.
• Check that the Cartridge is firmly inserted
• Clear error message(s)
• If the issue persists, refer to Table 3 for instructions to
disconnect and reconnect/replace the Water Vapor
Probe from the Cartridge
The Console has detected the disconnection of the Water
Vapor Probe pressure sensor.
• Depending upon the stage of the procedure, the Console
may not allow the procedure to continue until the Water
Vapor Probe is replaced
• Check that the Cartridge is firmly attached to the Water
Vapor Probe
• Clear error message(s)
• If the issue persists, refer to Table 3 for instructions to
disconnect and reconnect/replace the Water Vapor
Probe from the Cartridge
Alert Code/Name Description/Action
Syringe Unloaded
External Balloon
Inflation Too Slow
External Balloon
Leak
Middle Balloon
Leak
130
140
141
142
The Console has detected that the Syringe was unexpectedly
released/disconnected.
• Reinstall the syringe to resume treatment workflow
• Depending upon the stage of the procedure, the Console
may not allow the procedure to continue until the Water
Vapor Probe is replaced
The Console has detected a problem with balloon inflation
(external). The balloon is taking too long to fill.
• Ensure that the Cartridge Cable is not kinked or pinched
• Ensure that the Cartridge is firmly connected to the Water
Vapor Probe and is not leaking
• Clear error message(s)
• If the issue persists, refer to Table 3 for instructions to
disconnect and reconnect/replace the Water Vapor Probe
from the Cartridge
The Console has detected a problem with balloon inflation
(external).
• Ensure that the Cartridge Cable is not kinked or pinched
• Check for balloon inflation during pre-procedure test
• Ensure that the Cartridge is firmly connected to the Water
Vapor Probe and is not leaking
• Clear error message(s)
• If the issue persists, refer to Table 3 for instructions to
disconnect and reconnect/replace the Water Vapor
Probe from the Cartridge
The Console has detected a problem with balloon
inflation (middle).
• Ensure that the Cartridge Cable is not kinked or pinched
• Check for balloon inflation during pre-procedure test
• Ensure that the Cartridge is firmly connected to the Water
Vapor Probe and is not leaking
• Clear error message(s)
• If the issue persists, refer to Table 3 for instructions to
disconnect and reconnect/replace the Water Vapor
Probe from the Cartridge

30 31
MARA OPERATOR’S MANUAL MARA OPERATOR’S MANUAL
Alert Code/Name Description/Action
Internal Balloon
Leak
Air Pump
Overactive
External Balloon
Not Deflating
143
144
145
The Console has detected a problem with balloon
inflation (internal).
• Ensure that the Cartridge Cable is not kinked or pinched
• Check for balloon inflation during pre-procedure test
• Ensure that the Cartridge is firmly connected to the Water
Vapor Probe and is not leaking
• Clear error message(s)
• If the issue persists, refer to Table 3 for instructions to
disconnect and reconnect/replace the Water Vapor Probe
from the Cartridge
The Console has detected a problem with the balloon inflation
system – the air reservoir pump is overactive.
• Ensure that the Cartridge Cable of the Water Vapor Probe
is not kinked or pinched
• Ensure that the Cartridge is firmly connected to the Water
Vapor Probe and is not leaking
• If the issue persists, turn off the Console and contact an
AEGEA representative
The Console has detected a problem with external
balloon deflation.
• Ensure that the Cartridge Cable of the Water Vapor Probe
is not kinked, twisted or pinched
• Clear error message(s)
• If the issue persists, refer to Table 3 for instructions to
disconnect and reconnect/replace the Water Vapor Probe
from the Cartridge
• Note:If the Water Vapor Probe is within the cervix,
disconnect the Cartridge from the Water Vapor Probe
Handle before removing the Water Vapor Probe from
the patient
• If the issue persists, turn off the Console and contact an
AEGEA representative
Alert Code/Name Description/Action
Air Reservoir
Pressure Low
Air Reservoir
Pressure High
Balloon Test
Failure
146
147
148
The Console has detected a problem with the balloon inflation
system (low pressure issue).
• Ensure that the Cartridge Cable of the Water Vapor Probe
is not kinked or pinched
• Ensure that the Cartridge is firmly connected to the Water
Vapor Probe and is not leaking
• Clear error message(s)
• If the issue persists, refer to Table 3 for instructions to
disconnect and reconnect/replace the Water Vapor Probe
from the Cartridge
• If the issue persists, turn off the Console and contact an
AEGEA Medical representative
The Console has detected a problem with the balloon inflation
system (high pressure issue).
• Ensure that the Cartridge Cable of the Water Vapor Probe is
not kinked, twisted, or pinched
• Ensure that the Cartridge is firmly connected to the Water
Vapor Probe
• If the issue persists, turn off the Console and contact an
AEGEA Medical representative
The Console has detected that the Water Vapor Probe has failed
the balloon test.
• Check that the Protective Tip Cover is attached to the Water
Vapor Probe
• Check the Cartridge connection to the Water Vapor Probe
• Ensure that the Cartridge Cable of the Water Vapor Probe is
not kinked, twisted or pinched
• Clear error message(s)
• If the issue persists, refer to Table 3 for instructions to
disconnect and reconnect/replace the Water Vapor
Probe from the Cartridge

32 33
MARA OPERATOR’S MANUAL MARA OPERATOR’S MANUAL
Alert Code/Name Description/Action
Balloon Failure
in Thermal
Calibration
Middle Balloon
Not Deflating
Internal Balloon
Not Deflating
149
150
151
The Console has detected that the Water Vapor Probe has a
failed balloon.
• The Console may not allow the procedure to continue until
the Water Vapor Probe is replaced
• Check that the Protective Tip Cover is attached to the Water
Vapor Probe
• Clear error message(s)
• If the issue persists, refer to Table 3 for instructions to
disconnect and reconnect/replace the Water Vapor Probe
from the Cartridge
The Console has detected a problem with middle balloon
deflation.
• Ensure that the Cartridge Cable of the Water Vapor Probe
is not kinked, twisted or pinched
• Clear error message(s)
• If the issue persists, refer to Table 3 for instructions to
disconnect and reconnect/replace the Water Vapor Probe
from the Cartridge
• Note:If the Water Vapor Probe is within the cervix,
disconnect the Cartridge from the Water Vapor Probe
before removing the Water Vapor Probe from the patient
• If the issue persists, turn off the Console and contact an
AEGEA representative
The Console has detected a problem with internal balloon
deflation. The internal balloon is not deflating.
• Ensure that the Cartridge Cable of the Water Vapor Probe
is not kinked, twisted or pinched
• Clear error message(s)
• If the issue persists, refer to Table 3 for instructions to
disconnect and reconnect/replace the Water Vapor Probe
from the Cartridge
• Note:If the Water Vapor Probe is within the cervix,
disconnect the Cartridge from the Water Vapor Probe
before removing the Water Vapor Probe from the patient
• If the issue persists, turn off the Console and contact an
AEGEA representative
Alert Code/Name Description/Action
Middle Balloon
Inflation Too Slow
Internal Balloon
Inflation Too Slow
Pressure Sensor
Ambient Failure
152
153
154
The Console has detected a problem with the middle balloon
inflation. The middle balloon is taking too long to fill.
• Ensure that the Cartridge Cable is not kinked, twisted or
pinched
• Ensure that the Cartridge is firmly connected to the Water
Vapor Probe and not leaking
• Clear error message(s)
• If the issue persists, refer to Table 3 for instructions to
disconnect and reconnect/replace the Water Vapor Probe
from the Cartridge
The Console has detected a problem with the internal balloon
inflation. The internal balloon is taking too long to fill.
• Ensure that the Cartridge Cable is not kinked, twisted or
pinched
• Ensure that the Cartridge is firmly connected to the Water
Vapor Probe
• Clear error message(s)
• If the issue persists, refer to Table 3 for instructions to
disconnect and reconnect/replace the Water Vapor Probe
from the Cartridge
The Console has detected a problem with the intra-uterine
Pressure Sensor in the Water Vapor Probe. The Pressure
Sensor may be damaged.
• Ensure that the Cartridge is firmly connected to the Water
Vapor Probe
• Press “Clear” and allow the Console to re-evaluate the
Pressure Sensor system
• If the Console was stored in a hot or cold area, allow the
unit to stabilize to the room temperature environment
• If the issue persists, refer to Table 3 for instructions to
disconnect and reconnect/replace the Water Vapor Probe
from the Cartridge

34 35
MARA OPERATOR’S MANUAL MARA OPERATOR’S MANUAL
Alert Code/Name Description/Action
Cartridge
Pneumatic Leak
Pressure Sensor
Diagnostic Failure
Cartridge Under
Temperature
Cartridge Over
Temperature
156
158
159
160
The Console has detected a pneumatic leak during the
Cartridge leak test.
• Inspect the Cartridge and Cartridge Cable for leaks
during the next self-test
• Check that the Cartridge Cable connection to the Console
is not damaged
• Ensure that the Cartridge Cable is not kinked, twisted
or pinched
• If the issue persists, turn off the Console and contact an
AEGEA Medical representative
The Console has detected a problem with the intra-uterine
Pressure Sensor in the Water Vapor Probe. The Pressure
Sensor may be damaged.
• Ensure that the Cartridge is firmly connected to the Water
Vapor Probe
• Press “Clear” and allow the Console to re-evaluate the
Pressure Sensor system
• If the issue persists, refer to Table 3 for instructions to
disconnect and reconnect/replace the Water Vapor Probe
from the Cartridge
The Console has detected that the cartridge temperature
is too low.
• If the Console was stored in a cold area, allow the unit to
stabilize to the room temperature environment
• If this issue persists, contact an AEGEA Medical
representative
The Console has detected that the cartridge temperature
is too high.
• Disconnect the Cartridge and allow it to cool down
before proceeding
• If the Console was stored in a hot area, allow the unit to
stabilize to the room temperature environment
• If this issue persists, contact an AEGEA Medical
representative
Alert Code/Name Description/Action
Saline Pump
Over-extended
Pressure Sensor
Calibration Does
Not Complete
Pressure Sensor
Calibration
Outside of
Expected Range
Integrity Sensor
Not Connected
RF Power Not
Correct
164
165
166
168
170
The Console has detected that the Saline Pump lead screw
has extended too far.
• The Console should automatically refill the syringe and
allow the procedure to continue
• Check that the syringe is installed correctly
• Check that the IV bag is connected and that the tubing is
not kinked
• If this issue persists, contact an AEGEA Medical
representative
The Console has detected a problem with the Pressure Sensor
calibration
• Clear error message(s)
• If the issue persists, refer to Table 3 for instructions to
disconnect and reconnect/replace the Water Vapor Probe
from the Cartridge
The Console has detected a problem with the Pressure Sensor
calibration.
• Clear error message(s)
• If the issue persists, refer to Table 3 for instructions to
disconnect and reconnect/replace the Water Vapor Probe
from the Cartridge
The Console has detected that the Water Vapor Probe is
defective or not fully connected.
• Check that the Cartridge is firmly inserted
• Clear error message(s)
• If the issue persists, refer to Table 3 for instructions to
disconnect and reconnect/replace the Water Vapor Probe
from the Cartridge
The Console has detected that the RF Power supply was not
within acceptable range.
• Retry operation or power-cycle Console
• If the issue persists, consider replacing the Console.
Contact an AEGEA Medical representative.

36 37
MARA OPERATOR’S MANUAL MARA OPERATOR’S MANUAL
Alert Code/Name Description/Action
RF Power Status
Wrong
Hypotube
Temperature
Under Limit
Probe Impedance
Error
Hypotube
Temperature
Error
Wire Temperature
Error
171
176
179
180
181
The Console has detected that the RF Power supply has failed.
• Retry operation or power-cycle Console
• If the issue persists, consider replacing the Console.
Contact an AEGEA Medical representative.
The Console has detected a Hypotube Heating failure. The
heating element is not functioning properly.
• Check the connection of the Water Vapor Probe to the
Cartridge
The Console has detected a Heating Coil Impedance Error. The
heating element is not functioning or is not connected well.
• Check the connection of the Water Vapor Probe to the
Cartridge
• Clear error message(s)
• If the issue persists, refer to Table 3 for instructions to
disconnect and reconnect/replace the Water Vapor Probe
from the Cartridge
The Console has detected a Hypotube Temperature Sensor
failure. The Water Vapor Probe is defective or not fully
connected.
• Check the connection of the Water Vapor Probe to the
Cartridge
• Clear error message(s)
• If the issue persists, refer to Table 3 for instructions to
disconnect and reconnect/replace the Water Vapor Probe
from the Cartridge
The Console has detected a Wire Temperature Sensor failure.
The Water Vapor Probe is defective or not fully connected.
• Check the connection of the Water Vapor Probe to the
Cartridge
• Clear error message(s)
• If the issue persists, refer to Table 3 for instructions to
disconnect and reconnect/replace the Water Vapor Probe
from the Cartridge
Alert Code/Name Description/Action
Cervical
Thermocouple
Error
Thermocouples
Not Connected
Probe Memory
Error
Probe Not
Supported
184
185
186
187
The Console has detected a Cervical Temperature Sensor
Failure. The Water Vapor Probe’s temperature sensor has failed.
• Check the connection of the Water Vapor Probe to the
Cartridge
• Clear error message(s)
• If the issue persists, refer to Table 3 for instructions to
disconnect and reconnect/replace the Water Vapor Probe
from the Cartridge
The Console has detected multiple Temperature Sensor failures.
The Water Vapor Probe is defective or not fully connected.
• Check the connection of the Water Vapor Probe to the
Cartridge
• Clear error message(s)
• If the issue persists, refer to Table 3 for instructions to
disconnect and reconnect/replace the Water Vapor Probe
from the Cartridge
The Console has detected a Water Vapor Probe Memory Error.
The Water Vapor Probe’s memory has failed.
• Check the connection of the Water Vapor Probe to the
Cartridge
• Check the connection of the Cartridge Cable to the Console
• Clear error message(s)
• If the issue persists, refer to Table 3 for instructions to
disconnect and reconnect/replace the Water Vapor Probe
from the Cartridge
The Console has detected that the Water Vapor Probe is not
supported by this Console or has a memory failure.
• Clear error message(s)
• If the issue persists, refer to Table 3 for instructions to
disconnect and reconnect/replace the Water Vapor Probe
from the Cartridge

38 39
MARA OPERATOR’S MANUAL MARA OPERATOR’S MANUAL
Alert Code/Name Description/Action
Probe Lifetime
Exhausted
Probe Temp Error
Pressure Sensor
Communication
Alert
Water Vapor
Probe Attached
During Self-test
Water Vapor
Probe
Disconnected
188
189
190
191
197
The Console has detected that the Water Vapor Probe is being
re-used. Reuse of the Water Vapor Probe is not allowed.
• Clear error message(s)
• If the issue persists, refer to Table 3 for instructions to
disconnect and reconnect/replace the Water Vapor Probe
from the Cartridge
The Console has detected multiple Temperature Sensor failures.
The Water Vapor Probe is defective or not fully connected.
• Clear error message(s).
• If the issue persists, refer to Table 3 for instructions to
disconnect and reconnect/replace the Water Vapor Probe
from the Cartridge
The Console has detected that the intrauterine pressure sensor
is not being measured correctly.
• Upon clearing the alert, the Console will try to restore
functionality
• If the issue persists, refer to Table 3 for instructions to
disconnect and reconnect/replace the Water Vapor Probe
from the Cartridge
The Console has detected that the Water Vapor Probe is
attached to the Cartridge before the appropriate step.
• Disconnect the Water Vapor Probe from the Cartridge to
allow the Self-Test to proceed
The Console has detected the disconnection of the Water
Vapor Probe.
• Clear error message(s)
• If the issue persists, refer to Table 3 for instructions to
disconnect and reconnect/replace the Water Vapor
Probe from the Cartridge
• If the issue persists, turn off the Console and contact an
AEGEA Medical representative
Alert Code/Name Description/Action
Interrupt Button
Engaged
Cervical
Temperature
Greater Than
Expected Body
Temperature
Cervical
Thermocouple
Circuit Fault
External Pressure
Does Not Rise
External Pressure
High
External Pressure
Drop
199
201
202
205
206
207
The Console has detected that the Interrupt Button is Engaged.
• Release the Interrupt button by rotating it clockwise to
release the Interrupt button and proceed
- Press Quit to end the procedure and/or replace
the Water Vapor Probe
- Press Clear to resume
The Console has detected a cervical temperature higher
than expected.
• Water vapor delivery has stopped and treatment has
terminated early. Press “Clear” and prepare to remove the
Water Vapor Probe from the patient
The Console has detected that the Water Vapor Probe
temperature sensor is defective.
• Water vapor delivery has stopped and treatment has
terminated early. Press “Clear” and prepare to remove
the Water Vapor Probe from the patient
The Console has detected that the intrauterine pressure is not
responding correctly or the pressure is not rising.
• Water vapor delivery has stopped and treatment has
terminated early. Press “Clear” and prepare to remove the
Water Vapor Probe from the patient
The Console has detected that the intrauterine pressure
is too high.
• Water vapor delivery has stopped and treatment has
terminated early. Press “Clear” and prepare to remove the
Water Vapor Probe from the patient
The Console has detected that the intrauterine pressure is not
responding correctly and/or a sudden pressure drop could
indicate a leak in the uterus or Water Vapor Probe.
• Water vapor delivery has stopped and treatment has
terminated early. Press “Clear” and prepare to remove
the Water Vapor Probe from the patient
This manual suits for next models
1
Table of contents
Popular Water System manuals by other brands

DURRIDGE
DURRIDGE RAD AQUA user manual

Sea Recovery
Sea Recovery Aqua Whisper DX 450-1 owner's manual

Mueller
Mueller Hydro-Guard HG-6 Operating instructions manual

Aqua Systems
Aqua Systems AQLP Series Installation, operation and service manual

Infiltrator
Infiltrator Delta ECOPOD-N Series Installation, operation and maintenance manual

Atmos
Atmos Aqua clean operating instructions