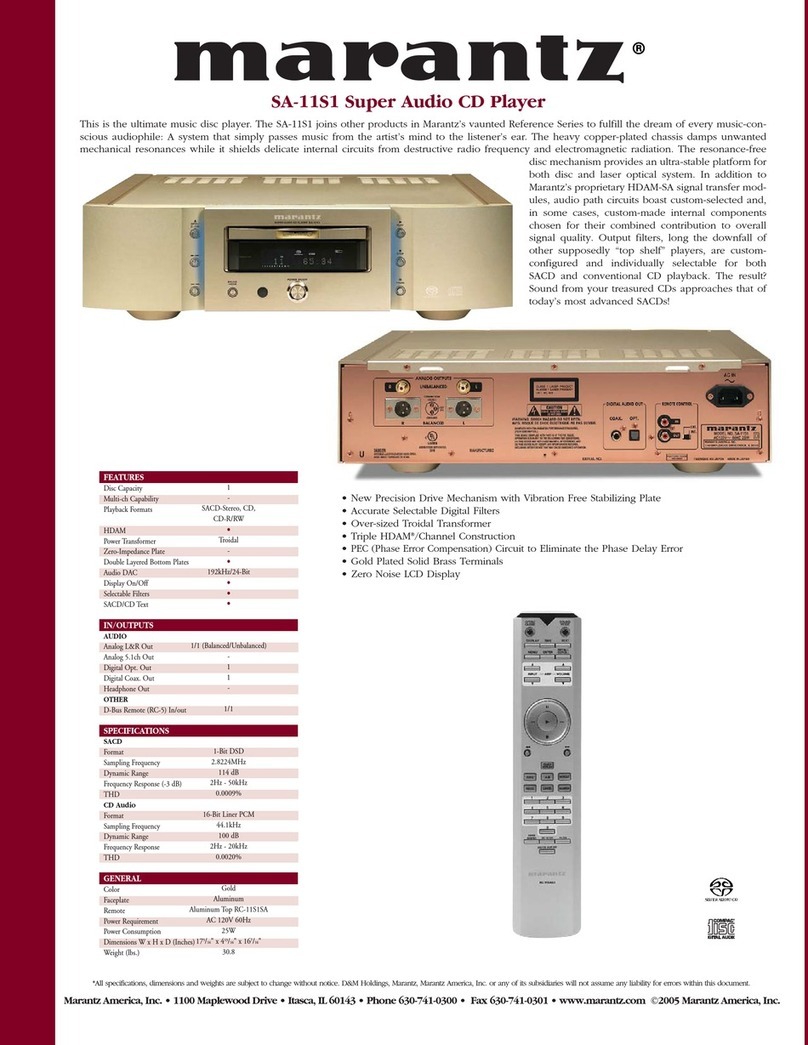
Marantz MD110 User manual

MD110
325W855010 MIT
3120 785 22730
First Issue 2001.12
Service
Manual
R
Please use this service manual with referring to the user guide ( D.F.U. ) without fail.
MD110 /F1S, /N1S
MD Deck
TABLE OF CONTENTS
SECTION PAGE
1. TECHNICAL SPECIFICATIONS ........................................................................... 1
2. SERVICE MODE .................................................................................................. 2
3. WIRING DIAGRAM ............................................................................................... 9
4. BLOCK DIAGRAM .............................................................................................. 11
5. SCHEMATIC DIAGRAM ..................................................................................... 13
6. PARTS LOCATION (Pattern Side) ..................................................................... 15
7. IC DATA .............................................................................................................. 21
8. EXPLODED VIEW AND PARTS LIST ................................................................ 27
9. ELECTRICAL PARTS LIST ................................................................................ 32
MULTI JOG
DISPLAY
SOURCE
EDIT
REC
REC MODE
CHARACTER
DUBB.
PUSH ENTER
MD110
STANDBY OPEN
STANDBY OPEN
MD110

MARANTZ DESIGN AND SERVICE
Using superior design and selected high grade components, MARANTZ company has created the ultimate in stereo sound.
Only original MARANTZ parts can insure that your MARANTZ product will continue to perform to the specifications for which
it is famous.
Parts for your MARANTZ equipment are generally available to our National Marantz Subsidiary or Agent.
ORDERING PARTS :
Parts can be ordered either by mail or by Fax.. In both cases, the correct part number has to be specified.
The following information must be supplied to eliminate delays in processing your order :
1. Complete address
2. Complete part numbers and quantities required
3. Description of parts
4. Model number for which part is required
5. Way of shipment
6. Signature : any order form or Fax. must be signed, otherwise such part order will be considered as null and void.
SHOCK, FIRE HAZARD SERVICE TEST :
CAUTION : After servicing this appliance and prior to returning to customer, measure the resistance between either primary AC
cord connector pins ( with unit NOT connected to AC mains and its Power switch ON ), and the face or Front Panel of product and
controls and chassis bottom.
Any resistance measurement less than 1 Megohms should cause unit to be repaired or corrected before AC power is applied, and
verified before it is return to the user/customer.
Ref. UL Standard No. 1492.
In case of difficulties, do not hesitate to contact the Technical
Department at above mentioned address.
010620MIT
USA
MARANTZ AMERICA, INC
MARANTZ AMERICA, INC.
1100 MAPLEWOOD DRIVE
ITASCA, IL. 60143
USA
PHONE : 630 - 741 - 0300
FAX : 630 - 741 - 0301
BRAZIL
PHILIPS DA AMAZONIA IND. ELET. ITDA
CENTRO DE INFORMACOES AO
CEP 04698-970
SAO PAULO, SP, BRAZIL
PHONE : 0800 - 123123
(Discagem Direta Gratuita)
FAX : +55 11 534. 8988
JAPAN
Technical
MARANTZ JAPAN, INC.
35- 1, 7- CHOME, SAGAMIONO
SAGAMIHARA - SHI, KANAGAWA
JAPAN 228-8505
PHONE : +81 42 748 1013
FAX : +81 42 741 9190
EUROPE / TRADING
MARANTZ EUROPE B.V.
P.O.BOX 80002, BUILDING SFF2
5600 JB EINDHOVEN
THE NETHERLANDS
PHONE : +31 - 40 - 2732241
FAX : +31 - 40 - 2735578
TECHNICAL AUDIO GROUP PTY, LTD
558 DARLING STREET,
BALMAIN, NSW 2041,
AUSTRALIA
PHONE : 61 - 2 - 9810 - 5300
FAX : 61 - 2 - 9810 - 5355
CANADA
LENBROOK INDUSTRIES LIMITED
633 GRANITE COURT,
PICKERING, ONTARIO L1W 3K1
CANADA
PHONE : 905 - 831 - 6333
FAX : 905 - 831 - 6936
AUSTRALIA
QualiFi Pty Ltd,
24 LIONEL ROAD,
MT. WAVERLEY VIC 3149
AUSTRALIA
PHONE : +61 - (0)3 - 9543 - 1522
FAX : +61 - (0)3 - 9543 - 3677
NEW ZEALAND
WILDASH AUDIO SYSTEMS NZ
14 MALVERN ROAD MT ALBERT
AUCKLAND NEW ZEALAND
PHONE : +64 - 9 - 8451958
FAX : +64 - 9 - 8463554
THAILAND
MRZ STANDARD CO.,LTD
746 - 754 MAHACHAI ROAD.,
WANGBURAPAPIROM, PHRANAKORN,
BANGKOK, 10200 THAILAND
PHONE : +66 - 2 - 222 9181
FAX : +66 - 2 - 224 6795
TAIWAN
PAI- YUING CO., LTD.
6 TH FL NO, 148 SUNG KIANG ROAD,
TAIPEI, 10429, TAIWAN R.O.C.
PHONE : +886 - 2 - 25221304
FAX : +886 - 2 - 25630415
MALAYSIA
WO KEE HONG ELECTRONICS SDN. BHD.
SUITE 8.1, LEVEL 8, MENARA GENESIS,
NO. 33, JALAN SULTAN ISMAIL,
50250 KUALA LUMPUR, MALAYSIA
PHONE : +60 3 - 2457677
FAX : +60 3 - 2458180
AMERICAS
SUPERSCOPE TECHNOLOGIES, INC.
MARANTZ PROFESSIONAL PRODUCTS
2640 WHITE OAK CIRCLE, SUITE A
AURORA, ILLINOIS 60504 USA
PHONE : 630 - 820 - 4800
FAX : 630 - 820 - 8103
AUSTRALIA
KOREA
MK ENTERPRISES LTD.
ROOM 604/605, ELECTRO-OFFICETEL, 16-58,
3GA, HANGANG-RO, YONGSAN-KU, SEOUL
KOREA
PHONE : +822 - 3232 - 155
FAX : +822 - 3232 - 154
SINGAPORE
WO KEE HONG DISTRIBUTION PTE LTD
130 JOO SENG ROAD
#03-02 OLIVINE BUILDING
SINGAPORE 368357
PHONE : +65 858 5535 / +65 381 8621
FAX : +65 858 6078

1
1.TECHNICAL SPECIFICATIONS
MAIN UNIT (MD110)
Type ........................................................................................................................... MiniDisc Digital Audio System
Laser ......................................................................................................................................... Semiconductor laser
Recording method ............................................................................... Magnetic field modulation overwrite method
RPMs ......................................................................................................... Approximately 400rpm to 900rpm (CLV)
Sampling frequency ..................................................................................................................................... 44.1 kHz
Frequency characteristics ........................................................................................................20 to 20 kHz (± 1 dB)
S/N .................................................................................................................................................. 85 dB or greater
Total Harmonic Distortion ................................................................................................................. 0.005 % or less
Wow and Flutter ............................................................................................................ Less than measurable limits
Line output level .......................................................................................................................................... 2.0 Vrms
Analog Input ........................................................................................................................................... 250 mVrms
GENERAL
Power supply ......................................................................................................... AC 100 V 50 / 60 Hz (F version)
AC 230 V 50 Hz (N version)
Power Consumption <Electric Appliance Control Act> ......................................................................................16 W
Maximum external dimensions (W x H x D)............................................................................. 210 x 71.5 x 310 mm
Weight .............................................................................................................................................................. 3.3 kg
ACCESSORIES
Remote Control Transmitter (RC110DRMD/N1S, RC110DRMDF/F1S) .................................................................. 1
External dimensions (W x H x D) ........................................................................................ 50.5 x 154.5 x 25 mm
Weight ............................................................................................................................................................. 60 g
AA type batteries ..................................................................................................................................................... 2
Stereo audio cable ............................................................................................................................................ 1 pair
Coaxial cable ........................................................................................................................................................... 1
Remote control cable ............................................................................................................................................... 1
The specifications and external appearance are subject to change without notice.
Some portions of the illustrations that appear in this manual may differ slightly from the actual product.
This product is licensed under U.S. and foreign patents of Dolby Laboratories.

2
Service Mode
1. While Mains cord is disconnected, press DISPLAY Button on the unit and plug in the Mains cord.
2. Version number of the front micom software is displayed.
3. Turn JOG dial to either direction then Display segment test begins.
4. First all the segments will light and then a segment turns off one by one.
5. Disconnect Mains cord to quit service mode.
Emargency Eject
1. Remove 5 screws on the top cover and remove 3. Disconnect the flexible wire.
the top cover. 4. Remove the MD mechanism component from the
2. Remove 4 screws on the bottom. (Pointed with unit and remove the 4 screws on the both sides.
the arrows in the picture above.) (Pointed with the arrows in the picture above.)
5. Slide the lever pointed with the arrow to the direction 6. Slide the pin pointed with the arrow to the direction
of the arrow. of the arrow.
7. Disc is ejected.
2. SERVICE MODE

3
TEST MODE
1 How to Setting and Cancel Test Mode
Setting: While pressing the PLAY/PAUSE keys, insert the power cord to the wall outlet.
Cancel: Pull out the power cord.
Key Operation for Adjustment
Key Operation
MULTI JOG Select parameter and mode.
PLAY Fix items. Change of display in every check.
STOP Cancel or back of test mode.
2 Remained Keys Operation
Key Operation
DISPLAY Display changes.
FF Pickup moves outwards when press FF key
FB Pickup moves inwards when press FB key
3 Selection of test mode
13 test modes are selected by pressing UPIDOWN keys.
No. Display Description Section
1 TEMP ADJUST The work of adjustment is unnecessary in this mode 6-5
2 LDPWR ADJUST Laser power adjustment 6-6
3 LDPWR CHECK Laser power check 6-6
4 EFBAL ADJUST Traverse adjustment 6-7
5 TE B. ADJUST Automatic EF balance adjustment
6 FBIAS ADJUST Focus bias adjustment 6-8
7 CPLAY MODE Continuous playback mode 5-4
8 CREC MODE Continuous recording mode 5-5
9 STT-LIMIT SW Check the mechanism start limit SW position -
10 JUMP MODE Track jump checking mode -
11 SRV DAT READ Servo data reading -
12 EEP MODE E2PROM data reading or rewrite -
13 EEP INITIAL E2PROM data initializing -
For more information on each adjustment mode, refer to each section of 6, "Electrical adjustment".
If other adjustment mode has been entered incorrectly, press the STOP key to exit the mode.
*The number 9 -13 are not used for service. If these modes have been entered incorrectly, press the STOP key
immediately to exit the mode. Specially, do not use EEP INITIAL. (E2PROM data has initialized if used it.)
4 continuous Playback Mode
1. Setting of Continuous Playback Mode
No. Key Display/Function
1 MULTI JOG Select [CPLAY MODE]
2 Load disc
3 PL AY [CPLAY MID]
[c=xxxx a=yy] error
(xxxx=C1 error, yy=ADIP error)
4 DISPLAY [CPLAY (zzzz)] CPLAY address
(MID=0300h, OUT=0700h, IN=0030h cluster)
5 DIS PLAY [h****d@@@@] address
(****=current head address, @@@@=ADIP address
In No.5, Display shows [-] if can't read disc.

2. Change of Playback Points (In continuous playback mode)
No. Key Display/Function
1 PL AY [CPLAY OUT]
2 Carry out No.4 and 5 in the above table
3 PL AY [CPLAY IN]
4 Carry out No.4 and 5 in the above table
5 ST OP [CPLAY MODE]
6 EJECT Disc out
5 Continuous Recording Mode
1. Continuous Recording Setting
No. Key Display/Function
1 MULTI JOG Select [CREC MODE]
2 Load the recordable disc
3 PLAY [CREC MID]
4 PLAY [CREC (zzzz)] CREC address
(0300h cluster = recording start point)
5 DIS PLAY [h****d@@@@] address
6 DISPLAY [c=xxxx a=yy] error
7 DISPLAY [CREC (zzzz)]
8 STOP [c=xxxx a=yy]
2. Change and End of Recording Points
No. Key Display/Function
1 Carry out No.1 to 3 in the above table Select [CREC MID]
2 MULTI JOG [CREC OUT]
3 PLAY [CREC (zzzz)] CREC address
(0700h cluster = recording start point)
Carry out No.5 to 8 in the above table
4 Carry out No.1 to 3 in the above table
5 PL AY Select [CREC MID]
6 MULTI JOG Select [CREC IN]
7 PLAY [CREC (zzzz)] CREC address
(0300h cluster = recording start point)
Carry out No.5 to 8 in the above table
8 EJ ECT Disc out
Starting address is the followings.
IN=30h cluster, MID=300h cluster, OUT=700h cluster
1. The recording start addresses of IN, MID, and OUT are described below.
IN 30H cluster
MID 300H cluster
OUT 700H cluster
2. An erasure prevention control is not detected in the test mode. Be careful not to enter the continuous recording
mode using a disc containing the data that should not be erased.
3. Do not record continuously for more than five minutes.
4. Take care that no vibration is applied during continuous recording.
Electrical adjustment
1 Precaution during confirmation of Laser Diode emission
During adjustment, do not view the emission of a laser diode from lust above for confirmation. This may damage
your eyes.
4

5
2 Precaution on handling of Optical pick-up (KMS-260B)
The laser diode in an optical pick-up is easy to be subject to electrostatic destruction. Therefore, solder-bridge the
laser tap on the flexible board when handling the optical pick-up.
When removing the flexible board from the connector, make a solder bridge in advance, then remove the board. Be
careful not to remove the solder bridge before inserting the connector. Moreover, take careful measures against
electrostatic destruction. The flexible board is cut easily. Handle the flexible board with care.
3 Precaution during adjustment
1) Perform the adjustment and confirmation marked with "O" in the order shown in the table when the parts below
are replaced.
BD board
Optical pick-up IC6 D101 IC1, IC2, IC10
1.Temperature compensation offset adjustment X O O O
2. Laser power adjustment O O X O
3.Trtvense adjustment O O X O
4. Focus bias adjustment O O X O
5. Error rate confirmation O O X O
2) In the test mode, perform the adjustment. After adjustment is completed, chancel the test mode.
3) Perform the adjustment in the order described.
4) Use the following tools and measurement equipment.
CD test disc TGYS-1
Laser power meter
Oscilloscope (with bandwidth of more than 40 M Ohms)
(Calibrate the probe before measurement)
Digital voltmeter
Thermometer
5) Take care that VC and GND (ground) are not connected on the oscilloscope when two or more signals are moni-
tored on the oscilloscope. (VC and GND are short-circuited in this case,)
4 Creating the recordable continuous recording disc
This disc is used for focus bias adjustment and error rate confirmation. How to create the recordable continuous
recording disc is 5-5
5 Offset Adjustment
No. Kay Display/Function
1 MULTI JOG Select [TEMP ADJUST]
2 PLAY [TEMP = xx (yy)]
(xx = compensation data, yy = setting temperature
3 MULTI JOG Input "yy" with present temp.
4 PL AY [TEMP=**SAVE]
[TEMP ADJUST] in writing data

6 Laser Power Check and Adjustment
Laser power setting in playback and recording modes.
Preparation
1. Remove the MD mechanism from the unit
2. Remove the case and bracket.
3. Reconnect the flat cable of MD mechanism to the unit
1. Laser Power Adjustment
No. Key Display/Function
1 MULTI JOG [LDPWR ADJUST]
Load recordable disc
2 Load the disc and laser on [a0.9mW>$xx] read power
(xx = power value)
3 EJECT Unload the disc and laser on
4 FF/FB
(REC)
Move the pickup to check the laser power with laser power meter sensor
(Press the REC key if the pickup is In the proper position)
5 MULTI JOG Adjust “xx” so that the power meter shows 0.9mW.
6 PLAY [a7.0mW>$xx] writing power
7 UPIDOWN Adjust “xx” so that the power meter shows 7.0mW.
This adjustment should be carried out In 15secs.
8 PLAY Laser power off
Display shows [LDPWR ADJUST] after [LDPWR<$xx] to save the data In
E2PROM
Start from No.2 if readjust.
2. Laser Power Check
No. Key Display/Function
1 UP [LDPWR CHECK]
2 PL AY [c0.9mW>$xx]
(xx=0.85 to 0.95mW)
3 PL AY [c7.0mW>$xx]
Laser power meter: 7.0 + - 1.0mW*
7 Traverse Adjustment
V: 0.5V/div H: 10ms/div
INPUT: DC mode
6

FE Balance
1. Recordable Disc
No. Key Display/Function
1 Connect the oscilloscope to TE1 and VC in X33 PCB
2 MULTI JOG Select [EFBAL ADJUST]
3 Load the recordable disc
4 PL AY [EFBAL MO-W]
5 PL AY [EF=$**MOW]
6 MULTI JOG Write adjustment. Adjust the waveform as follows.
7 PLAY Display shows [EF=$**MOR] after [EFB=**xSAVE] to save the data in
E2PROM.
Mode changes write to read
Focus and disc servo are on. Tracking servo off.
8 MULTI JOG Read power adjustment. Adjust the waveform as follows.
9 PL AY
PLAY
Save the data in E2PROM.
Display shows [EFBAL MO-P]
Display shows [EF=$**MOP]
(Pickup travels to search pits and tune the servo to on.)
10 MULTI JOG Adjust the waveform as follows.
11 PLAY Display shows [EFBAL CHANGE] after [EFB=**xSAVE] to save the data
in E2PROM.
Display shows [EFBAL CHANGE] disc motor stops.
12 EJECT Unload disc.
2. PER Master Test Disc (TGYS-1)
No. Key Display/Function
1 Load the disc (TGYS-1).
2 PLAY [EF=$**CD] servo is on
3 MULTI JOG Adjust the waveform as follows.
4 Save the data in E2PROM.
Display shows [EFB=**xSAVE] in brief time.
[EFBAL ADJUST]
5 EJ ECT Unload disc.
During this adjustment, the oscilloscope changes in units of about 2%. Adjust so that the waveform comes nearest to
the specified value. (MO groove read power traverse adjustment)
Notes:
1. Data is erased during MO write when a recorded disc is used for this adjustment
2. If the traverse waveform is difficult to be monitored, connect an oscilloscope as shown in the figure below.
7

8 Focus Bias Adjustment
Use the special disc (continuous recorded disc)
No. Key Display/Function
1 MULTI JOG Select [FBIAS ADJUST]
2 Load the disc.
3 PLAY [a=xx yyyy/zz] point a
(xx = focus bias yyyy = C1error)
4 UP Adjust "yyyy" to 220*
5 PLAY [b=xx yyyy/zz] point b
6 DOWN Adjust "yyyy" to 220*
7 PLAY [xx yyyy/zzc=] point c
Check "yyyy" within 50
8 PLAY Display shows [aa bb cc(xx)] focus bias adjust
(aa = point a, bb=b, cc=c )
Notes:
1. The relation between the C1 error and focus bias value is shown in the figure below. Points "a" and "b" in the
figure are detected by the above adjustment. Focal position "C" is automatically obtained from points "a" and “b”
by calculation.
2. The C1 error rate fluctuates. Therefore, perform the adjustment according to the observed mean value.
9 Error Rate Check
1. CD Error Rate
No. Key Display/Function
1 MULTI JOG [CPLAY MODE]
2 Load the test disc (TGYS-1)
3 PLAY Display shows [CPLAY MID]
Access and
[c=xxxx a=yy] xxxx=C1 error (lower 20) yy = AIDP error
4 ST OP [CPLAY MODE]
5 EJ ECT Unload disc.
2. MO Error Rate
No. Key Display/Function
1 MULTI JOG [CPLAY MODE]
2 Load the recordable disc
3 PLAY Display shows [CPLAY MID]
Access and
[c=xxxx a=yy] xxxx=C1 error (lower 50) yy = AIDP error (00)
4 ST OP [CPLAY MODE]
5 EJ ECT Unload disc.
8

910
3. WIRING DIAGRAM

4. BLOCK DIAGRAM
11 12

13 14
5. SCHEMATIC DIAGRAM

15 16
6. PARTS LOCATION (Pattern Side)
MAIN BOARD
Q20 Q10
IC12
IC7
IC9 IC11IC10
IC8
Q12
Q8
Q9
REC BOARD

17 18
Q21
Q14 Q15
Q1 Q2 IC4
Q4L Q4R Q16-Q18
Q19 Q5-Q7 IC13
Q3L Q3R
MAIN BOARD
IC1 IC3 IC2
REC BOARD

19 20
FRONT BOARD
Q302
Q303 - Q306
Q300 Q301
Q307

21
7. IC DATA
Pin Configuration
IC1/3/4:NJM2068
LP PACKAGE
(TOP VIEW)
CATHODE
ANODE
REF
Functional Block Diagram
CATHODE
REF
ANODE
+
_
Vref
Pin Assignment
IC7:TL431

22
IC2:KIC9459N
PIN CONNECTION
PIN DESCRIPTION

23
Outline 64P2G-A
Digit
output s
Segment
output s
55
54
53
52
51
50
49
48
47
46
45
44
43
42
39
36
1
2
3
4
5
6
7
8
9
10
11
12
13
14
15
16
17
18
19
20
21
22
23
24
25
26
27
28
29
30
31
32
41
40
38
37
35
34
33
64
63
62
61
60
59
58
57
56
DIG11
DIG10
DIG09
DIG08
DIG07
DIG06
DIG05
DIG04
DIG03
DIG02
DIG01
DIG00
RESET
Vcc1
P1
SDATA
SCK
CS
P0
XOUT
XIN
Vss
SEG35
Vp
SEG34
SEG33
SEG32
SEG31
SEG30
SEG29
SEG28
SEG27
SEG26
SEG25
SEG24
SEG23
SEG22
SEG21
SEG20
SEG19
SEG18
SEG17
SEG16
SEG15
SEG14
SEG13
SEG12
SEG11
SEG10
SEG09
SEG08
SEG07
SEG06
SEG05
SEG04
SEG03
SEG02
SEG01
SEG00
Vcc2
DIG12/SEG36
DIG13/SEG37
DIG14/SEG38
DIG15/SEG39
Reset input
Chip select input
Shift clock input
Serial data
input
Universal
bidirectional ports
Clock output
Clock input
Segment
output s
Digit /
segment
output s
PIN CONFIGURATION
RESET
SCK
SDATA
XIN ,
XOUT
P1, P0
Vcc1
Vcc2
Vss
Vp
Symbol Pin name Comment
Reset input
CS Chip select
input
When "L", M66005 is initialized.
When "L", communication with the MCU is possible.
When "H", any instruction from the MCU is neglected.
Shift clock input Serial input data is taken and shifted by the positive edge of SCK.
Serial data input
Clock input
Clock output
When use as a CR oscillator, connect external resistor and
capacitor.
When use an external clock, input external clock to XIN, and
XOUT must be opened.
DIG00~
DIG15 Digit output Connect to digit (grid) pins of VFD.
Connect to segment (anode) pins of VFD. Pins from SEG00 to
SEG39 correspond to segment pins of VFD as shown in the table
below. SEG36~SEG39 pins are common to DIG12~DIG15 pins.
So, when use SEG36~SEG39, the number of digit to be used is
decreased.
Segment output
Universal port Generally, use this port as the static output port.
This port also operates as the timing IN/OUT port to control
another M66005.
Positive power supply for internal logic.
Positive power supply for DIG and SEG outputs.
GND (0V)
Negative power supply to pull down.
SEG00~
SEG39
P1 : bidirectional
P0 : output
PIN DESCRIPTIONS
IC300:M66005F

24
PIN DESCRIPTION
PIN NO. SYMBOL NAME AND FUNCTION
1, 3, 5, 9, 11, 13 1A to 6A data inputs
2, 4, 6, 8, 10, 12 1Y to 6Y data outputs
7 GND ground (0 V)
14 VCC positive supply voltage
Fig.1 Pin configuration. Fig.4 Functional diagram. Fig.5 Schematic diagram
(one inverter).
IC13:74HC04
This manual suits for next models
2
Table of contents
Other Marantz Stereo System manuals

Marantz
Marantz ED-5.1F PW User manual

Marantz
Marantz PMD221 User manual

Marantz
Marantz 3800 User manual

Marantz
Marantz ZC4001 Instruction Manual

Marantz
Marantz NR1506 User manual

Marantz
Marantz SA-11S1 User manual

Marantz
Marantz ED-5.1F PW User manual

Marantz
Marantz ZC4001 User manual

Marantz
Marantz MD-19 User manual