3
ENGLISH
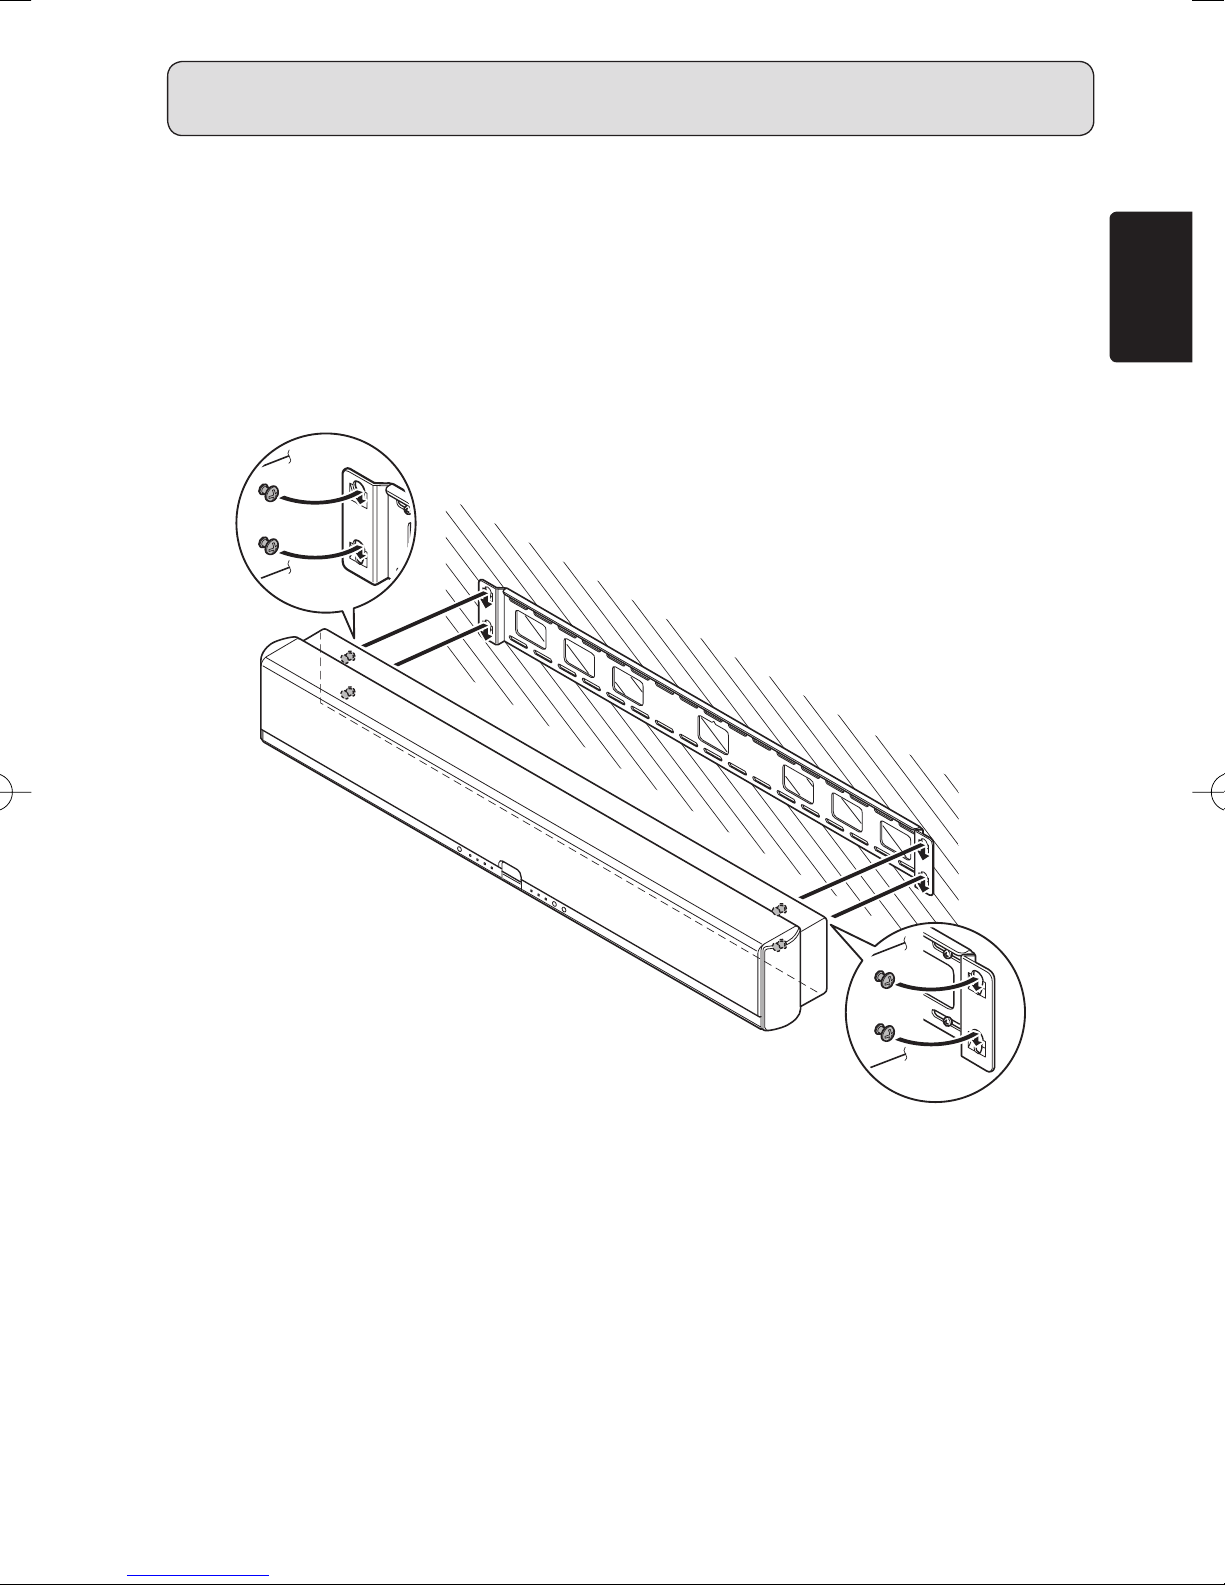
ABOUT THE INSTALLATION LOCATION
WARNING
¶Check the type of construction materials used and the structure of the installation location
before starting the installation work.
If the installation work does not match the construction materials and structure of the
installation location, the bracket or ES7001 may fall, causing injury.
¶Do not install directly onto a plasterboard wall or thin plywood.
¶Do not lean against or hang anything from the ES7001. Doing so may cause the ES7001
to fall and cause injury.
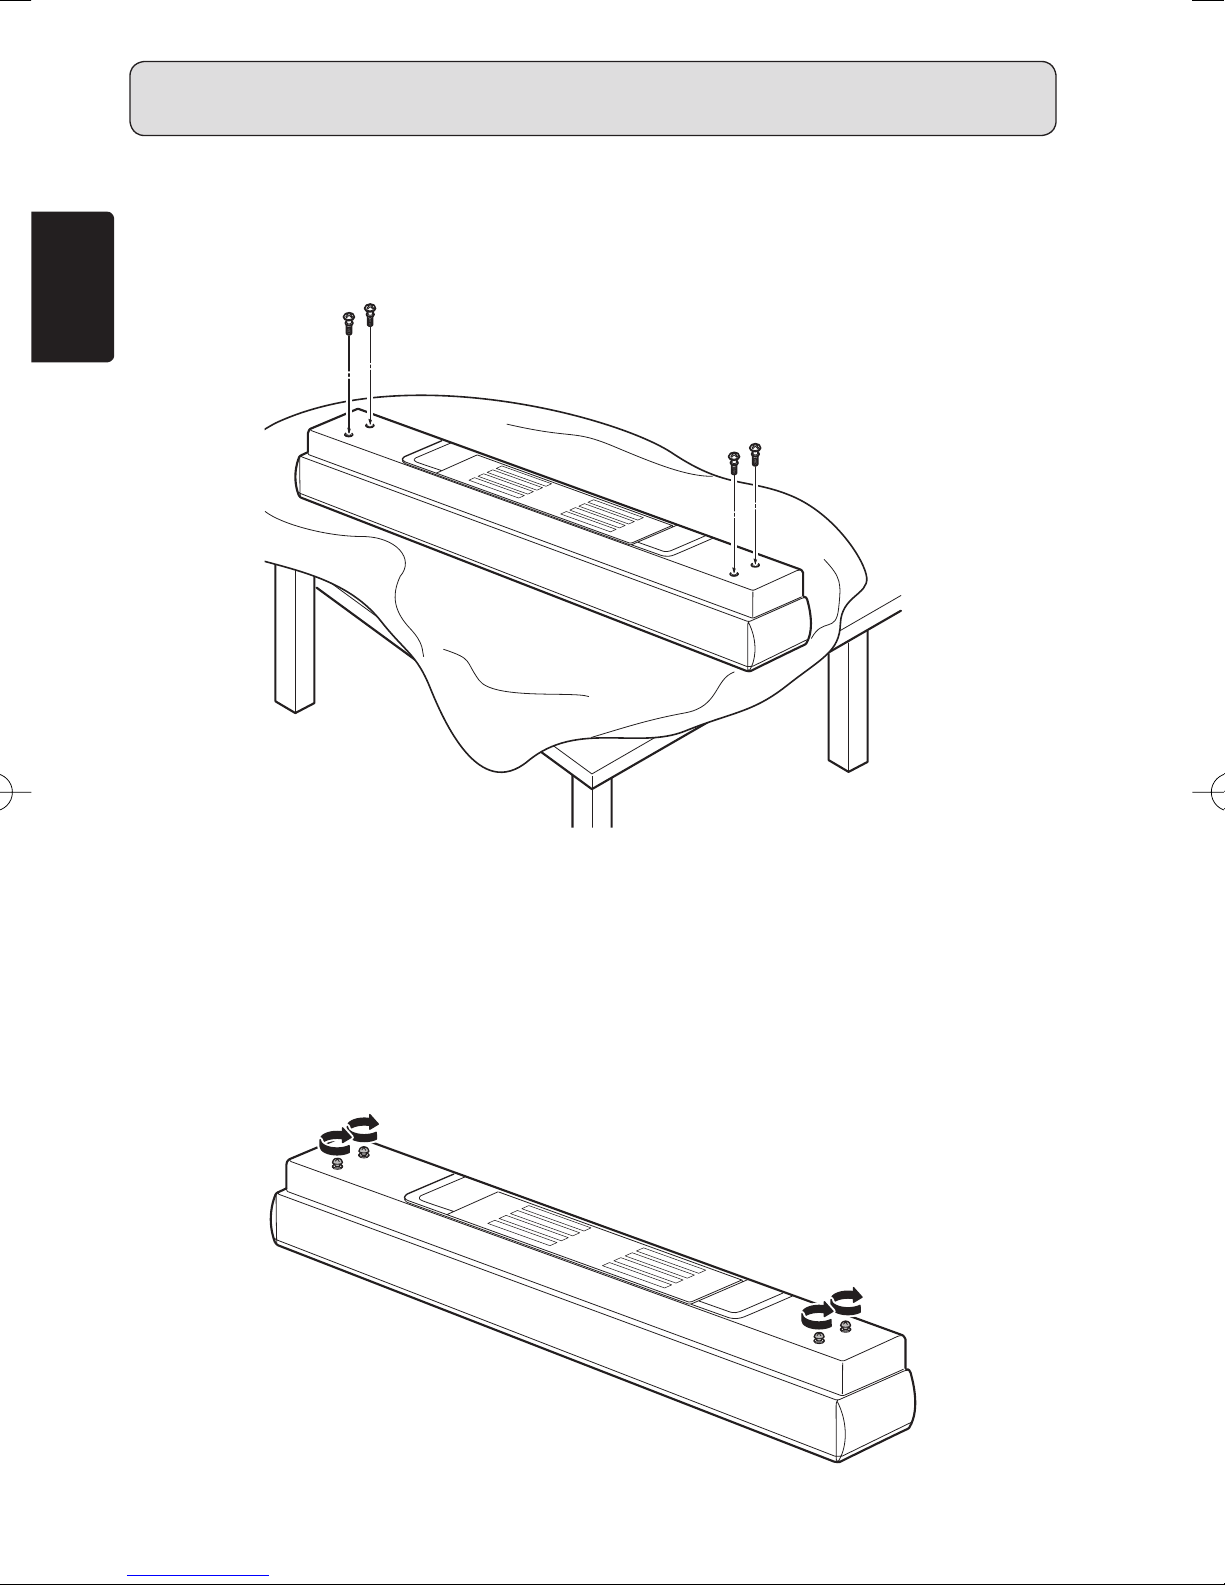
¶The combined weight of the wall hanging unit and ES7001 is 13.2kg.
Always make sure that the installation location wall is strong enough to support the
combined weight before starting the installation. If the grounding at the installation location
is not strong enough, change to a different location, or strengthen the grounding.
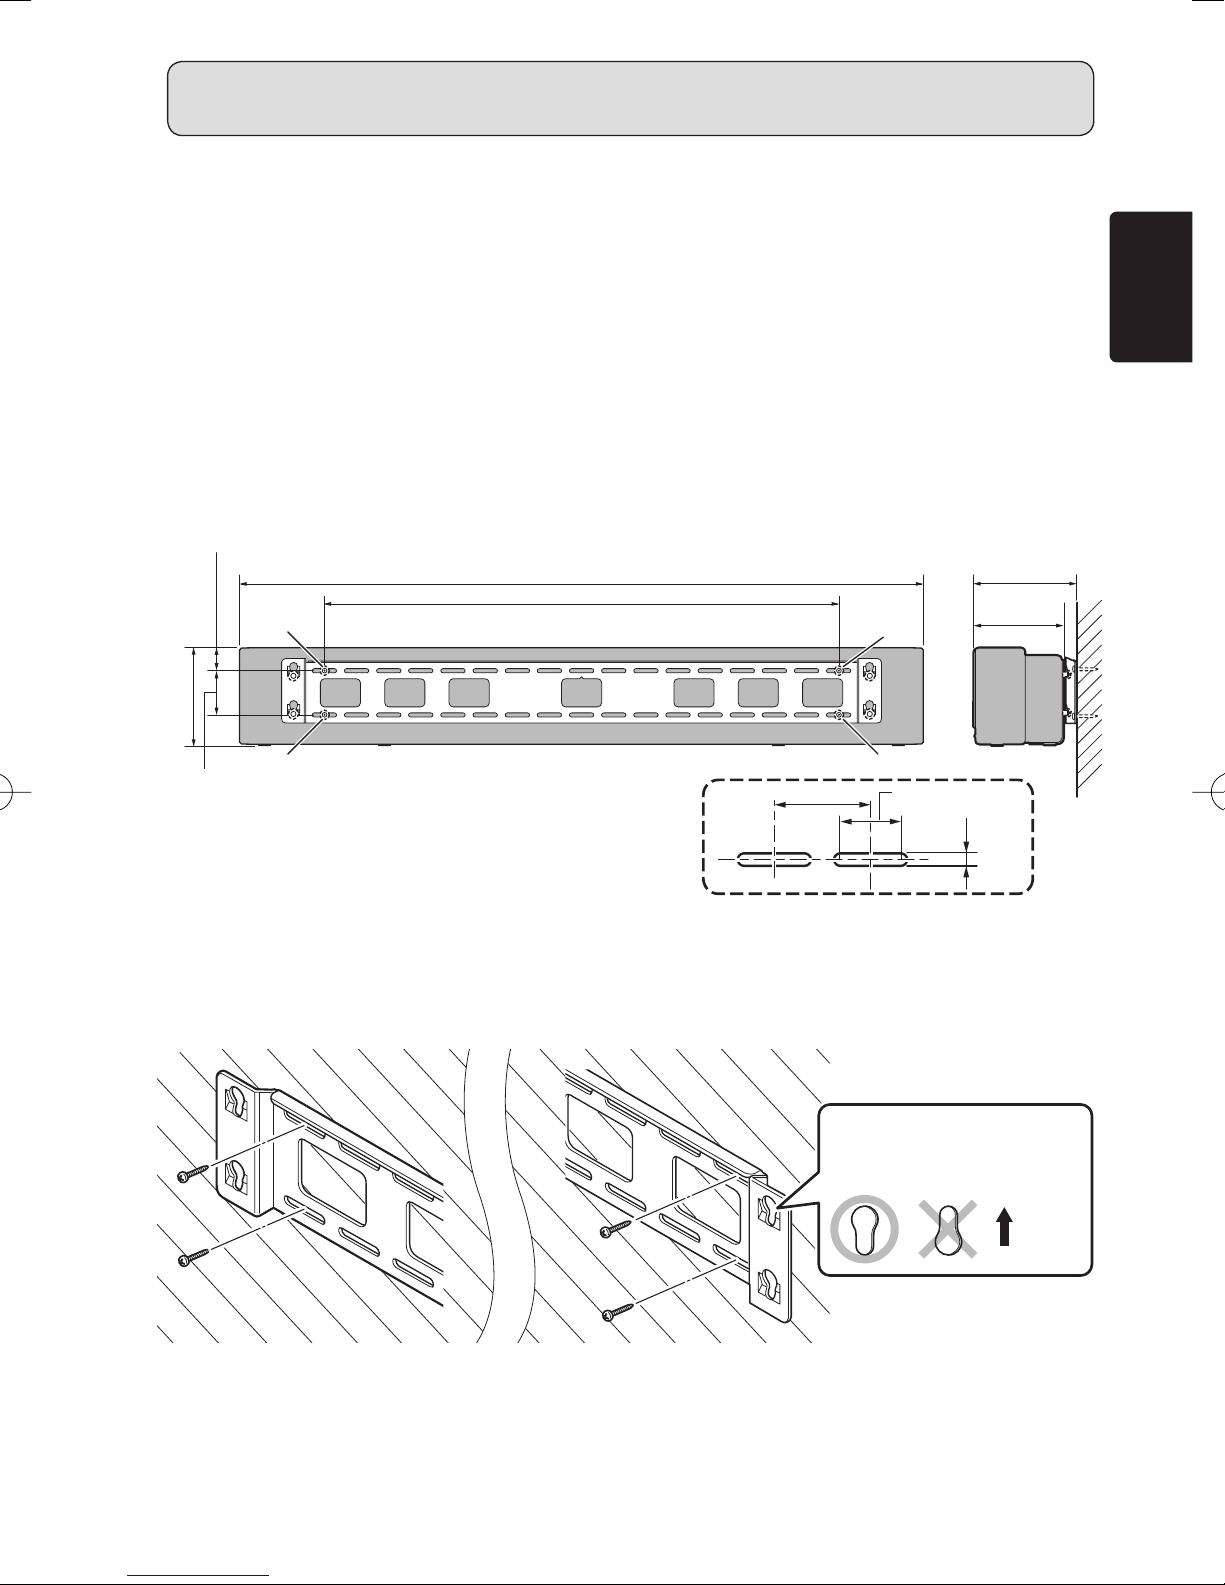
¶Installing Onto Wooden Walls
Always make sure the weight is supported by a wall stud or pillar, and reinforce if they are
not strong enough.
¶Use commercially available screws etc that are suitable for the construction
materials and structure of the wall.
¶Installing Onto Concrete Walls
Use commercially available anchors that are able to support the combined weight of the
ES7001 and wall hanging bracket.
CAUTION
¶Do not install near kitchen counters or humidifiers, or any locations that come into contact
with greasy fumes or steam. Doing so may cause fire or electric shock.
¶Do not install in particularly humid or dusty locations. Doing so may cause fire or electric
shock.
¶Do not install in hot or humid locations, or locations that may become wet easily. Doing so
may cause fire or electric shock.
¶Do not install near the intake or outflow of an air conditioning unit.
¶Do not install in a location that has a lot of dust, greasy fumes, or tobacco smoke. Doing
so may cause fire.
¶Only install the wall hanging plate on vertical wall surfaces. Failing to do so may cause the
unit to overheat internally, causing fire. Failing to do so may also cause the unit to drop,
causing damage or injury.
¶Do not install in locations that are subject to vibrations, impact, or a large amount of force.
Doing so may cause the unit to drop, become damaged, or cause injury.
¶Do not install in areas that are exposed to direct sunlight or strong light rays. Doing
so may cause the unit to overheat internally, causing fire. Fire may also be caused by
reflected light.
¶Do not cover the ventilation holes. Also, maintain a suitable amount of space around
the unit to allow air to circulate freely. Failing to do so may cause the unit to overheat
internally, causing fire.
MT7001E02ENG.indd3MT7001E02ENG.indd3 07.9.211:03:55PM07.9.211:03:55PM