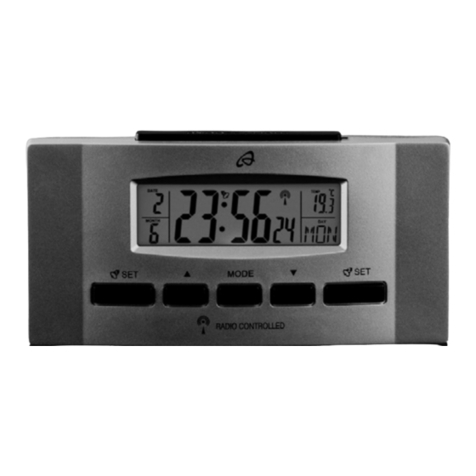
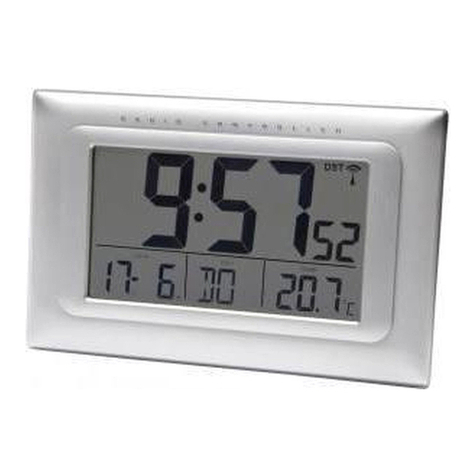
Marathon CL030049 User manual

FEATURES
OPERATION
TIME SETTING ALARM SETTING
MAIN UNIT
USER MANUAL
CL030049 PG 1
1. SET
2. ALARM
3. UP
4. DOWN
5. SNOOZE/LIGHT
1. Calendar from 2000~2099.
2. 7 languages display in date: English, German,
Italian ,French, ,Dutch, Spanish, Danish
3. Hours, minutes, seconds display
4. 12/24 hours selectable.
5. Temperature display with°C/°F selectable.
6. Temperature from: 0°C ~ +50°C.
7. Dual alarm and snooze
8. Memory day alarm
9. Week count function, Monday as day one.
10. Moon phase
11. Snooze function, snooze time is 5 minutes.
12. Countdown function
13. Button Keytone
1. In the normal display mode, press and hold
MODE button to start time setting.
2. The digit blinking will be the digit currently
being set.
3. Setting order is: Language → year → M/D →
D/M → month → day → hour → minute →
12/24 → exit
4. Press MODE button to conrm the setting and
to go to the next setting item or exit setting.
5. Year range: 2000 - 2099;
6. Language setting order: EN → GE → IT →FR
→DU →SP →DA
7. Press UP button, setting item will increase by
one unit
8. Press and hold UP button, setting item will
increase by 8 units per second
9. Press DOWN button, setting item will decrease
one unit
10. Press and hold DOWN, setting item will
decrease 8 units per second
11. The setting will be exited and data will be saved
when the user does not touch any button within
30 seconds
1. In the normal display mode, press ALARM
button to check alarm
2. Checking order is Alarm 1→Alarm 2→
Memory day→time
3. When checking Alarm 1 or Alarm 2, press
MODE button to turn on/off the alarm time
that is currently being checked.
4. Alarm 1 and Alarm 2 can both be set as:
weekday alarm (Monday to Friday), weekend
alarm (Saturday to Sunday), Normal Alarm
(Monday to Sunday)
ENGLISH
WALL / DESK ALARM CLOCK

ALARM MODE
USER MANUAL
CL030049 PG 2
• Alarm, Memory day and Countdown will keep
ringing for 2 minutes
• Alarm sounds as follows:
A.1-8 seconds: 1 Beep / second
B.9-20 seconds: 2 Beeps / second
C.21-59 seconds: 4 Beeps / second
D.60-120 seconds: continuous beeping
• When alarm sounds, press SNOOZE button
to start snooze, pressing other buttons will
stop alarm function.
• When snooze function is activated, pressing
other buttons will turn off snooze function.
• Snooze time is every 5 minutes.
• Snooze will be innite repeat unless user stops it.
ENGLISH
5. When checking Memory day alarm, press
MODE button to turn on/off Memory
day alarm.
6. When checking Alarm 1 or Alarm 2, press
and hold ALARM button to start setting
the alarm.
7. When checking Memory day alarm, press
and hold ALARM button to start Memory
day setting.
8. Alarm 1 or Alarm 2 setting order is:
Hour → Minute → Exit
9. Memory day setting order is: year à month
à day à hour à minute à exit
10. The item blinking will be the item currently
being set.
11. Press ALARM button to conrm setting and
to go to the next setting item or exit setting.
12. Press UP button, setting item will increase
by one unit.
13. Press and hold UP button, setting item will
increase by 8 units per second.
14. Press DOWN button, setting item will
decrease one unit.
15. Press and hold DOWN, setting item will
decrease 8 units per second.
16. The setting will be exited and data will be
saved when the user does not touch any
button within 30 seconds
TEMPERATURE
• Temperature range 0°C ~ +50°C.
• Temperature accuracy 0.1.
• When alarm is on or clock is receiving RCC,
stop to inspect and update indoor temperature.
• Temperature over 50° will show “HH.H”,
temperatures lower than 0° will show “LL.L”
• At normal display, press UP to switch
temperature unit.
• Monday is the rst day of one week
• If 1st of January is from Monday to Thursday, this week will be counted as the rst week of this year.
• If 1st of January is from Friday to Sunday, this week will be counted as the last week of the year.
MOON PHASE
WEEK COUNT

USER MANUAL
CL030049 PG 3
ENGLISH
• In normal display mode, press MODE button, to turn on Countdown timer display, the LCD display
will show “TM” and the number is 0:00
• Press UP button, the countdown timer hour will increase one unit, press and hold UP button,
the countdown button will increase 8 units per second.
• Press DOWN button, the countdown timer hour will decrease one unit, press and hold DOWN button,
the countdown button will decrease 8 units per second.
• Press SNOOZE button to start countdown timer
• When countdown timer is running, the “:” and “TM” will icker.
• User can set the countdown time when timer is paused.
• When countdown is paused, press DOWN and UP together to return the timer to zero.
• When the countdown is running, press MODE button can return to normal display, but the day of week
and “TM” will switch display every 5 seconds.
• Countdown range from 0:00 to 23:59
• When the countdown times up, the clock will alarm and number and “TM” will icker
• At normal display, the countdown times up, the clock will alarm and “TM” will icker
• Press any button to stop alarm
• Alarm will sound for 2 minutes
After power on or reset, the LCD will show full information for 3 seconds and into normal display.
will show “TM” and the number is 0:00
• Calendar default date is 1st of January, 2015 00:00, time zone 0, week display is M/D
• Temperature unit °C
• 12HR
• Language: English
• When the power lower than 2.5v, will show the low power mark
• ALARM: OFF
• Alarm time default: AL1 is 7: 00, AL2 is 0:00, memory day is 0:00
• languages display in week
COUNTDOWN TIMER
POWER ON AND RESET
LANGUAGES DISPLAY IN WEEK

USER MANUAL
CL030049 PG 4
ENGLISH
• Do not clean any part of the product with benzene, thinner or other solvent chemicals.
When necessary, clean with a soft cloth.
• Never immerse the product in water. This will damage the product.
• Do not subject the product to extreme force, shock, or uctuations in temperature or humidity.
• Do not tamper with the internal components.
• Do not mix new and old batteries or batteries of different types.
• Do not mix alkaline, standard or rechargeable batteries with this product.
• Remove the batteries if storing this product for a long period of time.
• Do not dispose of this product as unsorted municipal waste. Collection of such waste separately
for special treatment is necessary.
Please dispose the batteries and the unit environmentally compatibly and according to the current
legal requirements.
Never attempt to reload non-rechargeable batteries!
• The device is certied for use in the European Union.
• Due to limitations in printing the representation of this display in this manual can differ to the
actual display.
• The content of this manual must not be duplicated without the consent of the manufacturer.
• The device must be used only for the intended purpose. Repairs must be conducted only by
authorised and qualied personnel.
• Subject to change without notice.
PRECAUTIONS
ATTENTION
WARRANTY
Designed in Canada
Made in China
www.MarathonWatch.com
Marathon Watch Company Ltd.
30 Mural Street, Unit #10, Richmond Hill,
Ontario, Canada L4B 1B5
Marathon Watch Company warrants this item to be free from defects in material and workmanship
under normal use in accordance with care and usage instructions for 1 year from date of purchase.
This warranty excludes damage from misuse, abuse or any irregular application.
Return the item to us properly packaged accompanied with original bill of sale to: 30 Mural Street,
Unit #10, Richmond Hill, Ontario, Canada L4B 1B5. If we conrm a defect, we will replace it with the
same item or one of similar value and return it to you at no charge.

HORLOGE DE BUREAU DIGITALE
OPERATION
RÉGLAGE DE L’HEURE
RÉGLAGE DE L’ALARME
CL030049 PG 1
1. En mode d’afchage normal, pressez et
maintenez la touche MODE pour commencer
le réglage de l’heure.
2. Le clignotement du chiffre sera le chiffre en
cours de réglage.
3. L’ordre de réglage est: Langue → année →
M/J → J/M → mois → jour → heure →
minute → 12/24 → sortie
4. Pressez la touche MODE pour conrmer le réglage
et pour aller au prochain réglage ou pour sortir du
mode de réglage.
5. Plage des années: 2000 - 2099;
6. Ordre du réglage des Langues: EN → GE → IT →
FR →DU →SP →DA→FR →DU →SP →DA →DU
→SP →DA
7. Pressez la touche UP, l’élément de réglage
va augmenter d’une unité
8. Pressez et maintenez la touche UP, l’élément
de réglage va augmenter de 8 unités par seconde
9. Pressez la touche DOWN, l’élément de réglage va
diminuer d’une unité
10. Pressez et maintenez la touche DOWN, l’élément
de réglage va diminuer de 8 unités par seconde
11. Le réglage sera sorti et les données seront
sauvées quand l’utilisateur ne presse aucune
touche durant 30 secondes.
1. En mode d’afchage normal, pressez la
touche ALARM pour vérier l’alarme
2. L’ordre de contrôle est Alarme 1→Alarme
2→Jour mémorisé→Heure
3. Lors du contrôle de Alarme 1 ou Alarme 2,
pressez la touche MODE pour allumer/
éteindre l’heure de l’alarme qui est
actuellement vériée.
4. Alarme 1 et Alarme 2 peuvent être réglées
les deux comme: alarme de la semaine
(Lundi à vendredi), alarme du week-end
FRENCH
MANUEL DE L’UTILISATEUR
1. SET
2. ALARM
3. UP
4. DOWN
5. SNOOZE/LIGHT
1. Année de 2000~2099.
2. Afchage de la date en 7 langues, Anglais,
Allemand, Italien , Français, Hollandais,
Espagnol, Danois
3. Afchage heures, minutes, secondes
4. 12/24 heures.
5. Unité de température: °C/°F.
6. Température de: 0°C ~ +50°C.
7. Double alarme et répétition d’alarme (snooze)
8. Mémoire du jour de l’alarme
9. Fonction décompte de la semaine, lundi
comme étant le premier jour.
10. Phase de la lune
11. Fonction répétition de l’alarme (snooze),
le délai de répétition est de 5 minutes..
12. Fonction compte à rebours
13. Touche tonalité
CARACTERISTIQUES UNITE PRINCIPALE

MODE ALARME
CL030049 PG 2
• Alarme, Mémoire du jour et compte à rebours
continueront de sonner pendant 2 minutes.
• Les sons de l’alarme comme suit :
A. 1-8 secondes: 1 bip / seconde
B. 9-20 secondes: 2 bips / seconde
C. 21-59 secondes: 4 bips / seconde
D. 60-120 secondes: bip continu
• Quand l’alarme sonne, pressez la touche
SNOOZE pour commencer la répétition d’alarme,
presser d’autres touches arrêtera la fonction
de l’alarme.
• Quand la fonction de répétition est activée,
presser les autres touches arrêtera la fonction
de la répétition.
• Le délai de répétition est de 5 minutes
• La répétition sera innie sauf si l’utilisateur
l’arrête.
FRENCH
(Samedi et Dimanche), alarme normale
(Lundi à Dimanche) (Monday to Sunday)
5. Lors du contrôle de la mémoire du jour de
l’alarme, pressez la touche MODE pour
allumer/éteindre la mémoire du jour de
l’alarme.
6. Lors du contrôle Alarme 1 ou Alarme 2,
pressez et maintenez la touche ALARM
pour commencer le réglage de l’alarme.
7. Lors du contrôle de la mémoire du jour de
l’alarme, pressez et maintenez la touche
ALARM pour commencer le réglage de la
mémoire du jour.
8. L’ordre de réglage Alarme 1 ou Alarme 2 est:
Heure → Minute → Sortie
9. L’ordre de réglage de la mémoire est: année
à mois à jour à heure à minute à sortie
10. L’élément clignotant sera l’élément en cours
de réglage
11. Pressez la touche ALARM pour conrmer le
réglage et aller au prochain réglage ou sortir
du mode de réglage.
12. Pressez la touche UP, l’élément de réglage
va augmenter d’une unité.
13. Pressez et maintenez la touche UP,
l’élément de réglage va augmenter
de 8 unités par seconde
14. Pressez la touche DOWN, l’élément de
réglage va diminuer d’une unité
15. Pressez et maintenez DOWN, l’élément de
réglage va diminuer de 8 unités par seconde
16. Le réglage sera sauvegardé et les données
seront sauvées lorsque l’utilisateur ne
presse aucune touche durant 30 secondes.
TEMPÉRATURE
• Plage de la température 0°C ~ +50°C.
• Précision de la température 0.1.
• Quand l’alarme est activée ou que l’horloge
reçoit le RCC, arrêtez d’examiner et mettez
à jour la température intérieure.
• La température de plus de 50 afchera “HH.H”
les températures plus bas que 0 afchera “LL.L”
• A l’afchage normal, pressez UP pour changer
l’unité de la température
PHASE DE LA LUNE
MANUEL DE L’UTILISATEUR
nouvelle lune pleine lune

CL030049 PG 3
FRENCH
• En mode d’afchage normal, pressez la touche MODE pour allumer l’afchage du compte
à rebours, l’afchage LCD montrera “TM” et le nombre 0:00
• Pressez la touche UP, l’heure du compte à rebours va augmenter d’une unité, pressez et maintenez
la touche UP, le compte à rebours va augmenter de 8 unités par seconde.
• Pressez la touche DOWN, l’heure du compte à rebours va diminuer d’une unité, pressez et maintenez
la touche DOWN, le compte à rebours va diminuer de 8 unités par seconde.
• Pressez la touche SNOOZE pour commencer le compte à rebours
• Lorsque le compte à rebours est en cours d’exécution, “:” et “TM” scintilleront.
• Pressez la touche SNOOZE pour interrompre le compte à rebours, pressez la touche SNOOZE
à nouveau pour continuer le compte à rebours.
• Quand le compte à rebours est en pause, pressez DOWN et UP ensemble pour remettre le
minuteur à zéro.
• Lorsque le compte à rebours en en cours d’exécution, presser la touche MODE peut retourner
à l’afchage normal, mais le jour de la semaine et “TM” vont changer d’afchage chaque 5 secondes.
• La plage du compte à rebours et de 0:00 à 23:59
• Lorsque le compte à rebours s’est écoulé, l’horloge sonnera, le nombre et “TM” scintilleront
• A l’afchage normal, le compte à rebours s’est écoulé, l’horloge sonnera et “TM” scintillera
• Pressez n’importe quelle touche pour arrêter l’alarme
• L’alarme sonnera pendant 2 minutes
Après l’allumage ou la remise à zéro, le LCD montrera les informations complètes pendant
3 secondes et en afchage normal.
• La date du calendrier par défaut est le 1er Janvier 2015 00:00, fuseau horaire 0, afchage
de la semaine est M/D
• Unité de température : °C
• 12HR
• Langue: Anglais
• Lorsque la puissance est plus faible que 2.5v, la marque de la puissance faible s’afchera
• ALARME : OFF
• L’heure de l’alarme par défaut: AL1 est 7:00, AL2 est 0:00, mémoire du jour 0:00
• languages display in week
MINUTEUR COMPTE À REBOURS
ALLUMAGE ET REMISE À ZÉRO
MANUEL DE L’UTILISATEUR
• Lundi est le premier jour de la semaine
• Si le 1er janvier est entre lundi et jeudi, cette semaine sera comptée comme la première semaine
de l’année.
• Si le 1er janvier est entre vendredi et dimanche, cette semaine sera comptée comme la dernière
semaine de l’année.
DÉCOMPTE DE LA SEMAINE

CL030049 PG 4
FRENCH
• Ne nettoyer aucune partie de ce produit avec de la benzine, du dissolvant ou tout autre
solvant chimique. Quand nécessaire, nettoyer avec un chiffon doux.
• Ne jamais immerger le produit dans l’eau. Ceci endommagerait le produit.
• N’exposez pas le produit à des forces extrêmes, des chocs, ou des uctuations de température
ou d’humidité.
• Ne pas toucher aux composants internes.
• Ne mélanger pas les nouvelles et les anciennes piles ou des piles de différents types.
• Ne mélanger pas les piles alcalines, standards ou rechargeables avec ce produit.
• Enlevez les piles si vous n’utilisez pas ce produit pendant une longue période.
• Ne jetez pas ce produit avec les déchets municipaux non triés. Une collecte de ces déchets
pour un traitement spécial séparément est nécessaire
Veuillez jeter les piles et l'unité de manière écologiquement compatible et selon les dispositions
légales en vigueur.
Ne jamais tenter de recharger des piles non rechargeables!
• L'appareil est certié pour une utilisation dans l'Union européenne.
• En raison de limitations dans l'impression, la représentation de cet afchage dans ce manuel
peut différer de l'afchage réel.
• Le contenu de ce manuel ne doit pas être reproduit sans le consentement du fabricant.
• L’appareil doit être utilisé uniquement pour l'usage prévu. Les réparations doivent être effectuées
uniquement par du personnel qualié et autorisé.
• Sous réserve de modications sans préavis.
PRECAUTIONS
ATTENTION
MANUEL DE L’UTILISATEUR
GARANTIE
Conçu au Canada
Fabriqué en Chine
Marathon Watch Company garantit cet article comme étant libre de toute défectuosité de matières
premières et de fabrication dans des conditions normales d’utilisation, conformément aux instructions
de soin et d’utilisation pendant 2 ans, à compter de la date d’achat. Cette garantie exclut les dommages
causés par un mauvais usage, un usage abusif ou toute application irrégulière. Retournez-nous l’article,
convenablement emballé, accompagné de la facture originale à: 30 Mural Street, #10, Richmond Hill,
Ontario, Canada L4B 1B5. Si nous conrmons une défectuosité, nous remplacerons cet article par un
article identique ou de valeur similaire que nous vous retournerons sans frais.
www.MarathonWatch.com
Marathon Watch Company Ltd.
30 Mural Street, Unit #10, Richmond Hill,
Ontario, Canada L4B 1B5
AFFICHAGE DES LANGUES
DE LA SEMAINE
Table of contents
Languages:
Other Marathon Alarm Clock manuals
Marathon
Marathon CL030058 User manual

Marathon
Marathon CL030078 User manual
Marathon
Marathon Professional 75 User manual
Marathon
Marathon CL030053GD User manual
Marathon
Marathon CL800002WH User manual
Marathon
Marathon Travel 23 User manual

Marathon
Marathon CL030051WH User manual
Marathon
Marathon CL030070 Series User manual
Marathon
Marathon C1126 User manual
